Nature Tips - Cloudy Night Light

Hello, community!
I present my own implementation of the lamp-night lamp in the form of a cloud. The main idea is to make a nightlight with imitations of natural processes and some kind of interactivity. Nature is the best inspirer!
')
The basis was taken by cheap ATmega8-16PU microcontroller. The code is written in C without Arduino and implements several light effects with control from the general illumination of space and with sound control.
Details and photos - more ...
Electronic details
The circuit, besides the microcontroller, has 6 monochrome LEDs, one RGB LED, an illumination sensor (photoresistor) and a microphone with an amplifier and RF filter.
For a smooth change in the brightness of the LEDs, PWM is used. The PWM frequency is 244 Hz at 64 levels, it happens that some people see it. Increasing the frequency does not work - you need more CPU time to work. Therefore, a circuit on a transistor follower with a smoothing capacitor is applied to smoothing the PWM pulses. The transistor is taken with a large gain, to increase the input resistance and reduce the required capacity. As a result, 1 microfarad turned out to be quite enough, the pulses are almost completely smoothed. The advantages are cheaper than a DAC and have a large output current. The disadvantage of the scheme is the nonlinear dependence of brightness on the PWM level at low levels (up to 15%).
Micro-Cap 9 circuit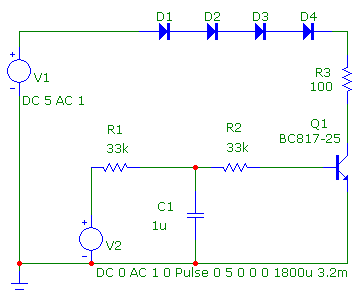
Smoothing scheme PWM. 4 diodes approximately = 1 white LED on IV

Graph of current and voltage on the LED at 56% PWM.
Smoothing scheme PWM. 4 diodes approximately = 1 white LED on IV
Graph of current and voltage on the LED at 56% PWM.
A miniature electret microphone through an amplifier on two transistors with a pulse (RF filter) is connected to the discrete input of the MK, confidently catching sharp sounds - clapping hands.
He drew the board and spread it in DipTrace , made it LUT, the details are mostly smd. Etching did in the "ferric chloride killer": Hydrogen peroxide + salt + citric acid, it came out the first time, I recommend. All amateur ways are written here.

Fee made by LUT
Power made via USB-connector that allows you to connect to any USB-port. The maximum consumption is 78 mA.
In previous versions, there was a micro-button on the cable for mode settings, but then it was removed, so as not to reach it, if the cloud is under the ceiling.
There is no USB connection, there is no USB in the MC, and it does not seem to be necessary in the finished product. For debugging, I used a UART controller, the code implements an exchange with a computer, but it is trite there

During the soldering process
LUT, soldering, writing the program, tests and rework, fitting timers and coefficients took 3 weeks.

General form
As a result, implemented 3 modes of illumination and light effects. I tried to make the lava lamp more interesting, but there was also no disco-music music with whistles.
Modes:
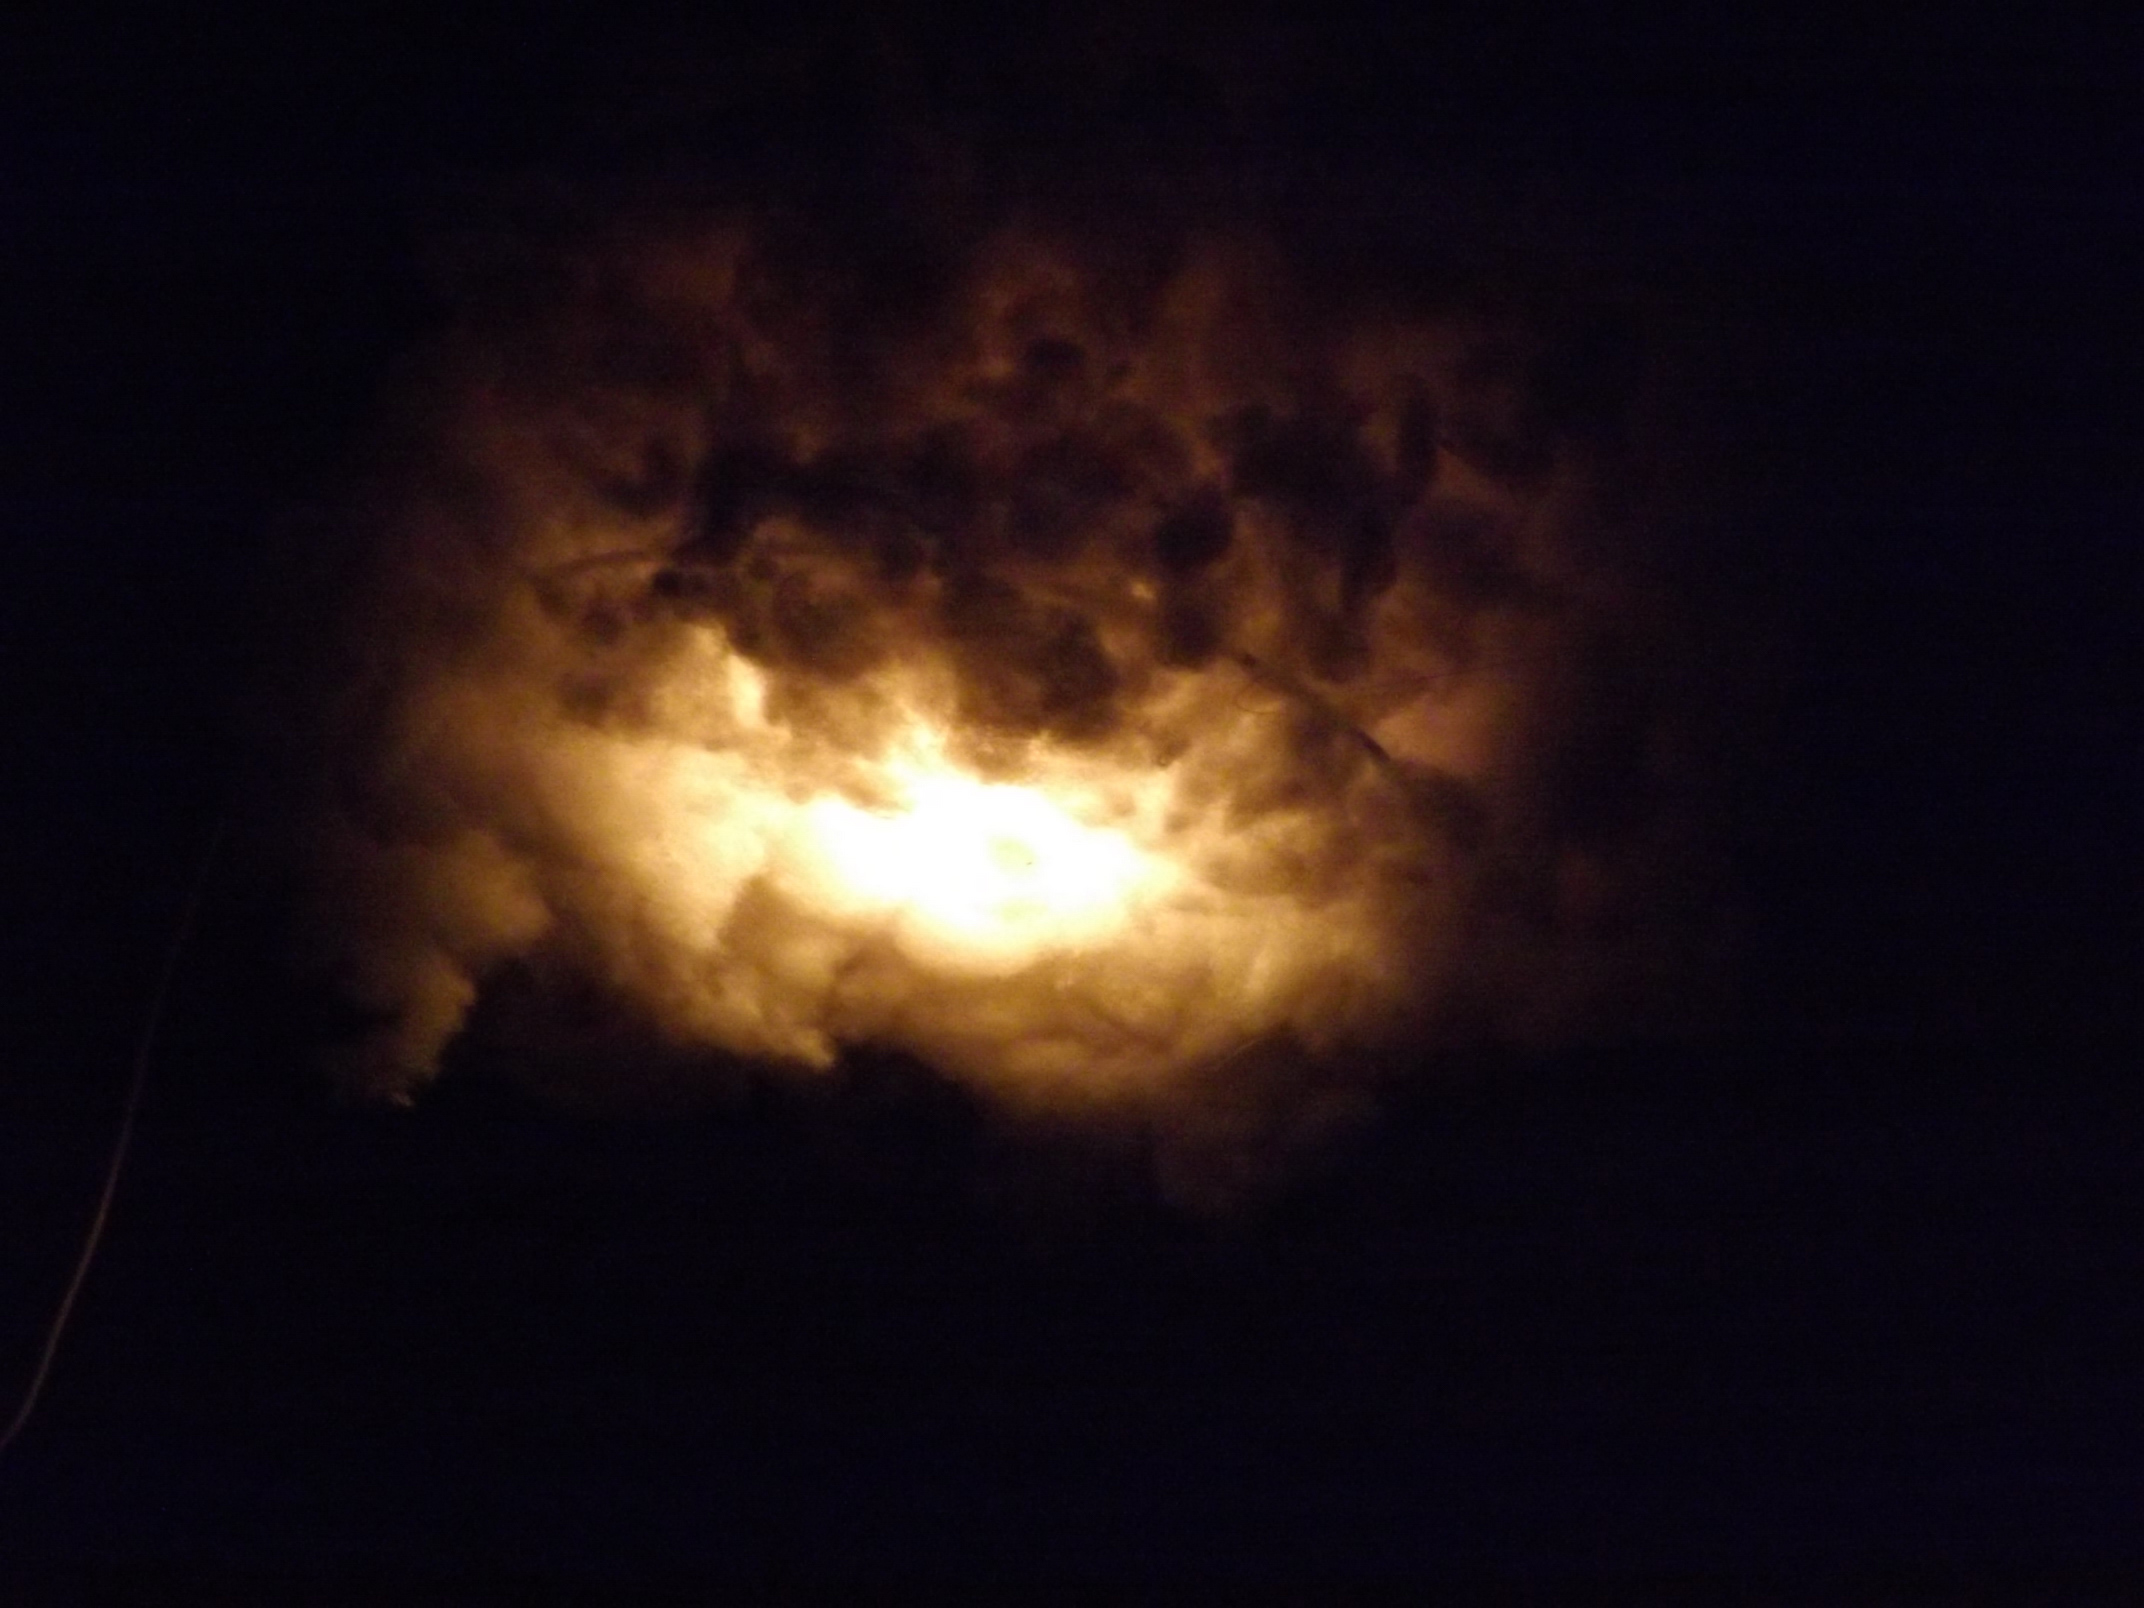
The main one is a nightlight in the form of a cloud. Different parts of the cloud in a random order smoothly change the brightness, the change period is also random (4 ... 25 seconds), the type of change - exponential smoothing from the task (I can tell more in the comments). It looks as a whole, with a share of imagination, like a play of light in a real cloud when it covers the sun. The maximum level of brightness depends on the level of lighting according to the schedule. I picked up various dependencies, there was an option with a choice of dependencies on the button, but I stopped on one this.
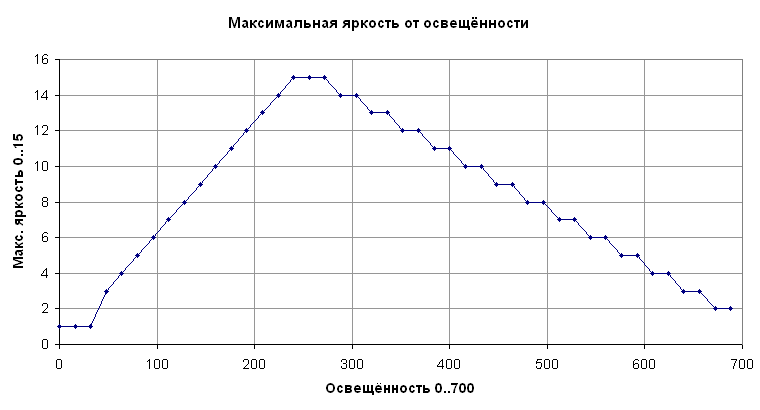
Graph of the brightness of the cloud from the ambient light.
Since during the outer darkness (night) the cloud almost does not glow, and a short-term bright light may be needed (for example, to rise at night), then for this purpose I invented the “Bright Cloud” submode. It turns on when you clap your hands together, a microphone is used here, since the buttons are usually out of reach. The cloud glows at full brightness for a minute, also with overflow, then gradually returns to the main cloud mode according to the illumination.
Cloud mode, the first sample. Video accelerated 5 times
Thunderstorm - turns on when there is a sharp decrease in external lighting (but not until complete darkness, so as not to hit the eyes in the dark) or three claps. Random LEDs flash (from one to 4x), with a random pause between flashes. A little zamorochilsya and made "runs" of lightning in the cloud, when the LEDs flash in a time chain. It also looks quite like a thunderstorm. Because of the thunderstorm mode, we had to compromise PWM filtering so that the flashes would be sharp (77 ms). The duration of the "thunderstorm" depends on the external lighting - the darker, the longer, from 4 to 12 flashes.
Dawn - turns on with a sharp increase in ambient light. The most difficult to set up mode, to get "the natural change of colors of the sun at dawn in a light haze" was not easy. To balance the RGB LED had to manually almost every level of PWM, and selecting dependencies. But in the end, I got a more or less interpolation formula. Dawn lasts 40 seconds, then the transition to normal mode.
Dawn
Electronics and software for those interested in:
Source archive
Scheme in pdf
PCB layout, one side
Constructive
The construction of the cloud is quite simple; I made it from sintepukh (one cushion 40x40 cm), the board is placed inside on hangers of threads. The LEDs are arranged as uniformly as possible in the volume, and, well, the RGB-LED is at the bottom, and the photo sensor is at the top.

In the process of plastering down
There were difficulties in fixing sintepukha, as it is covered with silicone to counteract caking. The lower part of the cloud is supported by narrow strips of adhesive tape on a wire frame.
Questions, comments, suggestions, write in the comments.
Great weather for everyone!

Source: https://habr.com/ru/post/428988/
All Articles