DeOldify: a program for coloring black and white images
In short, the task of this project is to color and restore old images. I’ll go into the details a bit, but first let's see the pictures! By the way, most of the original images are taken from the r / TheWayWeWere subdit, thank you all for such high-quality large images.
These are just a few examples, and they are quite typical!
Maria Anderson as Little Fairy and her page Lyubov Ryabtsova in the Sleeping Beauty ballet at the Imperial Theater, St. Petersburg, Russia, 1890

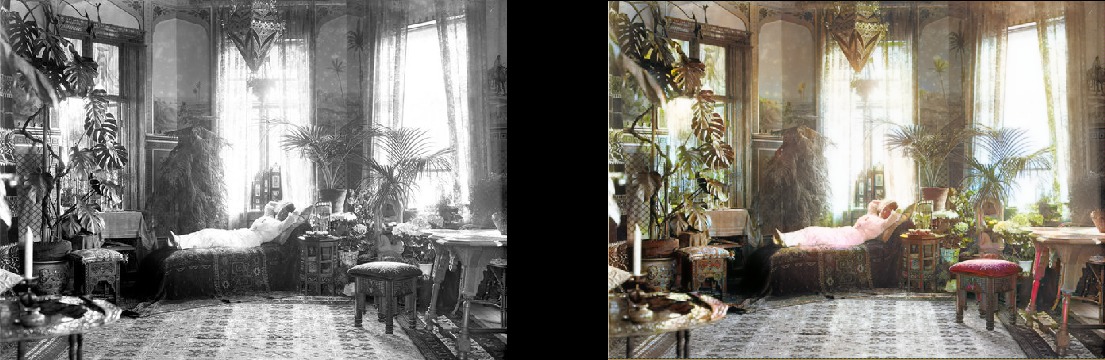
Woman relaxes in her living room (1920, Sweden)
')
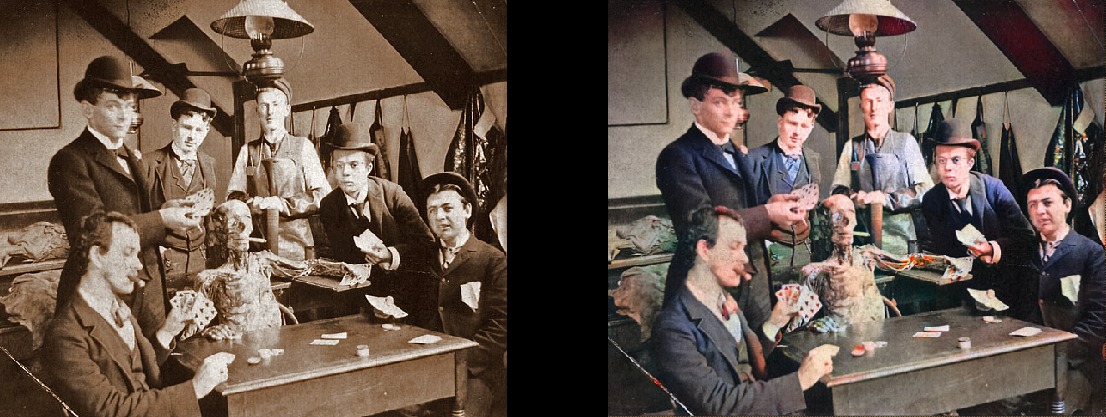
Medical students posing near the corpse, circa 1890
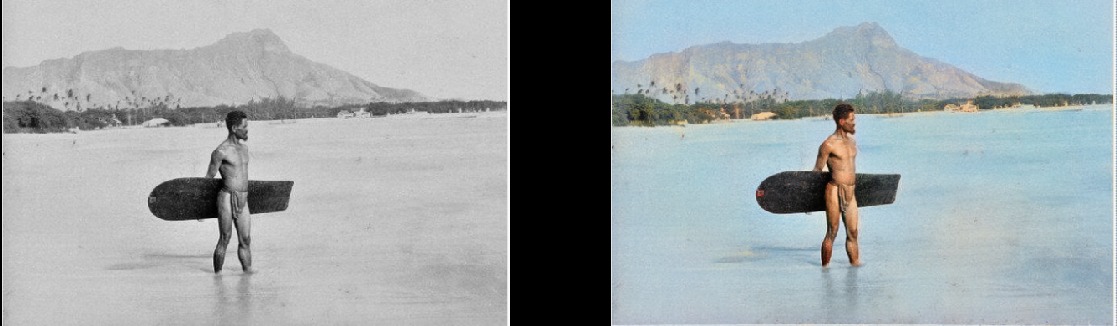
Surfer in Hawaii, 1890
Turning Horse, 1898
Interior bar Miller and Schumaker, 1899

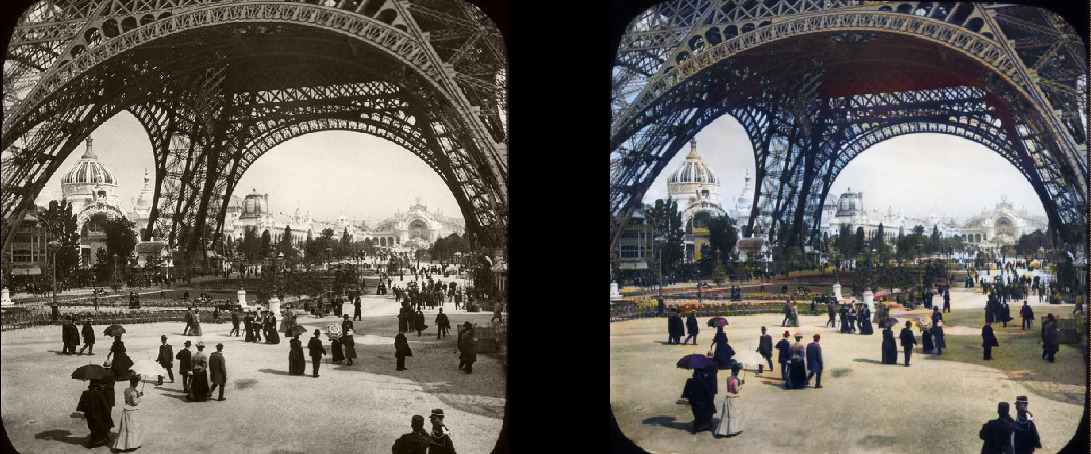
Paris in the 1880s
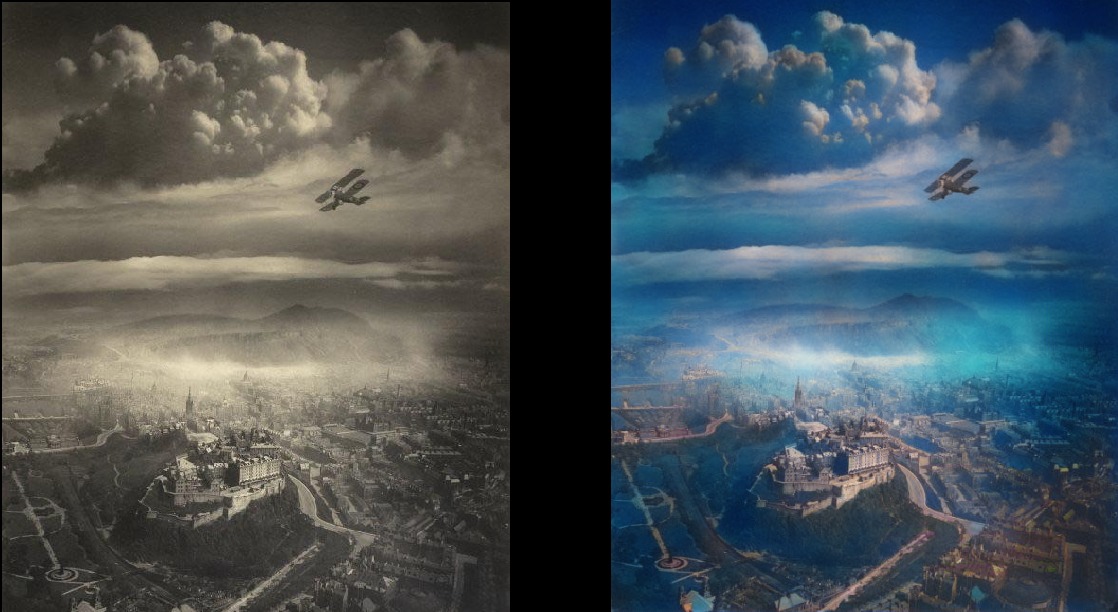
Edinburgh bird's eye view in the 1920s
Texas woman in 1938

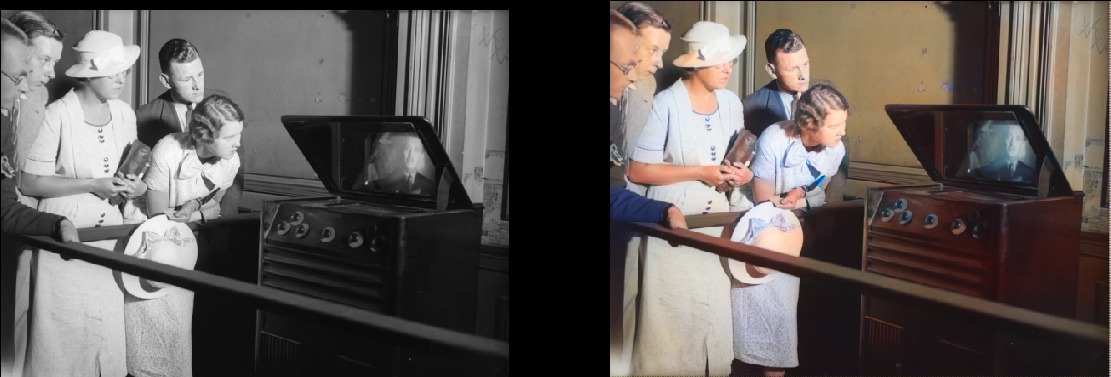
People at Waterloo station watching television for the first time, London, 1936
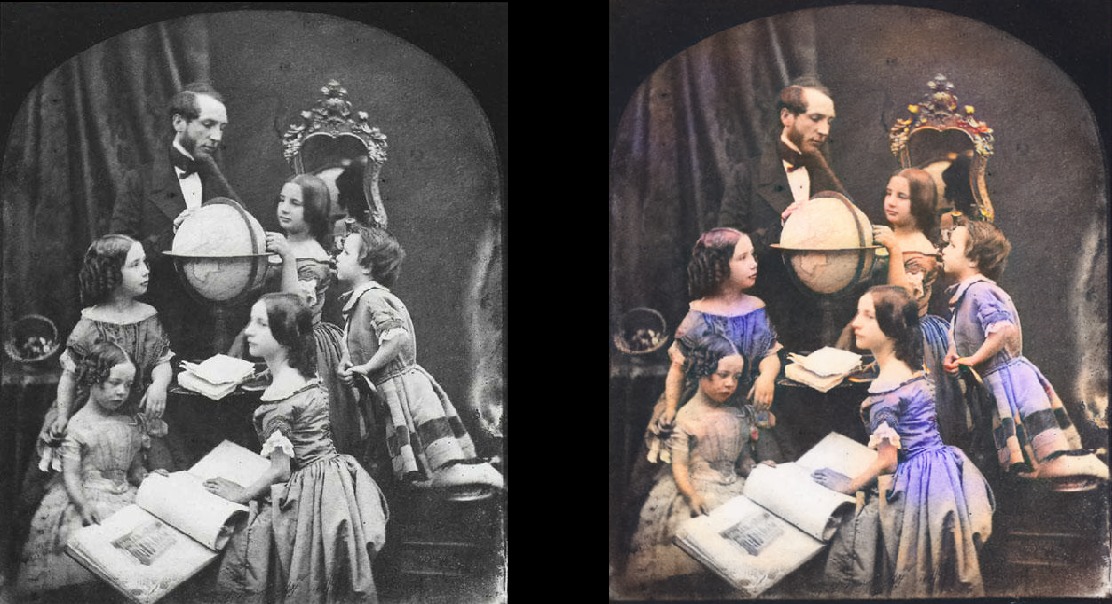
Geography lesson in 1850
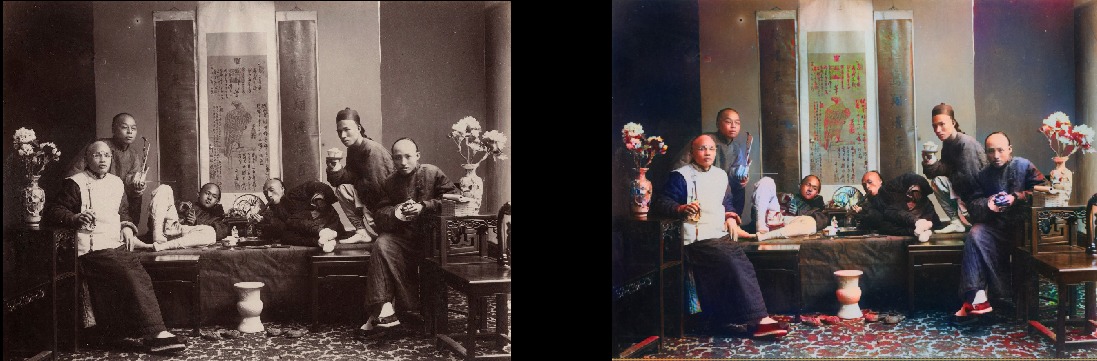
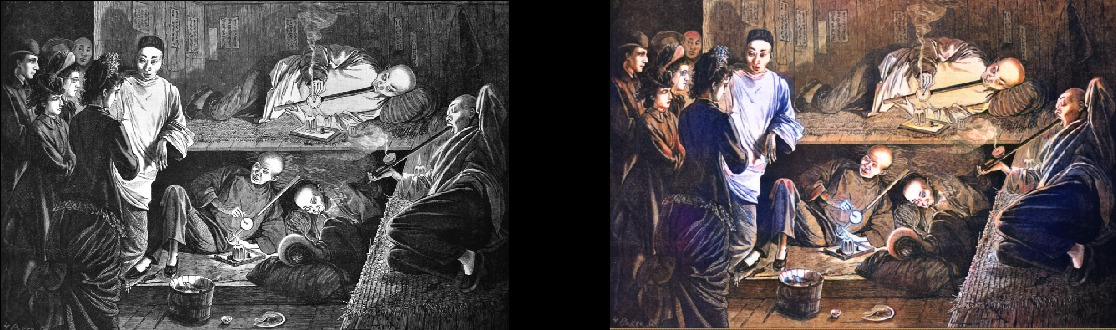
Chinese opium smokers in 1880
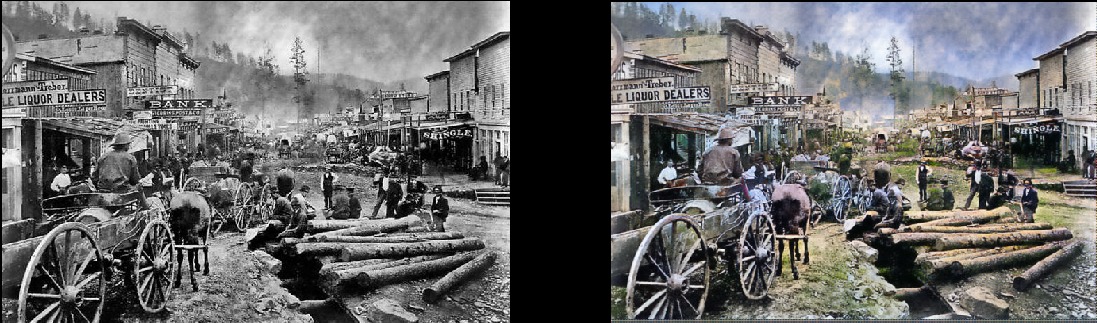
Please note that even really old and / or poor quality photos still look pretty cool:
Deadwood, South Dakota, 1877
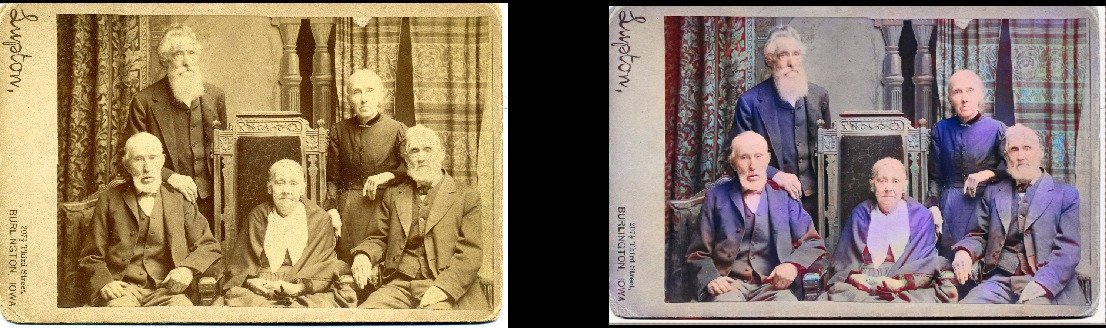
Brothers and Sisters in 1877 (Deadwood)
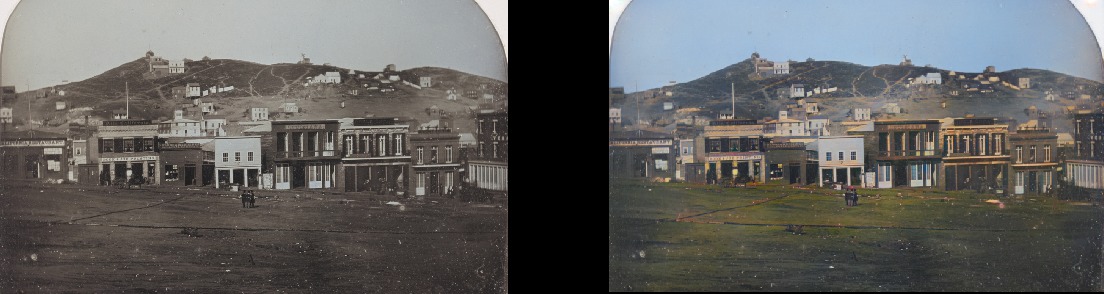
Portsmouth Square in San Francisco 1851
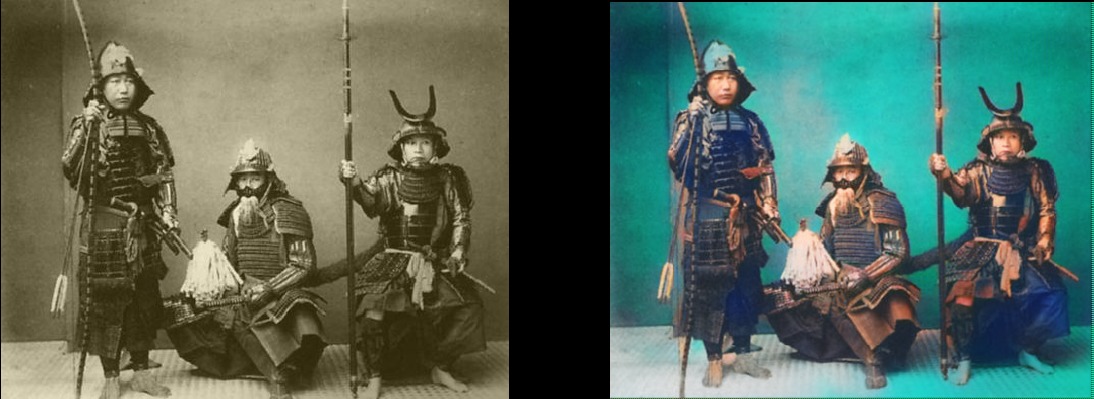
Samurai, circa 1860s
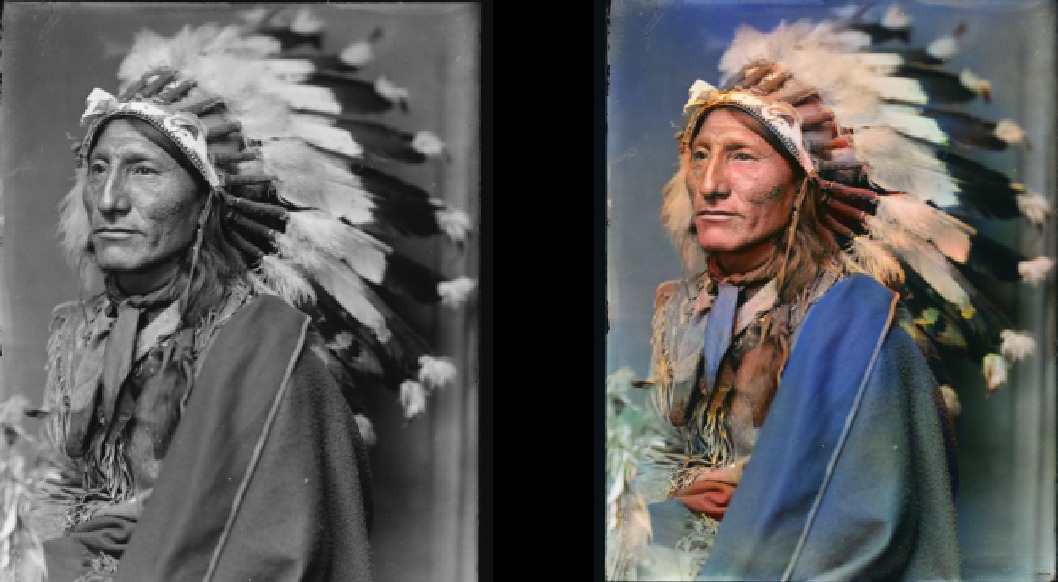
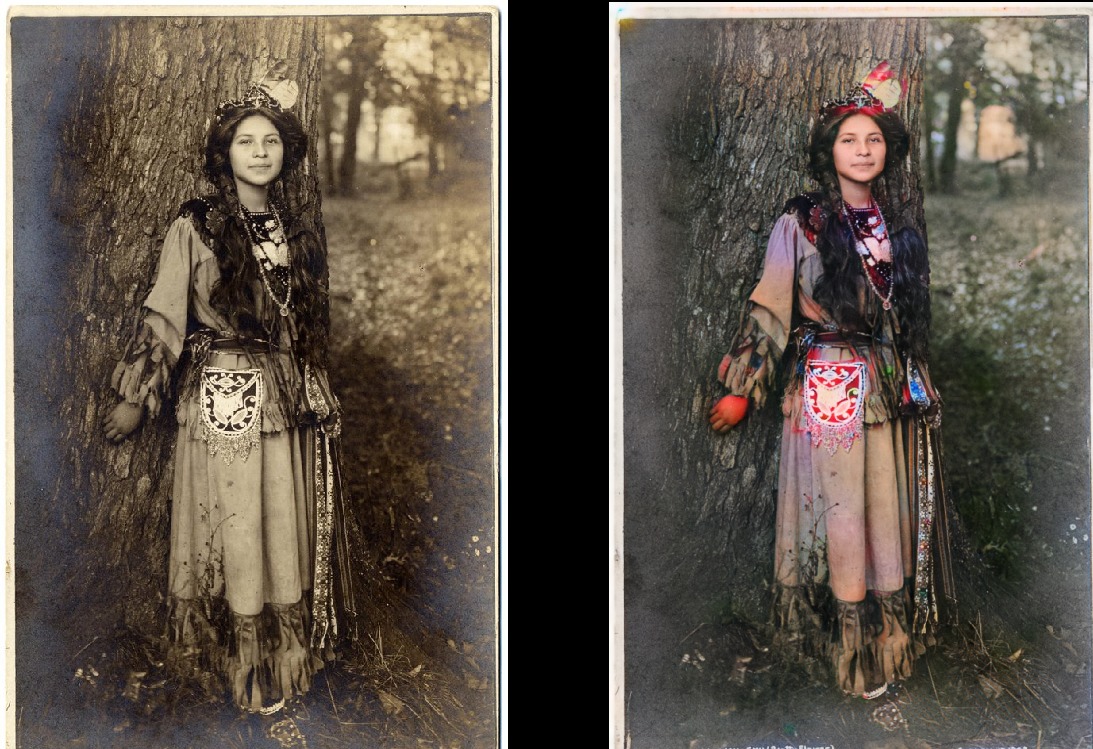
Of course, the model is not perfect. This red hand drives me crazy, but otherwise it works fantastic:
Seneca tribe girl from the Iroquois, 1908
She can also paint black and white drawings:
This is a model based on deep learning. In particular, I combined the following approaches:
The beauty of this model is that it is quite good in a variety of image modifications. What you see above are the results of the coloring model, but this is just one component in the pipeline that I want to develop with the same model.
Then I will try to bring the old images to perfection, and the next item on the agenda is the model of improving saturation and richness (defade). Now she is in the early stages of learning. This is basically the same model, but with some contrast / brightness settings as a simulation of faded photos and pictures taken with old / poor equipment. I have already received some encouraging results:

What is the essence of this project? I just want to apply GAN to make old photos look very, very good. And more importantly, it will make the project useful . And yes, I'm definitely interested in working with the video, but first you need to figure out how to take this model under control by memory consumption (this is a real beast). It would be nice if the models did not train for two to three days on 1080Ti (unfortunately, typical of the GAN). Although this is my child and I will actively update and improve the code in the foreseeable future, but I will try to make the program as user friendly as possible, although there will certainly be some difficulties with it.
And I swear I'll properly document the code ... someday. Admittedly, I am one of those people who believe in “self-documenting code” (LOL).
The project is built on the wonderful Fast.AI library. Unfortunately, this is the old version, and it has yet to be updated to the new one (this is definitely on the agenda). So, the preliminary requirements in brief:
If you want to start processing images right now without learning the model, you can download the finished weights here . Then open ColorizationVisualization.ipynb in JupyterLab. Make sure that there is a line with a reference to the weight:
Then you need to load the colorizer model after netG is initialized:
Then simply place any images in the / test_images / folder from where you run the program. You can visualize the results in Jupyter Notebook with the following lines:
I would keep the size around 500px, plus or minus, if you run the program on a GPU with a lot of memory (for example, GeForce 1080Ti 11 GB). If the memory is less, then you will have to reduce the size of the pictures or try to run on the CPU. I actually tried to do the latter, but for some reason the model worked very, absurdly slowly, and I did not find the time to investigate the problem. Connoisseurs recommended building Pytorch from source, then you’ll get a big performance boost. Hmm ... At that moment it was not before.
Jupyter can also render the generated images as you learn: you only need to set the value to true when creating an instance of this visualization hook:
I prefer to leave false and just use Tensorboard. Believe me, you also want to do just that. In addition, if left to work for too long, Jupyter will eat a lot of memory with such images.
Model weights are also automatically saved during the GANTrainer training runs. By default, they are saved every 1000 iterations (this is an expensive operation). They are stored in the root folder that you specified for training, and the name corresponds to the save_base_name specified in the training schedule. Weights are stored separately for each workout size.
I would recommend navigating the code from top to bottom, starting with Jupyter Notebook. I treat these notes simply as a convenient interface for prototyping and visualization, everything else will go into .py files as soon as I find a place for them. I already have visualization examples that can be conveniently included and viewed: just open xVisualization in Notebook, the test images included in the project are listed there (they are in test_images).
If you see GAN Schedules, then this is the ugliest thing in the project, just my version of the implementation of progressive GAN learning, suitable for the Unet generator.
The pre-learned weights for the colorizer generator are also here . The project DeFade while in work, I will try to lay out a good weight in a few days.
Usually, when training, you will see the first good results halfway, that is, with a size of 192px (if you use the provided training examples).
I'm sure I screwed up somewhere, so please let me know if this is the case.
I will post new results on Twitter .
Addition from the translator.
From the last on Twitter:
Representatives themselves nationality in their dugout, 1880
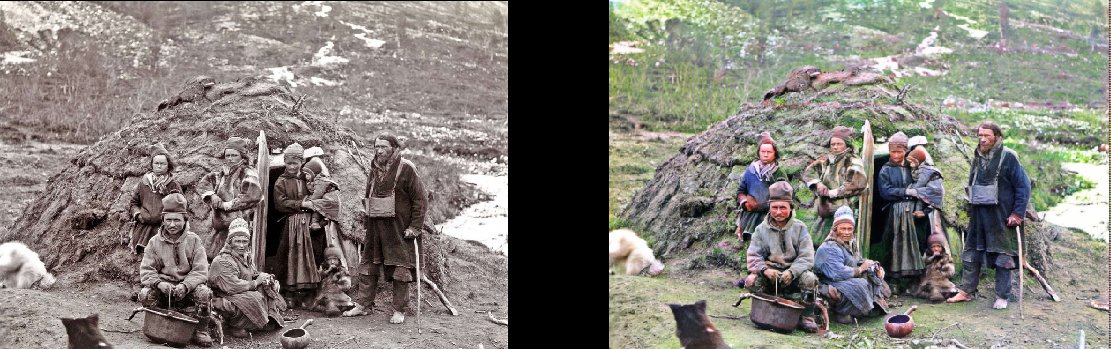
( original )
Construction of the London Underground, 1860
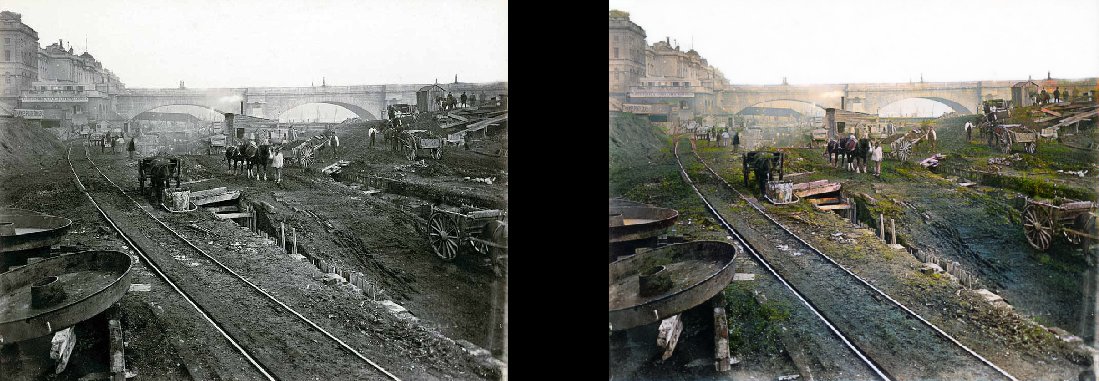
( original )
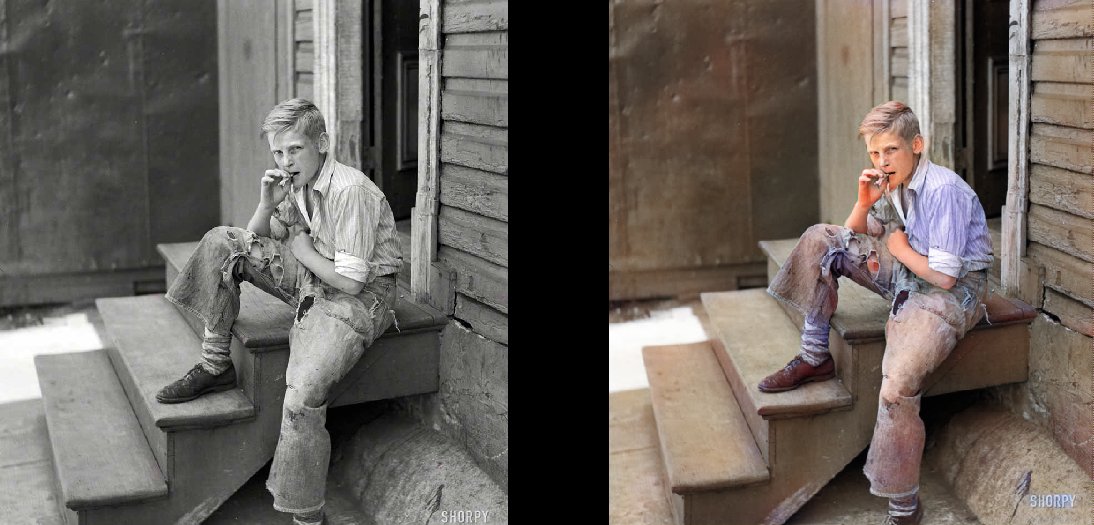
Slums of Baltimore, 1938
Gym on the Titanic, 1912
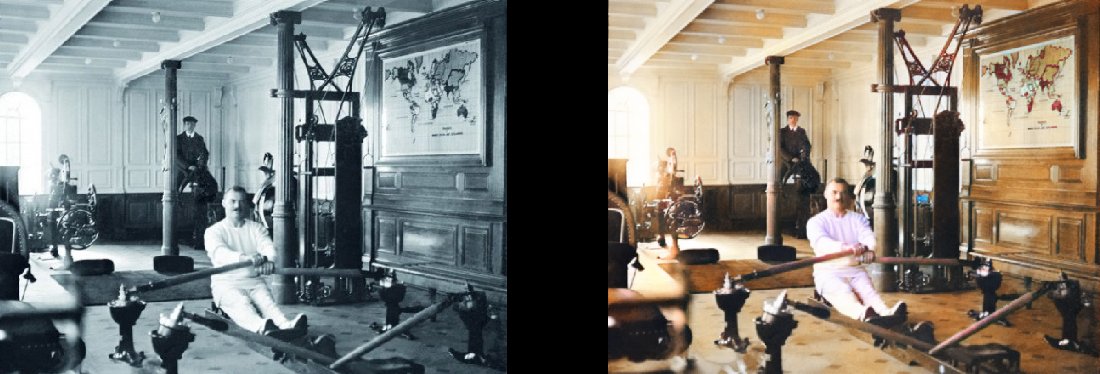
( original )
These are just a few examples, and they are quite typical!
Maria Anderson as Little Fairy and her page Lyubov Ryabtsova in the Sleeping Beauty ballet at the Imperial Theater, St. Petersburg, Russia, 1890
Woman relaxes in her living room (1920, Sweden)
')
Medical students posing near the corpse, circa 1890
Surfer in Hawaii, 1890
Turning Horse, 1898
Interior bar Miller and Schumaker, 1899
Paris in the 1880s
Edinburgh bird's eye view in the 1920s
Texas woman in 1938
People at Waterloo station watching television for the first time, London, 1936
Geography lesson in 1850
Chinese opium smokers in 1880
Please note that even really old and / or poor quality photos still look pretty cool:
Deadwood, South Dakota, 1877
Brothers and Sisters in 1877 (Deadwood)
Portsmouth Square in San Francisco 1851
Samurai, circa 1860s
Of course, the model is not perfect. This red hand drives me crazy, but otherwise it works fantastic:
Seneca tribe girl from the Iroquois, 1908
She can also paint black and white drawings:
Technical details
This is a model based on deep learning. In particular, I combined the following approaches:
- Self-Attention GAN . The only thing is that the pre-trained Unet is used as a generator and I just changed it for spectral normalization and the Self-Attention mechanism itself. This is a fairly simple modification. I can tell you that the difference is striking compared to the previous version of Wasserstein GAN, which I tried to make work. I liked the Wasserstein GAN theory, but in practice it does not work. But I just fell in love with the Self-Attention GAN network.
- A learning structure like the progressive growth of GAN (but not exactly like this). The difference is that the number of layers remains constant: I just changed the size of the input data and adjusted the learning speed so that the transitions between the dimensions were successful. It seems that it produces the same end result, but it learns faster, is more stable and performs generalization better.
- TTUR (Two Time-Scale Update Rule) rule. It’s pretty understandable here: just one-to-one iteration of the generator / discriminator (critic) and a higher learning speed of the discriminator.
- The generator loss function consists of two parts: one of them is the main function of the Perceptual Loss (or Feature Loss) based on the VGG16 - it simply pushes the generator model to replicate the input image. The second part is the evaluation of losses from the discriminator (critic). For the curious: only the function Perceptual Loss is not enough for a good result. It tends to just encourage a bunch of brown / green / blue - you know, by fooling the test, what neural networks are really good at! The key point is that GAN is essentially exploring the loss function for you, which is actually one big step towards the ideal we are aiming at in machine learning. And of course, the results will significantly improve when the machine itself learns what you previously coded manually. Of course, here it is.
The beauty of this model is that it is quite good in a variety of image modifications. What you see above are the results of the coloring model, but this is just one component in the pipeline that I want to develop with the same model.
Then I will try to bring the old images to perfection, and the next item on the agenda is the model of improving saturation and richness (defade). Now she is in the early stages of learning. This is basically the same model, but with some contrast / brightness settings as a simulation of faded photos and pictures taken with old / poor equipment. I have already received some encouraging results:
More about the project
What is the essence of this project? I just want to apply GAN to make old photos look very, very good. And more importantly, it will make the project useful . And yes, I'm definitely interested in working with the video, but first you need to figure out how to take this model under control by memory consumption (this is a real beast). It would be nice if the models did not train for two to three days on 1080Ti (unfortunately, typical of the GAN). Although this is my child and I will actively update and improve the code in the foreseeable future, but I will try to make the program as user friendly as possible, although there will certainly be some difficulties with it.
And I swear I'll properly document the code ... someday. Admittedly, I am one of those people who believe in “self-documenting code” (LOL).
Independent model launch
The project is built on the wonderful Fast.AI library. Unfortunately, this is the old version, and it has yet to be updated to the new one (this is definitely on the agenda). So, the preliminary requirements in brief:
- Old Fast.AI library . Having dug into the project for two months, I missed a little what happened to her, because the one that is now marked as “old” does not really look like the one I have. Everything has changed in the last two months or so. Therefore, if nothing works with other versions, I forked it here . Again, updating to the latest version is on the agenda, I apologize in advance.
- All Fast.AI dependencies : there are convenient requirements.txt and environment.yml files.
- Pytorch 0.4.1 (spectral_norm is required, so the last stable release is needed).
- JupyterLab .
- Tensorboard (i.e. installing Tensorflow) and TensorboardX . I think this is not strictly necessary, but so much easier. For your convenience, I have already provided all the necessary hooks / callbacks in the Tensorboard! There are examples of their use. It is noteworthy that by default, the images are processed in the Tensorboard every 200 iterations, so you get a constant and convenient view of what the model does.
- ImageNet : a great set of data for learning.
- Powerful graphics card . I would really like to have more memory than 11 GB in my GeForce 1080Ti. If you have something weaker, it will be difficult. Unet and Critic are absurdly large, but the bigger they are, the better the results.
If you want to start processing images right now without learning the model, you can download the finished weights here . Then open ColorizationVisualization.ipynb in JupyterLab. Make sure that there is a line with a reference to the weight:
colorizer_path = Path('/path/to/colorizer_gen_192.h5') Then you need to load the colorizer model after netG is initialized:
load_model(netG, colorizer_path) Then simply place any images in the / test_images / folder from where you run the program. You can visualize the results in Jupyter Notebook with the following lines:
vis.plot_transformed_image("test_images/derp.jpg", netG, md.val_ds, tfms=x_tfms, sz=500) I would keep the size around 500px, plus or minus, if you run the program on a GPU with a lot of memory (for example, GeForce 1080Ti 11 GB). If the memory is less, then you will have to reduce the size of the pictures or try to run on the CPU. I actually tried to do the latter, but for some reason the model worked very, absurdly slowly, and I did not find the time to investigate the problem. Connoisseurs recommended building Pytorch from source, then you’ll get a big performance boost. Hmm ... At that moment it was not before.
Additional Information
Jupyter can also render the generated images as you learn: you only need to set the value to true when creating an instance of this visualization hook:
GANVisualizationHook(TENSORBOARD_PATH, trainer, 'trainer', jupyter=True, visual_iters=100I prefer to leave false and just use Tensorboard. Believe me, you also want to do just that. In addition, if left to work for too long, Jupyter will eat a lot of memory with such images.
Model weights are also automatically saved during the GANTrainer training runs. By default, they are saved every 1000 iterations (this is an expensive operation). They are stored in the root folder that you specified for training, and the name corresponds to the save_base_name specified in the training schedule. Weights are stored separately for each workout size.
I would recommend navigating the code from top to bottom, starting with Jupyter Notebook. I treat these notes simply as a convenient interface for prototyping and visualization, everything else will go into .py files as soon as I find a place for them. I already have visualization examples that can be conveniently included and viewed: just open xVisualization in Notebook, the test images included in the project are listed there (they are in test_images).
If you see GAN Schedules, then this is the ugliest thing in the project, just my version of the implementation of progressive GAN learning, suitable for the Unet generator.
The pre-learned weights for the colorizer generator are also here . The project DeFade while in work, I will try to lay out a good weight in a few days.
Usually, when training, you will see the first good results halfway, that is, with a size of 192px (if you use the provided training examples).
I'm sure I screwed up somewhere, so please let me know if this is the case.
Known Issues
- You have to play a little with the image size to get the best result. The model clearly suffers from some dependence on the aspect ratio and size when generating images. It used to be much worse, but the situation improved significantly with the increase in lighting / contrast and the introduction of progressive learning. I want to completely eliminate this problem and focus on it, but do not despair if the image looks excessively saturated or with strange glitches. Most likely, everything will be fine after a small size change. As a rule, for oversaturated images you need to increase the size.
- In addition to the above: getting the best images really comes down to the art of choosing the optimal parameters . Yes, the results are selected manually. I am very pleased with the quality, and the model works quite reliably, but not perfectly. The project is still ongoing! I think the tool can be used as an "artist's AI", but it is not yet ready for the general public. Just not time yet.
- To complicate the situation: at present, the model is brutally eating memory , so on my 1080Ti card it turns out to handle images with a maximum of 500-600px. I bet there are a lot of optimization options here, but I haven't done it yet.
- I added zero padding to the Unet generator for everything that does not match the expected sizes (this is how I can load an image of an arbitrary size). It was a very fast hack, and it leads to silly right and lower bounds on the output of test images of arbitrary size. I am sure that there is a better way, but I have not found it yet.
- The model loves blue clothes. Not quite sure why the solution is in the search!
Want more?
I will post new results on Twitter .
Addition from the translator.
From the last on Twitter:
Representatives themselves nationality in their dugout, 1880
( original )
Construction of the London Underground, 1860
( original )
Slums of Baltimore, 1938
Gym on the Titanic, 1912
( original )
Source: https://habr.com/ru/post/428818/
All Articles