Without ensemble

We decided once to do the automation of our routine work moments. Create an ensemble (ansible) or something like that. I climbed onto the site of the ensemble, looked at how it works ... connects to the remote server via ssh and executes some scripts ... Stop, I thought, does an ensemble need for this? Without the ensemble, I myself ..., alone ... I can do it! And so that not only I could, I decided to write a web application. The application was called Update Server , abbreviated as UpS .
Vorning! Under the cut a lot of pictures and a couple of gifs.
I decided to make an application using python and jungle. There are enough specialists and “specialists” both for this and that. Therefore, I will not be measured by the number of lines of code. Those
')
But first things first, it all starts with such a simple page with a description.

Clicking on Jumbotron Projects we get to the page of project selection.
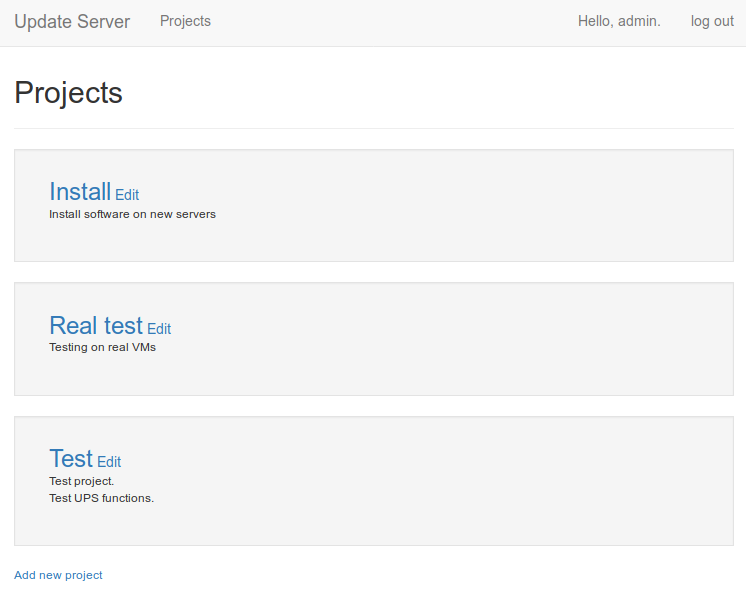
Choosing a project we get to the main page with a list of servers, scripts, etc.
Let's go to the details. In the application there are several entities: server (server), script (script), update package (update), task in cron (cron job), event in the history (event), project (project) and not quite a dump (dump).
Small lyrical digression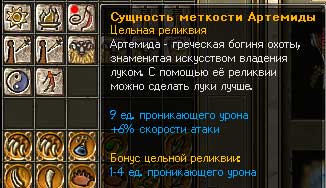 We play with our son in the Titan quest, or rather I play, and he looks) There are some artifacts that fall out of the monsters, in the Russian version they are called entities. Then one day I had some kind of Achilles essence of something there. In the picture something else, but from the same opera)
The son saw and shouted:
- Dad, look the seriousness of Achilles!)
We play with our son in the Titan quest, or rather I play, and he looks) There are some artifacts that fall out of the monsters, in the Russian version they are called entities. Then one day I had some kind of Achilles essence of something there. In the picture something else, but from the same opera)The son saw and shouted:
- Dad, look the seriousness of Achilles!)
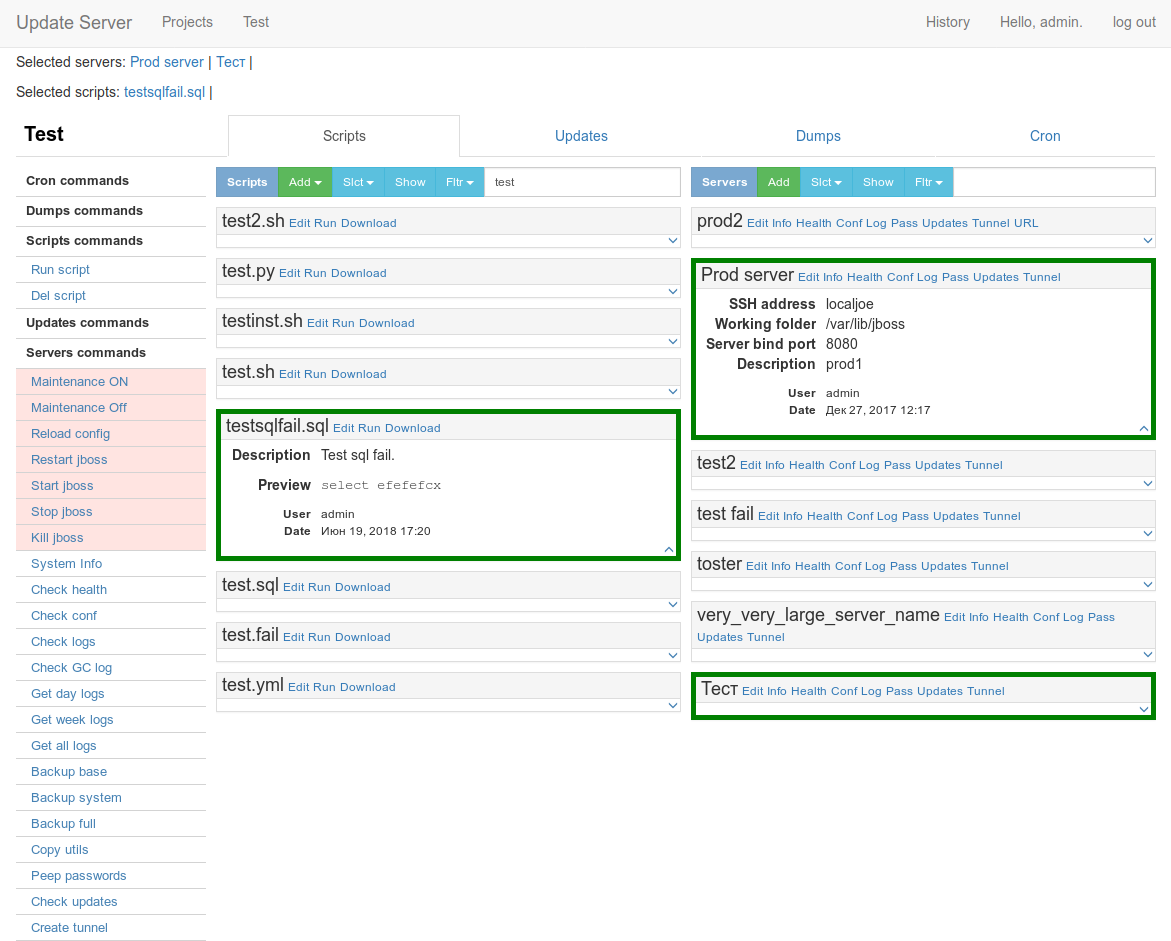
The main entity is the project. The project clings servers, scripts, updates. Created tasks in the crown and dumps. Objects are scattered across the respective bookmarks. On the left is a menu with a list of commands. Go through the bookmarks. The first tab is scripts.
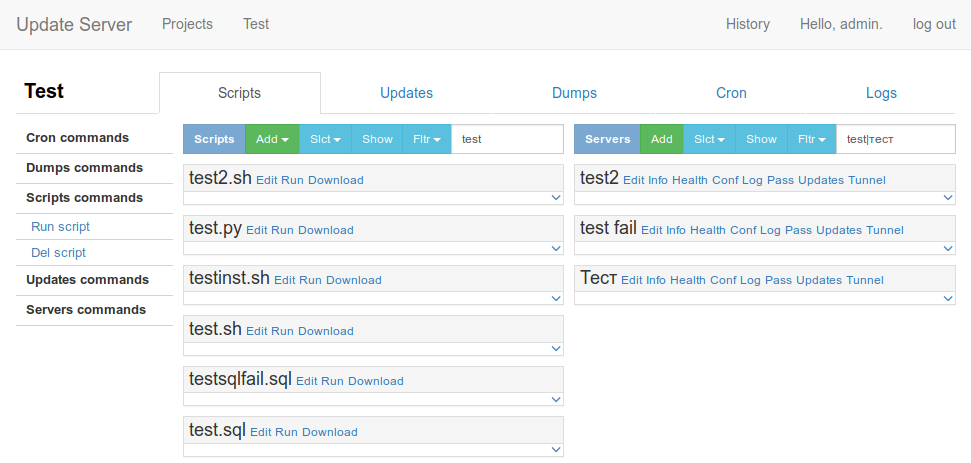
Here we see the available scripts and servers (servers are available on all tabs, because almost always they are needed). Scripts can be loaded from a file or created in the interface with the Add button. SH, PY, YML and SQL scripts are supported.
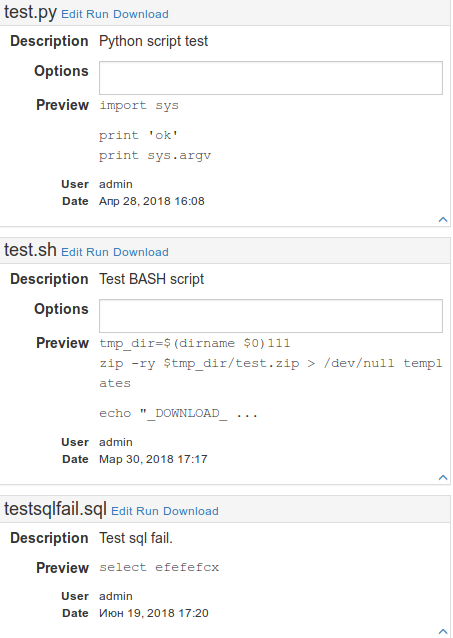 In the panel of the script there is a description ( description ), a piece of code ( preview ), the author and the date. For SH and PY scripts it is possible to add options (the options field). The script is selected (and any other object) by clicking on any part of the panel (except for the “quick” buttons). Click on the script (second, third, etc.), click on the server (second, third, etc.) and click on Run script . The selected script or scripts will be executed on the selected server or servers. If you need to “quickly” execute one script, you can use the “quick” button on the script panel, click on the server (second, third, etc.) and click on the Run of the desired script. While writing the article there were changes. Separated SQL scripts from the rest, added a separate command and permishon for the execution of escules. This made it possible to give, for example, only the rights to execute escules, since SH and PY are much more powerful, they provide almost unlimited possibilities. But I didn’t redo the screenshots) Scripts could be limited to, almost everything can be done by them, but it was already difficult to stop).
Go ahead, service packs.

On this tab, you can add new updates, copy them to servers, perform updates.
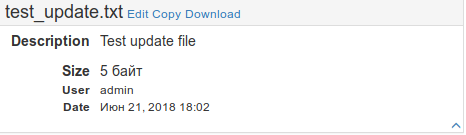 In fact, these can be any files, as in this example a regular txt file is used as a test update. You upload a file to the server (most often it is zip) and somehow use it with the help of scripts. Updates also have a description, author, date and size shown.
Next come the dumps.

Here you can see the list of files received by the Get dump command or downloaded here from a computer.
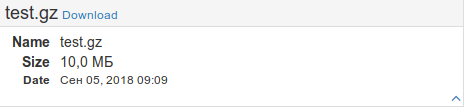 Dumps have no description, only the name, size and creation time. Probably not only all at least once (two, three) banged the food base? I brought this opportunity to a new level) Send dump This command expands the server base from the selected dump. Do you feel the possibilities? (You hear the crash of the farts) Yes, in
All this ugliness can be run through kroner. This tab displays active tasks.
 Each task has a unique identifier ( crontab id ), it is necessary for subsequent manipulations with it. The description indicates what the task will do. In the example, run the test2.sh script on the server with the address jboss @ localhost. The start time of the task is indicated in the Start date field in the format YYYY-MM-DD HH: MM The author and the creation time are indicated. You can cancel the task, change the time, make the task permanent (will be executed every day at a specified time) or vice versa one-time.
Logs of running commands appear here.
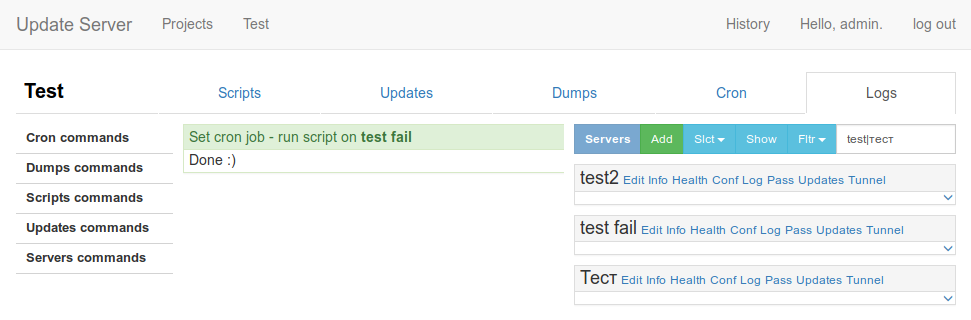
Nothing can be done with the logs, everything has already been done, sit and see what happened) Click on the log plate opens it in a separate window. If several processes are running, the All logs button appears, opens all the logs in one window (I forgot to make this screenshot).
Servers. As I said, the server list is available on all bookmarks.
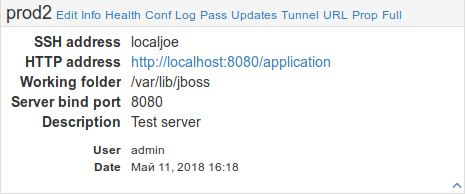 The servers display the address ( ssh address ), you can write in the user @ address format, but it is better to use ssh aliases (~ / .ssh / config) and specify some meaningful names. HTTP adress is an application URL deployed on the server. The working directory ( working folder ) and port ( server bind port ) is the folder where the application is located and the port it opens accordingly. Description, author, date. In the screenshot, a couple of new teams were added, which were added at the time of writing: Prop and Full . We have two main configuration files, these commands allow you to edit them conveniently.
 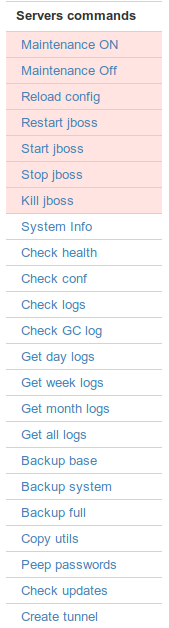 The rest of the team. First reds:
Maintenance ON \ OFF - enable \ disable the "Routine maintenance work" page during maintenance work O_o or if something went wrong (after send dump for example).
Reload config - reloads jboss config (our project uses jboss).
Restart \ start \ stop \ kill jboss - stop, start, restart jboss and brutal murder if nothing helps)
Further different useful things:
System info - shows information about the server: memory, disk, processor, users, processes.
Check health - a quick check of the application’s performance, looks for the application process, checks if the port is open and tries to knock on the port with a curtain.
Check conf - shows the application configuration file.
Check logs - shows the application logs.
Check GC log - shows the log collector's log.
Get day \ week \ month \ all logs - allows you to download logs for a certain time in one archive.
Backup base \ system \ full - creates a backup copy of the database, application files, does both.
Copy utils - copies all sorts of different scripts to the server.
Peep passwords - allows you to peep the admin password.
Check updates - shows which update files are uploaded to the server.
Create tunnel - makes the port of the application forwarding, from the application server to UpS 'a (we have ssh). You can connect to the application port directly. Useful for performance checks in the absence of access (http \ s) to the primary address.
The commands System info , Check health , Check conf , Check logs , Peep passwords , Check updates and Create tunnel have “fast” counterparts directly on the panel of each server.
In the top pane there is a History link, in the history the result of the execution of all (almost) commands is recorded. Permishons are required to view the history and execute commands. Permishons are hung with a standard jung admin panel. The only thing I added here is that I screwed the jango-guardian library, which allows you to hang permishons on objects, it seemed to me very convenient, and junga does not know how to do it out of the box.
Of course, I am not the guru, but I tried to make the management easy and not forced) We squeal the necessary objects, choose the team and

A few words about how this all works. Python and junga, as I said before, views, models, urls, forms, this is all this commands.py file. This file describes the available commands (as long as everything is logical, right?). It looks something like this:
class CommandClass: """ """ def __init__( self, permission='run_command', # Permission needed to run this command. position=1, # Position in commands list section='', # Section command will be placed to. style='', # Class assigned to a command button title='', # Pop up help message(via title) short='', # Short name for commands in quick section menu='', # Command name in UI name='', # Command name(an internal command name) run='', # Prevent CRONing his=True, # Command log will be saved to history fst=False, # Add command to quick section dgr='false', # If true will show confirmation window job='false', # Check if some cron jobs selected srv='false', # Check if some servers selected upd='false', # Check if some updates selected scr='false', # Check if some scripts selected dmp='false', # Check if some dumps selected ): self.permission = permission self.position = position self.section = section self.style = style self.title = title self.short = short self.name = name self.menu = menu self.run = run self.his = his self.fst = fst self.srv = srv self.upd = upd self.job = job self.scr = scr self.dmp = dmp self.dgr = dgr And all existing commands are described in the commandick dictionary. The name of the dictionary is a kind of wordplay command (command) and dictionary (dictionary), experts in English will probably find some more hidden meaning. Dictionary:
commandick = { # Cron submenu }----------------------------------- 'cancel_job': CommandClass( permission='run_cron', position=4, section='cron', title='Cancel selected cron job(s).', name='cancel_job', menu='Remove job', job='true', run="run_or_cron('RUN');", ), 'permanent_job': CommandClass( permission='run_cron', position=3, section='cron', title='Make selected cron job(s) permanent.', name='permanent_job', menu='Run everyday', job='true', run="run_or_cron('RUN');", ), ... 'tunnel': CommandClass( permission='tunnel', position=80, section='server', title='Make ssh tunnel to the bind port of selected server(s).', short='Tunnel', name='tunnel', menu='Create tunnel', run="run_or_cron('RUN');", srv='true', his=False, fst=True, ), 'test_ssh': CommandClass( permission='tunnel', position=90, section='server', title='Test ssh connection.', short='Tunnel', name='test_ssh', menu='Test ssh', run="run_or_cron('RUN');", srv='true', his=False, ), } Each command is a separate module in the modules folder. Commands are launched by a separate process, if several servers are selected, then each one creates its own starter.py script, it imports and executes the necessary module (command). Invented a new feature? You add a file to the modules folder and describe it in the dictionary,
other crafts
In conclusion, I want to mention a couple of my crafts. For the smallest coloring book . A script that simplifies the process of coloring other scripts:
For older guys, spending a lot of time in the console, nice information panel .

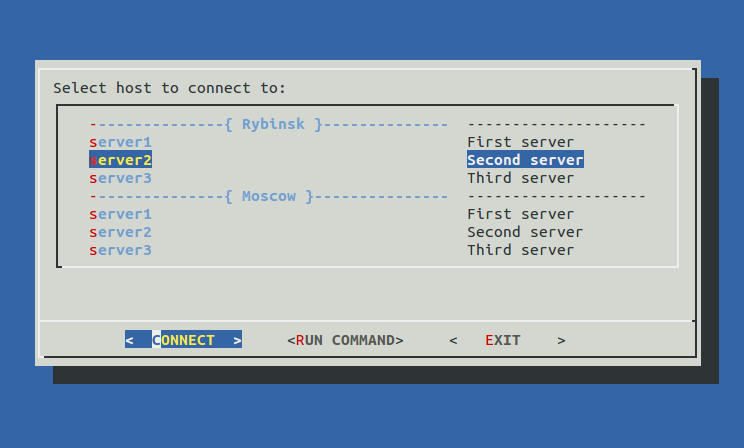
For those who are already closely within the framework of localhost, there is a script that creates a menu (dialog) from your ~ / .ssh / config . Everyone knows why you need ~ / .ssh / config ?) It looks like this:
And of course, PIU-PIU!
Piu-Piu liked a lot (more than 550 stars on the githaba), thank you all for your kind words and help! Have you heard of pi-piu? Hurry read here , here and here . I want to develop the story further and make the game more, I have ideas for optimization, but there is a catastrophic lack of time. New Year's holidays can not be by the way, I hope it will work to work on the game. By the way, piPiPi can be installed by apt:
Holiday greetings!)
#--------------------------------------------------------------------+ #Color picker, usage: printf $BLD$CUR$RED$BBLU'Hello World!'$DEF | #-------------------------+--------------------------------+---------+ # Text color | Background color | | #-----------+-------------+--------------+-----------------+ | # Base color|Lighter shade| Base color | Lighter shade | | #-----------+-------------+--------------+-----------------+ | BLK='\e[30m'; blk='\e[90m'; BBLK='\e[40m'; bblk='\e[100m' #| Black | RED='\e[31m'; red='\e[91m'; BRED='\e[41m'; bred='\e[101m' #| Red | GRN='\e[32m'; grn='\e[92m'; BGRN='\e[42m'; bgrn='\e[102m' #| Green | YLW='\e[33m'; ylw='\e[93m'; BYLW='\e[43m'; bylw='\e[103m' #| Yellow | BLU='\e[34m'; blu='\e[94m'; BBLU='\e[44m'; bblu='\e[104m' #| Blue | MGN='\e[35m'; mgn='\e[95m'; BMGN='\e[45m'; bmgn='\e[105m' #| Magenta | CYN='\e[36m'; cyn='\e[96m'; BCYN='\e[46m'; bcyn='\e[106m' #| Cyan | WHT='\e[37m'; wht='\e[97m'; BWHT='\e[47m'; bwht='\e[107m' #| White | #----------------------------------------------------------+---------+ # Effects | #--------------------------------------------------------------------+ DEF='\e[0m' #Default color and effects | BLD='\e[1m' #Bold\brighter | DIM='\e[2m' #Dim\darker | CUR='\e[3m' #Italic font | UND='\e[4m' #Underline | INV='\e[7m' #Inverted | COF='\e[?25l' #Cursor Off | CON='\e[?25h' #Cursor On | #--------------------------------------------------------------------+ # Text positioning, usage: XY 10 10 'Hello World!' | XY () { printf "\e[$2;${1}H$3"; } # | #--------------------------------------------------------------------+ # Print line, usage: line - 10 | line -= 20 | line 'Hello World!' 20 | line () { printf -v LINE "%$2s"; printf "${LINE// /$1}"; } # | #--------------------------------------------------------------------+ For older guys, spending a lot of time in the console, nice information panel .
For those who are already closely within the framework of localhost, there is a script that creates a menu (dialog) from your ~ / .ssh / config . Everyone knows why you need ~ / .ssh / config ?) It looks like this:
And of course, PIU-PIU!
Piu-Piu liked a lot (more than 550 stars on the githaba), thank you all for your kind words and help! Have you heard of pi-piu? Hurry read here , here and here . I want to develop the story further and make the game more, I have ideas for optimization, but there is a catastrophic lack of time. New Year's holidays can not be by the way, I hope it will work to work on the game. By the way, piPiPi can be installed by apt:
sudo apt install -y piu-piu Holiday greetings!)
Source: https://habr.com/ru/post/428439/
All Articles