How to make a solar flashlight do it yourself (part 1)
Solar lanterns can be easily divided into several groups, these are “author's”, made of some rather unique things and ingenious in their idea, mini-spotlights designed for lighting in the direction, or illuminating from above flower beds and ordinary soldiers of country lighting - classic lanterns on a column designed to illuminate the tracks. How and from what they can be made, I will tell in this article. There will also be considered several versions of electronics for shady areas of the garden, where charging the flashlight from the sun is difficult and the brightness of the light will have to be sacrificed.
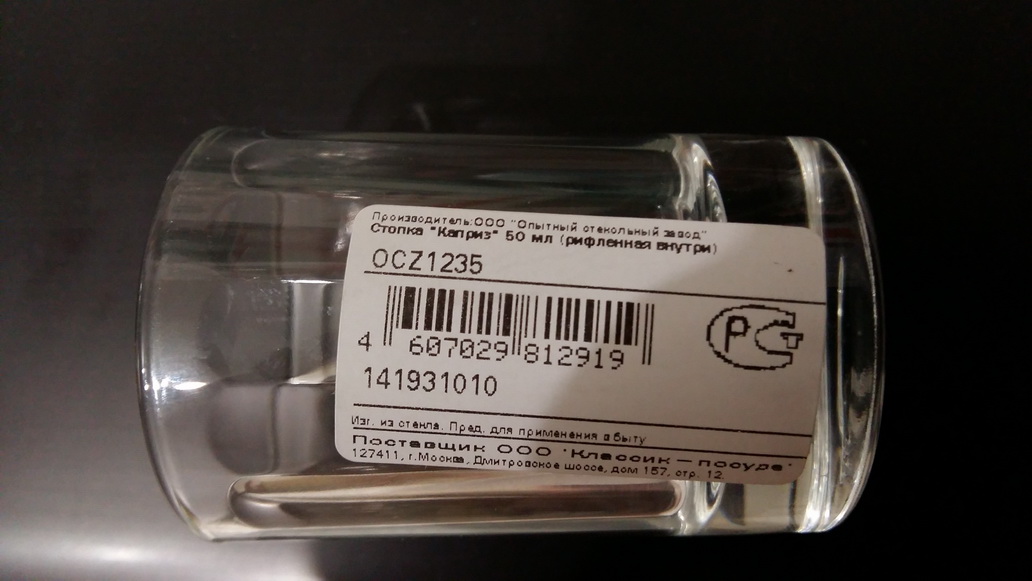
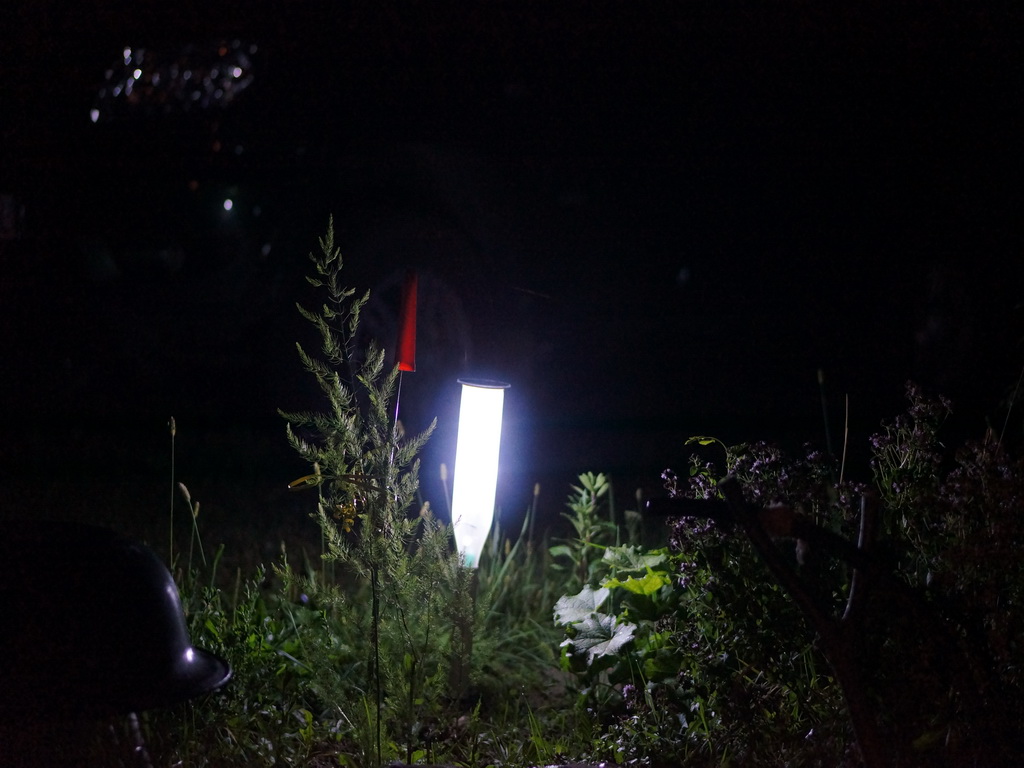
The basis of almost any homemade flashlight is its plastic or glass ceiling made of an intricate bottle, glass or shot glass, a store-bought ceiling, or left over from an old chandelier, it can be a child's toy, or whatever is left of it. By the way, from the source of the ceiling my flashlights get their names, for example - “Caprice”, “Mill”, “Nescafe”, “Lukoshko”, “Grappa”, etc. ... As practice has shown, the most successful ceiling lamps for classic flashlights on the column are the usual inexpensive glasses. They are easy to clean, do not grow cloudy over time and do not become brittle in contrast to the shades of Chinese lanterns. And having picked up glasses as glasses with beautiful ribbing, you can get original light drawings and a unique appearance. For example, a flashlight made from the “Caprice” glass has a light pattern with radiating rays of light:
')
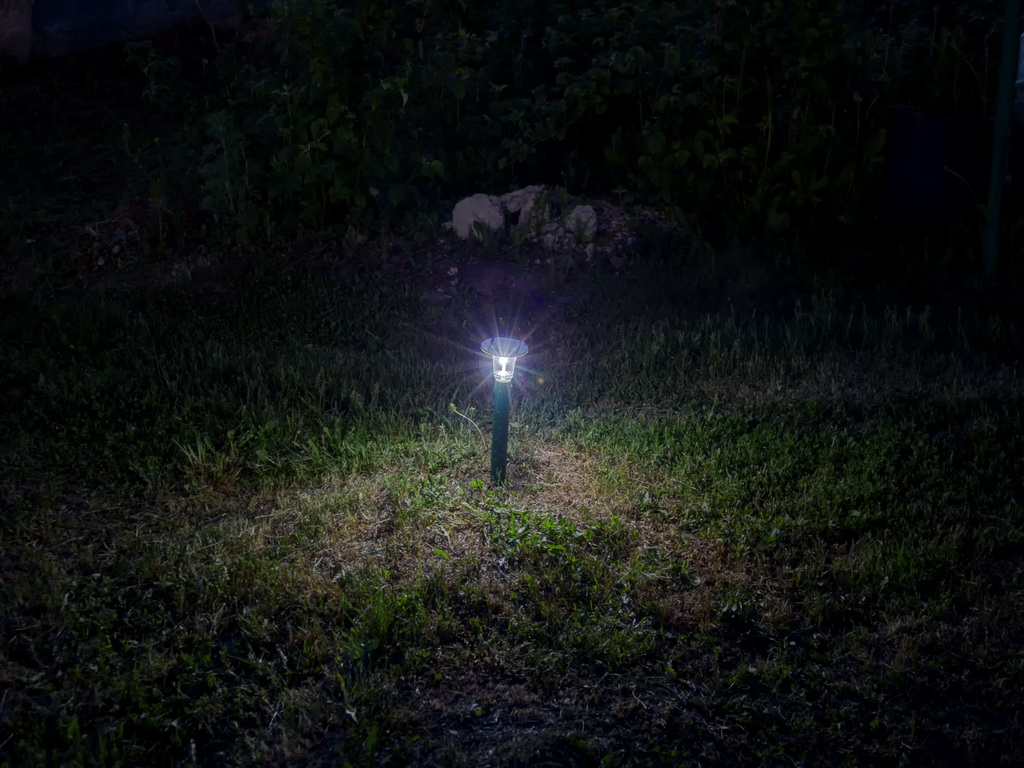
And this is what a flashlight with a canopy of a simple transparent glass looks like:
In general, turning on the fantasy, you can also use completely unexpected glass or plastic objects as the ceiling lamps. It can be a finished mill from seasoning:
Or a small jar of nescafe:

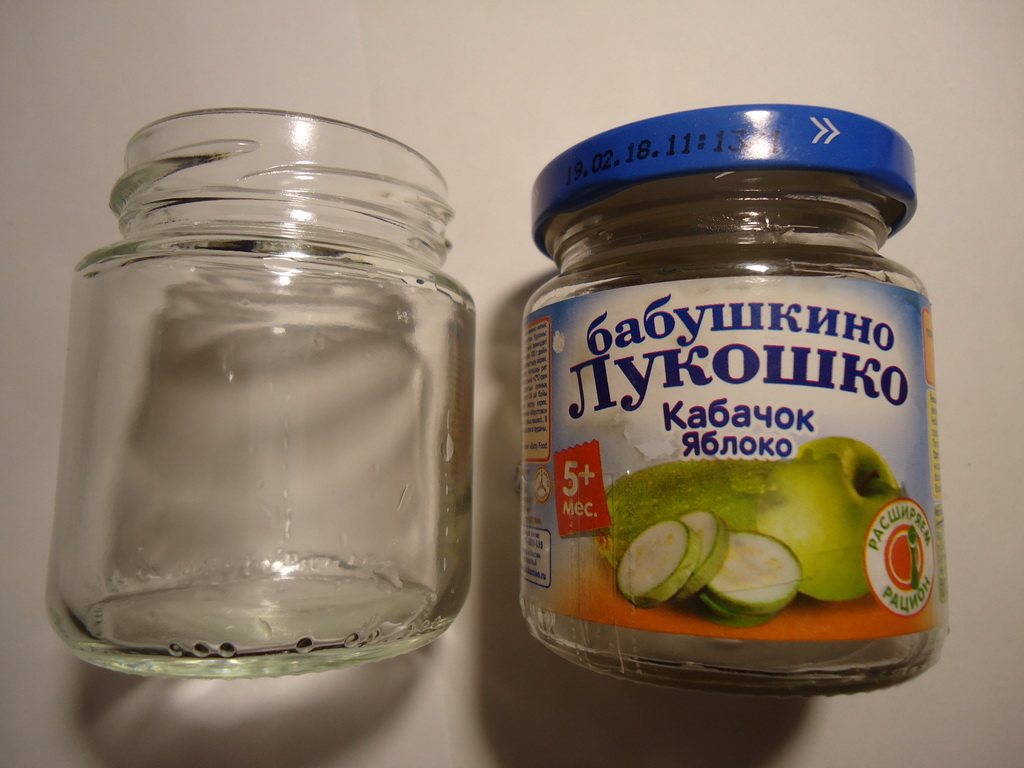
Baby food jar:
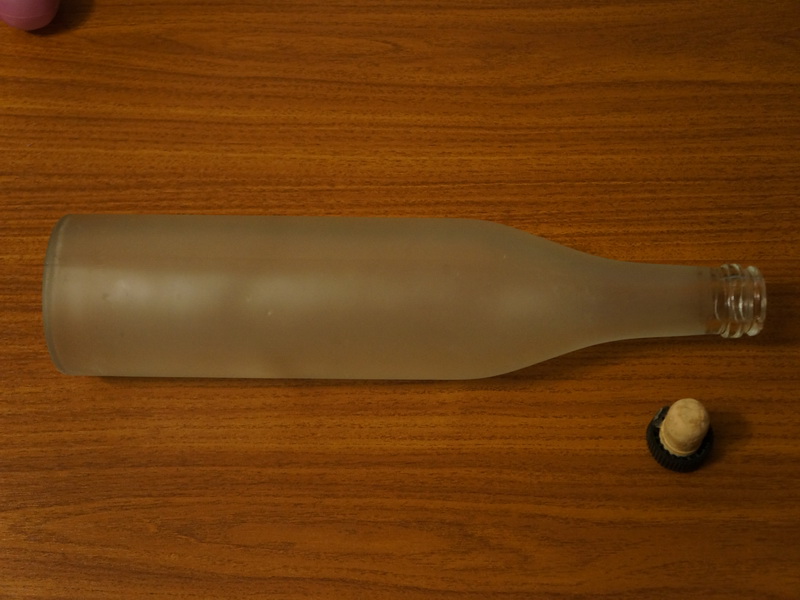
Or even a round bottle of vodka:
And these are historical photos of one of the very first lanterns made from a bottle from under the Crimean grappa and which has long been broken:

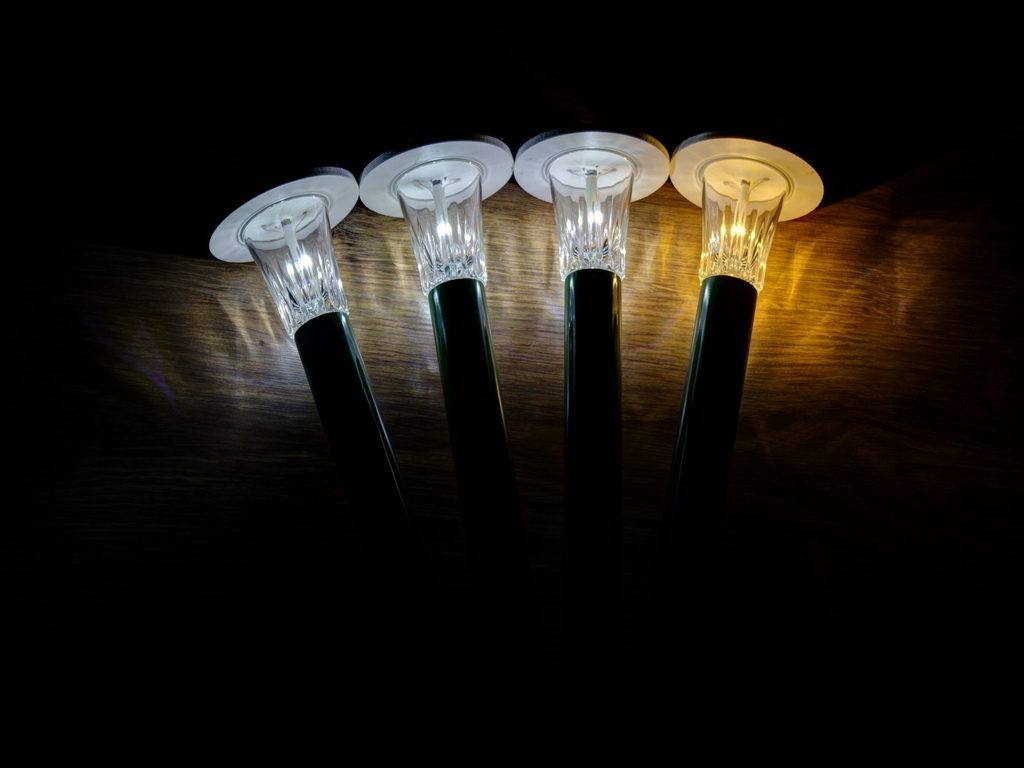
In order to show the main points of the assembly, I made a small batch of four lanterns:
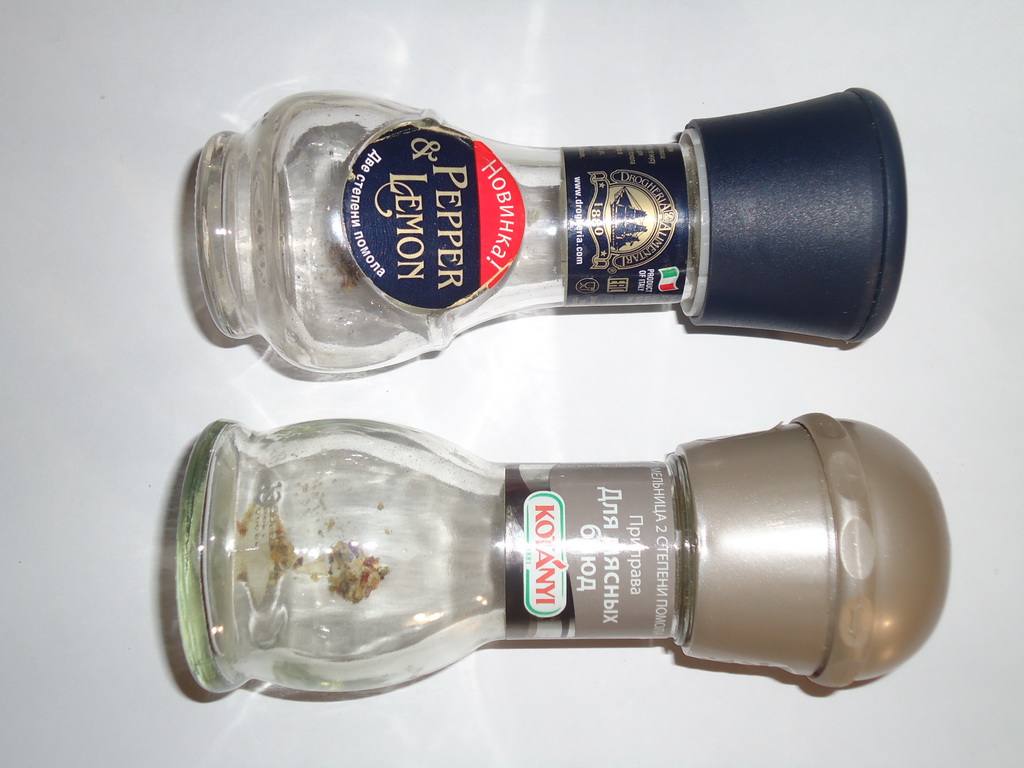
As the "whipping boys" in the photo on the left is a flashlight from Globus, on the right from Leroy.
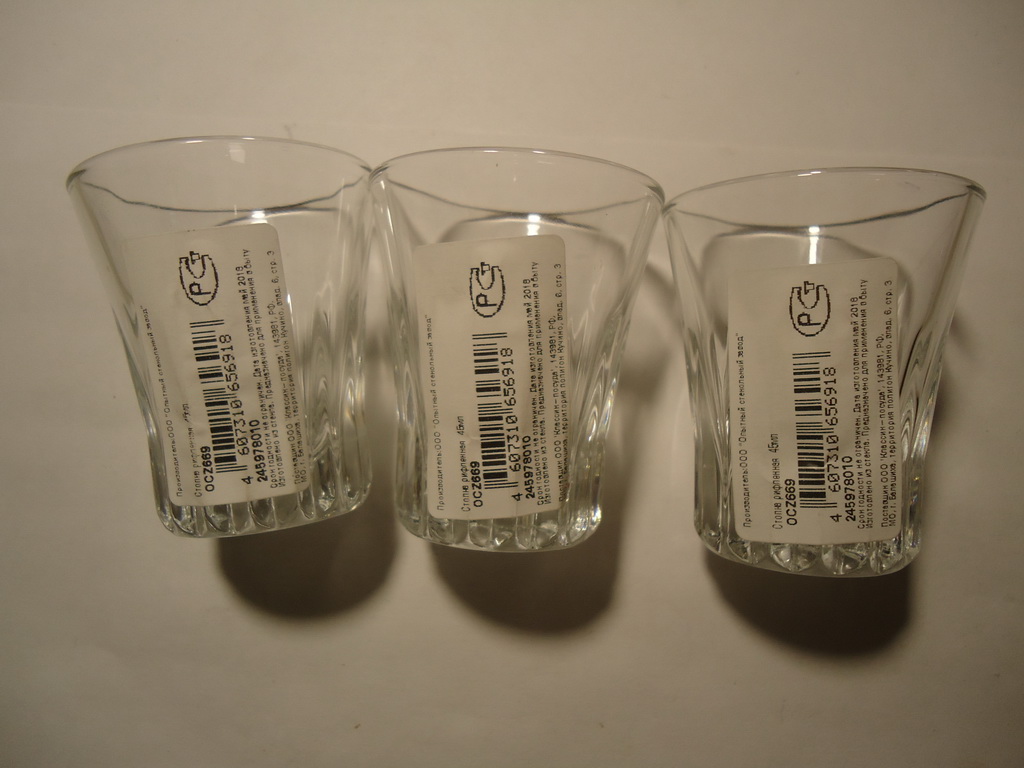
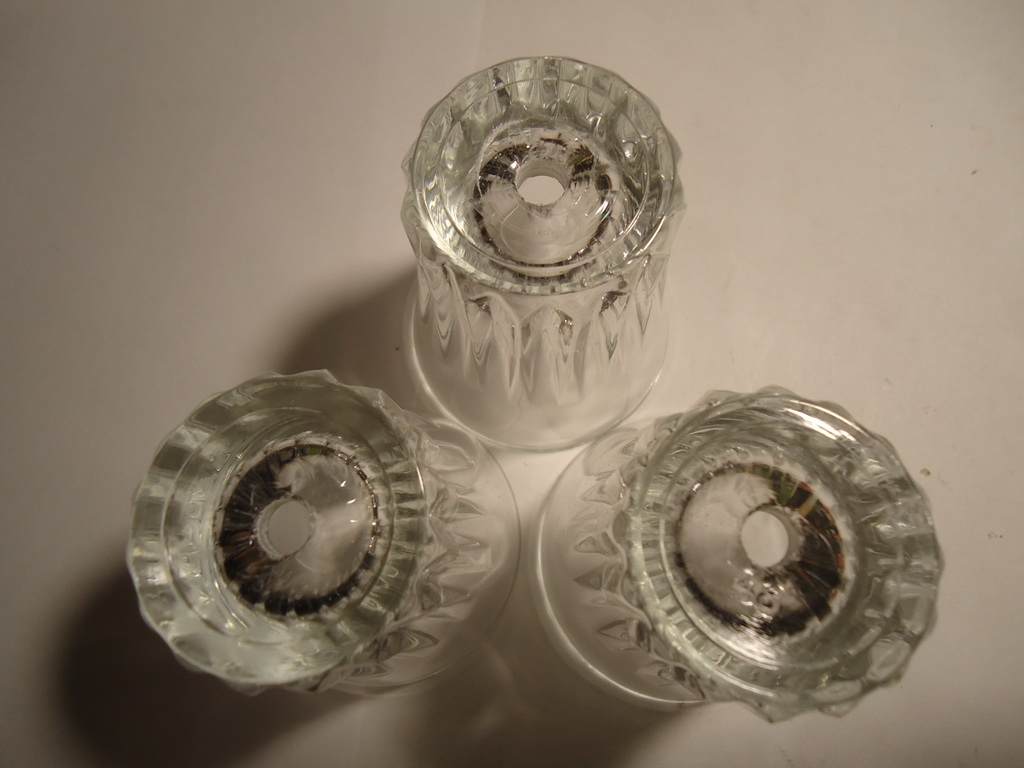
Cheap corrugated glasses purchased in Globus were used as plafonds:
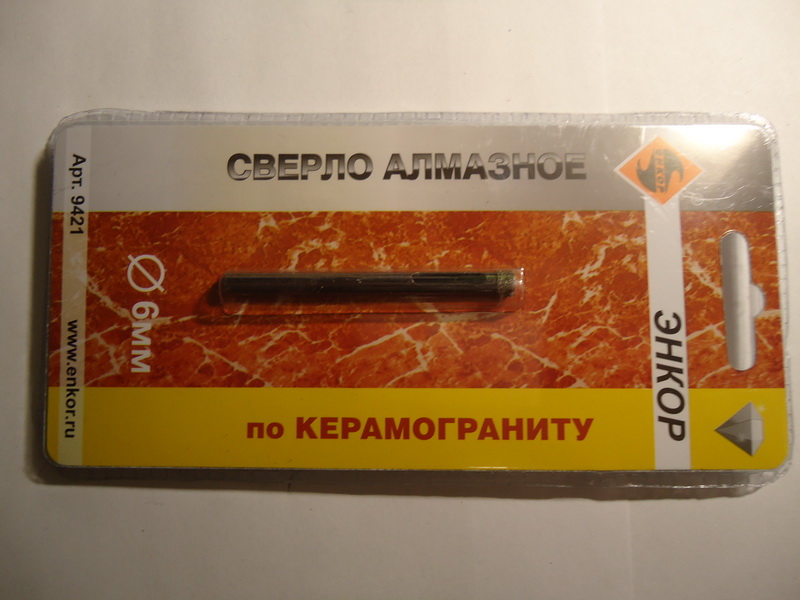
In the bottom of the glasses we drill a hole with a diameter of 6 to 8 millimeters with a drill on ceramic granite, for example:
The most convenient way is to drill on a drilling machine, setting revolutions of between 800 and 1000 and dropping a glass in a shallow container with water for better cooling. But in the extreme case, the usual screwdriver will do; in fact, with them I practically drilled all of my ceiling lamps. When drilling, be sure to hold the glass part with a hand clad in a cloth protective glove so as not to cut yourself if glass breaks due to excessive force or internal stress. But at the same time, be careful that the glove is not wound on the drill.
The base for the solar battery is cut from sheet PVC plastic 5–6 mm thick using a jigsaw, or as in my case on the CNC:
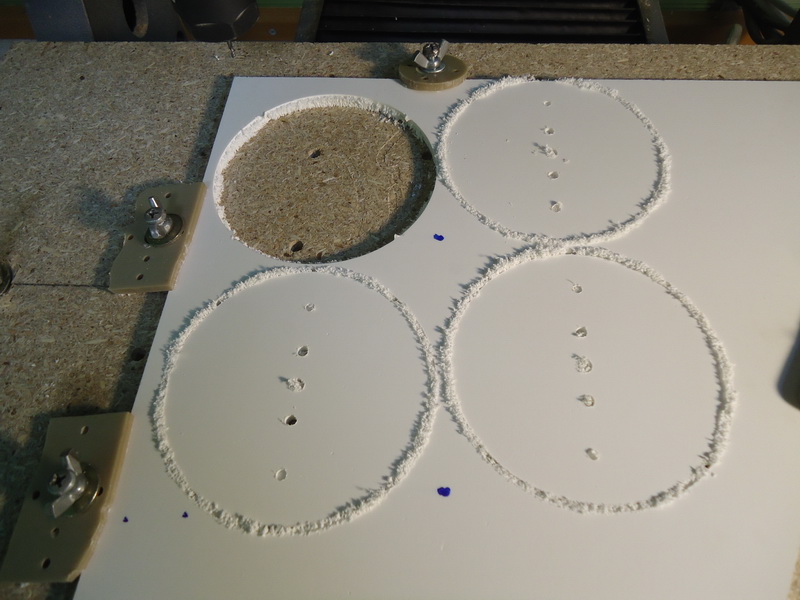
This plastic is widely used in advertising and its scraps can be stowed in advertising offices.
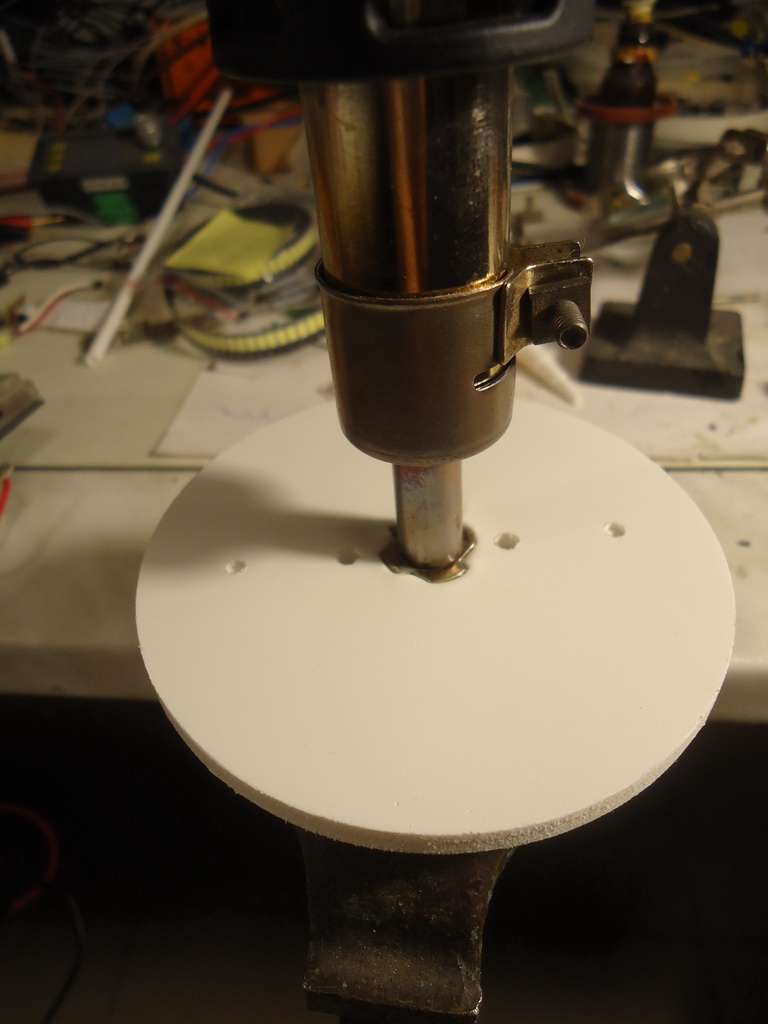
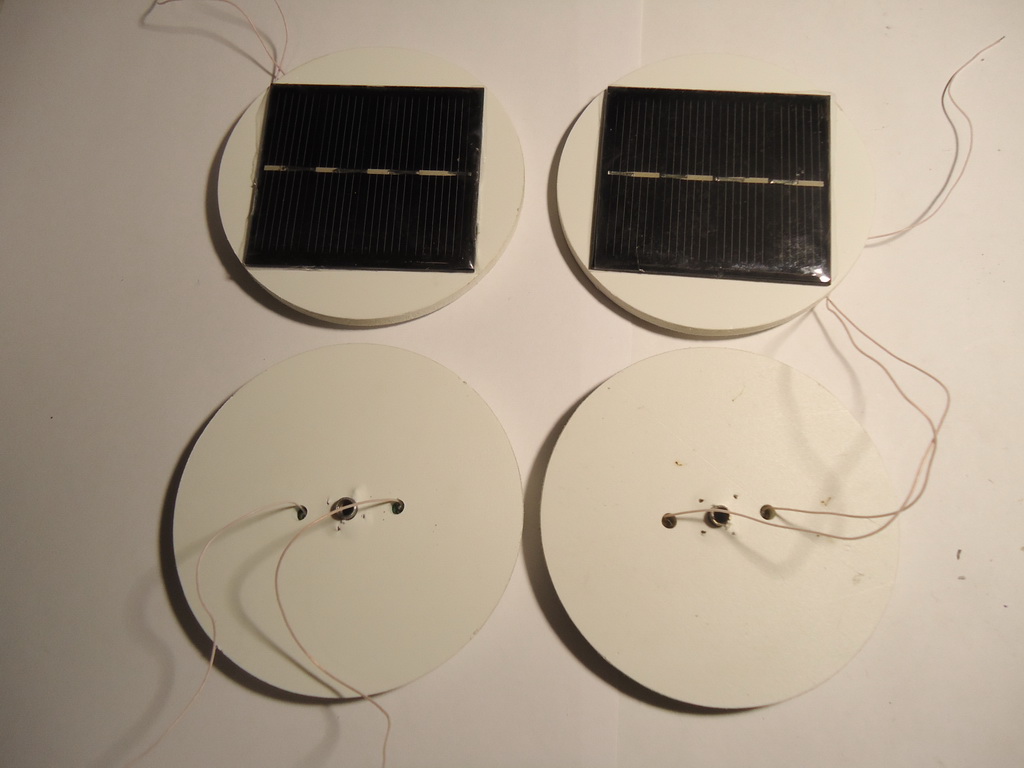
With the help of a soldering dryer, the furniture nut M4 is fused to the center:
Wires are soldered to the solar battery. In order to eliminate the possibility of a short circuit of the solar panel with a furniture nut, the tracks immediately behind the soldering points are cut:
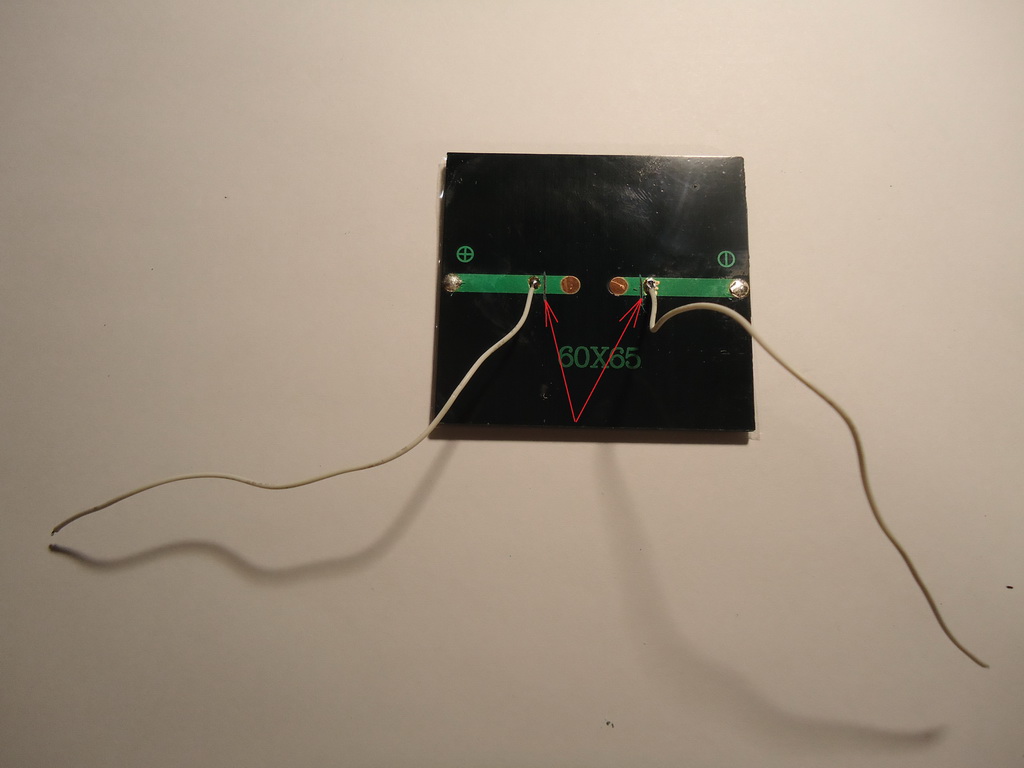
The solar cells are used four-cell, with an operating voltage of 2 volts. As shown by the calculations given in the article "Solar lanterns - we need to be brighter," it is better to use solar panels of 60x65 mm or more, and before gluing the solar battery to the base, it should be checked. In my experience, in a batch of ten solar cells, as a rule, one comes across as a “third grade is not a marriage”, and at the dawn of my experiments using solar energy in the first order out of ten solar panels, only four came to work. Putting the panels in a row and taking turns taking a picture of what voltage they give out, I sent the photos to the seller and the incident was decided in my favor. Conclusion - do not chase for very cheap and use shops with several years of work and a good reputation. To test the solar panels you need a lamp with a 75 watt incandescent lamp and a multimeter. Let's switch the multimeter to the measurement limit of DC 10 A and connect the solar battery to it. A working battery at a distance of 2 ... 50 centimeters from an incandescent lamp should have a smooth current change in the range of 0.01 ... .4 amperes.
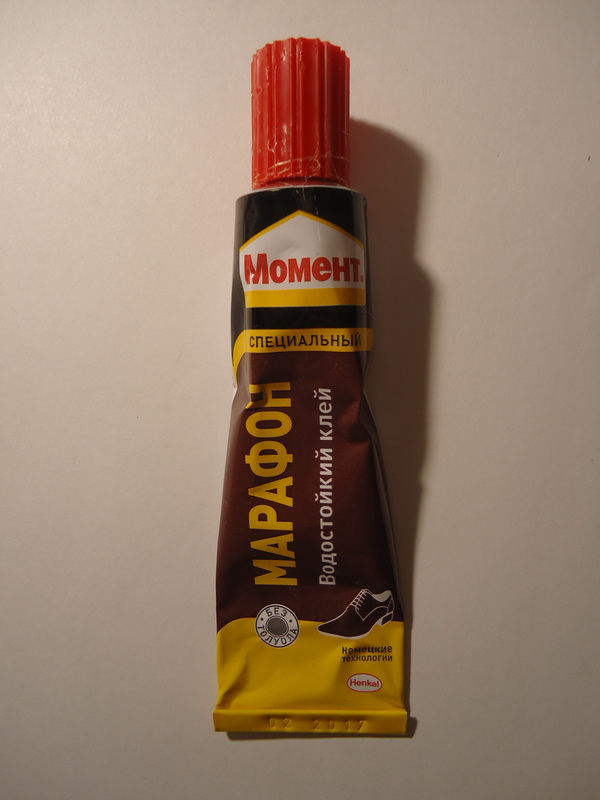
The base of the panel and the bottom of the solar battery are degreased with alcohol or a solvent, while not allowing the solvent to hit the front of the solar panel to avoid turbidity, then glue the solar battery to the base with waterproof glue, for example:
Excess glue, extruded when connecting the solar panel and the base, is removed with a cloth, the holes through which the wires are drawn are sealed with the same adhesive, or sealant.
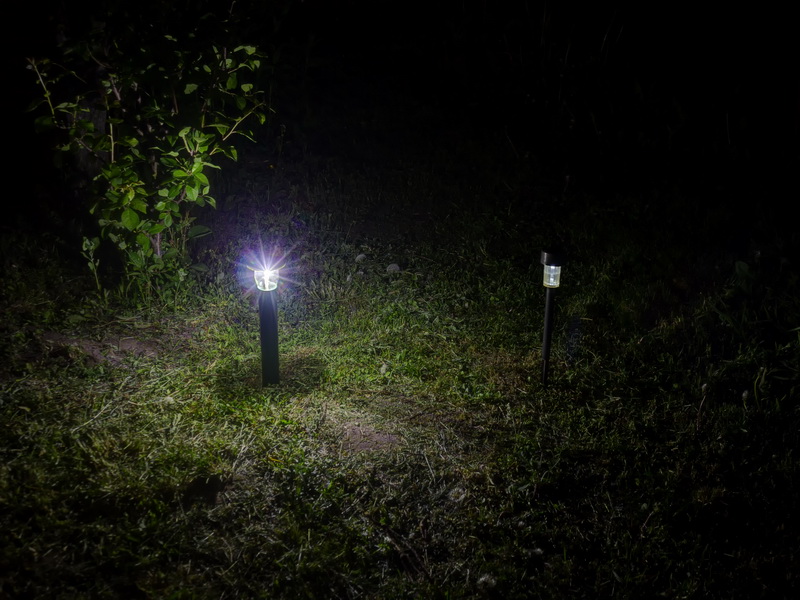
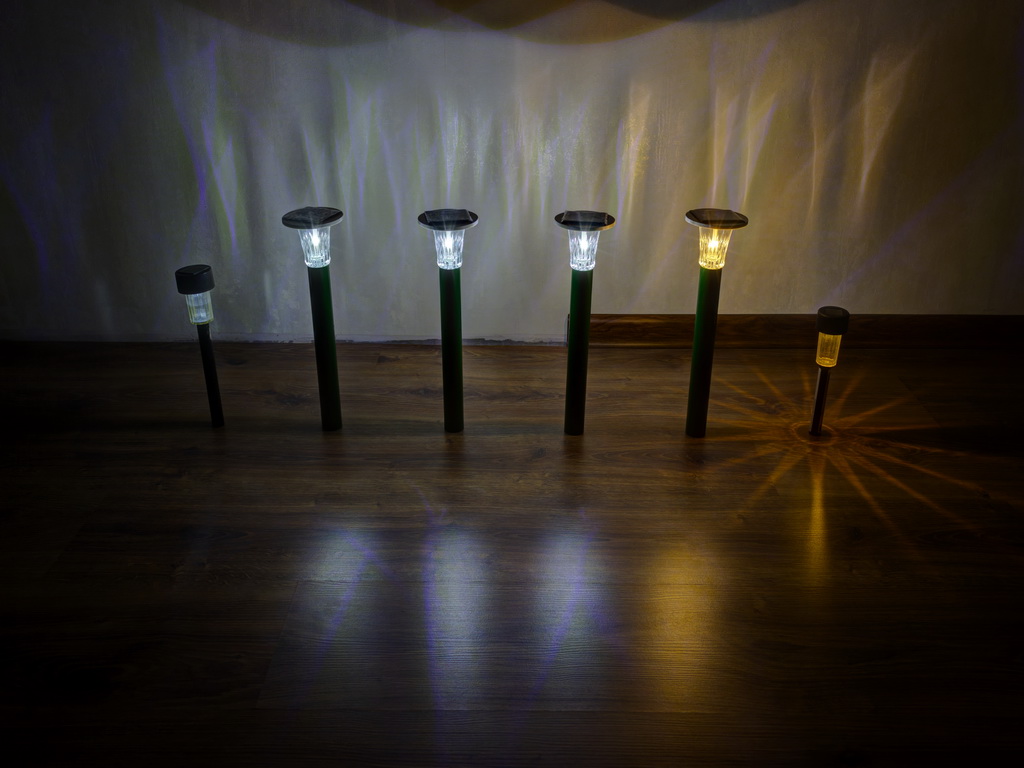
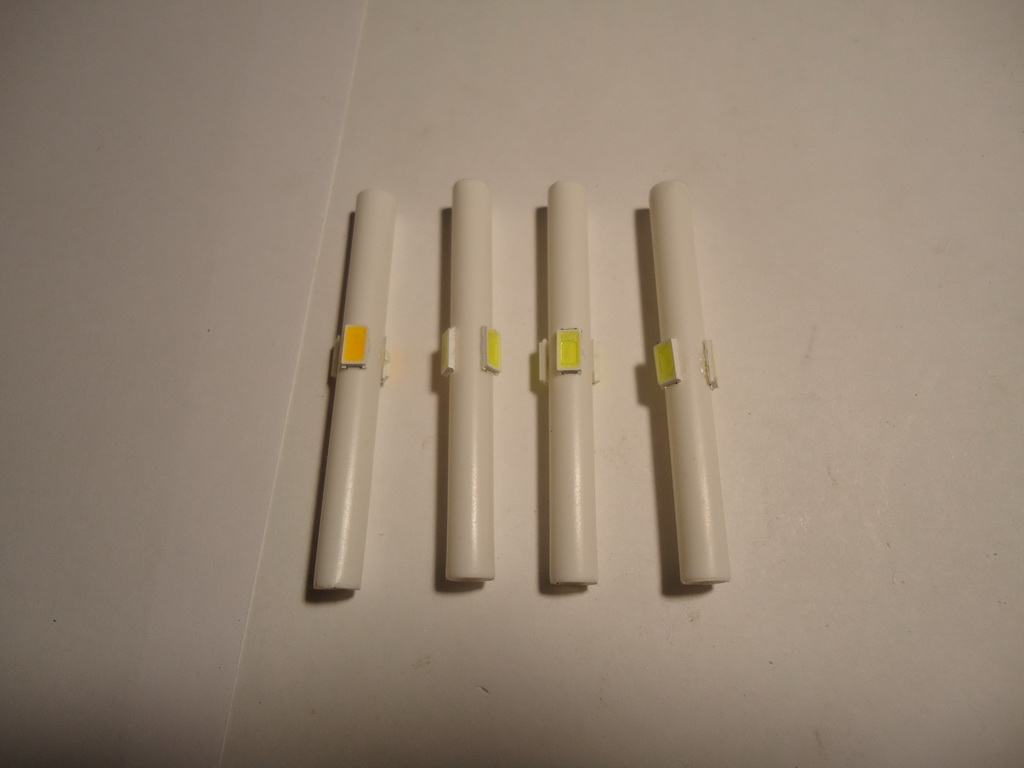
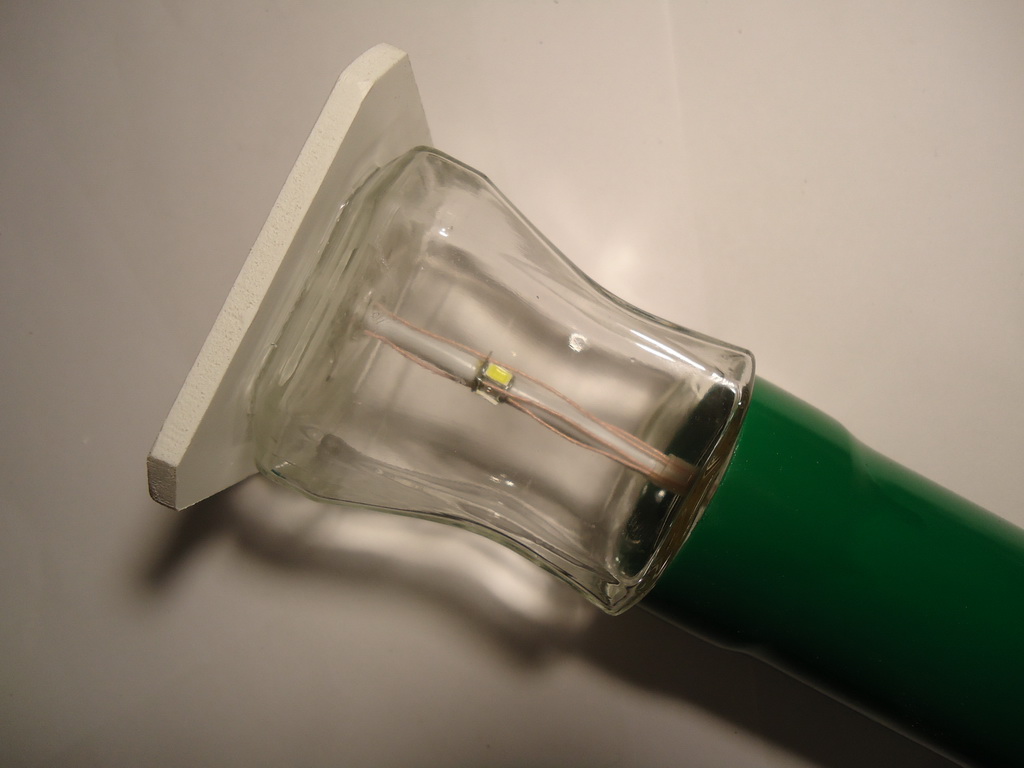
And now briefly about the LEDs, or rather their color temperature. Light-emitting diodes with a color temperature of around 3000K are distinguished by a warm “tube” light and are more pleasant for the eyes at night, but they are less bright. The luminescence of LEDs with a temperature of 6000K gives off to blue, but they illuminate the surrounding space better. For example, in the foreground a “Caprice” flashlight with LEDs with a color temperature of 3000K, and in the background a “Mill” flashlight with LEDs with a color temperature of 6000K:
PVC pipes with a diameter of 4 to 5 millimeters, cut in length to the size of the ceiling, make the basis for 5730 LEDs. The material from the perfect tube from balloons, which are distributed at all sorts of events.
The LEDs are glued to the base approximately in the center of the ceiling:
We solder the wires and fix them together with the wires from the solar panel by shrinking white or neutral colors and must be protected from moisture by two layers of capes - varnish, or similar:
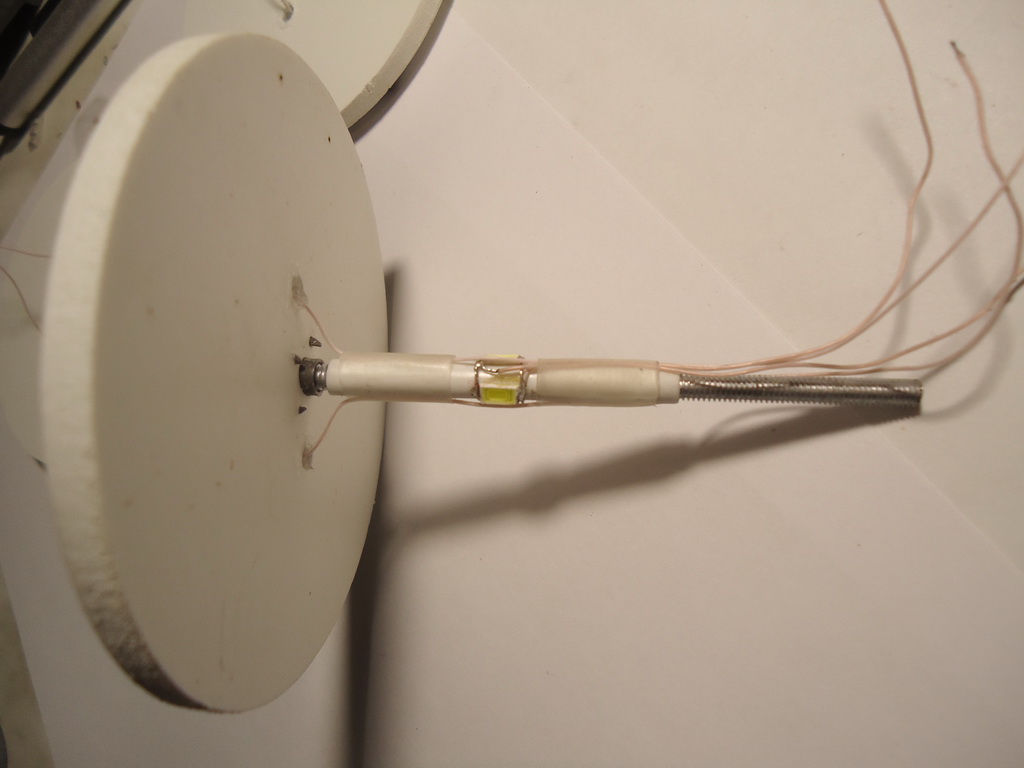
We install the cover, stretch the wires and tie them into a knot, it will distribute the load at all soldering points, protecting it from breaking, in the case of not careful handling:
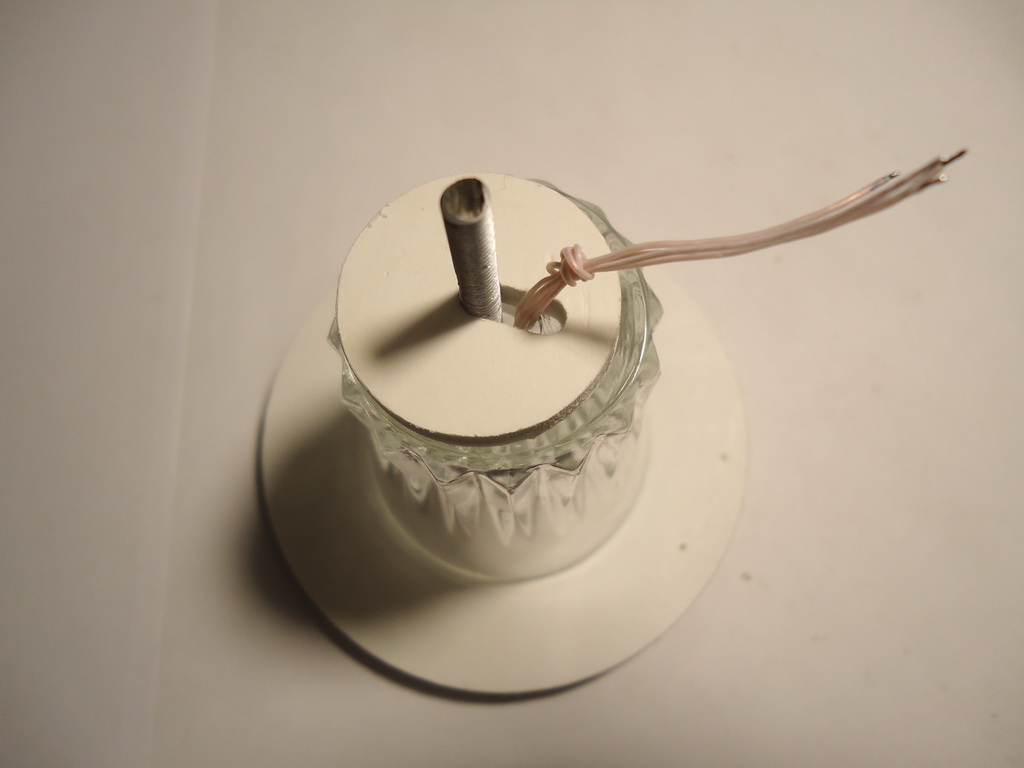
We assemble the ceiling with the help of plastic washers with a diameter of 28 millimeters with a slot, spacers from a section of any plastic inch pipe about 10 mm long, studs, washers and nuts M4:

And solder the electronics board to the wires:
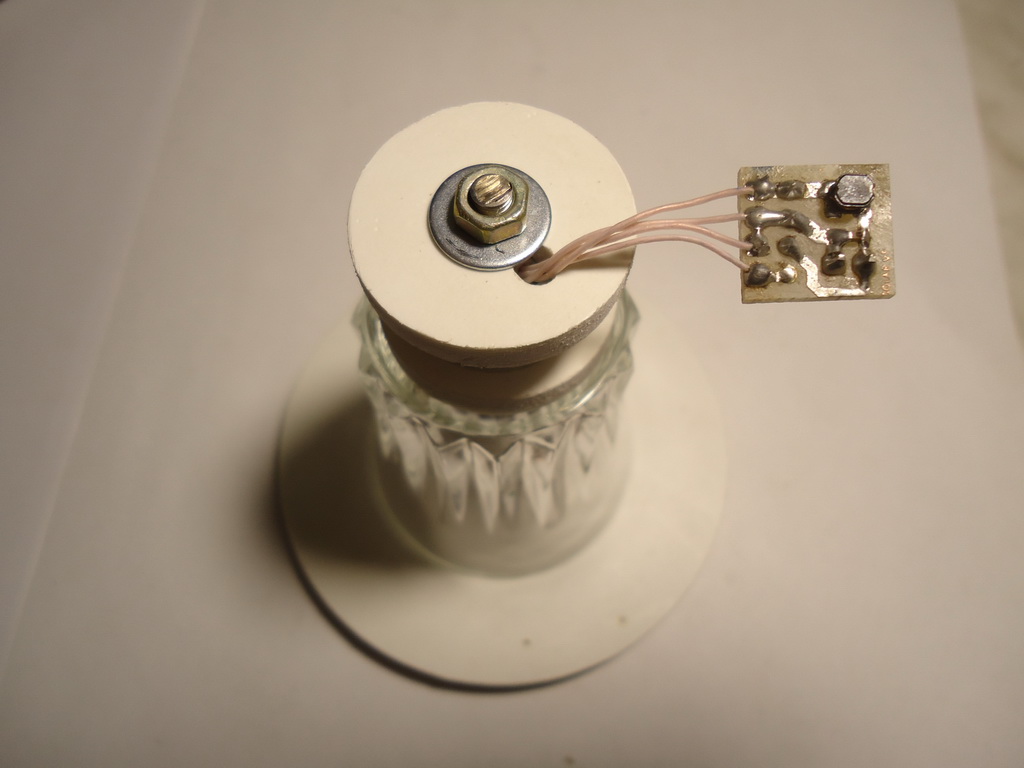

The board must be protected from moisture by two layers of tsapon - lacquer, or similar.
Let us dwell on the operating currents of the flashlights using the example of a QX5252 microcircuit (circuit 11 from the article “Solar lanterns - we need brighter”):

Link to the archive with the schemes and printed circuit boards (in the format of P-CAD 2006 and .pdf)
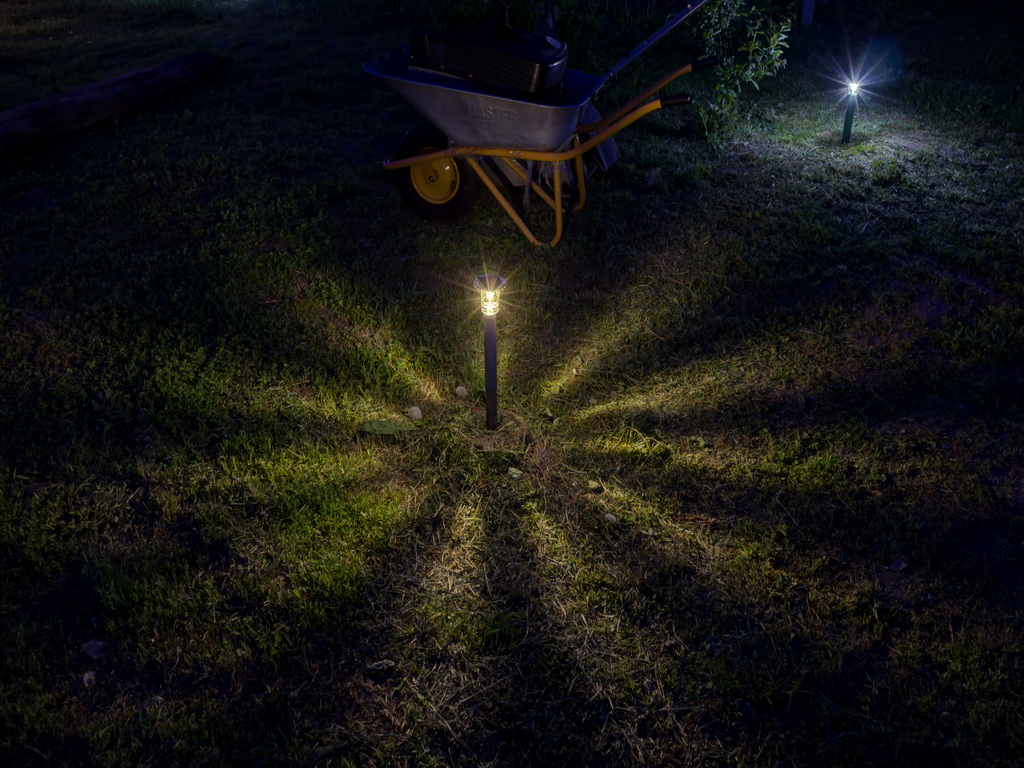
Due to the fact that the consumption of the scheme with the specified nominal is 100 - 110 mA, a flashlight based on this scheme to shine before dawn during the entire summer season should be installed only in open space without shading from buildings and trees, but in practice this is not always possible. Therefore, despite the appearance in the stores of one distant country of solar panels with dimensions of 50x80 mm and a stated current of 300 mA, in some cases you may have to temper the appetites and reduce the consumption of flashlights. In order to see how much the brightness decreases, in two flashlights the current consumption was reduced by increasing the nominal current chokes, one to 67 mA (L1 = 33 μH), and the other to 45 mA (L1 = 47 μH). Before final assembly, their brightness was measured with a lux meter, the results are shown in the table (diagrams 8, 10, 11 are given in the article “Solar lanterns - we need brighter”):
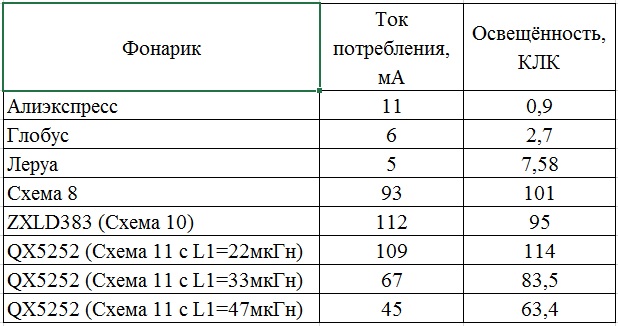
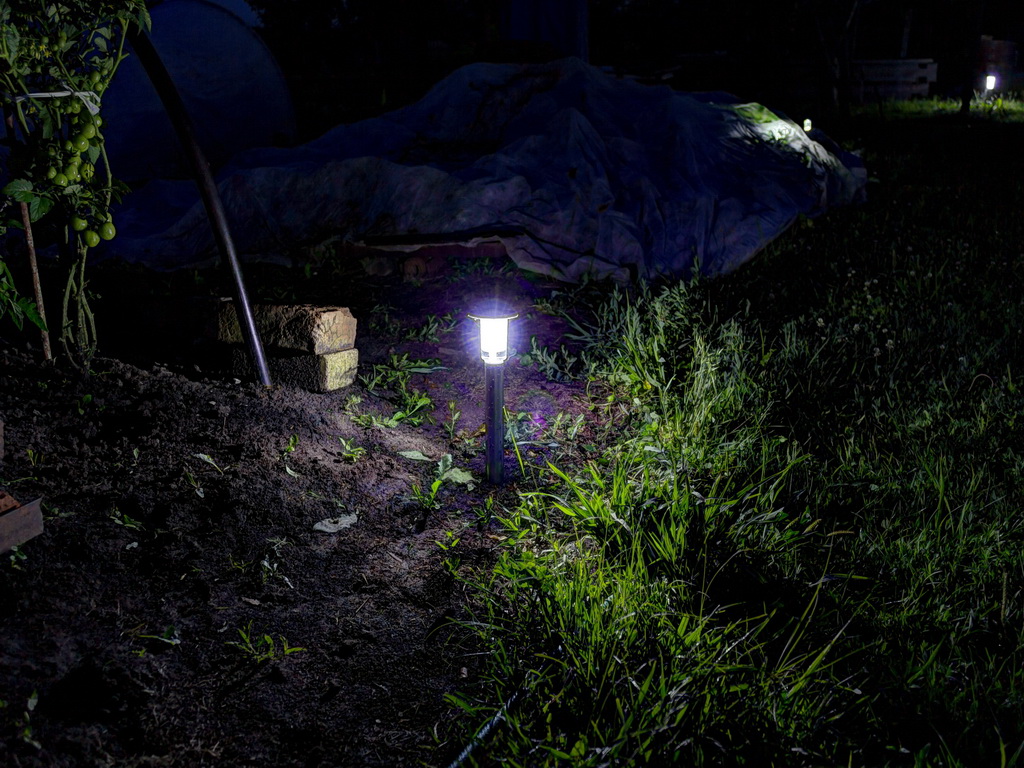
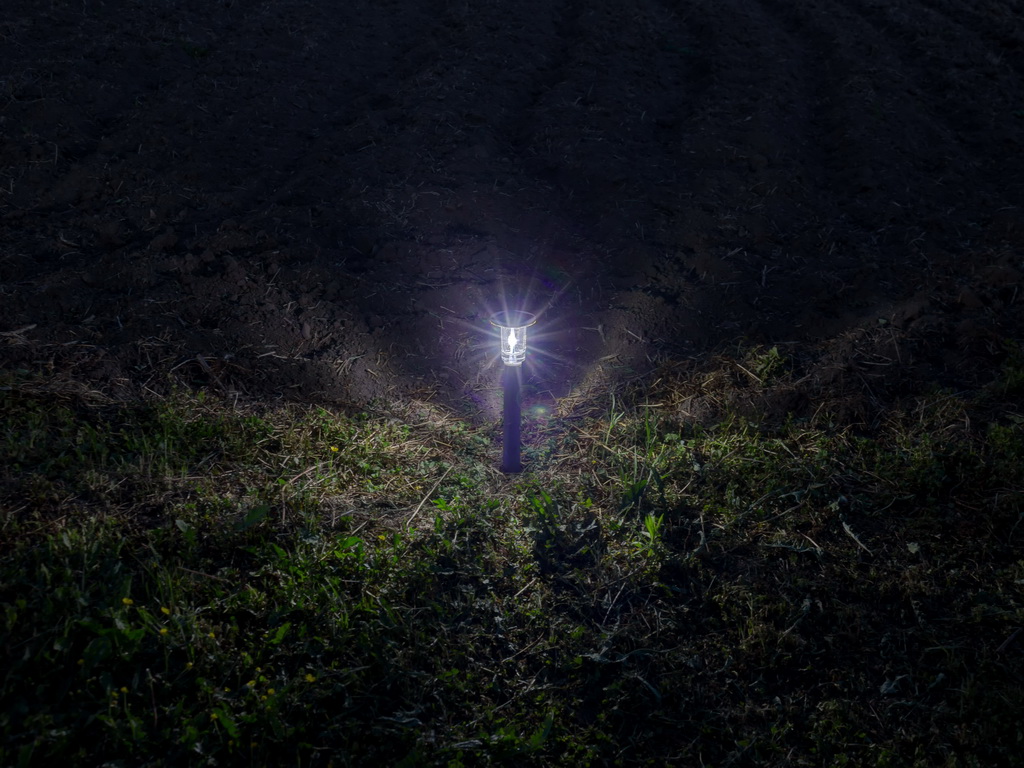
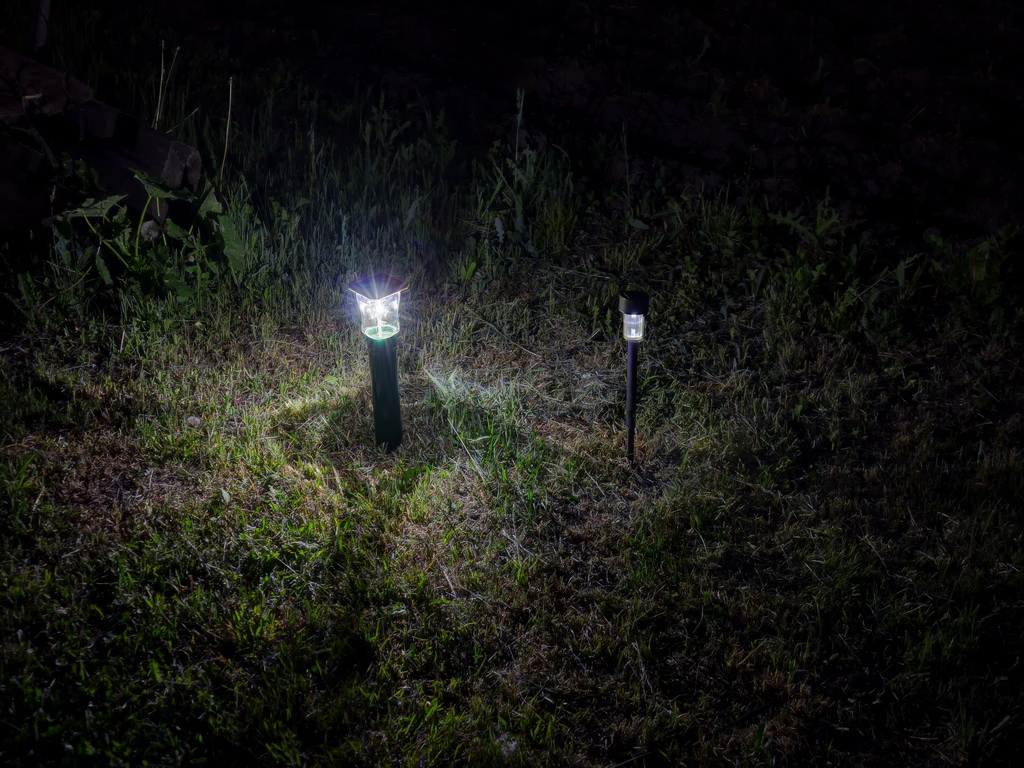
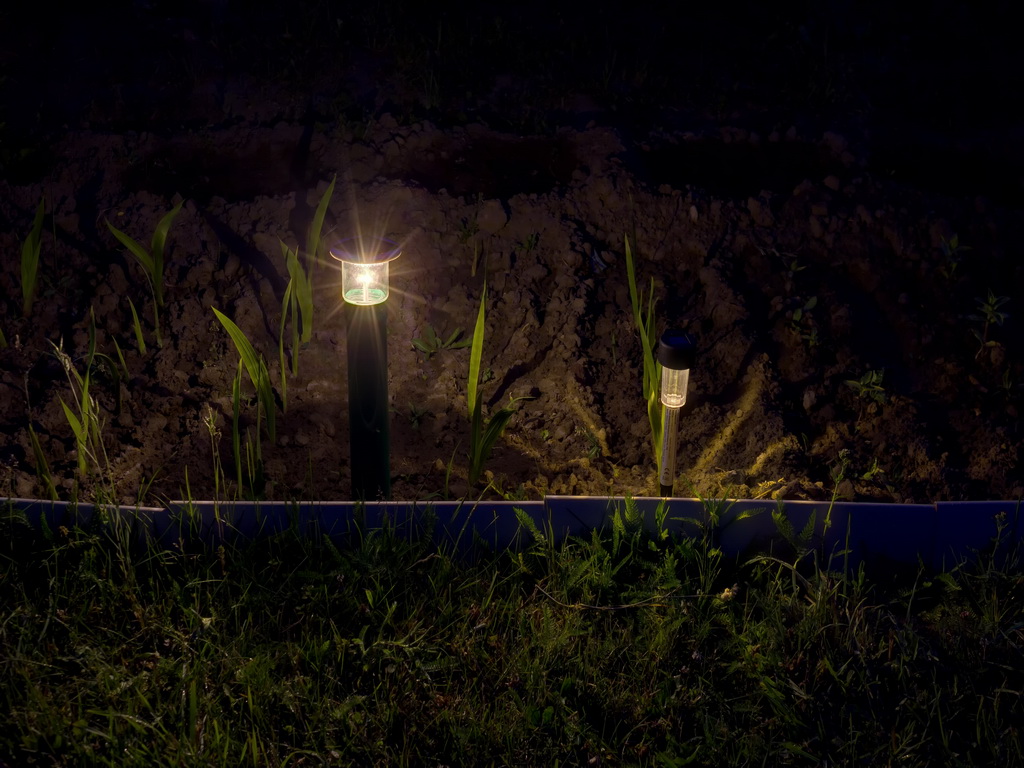
As can be seen from the table, the brightness of the flashlights with a decrease in current consumption is expectedly decreased. But at the same time, in the worst case, the brightness of the self-made flashlight exceeds the best Chinese from Le Roy by almost an order of magnitude. On this basis, it makes sense to divide the lanterns by consumption from the battery into several groups intended for installation in open space, in partial shade and for shady places, which will allow them to shine until dawn almost independently of cloudiness the day before. The picture from left to right shows flashlights with a current consumption of 45 mA (L1 = 47 μH), 67 mA (L1 = 33 μH) and 109 mA (L1 = 22 μH):
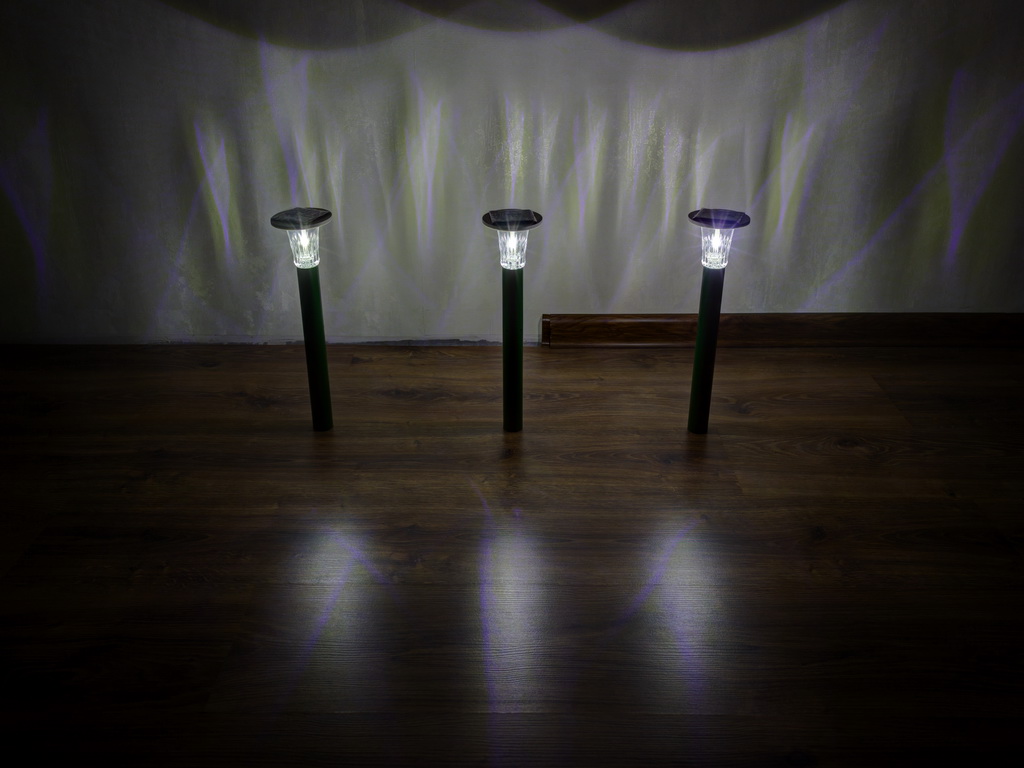
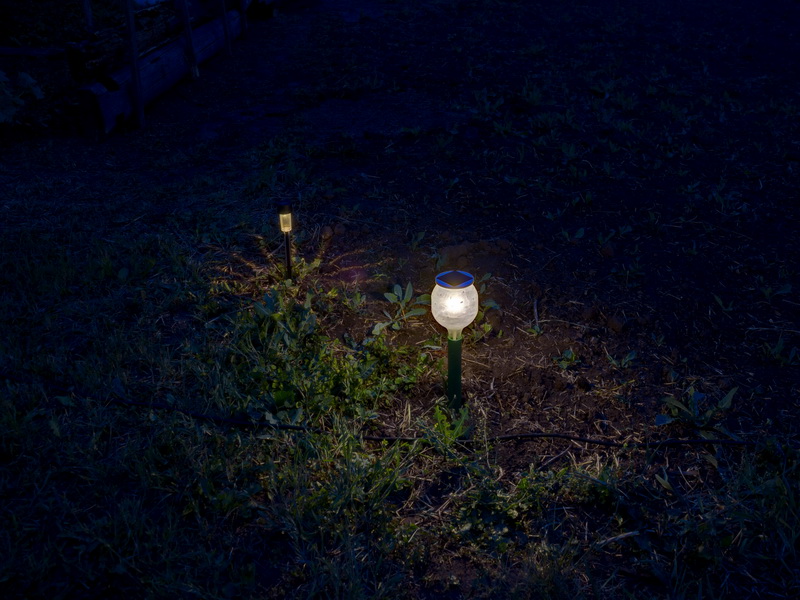
Unfortunately, it was not possible to hold a photo session of lanterns in nature, but at home there is practically no difference in brightness. Of course, in real conditions the difference will be more noticeable, but for the sake of the stable operation of the lanterns in shady areas, you can sacrifice some brightness, the choice is yours.
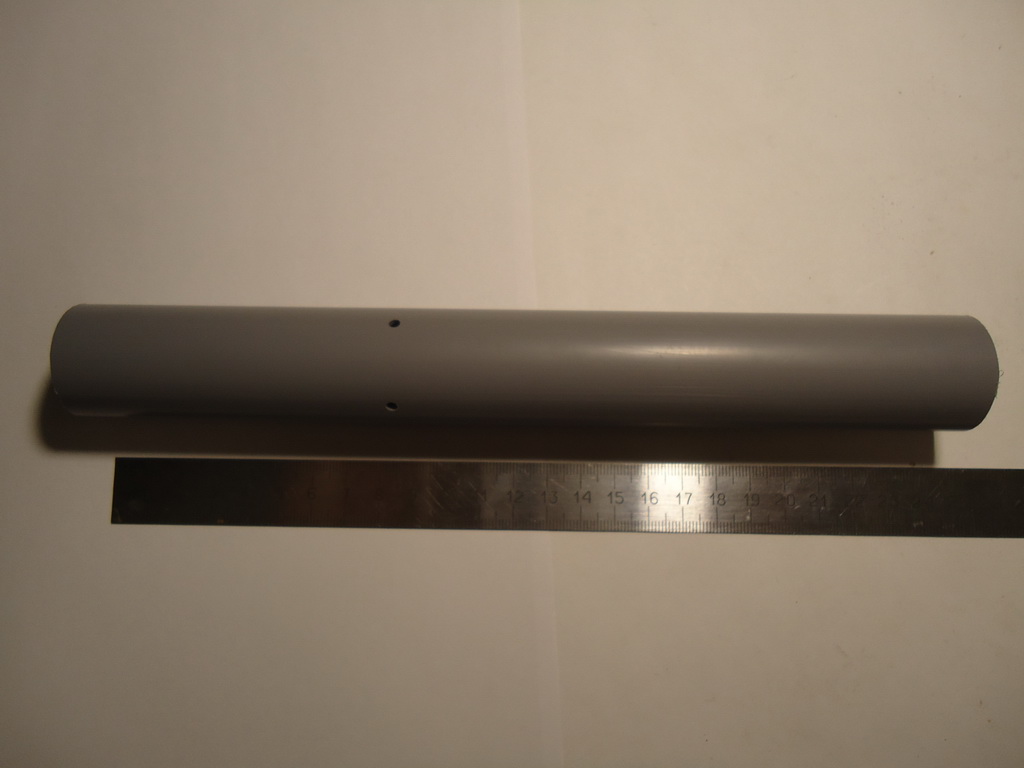
As racks for flashlights, you can use almost any trimming of polypropylene water pipes with a diameter of 30–50 mm that are left after repairs from you, or friends:
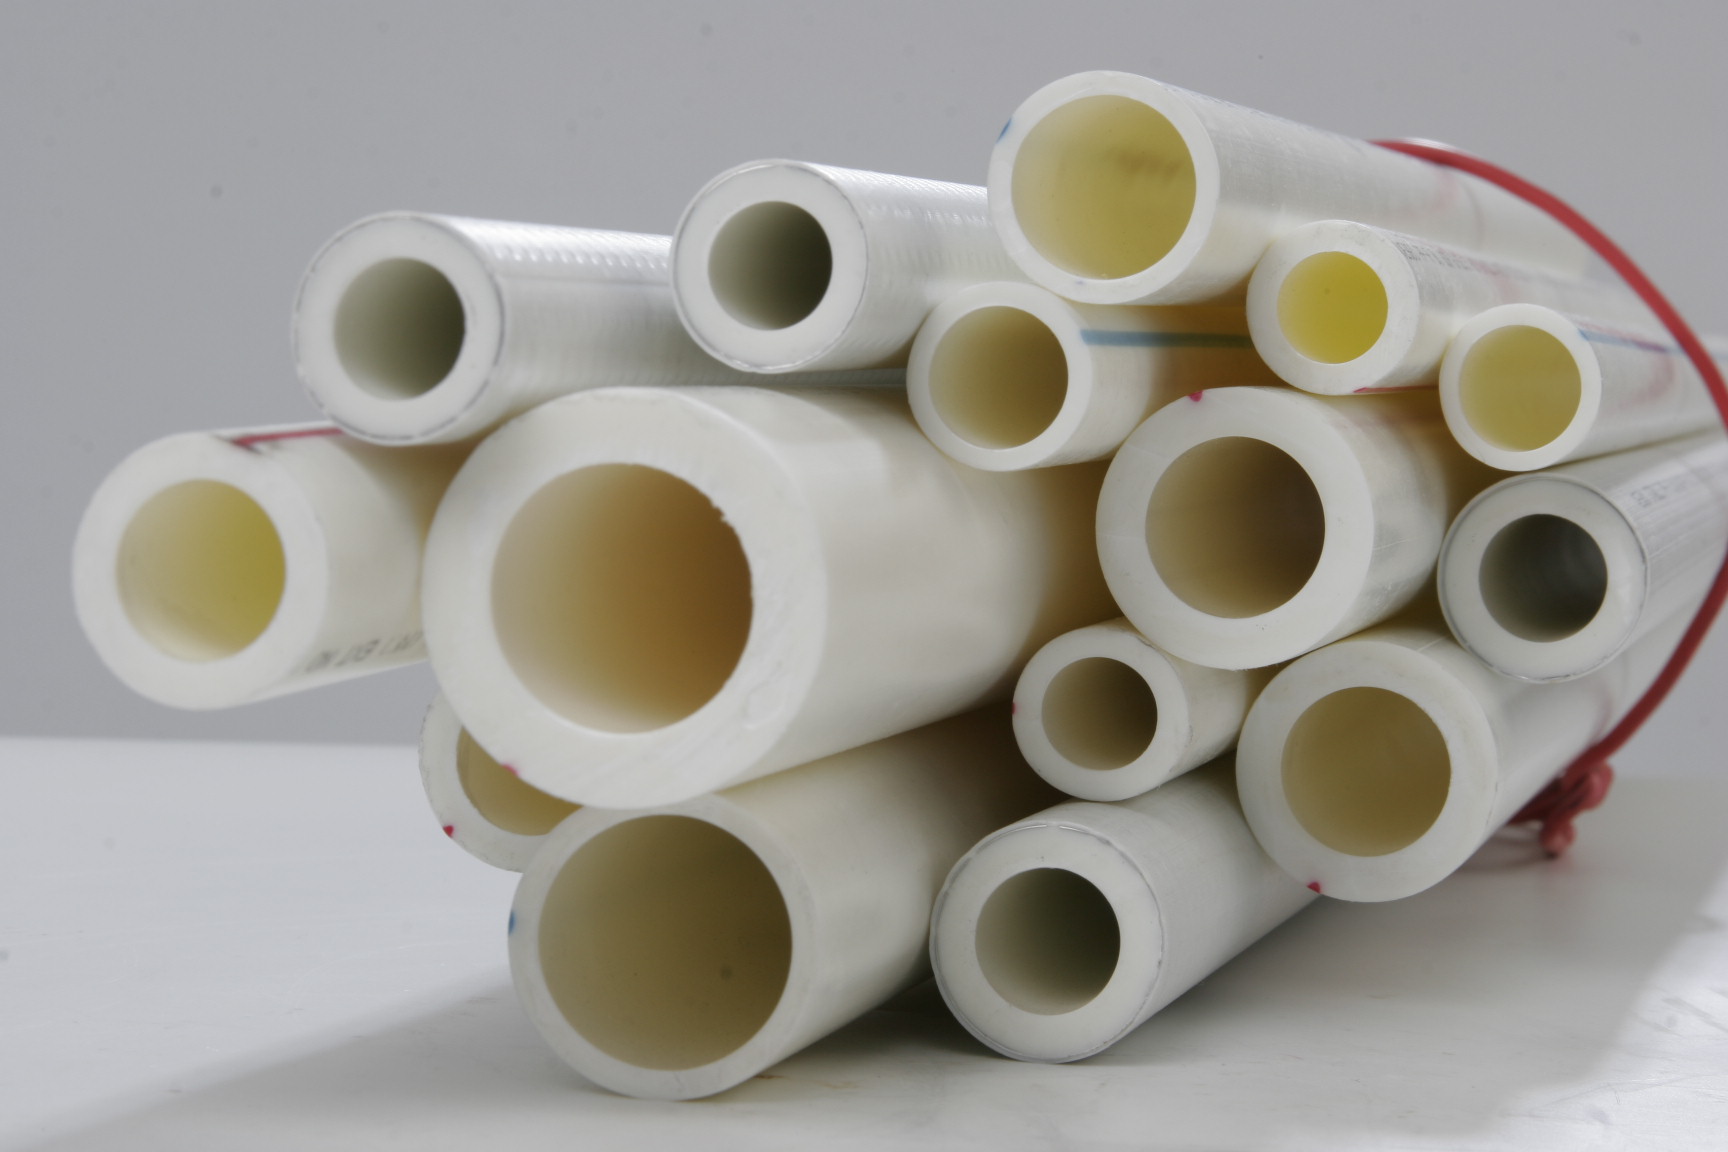
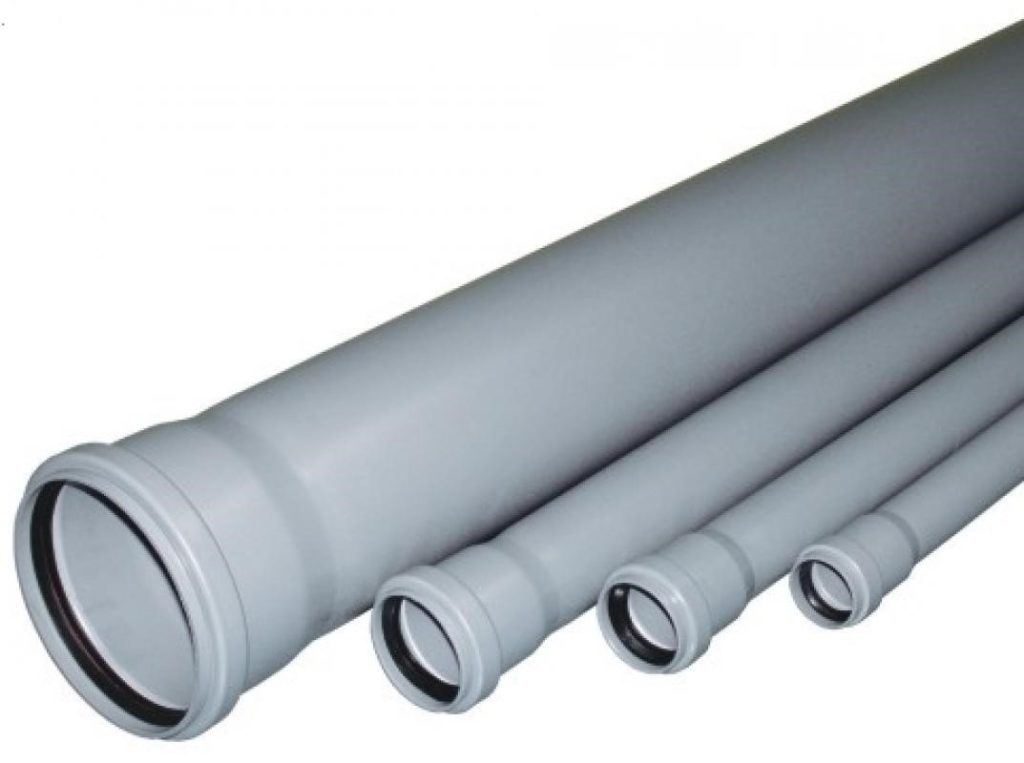
It is also quite suitable for the cheapest gray PP pipe:
The length of the racks is chosen depending on how often the paths and lawns are crooked in the area where you plan to install solar lanterns. If the grass mows regularly and its height is small, then it is better to choose the length of racks 20-30 centimeters, and if the grass squints from time to time, then it is better to increase the length of the racks to 35-40 centimeters, otherwise the flashlights will simply not be visible. The diameter of the pipe is selected on the basis of the artistic intent and the size of the selected ceiling flashlight.
If the cover is slightly larger in diameter than the pipe, then you can use the influx of PP pipe, cutting off the ring under the seal, for example, as in the Nescafe flashlight:
A similar solution was used in the flashlight "Lukoshko."
Electronics and batteries in the flashlight can be placed directly in the ceiling, if its dimensions allow, or in a rack. We will talk about flashlights with electronics in the plafond next time, for them the stand is just a painted pipe of a suitable diameter, and using the example of a gray PP tube with a diameter of 30 mm, I will show how a stand for a flashlight with a compartment for electronics is made. In the blank already cut at a distance of 9 to 10 cm from the top, drill four holes with a diameter of 2 to 3 millimeters to drain condensate from the future battery compartment:
We produce plastic or foam plastic at the bottom of the electronics compartment and glue it onto waterproof glue or sealant, adjusting the height flush to the drain holes so that the electronics and battery inside the rack do not float in rainy weather. In general, the side holes in the rack are a controversial decision from the point of view of aesthetics, but before that I made drain holes in the bottom of the battery compartment in several flashlights and had to “re-start” the flashlights repeatedly, sticking and pulling out the battery connector to restore contact, intermittently due to moisture reaching the electronics compartment from the ground.
White pipes look good as racks, but gray pipes should be painted. I mainly use green color, in the grass it looks the most organic. With the help of a solvent, for example 646, the inscriptions are carefully rubbed off the posts and the rest of the surface is degreased. Racks are covered with a primer designed for use in plastics, for example:
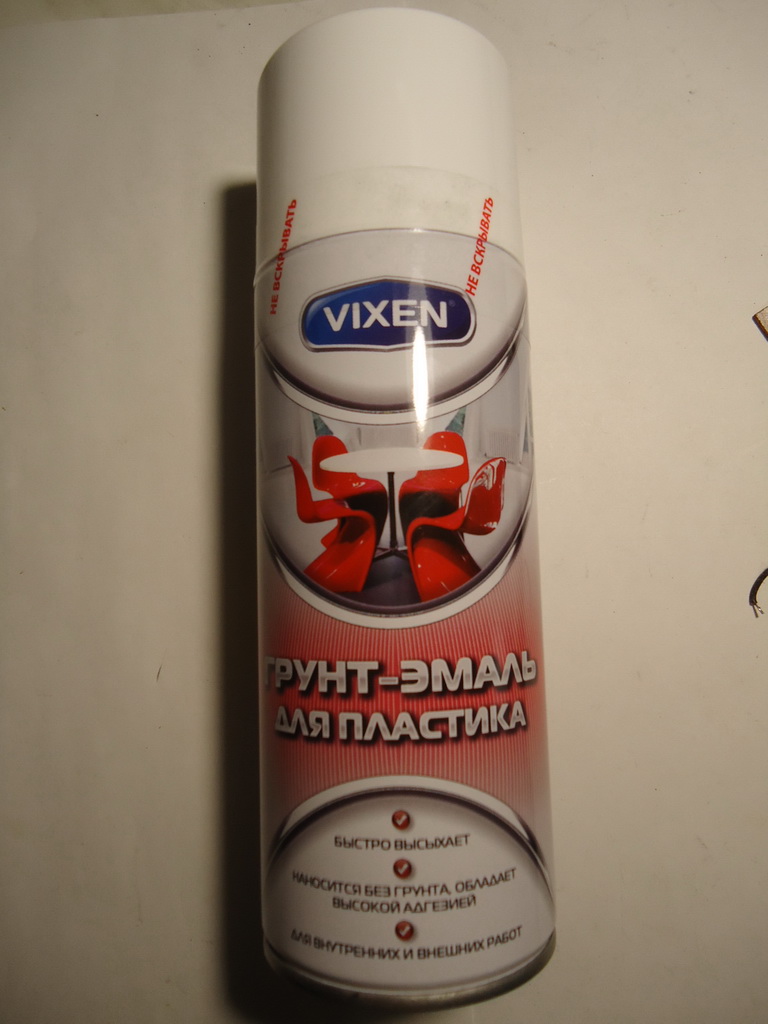
Then painted in 2 layers of paint from a can, for example:

Before buying paint, you must make sure that it is suitable for plastics.
Although the pipe material is polypropylene, which is very poorly painted, but as practice has shown, pipes painted with this paint, if they are not kicked, can be kept quite well for several seasons, retaining a good appearance:

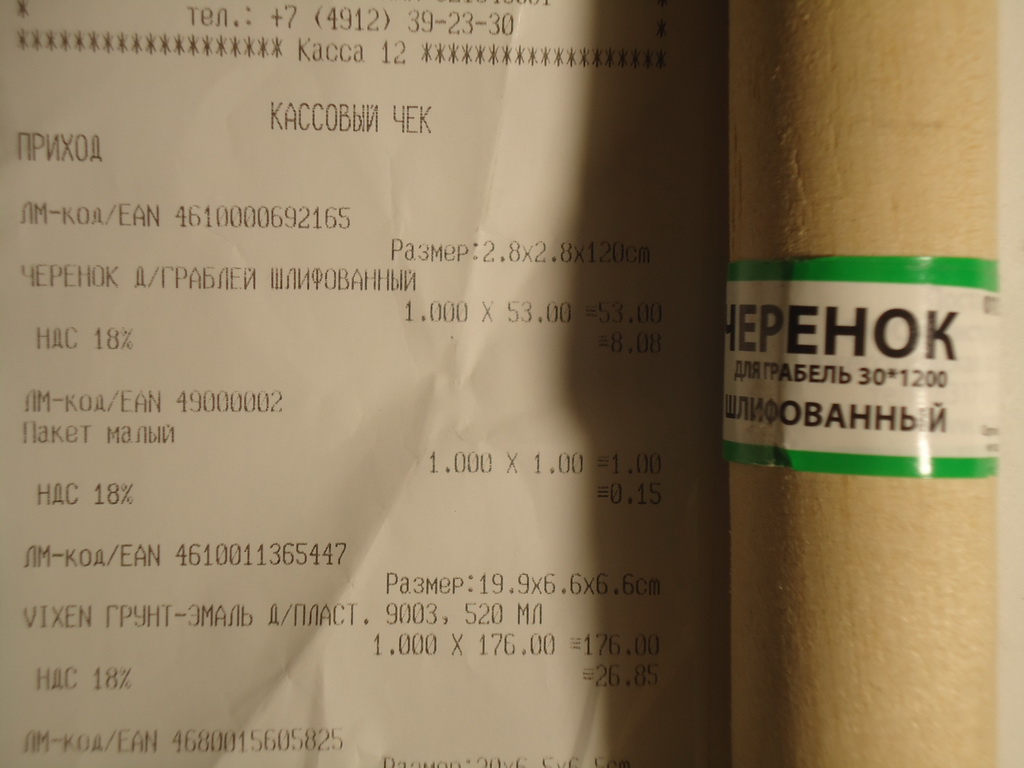
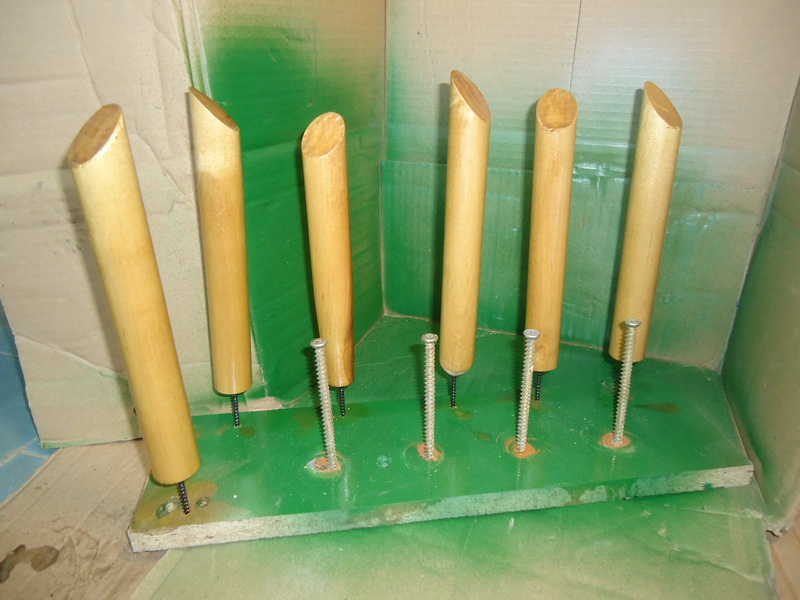
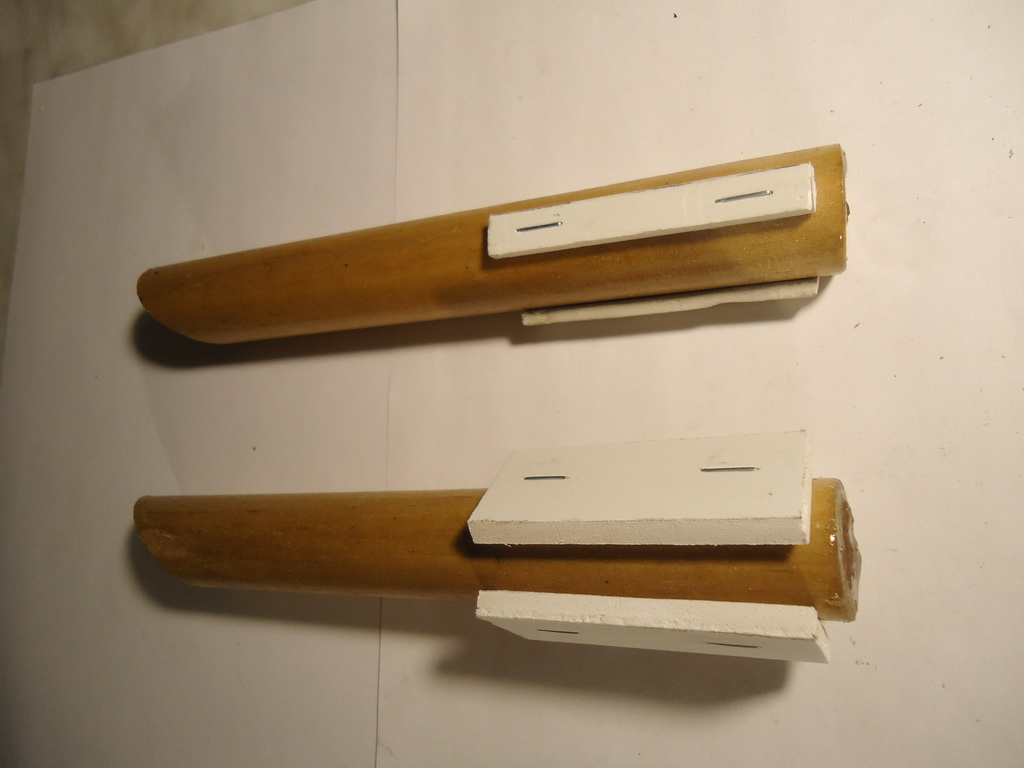
The material of the lantern pegs are cuttings for the rake and shovels with a diameter of 24, 28 and 30 mm. For gray PP pipes with a diameter of 30 mm, only pegs with a diameter of 28 mm are ideal. Under the guise of 30 mm, 28 mm cuttings can be sold, and often in terms of quality, they are not suitable for anything other than pegs.
Using an electric jigsaw, the pegs are cut to a length of about 20 centimeters and covered with two layers of yacht varnish.
It would also be nice if we treat them with wood preservative before painting:
If a pipe with an internal diameter of more than 24 to 30 mm is used as a stand, then in order for the peg to dangle in it, spacers can be made, for example, from PVC sheet of suitable thickness, by attaching them with a stapler or small wallpaper studs. Here is what it looks like for 40 mm and 50 mm racks:
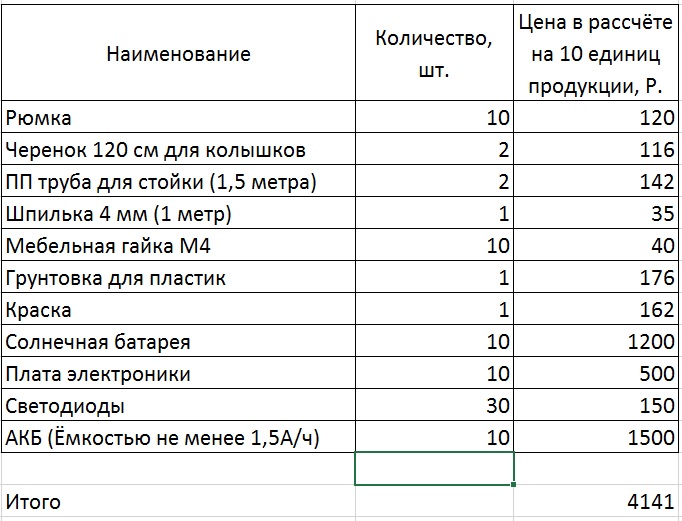
In conclusion, let's talk about how much it costs one flashlight. The main materials and components for the manufacture of ten lanterns without taking into account small things in the form of varnish, wires and plastic are shown in the table:
Summarizing, we can say that solar lanterns for illuminating the garden paths “not having world analogues” can be fully assembled “on one's knees” during several long winter evenings with your own hands. Their final cost turned out to be more expensive than the Chinese solar lanterns sold in our retail chains, but they are an order of magnitude better than handicrafts from China. These details of the assembly are not a postulate, but are a guideline for your creativity.
Previous Cycle Articles
A small review of solar lanterns
Solar lanterns - we need brighter
Source: https://habr.com/ru/post/428295/
All Articles