Quick start with WPF. Part 1. Binding, INotifyPropertyChanged and MVVM
Hello!
For various reasons, most of us use desktop applications, at least a browser :) And some of us need to write our own. In this article, I want to go over the process of developing a simple desktop application using the technology of Windows Presentation Foundation (WPF) and using the MVVM pattern. Those who wish to continue reading please under the cat.
I think it is not necessary to say that WPF is the development of Microsoft :) This technology is designed for developing desktop applications for Windows, starting with Windows XP. Why so? This is due to the fact that WPF runs on top of the .NET platform, the minimum requirements of which are Windows XP and later. Unfortunately, WPF does not work on other platforms, although there are chances that this will change in the near future: WPF-based Avalonia framework is under development .
What is special about WPF?
The two main differences between WPF and other tools for building desktop applications:
- The XAML markup language, designed to markup the window interface itself.
- DirectX rendering, hardware graphics acceleration.
I will not go into details, because This is not exactly the topic of the article. If interested, google XAML, WPF rendering, milcore.dll and DirectX :)
What is this article about?
This article contains an example of an application built on WPF technology:
I will try to orient the material of the article to the practical side in the “repeat after me” style with explanations.
What do we need to repeat the article?
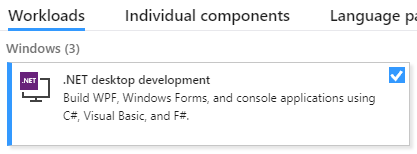
Little experience developing in C # :) At a minimum, you need to understand the syntax of the language well. You will also need a Windows machine (in the examples will be Win 10) with Visual Studio installed on it (in the examples will be 2017, there is a free Community version). When installing VS, you will need to enable support for desktop development under the .NET platform
Also in this section I will describe the creation of the project.
Run VS, create a new project, select the type of application WPF App (.NET Framework) (you can enter in the search bar at the top right), call it whatever you like.

After creating a new project, the interface editor window will open, it looks like this for me
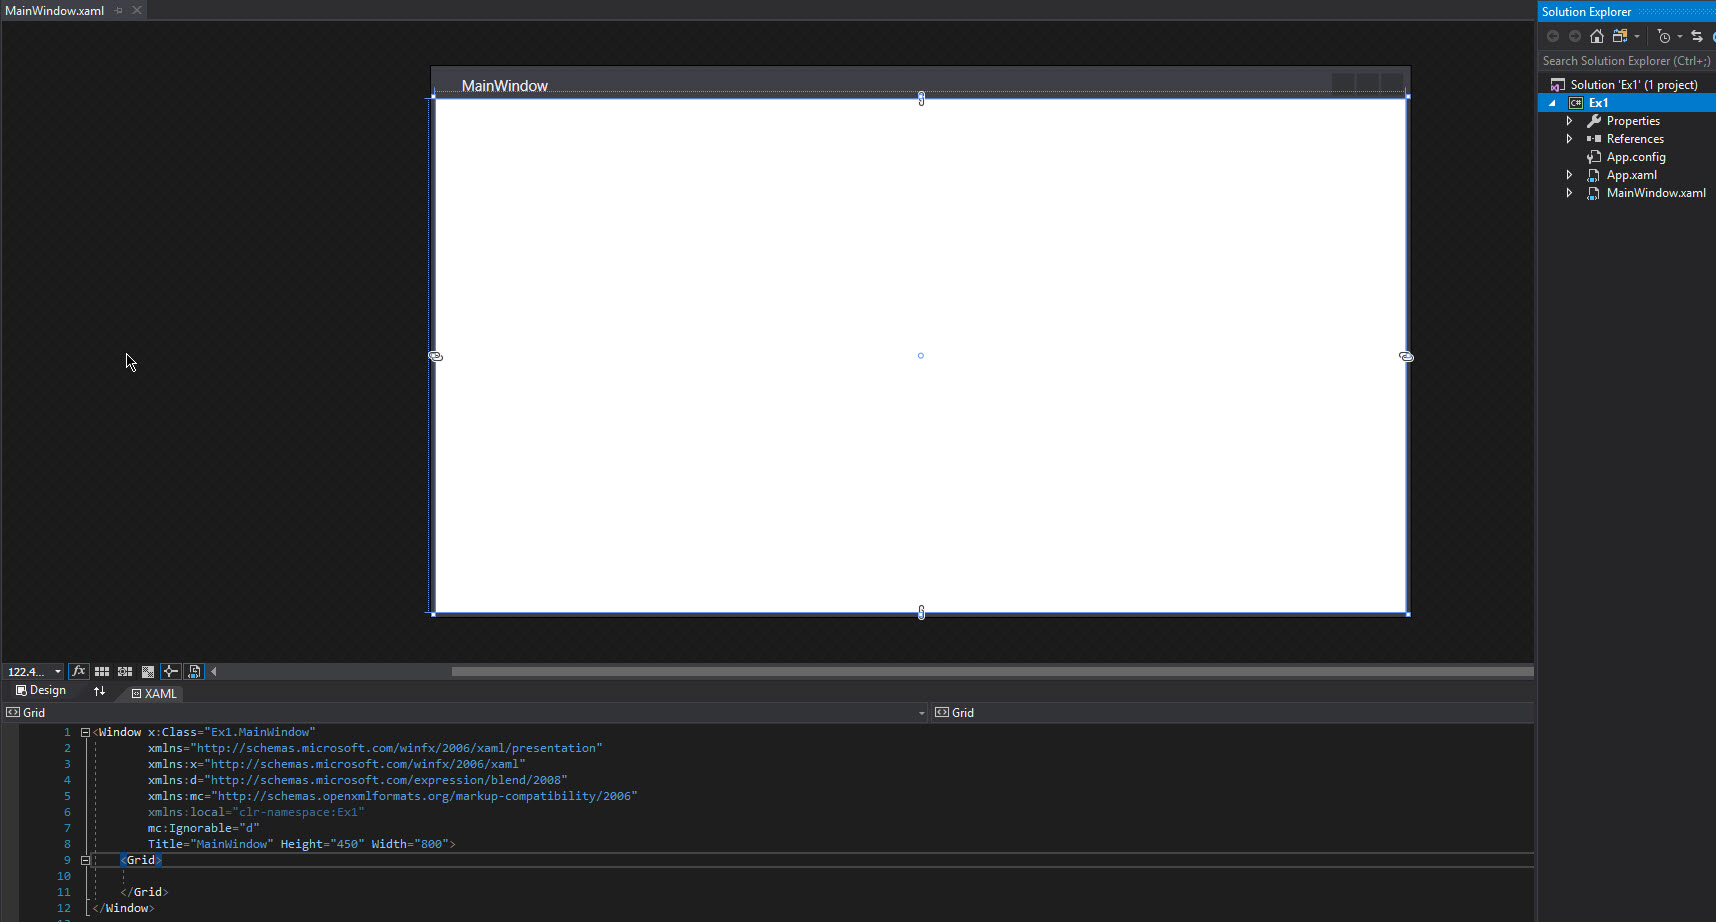
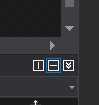
At the bottom there is a markup editor, at the top - a preview of the window interface, but you can change the relative location of the code editor and the interface preview so that they will be arranged in a horizontal order using these buttons (to the right of the two areas):
Before you start
Window elements (also called Controls from the word Control ) should be placed inside the container or inside another element of the ContentControl type. A container is a special control that allows you to place several affiliate controls inside you and organize their mutual arrangement. Examples of containers:
- Grid - allows you to organize the elements in columns and rows, the width of each column or row is configured individually.
- StackPanel - allows you to arrange the children in a single row or column.
There are other containers. Since the container is also a control, inside the container there can be nested containers containing nested containers and so on. This allows you to flexibly position the controls relative to each other. Also, with the help of containers, we can no less flexibly control the behavior of nested controls when resizing a window.
MVVM and INotifyPropertyChanged interface. Copy of text.
The result of this example will be an application with two controls, in one of which you can edit the text, and in the other you can only view. Changes from one to another will be transferred synchronously without explicitly copying the text using a binding .
So, we have a newly created project (I called it Ex1 ), move to the markup editor and first replace the default container ( <Grid> </ Grid> ) with <StackPanel> </ StackPanel> . This container will be enough, because we will need to place only two controls one above the other. We explicitly indicate how the components will be located by adding the Orientation = "Vertical" property. Add a couple of elements inside the panel stack: a text box and a text box. Since these controls will not contain nested code, you can describe them with a self-closing tag (see the code below). After all the above procedures, the container description code and nested controls should look like this:
<StackPanel Orientation="Vertical"> <TextBox /> <TextBlock /> </StackPanel> Now focus on the purpose of this example. We want the same text to be synchronously displayed in the text block when typing in the textbox, while avoiding the explicit text copy operation. We will need some kind of binding entity, and it is here that we come to such a thing as binding , which was mentioned above. Linking in WPF terminology is a mechanism that allows you to associate some properties of controls with some properties of a C # class object and perform mutual updating of these properties when one of the bundle parts changes (this can work in one, the other, or both sides at once). For those familiar with Qt, you can draw an analogy of slots and signals. In order not to stretch the time, move on to the code.
So, for organizing the binding, you need the properties of controls and a certain property of a certain C # class. First, let's look at the XAML code. The text of both controls is stored in the Text property, so we will add a binding for these properties. This is done like this:
<TextBox Text="{Binding}"/> <TextBlock Text="{Binding}"/> We made a binding, but it is not yet clear what for :) We need an object of some class and some property in this object to which the binding will be performed (as they say, which you need to bind).
So what is this class? This class is called the view model and serves as a link between the view (interface or its parts) and model (model, ie, those parts of the code that are responsible for the application logic. This allows us to separate (to some extent a) the application logic from the interface (view, view) is called the Model-View-ViewModel pattern (MVVM) . Within WPF, this class is also called DataContext .
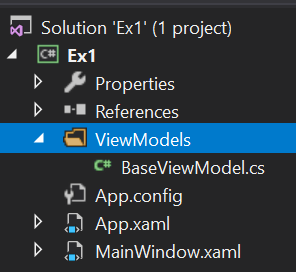
However, simply writing a view model is not enough. It is also necessary to somehow notify the binding mechanism that the view model property or the view property has changed. For this, there is a special INotifyPropertyChanged interface that contains the PropertyChanged event. We implement this interface within the base BaseViewModel class. In the future, we will inherit all our model views from this base class so as not to duplicate the interface implementation. So, add the ViewModels directory to the project, and add the BaseViewModel.cs file to this directory. We get the following project structure:
The implementation code of the basic view model:
using System.ComponentModel; namespace Ex1.ViewModels { public class BaseViewModel : INotifyPropertyChanged { public event PropertyChangedEventHandler PropertyChanged; protected virtual void OnPropertyChanged(string propertyName = "") { PropertyChanged?.Invoke(this, new PropertyChangedEventArgs(propertyName)); } } } Let's create our view model for our MainWindow class, inheriting from the base model. To do this, in the same ViewModels directory, create a MainWindowViewModel.cs file, inside which will be such code:
namespace Ex1.ViewModels { public class MainWindowViewModel : BaseViewModel { } } Gorgeous! Now we need to add a property to this model, on which we will bind the text of our controls. Since this is text, the type of this property should be string :
public string SynchronizedText { get; set; } As a result, we get this code
namespace Ex1.ViewModels { public class MainWindowViewModel : BaseViewModel { public string SynchronizedText { get; set; } } } So it seems to have done it. It remains to be bogged down on this property from the view and it is ready. Let's do it right now:
<TextBox Text="{Binding Path=SynchronizedText}"/> <TextBlock Text="{Binding Path=SynchronizedText}"/> Nishtyak, we are launching a project, we are typing text in a textbox, and ... nothing happens))) Well, it's okay, in fact, we are going the right way, just have not yet reached the desired point.
I propose to stop for a moment and think about what we are missing. We have a view. Viewmodel too. Properties like zabindili. The desired interface has been implemented. We did a lot of work to copy a pathetic line of text, why do we need it ???!?! 111
Okay, jokes aside. We forgot to create an object view model and something else (more on that later). We have described the class itself, but it does not mean anything, because we do not have objects of this class. Ok, where you need to store a link to this object? Toward the beginning of the example, I mentioned some DataContext used in WPF. So, every view has a DataContext property to which we can assign a link to our view model. Let's do it. To do this, open the MainWindow.xaml file and press F7 to open the code for this view. It is almost empty; it contains only the window class constructor. Add the creation of our view model to it and place it in the DataContext of the window (do not forget to add using with the necessary namespace):
public MainWindow() { InitializeComponent(); this.DataContext = new MainWindowViewModel(); } It was simple, but it is still not enough. As before, when you start the application, no text synchronization occurs. What else needs to be done?
You must call the PropertyChanged event when you change the SynchronizedText property and tell the view that it should monitor this event. So, to trigger an event, we modify the code of the view model:
public class MainWindowViewModel : BaseViewModel { private string _synchronizedText; public string SynchronizedText { get => _synchronizedText; set { _synchronizedText = value; OnPropertyChanged(nameof(SynchronizedText)); } } } What did we do here? Added a hidden field for storing text, wrapped it in an already existing property, and when changing this property, we not only change the hidden field, but also call the OnPropertyChanged method defined in the basic view model and causing the PropertyChanged event, declared in the INotifyPropertyChanged interface, also implemented in the basic View Models It turns out that each time the text changes, a PropertyChanged event occurs, which is passed the name of the view model property that has been changed.
Well, almost everything, finish line! It remains to specify the view that it should listen to the PropertyChanged event:
<TextBox Text="{Binding Path=SynchronizedText, UpdateSourceTrigger=PropertyChanged, Mode=OneWayToSource}"/> <TextBlock Text="{Binding Path=SynchronizedText, UpdateSourceTrigger=PropertyChanged, Mode=OneWay}"/> In addition to the fact that we indicated which trigger should be updated, we also indicated in which direction this update is being tracked: from view to view model or vice versa. Since we enter text in the textbox, we are only interested in the changes in the view, so we select the OneWayToSource mode. In the case of a text block, everything is exactly the opposite: we are interested in changes in the view model to display them in a view, so we select the OneWay mode. If we needed the changes to be tracked in both directions, we could not specify the Mode at all, or specify TwoWay explicitly.
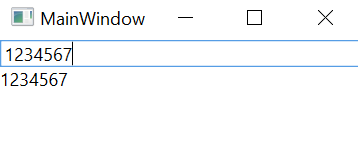
So, run the program, type the text and voi-la! The text changes simultaneously, and we haven't copied anything anywhere!
Thank you for your attention, to be continued. We will deal with the DataTemplate and the Command pattern.
')
Source: https://habr.com/ru/post/427325/
All Articles