Trial and installation methods for Arch Linux
Now we will talk about installation in various versions of such a well-known Linux distribution kit - Arch Linux. At the time of this writing, he is ranked 12th in distrowatch in terms of the number of search requests in 6 months, with an honorable average rating of the distribution 9.3 / 10. Many people consider it a real Linux, for real programmers, but first of all it is famous not for this, but for its nontrivial installation process. When launching a bootable media, the user first of all sees not the usual “click here to install X” interface, but a large black window into the Linux world.

This is probably the safest way to try your hand at installing this system, or at least a good way to “ rehearse ” the installationside by side instead of Windows, another Linux or MacOS. I personally will use licensed VMware Workstation Pro 14 ...

')
But as a whole, any other program for working with virtual machines is suitable.
First we need a fresh iso image downloaded from archlinux.org
Downloaded? Cool!
Create a new virtual machine with it. We give the memory, how many it is not a pity, we launch andopen the guide on the Internet, we read further.
To install the system, we need an Internet connection, which should be at the standard settings of the new virtual machine. Check with
Then we need to partition the disk. To do this, in the image that we run, there are several utilities, for example cfdisk, fdisk, gdisk, cgdisk, partitionmanager, parted, gparted ... The list goes on. I like to use the cfdisk utility, because it allows you to partition in both the MBR and GPT.
Which partition table to choose is everyone’s business, I’d just say that GPT will be newer than the MBR. More information about the choice between GPT and MBR can be read here .
Run cfdisk , which should ask us about the partition table. Choose GPT (or dos). Make a partition of 100 MB. Then you can get confused and make separate partitions for different mount points : under / home, / boot, / var ... But on the virtual machine, I think it's useless - we are sawing a single partition for all remaining space as root.
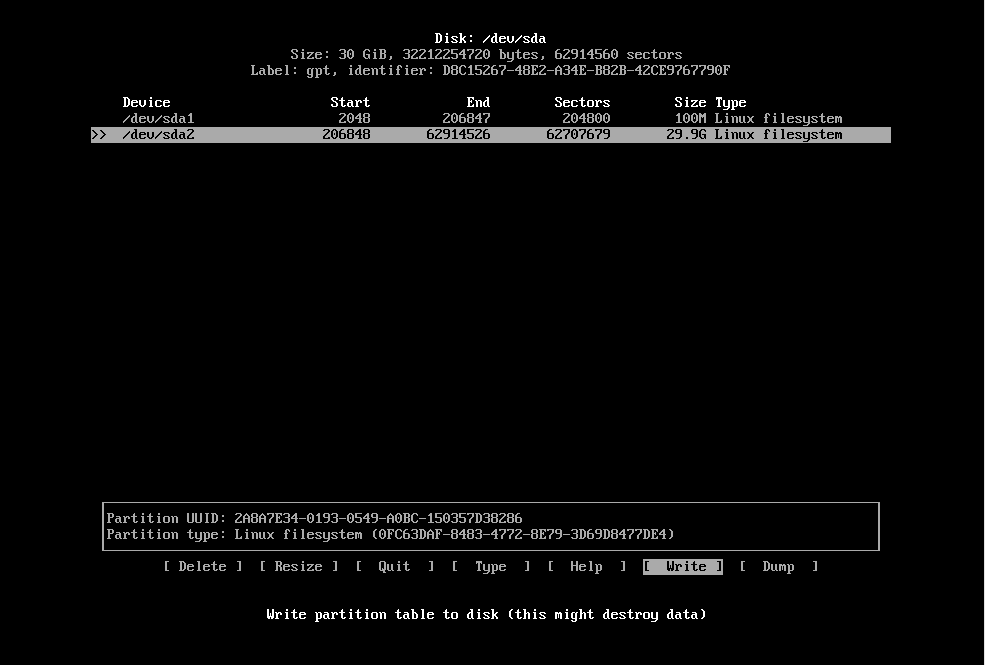
Do not forget to write the changes to disk by selecting the write item.
Next, you need to create file systems using the mkfs utility. I propose to format the EFI partition in FAT32:
Where X is the partition number (for me, for example, it is sda1)
The rest of the sections usually format everything either in ext4 or ext3:
Then we first mount the root partition in / mnt, then everything else in the corresponding directories created in / mnt
Before installing directly, I like to set up mirrors using the reflector utility:
Reflector will sort all mirrors by ping and record the first 200 of them in the mirrorlist.
Now we put the system itself:
After the command has been executed, we need to let the system know which sections should be mounted at boot time - for this we write:
And now we stretch our fingers, now we have to knock a little more on the keyboard ...

Let's make a small initial setup of the system. To do this, go to its root directory:
Adjust the time:
Then in the /etc/locale.gen file we find our native language and uncomment it, then we write the
Next, you must specify the computer name in the file / etc / hosts. Example of the final file:
Add one gram user
Pinch of passwords:
And finally, to boot the system, set the bootloader. Read more about those that can be installed here . Which one to install is up to you, of course, and here and now we will install the most common grub:
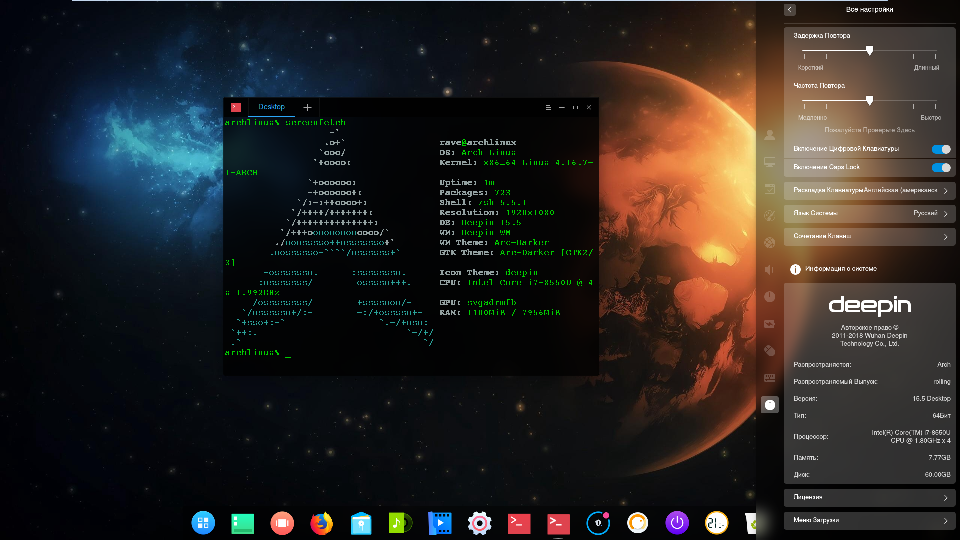
In general, you are ready, you can exit the chroot, unmount the disks and restart the machine. Then you can already put on hergraphic environment . Read more about it here .
Well, you can basically enjoy it ...

Let's solve the problem: we have a clogged hard disk with Windows 10 / Mac Os Mojave , which has a downloaded Arch Linux image and a completely empty external ssd or hdd.
Task: Install the system on an external disk without leaving Windows / MacOS
Think for a couple of minutes, and then see an elegant life hack .
How can this come in handy later? And I will say - situations are different. Once your working machine broke down, you live for a week or two without it, because It is under repair, but you need to work on anything. Or you bought / assembled a new computer, on which so far there is not even ms-dos — you will be able to at least make a bootable USB flash drive / disk or continue working from external media. Portability, so to speak. At the same time, it is better to install on an external disk, at least manjaro.
Having thoroughly trained in installing archa on virtuals, you can try to install it on a real disk. The only difference is that if there were other operating systems on the disk before, then you shouldn’t get rid of them by deleting partitions ... You can also do some “improvements” to the installation: for example, allocate space for the swap partition
It remains only to custom settings, which I will not describe here, because this is a creative and individual process.
Personally, I am inclined to the version that Arch Linux is the best distribution. Yes, it can sometimes break when updating (many rolling release are sinful with this), but in 2018 this happens as rarely as possible. Arch - the most lightweight distribution "on the market", this title can only be challenged by Gentoo. Unlike the latter, by the way, we don’t have to force our car by compiling packages. Archa's repositories are huge, they have almost everything. And if not, then almost any deb package can be configured specifically for the PKGBUILD. If something still somehow breaks, then most likely there is already an article on archwiki on this subject , which, if you have the ability to read, can be easily corrected. Arch can be customized. As you wish.
And he has a beautiful logo.
On this I think the topic has been settled, on which I complete this fascinating story. Happiness to those who read up to this point.
UPD:
Apparently, I’ve been somewhat naughty with the flags when installing grub, and also forgot to mention about os-prober, the utility needed to detect other operating systems.
Correcting:
Hope for a graphical interface for setting up / using your system will eventually bring only problems to the user. At some point in time, the user will feel that he needs to know what the graphical interface is hiding ...
Act one: installation on a virtual machine
This is probably the safest way to try your hand at installing this system, or at least a good way to “ rehearse ” the installation
')
But as a whole, any other program for working with virtual machines is suitable.
First we need a fresh iso image downloaded from archlinux.org
Downloaded? Cool!
Create a new virtual machine with it. We give the memory, how many it is not a pity, we launch and
To install the system, we need an Internet connection, which should be at the standard settings of the new virtual machine. Check with
ping google.comThen we need to partition the disk. To do this, in the image that we run, there are several utilities, for example cfdisk, fdisk, gdisk, cgdisk, partitionmanager, parted, gparted ... The list goes on. I like to use the cfdisk utility, because it allows you to partition in both the MBR and GPT.
Which partition table to choose is everyone’s business, I’d just say that GPT will be newer than the MBR. More information about the choice between GPT and MBR can be read here .
Run cfdisk , which should ask us about the partition table. Choose GPT (or dos). Make a partition of 100 MB. Then you can get confused and make separate partitions for different mount points : under / home, / boot, / var ... But on the virtual machine, I think it's useless - we are sawing a single partition for all remaining space as root.
Do not forget to write the changes to disk by selecting the write item.
Next, you need to create file systems using the mkfs utility. I propose to format the EFI partition in FAT32:
mkfs.vfat -F 32 /dev/sdaXWhere X is the partition number (for me, for example, it is sda1)
The rest of the sections usually format everything either in ext4 or ext3:
mkfs.ext4 /dev/sda2Then we first mount the root partition in / mnt, then everything else in the corresponding directories created in / mnt
mount /dev/sda2 /mnt mkdir /mnt/boot mount /dev/sda1 /mnt/boot // Before installing directly, I like to set up mirrors using the reflector utility:
pacman -S reflector reflector —verbose -l 200 —sort rate —save /etc/pacman.d/mirrorlist Reflector will sort all mirrors by ping and record the first 200 of them in the mirrorlist.
Now we put the system itself:
pacstrap -i /mnt base base-develAfter the command has been executed, we need to let the system know which sections should be mounted at boot time - for this we write:
genfstab -U /mnt >> /mnt/etc/fstabAnd now we stretch our fingers, now we have to knock a little more on the keyboard ...
Let's make a small initial setup of the system. To do this, go to its root directory:
arch-chroot /mntAdjust the time:
ln -sf /usr/share/zoneinfo/%%/%% /etc/localtime hwclock --systohc Then in the /etc/locale.gen file we find our native language and uncomment it, then we write the
locale-gen .Next, you must specify the computer name in the file / etc / hosts. Example of the final file:
127.0.0.1 localhost ::1 localhost 127.0.1.1 %%.localdomain %% Add one gram user
useradd -m -g users -G wheel -s /bin/bash %userName% Pinch of passwords:
passwd // root passwd %userName% // And finally, to boot the system, set the bootloader. Read more about those that can be installed here . Which one to install is up to you, of course, and here and now we will install the most common grub:
pacman -S grub grub-install --target=x86_64-efi --efi-directory=/boot/EFI --bootloader-id=grub grub-mkconfig -o /boot/grub/grub.cfg In general, you are ready, you can exit the chroot, unmount the disks and restart the machine. Then you can already put on her
Well, you can basically enjoy it ...
Act Two: installation on external media
Let's solve the problem: we have a clogged hard disk with Windows 10 / Mac Os Mojave , which has a downloaded Arch Linux image and a completely empty external ssd or hdd.
Task: Install the system on an external disk without leaving Windows / MacOS
Think for a couple of minutes, and then see an elegant life hack .
See the solution ...
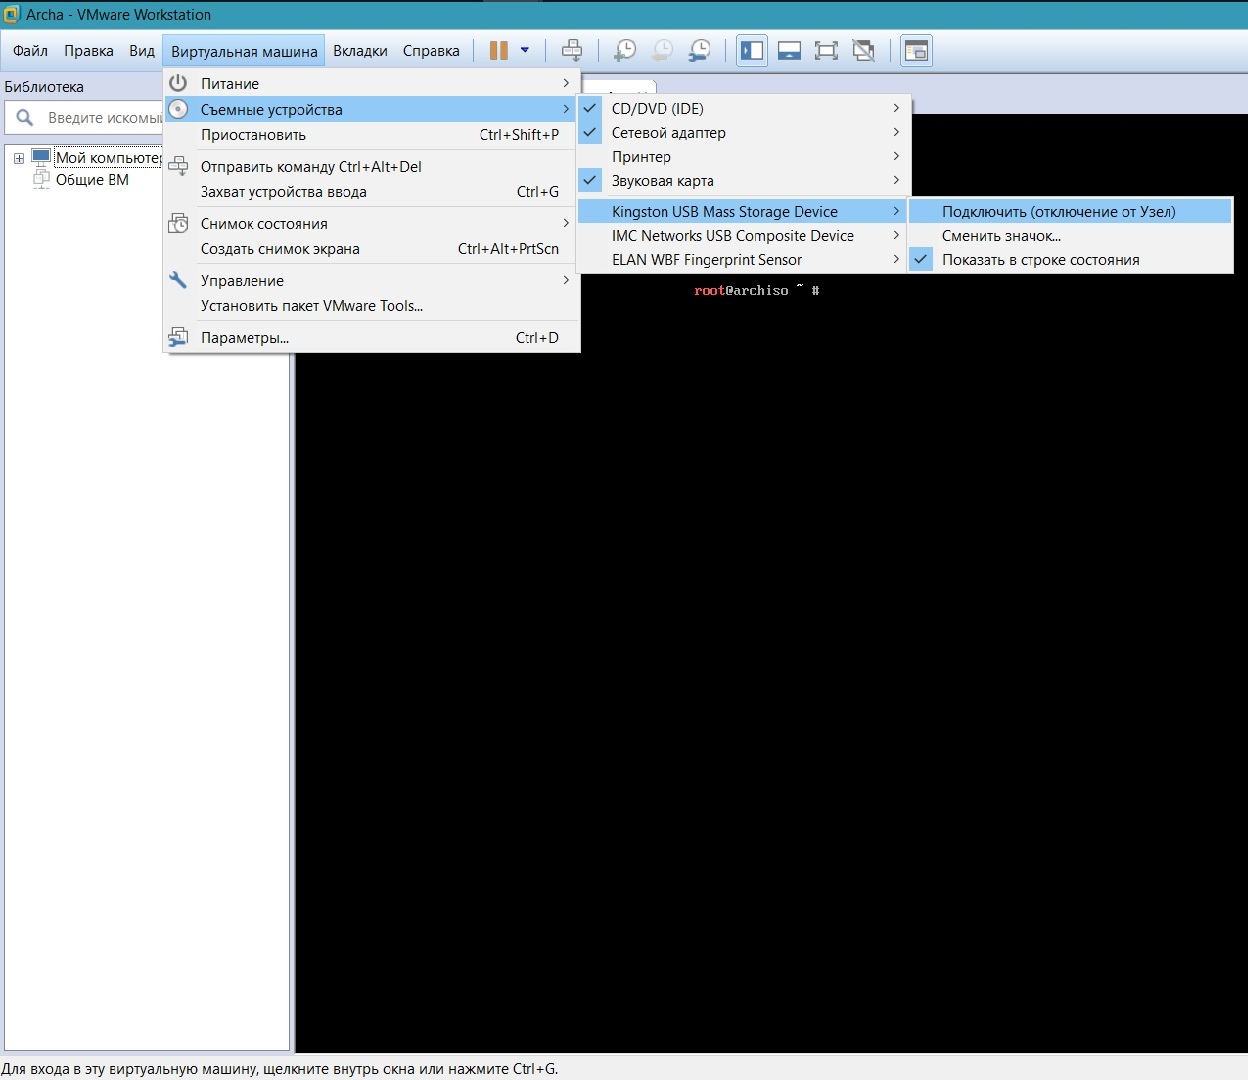
And the solution is pretty simple: we use the same virtual machine for this
To do this, we simply create it without any virtual hard disk, and then connect external media to it (hereinafter - the USB flash drive) and repeat the steps described above.
Note: when booting from the received flash drive, there may be different types of problems with the network, in most cases due to conflicts between the services responsible for connecting and implementing domain names. It is solved by choosing which service to use, and then disabling all the others through the systemctl. It is also important to mention the standard wifi-menu utility.
How can this come in handy later? And I will say - situations are different. Once your working machine broke down, you live for a week or two without it, because It is under repair, but you need to work on anything. Or you bought / assembled a new computer, on which so far there is not even ms-dos — you will be able to at least make a bootable USB flash drive / disk or continue working from external media. Portability, so to speak. At the same time, it is better to install on an external disk, at least manjaro.
Act three: installation next to another operating system
Having thoroughly trained in installing archa on virtuals, you can try to install it on a real disk. The only difference is that if there were other operating systems on the disk before, then you shouldn’t get rid of them by deleting partitions ... You can also do some “improvements” to the installation: for example, allocate space for the swap partition
mkswap /dev/sdxy swapon /dev/sdxy It remains only to custom settings, which I will not describe here, because this is a creative and individual process.
Epilogue: why is all this necessary
Personally, I am inclined to the version that Arch Linux is the best distribution. Yes, it can sometimes break when updating (many rolling release are sinful with this), but in 2018 this happens as rarely as possible. Arch - the most lightweight distribution "on the market", this title can only be challenged by Gentoo. Unlike the latter, by the way, we don’t have to force our car by compiling packages. Archa's repositories are huge, they have almost everything. And if not, then almost any deb package can be configured specifically for the PKGBUILD. If something still somehow breaks, then most likely there is already an article on archwiki on this subject , which, if you have the ability to read, can be easily corrected. Arch can be customized. As you wish.
And he has a beautiful logo.
On this I think the topic has been settled, on which I complete this fascinating story. Happiness to those who read up to this point.
UPD:
Apparently, I’ve been somewhat naughty with the flags when installing grub, and also forgot to mention about os-prober, the utility needed to detect other operating systems.
Correcting:
pacman -Syu grub os-prober grub-mkconfig > /boot/grub/grub.cfg grub-install --target=i386-pc /dev/sdX Source: https://habr.com/ru/post/426953/
All Articles