How to run an iOS application through React Native

This is a translation of the original article by a programmer blogging under the pseudonym Soujanya PS. She is a professional in her field and loves not only developing applications and services, but also writing articles about it. Here is her review of launching an iOS application using the React Native framework.
Not long ago, I started using React Native for iOS programs. This is my first deep immersion into the native application development environment. I note that I was surprised by the ease of the whole process, as well as the level of abstraction that the React Native command line interface provides. Actually, this was one of the factors that prompted me to write about this framework. I would like to share my own experience with those who have just started working with him.
Skillbox recommends: "Mobile Developer PRO" .
We remind: for all readers of "Habr" - a discount of 10,000 rubles when recording for any Skillbox course on the promotional code "Habr".
React Native provides command line tools for running iOS and Android applications on emulators and devices. Let's try to understand what and how to do to deploy React Native application for iOS.
')
Actually launch
React Native provides an excellent utility called init. It provides an application template while simultaneously creating relevant Xcode project files in the iOS folder of this application.
It, in turn, can be launched both in the iOS emulator environment and on the phone / tablet by entering the following command in the application root folder:
react-native run-ios
Successful execution of the command is accompanied by running the application in the emulator or on the device. We tell what to do for this.
Run ios command
React Native provides the developer with several command-line utilities that allow you to interact with the application. They are located in the local-cli folder of the React Native module nodes. Run-ios is one of the utilities that runs the runIOS () function defined in the runIOS.js file.
Run-ios allows you to use the following options:
#Launch the app on a specific simulator
react-native run-ios --simulator "iPhone 5"
#Pass a non-standard location of iOS directory
react-native run-ios --project-path "./app/ios"
#Run on a connected device, eg Max's iPhone
react-native run-ios --device "Max's iPhone"
#Build the app in Release mode
react-native run-ios --configuration Release
Device / Emulator Selection
If the device is not specified, then run-ios will start debugging the application in the emulator by default. This is possible thanks to the execution of a series of xcrun / simctl commands. First, we check the list of available emulators, select one of them and download the application in its environment.
If you want to run the application on a physical device, simply connect it to your laptop and set the details through run-ios.
The next step is to create an Xcode application project.
Application code
Usually, the Xcode project of the React Native application is located in the iOS folder in the root directory. The xcode project is created using the xcodebuild command. Any parameters previously set for run-ios are passed to this command.
Once the project is created, the application is installed and launched on the emulator or the connected device.
Add application code in debug mode
During the entire development process, React Native dynamically loads your code. In order for everything to go smoothly and the code is available as needed, you will need a server.
While the Xcode project is in the process of debugging, the Metro server is launched in parallel with it. It is used by applications that are created using the React Native command line interface. All this allows you to speed up and simplify the process using a hot boot and other methods.
By default, Metro "listens" port 8081. As soon as the application is running in the emulator, a request is sent to the server.
#Code in AppDelegate.m sends the request for the bundle: #index.bundle to server jsCodeLocation = [[RCTBundleURLProvider sharedSettings] jsBundleURLForBundleRoot:@"index" fallbackResource:nil]; RCTRootView *rootView = [[RCTRootView alloc] initWithBundleURL:jsCodeLocation moduleName:@"MobileApp initialProperties:nil launchOptions:launchOptions]; The server loads all the necessary dependencies, collects the JavaScript code and sends it to the application. After this step, you can see the running application in the emulator or on a connected device.
Package JavaScript Package
In release-mode, you need to pre-pack JavaScript by placing it in the application. This requires some changes to ensure that the static package can be downloaded. You need to change jsCodeLocation in the file AppDelegate.m, specifying the location of the static package outside of debug mode:
#ifdef DEBUG jsCodeLocation = [[RCTBundleURLProvider sharedSettings] jsBundleURLForBundleRoot:@"index" fallbackResource:nil]; #else jsCodeLocation = [[NSBundle mainBundle] URLForResource:@"main" withExtension:@"jsbundle"]; #endif Now this is an indication of the resource file main.bundle, which appeared during the processing of the Xcode project. At this stage, the react-native-xcode.sh script is launched. It can be found in the scripts folder of the React Native module.
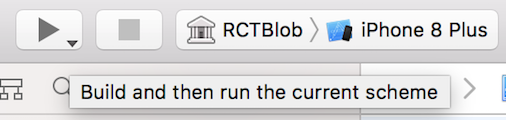
Creating an application from Xcode
You can create an Xcode project directly on the Mac instead of using the React Native CLI. After creation, the application can also be run on an emulator selected in the Xcode options, or on a physical device.
I hope that this material has helped you understand the processes that are launched when the react-native run-ios command is executed, which creates magic and allows the application to run in the iOS environment.
Skillbox recommends:
- Practical course "Profession web developer" .
- Online course "Profession Frontend-developer" .
- Practical annual course "PHP-developer from scratch to PRO" .
Source: https://habr.com/ru/post/426893/
All Articles