OpenCV based line following
Nowadays, autopilot courses for cars are very popular. This nano-grade from Udacity is probably the most well-known option.
Many people learn from it and spread their decisions. I also could not pass by and got carried away.
The difference is that the course involves the development of an algorithm based on the data provided, and I did everything for my robot .
The first task that course students face when studying computer vision is to follow a line on the road. Many articles are written on this topic, here are some of the most detailed:
')
Everything is pretty simple and the scheme of work comes down to several points:
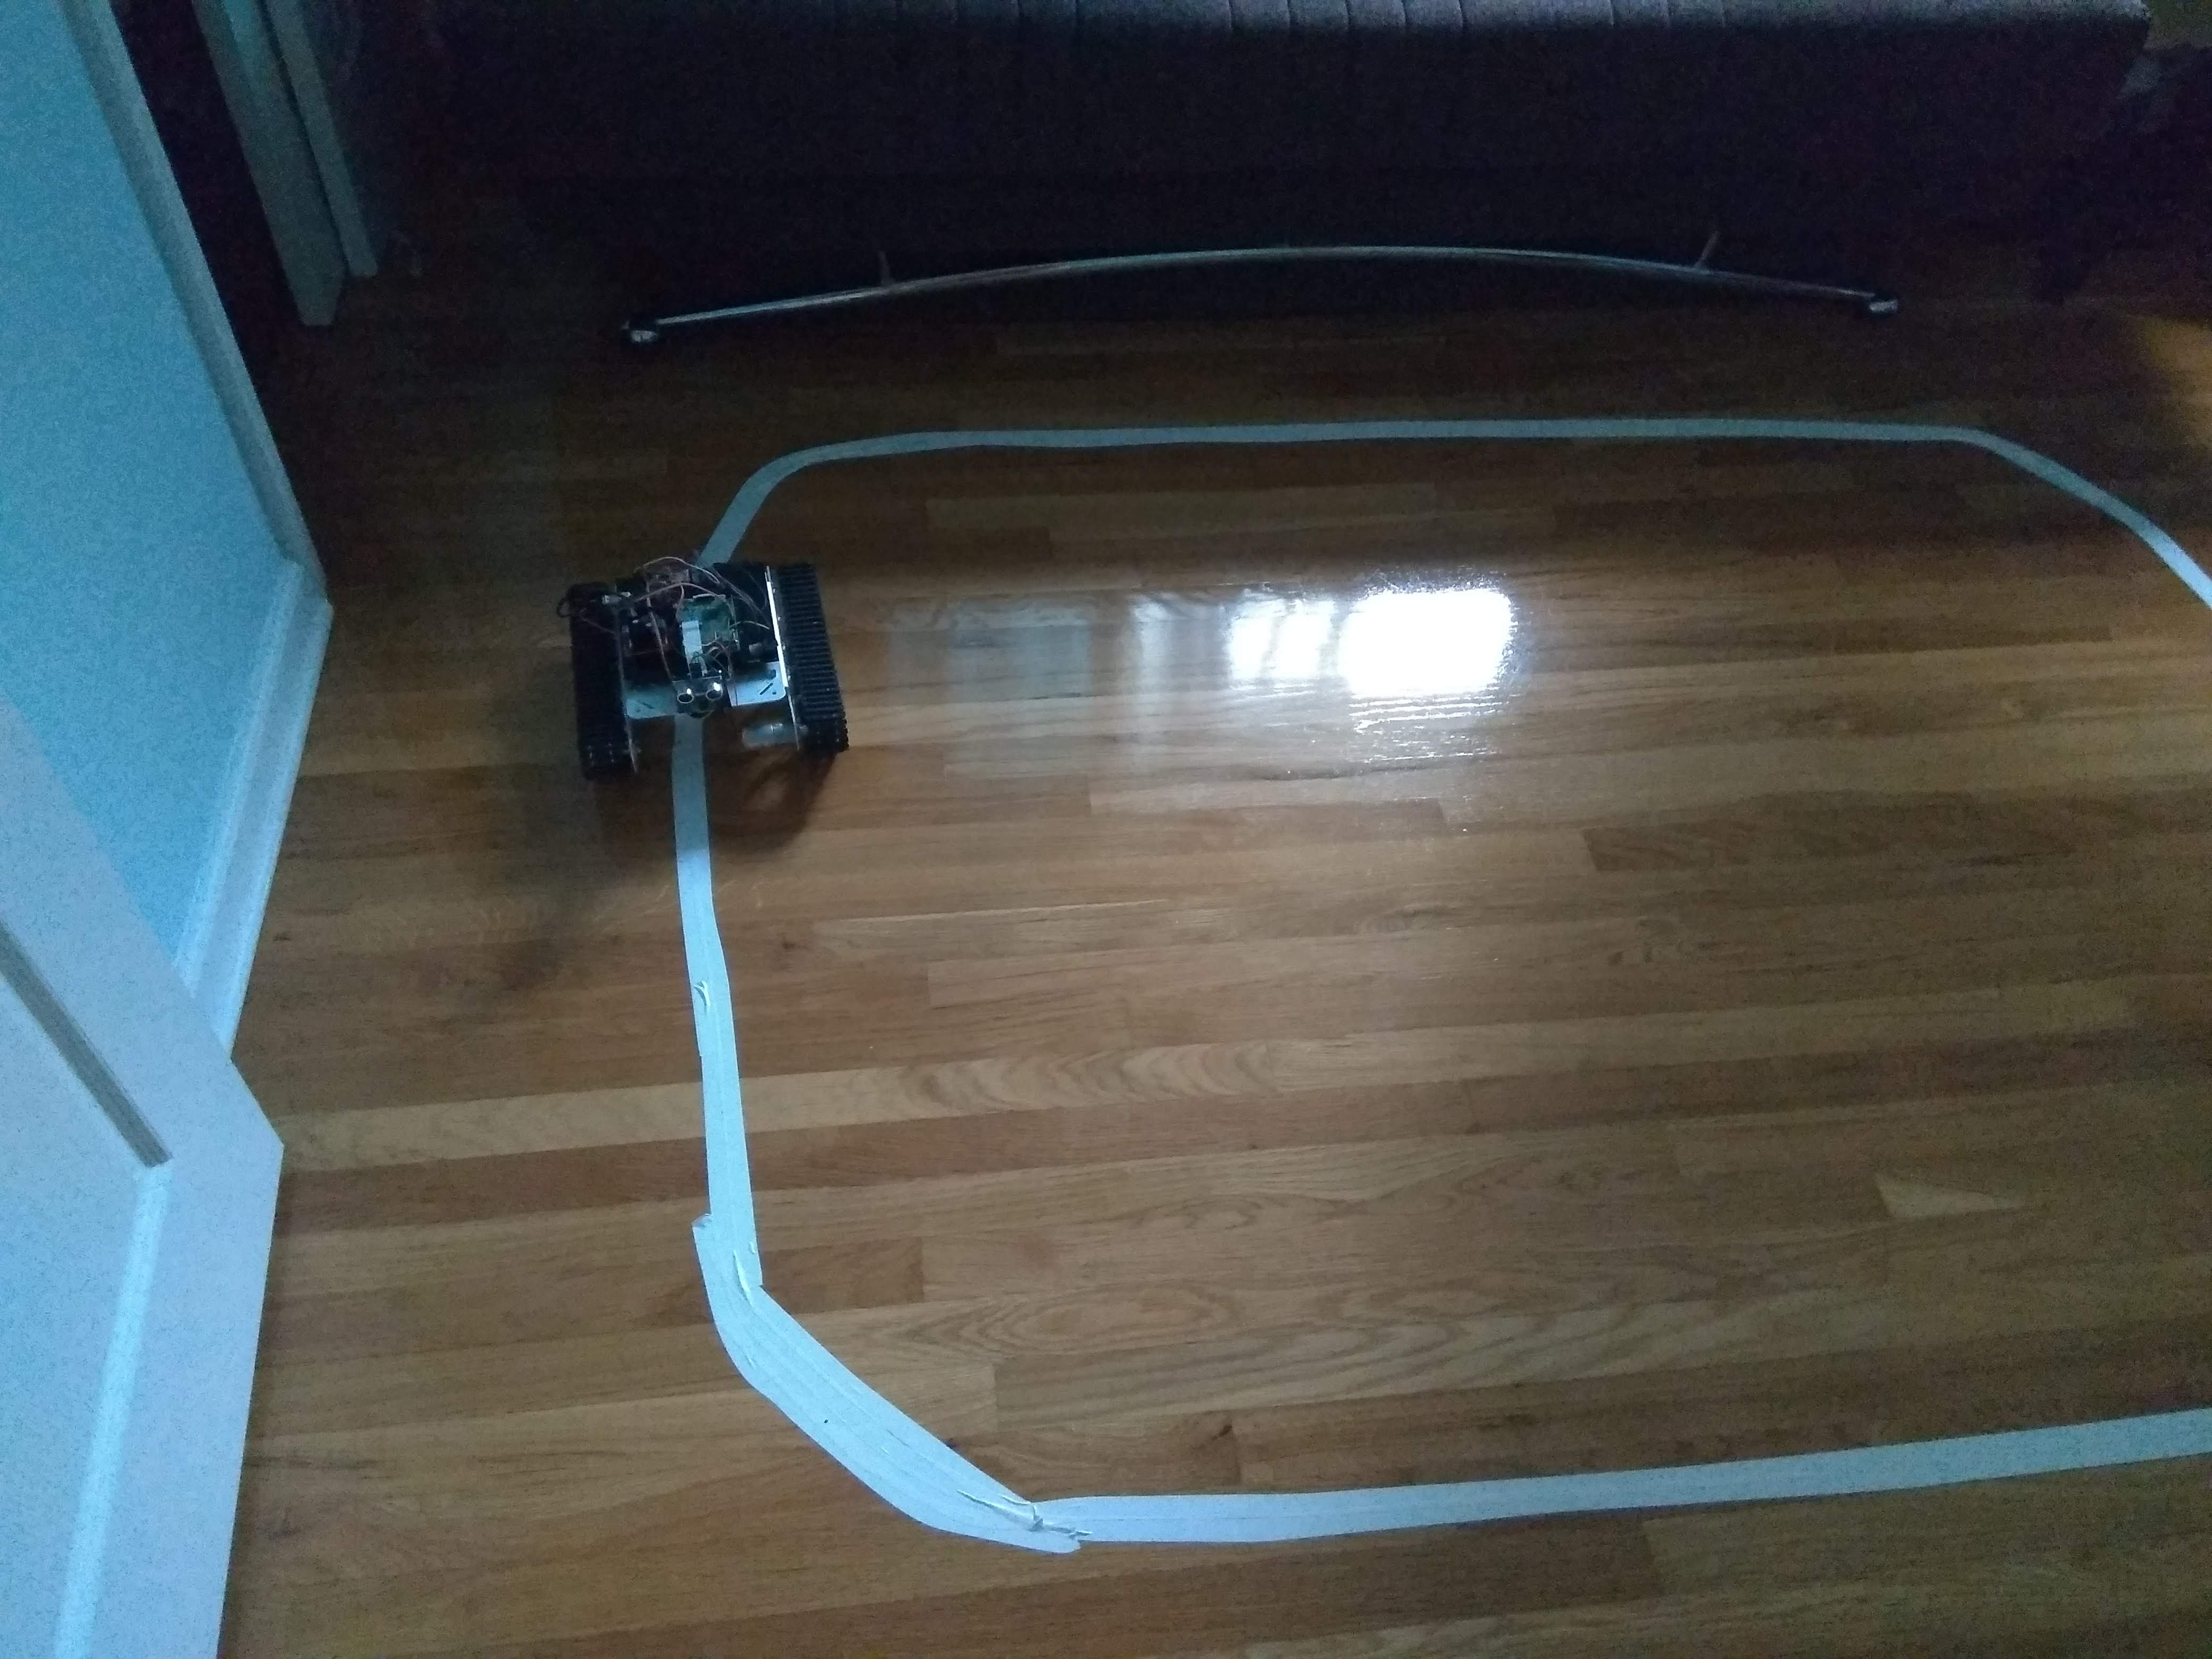
I stuck white tape on the floor and got down to business.
In your works mentioned, the task was also to find the yellow line, so they worked with HLS and HSV colors. Since my line was only white, I decided not to bother with this and limit myself to a black and white filter.
Immediately began problems with geometry. The students in the pictures are striking the arrow into the horizon. Still, it detects many lines that the authors had to combine. However, their lines were well-directed, and there was no garbage in the pictures.
I have a completely different picture. The geometry of the tape band was far from straight. Glare on the floor generated noises.
After applying Canny, this is what happened:
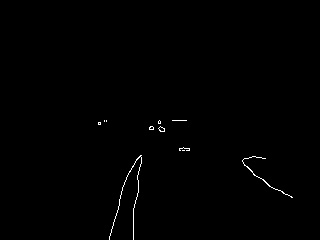
And the lines of Hafa were:
Strengthening the criteria, we managed to eliminate garbage, but almost all the lines found on the strip disappeared. To rely on such tiny stretches would be stupid.

In general, the results were extremely unstable, and it occurred to me to try a different approach.
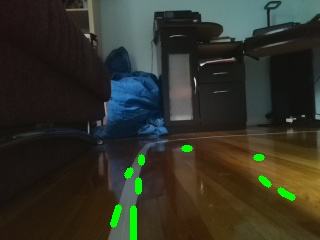
Instead of lines, I began to look for contours. Having made the assumption that the largest circuit - this is the electrical tape, managed to get rid of the garbage. (Then it turned out that the large white plinth occupied more space in the frame than electrical tape. I had to be covered with a sofa cushion).
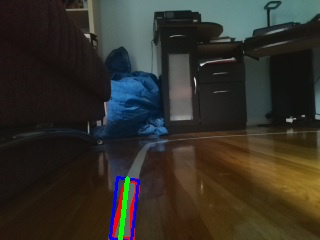
If we take the minimal rectangle bounding the contour, then the average longitudinal line is very well suited to the role of the motion vector.
The second problem was with the lighting. I very successfully laid one side of the track in the shadow of the sofa and it was absolutely impossible to process the photo of the whole track with the same settings. As a result, I had to implement a dynamic cutoff on a black and white filter. The algorithm is as follows - if after applying the filter in the picture too much white (more than 10%), then the threshold should be raised. If too little (less than 3%) - omit. Practice has shown that, on average, in 3-4 iterations it is possible to find the optimal cutoff.
Magic numbers are in a separate config (see below), you can play with them in search of optimum.
Having adjusted machine vision, it was possible to move on to the movement itself. The algorithm was as follows:
Abbreviated version of the code (Full - on Gitkhab ):
Roughly, but confidently the tank crawls along the trajectory:
But I collected a gif from debug graphics:
Code on Gitkhab .
Many people learn from it and spread their decisions. I also could not pass by and got carried away.
The difference is that the course involves the development of an algorithm based on the data provided, and I did everything for my robot .
The first task that course students face when studying computer vision is to follow a line on the road. Many articles are written on this topic, here are some of the most detailed:
')
Everything is pretty simple and the scheme of work comes down to several points:
- Filter by color.
- Select faces
- Trim unnecessary parts of the picture.
- Detect lines using Hough transform .
I stuck white tape on the floor and got down to business.
In your works mentioned, the task was also to find the yellow line, so they worked with HLS and HSV colors. Since my line was only white, I decided not to bother with this and limit myself to a black and white filter.
Geometry
Immediately began problems with geometry. The students in the pictures are striking the arrow into the horizon. Still, it detects many lines that the authors had to combine. However, their lines were well-directed, and there was no garbage in the pictures.
I have a completely different picture. The geometry of the tape band was far from straight. Glare on the floor generated noises.
After applying Canny, this is what happened:
And the lines of Hafa were:
Strengthening the criteria, we managed to eliminate garbage, but almost all the lines found on the strip disappeared. To rely on such tiny stretches would be stupid.
In general, the results were extremely unstable, and it occurred to me to try a different approach.
Instead of lines, I began to look for contours. Having made the assumption that the largest circuit - this is the electrical tape, managed to get rid of the garbage. (Then it turned out that the large white plinth occupied more space in the frame than electrical tape. I had to be covered with a sofa cushion).
If we take the minimal rectangle bounding the contour, then the average longitudinal line is very well suited to the role of the motion vector.
Shine
The second problem was with the lighting. I very successfully laid one side of the track in the shadow of the sofa and it was absolutely impossible to process the photo of the whole track with the same settings. As a result, I had to implement a dynamic cutoff on a black and white filter. The algorithm is as follows - if after applying the filter in the picture too much white (more than 10%), then the threshold should be raised. If too little (less than 3%) - omit. Practice has shown that, on average, in 3-4 iterations it is possible to find the optimal cutoff.
Magic numbers are in a separate config (see below), you can play with them in search of optimum.
def balance_pic(image): global T ret = None direction = 0 for i in range(0, tconf.th_iterations): rc, gray = cv.threshold(image, T, 255, 0) crop = Roi.crop_roi(gray) nwh = cv.countNonZero(crop) perc = int(100 * nwh / Roi.get_area()) logging.debug(("balance attempt", i, T, perc)) if perc > tconf.white_max: if T > tconf.threshold_max: break if direction == -1: ret = crop break T += 10 direction = 1 elif perc < tconf.white_min: if T < tconf.threshold_min: break if direction == 1: ret = crop break T -= 10 direction = -1 else: ret = crop break return ret Having adjusted machine vision, it was possible to move on to the movement itself. The algorithm was as follows:
- 0.5 seconds go straight
- make a photo
- find a vector
- if the beginning of the vector is displaced relative to the center of the image - we slightly taxi in the right direction
- if the tilt angle of the vector deviates from the vertical more than necessary - we rush in the right direction
- if it happened suddenly that the strip disappeared from the frame, we make an assumption that we passed the turn and began to turn in the direction of the last steering or tilting of the vector at the previous step
Abbreviated version of the code (Full - on Gitkhab ):
def check_shift_turn(angle, shift): turn_state = 0 if angle < tconf.turn_angle or angle > 180 - tconf.turn_angle: turn_state = np.sign(90 - angle) shift_state = 0 if abs(shift) > tconf.shift_max: shift_state = np.sign(shift) return turn_state, shift_state def get_turn(turn_state, shift_state): turn_dir = 0 turn_val = 0 if shift_state != 0: turn_dir = shift_state turn_val = tconf.shift_step if shift_state != turn_state else tconf.turn_step elif turn_state != 0: turn_dir = turn_state turn_val = tconf.turn_step return turn_dir, turn_val def follow(iterations): tanq.set_motors("ff") try: last_turn = 0 last_angle = 0 for i in range(0, iterations): a, shift = get_vector() if a is None: if last_turn != 0: a, shift = find_line(last_turn) if a is None: break elif last_angle != 0: logging.debug(("Looking for line by angle", last_angle)) turn(np.sign(90 - last_angle), tconf.turn_step) continue else: break turn_state, shift_state = check_shift_turn(a, shift) turn_dir, turn_val = get_turn(turn_state, shift_state) if turn_dir != 0: turn(turn_dir, turn_val) last_turn = turn_dir else: time.sleep(tconf.straight_run) last_turn = 0 last_angle = a finally: tanq.set_motors("ss") results
Roughly, but confidently the tank crawls along the trajectory:
But I collected a gif from debug graphics:
Algorithm Settings
## Picture settings # initial grayscale threshold threshold = 120 # max grayscale threshold threshold_max = 180 #min grayscale threshold threshold_min = 40 # iterations to find balanced threshold th_iterations = 10 # min % of white in roi white_min=3 # max % of white in roi white_max=12 ## Driving settings # line angle to make a turn turn_angle = 45 # line shift to make an adjustment shift_max = 20 # turning time of shift adjustment shift_step = 0.125 # turning time of turn turn_step = 0.25 # time of straight run straight_run = 0.5 # attempts to find the line if lost find_turn_attempts = 5 # turn step to find the line if lost find_turn_step = 0.2 # max # of iterations of the whole tracking max_steps = 100 Code on Gitkhab .
Source: https://habr.com/ru/post/426675/
All Articles