We create a simple, compact and cheap Internet radio station
Software platform will be Linux, for simplicity, it is better to use something common, with a lot of information on the Internet, if suddenly something goes wrong. Iron for an Internet radio station can be anything, a full-fledged server with your projects, some old laptop, or a netbook, we want cheap, and we do not need special performance from hardware.
If there is nothing like that at hand, or we need a completely silent server, why not try using a mini-computer?
Something like Raspberry Pi 3?
')
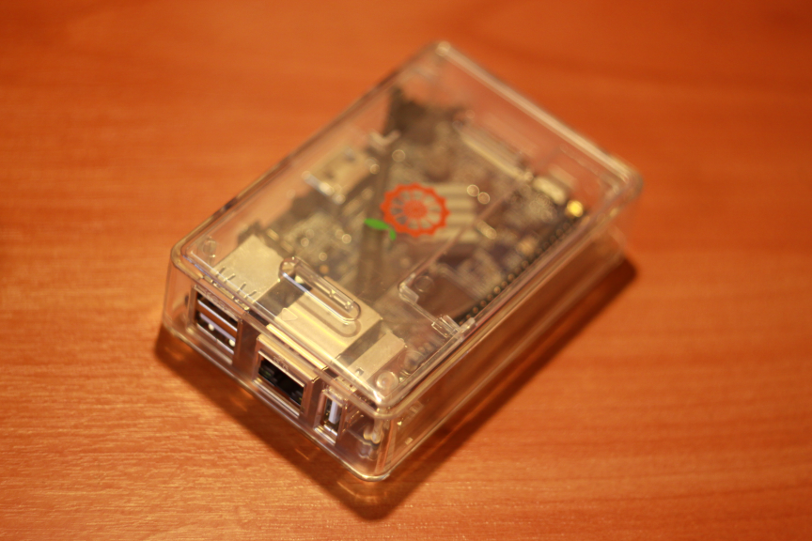
No, we want cheaper, so we need something like the Orange Pi. I found a Orange Pi Pc Plus model with 1GB DDR3 RAM and 8GB EMMC Flash.
UPD: Yesterday, everyone somehow took the article too seriously, but in fact the experiment was carried out for the sake of a fan, to see whether it turned out or not. Naturally, there is no talk of any “industrial” use, it's like trying to voice the stadium with an ordinary music center.
What else can we need?
I want to try to configure everything in a simple way, so I still need a twisted pair to the router and a Micro SD memory card, since the operating system cannot be installed directly on the micro computer. I found a 8 gigabyte memory card, this volume is enough.
So, the first thing you need to write the image of the operating system on the memory card.
For servers, I prefer to use time-tested Debian (yes, the younger generation most likely prefers CentOS, but gray-bearded people agree with me that Debian is still very good).
In general, there is a huge amount of ready-made images for Orange Pi on www.orangepi.org/downloadresources , but I still go to www.armbian.com/download and download the torrent file with armbian from dl.armbian.com/orangepipcplus (in my case of Debian_stretch_next.7z).
I have an Orange Pi Pc Plus, you can have any other mini computer, so look for the appropriate image.
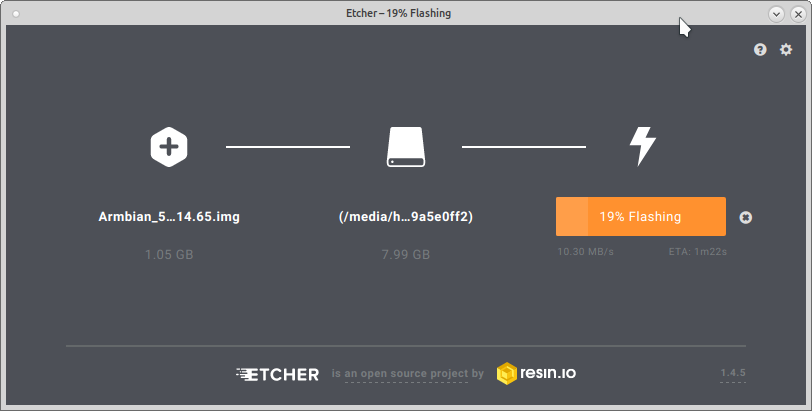
After downloading, unpack the archive and see the image in img format. Who wants what, and the image fills, I personally prefer Etcher (https://etcher.io). They inserted a memory card, chose it if you have several carriers connected, pressed the sew button, entered the password if you also have Linux on your desktop or laptop.
The map with the image is ready, you can start to connect everything.
What do we need to start and start setting up our server?
Itself a mini computer, Internet via Ethernet wire and power supply.
And that's all.
No, of course you can get stuck, connect the monitor and keyboard and configure everything directly, but I prefer the keyboard of my laptop, so I will configure my mini computer remotely via SSH.
So let's get started, plug in an Ethernet cable, a Micro SD card with an Armbian image.
It remains only to apply power to the mini computer.
But with the power on the Orange Pi, everything is very sad. What is on a normal mini computer? Right, Micro-USB, and how can I power the Orange Pi? Only 5V through pin connector, which is purchased separately.
A power adapter with a suitable plug is more expensive than just a wire with a standard USB at the end, so you can take it.
If there is no free power supply with USB (and we need not anyhow what, but 2 amps), then we dig in our mailbox with wires, adapters and motherboards for computers (you also have such a box, right?) And find a suitable adapter from of an old tablet, long broken by a child, we rewire the cable and the power for our server is ready.
Well, or just take the charger from the old iRiver disk mp3 player (it is only 4.7 volts and 1.2 amps, but it also works).
We supply power and we are ready to go, strictly speaking, to the point for which everything was started, to create an Internet radio station.
If you, like me, intend to do with a minimum of peripherals, then we need to find out what IP address our mini computer received. The easiest way to find it out is to log into your router and see what IP address the router gave to our server (does your router know how to use DHCP, right?).
Now you can log in via SSH to our server. To whom the SSH client is convenient, he uses that one (doesn’t you have windows, and as for SSH clients, I don’t know about it at all).
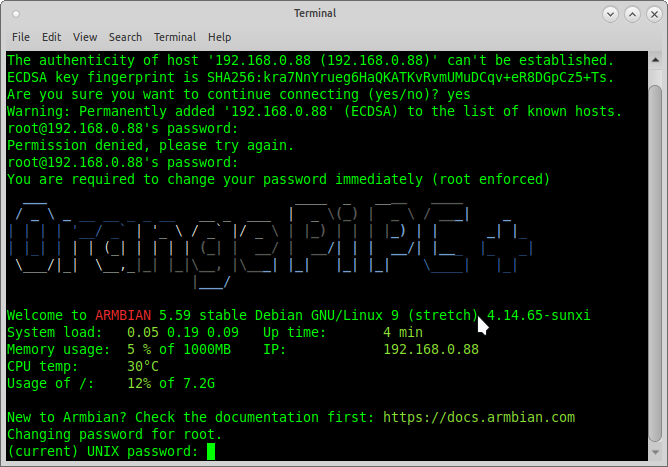
In my case, I just slaughter ssh root@192.168.0.88 in the console, agree to add the ECDSA key, the default password for root is “1234”, after logging in we find ourselves in the console of the microcomputer, which immediately suggests changing the root password.
After that, it is proposed to create an unprivileged user account, create it.
Compared with previous versions of the OS, the current version is somewhat simplified in terms of settings and a lot of things are already configured automatically.
Armbian has a very handy setup tool:
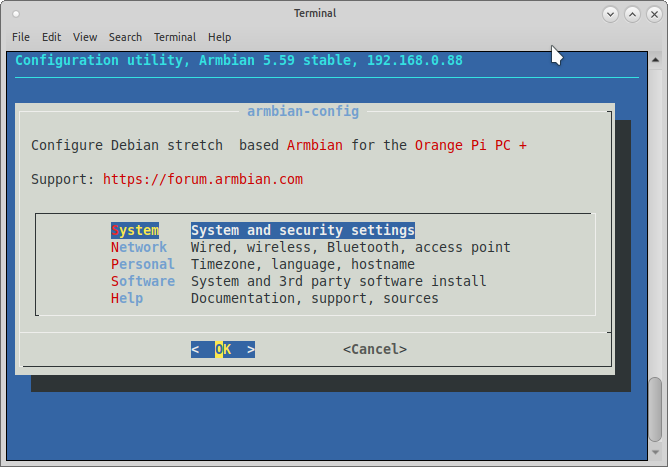
We don’t need the system settings yet, but they may need them later, for example, to transfer a tuned system from Micro SD to the built-in 8GB EMMC Flash memory of a mini computer.
The Network section will be useful to us, after all it would be nice to have a server with a static IP address. Our Internet radio station can be connected to the network even via Wi-Fi. Everyone establishes the level of perversion himself, but if you build Internet radio purely for yourself and you don’t plan more than 10 listeners at the same time, then why not pick up our server via Wi-Fi? In extreme cases, you can plug in an Ethernet cable at any time.
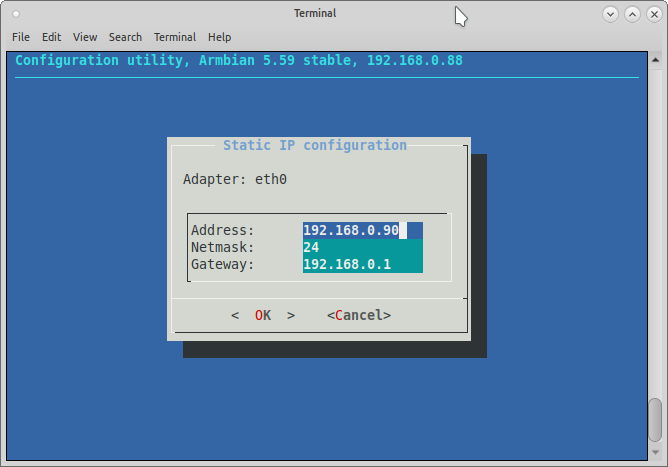
So, we decided on the connection type, now we need to configure a static IP address, for this we go to the IP settings and select the desired network interface, after which we say that we want a static address, we start it and save the settings. There is no need to change the mask and gateway, as they are received from your router via DHCP.
After you enter a new IP address and press Enter, your SSH session will immediately hang, as the device will immediately receive a new IP address. Therefore, simply close the window with the terminal and go to our mini computer via SSH using the new IP address.
By the way, since all the functions we will have are administrative in nature, in order not to write constantly before each sudo command, I simply log in to the mini computer as root.
By running
To apply the settings, you need to exit the settings utility, log out and log in again, or restart the server using the reboot command.
I used the reboot command to make sure that the settings were saved and the server started successfully with them.
The basic server setup is done and why not install a microSD-based OS on the internal EMMC Flash memory? Of course, if your mini computer has this very memory on board.
To do this, go to
Now we can sit back and wait until the OS is transferred to the internal storage of the mini computer.
After copying is complete, select power off. We wait a couple of seconds until the LED on the mini computer goes out, pull out the power, remove the MicroSD card, stick the power back in and turn on the computer.
Yes, if you do not have an internal memory and you did not transfer the operating system to it, pulling out a MicroSD will most likely not be a very good idea.
After logging into our mini computer via SSH and making sure that everything works, you can begin to tune the radio station itself.
First of all we update information about packages by typing
Yes, I love comfort, so I install mc with
I love to do everything from under mc, and if I need to see the console, I just press ctrl + o.
First install the daemon music player itself:
Together with him a lot of dependencies will be established.
Let's go to the setting. The /etc/mpd.conf file is responsible for the configuration of the daemon, open it with the
My username is without hzs privileges, and my configuration file looks like this:
Everything is clear and without any comments.
To work, you need to create a directory structure from the top of the settings. Please note that the owner for these directories should be an unprivileged user, from which everything will work, in my case hzs.
From under root execute the following commands:
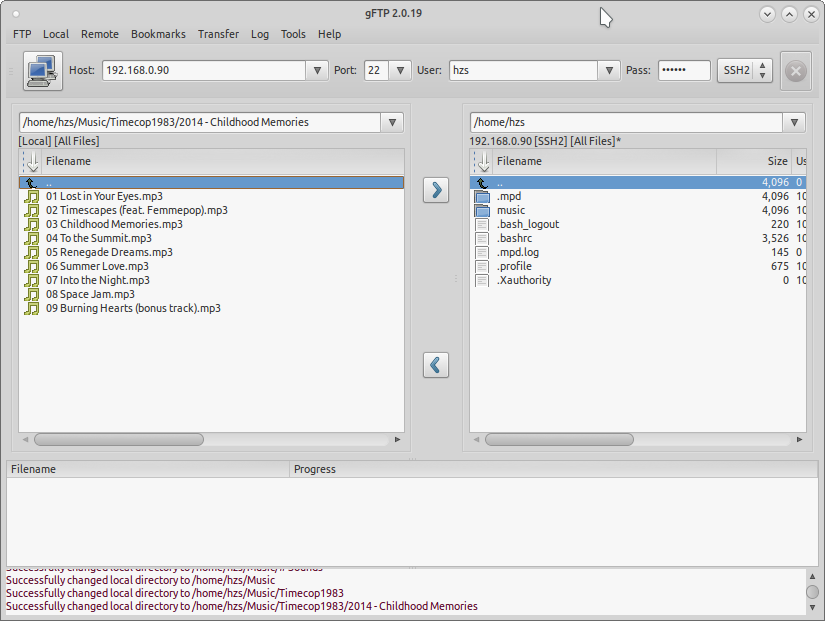
It's time to upload music, we have SSH on the server, so we can connect with our favorite FTP client to our server.
We know the IP address, port 22, the username and password that you specified when creating an unprivileged user, the type of SSH connection. Fill some music for the test in the directory for music specified in the config.
Now the player is running with the wrong config, so stop the daemon and run it again:
For the simplest daemon control, we
After installation we will configure the player a bit:
Now you need to add tracks to a playlist, in the console it is somewhat gimorreyno, but nothing can be done.
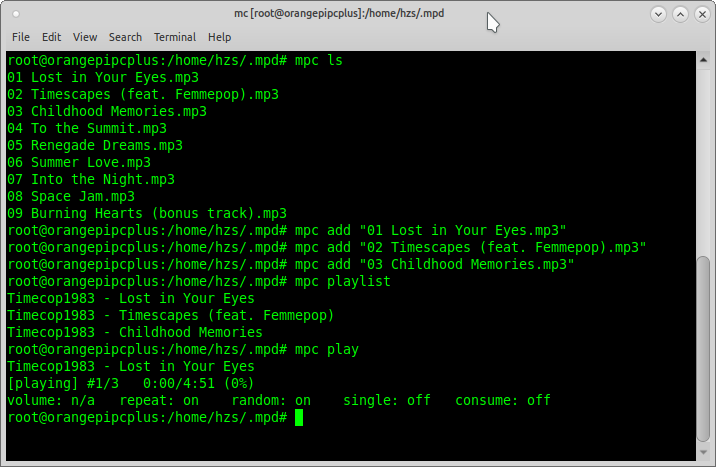
We look at the files available to us, which we can add to the playlist:
To add a file to the playlist, in the
Watch the resulting playlist:
It's time to launch our radio station:
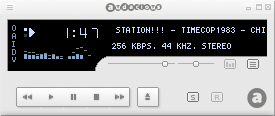
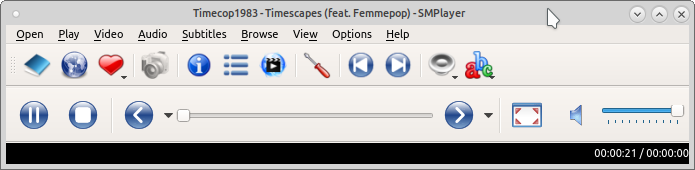
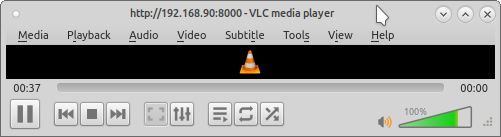
Let's try to listen, for this we open the audio stream of our radio station in any audio player. To do this, enter the address of the stream
Audacious played intermittently, there was a problem with caching, but SMPlayer and VLC did not feel any problems.
In principle, at this stage, our Internet radio station is already working, you need to add music to the playlist and forward the ports on the router, so that our Internet radio station becomes an Internet radio station, and not a radio on the local network.
I have several domains, so first of all I create an “A” entry in the DNS settings with testradio and the static external IP address of my router at home. You do not need to do this.
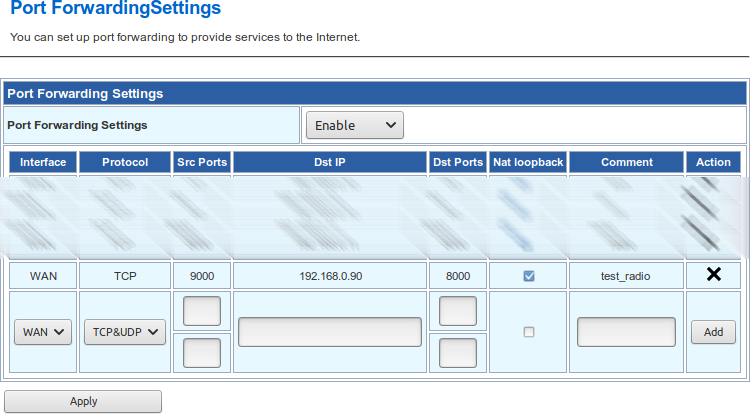
Next, on my router, I configure port forwarding.
Since I already have my own radio station on a large server, I specify the external source port 9000, and the internal local 8000, so from the outside the radio station will broadcast on
Everything, now we got a “real” Internet radio station.
If you do not want to stop there, go further.
We do not broadcast the voice of a DJ, but if necessary it can be implemented, but what is really needed is a convenient interface for managing the playlist.
There are a bunch of management consoles, some can be seen here , but I will use the Pitchfork MPD Client .
This is a full web snout, and yes, we will shoot a cannon at the sparrows and raise a full http server on the mini computer with our radio station:
We also need PHP:
More need
and
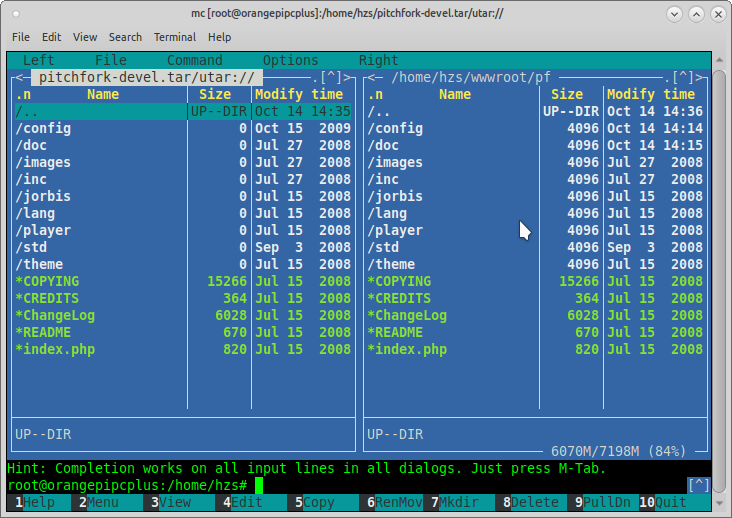
Create the / home / hzs / wwwroot / pf directory in the home folder and unpack the pre-loaded SSH Pitchfork MPD Client into it.
In the apache2 web server configuration file /etc/apache2/sites-available/000-default.conf
we mow and write everything (remembering to change “hzs” in the name of your user):
Then we reboot the http server
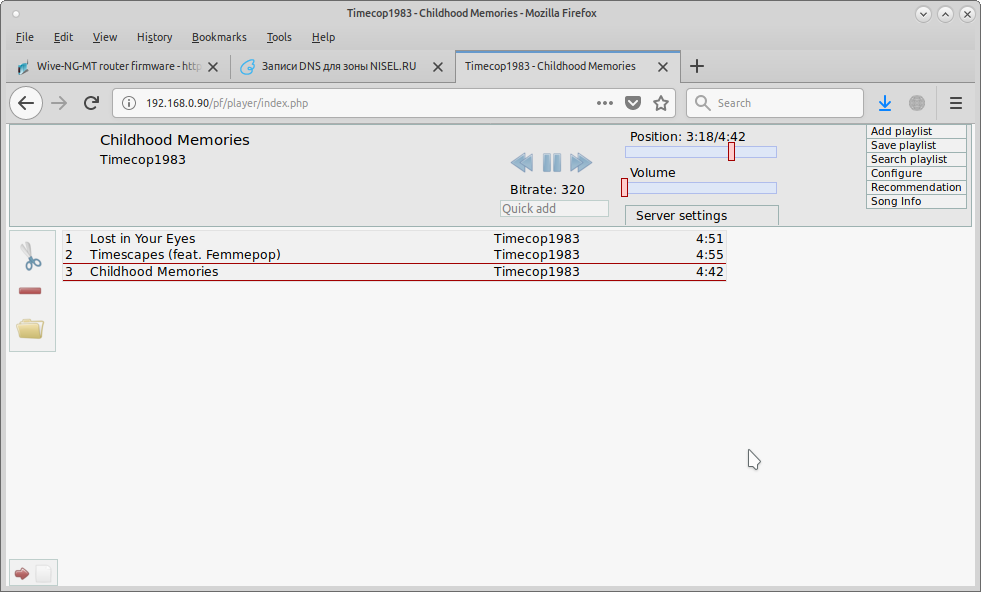
Having come to the address of the IP / pf server (in my case:
We will see the control panel:
Everything is quite simple and intuitive.
Next, click on the folder icon on the right and the Filesystem tab.
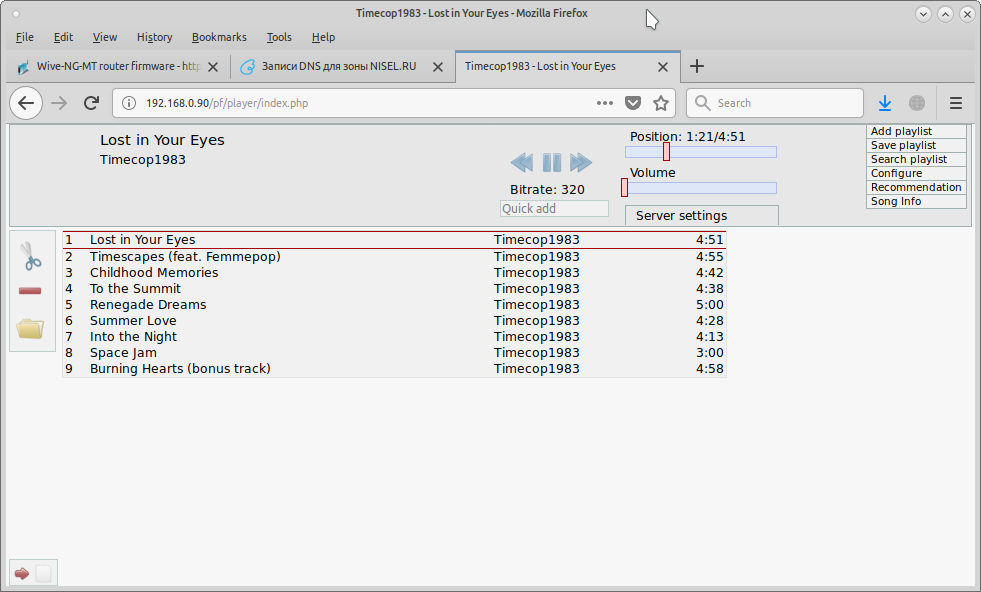
To update the file list, press the Update DB button, then select the remaining files that we still lack in the playlist and click the Add button just below.
We update the page and see that all the files we have added to the playlist:
If you want to hide the player control under the password, you can edit the configuration file:
There is a clear structure of settings.
So, we have a full-fledged Internet radio server with a size of 10 * 7 * 3 centimeters. Of course, using a low-powered server will not pull hundreds of listeners, but at least it will not leave you without your favorite music wherever you are, if there is an Internet nearby.
In principle, you can not continue to read, but for particularly persistent we continue on.
We also have a full-fledged web server, why ...
Well, you already understood.
Create the testradio directory in the root of our web server, create the
This is the simplest example of creating a player for a site, as well as it can display the name of the current composition, updated with ajax every 5 seconds.
Appearance can be finished to taste with the help of css.
The code shows that the audio stream is already going to the address specified in the DNS of my domain.
Do not forget to upload the jquery file (in my case jquery-3.3.1.min.js) to the directory. In general, of course, jquery is brute force and you could make an ajax request without it, but it turned out to be too lazy to think and I used a ready-made piece of code.
Next, create the file
Also in the root of the web server we create the directory “mpc” and in it the file
Why such crutches may be asked by some, the fact is that in my battle radio station the player server is on one server, and the web site muzzle is on a physically different web server.
Since you need to poll the track being played directly on the server with the player, the mpc server web directory should be on it, and the file
The player itself and the site of the radio station may be very far from each other and communicate both by external IP addresses and by addresses clogged in the DNS. For everything to work, you just need to correctly forward ports.
You can refine the project to your liking, well, I spent a pleasant Saturday half of the day.
All successful experiments!
UPD2: The week-long experiment came to its logical conclusion, and I turn off my mini server with a radio station.
If there is nothing like that at hand, or we need a completely silent server, why not try using a mini-computer?
Something like Raspberry Pi 3?
')
No, we want cheaper, so we need something like the Orange Pi. I found a Orange Pi Pc Plus model with 1GB DDR3 RAM and 8GB EMMC Flash.
UPD: Yesterday, everyone somehow took the article too seriously, but in fact the experiment was carried out for the sake of a fan, to see whether it turned out or not. Naturally, there is no talk of any “industrial” use, it's like trying to voice the stadium with an ordinary music center.
What else can we need?
I want to try to configure everything in a simple way, so I still need a twisted pair to the router and a Micro SD memory card, since the operating system cannot be installed directly on the micro computer. I found a 8 gigabyte memory card, this volume is enough.
So, the first thing you need to write the image of the operating system on the memory card.
For servers, I prefer to use time-tested Debian (yes, the younger generation most likely prefers CentOS, but gray-bearded people agree with me that Debian is still very good).
In general, there is a huge amount of ready-made images for Orange Pi on www.orangepi.org/downloadresources , but I still go to www.armbian.com/download and download the torrent file with armbian from dl.armbian.com/orangepipcplus (in my case of Debian_stretch_next.7z).
I have an Orange Pi Pc Plus, you can have any other mini computer, so look for the appropriate image.
After downloading, unpack the archive and see the image in img format. Who wants what, and the image fills, I personally prefer Etcher (https://etcher.io). They inserted a memory card, chose it if you have several carriers connected, pressed the sew button, entered the password if you also have Linux on your desktop or laptop.
The map with the image is ready, you can start to connect everything.
What do we need to start and start setting up our server?
Itself a mini computer, Internet via Ethernet wire and power supply.
And that's all.
No, of course you can get stuck, connect the monitor and keyboard and configure everything directly, but I prefer the keyboard of my laptop, so I will configure my mini computer remotely via SSH.
So let's get started, plug in an Ethernet cable, a Micro SD card with an Armbian image.
It remains only to apply power to the mini computer.
But with the power on the Orange Pi, everything is very sad. What is on a normal mini computer? Right, Micro-USB, and how can I power the Orange Pi? Only 5V through pin connector, which is purchased separately.
A power adapter with a suitable plug is more expensive than just a wire with a standard USB at the end, so you can take it.
If there is no free power supply with USB (and we need not anyhow what, but 2 amps), then we dig in our mailbox with wires, adapters and motherboards for computers (you also have such a box, right?) And find a suitable adapter from of an old tablet, long broken by a child, we rewire the cable and the power for our server is ready.
Well, or just take the charger from the old iRiver disk mp3 player (it is only 4.7 volts and 1.2 amps, but it also works).
We supply power and we are ready to go, strictly speaking, to the point for which everything was started, to create an Internet radio station.
If you, like me, intend to do with a minimum of peripherals, then we need to find out what IP address our mini computer received. The easiest way to find it out is to log into your router and see what IP address the router gave to our server (does your router know how to use DHCP, right?).
Now you can log in via SSH to our server. To whom the SSH client is convenient, he uses that one (doesn’t you have windows, and as for SSH clients, I don’t know about it at all).
In my case, I just slaughter ssh root@192.168.0.88 in the console, agree to add the ECDSA key, the default password for root is “1234”, after logging in we find ourselves in the console of the microcomputer, which immediately suggests changing the root password.
After that, it is proposed to create an unprivileged user account, create it.
Compared with previous versions of the OS, the current version is somewhat simplified in terms of settings and a lot of things are already configured automatically.
Armbian has a very handy setup tool:
armbian-config copy the command to the console and see what may come in handy.We don’t need the system settings yet, but they may need them later, for example, to transfer a tuned system from Micro SD to the built-in 8GB EMMC Flash memory of a mini computer.
The Network section will be useful to us, after all it would be nice to have a server with a static IP address. Our Internet radio station can be connected to the network even via Wi-Fi. Everyone establishes the level of perversion himself, but if you build Internet radio purely for yourself and you don’t plan more than 10 listeners at the same time, then why not pick up our server via Wi-Fi? In extreme cases, you can plug in an Ethernet cable at any time.
So, we decided on the connection type, now we need to configure a static IP address, for this we go to the IP settings and select the desired network interface, after which we say that we want a static address, we start it and save the settings. There is no need to change the mask and gateway, as they are received from your router via DHCP.
After you enter a new IP address and press Enter, your SSH session will immediately hang, as the device will immediately receive a new IP address. Therefore, simply close the window with the terminal and go to our mini computer via SSH using the new IP address.
By the way, since all the functions we will have are administrative in nature, in order not to write constantly before each sudo command, I simply log in to the mini computer as root.
By running
armbian-config again, we can see what else can be configured? In the Personal section we can configure the time zone, locale and host name. I added the ru_RU.UTF-8 UTF-8 locale, it suddenly comes in handy.To apply the settings, you need to exit the settings utility, log out and log in again, or restart the server using the reboot command.
I used the reboot command to make sure that the settings were saved and the server started successfully with them.
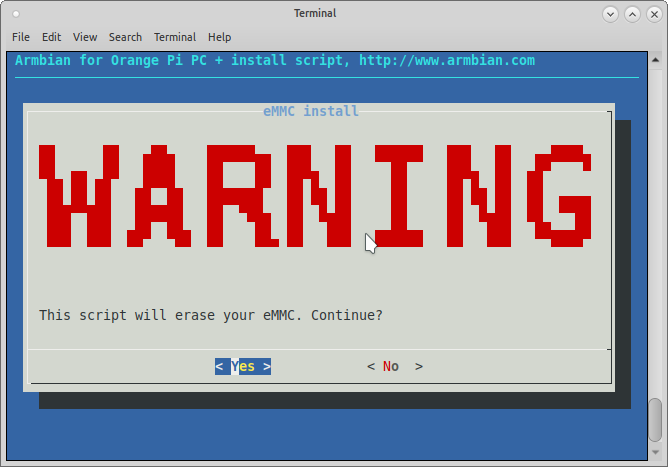
The basic server setup is done and why not install a microSD-based OS on the internal EMMC Flash memory? Of course, if your mini computer has this very memory on board.
To do this, go to
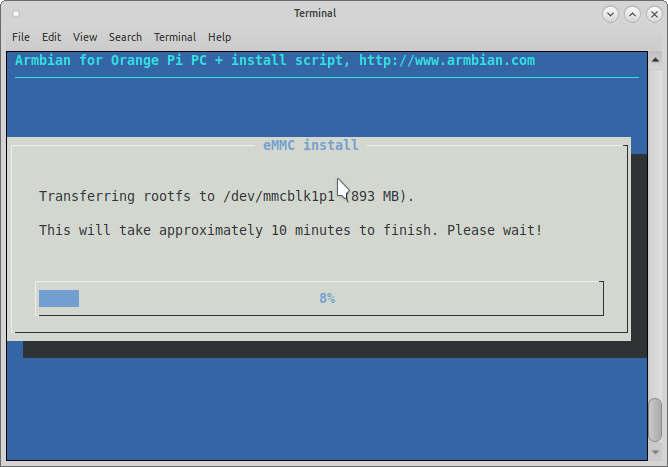
armbian-config - System - Install, select an available drive, click Enter, get hi from the past, agree and choose the type of the ext4 file system.Now we can sit back and wait until the OS is transferred to the internal storage of the mini computer.
After copying is complete, select power off. We wait a couple of seconds until the LED on the mini computer goes out, pull out the power, remove the MicroSD card, stick the power back in and turn on the computer.
Yes, if you do not have an internal memory and you did not transfer the operating system to it, pulling out a MicroSD will most likely not be a very good idea.
After logging into our mini computer via SSH and making sure that everything works, you can begin to tune the radio station itself.
First of all we update information about packages by typing
apt update into the server console.Yes, I love comfort, so I install mc with
apt install mc .I love to do everything from under mc, and if I need to see the console, I just press ctrl + o.
First install the daemon music player itself:
apt install mpd .Together with him a lot of dependencies will be established.
Let's go to the setting. The /etc/mpd.conf file is responsible for the configuration of the daemon, open it with the
nano /etc/mpd.conf command nano /etc/mpd.conf .My username is without hzs privileges, and my configuration file looks like this:
music_directory "/home/hzs/music" playlist_directory "/home/hzs/.mpd/playlists" db_file "/home/hzs/.mpd/tag_cache" log_file "/home/hzs/.mpd.log" pid_file "/home/hzs/.mpd/pid" state_file "/home/hzs/.mpd/state" sticker_file "/var/lib/mpd/sticker.sql" user "hzs" bind_to_address "localhost" restore_paused "yes" metadata_to_use "artist,title" auto_update "yes" audio_output { type "httpd" name "My New Internet Radio Station!!!" encoder "lame" # optional, vorbis or lame port "8000" bind_to_address "0.0.0.0" # optional, IPv4 or IPv6 bitrate "256" # do not define if quality is defined format "44100:16:2" } volume_normalization "yes" filesystem_charset "UTF-8" id3v1_encoding "UTF-8" Everything is clear and without any comments.
To work, you need to create a directory structure from the top of the settings. Please note that the owner for these directories should be an unprivileged user, from which everything will work, in my case hzs.
From under root execute the following commands:
chown -cR hzs:hzs /home/hzs/musicchown -cR hzs:hzs /home/hzs/.mpdIt's time to upload music, we have SSH on the server, so we can connect with our favorite FTP client to our server.
We know the IP address, port 22, the username and password that you specified when creating an unprivileged user, the type of SSH connection. Fill some music for the test in the directory for music specified in the config.
Now the player is running with the wrong config, so stop the daemon and run it again:
service mpd stopservice mpd startFor the simplest daemon control, we
apt install mpc console utility with apt install mpc .After installation we will configure the player a bit:
mpc random onmpc repeat onNow you need to add tracks to a playlist, in the console it is somewhat gimorreyno, but nothing can be done.
We look at the files available to us, which we can add to the playlist:
mpc lsTo add a file to the playlist, in the
mpc add command we must specify the full name of the file being added, the selection by mask does not work:mpc add "01 Lost in Your Eyes.mp3"Watch the resulting playlist:
mpc playlistIt's time to launch our radio station:
mpc playLet's try to listen, for this we open the audio stream of our radio station in any audio player. To do this, enter the address of the stream
http://ip:port , I have it http://192.168.0.90:8000 .Audacious played intermittently, there was a problem with caching, but SMPlayer and VLC did not feel any problems.
In principle, at this stage, our Internet radio station is already working, you need to add music to the playlist and forward the ports on the router, so that our Internet radio station becomes an Internet radio station, and not a radio on the local network.
I have several domains, so first of all I create an “A” entry in the DNS settings with testradio and the static external IP address of my router at home. You do not need to do this.
Next, on my router, I configure port forwarding.
Since I already have my own radio station on a large server, I specify the external source port 9000, and the internal local 8000, so from the outside the radio station will broadcast on
http://_ip:9000 .Everything, now we got a “real” Internet radio station.
If you do not want to stop there, go further.
We do not broadcast the voice of a DJ, but if necessary it can be implemented, but what is really needed is a convenient interface for managing the playlist.
There are a bunch of management consoles, some can be seen here , but I will use the Pitchfork MPD Client .
This is a full web snout, and yes, we will shoot a cannon at the sparrows and raise a full http server on the mini computer with our radio station:
apt install apache2We also need PHP:
apt-get install phpMore need
apt install php7.0-xmland
apt install php-pearCreate the / home / hzs / wwwroot / pf directory in the home folder and unpack the pre-loaded SSH Pitchfork MPD Client into it.
In the apache2 web server configuration file /etc/apache2/sites-available/000-default.conf
nano /etc/apache2/sites-available/000-default.confwe mow and write everything (remembering to change “hzs” in the name of your user):
<VirtualHost *:80> ServerName localhost ServerAdmin webmaster@localhost DocumentRoot /home/hzs/wwwroot <Directory /home/hzs/wwwroot/> Options All AllowOverride All DirectoryIndex index.php index.html index.htm Order Allow,Deny Allow from All Require all granted </Directory> </VirtualHost> Then we reboot the http server
service apache2 restartHaving come to the address of the IP / pf server (in my case:
http://192.168.0.90/pf )We will see the control panel:
Everything is quite simple and intuitive.
Next, click on the folder icon on the right and the Filesystem tab.
To update the file list, press the Update DB button, then select the remaining files that we still lack in the playlist and click the Add button just below.
We update the page and see that all the files we have added to the playlist:
If you want to hide the player control under the password, you can edit the configuration file:
nano /home/hzs/wwwroot/pf/config/config.xmlThere is a clear structure of settings.
So, we have a full-fledged Internet radio server with a size of 10 * 7 * 3 centimeters. Of course, using a low-powered server will not pull hundreds of listeners, but at least it will not leave you without your favorite music wherever you are, if there is an Internet nearby.
In principle, you can not continue to read, but for particularly persistent we continue on.
We also have a full-fledged web server, why ...
Well, you already understood.
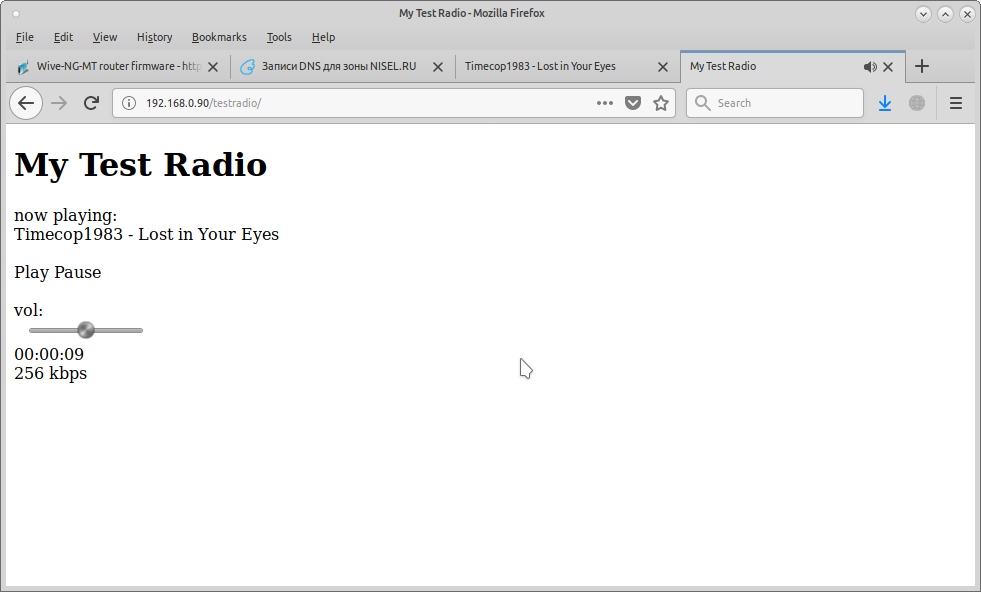
Create the testradio directory in the root of our web server, create the
"index.php" file in it: <!DOCTYPE html> <html xmlns="https://www.w3.org/1999/xhtml" xml:lang="ru-ru" lang="ru-ru" dir="ltr"> <head> <meta http-equiv="content-type" content="text/html; charset=utf-8" /> <title>My Test Radio</title> <script src="jquery-3.3.1.min.js"></script> </head> <body> <h1>My Test Radio</h1> <div id="song"> now playing:<br> <div id="title">now playing</div> <br> <div> <span id="play" type="button">Play</span> <span id="pause" type="button">Pause</span> </div> <br> <div> vol:<br> <input id="volume" type="range" min="0" max="10" value="5" /> </div> <span id="duration"></span> <br> <div>256 kbps</div> </div> <script language="JavaScript"> var audio = new Audio('http://testradio.nisel.ru:9000'); var play = document.getElementById('play'); play.addEventListener('click', function() { audio.play(); }, false); var pause = document.getElementById('pause'); pause.addEventListener('click', function() { audio.pause(); }, false); var volume = document.getElementById('volume'); volume.addEventListener('change', function(){ audio.volume = parseFloat(this.value / 10); }, false); audio.addEventListener("timeupdate", function() { var duration = document.getElementById('duration'); var s = parseInt(audio.currentTime % 60); var m = parseInt((audio.currentTime / 60) % 60); var h = parseInt((audio.currentTime / 3600) % 60); if (s < 10) s = '0' + s; if (m < 10) m = '0' + m; if (h < 10) h = '0' + h; duration.innerHTML = h + ':' + m + ':' + s; }, false); </script> <script language="JavaScript"> function show() { $.ajax({ url: "trackname.php", cache: false, success: function(html){ $("#title").html(html); } }); } $(document).ready(function(){ show(); setInterval('show()',5000); }); </script> </body> </html> This is the simplest example of creating a player for a site, as well as it can display the name of the current composition, updated with ajax every 5 seconds.
Appearance can be finished to taste with the help of css.
The code shows that the audio stream is already going to the address specified in the DNS of my domain.
Do not forget to upload the jquery file (in my case jquery-3.3.1.min.js) to the directory. In general, of course, jquery is brute force and you could make an ajax request without it, but it turned out to be too lazy to think and I used a ready-made piece of code.
Next, create the file
"trackname.php" : <?php echo file_get_contents('http://192.168.0.90/mpc');?> Also in the root of the web server we create the directory “mpc” and in it the file
"index.php" : <?php echo exec('mpc current');?> Why such crutches may be asked by some, the fact is that in my battle radio station the player server is on one server, and the web site muzzle is on a physically different web server.
Since you need to poll the track being played directly on the server with the player, the mpc server web directory should be on it, and the file
"trackname.php" is on the web server of the site itself and loads the file with the description of the track from another server by its IP address.The player itself and the site of the radio station may be very far from each other and communicate both by external IP addresses and by addresses clogged in the DNS. For everything to work, you just need to correctly forward ports.
You can refine the project to your liking, well, I spent a pleasant Saturday half of the day.
All successful experiments!
UPD2: The week-long experiment came to its logical conclusion, and I turn off my mini server with a radio station.
Source: https://habr.com/ru/post/426349/
All Articles