Conference DEFCON 22. GTVHacker Group. Breaking it all: 20 devices in 45 minutes. Part 1
Amir Etemadi: welcome everyone and welcome to the GTVHacker presentation “Breaking Everything in: 20 Devices in 45 Minutes”. We are the creators of the original Google TV products since 2010, as well as products such as Chromecast, Roku and Nest, and we also release exploits for all Google TV devices.
So who are we? I am a research scientist at Accuvant Labs, created by the GTVHacker group, CJ is the team leader and security systems researcher, and also sometimes acts as a technology developer. Hans Nielsen is Matasano's senior security consultant, and Mike Baker is developing firmware and co-founder of OpenWRT.
')
There are 8 members in total in our group, among them Gynophage, right now he is doing a thing called DefCon CTF, Jay Freeman, the creator of Cydia, student Koa Hoang and Tom Dwenger, the greatest expert in APK and everything related to Java.
So why did we decide to hack devices, why not software that we also don’t like? You know, when a device becomes obsolete, reaches its end of life, it is simply thrown into a landfill. In fact, the old devices are killed, and there is no benefit in this, as happened in the case of the Logitech Revue.
We give new life to discarded devices, and we also always strive to make the product better, give it more opportunities, and if we can do it, we do it. We like to answer technical challenges, you know, like puzzles that you like to solve.
The study, of course, is a delightful process, but the essence of this presentation can be expressed in words:
“You have a root!”
In essence, “hacking 20 devices in 45 minutes,” that is, during the presentation, does not leave us much time to spend on each device in detail. Therefore, I will show you a device window that will be included in our Wiki immediately after the presentation. We will acquaint you with technical details, equipment diagrams, everything we can, because it is rather difficult to read. At the bottom of the slide you see the link, you can use it after the presentation to get access to all the things shown during this demonstration. And now I give the floor to my colleague, who will tell you about the “Prospectus of Attacks”.
Hans Nielsen: There are an infinite number of ways to attack devices of this kind. Today, on the example of these 20 devices, we consider 3 basic methods of hacking.
The first is the use of debug ports located in the devices themselves. The second method is that we can use serial ports or EMMC memory cards, this is an outdated version of SD cards to connect to the device and modify the storage. The third method is to get direct access to the OS, which allows you to deploy a whole bunch of commands via the command line to cause the most common errors in consumer electronics.
So, let's talk about the UART - the universal asynchronous transceiver. It is used by developers for debugging equipment and no longer carries any functional load. This is a very simple interface - one wire is for transmission, the other is for receiving, and the third is grounding.

They ask me how old I am - I answer, I am 27 years old, thanks for your question! So, it uses a very simple data exchange protocol, and the port itself works with different voltage levels, for example, 1.8V, 3.3V or 5V, and is a serial port similar to the USB ports on a computer.
So you have several free adapters that allow you to play with your own devices, and I hope you will get as much benefit from them as we could get. So how can you use a UART?
Consider a specific device - Epson Artisan 700/800 MFP, this is a printer, scanner and copier at the same time, which can be used as a network printer. It is controlled by Linux OS 2.6.21 - arm1. What can you do with it? If you open the case, you can see the printed circuit board on which there are 4 contacts: reception, transmission, grounding, power. This is a classic UART connection option.

After connecting our debug port here, we saw the console menu of printer settings.

We can restart the printer, reset the settings, execute an arbitrary shell command, execute any commands that we need, in general, have fun playing with our printer.
The second device is a smart Belkin WeMo socket with Internet control. It allows you to use a mobile phone to turn on your coffee maker and other appliances via the Internet and is widely used by different people.
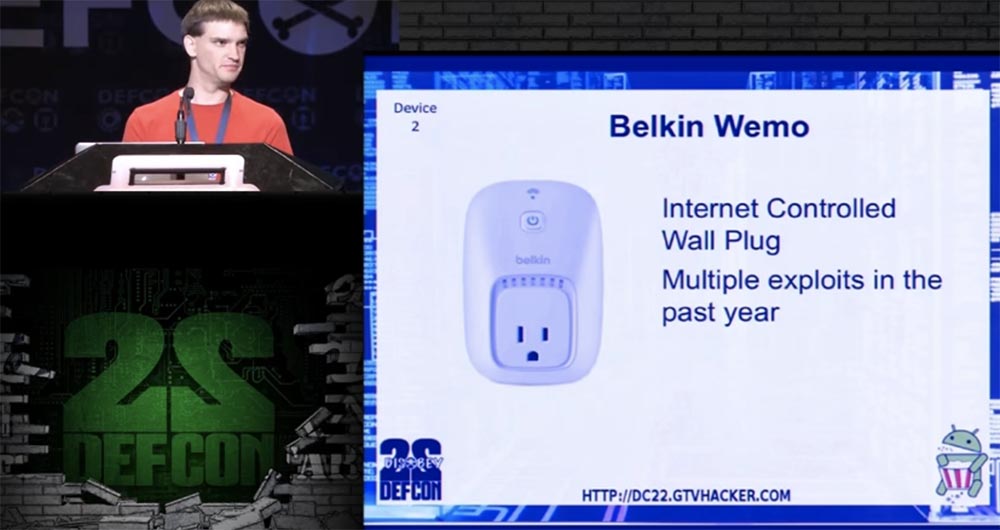
This is a rather small device, so reading the symbols on the circuit board is quite difficult. But we found the contacts of the receiver and transmitter and connected the UART to them. After that, the Internet reported that the device was patched, but it was not true. It turned out that we have only 2 seconds to enter a command, after which the device automatically rebooted.

At the right moment, we managed to enter a command that “killed” the reload script, after which we could do everything we want with this smart socket.
The third device was the smart lamp Greenwave Reality, a competitor to Phillips Hue, which uses the top-level network protocol ZigBee, it has already been talked about a lot. It's funny that it uses a PowerPC microprocessor. During startup, this lamp provides an SSH server, from which we did not have a password.

When we opened the case, we also found contacts for the UART. This device was equipped with the universal open bootloader U-boot, which loads and launches Linux. Using this bootloader, you can do anything - flash the device, change the kernel command line. You can accompany Linux booting with a variety of options, for example, allowing you to see the amount of device memory. We managed to get root-rights by changing the bootloader command line. To do this, we connected through the UART, inserted the module bin / sh into the kernel command line, and so went into the bootloader shell.
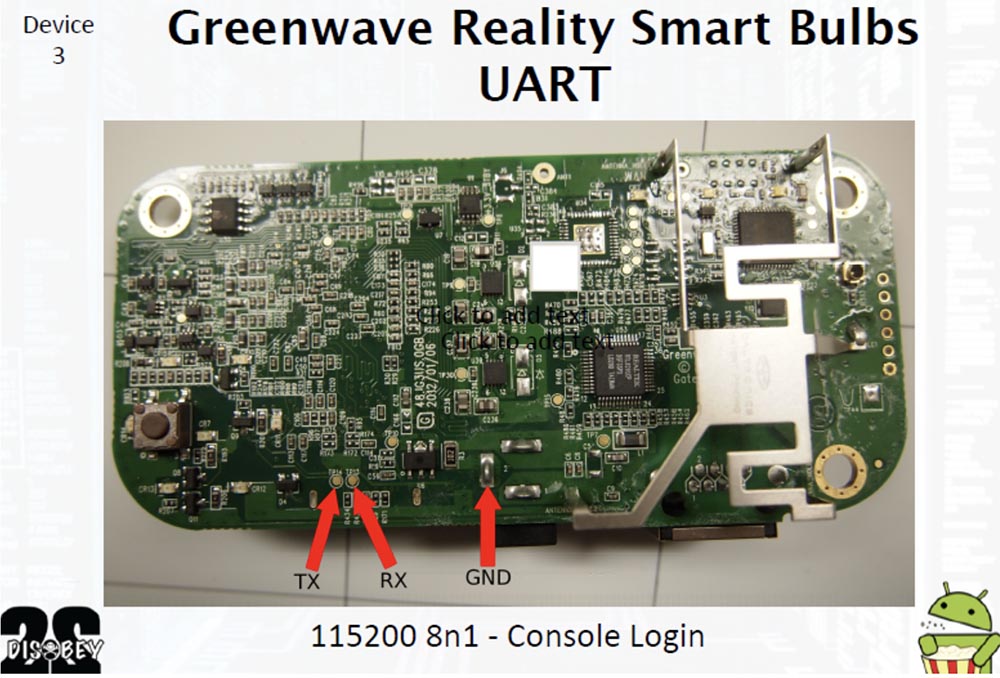
In order to safely use the device in the future, we cracked the password “thinkgreen” to access the root-rights.
The fourth device is File Transporter, a flash drive with the ability to transfer data over the network. This is a kind of portable “cloud” that uses a large hard disk of a classic HDD format with a capacity of 1 TB for storing files. You can connect it to your home network and access files on various home devices.

This "file carrier" appeared on the market recently and is a fairly standard type of device running Linux. This is a pretty funny thing, and removing the case from it, we easily found the adapter to connect the UART.

Here, the U-boot loader was also used, so that, as in the previous case, we were able to get root-rights using the kernel command line. This gave us the opportunity to change the root password and access the device.

The fifth device was the network media player Vizio CoStar LT model ISV-B11. It provides access to the CoStar channel, which previously belonged to the Google TV network. This media player connects to other devices via the Internet or cable through the HDMI output.

It may seem ridiculous that Google TV no longer exists, but still there is our group called GTVHacker. So, in the upper left corner of the printed circuit board in white letters there is a classic connector for connecting a UART of 4 pins in a row. Here we had some difficulties in communicating with the kernel, because after we connected the “flash drive”, we received the message “incomprehensible file system on the flash drive”. We reformatted it into FAT32, after which a message popped up: “I can't find fs.sys”. It looked suspicious, so we did some research.
As a result, it was concluded that during boot you need to have on the flash drive both files - fs.sys and safe-kernel.img1. The first file is a U-Boot script image loader that contains arbitrary U-Boot commands that are executed during the boot process. We used the same technique as when hacking the previous device. Modifying the command line of the kernel gave us the opportunity to hack the kernel and get root-rights. To download a completely new kernel, you can use a combination of these two files located on a flash drive that simply connects to the UART.
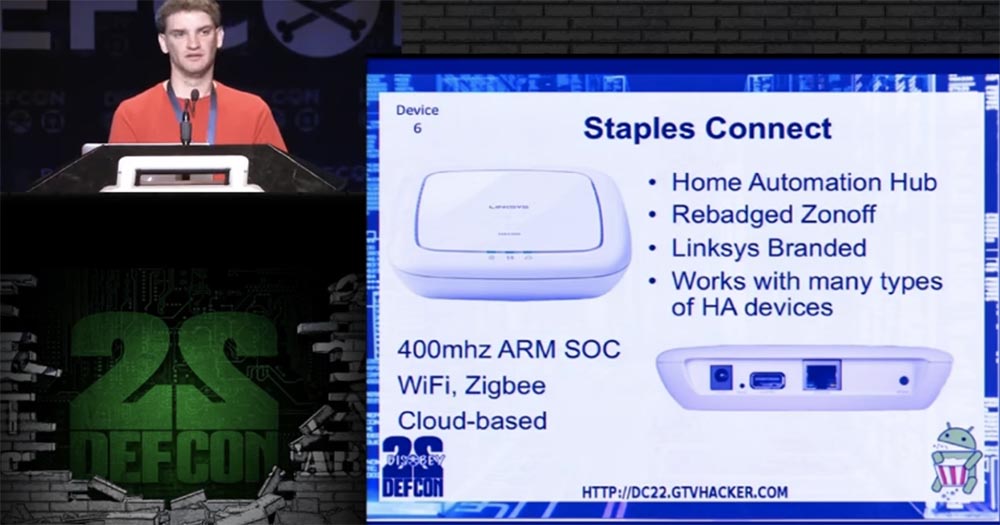
Staples Connect, model Linksys Zonoff was the sixth device that we hacked. This is another small home automation center, a hub that communicates home devices of different brands and different types together. It is equipped with a Wi-Fi module and a USB port for connecting a hard disk and is based on the use of cloud technology.
On the printed circuit board, we found a block with contact sockets. We short-circuited the 29/30 NAND memory pins, due to which an error occurred during the U-Boot bootup and the device rebooted. Having set the default timeout, we launched the setenv bootargs command “console = ttyS0,115200 init = / bin / sh [...]”, we loaded into the root console. Adding the line # dropbear - d 222, we got the opportunity to modify, save and edit U-Boot. The SSH password “oemroot” was used to access the root, which we managed to crack relatively easily. And now I want to introduce you to CJ.
CJ Heres: I want to talk with you about non-volatile memory cards in eMMC format - Embedded MultiMedia Card. They are based on a standard SD memory card chip. This is a pretty cool thing that includes a flash memory module and a flash memory controller. In this case, you do not need to worry about any additional magic bits.

A regular memory card contains additional bits that handle errors and contain an error correction code; this feature is intended for developers. The eMMC memory card uses a regular file system, and it is accessed through a cheap multimedia card reader, which reads equally well both regular SD cards and eMMC. Since this card is structurally a surface-mounted BGA chip, its conclusions are balls of solder deposited on the back side of the contact pad. To work with such a card, it is necessary to identify these contacts, that is, we needed certain balls to connect a debugger.
In order to find the necessary contacts, we first examined the board's design, all sorts of stickers, inscriptions under the resistors, the tracing of the printed substrate and the contacts on the other side of the board. Then we took advantage of intuition and logical analysis, and after that we just pulled out the chip and made sure that it does not work. We were able to connect this card to the MMC reader and reset the settings.
Now let's talk about our 7th device, this is an Amazon Fire TV set-top box with a remote control.
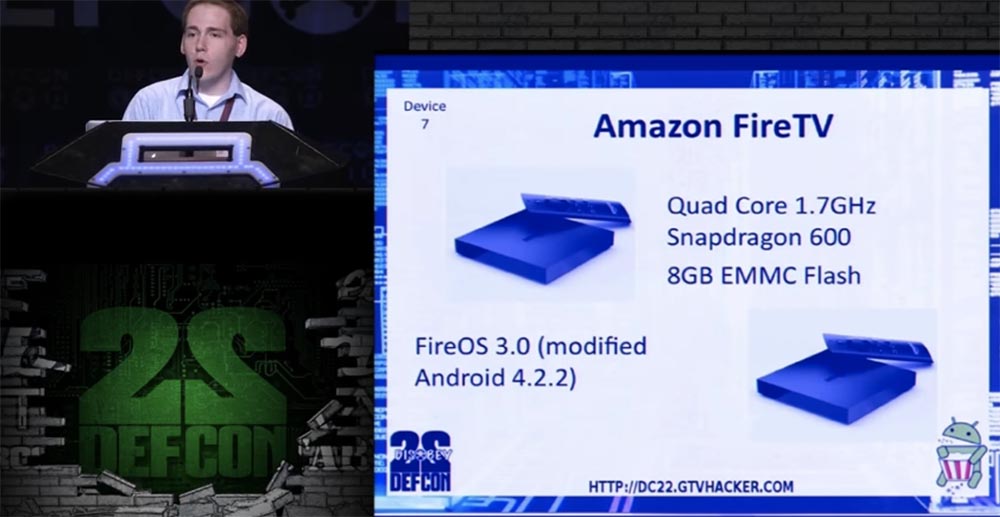
It is equipped with a 4-core Snapdragon 600 processor with a frequency of 1.7 GHz and an eMMC memory drive with a capacity of 8 GB, and is controlled by a modified version of Android 4.2.2 called Fire OS 3.0.
Opening the case, we began to look for pinout eMMC, and during the search, we messed up one device, because we broke one of the contacts when we pulled out the eMMC chip, so we had to work on the second copy of the console.

The left on the slide shows the location of the eMMC contacts, on the right - the UART contacts for 1.8V voltage.
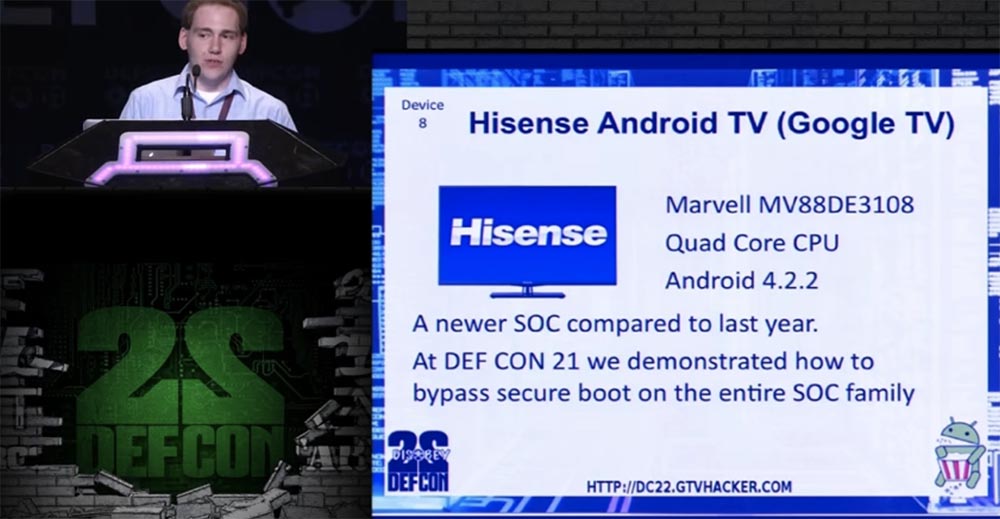
Having successfully cracked this console, we took the device number 8 - Hisense Android TV, a smart TV running “Android”, this is a kind of Google TV, which was re-branded. It uses one of the latest processors, 4-core Marvell MV88DE3108. At last year's DefCon conference, we showed how to bypass the download in safe mode for the processors of this line due to a small error in their firmware.
The next slide shows what the pins for connecting the debugger look like. They are quite small, but we did not need to pull out the flash memory chip.
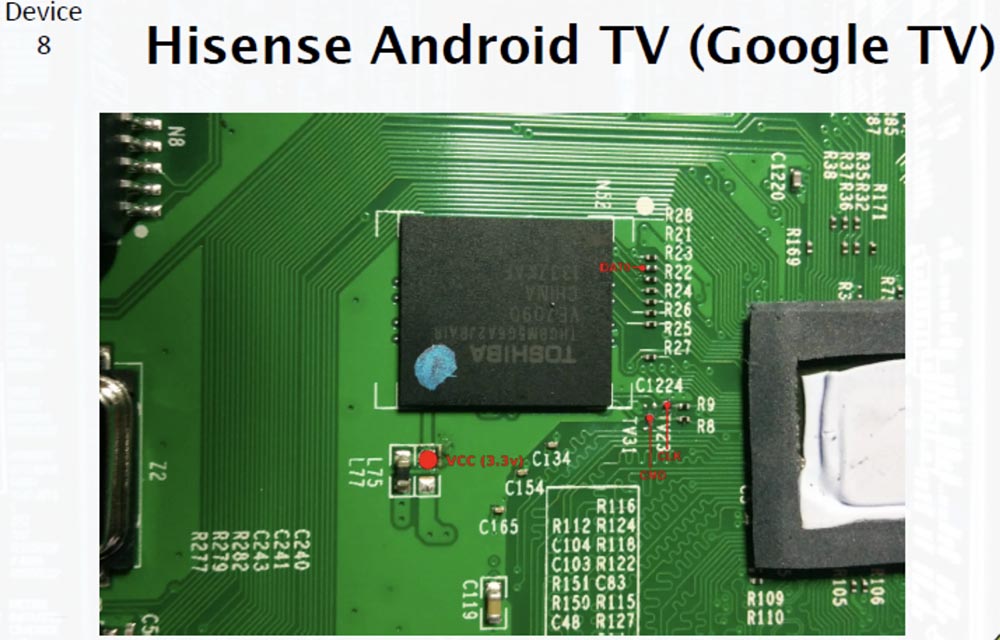
For this device, we had to do a rather extensive procedure - first mount the factory settings section "factory_settings" using the / dev / mmcblk0p3 command, which was saved between downloads, then use the good old # chmod 4755 su mode, you can also use the Super root-rights program SU. Further, through the debug bridge "Android" ADB, you can modify the OS, which is very similar to the original Android.
So, move on. Never say "Device X can not be hacked." In 2011, the USPS postal service published a commercial in which it was stated that “the refrigerator cannot be cracked”. This company has positioned itself as a leader in the field of refrigerator safety. You can watch a video about this on YouTube here . I took it as a challenge. I didn’t have extra $ 3000 to test this statement on a new refrigerator, but you can find anything at the dump, including parts of the discarded refrigerators. I managed to get an electronic filling for the LG Smart Refrigerator, model LFX31995ST, running a slightly outdated Android 2.3 operating system. This is the ninth device that managed to crack.

The “brain” of the refrigerator controlled freezing, food temperature, ice making, drinking water consumption, and the device itself was equipped with a Wi-Fi module, a USB port and an SD memory card.
The UART pins were on the PCB, allowing the Root console to be loaded, and the eMMC chip. This made it possible to mount the system, as in the case of Fire TV, insert the Android stock downloader and download the binary file of the superuser. As it turned out, the parameter ro.secure = 0, that is, the device already had superuser access. Probably, the developers were confident that no one would even take advantage of this opportunity.
Then we started typing commands. I note that you should never trust the data that the user enters and never use shell commands. Entering the ls% s command with the parameter “; reboot” gave the result ls; reboot, after which the system successfully rebooted.
Exhibit number 10, which perfectly demonstrated the possibility of hacking, was a smart TV Vizio Smart TV, model VF552XVT, which is based on a series of smart TVs BCM97XXX Yahoo Powered Smart TV. Although this platform is outdated, it is still widely used.
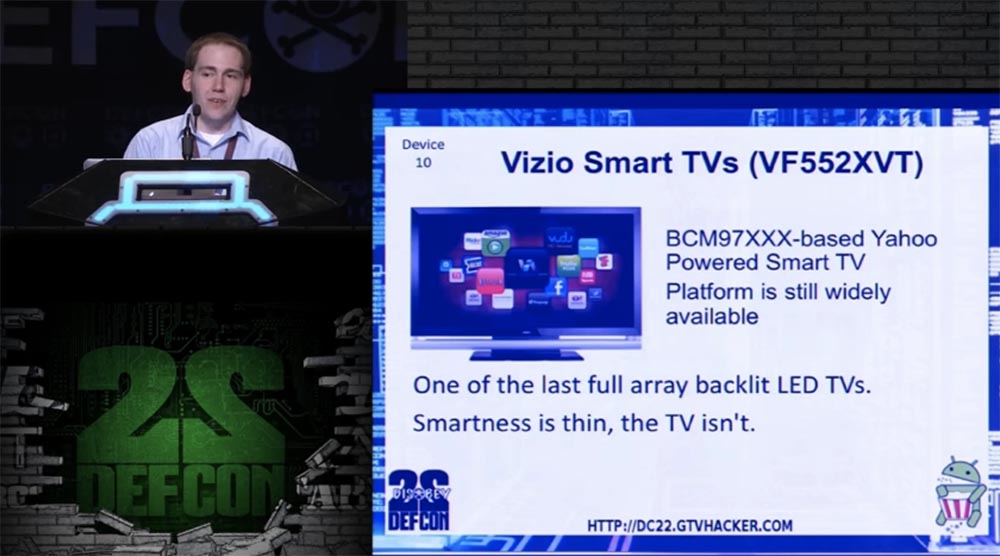
This is one of the latest LED TVs with LED backlighting, which is noticeably thinner than LCD models.
The command line injection is here via a Wi-Fi password, which is a more modern version of the UART debugger via the USB port.

If you set the Wi-Fi mode, you can enter the menu and connect to a Wi-Fi access point. If you manage to enter the commands shown on the slide, you will get access to the root of the system.
To do this, we used a USB UART adapter and then entered a string of several characters that told the kernel where to send the data. After a couple of minutes, we received a data entry error, and then entered a long bash 2 command, which meant that all data coming from this device should be sent to the shell, and all the data from the shell should be sent to the device. Thus, we were able to get root-rights via USB UART.
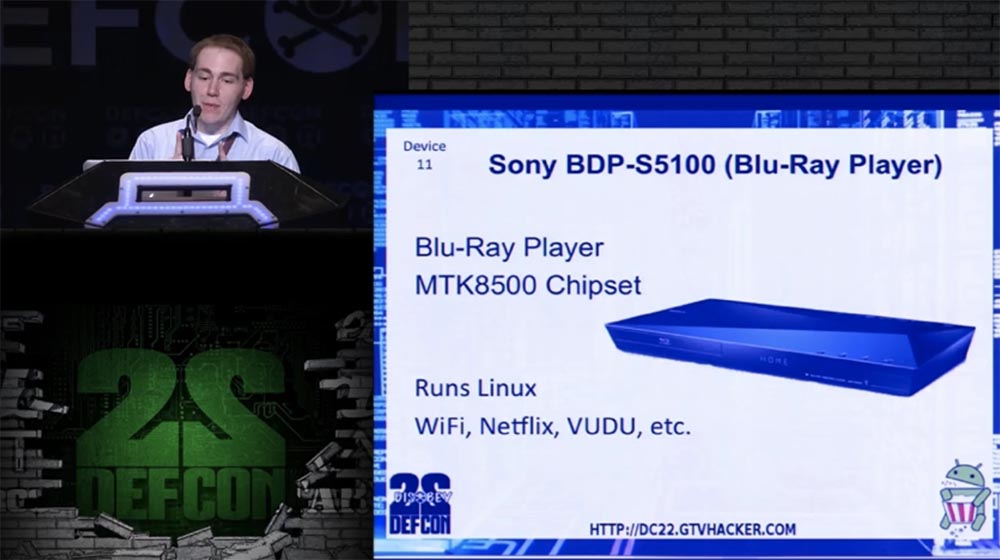
The device number 11 was the Blu-Ray player Sony BDP-S5100 with an MTK 8500 processor running OC Linux. It is equipped with Wi-Fi, access to online movie viewing services Netflix, VUDU and so on.
Another Blu-ray player on the same chipset is device number 12, LG BP530, with similar functionality.

We found that both of these devices have the same chipset firmware error, which supports the use of the SDK.
If you place an empty file called “vudu.txt” in a folder called “vudu” on a flash drive, and also create an exploit “vudu.sh” containing these lines:
Then you can do the following.
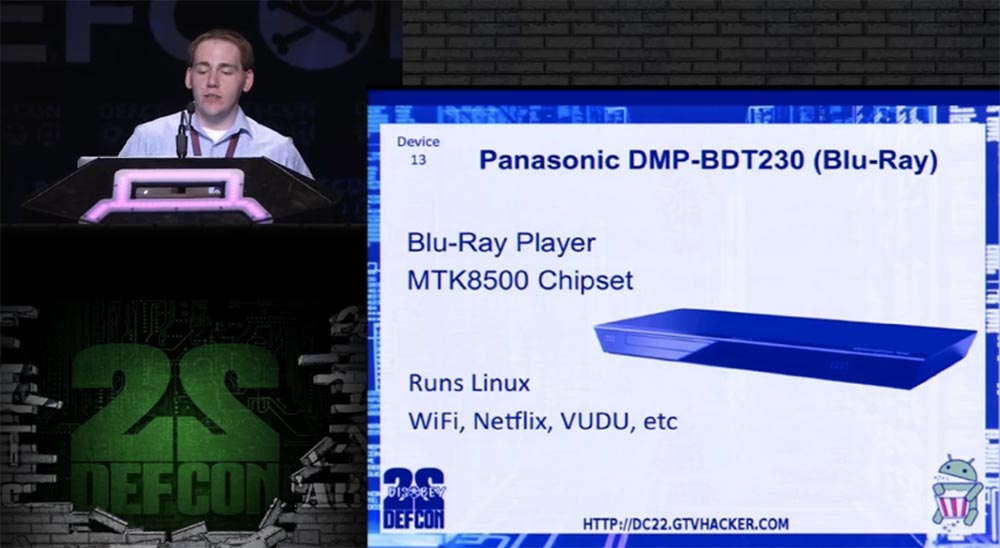
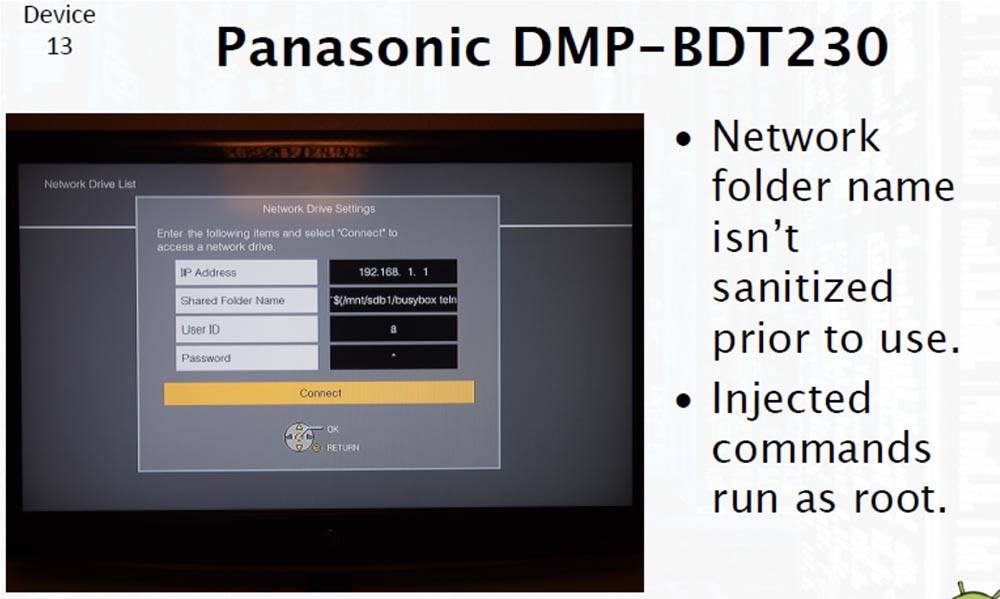
Start the VUDU service, it will execute the shell script as a superuser, and you will be able to use the Telnet connection completely free. This can be done with all the players on the MTK 8500 chipset, including the following device numbered 13 - the Panasonic Blu-Ray Player DMP-BDT230.
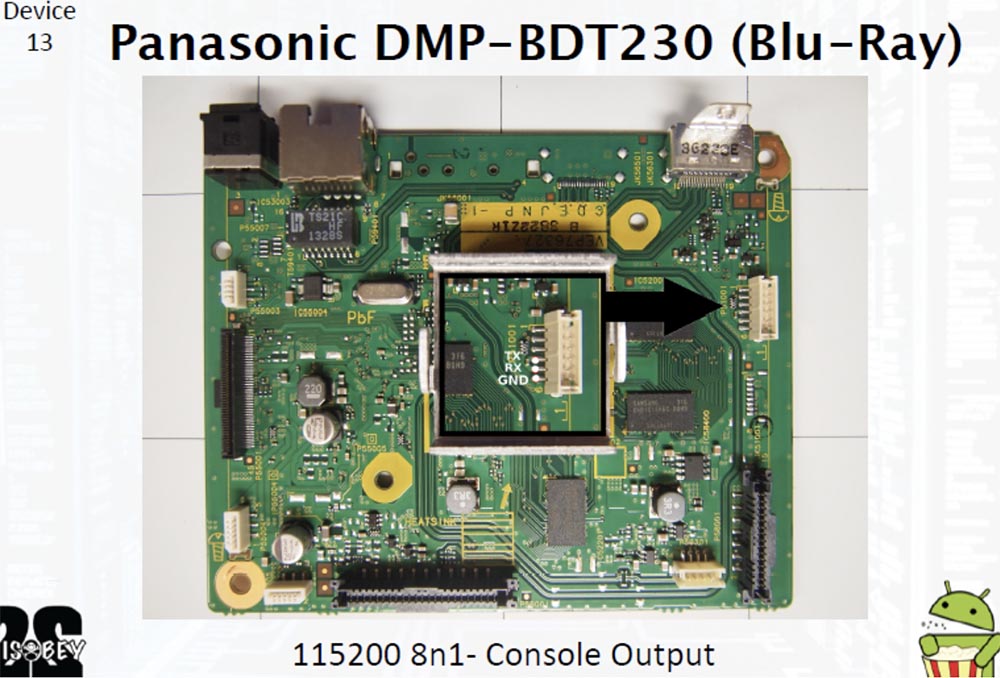
It is very simple. The next slide shows a printed circuit board that has almost the same layout for all the mentioned players. There is a console output 115200 8n1, to which you can connect the UART. This was very important for us, as it allowed us to detect the above error while debugging. However, there is another possibility to inject the command line through the root console using the on-screen menu, since the name of the network folder is not checked before use.
In this way, you can get superuser rights and dispose of all features of the device at your discretion.
24:10 min
Conference DEFCON 22. GTVHacker Group. Breaking it all: 20 devices in 45 minutes. Part 2
Thank you for staying with us. Do you like our articles? Want to see more interesting materials? Support us by placing an order or recommending to friends, 30% discount for Habr users on a unique analogue of the entry-level servers that we invented for you: The whole truth about VPS (KVM) E5-2650 v4 (6 Cores) 10GB DDR4 240GB SSD 1Gbps from $ 20 or how to share the server? (Options are available with RAID1 and RAID10, up to 24 cores and up to 40GB DDR4).
VPS (KVM) E5-2650 v4 (6 Cores) 10GB DDR4 240GB SSD 1Gbps until December for free if you pay for a period of six months, you can order here .
Dell R730xd 2 times cheaper? Only we have 2 x Intel Dodeca-Core Xeon E5-2650v4 128GB DDR4 6x480GB SSD 1Gbps 100 TV from $ 249 in the Netherlands and the USA! Read about How to build an infrastructure building. class c using servers Dell R730xd E5-2650 v4 worth 9000 euros for a penny?
So who are we? I am a research scientist at Accuvant Labs, created by the GTVHacker group, CJ is the team leader and security systems researcher, and also sometimes acts as a technology developer. Hans Nielsen is Matasano's senior security consultant, and Mike Baker is developing firmware and co-founder of OpenWRT.
')
There are 8 members in total in our group, among them Gynophage, right now he is doing a thing called DefCon CTF, Jay Freeman, the creator of Cydia, student Koa Hoang and Tom Dwenger, the greatest expert in APK and everything related to Java.
So why did we decide to hack devices, why not software that we also don’t like? You know, when a device becomes obsolete, reaches its end of life, it is simply thrown into a landfill. In fact, the old devices are killed, and there is no benefit in this, as happened in the case of the Logitech Revue.
We give new life to discarded devices, and we also always strive to make the product better, give it more opportunities, and if we can do it, we do it. We like to answer technical challenges, you know, like puzzles that you like to solve.
The study, of course, is a delightful process, but the essence of this presentation can be expressed in words:
“You have a root!”
In essence, “hacking 20 devices in 45 minutes,” that is, during the presentation, does not leave us much time to spend on each device in detail. Therefore, I will show you a device window that will be included in our Wiki immediately after the presentation. We will acquaint you with technical details, equipment diagrams, everything we can, because it is rather difficult to read. At the bottom of the slide you see the link, you can use it after the presentation to get access to all the things shown during this demonstration. And now I give the floor to my colleague, who will tell you about the “Prospectus of Attacks”.
Hans Nielsen: There are an infinite number of ways to attack devices of this kind. Today, on the example of these 20 devices, we consider 3 basic methods of hacking.
The first is the use of debug ports located in the devices themselves. The second method is that we can use serial ports or EMMC memory cards, this is an outdated version of SD cards to connect to the device and modify the storage. The third method is to get direct access to the OS, which allows you to deploy a whole bunch of commands via the command line to cause the most common errors in consumer electronics.
So, let's talk about the UART - the universal asynchronous transceiver. It is used by developers for debugging equipment and no longer carries any functional load. This is a very simple interface - one wire is for transmission, the other is for receiving, and the third is grounding.
They ask me how old I am - I answer, I am 27 years old, thanks for your question! So, it uses a very simple data exchange protocol, and the port itself works with different voltage levels, for example, 1.8V, 3.3V or 5V, and is a serial port similar to the USB ports on a computer.
So you have several free adapters that allow you to play with your own devices, and I hope you will get as much benefit from them as we could get. So how can you use a UART?
Consider a specific device - Epson Artisan 700/800 MFP, this is a printer, scanner and copier at the same time, which can be used as a network printer. It is controlled by Linux OS 2.6.21 - arm1. What can you do with it? If you open the case, you can see the printed circuit board on which there are 4 contacts: reception, transmission, grounding, power. This is a classic UART connection option.
After connecting our debug port here, we saw the console menu of printer settings.
We can restart the printer, reset the settings, execute an arbitrary shell command, execute any commands that we need, in general, have fun playing with our printer.
The second device is a smart Belkin WeMo socket with Internet control. It allows you to use a mobile phone to turn on your coffee maker and other appliances via the Internet and is widely used by different people.
This is a rather small device, so reading the symbols on the circuit board is quite difficult. But we found the contacts of the receiver and transmitter and connected the UART to them. After that, the Internet reported that the device was patched, but it was not true. It turned out that we have only 2 seconds to enter a command, after which the device automatically rebooted.
At the right moment, we managed to enter a command that “killed” the reload script, after which we could do everything we want with this smart socket.
The third device was the smart lamp Greenwave Reality, a competitor to Phillips Hue, which uses the top-level network protocol ZigBee, it has already been talked about a lot. It's funny that it uses a PowerPC microprocessor. During startup, this lamp provides an SSH server, from which we did not have a password.
When we opened the case, we also found contacts for the UART. This device was equipped with the universal open bootloader U-boot, which loads and launches Linux. Using this bootloader, you can do anything - flash the device, change the kernel command line. You can accompany Linux booting with a variety of options, for example, allowing you to see the amount of device memory. We managed to get root-rights by changing the bootloader command line. To do this, we connected through the UART, inserted the module bin / sh into the kernel command line, and so went into the bootloader shell.
In order to safely use the device in the future, we cracked the password “thinkgreen” to access the root-rights.
The fourth device is File Transporter, a flash drive with the ability to transfer data over the network. This is a kind of portable “cloud” that uses a large hard disk of a classic HDD format with a capacity of 1 TB for storing files. You can connect it to your home network and access files on various home devices.
This "file carrier" appeared on the market recently and is a fairly standard type of device running Linux. This is a pretty funny thing, and removing the case from it, we easily found the adapter to connect the UART.
Here, the U-boot loader was also used, so that, as in the previous case, we were able to get root-rights using the kernel command line. This gave us the opportunity to change the root password and access the device.
The fifth device was the network media player Vizio CoStar LT model ISV-B11. It provides access to the CoStar channel, which previously belonged to the Google TV network. This media player connects to other devices via the Internet or cable through the HDMI output.
It may seem ridiculous that Google TV no longer exists, but still there is our group called GTVHacker. So, in the upper left corner of the printed circuit board in white letters there is a classic connector for connecting a UART of 4 pins in a row. Here we had some difficulties in communicating with the kernel, because after we connected the “flash drive”, we received the message “incomprehensible file system on the flash drive”. We reformatted it into FAT32, after which a message popped up: “I can't find fs.sys”. It looked suspicious, so we did some research.
As a result, it was concluded that during boot you need to have on the flash drive both files - fs.sys and safe-kernel.img1. The first file is a U-Boot script image loader that contains arbitrary U-Boot commands that are executed during the boot process. We used the same technique as when hacking the previous device. Modifying the command line of the kernel gave us the opportunity to hack the kernel and get root-rights. To download a completely new kernel, you can use a combination of these two files located on a flash drive that simply connects to the UART.
Staples Connect, model Linksys Zonoff was the sixth device that we hacked. This is another small home automation center, a hub that communicates home devices of different brands and different types together. It is equipped with a Wi-Fi module and a USB port for connecting a hard disk and is based on the use of cloud technology.
On the printed circuit board, we found a block with contact sockets. We short-circuited the 29/30 NAND memory pins, due to which an error occurred during the U-Boot bootup and the device rebooted. Having set the default timeout, we launched the setenv bootargs command “console = ttyS0,115200 init = / bin / sh [...]”, we loaded into the root console. Adding the line # dropbear - d 222, we got the opportunity to modify, save and edit U-Boot. The SSH password “oemroot” was used to access the root, which we managed to crack relatively easily. And now I want to introduce you to CJ.
CJ Heres: I want to talk with you about non-volatile memory cards in eMMC format - Embedded MultiMedia Card. They are based on a standard SD memory card chip. This is a pretty cool thing that includes a flash memory module and a flash memory controller. In this case, you do not need to worry about any additional magic bits.
A regular memory card contains additional bits that handle errors and contain an error correction code; this feature is intended for developers. The eMMC memory card uses a regular file system, and it is accessed through a cheap multimedia card reader, which reads equally well both regular SD cards and eMMC. Since this card is structurally a surface-mounted BGA chip, its conclusions are balls of solder deposited on the back side of the contact pad. To work with such a card, it is necessary to identify these contacts, that is, we needed certain balls to connect a debugger.
In order to find the necessary contacts, we first examined the board's design, all sorts of stickers, inscriptions under the resistors, the tracing of the printed substrate and the contacts on the other side of the board. Then we took advantage of intuition and logical analysis, and after that we just pulled out the chip and made sure that it does not work. We were able to connect this card to the MMC reader and reset the settings.
Now let's talk about our 7th device, this is an Amazon Fire TV set-top box with a remote control.
It is equipped with a 4-core Snapdragon 600 processor with a frequency of 1.7 GHz and an eMMC memory drive with a capacity of 8 GB, and is controlled by a modified version of Android 4.2.2 called Fire OS 3.0.
Opening the case, we began to look for pinout eMMC, and during the search, we messed up one device, because we broke one of the contacts when we pulled out the eMMC chip, so we had to work on the second copy of the console.
The left on the slide shows the location of the eMMC contacts, on the right - the UART contacts for 1.8V voltage.
Having successfully cracked this console, we took the device number 8 - Hisense Android TV, a smart TV running “Android”, this is a kind of Google TV, which was re-branded. It uses one of the latest processors, 4-core Marvell MV88DE3108. At last year's DefCon conference, we showed how to bypass the download in safe mode for the processors of this line due to a small error in their firmware.
The next slide shows what the pins for connecting the debugger look like. They are quite small, but we did not need to pull out the flash memory chip.
For this device, we had to do a rather extensive procedure - first mount the factory settings section "factory_settings" using the / dev / mmcblk0p3 command, which was saved between downloads, then use the good old # chmod 4755 su mode, you can also use the Super root-rights program SU. Further, through the debug bridge "Android" ADB, you can modify the OS, which is very similar to the original Android.
So, move on. Never say "Device X can not be hacked." In 2011, the USPS postal service published a commercial in which it was stated that “the refrigerator cannot be cracked”. This company has positioned itself as a leader in the field of refrigerator safety. You can watch a video about this on YouTube here . I took it as a challenge. I didn’t have extra $ 3000 to test this statement on a new refrigerator, but you can find anything at the dump, including parts of the discarded refrigerators. I managed to get an electronic filling for the LG Smart Refrigerator, model LFX31995ST, running a slightly outdated Android 2.3 operating system. This is the ninth device that managed to crack.
The “brain” of the refrigerator controlled freezing, food temperature, ice making, drinking water consumption, and the device itself was equipped with a Wi-Fi module, a USB port and an SD memory card.
The UART pins were on the PCB, allowing the Root console to be loaded, and the eMMC chip. This made it possible to mount the system, as in the case of Fire TV, insert the Android stock downloader and download the binary file of the superuser. As it turned out, the parameter ro.secure = 0, that is, the device already had superuser access. Probably, the developers were confident that no one would even take advantage of this opportunity.
Then we started typing commands. I note that you should never trust the data that the user enters and never use shell commands. Entering the ls% s command with the parameter “; reboot” gave the result ls; reboot, after which the system successfully rebooted.
Exhibit number 10, which perfectly demonstrated the possibility of hacking, was a smart TV Vizio Smart TV, model VF552XVT, which is based on a series of smart TVs BCM97XXX Yahoo Powered Smart TV. Although this platform is outdated, it is still widely used.
This is one of the latest LED TVs with LED backlighting, which is noticeably thinner than LCD models.
The command line injection is here via a Wi-Fi password, which is a more modern version of the UART debugger via the USB port.
If you set the Wi-Fi mode, you can enter the menu and connect to a Wi-Fi access point. If you manage to enter the commands shown on the slide, you will get access to the root of the system.
To do this, we used a USB UART adapter and then entered a string of several characters that told the kernel where to send the data. After a couple of minutes, we received a data entry error, and then entered a long bash 2 command, which meant that all data coming from this device should be sent to the shell, and all the data from the shell should be sent to the device. Thus, we were able to get root-rights via USB UART.
The device number 11 was the Blu-Ray player Sony BDP-S5100 with an MTK 8500 processor running OC Linux. It is equipped with Wi-Fi, access to online movie viewing services Netflix, VUDU and so on.
Another Blu-ray player on the same chipset is device number 12, LG BP530, with similar functionality.
We found that both of these devices have the same chipset firmware error, which supports the use of the SDK.
If you place an empty file called “vudu.txt” in a folder called “vudu” on a flash drive, and also create an exploit “vudu.sh” containing these lines:
mount –t overlayfs –o overlayfs /etc/passwd echo "root::0:0:root:/root:/bin/sh" > /etc/passwd /mnt/rootfs_normal/usr/sbin/telnetd Then you can do the following.
Start the VUDU service, it will execute the shell script as a superuser, and you will be able to use the Telnet connection completely free. This can be done with all the players on the MTK 8500 chipset, including the following device numbered 13 - the Panasonic Blu-Ray Player DMP-BDT230.
It is very simple. The next slide shows a printed circuit board that has almost the same layout for all the mentioned players. There is a console output 115200 8n1, to which you can connect the UART. This was very important for us, as it allowed us to detect the above error while debugging. However, there is another possibility to inject the command line through the root console using the on-screen menu, since the name of the network folder is not checked before use.
In this way, you can get superuser rights and dispose of all features of the device at your discretion.
24:10 min
Conference DEFCON 22. GTVHacker Group. Breaking it all: 20 devices in 45 minutes. Part 2
Thank you for staying with us. Do you like our articles? Want to see more interesting materials? Support us by placing an order or recommending to friends, 30% discount for Habr users on a unique analogue of the entry-level servers that we invented for you: The whole truth about VPS (KVM) E5-2650 v4 (6 Cores) 10GB DDR4 240GB SSD 1Gbps from $ 20 or how to share the server? (Options are available with RAID1 and RAID10, up to 24 cores and up to 40GB DDR4).
VPS (KVM) E5-2650 v4 (6 Cores) 10GB DDR4 240GB SSD 1Gbps until December for free if you pay for a period of six months, you can order here .
Dell R730xd 2 times cheaper? Only we have 2 x Intel Dodeca-Core Xeon E5-2650v4 128GB DDR4 6x480GB SSD 1Gbps 100 TV from $ 249 in the Netherlands and the USA! Read about How to build an infrastructure building. class c using servers Dell R730xd E5-2650 v4 worth 9000 euros for a penny?
Source: https://habr.com/ru/post/424907/
All Articles