Deploying vCloud Extender

When it is decided to build a hybrid cloud, it is important to choose the right tool for migrating virtual machines. Such a tool is VMware vCloud Director Extender. Let's look at how to prepare the infrastructure for expansion into the cloud environment.
vCloud Director Extender was announced as a component of a VMware vCloud Director 9. It was released in October 2017. He replaced the already proven VMware vCloud Connector. The product is based on the “H4 engine” solution deployed on Photon OS (VMware's own operating system).
')
For details - welcome under the cat ... (many pictures!)
Opportunities
This product allows you to solve the following tasks:
- allows you to build "stretched" L2 networks between the local infrastructure and the provider cloud, without the need to introduce additional equipment or software on the client side;
- Carry out the transfer of virtual machines from the organization’s infrastructure to the provider’s cloud infrastructure, minimizing idle client services;
- The transfer of virtual machines can be automated according to a schedule, which will allow you to select a time window for the smallest load on the company’s network, as well as to migrate without personnel participation, freeing up their time for other tasks.
Migration can be carried out both in cold and in hot mode, which allows to minimize the possible downtime of the client service. In this case, the whole process is controlled from the familiar interface of the VMware vCenter Server web client.
- Cold migration . Allows you to migrate a switched off machine for its subsequent launch in the vCloud Director environment. This procedure is essentially the same as exporting a virtual machine to an OVF template and then importing it into vCloud Director, but it requires less administrative action.
- Warm migration. Allows you to migrate an enabled virtual machine, with a minimum RPO (Recovery Point Objective) - 5 minutes. For the migration, you will need to deploy an additional Edge Gateway Standalone component that will allow you to pick up the L2VPN tunnel with the border router of the virtual data center organization. The final process of this migration is the automatic shutdown of the virtual machine in the client infrastructure and the launch of the replica in the cloud.
- Hot migration to a preloaded seed of a virtual machine (Warm migration with preloaded seed). At the same time, a copy can be uploaded either via cold migration or imported via an OVF template. The migration process itself is also performed for an enabled virtual machine with an RPO of 5 minutes.
Before looking at each of the views separately, let's take a look at the solution architecture, its components and the client infrastructure deployment process.
Solution Architecture
The process of deployment and preparation of the infrastructure can be divided into five steps. Daniel Paluszek at his presentation at the VMWorld 2018 US conference was able to briefly describe all the steps in one slide.
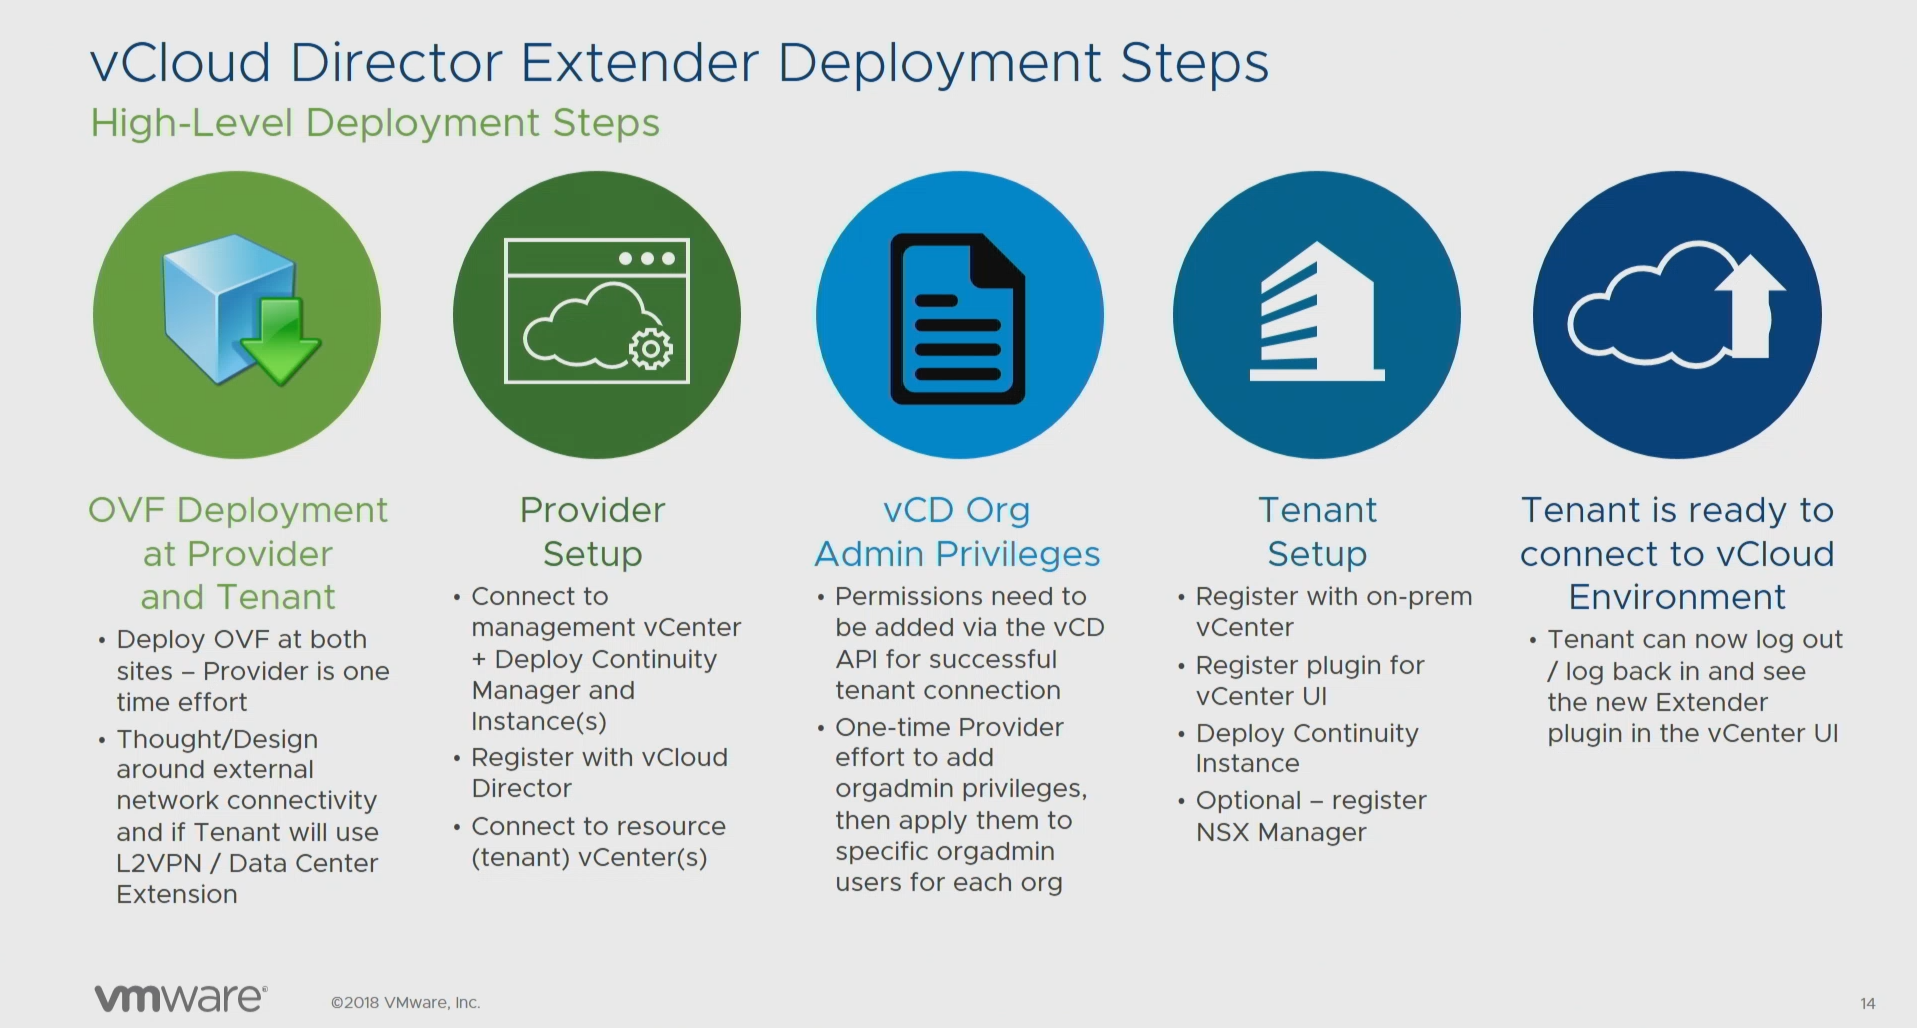
- Deploy VM OVF Templates. Designing public network connections, preparing L2VPN and expanding data center networks.
- Configure and deploy provider infrastructure components. Register with vCloud Director and link to VMware vCenter .
- Assigning extended rights for the organization administrator role on the vCloud Director side.
- Configure and deploy client infrastructure nodes.
- Readiness for migration!
You can watch the recording of his speech in his blog .
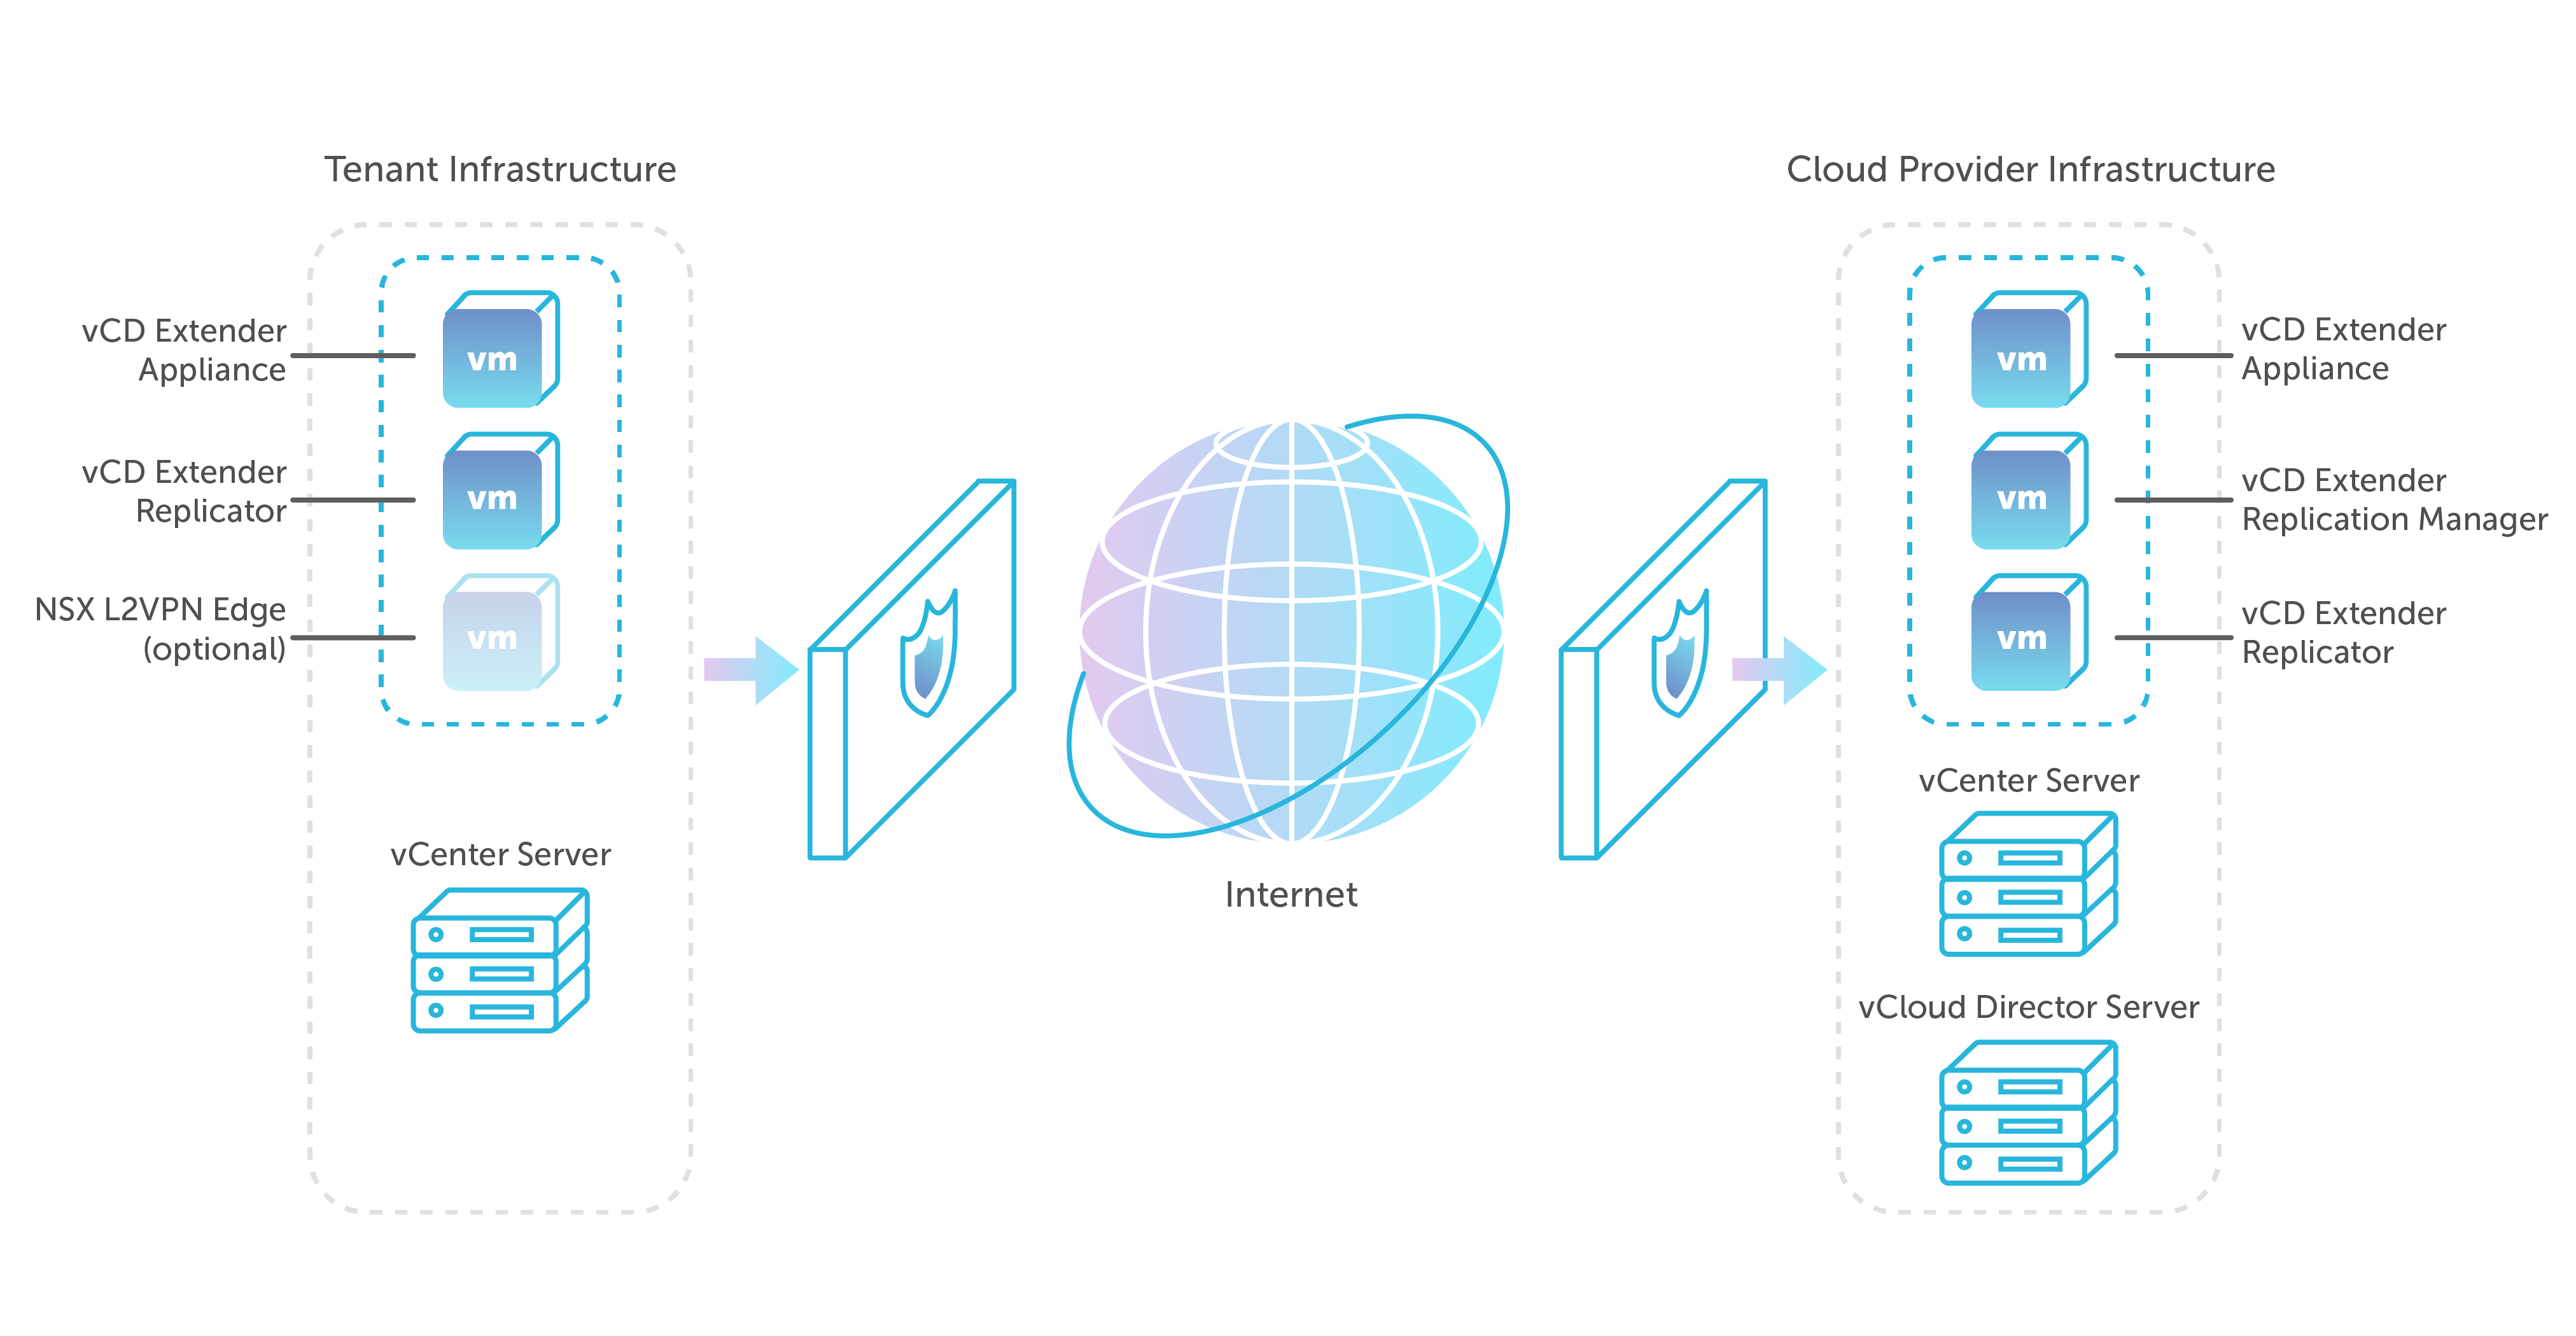
Provider infrastructure nodes
The following components are deployed in the IT infrastructure of the provider.
- vCD Extender Appliance . The main component of the infrastructure is vCloud Director Extender, which provides a web interface for configuring and managing the rest of the components. Its installation is the process of deploying an OVA template downloaded from the VMware portal.
- vCD Extender Replication Manager . The control component of the replicators. It is presented in a single copy and only on the side of the provider. Its installation is done from the applining web interface.
- vCD Extender Replicator . The component responsible for transferring replicated data. In the case of the provider, it is responsible for receiving the data of the replicated virtual machines. Its deployment also comes from the applining web interface. The provider can have several replicators deployed to evenly distribute the load, and each must have a separate public IP address.
Customer infrastructure nodes
The customer should deploy the following components:
- vCD Extender Appliance . The same component as the provider, except that it is deployed at the client. It also provides a web interface for managing and deploying already client nodes.
- vCD Extender Replicator . Replicator responsible for outbound replication of data.
- NSX Edge Gateway Standalone. An optional component that is required to raise the L2-VPN tunnel with the organization of vCloud Director and stretch the organization's network. Only needed in case of hot migrations. However, the deployment of a full-fledged NSX infrastructure is not required
In more detail all components are described in official documentation: here and here .
Infrastructure preparation
From the provider
Network preparation and design of public network connections
At this stage, you will need to plan the network architecture of the solution, allocate public addresses, create public and private DNS records, and configure the external firewall / NAT.
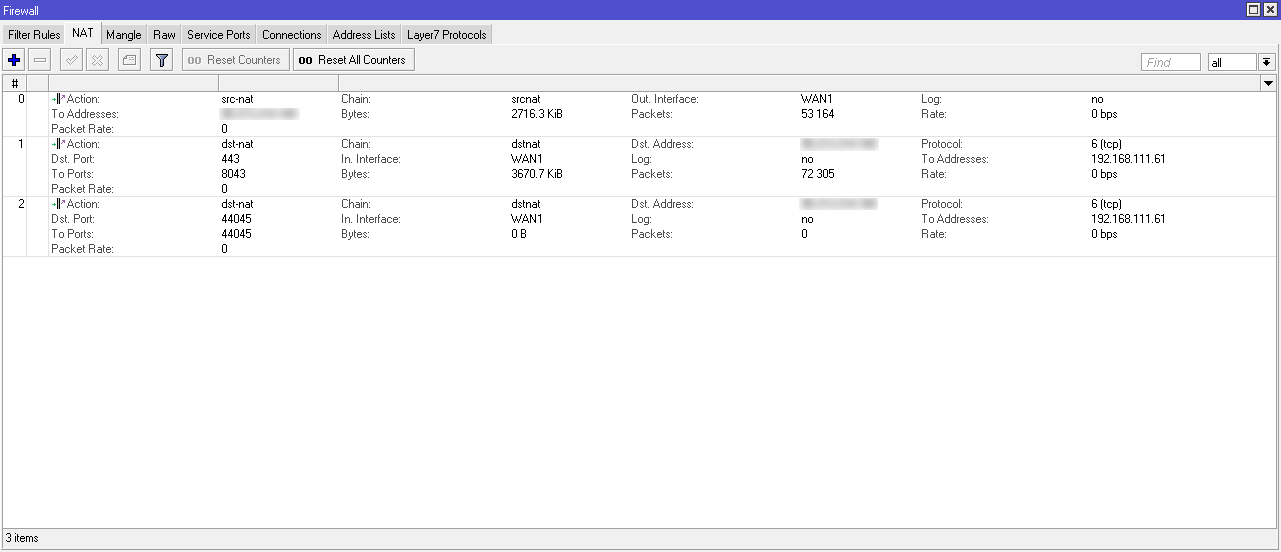
For firewall / NAT, the following rules should be configured.
| Traffic source | Public destination address | External destination port | Broadcast port | Private destination address |
| the Internet | External-IP-1 | TCP: 443 | TCP: 443 | vCD-Extender appliance IP |
| the Internet | External-IP-2 | TCP: 443 | TCP: 443 | Replication manager IP |
| the Internet | External-IP-2 | TCP: 8044 | TCP: 8044 | Replication manager IP |
| the Internet | External-IP-2 | TCP: 44045 | TCP: 44045 | IP Replicator |
It is also worth considering that up to the infrastructure of the customer traffic should be allowed on ports 443 (tcp) and 44045 (tcp) . A little further we will consider setting up the infrastructure of the customer, but for now let's continue to talk about the provider.
Deploying and configuring provider components
The product itself can be downloaded from the VMware portal as an OVA template here :
- Log in to the portal with your credentials.
- Go to the download section of vCloud Director components for version 9.1.
- Open the Drivers & Tools tab
- Download the vCloud Director Extender 1.1.0.1 component

Once all the preparations have been made and the required files have been uploaded, you can proceed with the deployment of the product itself. For the provider and the customer, the same virtual machine pattern is used.
When the template is loaded, you can begin to deploy it.
To do this, follow these steps:
- Launch vCenter Server Web Client.
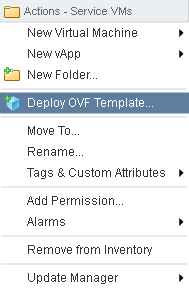
- Right-click on the icon named vCenter and select Deploy OVF Template .
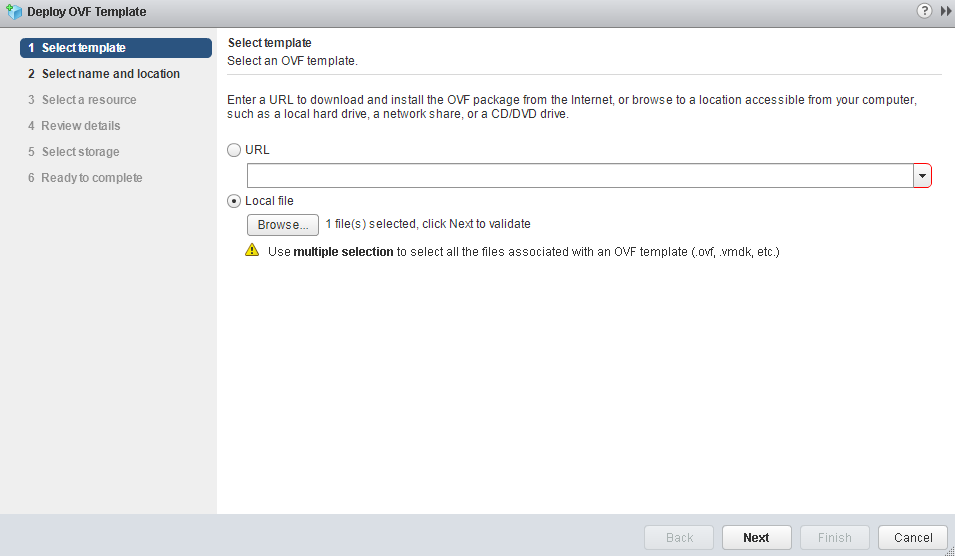
- Specify the path to our file, click Next and follow the wizard’s instructions.
- The process will need to specify the type of deployment. By default, cx-connector will be specified - this type is required for the client infrastructure. For provider infrastructure, select cx-cloud-service . Below we indicate the network parameters: NTP, GW, DNS and Static IP. Using DHCP is not supported.
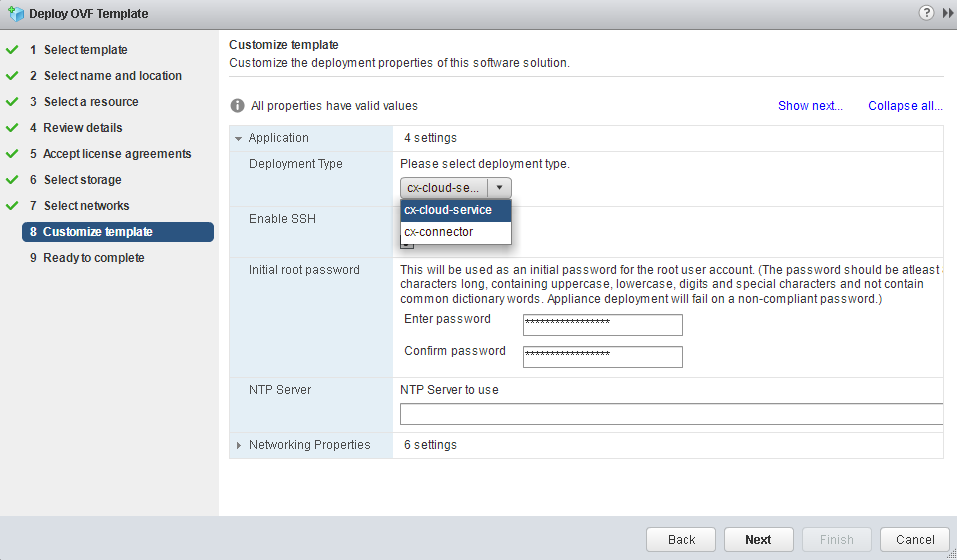
It is important to comply with the requirements for password complexity, otherwise we will get an error when we try to access the web interface. In this case, the deployment procedure will have to be repeated from the beginning. - Once the template is deployed, the virtual machine must be enabled. After booting the OS, you can see the following welcome screen.
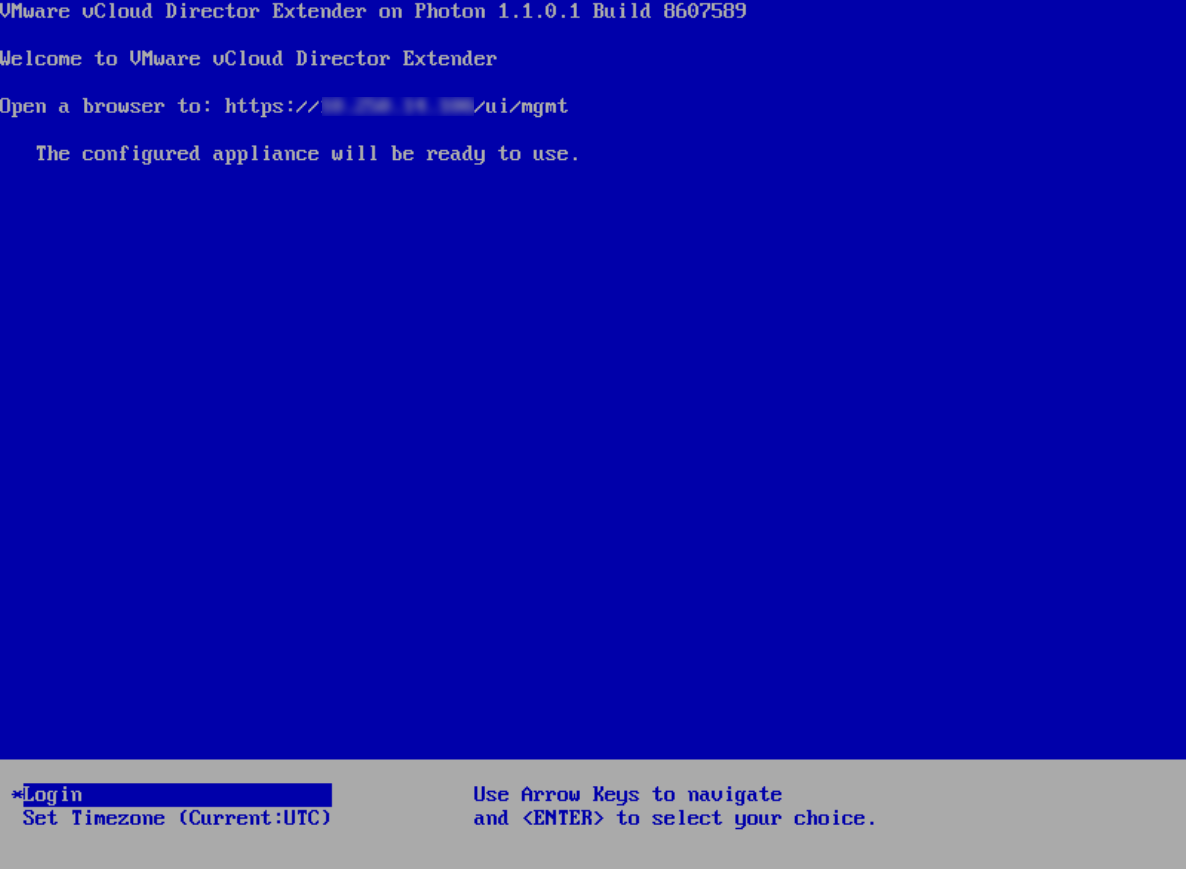
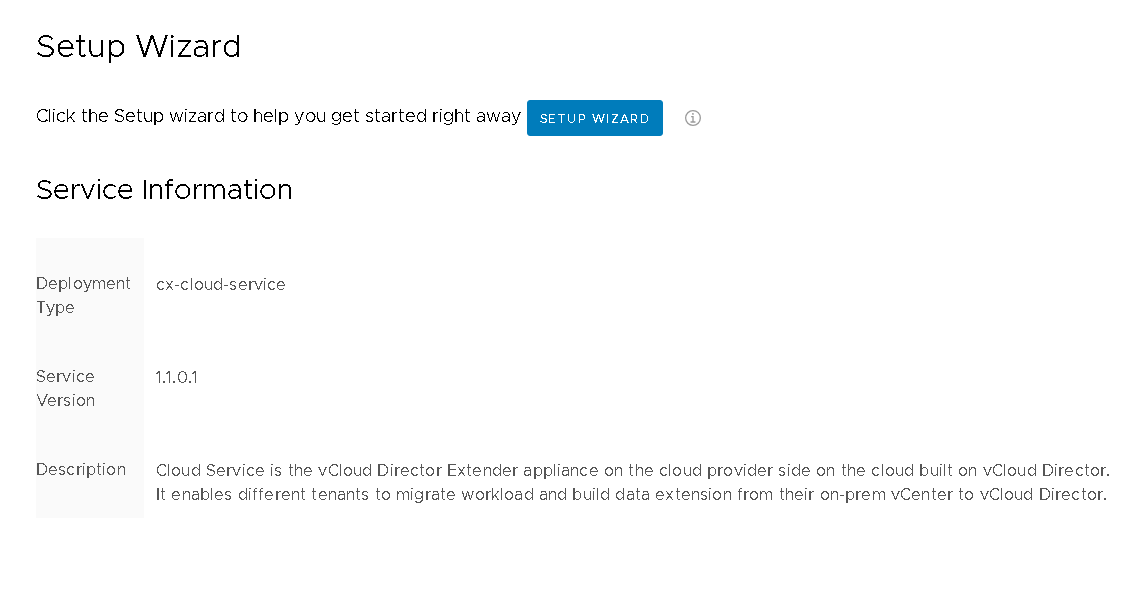
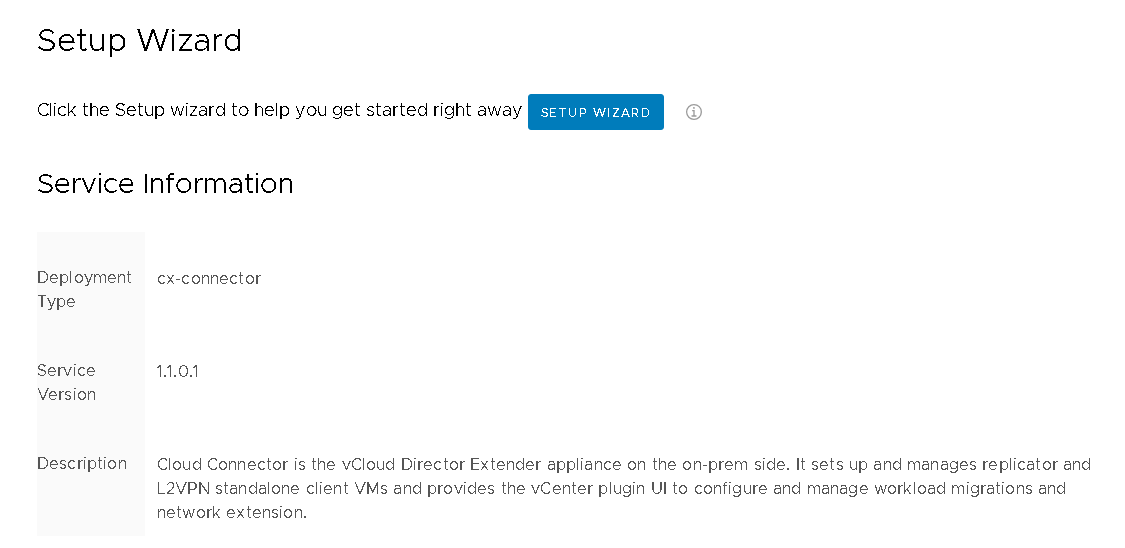
As we are offered, run the browser and go to https: // XXXX / ui / mgmt - In a friendly web interface, we will launch the Setup Wizard , where we will be offered to go through several simple and intuitive steps.
- In the first step, you will need to connect the vCloud Director Extender appliance to the vCenter server, where the rest of the infrastructure components will be located.

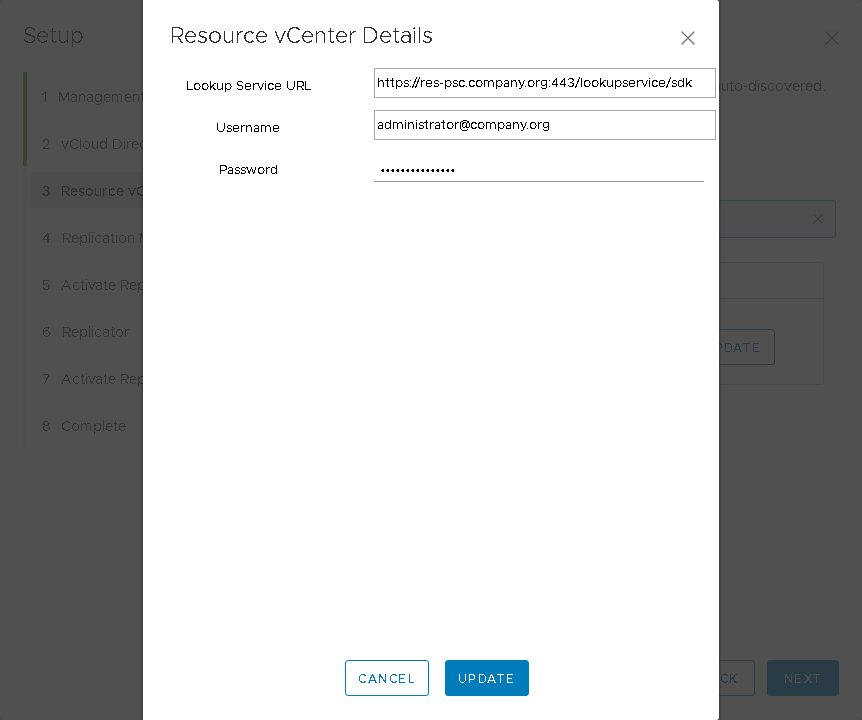
If vCenter is deployed with an external Platform Service Controller , then in the Lookup Service URL column you will need to specify the following address:
https: // [IP_or_hostname] / lookupservice / sdk .
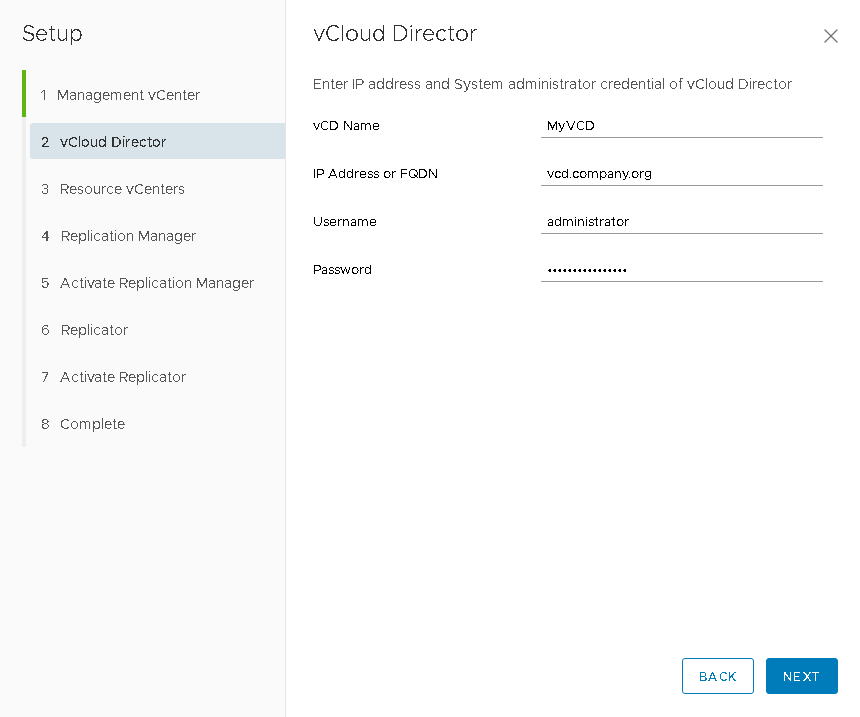
If you deploy a vCenter with an embedded Platform Service Controller , then this field can be left blank. - In the second step, we specify the connection parameters for the vCloud Director : management address and administrator credentials.
- In the next step, the resource vCenter will be automatically determined, i.e. the vCenter whose computing resources are allocated to vCloud Director users. You will only need to update the registration data: lookupservice and administrator credentials.
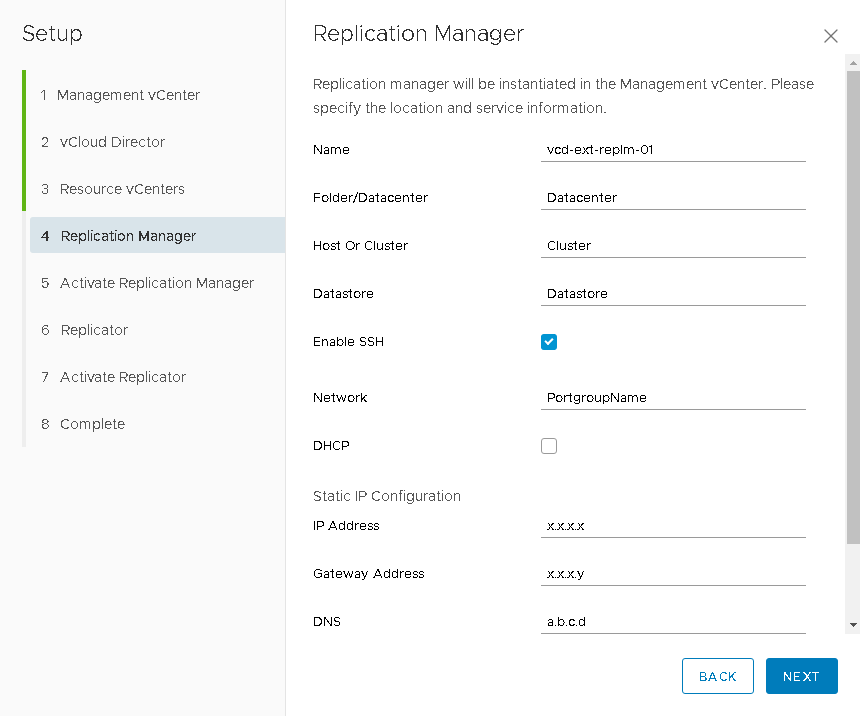
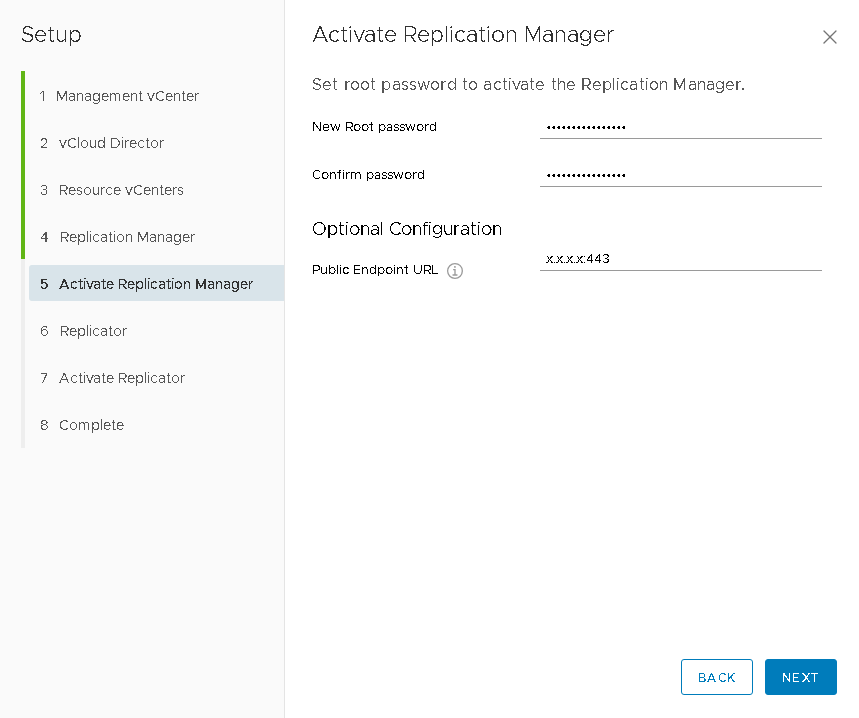
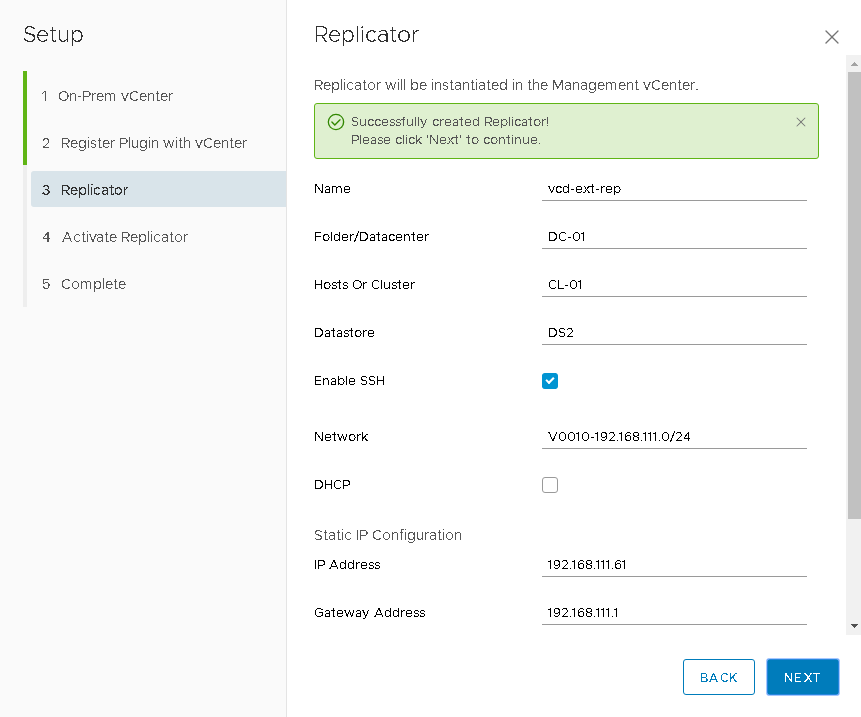
- Then you need to set the parameters for the vCloud Extender Replication Manager virtual machine. After the virtual machine has been deployed and loaded, the next step will be available with its activation, where you will need to set an administrator password and a public connection address with TCP port 443 .
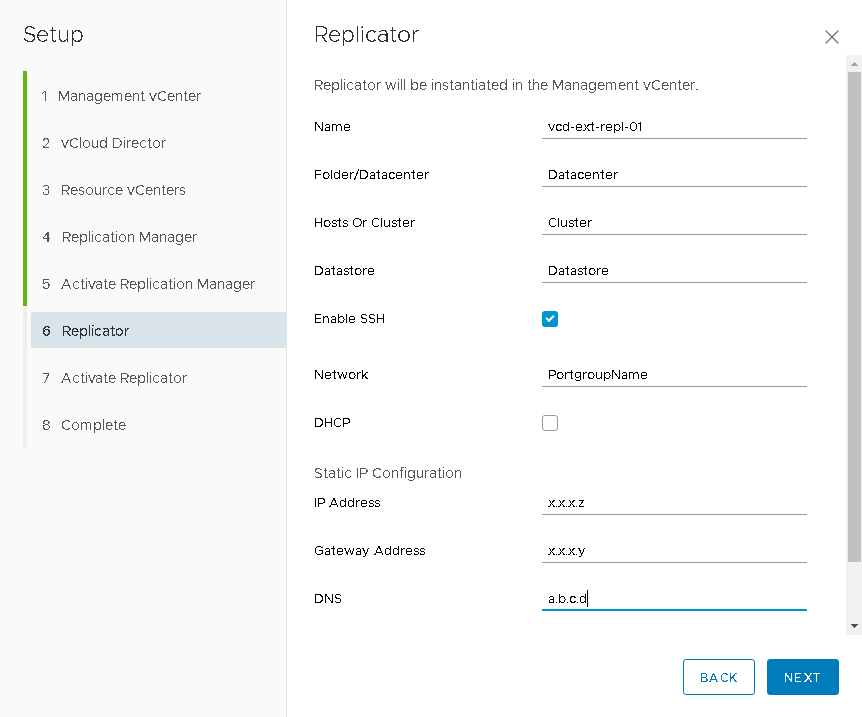
- Next, by analogy with the previous step, we specify the vCloud Extender Replicator virtual machine parameters and, by analogy, activate it by setting the administrator password, the public address with port 44045 , as well as the lookupservice and vCenter resource credentials, It is this component that will be responsible for transferring replicated data to the “destination”.
- At this we can say that on the provider side, all components are deployed and you can proceed to the preparations on the customer side.
But there is a small "but"! Before any of your customers can connect to your cloud and start migrating their virtual machines, you need to add additional permissions for the organization administrator role, which is not a trivial task. Here I would like to thank Daniel Palusek for preparing a simple PowerShell script that will facilitate this task.
You can view the script in its official blog .
From the customer
Before proceeding with the deployment of vCloud Director Extender components on the customer side, you should also familiarize yourself with the official documentation and pay attention to the system requirements:
- VMware vSphere version not lower than 5.5u3;
- availability of an Internet channel with a bandwidth of at least 100Mbps;
- Dedicated static IP addresses for all components
- for applining and replicator, you need to allocate a total of 4 vCPU, 12Gb vRAM and 22 Gb HDD;
- VMware NSX Edge will require another 6 vCPU, 8Gb RAM and about 3Gb HDD;
- On the side of the provider, additional preparation of permissions for the administrator role of the vCloud Director organization is required.
It is advisable to notify the support service provider in advance of your desire to use this product. It is possible to use “thin” (thin-provisioning) disks, which will allow to reduce the occupied disk space, otherwise it is better not to save.
DNS setup
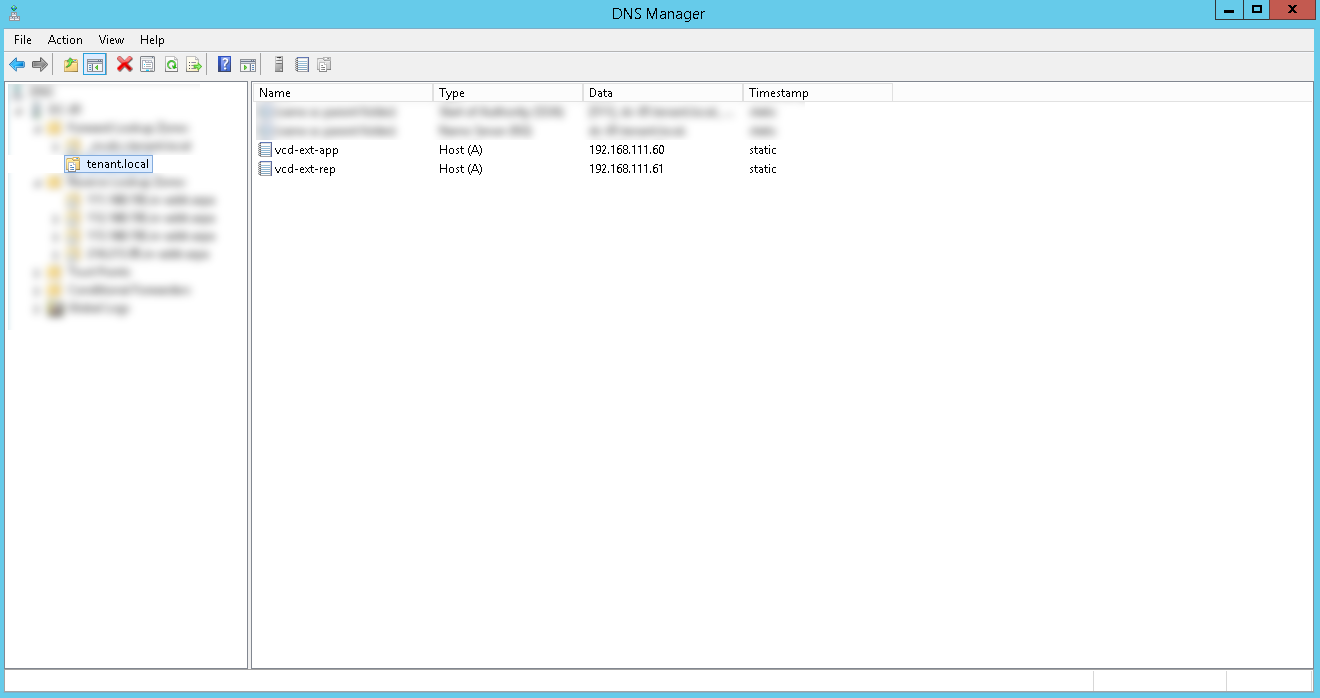
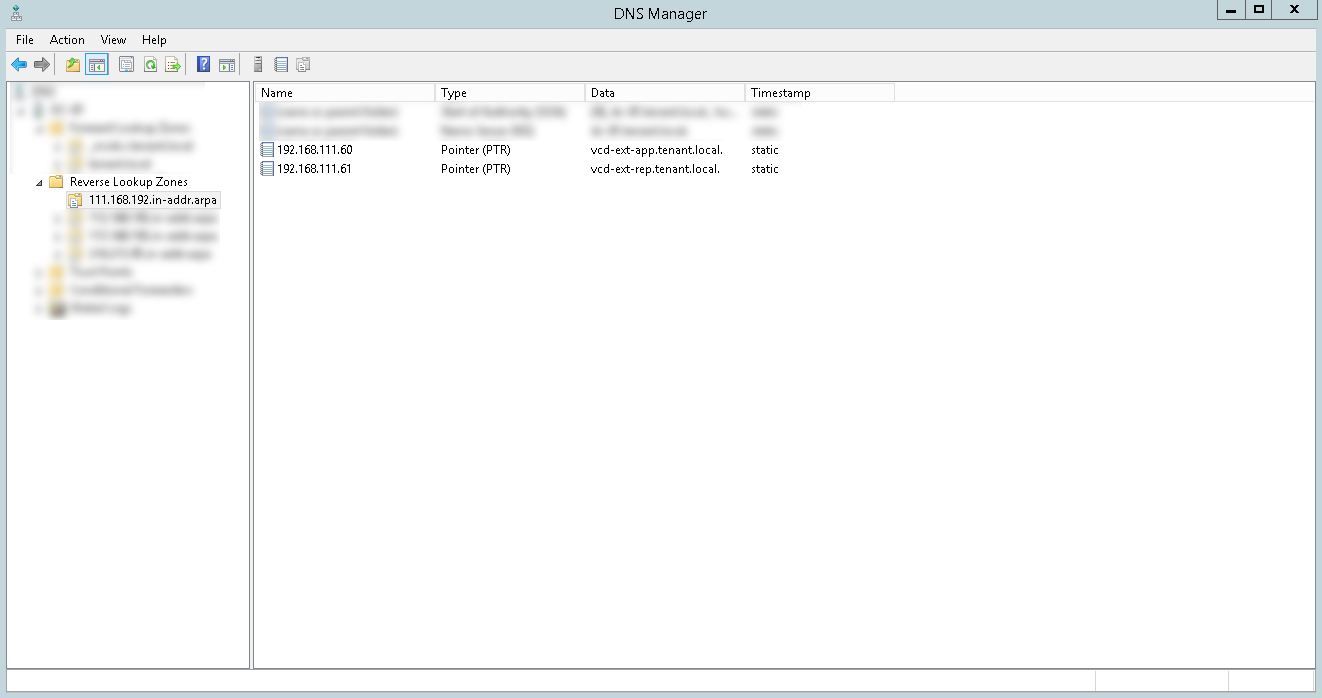
Before starting the installation, you will need to create A- and PTR-records on the DNS server in the organization's network, as well as configure the Firewall / NAT rules.
When configuring NAT, you need to configure the following rules:
- Public IP: 443 to Replicator IP: 8043 ;
- Public IP: 44045 to Replicator IP: 44045 .
Deployment
The deployment will use the same virtual machine pattern as the provider. You can download it from the VMware portal .
The first steps in the deployment will be similar to those described earlier: select the deployment from the OVF template, specify the template file, specify the computational and disk resources. The following steps take a closer look:
- We set the type of deployment and network settings. By default, the cx-connector will be specified - this type is required for the client infrastructure. We specify NTP, GW, DNS and, most importantly, Static IP.
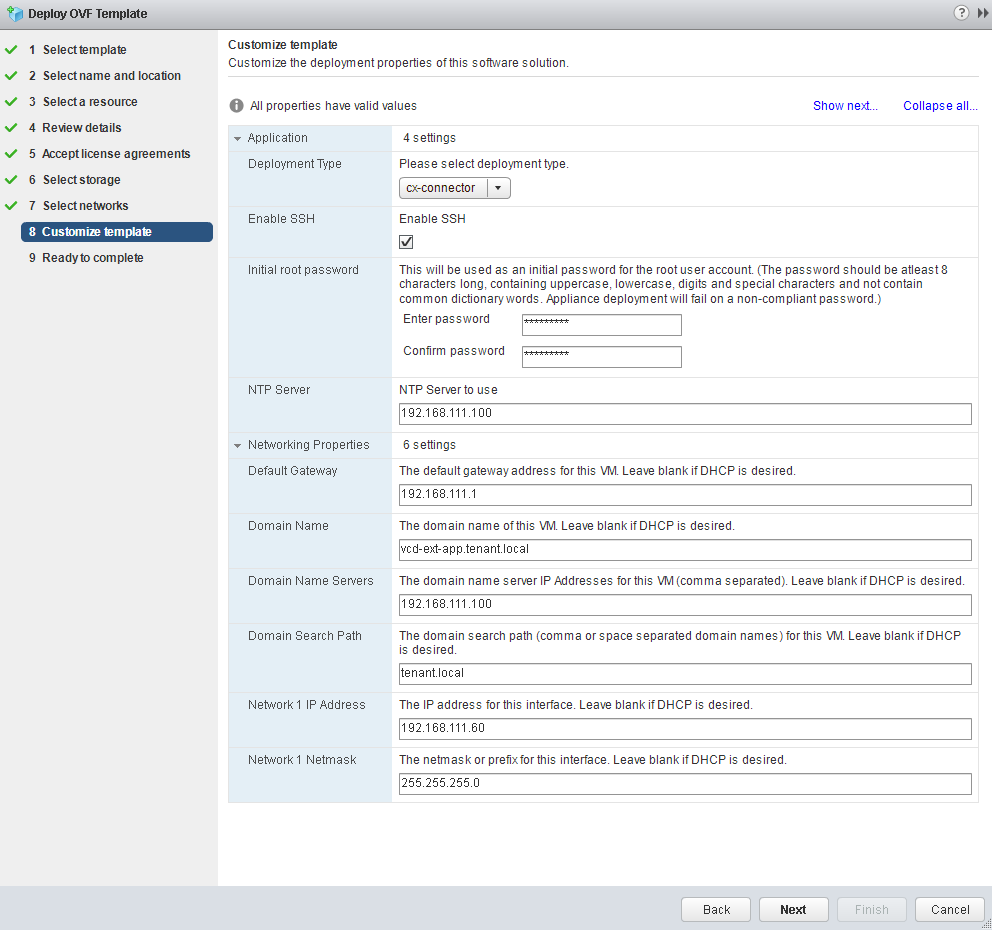
Password complexity requirements are the same as on the provider side. - Next, go the same way: turn on the virtual machine, wait until it loads and in the web browser go to xxxx / ui / mgmt , and run the Setup Wizard .
- Specify the connection parameters to the local vCenter . If vCenter is deployed with an external Platform Service Controller , then in the Lookup Service URL column you will need to specify the address of the form:
https: // [IP_or_hostname] / lookupservice / sdk .
If you deploy a vCenter with an embedded Platform Service Controller , then this field can be left blank.
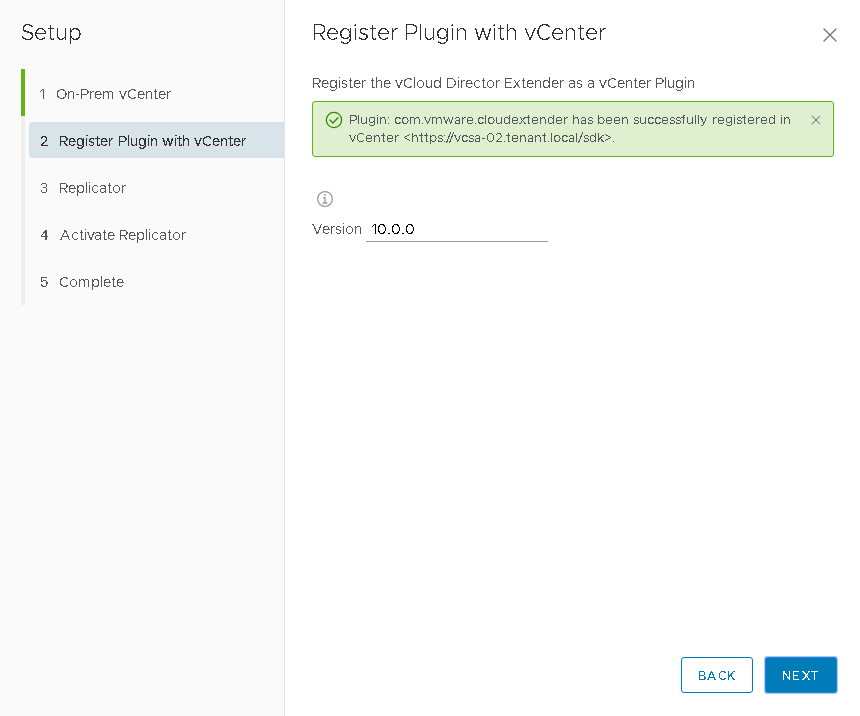
- We install and register the plugin in the vCenter Server interface, through which the migration of virtual machines will be managed. The version of the plug-in can be left unchanged, but if it is reinstalled in the future, the version will need to be upgraded.
- Enter the parameters of the virtual machine replicator. DHCP - do not use . Fill in all fields and click Next .
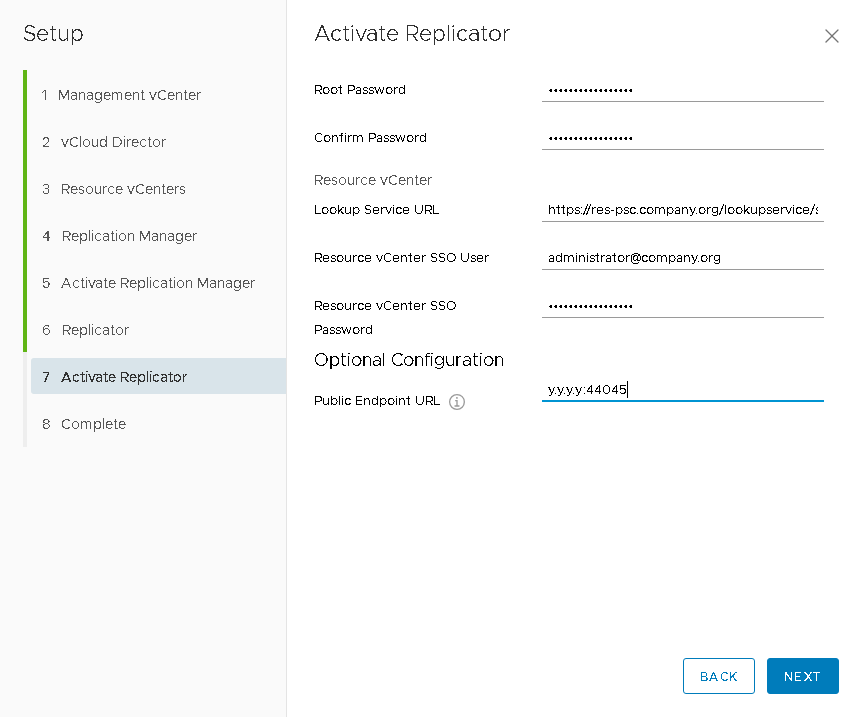
- The next item is to activate the replicator on your vCenter . Now you cannot leave the Lookup Service URL field empty. Here we specify either the address of the external Platform Service Controller , or the address of the vCenter Server :
https: // [IP_or_hostname] / lookupservice / sdk .
In the Public Endpoint URL field, we indicate the public address at which the replicator will be located (the one for which the NAT rules were previously created)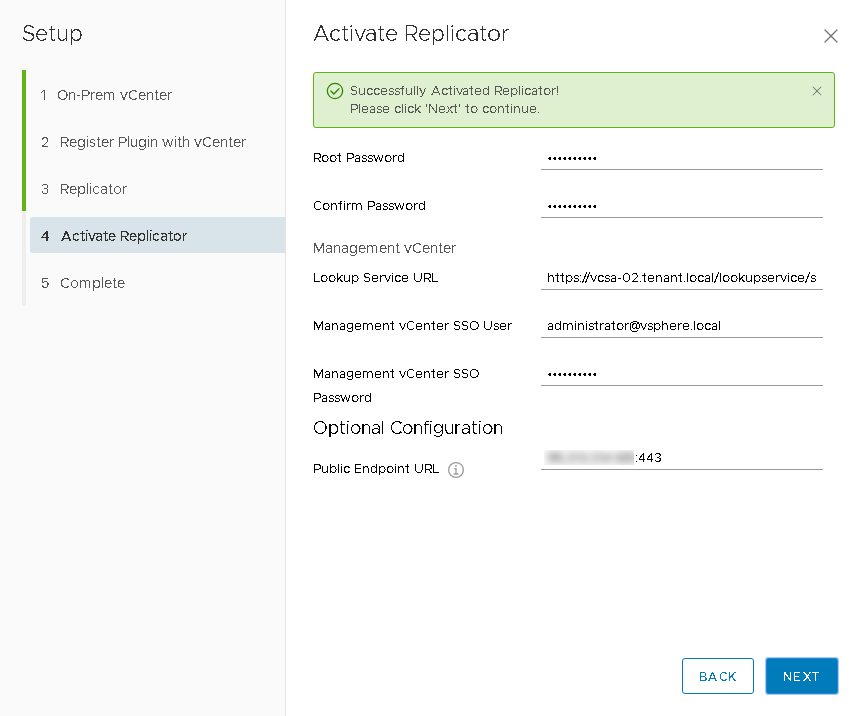
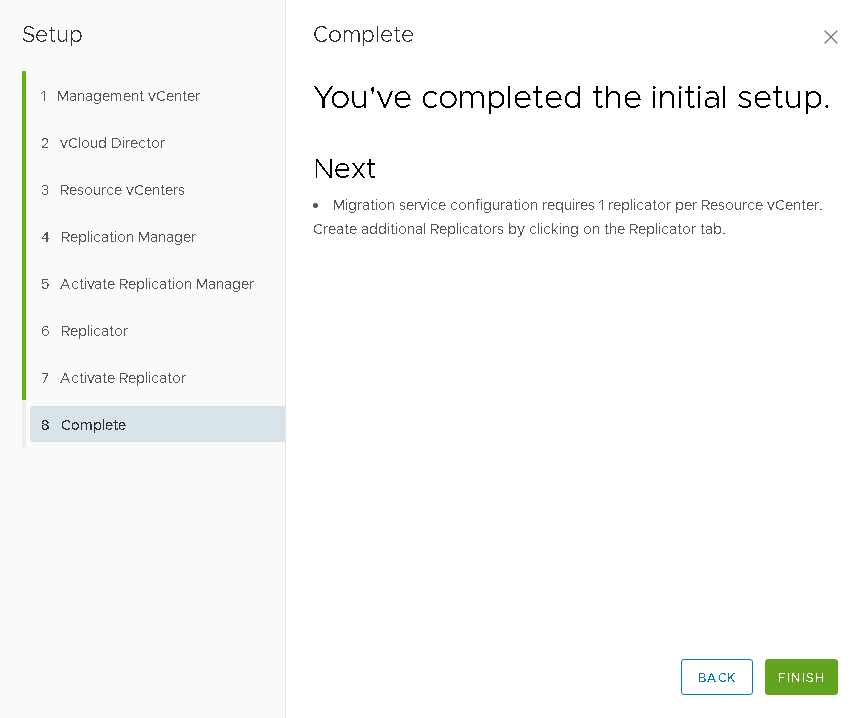
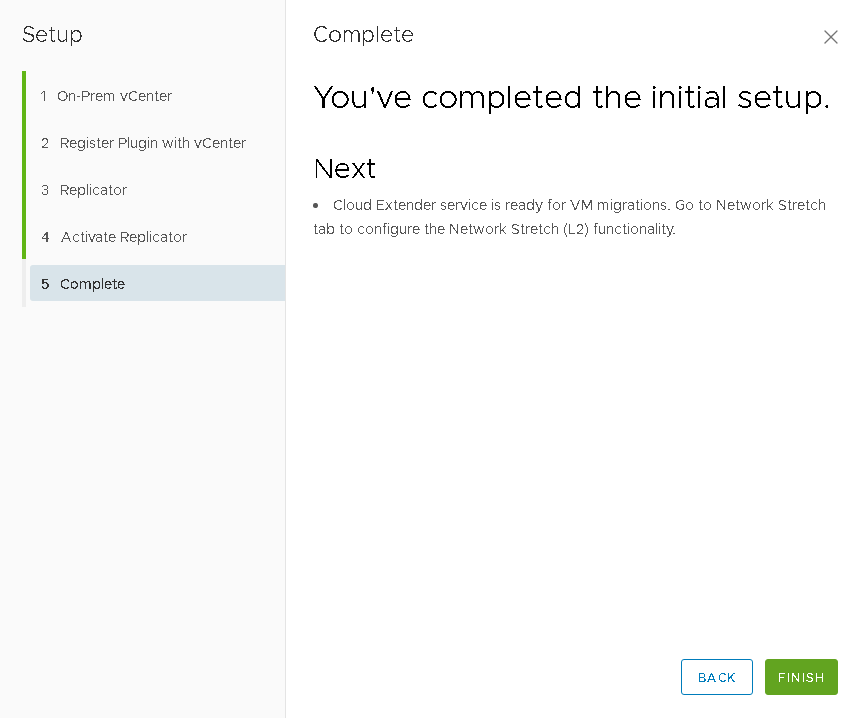
- Initial installation is complete.
Check
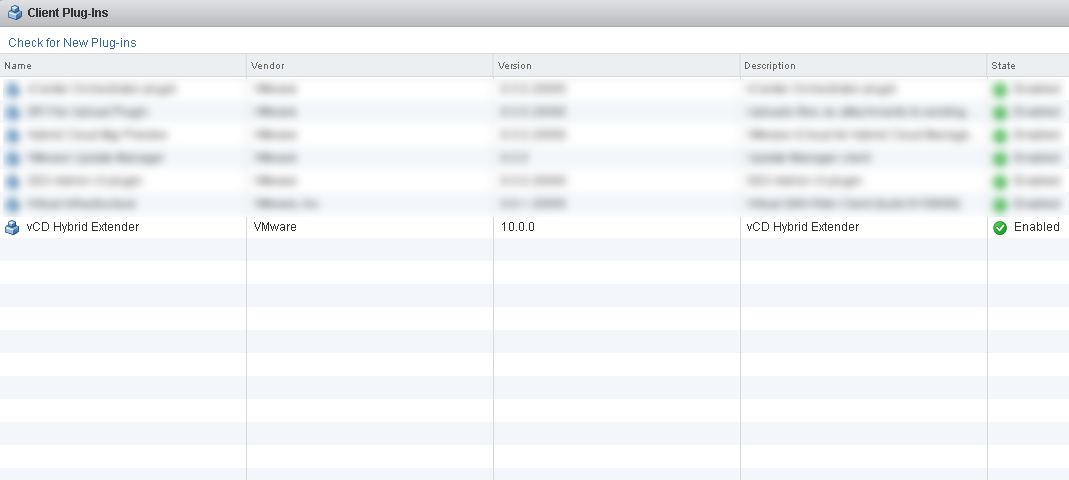
- We return to the web client vCenter server.
- Go to the plugins management section:
Administration -> Solutions -> Client Plug-Ins . - Make sure that the plugin has been successfully added and activated. There will also be a version of the plug-in that was specified when registering the vCloud Director Extender via the web interface.
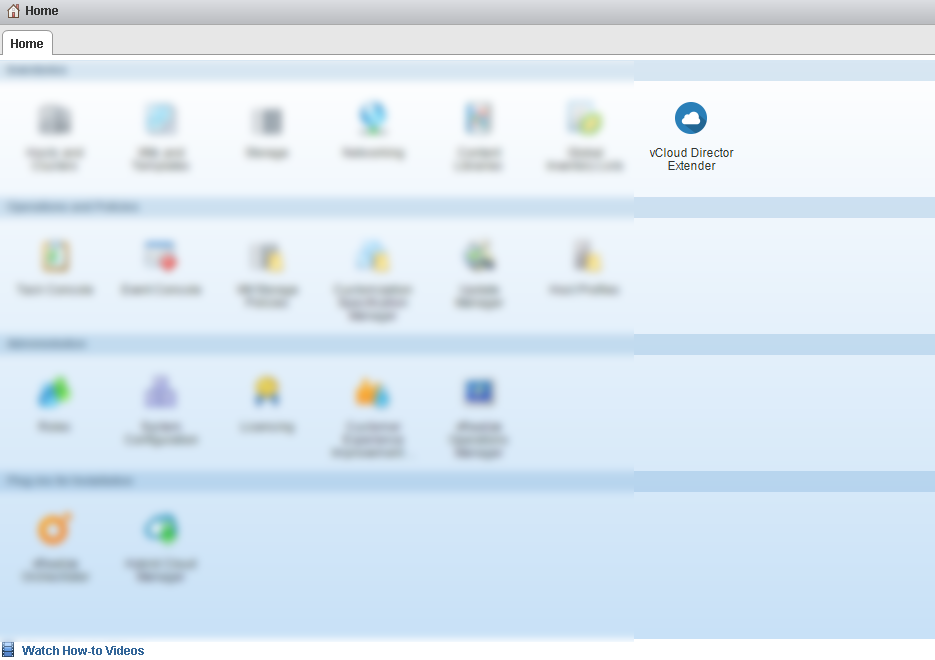
- Go to the Home section, where the vCloud Director Extender management interface has become available. If nothing appears, then you need to log in to the web client.
Conclusion
This article described the VMware vCloud Director Extender solution architecture. We also considered the phased steps of deploying the infrastructure of the provider and the customer. The deployment wizard interface is fairly simple and intuitive. The deployment procedure itself is quite well automated and, if the infrastructure is thought out in advance at the planning stage, will take no more than half an hour. On the customer side, a convenient migration management plugin will be available directly from the vCenter Server web interface.
The next article will discuss various types of migration, and will also describe the procedure for expanding an organization’s network to the cloud through the NSX Edge Gateway Standalone component.
Source: https://habr.com/ru/post/424371/
All Articles