Automating the assembly of iOS applications using Fastlane

How often do we, iOS developers, have to build an application to load in iTunes Connect App Store Connect ? During the active beta testing phase of the application, you need to quickly fix bugs and deliver an updated build for testing. And also you need to download certificates, Provision Profiles, click on a lot of different checkboxes and buttons with each new build.
Fortunately, there is such a great tool as fastlane , which helps us automate the mobile developer’s manual actions.
In this post, I’ll tell you what fastlane is and how to quickly start using it in your iOS projects.
Introduction
What is it?
Fastlane is a tool to automate the processes of building and displaying mobile iOS and Android applications, which also includes generating screenshots , running Unit / UI tests , sending messages to Slack , connecting to Crashlytics and many other useful things that make life easier.
What is the profit?
It will take no more than two hours to initialize the basic commands to automate the display of the application, for example, to publish to the App Store or TestFlight, but in the future it will save a lot of time, because the whole process will be started by a single call from the command line.
ATTENTION: To complete all the steps, you need an Apple Developer subscription, as access to App Store Connect is not available for free accounts.
Installation
Install yourself fastlane
First, install / upgrade to the latest version of Xcode Command Tools:
$ xcode-select --install Install the gem fastlane:
$ sudo gem install fastlane -NV # brew $ brew cask install fastlane Add to the project
In the root directory of the project run:
$ sudo fastlane init Fastlane will offer us variants of pre-installed scripts depending on what we want:

We will choose the 4th option, since We will register all the necessary commands for our situation:
Done! The fastlane folder and the gemfile file have been successfully installed into our project.
Before we continue
If the shell profile locale is not UTF-8 , then there will be problems with building and loading builds. Go to your shell profile file ( ~ / .bashrc , ~ / .bash_profile , ~ / .profile or ~ / .zshrc ) and add the following lines:
export LC_ALL=en_US.UTF-8 export LANG=en_US.UTF-8 Now everything is ready to write the direct steps of assembly automation.
How it works
First, find out what fastlane does: its main commands and how we describe what needs to be done.
Commands (Actions)
Fastlane includes many useful commands that simplify the life of a developer:
- cert : automatically downloads and installs the necessary certificates (Distribution, Development) for signing the collected applications;
- increment_build_number : increases the build number by 1, or changes to the value specified in the build_number parameter
- sigh : automatically downloads and installs all necessary provision profiles;
- snapshot : runs UI tests and takes screenshots that can be used when submitting for review in the App Store;
- gym : collects the archive and, here, the final ipa of your application;
- scan : everything is simple - runs target tests;
- deliver : sends ipa, screenshots, metadata straight to the App Store;
- pilot : loads fresh ipa on beta test in TestFlight. Also with the help of this command you can manage testers.
- and many others
Fastfile
The fastlane folder contains Fastfile and Appfile . In the Appfile, we will write the values required for building and publishing: Bundle IDs, App ID, Team ID, and others. In Fastfile, we will describe our scripts. After the initial installation, it looks like this:
default_platform(:ios) platform :ios do desc "Description of what the lane does" lane :custom_lane do # add actions here: https://docs.fastlane.tools/actions end end - default_platform (: ios) - set the default platform so as not to specify it from the command line.
- platform: ios do ... end - describes the "lanes" for the iOS platform.
- desc "Description of what the lane does" - a brief description of the "lane". A list of all the "lanes" with descriptions can be viewed using the
$ fastlane lanes. - lane: custom_lane do ... end : Lane (path, strip) is, more simply, a method. He has a name, parameters and body. In the body, we will call the commands we need to build, display, run tests, etc. Lanes are invoked from the command line by calling
$ fastlane [lane_name] [parameters]. It is with a call to one of the lanes that the execution of the automated steps begins.
We automate unloading on TestFlight
Let's start with setting a clear name to our lane. Rename custom_lane to testflight_lane . Now it is clear that the result of the execution of this script will be a loaded fresh assembly in TestFlight .
default_platform(:ios) platform :ios do desc "Builds, achieves and uploads ipa to TestFlight" lane :testflight_lane do # Actions end end Configuring Appfile
In order for each time you run the script not to enter the bundle application and Apple ID, we write them in the Appfile :
app_identifier "ru.ee.shishko.TheHatGame" apple_id "ee.shishko@gmail.com" Certifications and Provision Profiles
Add the cert and sigh commands to install certificates and provision profiles, respectively:
( Note : if your application is not in App Store Connect, then you need to add the produce command with the app_name parameter)
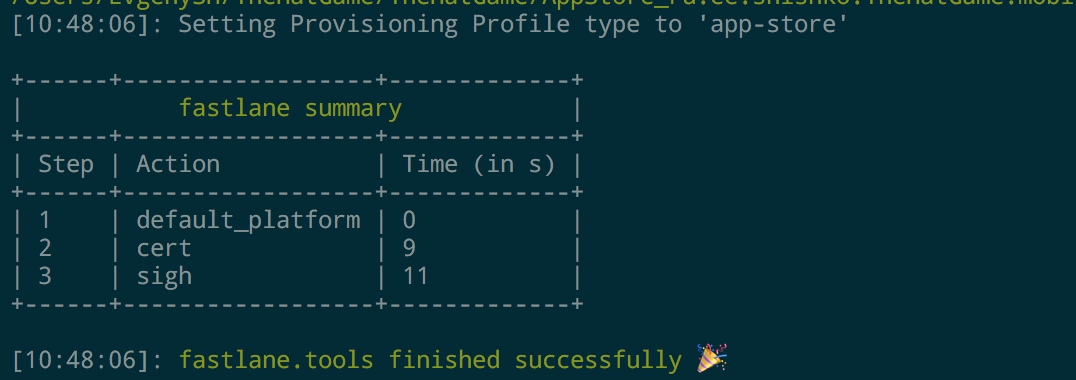
default_platform(:ios) platform :ios do desc "Builds, achieves and uploads ipa to TestFlight" lane :testflight_lane do # App Store Connect: # produce ( # app_name: "MyAppName" # ) cert sigh end end Run our script using the $ fastlane testflight_lane
When you start Fastlane will ask us to enter the password for the account, enter it. This will only be required once - fastlane will remember it and you will not need to enter anything during the next launches.
This is what the output looks like when fastlane successfully completes the script:
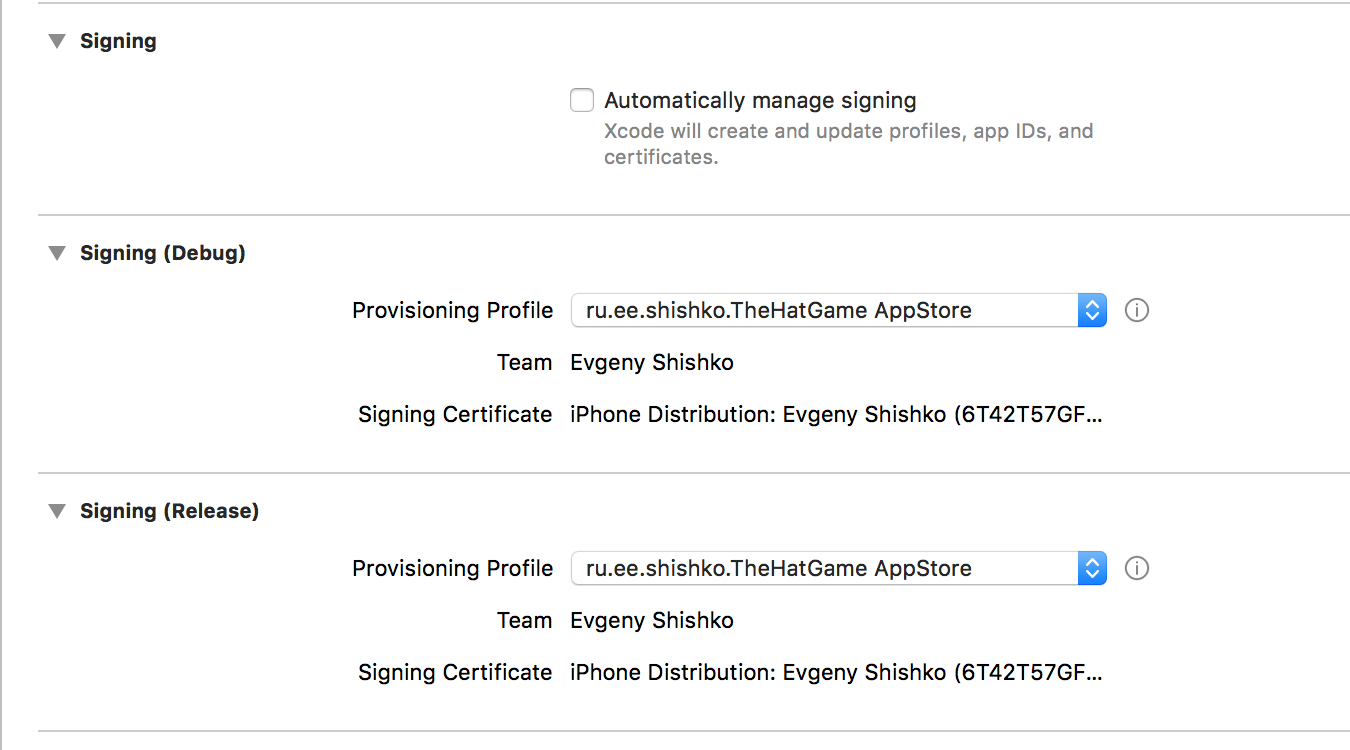
Now the certificate and provision profiles are downloaded and installed. It remains to put down in the General contribution of the desired target:
Build the application
Add the command increment_build_number to increase the build number. If your main .xcodeproj file is not in the root folder, then specify the path for it in the xcodeproj parameter:
default_platform(:ios) platform :ios do desc "Builds, achieves and uploads ipa to TestFlight" lane :testflight_lane do cert sigh increment_build_number # .xcodeproj , : # # increment_build_number( # xcodeproj: "./path/to/MyApp.xcodeproj" # ) end end To work with an increase in the build number, you need to go to Build Settings / Versioning and set the Versioning System to Apple Generic and Current Project Version to 1 :

')
Add a gym command that collects the ipa file of our application:

Among the parameters, you can specify where ipa ( output_directory ) will be put, name ipa ( output_name ), scheme ( scheme ), whether to do Clean ( clean ) and some others. We will not specify anything in the parameters - fastlane will set the default parameters, collect and sign ipa, but again: if you want and need, you can specify everything in detail:
default_platform(:ios) platform :ios do desc "Builds, achieves and uploads ipa to TestFlight" lane :testflight_lane do cert sigh increment_build_number gym # : # # gym( # workspace: "TheHatGame.xcworkspace", # scheme: "TheHatGame", # configuration: "Release", # clean: true, # output_directory: "./build", # output_name: "TheHatGame.ipa", # codesigning_identity: "iPhone Distribution: Evgeny Shishko" # ) end end Upload to TestFlight
To load ipa into TestFlight we will use Pilot :

Using Pilot you can:
- unload and distribute assemblies;
- add and remove beta testers;
- get information about testers and their devices;
- export testers information to .csv in order to import them into another project.
We will use its main function: sending assemblies to the Apple Store Connect .
Let's add to the testflight_lane a call to upload_to_testflight with the parameters skip_submission (we will use only for loading the ipa file) and skip_waiting_for_build_processing (we do not wait for the end of processing'a):
default_platform(:ios) platform :ios do desc "Builds, achieves and uploads ipa to TestFlight" lane :testflight_lane do cert sigh increment_build_number gym upload_to_testflight( skip_submission: true, skip_waiting_for_build_processing: true ) end end Run the final script
We save our changes and run from the console:
$ fastlane testflight_lane At the stage of sending to testflight in the console, you will need to enter an app-specific password (which is required for authorization in the Application Loader ). You can find it in your Apple ID dashboard by generating it by clicking on "Generate Password":

After entering the password, the fresh build will be successfully loaded into TestFlight and the execution of fastlane will end there:

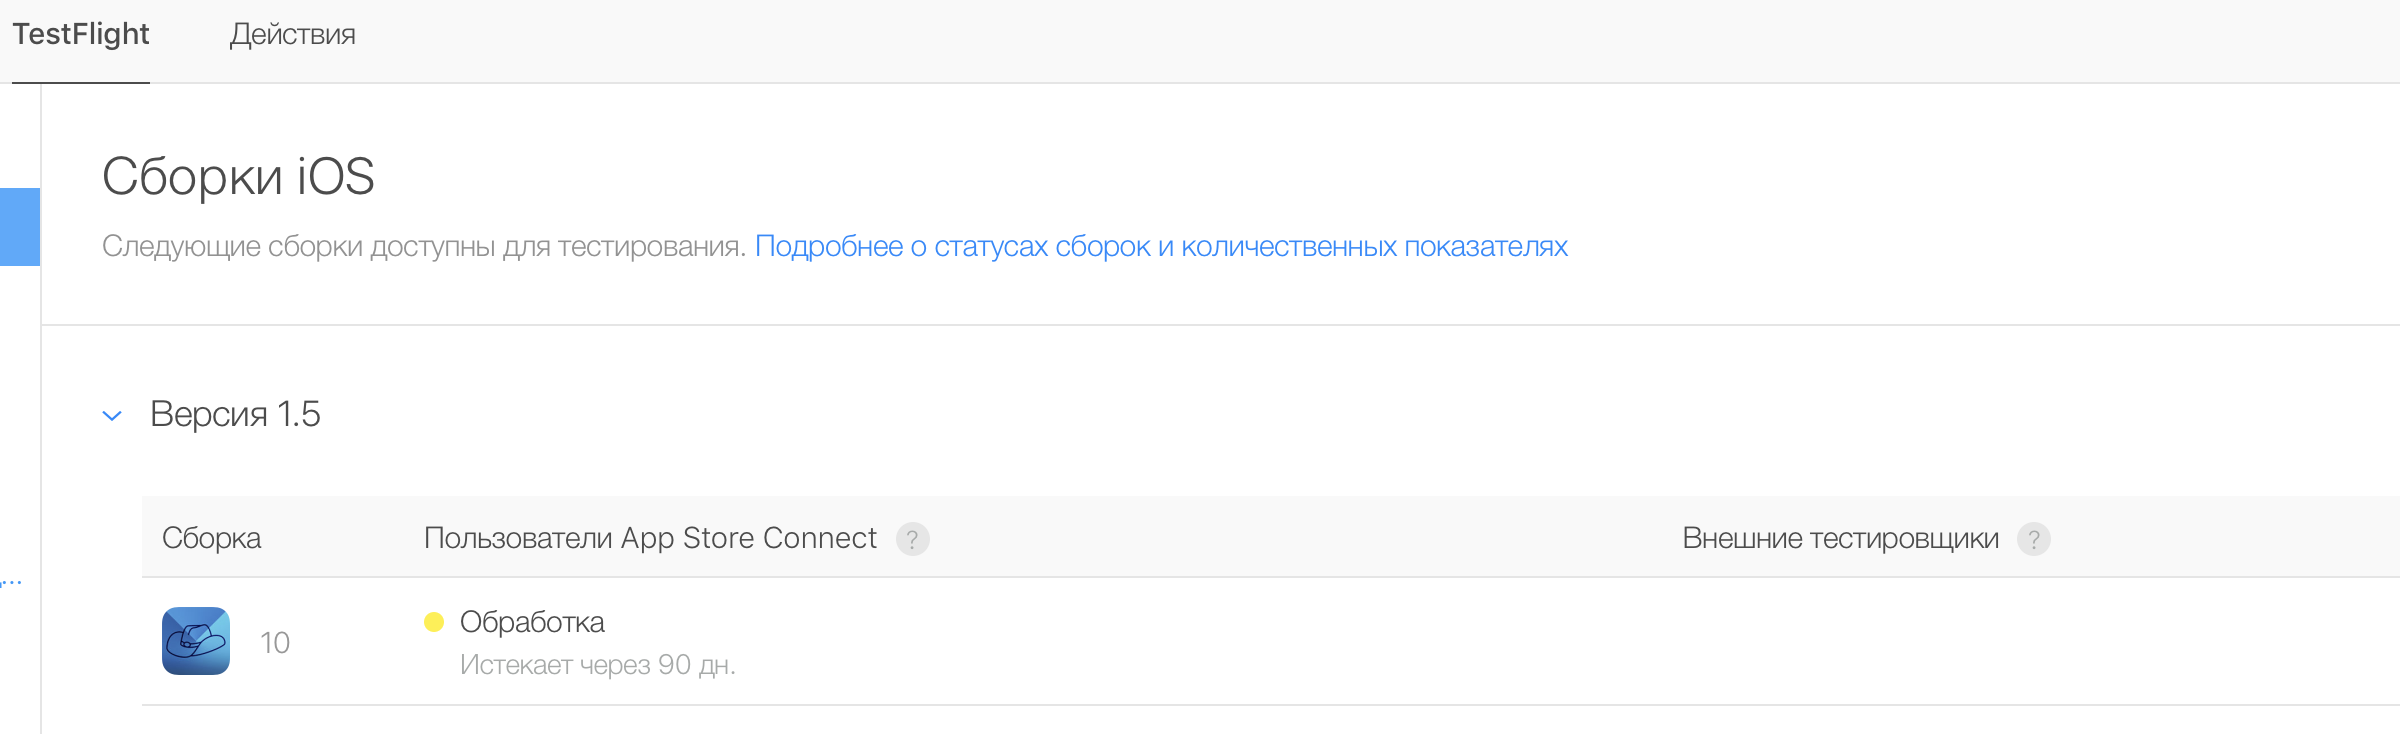
The status of the new version can be viewed in the App Store Connect:
Conclusion
That's all! I would like to note that in this article we have, in the most general case, tried the possibilities of fastlane. In connection with this, I attach a survey: would you, habrovchane, be interested in posts about the detailed use of the mentioned and other useful commands in fastlane and advanced chips in setting up scripts?
An application with the fastlane setting provided can be found here .
Source: https://habr.com/ru/post/424023/
All Articles