Reducing AWS costs with Kubernetes Ingress with the classic ELB balancer

A few months ago, I wrote an article about the Kubernetes Nginx Ingress controller, which ranks second in popularity on this blog. Its main theme is the use of Kubernetes Ingress for local deployments. However, most users use Kubernetes in the AWS cloud and other cloud-based public services. However, the problem is that for each service of type LoadBalancer, AWS creates a new balancer ELB (Elastic Load Balancer). This may be too expensive. If you use Kubernetes Ingress, you only need one ELB.
How it works?
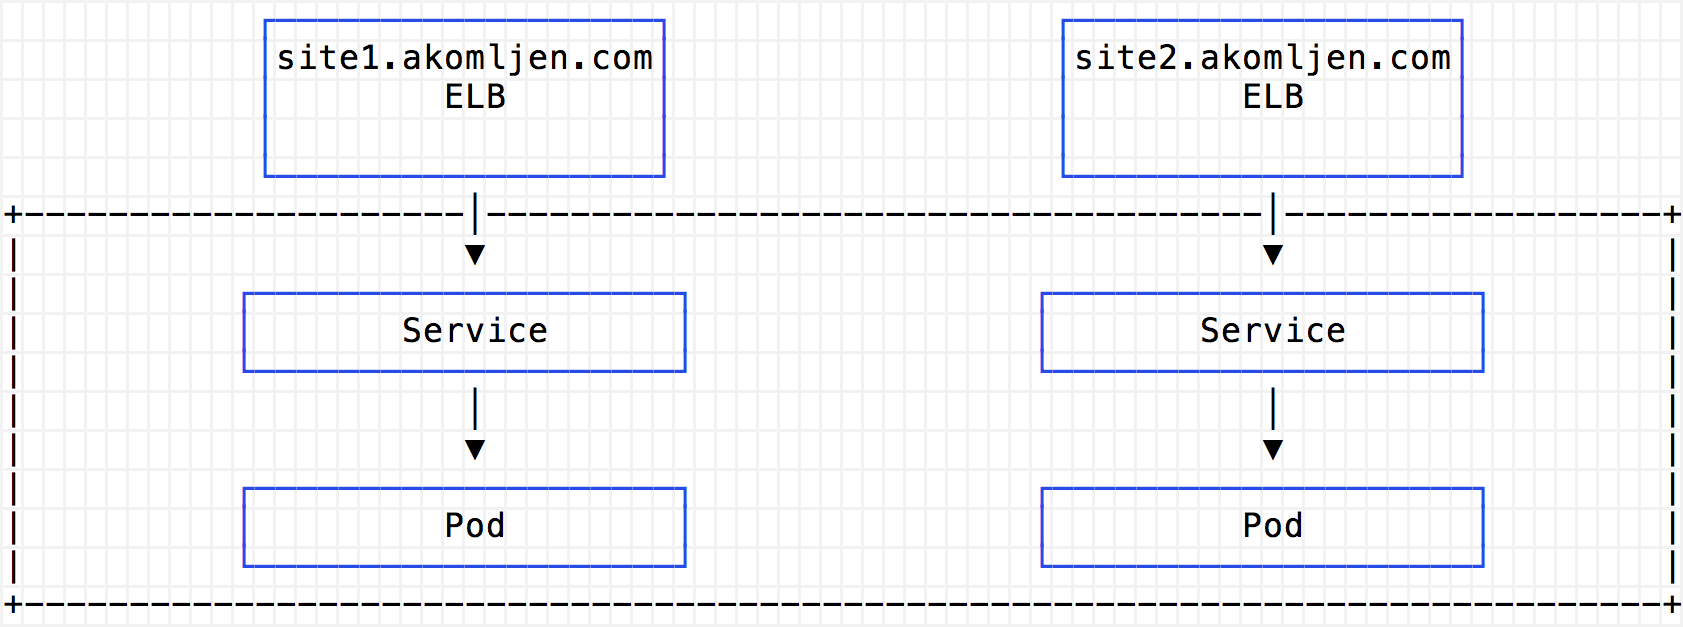
For a better understanding, I will cite several schemes. Without an Ingress controller, a separate classic ELB balancer will be created for each provided service:
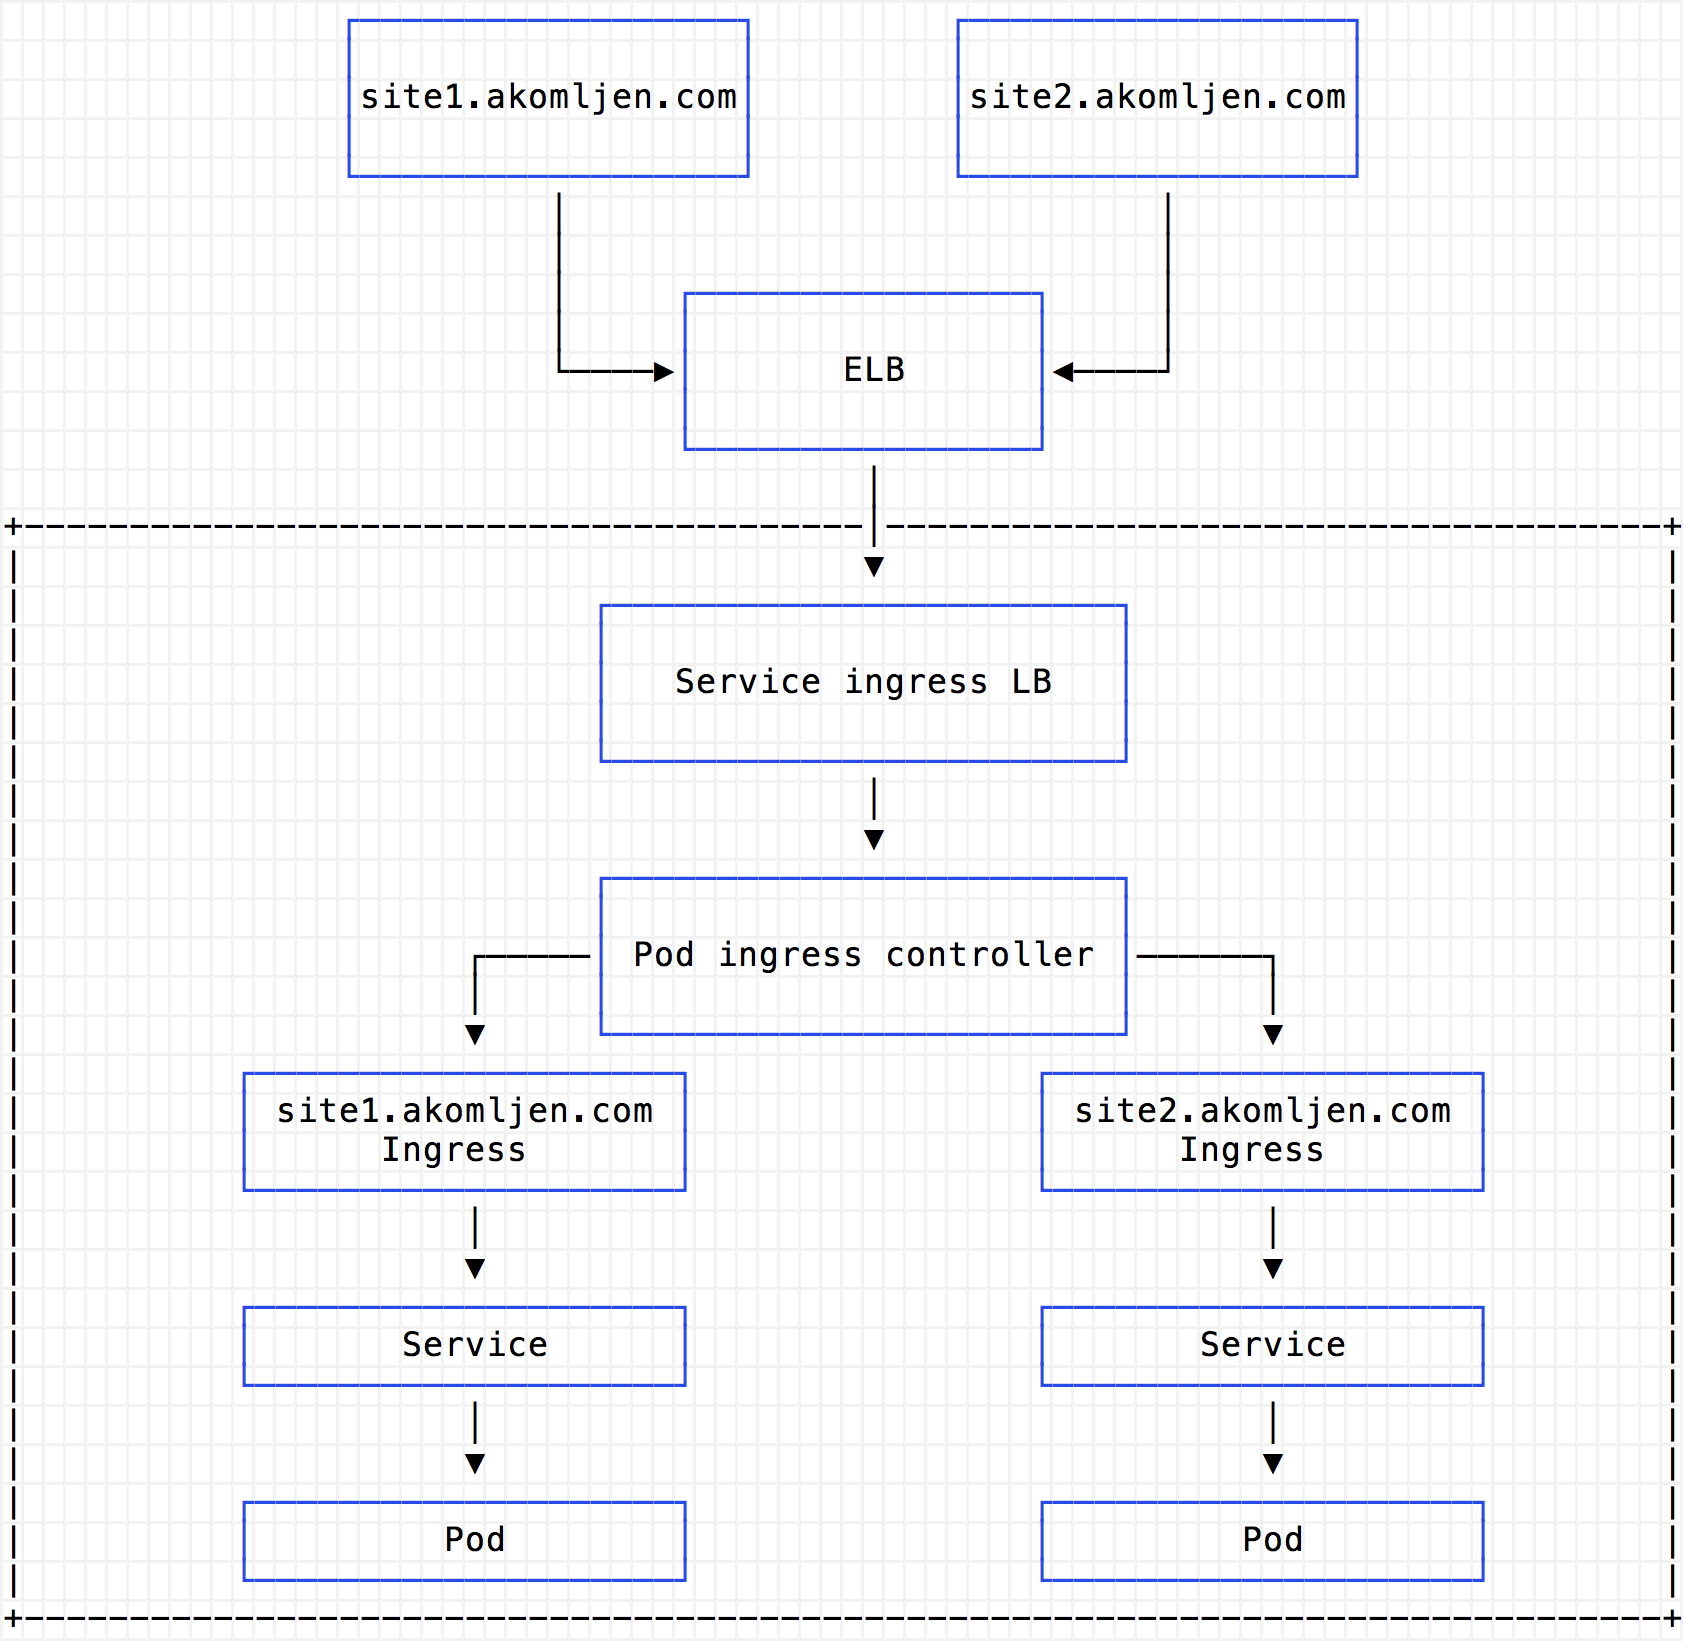
When using Ingress, you need only one such ELB balancer, which sends all requests to the proxy under Ingress, which is executed in the cluster:
Consider the cost of the Classic Load Balancer load balancer:
It is necessary to pay every full or incomplete hour of work of the load balancer Classic Load Balancer and for each gigabyte of data transferred with its help.
This means that when using a cluster in the US East region, you will have to pay approximately $ 18.25 for each service provided. Still it is necessary to pay each gigabyte of the processed data. Ingress allows you to reduce the cost of AWS with a large number of services provided. Of course, for high availability, you can use multiple replicas of the Ingress proxy.
Deploying Nginx Ingress
There are many available options for the Ingress controller, for example, Traefik , Voyager (for HAProxy), Contour (for Envoy ), or even the Ingress AWS ALB controller (alpha version), which is somewhat different from the others. In this post, I look at the Nginx Ingress controller, which is now the most common. Unlike the previous article about the Ingress Nginx controller, this time for deployment I use Helm :
cat > values.yaml <<EOF controller: replicaCount: 2 config: use-proxy-protocol: "true" service: annotations: service.beta.kubernetes.io/aws-load-balancer-proxy-protocol: '*' EOF helm install --name ingress \ --namespace ingress \ -f values.yaml \ stable/nginx-ingress Note. Helm has a problem with the fact that logical values are not analyzed as string values when using the set argument. Therefore, I created a file with values, but did not --set default values via --set and --set-string .
Ingress checks Ingress displays two services, the controller and the server-side by default:
kubectl get pod -n ingress --selector=app=nginx-ingress NAME READY STATUS RESTARTS AGE ingress-nginx-ingress-controller-8689c87db7-jlwxv 1/1 Running 0 5m ingress-nginx-ingress-controller-8689c87db7-kv859 1/1 Running 0 5m ingress-nginx-ingress-default-backend-5f5888cc9b-jdjrp 1/1 Running 0 5m Some points should be explained here. Since all requests will go through the Ingress controller, it is advisable to have at least two of its replicas. In essence, this is an internal proxy server. The controller uses the default server portion to route non-existent Ingress resources. The server side is pretty simple by default. To obtain the source IP addresses in the Ingress proxy log, I activated the proxy protocol for Nginx and ELB using the following two settings:
--set controller.service.annotations."service\\.beta\\.kubernetes\\.io/aws-load-balancer-proxy-protocol"='*' \ --set-string controller.config.use-proxy-protocol=true \ The proxy protocol is intended to connect proxy servers without losing client data.
And as a bonus, you can now easily get an automatic DNS. First create a DNS A record using metacharacters, for example, *.test.example.com , which will point to an Ingress ELB controller. The ELB address can be obtained with this command:
kubectl get svc ingress-nginx-ingress-controller -o jsonpath='{.status.loadBalancer.ingress[0].hostname}' -n ingress a00950ebcfd0411e740ee0207cf10ce8-1089949860.eu-west-1.elb.amazonaws.com Then, when you create the Ingress entry point with the host site1.test.example.com you can immediately enter this line in the browser. DNS will resolve the name without additional configuration. Using a DNS record with meta characters is not the best idea, but it works. For detailed DNS settings, you can use an external DNS for Kubernetes.
Conclusion
Using the Ingress controller really helps achieve a higher level of automation. But remember that if it fails, all your external endpoints will also fail! In the next article, I will show you how to configure automatic renewal and installation of SSL certificates using Let's Encrypt. You can then use the default automatic DNS with SSL endpoints by default. Follow the news.
')
Source: https://habr.com/ru/post/423809/
All Articles