Job system and search path
Map
In the previous article, I sorted out what the new job system of the Job system is , how it works, how to create tasks, fill them with data and perform multi-threaded calculations, and only briefly explained where you can use this system. In this article I will try to make out a specific example of where you can use this system to get better performance.
Since the system was originally designed to perform work with data, it is perfect for solving problems of finding the path.
The unity already has a good NavMesh search engine , but it does not work in 2D projects, although there are a lot of ready-made solutions on the same asset store . Well, we will try to create not just a system that will search for paths on the created map, but we will make this very dynamic map so that every time something on it changes the system will create a new map, and of course we will calculate all this using The new task system, so as not to load the main thread.
An example of the system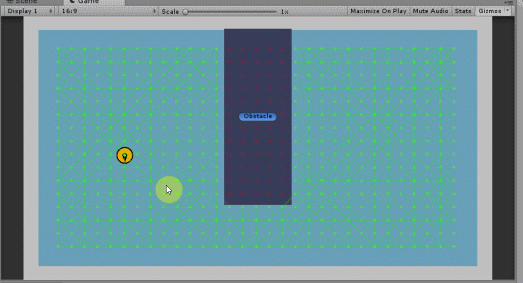
In the example, a grid is built on the map, there is a bot and an obstacle. The grid is rebuilt every time we change any properties of the map, be it its size or position.
')
For the planes I used a simple SpriteRenderer , this component has an excellent bounds property with which you can easily find out the size of the map.
But in general, and all for a start, but we will not stop and get right to the point.
Let's start with the scripts. And the Obstacle obstacle script will be the first.
Obstacle
public class Obstacle : MonoBehaviour { } Inside the Obstacle class, we will catch all changes in the obstacles on the map, for example, changing the position or size of the object.
Then you can create a Map class on which the grid will be built and inherit it from the Obstacle class.
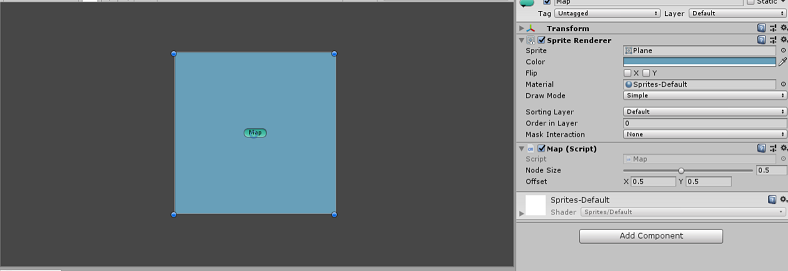
Map
public sealed class Map : Obstacle { } The Map class will also track all changes on the map in order to re-arrange the grid if needed.
To do this, fill the base class Obstacle with all the necessary variables and methods to track object changes.
Obstacle
public class Obstacle : MonoBehaviour { public new SpriteRenderer renderer { get; private set;} private Vector2 tempSize; private Vector2 tempPos; protected virtual void Awake() { this.renderer = GetComponent<SpriteRenderer>(); this.tempSize = this.size; this.tempPos = this.position; } public virtual bool CheckChanges() { Vector2 newSize = this.size; float diff = (newSize - this.tempSize).sqrMagnitude; if (diff > 0.01f) { this.tempSize = newSize; return true; } Vector2 newPos = this.position; diff = (newPos - this.tempPos).sqrMagnitude; if (diff > 0.01f) { this.tempPos = newPos; return true; } return false; } public Vector2 size { get { return this.renderer.bounds.size;} } public Vector2 position { get { return this.transform.position;} } } Here, the renderer variable will link to the SpriteRenderer component, and the tempSize and tempPos variables will be used to track changes in the size and position of the object.
The Awake virtual method will be used to initialize the variables, and the CheckChanges virtual method will track the current changes in the size and position of the object and return a boolean result.
On this, for now, leave the Obstacle script and go to the Map Map script itself, where we also fill it with the necessary parameters for operation.
Map
public sealed class Map : Obstacle { [Range(0.1f, 1f)] public float nodeSize = 0.5f; public Vector2 offset = new Vector2(0.5f, 0.5f); } The variable nodeSize will indicate the size of the cells on the map, here I have limited it to 0.1 to 1 size, so that the cells on the grid are not too small, but too large. The variable offset will be used to indent on the map when the grid is constructed, so that the grid is not built along the edges of the map.
Since now there are two new variables on the map, it turns out that their changes will also need to be monitored. To do this, add a couple of variables and overload the CheckChanges method in the Map class.
Map
public sealed class Map : Obstacle { [Range(0.1f, 1f)] public float nodeSize = 0.5f; public Vector2 offset = new Vector2(0.5f, 0.5f); private float tempNodeSize; private Vector2 tempOffset; protected override void Awake() { base.Awake(); this.tempNodeSize = this.nodeSize; this.tempOffset = this.offset; } public override bool CheckChanges() { float diff = Mathf.Abs(this.tempNodeSize - this.nodeSize); if (diff > 0.01f) { this.tempNodeSize = this.nodeSize; return true; } diff = (this.tempOffset - this.offset).sqrMagnitude; if (diff > 0.01f) { this.tempOffset = this.offset; return true; } return base.CheckChanges(); } } Is done. Now on the stage, you can create a sprite map and throw at it the Map script.
Do the same with the obstacle - create a simple sprite on the stage and cast the Obstacle script on it.
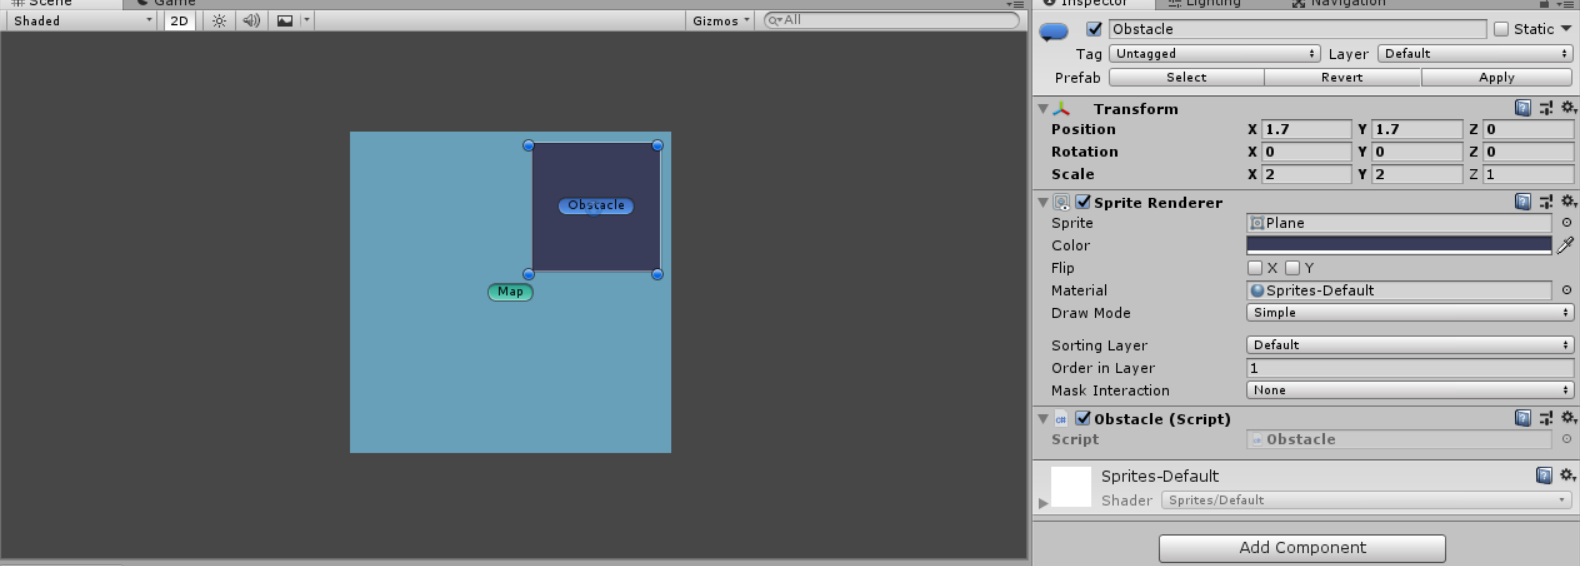
Now we have map objects and obstacles on the scene.
The Map script will be responsible for tracking all changes on the map, where in the Update method every frame will check for these changes.
Map
public sealed class Map : Obstacle { /*... …*/ private bool requireRebuild; private void Update() { UpdateChanges(); } private void UpdateChanges() { if (this.requireRebuild) { print(“ , !”); this.requireRebuild = false; } else { this.requireRebuild = CheckChanges(); } } /*... …*/ } Thus, in the UpdateChanges method , the map will track only its changes so far. You can even start the game now and try to resize the map or offset the offset to make sure that all changes are tracked.
Now you need to somehow track the changes themselves obstacles on the map. To do this, we will place each obstacle in the list on the map, which in turn will be updated each frame in the Update method.
In the Map class, create a list of all possible obstacles on the map and a couple of static methods for their registration.
Map
public sealed class Map : Obstacle { /*... …*/ private static Map ObjInstance; private List<Obstacle> obstacles = new List<Obstacle>(); /*... …*/ public static bool RegisterObstacle(Obstacle obstacle) { if (obstacle == Instance) return false; else if (Instance.obstacles.Contains(obstacle) == false) { Instance.obstacles.Add(obstacle); Instance.requireRebuild = true; return true; } return false; } public static bool UnregisterObstacle(Obstacle obstacle) { if (Instance.obstacles.Remove(obstacle)) { Instance.requireRebuild = true; return true; } return false; } public static Map Instance { get { if (ObjInstance == null) ObjInstance = FindObjectOfType<Map>(); return ObjInstance; } } } In the static RegisterObstacle method, we will register the Obstacle obstacle on the map and add it to the list, but first it is important to take into account that the card itself also inherits from the Obstacle class and therefore the first step in the method is to check whether we are trying to register the card itself as an obstacle.
The static method UnregisterObstacle, on the contrary, eliminates an obstacle from the map and removes it from the list when we assume we destroy it.
At the same time, every time we add or remove an obstacle from the map, it is necessary to re-create the map itself, so after performing these static methods, set the requireRebuild variable to true .
Also, to have easy access to the Map script from any script, I created a static Instance property that will return me this very instance of Map .
Now let's go back to the Obstacle script, where we will register the obstacle on the map, for this we will add a couple of OnEnable and OnDisable methods to it.
Obstacle
public class Obstacle : MonoBehaviour { /*... …*/ protected virtual void OnEnable() { Map.RegisterObstacle(this); } protected virtual void OnDisable() { Map.UnregisterObstacle(this); } } Each time we create a new obstacle while playing a game on the map, it will automatically register in the OnEnable method, where it will be taken into account when building a new grid and removing itself from the map in the OnDisable method when it is destroyed or disabled.
It remains only to track the changes of the obstacles themselves in the Map script in the overloaded CheckChanges method.
Map
public sealed class Map : Obstacle { /*... …*/ public override bool CheckChanges() { float diff = Mathf.Abs(this.tempNodeSize - this.nodeSize); if (diff > 0.01f) { this.tempNodeSize = this.nodeSize; return true; } diff = (this.tempOffset - this.offset).sqrMagnitude; if (diff > 0.01f) { this.tempOffset = this.offset; return true; } foreach(Obstacle obstacle in this.obstacles) { if (obstacle.CheckChanges()) return true; } return base.CheckChanges(); } /*... …*/ } Now we have a map, obstacles - in general, everything that is needed for the construction of the grid and now you can move on to the most important thing.
Mesh construction
The grid, in its simplest form, is a two-dimensional array of points. To build it you need to know the size of the map and the size of the points on it, after some calculations we get the number of points horizontally and vertically, this is our grid.
There are many ways to find a path on a grid. In this article, it is still important to understand how to correctly use the capabilities of the task system, so here I will not consider different options for finding the path, their advantages and disadvantages, but take the simplest variant of the search A * .
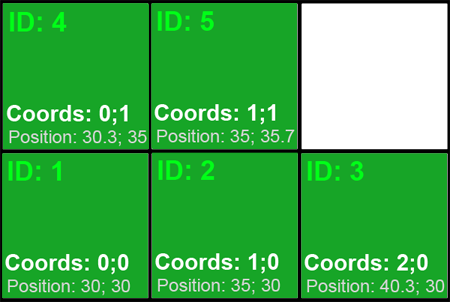
In this case, all points on the grid should have, in addition to the position, coordinates and the property of patency.
With patency, I think, everything is clear why it is needed, but the coordinates will indicate the order of the point on the grid, these coordinates are not tied specifically to the position of the point in space. The picture below shows a simple grid showing the differences in coordinates from position.
Why coordinates?
The fact is that in unity, in order to indicate the position of an object in space, a simple float is used which is very inaccurate and can be a fractional or negative number, so it will be difficult to use to implement a search for a path on the map. The coordinates are made in the form of a clear int which will always be positive and with which it is much easier to work when searching for neighboring points.
First we define the object of a point; it will be a simple Node structure.
Node
public struct Node { public int id; public Vector2 position; public Vector2Int coords; } This structure will contain the position position as Vector2 , where with this variable we will draw a point in space. The coordinate coordinate coords in the form of Vector2Int will indicate the coordinates of a point on the map, and the variable id its numeric account number using it we will compare different points on the grid and check the existence of a point.
The permeability of the point will be indicated as its boolean property, but since we cannot use the convertible data types in the task system, we indicate its permeability as int numbers, for this I used the simple NodeType enumeration, where: 0 is not a passable point, and 1 is passable.
NodeType and Node
public enum NodeType { NonWalkable = 0, Walkable = 1 } public struct Node { public int id; public Vector2 position; public Vector2Int coords; private int nodeType; public bool isWalkable { get { return this.nodeType == (int)NodeType.Walkable;} } public Node(int id, Vector2 position, Vector2Int coords, NodeType type) { this.id = id; this.position = position; this.coords = coords; this.nodeType = (int)type; } } Also, for convenience of working with a point, I will overload the Equals method to make it easier to compare points and also complement the verification method for the existence of a point.
Node
public struct Node { /*... …*/ public override bool Equals(object obj) { if (obj is Node) { Node other = (Node)obj; return this.id == other.id; } else return base.Equals(obj); } public static implicit operator bool(Node node) { return node.id > 0; } } Since the id number of a point on the grid will start with 1 unit, I will check the existence of a point as a condition that its id is greater than 0.
Go to the Map class where we prepare everything to create a map.
We already have a check for changing the map parameters, now we need to determine how exactly the grid generation process will be performed. To do this, create one new variable and several methods.
Map
public sealed class Map : Obstacle { /*... …*/ public bool rebuilding { get; private set; } public void Rebuild() {} private void OnRebuildStart() {} private void OnRebuildFinish() {} /*... …*/ } The rebuilding property will indicate whether the grid is being built. The Rebuild method will collect data and tasks for building a grid, then the OnRebuildStart method will start the process of building a grid and the OnRebuildFinish method will collect data from tasks.
Now we ’ll change the UpdateChanges method a bit so that the grid condition is taken into account.
Map
public sealed class Map : Obstacle { /*... …*/ public bool rebuilding { get; private set; } private void UpdateChanges() { if (this.rebuilding) { print(“ ...”); } else { if (this.requireRebuild) { print(“ , !”); Rebuild(); } else { this.requireRebuild = CheckChanges(); } } } public void Rebuild() { if (this.rebuilding) return; print(“ !”); OnRebuildStart(); } private void OnRebuildStart() { this.rebuilding = true; } private void OnRebuildFinish() { this.rebuilding = false; } /*... …*/ } As you can see now in the UpdateChanges method there is a condition that while the old grid is being built, do not start building a new one, and also in the Rebuild method, the first action checks whether the process of building the grid is already going on.
The solution of the problem
Now a little about the process of building a map
Since we will use the task system and build the grid in parallel to build the map, I used the IJobParallelFor task type , which will be performed a certain number of times. In order not to burden the construction process with any one separate task, we will use a pool of tasks packed into one JobHandle .
Most often, to build a grid use two cycles nested into each other, to build for example horizontally and vertically. In this example, we will also build the grid first horizontally and then vertically. To do this, in the Rebuild method, we calculate the number of horizontal and vertical points, then in the Rebuild method we will cycle through the vertical points, and the horizontal ones will be built in parallel in the task. To better visualize the build process, take a look at the animation below.
Mesh construction
The number of vertical points will indicate the number of tasks, in turn each task will build points only horizontally, after all the tasks have been completed, the points are summarized in one list. That is why I need to use a task of the IJobParallelFor type in order to transfer the index of a point on the grid horizontally to the Execute method.
And so we have the structure of points, now you can create the structure of the Job task itself and inherit it from the IJobParallelFor interface, everything is simple.
Job job
public struct Job : IJobParallelFor { public void Execute(int index) {} } We return in the Rebuild method of the Map class, where we will perform the necessary calculations to measure the grid.
Map
public sealed class Map : Obstacle { /*... ...*/ public void Rebuild() { if (this.rebuilding) return; print(“ !”); Vector2 mapSize = this.size - this.offset * 2f; int horizontals = Mathf.RoundToInt(mapSize.x / this.nodeSize); int verticals = Mathf.RoundToInt(mapSize.y / this.nodeSize); if (horizontals <= 0) { OnRebuildFinish(); return; } Vector2 center = this.position; Vector2 origin = center - (mapSize / 2f); OnRebuildStart(); } /*... ...*/ } In the Rebuild method, we calculate the exact size of the mapSize map, taking into account the indent, then write the number of points vertically in verticals, and the number of points horizontally in horizontals. If the number of points vertically is 0, then we stop building the map and call the OnRebuildFinish method to complete the process. The origin variable will indicate where we will start building the grid - in the example, this is the bottom left point on the map.
Now you can go to the tasks themselves and fill them with data.
During the construction of the grid, the task will need the NativeArray array where we will place the obtained points, also since we have obstacles on the map, we will also need to pass them into the task, for this we will use another NativeArray array, then we need the size of the points in the task , the starting position from which we will build the points, as well as the initial coordinates of the series.
Job job
public struct Job : IJobParallelFor { [WriteOnly] public NativeArray<Node> array; [ReadOnly] public NativeArray<Rect> bounds; public float nodeSize; public Vector2 startPos; public Vector2Int startCoords; public void Execute(int index) {} } I marked the array of points in array with the WriteOnly attribute, since in the task it would only be necessary to “ write ” the obtained points to the array, but the array of obstacles bounds is marked with the ReadOnly attribute, since in the problem we will only “ read ” the data from this array.
Well and while everything, we will pass to calculation of points later.
Now let's go back to the Map class where we denote all variables involved in the tasks.
Here, first, we need a global task handle , an array of obstacles in the form of NativeArray , a task list that will contain all points obtained on the grid and a Dictionary with all coordinates and points on the map, so that it is more convenient to look for them later.
Map
public sealed class Map : Obstacle { /*... ...*/ private JobHandle handle; private NativeArray<Rect> bounds; private HashSet<NativeArray<Node>> jobs = new HashSet<NativeArray<Node>>(); private Dictionary<Vector2Int, Node> nodes = new Dictionary<Vector2Int, Node>(); /*... ...*/ } Now back to the Rebuild method and continue building the grid.
First, initialize the bounds array of obstacles in order to pass it to the task.
Rebuild
public void Rebuild() { /*... ...*/ Vector2 center = this.position; Vector2 origin = center - (mapSize / 2f); int count = this.obstacles.Count; if (count > 0) { this.bounds = new NativeArray<Rect>(count, Allocator.TempJob, NativeArrayOptions.UninitializedMemory); } OnRebuildStart(); } Here we create an instance of NativeArray through a new constructor with three parameters. I analyzed the first two parameters in the last article, but the third parameter will help us save some time to create an array. The fact is that we will write data to the array immediately after its creation, which means we do not need to make sure that it is cleared. This option is useful for NativeArray that will only be used in “ read ” mode in a task.
And so, further we will fill the bounds array with data.
Rebuild
public void Rebuild() { /*... ...*/ Vector2 center = this.position; Vector2 origin = center - (mapSize / 2f); int count = this.obstacles.Count; if (count > 0) { this.bounds = new NativeArray<Rect>(count, Allocator.TempJob, NativeArrayOptions.UninitializedMemory); for(int i = 0; i < count; i++) { Obstacle obs = this.obstacles[i]; Vector2 position = obs.position; Rect rect = new Rect(Vector2.zero, obs.size); rect.center = position; this.bounds[i] = rect; } } OnRebuildStart(); } Now you can proceed to the creation of tasks, for this we will cycle through all the vertical rows of the grid.
Rebuild
public void Rebuild() { /*... ...*/ Vector2 center = this.position; Vector2 origin = center - (mapSize / 2f); int count = this.obstacles.Count; if (count > 0) { this.bounds = new NativeArray<Rect>(count, Allocator.TempJob, NativeArrayOptions.UninitializedMemory); for(int i = 0; i < count; i++) { Obstacle obs = this.obstacles[i]; Vector2 position = obs.position; Rect rect = new Rect(Vector2.zero, obs.size); rect.center = position; this.bounds[i] = rect; } } for (int i = 0; i < verticals; i++) { float xPos = origin.x; float yPos = origin.y + (i * this.nodeSize) + this.nodeSize / 2f; } OnRebuildStart(); } To begin with, in xPos and yPos we get the starting position of the row horizontally.
Rebuild
public void Rebuild() { /*... ...*/ Vector2 center = this.position; Vector2 origin = center - (mapSize / 2f); int count = this.obstacles.Count; if (count > 0) { this.bounds = new NativeArray<Rect>(count, Allocator.TempJob, NativeArrayOptions.UninitializedMemory); for(int i = 0; i < count; i++) { Obstacle obs = this.obstacles[i]; Vector2 position = obs.position; Rect rect = new Rect(Vector2.zero, obs.size); rect.center = position; this.bounds[i] = rect; } } for (int i = 0; i < verticals; i++) { float xPos = origin.x; float yPos = origin.y + (i * this.nodeSize) + this.nodeSize / 2f; NativeArray<Node> array = new NativeArray<Node>(horizontals, Allocator.Persistent); Job job = new Job(); job.startCoords = new Vector2Int(i * horizontals, i); job.startPos = new Vector2(xPos, yPos); job.nodeSize = this.nodeSize; job.bounds = this.bounds; job.array = array; } OnRebuildStart(); } Next, we create a simple array NativeArray where the points in the task will be placed; here, for the array array, you need to specify how many points will be created horizontally and the type of allocation will be Persistent , because the task can run longer than one frame.
After that, we create an instance of the Job task, place the initial coordinates of the startCoords series, the initial position of the startPos series, the size of the nodeSize points, the bounds obstacle array and at the end the array of points itself.
It remains only to place the task in the handle and the global task list.
Rebuild
public void Rebuild() { /*... ...*/ Vector2 center = this.position; Vector2 origin = center - (mapSize / 2f); int count = this.obstacles.Count; if (count > 0) { this.bounds = new NativeArray<Rect>(count, Allocator.TempJob, NativeArrayOptions.UninitializedMemory); for(int i = 0; i < count; i++) { Obstacle obs = this.obstacles[i]; Vector2 position = obs.position; Rect rect = new Rect(Vector2.zero, obs.size); rect.center = position; this.bounds[i] = rect; } } for (int i = 0; i < verticals; i++) { float xPos = origin.x; float yPos = origin.y + (i * this.nodeSize) + this.nodeSize / 2f; NativeArray<Node> array = new NativeArray<Node>(horizontals, Allocator.Persistent); Job job = new Job(); job.startCoords = new Vector2Int(i * horizontals, i); job.startPos = new Vector2(xPos, yPos); job.nodeSize = this.nodeSize; job.bounds = this.bounds; job.array = array; this.handle = job.Schedule(horizontals, 3, this.handle); this.jobs.Add(array); } OnRebuildStart(); } Is done. We have a list of tasks and their common handle , now we can run this handle by calling its Complete method in the OnRebuildStart method.
OnRebuildStart
private void OnRebuildStart() { this.rebuilding = true; this.handle.Complete(); } Since the rebuilding variable will indicate that the grid is being built, the UpdateChanges method itself also needs to specify the condition when this process ends, using the handle and its IsCompleted property.
Updatechanges
private void UpdateChanges() { if (this.rebuilding) { print(“ ...”); if (this.handle.IsCompleted) OnRebuildFinish(); } else { if (this.requireRebuild) { print(“ , !”); Rebuild(); } else { this.requireRebuild = CheckChanges(); } } } After the tasks are completed, the OnRebuildFinish method will be called, where we will already collect the points we have collected into one common Dictionary list, and most importantly, clear the occupied resources.
OnRebuildFinish
private void OnRebuildFinish() { this.nodes.Clear(); foreach (NativeArray<Node> array in this.jobs) { foreach (Node node in array) this.nodes.Add(node.coords, node); array.Dispose(); } this.jobs.Clear(); if (this.bounds.IsCreated) this.bounds.Dispose(); this.requireRebuild = this.rebuilding = false; } First, we clear the nodes dictionary from the previous points, then use the foreach loop to iterate through all the obtained points from the tasks and put them into the nodes dictionary , where the key is the coordinates ( NOT the position !) Points and the value is the point itself. Using this dictionary it will be easier for us to search for neighboring points on the map. After filling cleanse array array using the method Dispose and finally purified himself the task list jobs User .
You will also need to clear the bounds obstacle array if it was previously created.
After all these actions we get a list of all points on the map and now we can draw them on the scene.
Like that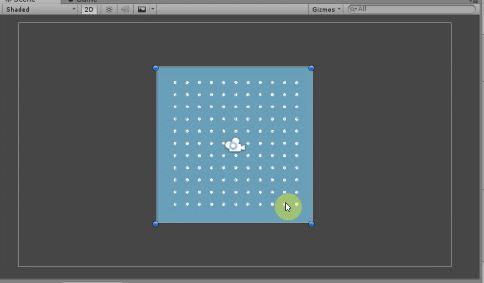
To do this, in the Map class, create the OnDrawGizmos method where we draw the points.
Map
public sealed class Map : Obstacle { /*... …*/ #if UNITY_EDITOR private void OnDrawGizmos() {} #endif } Now through the loop, draw each point.
Map
public sealed class Map : Obstacle { /*... …*/ #if UNITY_EDITOR private void OnDrawGizmos() { foreach (Node node in this.nodes.Values) { Gizmos.DrawWireSphere(node.position, this.nodeSize / 10f); } } #endif } After all these actions, our map looks somehow boring, in order to get a true grid, you need the points to be connected to each other.
Grid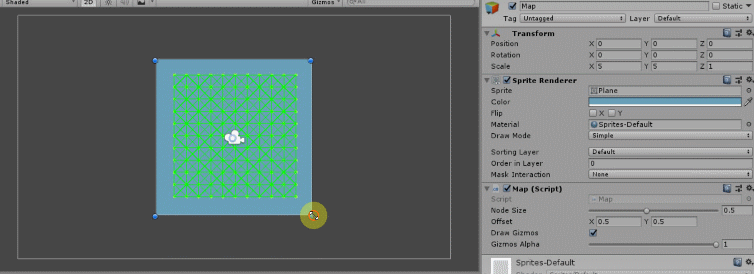
To search for neighboring points, we just need to find the desired point by its coordinates in 8 directions, so in the Map class we will get a simple static array of Directions and the cell search method according to its coordinates GetNode .
Map
public sealed class Map : Obstacle { public static readonly Vector2Int[] Directions = { Vector2Int.up, new Vector2Int(1, 1), Vector2Int.right, new Vector2Int(1, -1), Vector2Int.down, new Vector2Int(-1, -1), Vector2Int.left, new Vector2Int(-1, 1), }; /*... …*/ public Node GetNode(Vector2Int coords) { Node result = default(Node); try { result = this.nodes[coords]; } catch {} return result; } #if UNITY_EDITOR private void OnDrawGizmos() {} #endif } The GetNode method will return a point by coordinates from the list of nodes , but this should be done carefully because if the coordinates of Vector2Int are incorrect, an error will occur, so here we use the try catch exception bypass block , which will help bypass the exception and not hang the entire application with an error.
Next, go through the cycle in all directions and try to find the neighboring points in the OnDrawGizmos method , and most importantly, do not forget to take into account the cross-country ability.
OnDrawGizmos
#if UNITY_EDITOR private void OnDrawGizmos() { Color c = Gizmos.color; foreach (Node node in this.nodes.Values) { Color newColor = Color.white; if (node.isWalkable) newColor = new Color32(153, 255, 51, 255); else newColor = Color.red; Gizmos.color = newColor; Gizmos.DrawWireSphere(node.position, this.nodeSize / 10f); newColor = Color.green; Gizmos.color = newColor; if (node.isWalkable) { for (int i = 0; i < Directions.Length; i++) { Vector2Int coords = node.coords + Directions[i]; Node connection = GetNode(coords); if (connection) { if (connection.isWalkable) Gizmos.DrawLine(node.position, connection.position); } } } } Gizmos.color = c; } #endif Now you can safely start the game and see what happened.
Dynamic map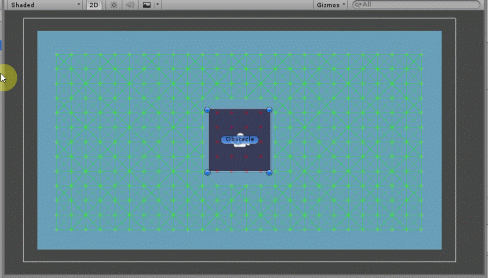
In this example, we built only the graph itself with the help of tasks, but this is what happened after I screwed the algorithm A * to this system , which also uses the Job system to find the path, the source code at the end of the article .
Map and search path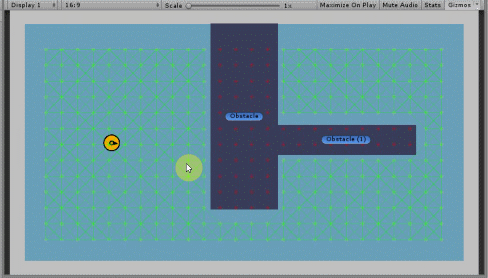
This is how you can use the new task system for your purposes and build interesting systems without much effort.
As in the previous article, here the task system is used without ECS , but if you use this system together with ECS , you can achieve just amazing results in productivity gains. Good luck !
Pathfinder project source
Source: https://habr.com/ru/post/423601/
All Articles