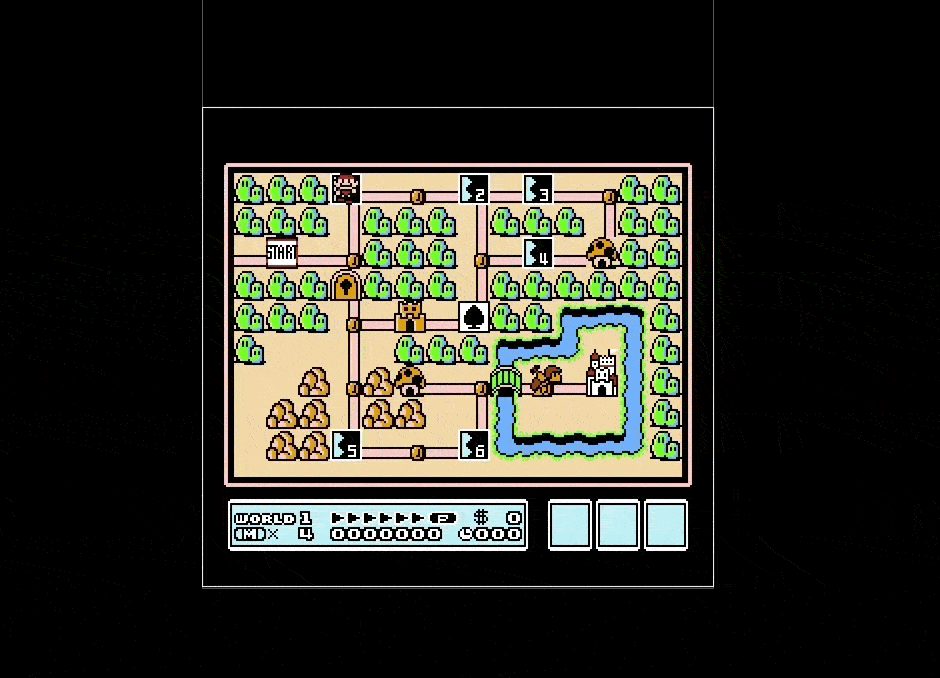
Project wideNES - go beyond the NES screen
In the mid-1980s, the Nintendo Entertainment System (NES) was a binding console. The best sound, the best graphics and the best games among all consoles of that time - the prefix expanded the boundaries of the possible. Still projects like Super Mario Bros. , The Legend of Zelda and Metroid are considered among the best games of all time.
More than 30 years have passed since the release of the NES, and the classic games feel great, which is not the case for the hardware on which they worked. With a resolution of only 256x240, the NES console could not provide enough space for games. However, fearless developers managed to fit in the NES games stunning, unforgettable worlds: the labyrinth dungeons The Legend of Zelda , the vast spaces of the planet in Metroid , the bright levels of Super Mario Bros. . However, due to NES hardware limitations, players could never go beyond the resolution of 256x240 ...
Until recently.
')
I present to your attention the project wideNES - a new way to play the classic NES!
wideNES is a new technology for automatic and interactive marking of NES games in real time .
When players move in level, wideNES records the screen, gradually building a map of the explored part of the world. On subsequent level passes, wideNES synchronizes the gameplay on the screen with the generated map, essentially allowing players to see more, “looking” beyond the NES screen! Best of all, the way of marking the wideNES games is absolutely universal , which allows a wide range of NES games to work with wideNES without any settings!
But how does all this work?
If you want to check how wideNES works, before reading the article, then please! ANESE is the NES emulator written by me, and currently it is the only emulator in which wideNES is implemented. However, it is worth warning that ANESE is not the best NES emulator in the world, in terms of both UI and emulation accuracy. Most features (including the inclusion of wideNES) are available only through the command line, and although many popular games work fine, some others may behave in unexpected ways.
How wideNES works
Before delving into the details, it is important to briefly explain how the NES renders graphics.
Transfer pixels using PPU
The heart of NES is the venerable MOS 6502 processor. In the late 70s and early 80s, 6502 were used everywhere and worked in such legendary machines as the Commodore 64, Apple II and many others. It was cheap, easy to program and powerful enough to be dangerous.
Supplemented 6502 in the NES console is a powerful graphics co-processor called the Picture Processing Unit (PPU). Compared to simple video coprocessors used in older systems based on, PPU is a huge step forward in terms of usability. For example, five years before the release of NES, the Atari 2600 processor 6502 was used to transfer graphic commands to the coprocessor for each raster line , which left the processor with very little time to execute the gaming logic. For comparison: PPU needed only a couple of teams per frame , and this gave 6502 enough time to create interesting and innovative gameplay.
PPU is an amazing chip, its way of rendering graphics is almost nothing like the work of modern GPUs, and a full series of articles will be required to fully explain its functions. Since wideNES uses only a small subset of the PPU functions, it suffices to consider them only briefly:
- Resolution: 256x240 pixels, 60 Hz
- Works independently of the CPU
- Communicates with the CPU using memory mapped I / O (address range 0x2000 - 0x2007)
- 2 rendering layers: a sprite layer and a background layer
- Sprites layer
- Every single sprite can be placed anywhere on the screen.
- Great for moving objects: player, enemies, shells
- Up to 64 sprites 8x8 pixels
- Background layer
- Tied to the grid
- Great for static elements: platforms, large obstacles, decorations
- Video memory is enough to store 64x30 tiles of 8x8 pixels
- The current internal resolution is 512x240, with a 256x240 viewing window
- Supports hardware scrolling to change the viewport 256x240
- The register PPUSCROLL (address 0x2005) controls the offset of the viewport by X / Y
- Sprites layer
Having dealt with this very brief overview, let's move on to the fun part: how does wideNES work?
main idea
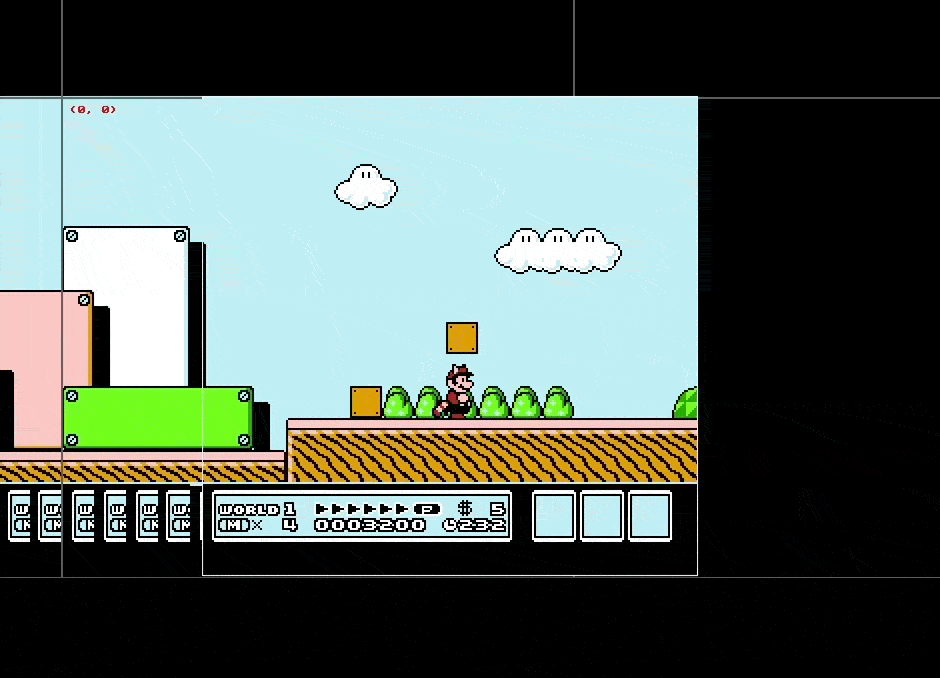
At the end of each frame, the CPU transmits the change information to the PPU. These include new sprite positions, new level data and, crucially for wideNES, new viewport offsets . Since wideNES works in an emulator, it is very easy for us to track the values written to the PPUSCROLL register, which means it is incredibly easy to calculate how much the screen has moved between any two frames!
Hmm, what will happen if, instead of drawing each new frame directly on top of the old frame, new frames will be drawn overlaying the previous frame, but shifting to the current scrolling value? Then, over time, the greater part of the level will remain on the screen, gradually building up a complete picture of the level!
To test whether this idea has any value, I quickly sketched the first implementation.
Compile ...
Running ...
Download Super Mario Bros. ...
Voila!
It worked!
It seems to be ...
Another approach: why not extract levels directly from ROM files?
Even without considering the details of the implementation, it becomes obvious that this technique has a serious limitation: a complete map of the game can be collected only when the player has independently investigated the entire game.
What if there was some way to extract levels from raw NES ROM?
Can there ever be such a technique?
Well, most likely not.
If you take any two games for NES, you can guarantee that they have only one thing in common - they both work for NES. Everything else can be completely different! Such a mismatch is a real misfortune, because NES games in fact have an infinite number of options for storing data levels!
Some people extracted complete levels using reverse engineering of how to store data levels of a couple of games (sometimes with the creation of full - featured map editors !), But this is a difficult task that requires a lot of work, perseverance and intelligence.
In order to extract the data from the ROM, you need to determine which parts of the ROM are code (and not data), and this is difficult to do, because finding the entire code in a binary file is equivalent to the problem of stopping !
In wideNES, a much simpler approach is used: instead of guessing how the game has packed the level data into ROM, wideNES simply starts the game and monitors the output!
Scrolling outside 255
NES is an 8-bit system, that is, the PPUSCROLL register can only receive 8-bit values. This limits the maximum scrolling offset to 255 pixels, that is, the maximum 8-bit number. There is no coincidence that the screen resolution of the NES is 240x256 pixels, that is, a 255-pixel offset is just enough to scroll the entire screen.
But what happens when you scroll on 255?
First, the games reset the PPUSCROLL register to 0. This explains why the SMB is shifted to the beginning when Mario moves too far to the right.
Then, to compensate for the 8-bit limitations of PPUSCROLL, the games update another PPU register: PPUCTRL (address 0x2000). The lower 2 bits of PPUCTRL set the “starting point” of the current scene in full-screen increments. For example, writing value 1 shifts the viewport to the right by 256 pixels, value 2 shifts the viewport down by 240 pixels. The PPUCTRL offset is pushed onto the stack with the PPUSCROLL register, which allows the screen to be scrolled horizontally within 512 pixels or vertically within 480 pixels.
But build, because the video memory is only enough for two level screens? What happens when the viewport scrolls too far to the right and “beyond the limits” of VRAM? To handle this case, PPU implements a convolution: all parts of the viewing window outside the selected video memory are simply minimized to the opposite edge of the video memory.
Such a folding in combination with the smart manipulation of the registers PPUSCROLL and PPUCTRL allows NES games to create the illusion of infinitely high / wide worlds! Due to the lazy loading of the part of the level outside the viewing window and the gradual scrolling into it, players never realize that inside VRAM they actually “run in a circle”!
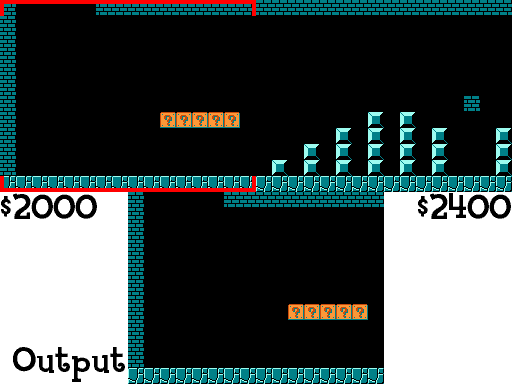
An excellent illustration from the nesdev wiki shows how Super Mario Bros. uses these properties to create levels longer than two screens:
Let's return to the question we are discussing: how does wideNES handle scrolling beyond 256?
Well, frankly, wideNES completely ignores the PPUCTRL register and just keeps track of the difference between the PPUSCROLL frames!
If PPUSCROLL unexpectedly jumps to about 256, which usually means that the player’s character has moved left / up the screen, and if he suddenly jumps to about 0, then this usually means that the player has moved across the screen to the right / down.
Although this heuristic may look simple - and it is - it actually works great!
After implementing this heuristic for Super Mario Bros. , Metroid and many other games have earned almost perfect!
I was delighted, so I went ahead and downloaded another NES classic - Super Mario Bros. 3 ...
Hmm ... not very pretty.
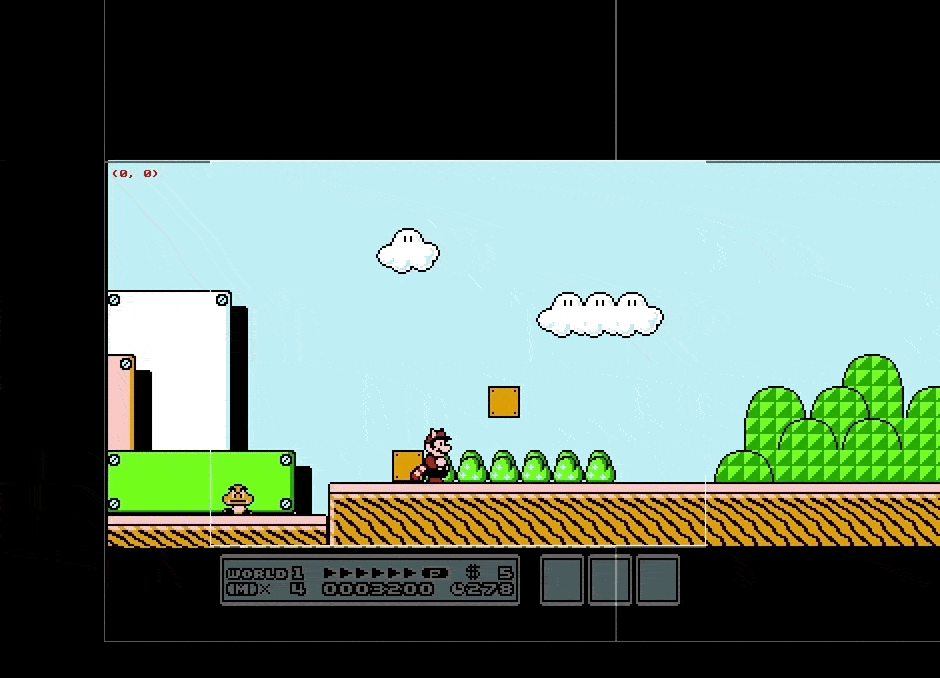
Ignoring static screen elements
Many games have static UI elements around the edges of the screen. In the case of SMB3, this is the column on the left and the status bar at the bottom of the state.
By default, wideNES performs sampling with 16-pixel increments from the edges of the screen, that is, all static elements are sampled along the edges! Not good!
To get around this problem, wideNES implemented rules and heuristics that try to automatically recognize and mask static screen elements.
In general, NES games use three different types of static screen elements: HUD, masks, and status bars.
HUD - no problem
If the game puts a HUD on top of the level, then there is a chance that the HUD consists of several sprites. Example: Metroid HUD.
Fortunately, such HUDs do not cause problems, because wideNES currently just ignores the sprite layer. Fine!
Masks - nowhere easier
PPU has a feature that allows games to mask the leftmost 8 pixels of the background layer. It is activated by setting the second bit of the register (address 0x2001). Many games use this feature, but explaining why they do it is beyond the scope of this article.
Recognizing the included mask is incredibly simple: wideNES simply monitors the PPUMASK value and ignores the leftmost 8 pixels when the second bit is set in the register!
It seems that the implementation of this simple rule has eliminated the problem with SMB3 :
... well, or almost eliminated.
Status bars - the most difficult
Due to the limitations of PPU, at any given time on the screen there can be no more than 64 sprites; Moreover, at any moment in each raster line there can be no more than 8 sprites. This restriction does not allow developers to create complex HUDs from sprites and forces them to use to display information of a part of the background layer.
In addition to masks, PPU does not have a simple way to separate the background layer into a game area and a status area. Therefore, the developers went to tricks, leading to a bunch of unorthodox ways to create state panels ...
To recognize different types of status bars, wideNES uses different heuristics, but to save time, I’ll consider only one of the most interesting ones: Mid-Frame IRQ tracking.
Mid-Frame IRQ Tracking
Unlike modern GPUs with large internal frame buffers, PPU has no frame buffer at all! To save space, PPU stores scenes as a grid of 64x32 tiles measuring 8x8 pixels. Instead of pre-calculating pixel data, tiles are stored as pointers to a CHR Memory (Character Memory), which contains all the pixel data.
Since NES was developed in the 80s, PPU was created without taking into account modern display technologies. Instead of simultaneously rendering a full frame, PPU outputs the NTSC video signal, which should be displayed on a CRT screen that displays video pixel by pixel , line by line , from top to bottom, from left to right.
Why is all this important?
Since PPU renders frames from top to bottom, line by line, you can send PPU frame-by-frame instructions to create video effects that are impossible with any other approach! These effects can be as simple (for example, changing the palette), and quite complex (for example, you guessed it, creating state panels!).
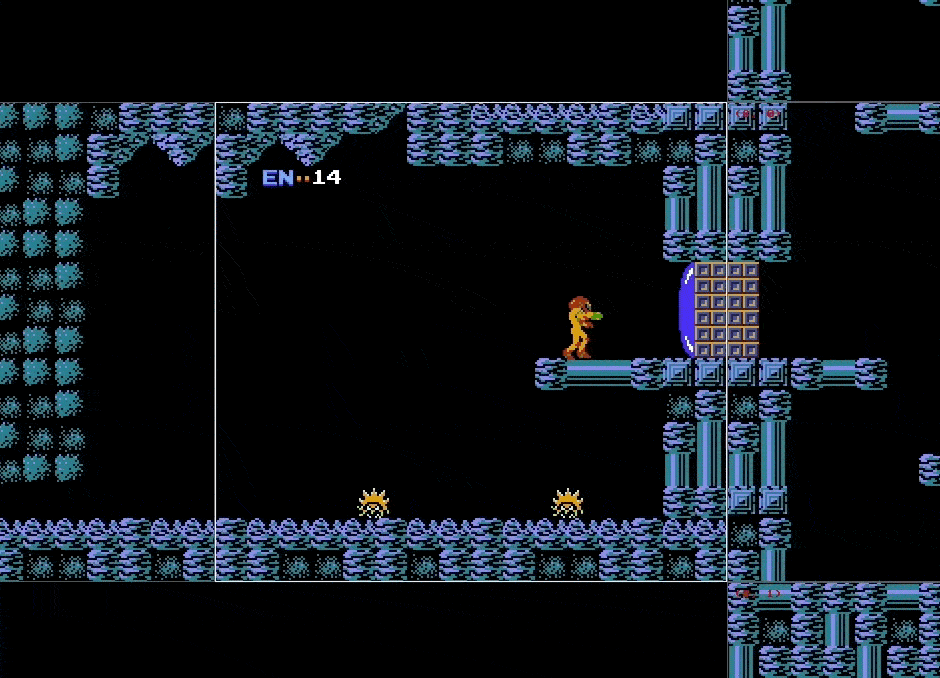
To explain how writing to PPU in the middle of a frame can create status bars, I recorded a raw dump of PPU and CHR Memory video memory for one SMB3 frame:
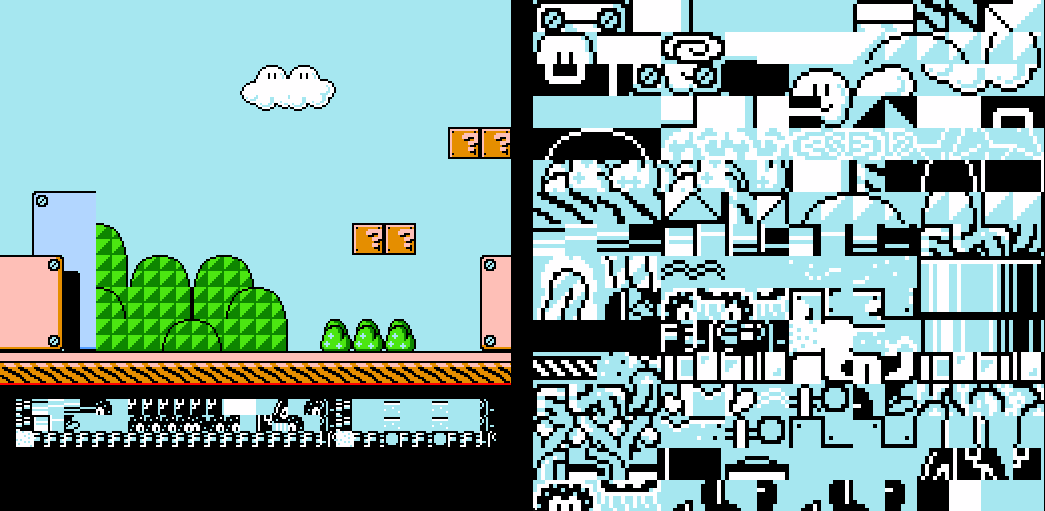
Everything looks fine, nothing special ... but just look at the status bar! It is completely distorted!
Now look at the same raw dump, but made after line 196 ...

Yes, the level looks awful, but the status bar looks great!
What is going on here?
SMB3 sets a timer to start the IRQ (interrupts) exactly after rendering the raster line 195. It sends the following instructions to the IRQ handler:
- Set PPUSCROLL values (0,0) (so that the status bar stays in place)
- Replace the tile card in the CHR Memory (put in order the graphics of the status panel)
Since the rest of the level is already rendered, the PPU will not re-frame the frame. Instead, it will continue rendering with these parameters, displaying a beautiful undistorted state panel!
Let's go back to wideNES: watching all the IRQs in the middle of the frame and remembering the raster line on which they occurred, wideNES can ignore all subsequent raster lines in the record! If the IRQ occurs in the raster line above 240/2, then all previous lines are ignored, because early interruption of the raster line means that the status bar may be at the top of the screen.
After implementing this heuristic for Super Mario Bros. 3 earned perfect!
I briefly considered the possibility of using a computer vision library, such as OpenCV, for recognizing state panels (or other mostly static areas of the screen), but as a result I decided to refuse it. The use of a huge, complex and non-transparent library of computer vision contradicts the ideals of wideNES, in which I seek to use compact, simple, and transparent rules and heuristics to get results.
Scene Recognition
With the exception of a few outstanding examples (for example, Metroid ), games for NES usually do not take place within one huge, inseparable level. On the contrary, most NES games are divided into many small independent “scenes” with doors or transition screens between them.
Since there is no concept of “scenes” in wideNES, bad things happen when changing scenes ...
For example, here is the first passage from the scene of Castlevania , where Simon Belmont enters Dracula’s castle:
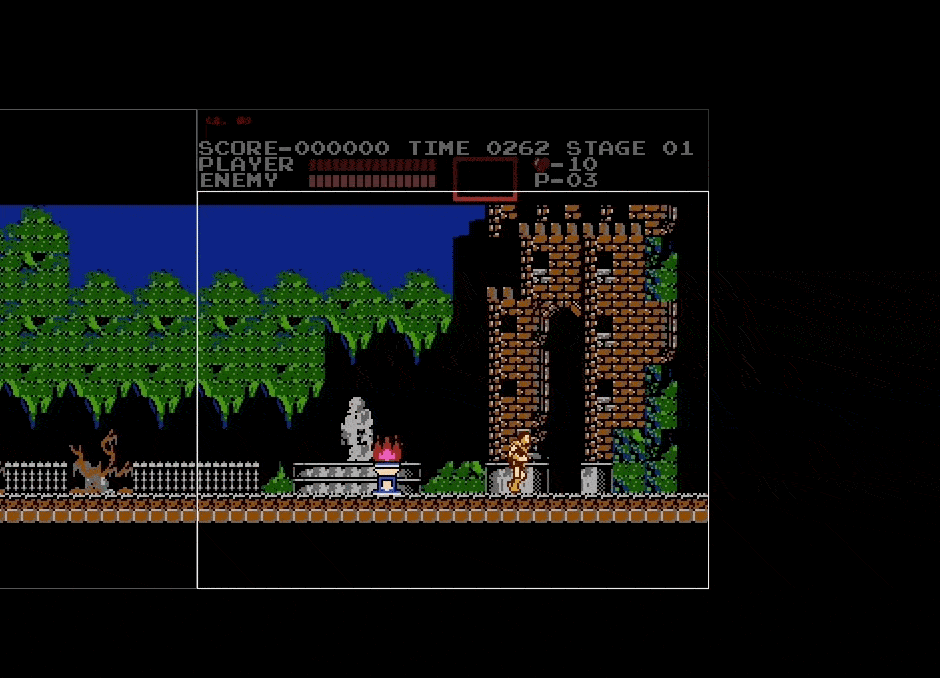
Wow, everything is bad! wideNES completely rewrote the last part of the level with the first screen of the new level!
Obviously, wideNES needs some way to recognize scene changes. But which one?
Perceptual hashing!
Unlike cryptographic hash functions that seek to evenly distribute similar incoming data across the output space, perceptual hash functions try to keep similar incoming data “close” to each other in the output data space. Therefore, perceptual hashes are ideal for recognizing similar images!
Perceptual hash functions can be incredibly complex, some of them are able to recognize similar images, if one of them was rotated, scaled, stretched and colors changed in it. Fortunately, wideNES does not require complex hash functions, because each frame is guaranteed to have the same size. Therefore, in wideNES, the simplest perceptual hash is used: summation of all pixels on the screen!
It is simple, but it works quite well!
For example, see how the transitions between scenes stand out if you plot the change in perceptual hash over time in The Legend of Zelda :
Currently, wideNES uses a fixed threshold between perceptual hash values to perform the transition between scenes, but the result is far from ideal. Different games use different palettes, and there are many cases in which wideNES thinks that a transition has taken place, but in fact it was not. Ideally, wideNES should use a dynamic threshold value, but for now it will come down and fixed.
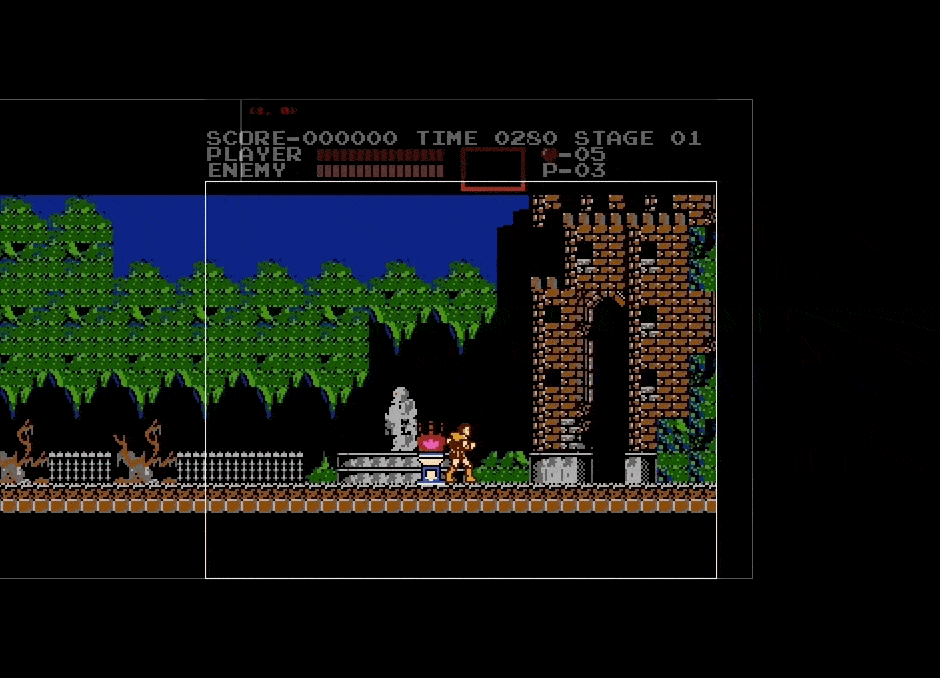
After the implementation of this new heuristic, wideNES successfully recognizes Simon's entry from Castlevania to the castle and accordingly creates a new canvas.
And with this decision we replaced the last large piece of the wideNES puzzle.
Having implemented the simplest serialization, I was finally able to launch the game for NES, play several levels and automatically generate level maps!
What awaits wideNES in the future?
wideNES consists of two separate parts: the wideNES core , which is the technology rules / heuristics that underlie the technology, and the specific implementation of wideNES inside the ANESE emulator.
Kernel wideNES enhancements
First, wideNES tends to be too aggressive to recognize transitions between scenes. The number of false positives can be minimized by using a more appropriate perceptual hashing algorithm or by moving to dynamic thresholds between perceptual hashes.
Additional work is also required on recognizing static screen elements. For example, in Megaman IV there is an IRQ in the middle of the frame, but there is no status bar, due to which wideNES mistakenly ignores a solid part of the playing field. Although this particular case can be corrected manually, it is better to use smarter heuristics.
Some NES games scrolling the screen in “unique” ways. One of the most notable examples is The Legend of Zelda , in which PPUSCROLL is used for the horizontal scroll, but for the vertical scroll, a completely different register is used - PPUADDR. Zelda is a fairly popular game, so wideNES implements heuristics specifically for Zelda . There are other games with similar "unique" scrolling modes, for which individual heuristics will also be needed.
It would be useful to find some way of “stitching” identical scenes. For example, if a user plays Super Mario Bros. Level 1, but climbs into a pipe to get into an underground cave with coins, then wideNES will create two separate scenes for Level 1: Scene A, level until the moment when Mario enters the coin area, and Scene B, level, from when Mario comes out of the pipe and up to the flagpole. If the game is then restarted and Level 1 is replayed without entering the tube, then wideNES will simply update scene A, which will contain a full-level map, but scene B will “end”.
Finally, wideNES should track transitions between scenes. Without this data, it will be impossible to construct a transition graph between scenes for generating maps of the world of games that do not consist of a single large world.
Improved wideNES implementation in ANESE
Currently, wideNES is implemented only in the NES emulator written by me called ANESE. ANESE is a very spartan emulator: most options are hidden behind CLI flags, and the only implemented UI is the simplest file selection overlay! He is still extremely far from the level of "production".
In addition to the lack of UI, ANESE and wideNES would not prevent improvements in compatibility and speed. ANESE - the first emulator written by me, and it is noticeable!
There are quite a few compatibility issues - many games do not work correctly or do not start at all. Fortunately, the imperfection of ANESE does not mean that wideNES is a bad technology. wideNES is based on proven principles that will be easy to implement in other emulators!
In terms of speed, ANESE and wideNES are not ideal, and even on relatively powerful PCs, performance can sometimes fall below 60fps! In ANESE and wideNES you need to implement many optimizations. In addition to general improvements to the ANESE kernel, you need to improve in wideNES frame recording, map rendering and hash sampling.
Conclusion
In the article I talked about the main aspects of wideNES, but I could not describe many small features. For example, wideNES stores a map of the true hash and scroll values of each frame, which are used to enable repeated scenes. This and many other functions are described in the widely commented wideNES source code posted on the wideNES project page .
Work on wideNES was a truly amazing experience, but due to the approaching new academic semester at Waterloo University, I doubt that I will be able to continue the development of wideNES soon. At the moment, the main functions of wideNES are working, and I am glad that I was able to write this post with a description of some of its technologies!
Try using wideNES and tell about your feelings! Download ANESE , run Super Mario Bros. , The Legend of Zelda or Metroid , and play them in new ways!
Source: https://habr.com/ru/post/421555/
All Articles