Mastering Vuex - from Zero to Hero
Hi, Habr! I present to your attention the translation of the article “Mastering Vuex - Zero to Hero” by Sanath Kumar.
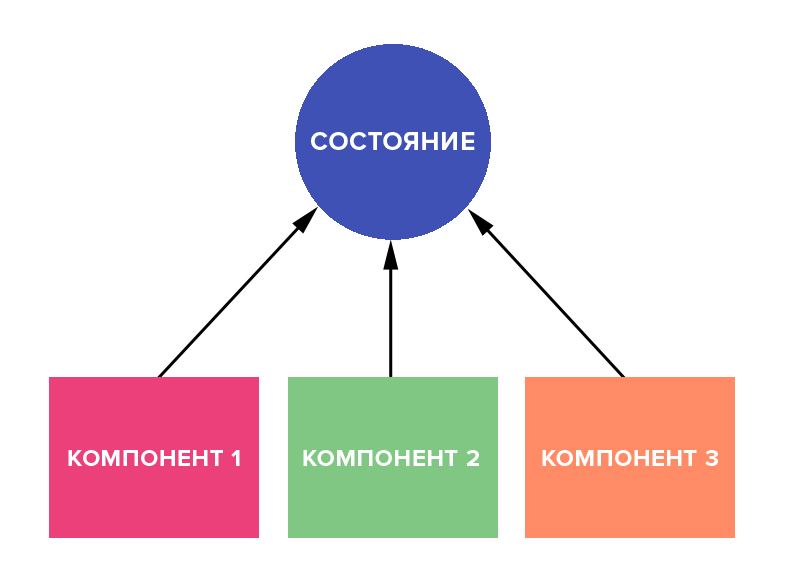
The official Vuex documentation defines it as a state management pattern + library for Vue.js applications. But what does it mean? What is a state management pattern?
Imagine you are working on a large web application with hundreds of routes and components. Wouldn't it be easier if we could store all the data we would ever need in an application in one centralized vault?
Each component or route within our application will request data from the Vuex state and send the modified data back to the state.
In fact, the state of Vuex can be considered as the only source of truth for the entire application.
Data is stored inside the state as a JSON object. For example:
state: { name: "John Doe", age: "28" } But how can our components and routes access data stored in our state? To do this, inside our Vuex repository, you must define getters that will return data from the repository to our components. Let's see what a simple Getter looks like that gets its name from our repository:
getters: { NAME: state => { return state.name; }, } Note that the name of the getter is written in capital letters. This is just a code style recommendation. You don’t have to follow it if you don’t like it.
Now that we have defined a getter for a name, it is incredibly easy to get the value of the name inside our component. The following snippet presents the code that allows this.
let name = this.$store.getters.NAME; We figured out how to get data from the repository. Now let's see how we can set the data in the repository. We define setters, right? In addition, Vuex setters are named a little differently. We define Mutation for setting data in our Vuex state.
mutations: { SET_NAME: (state, payload) => { state.name = payload; }, } What kind of payload? Payload is the data passed to our mutation from the component that performs the mutation. How can we do this? Very simple:
this.$store.commit('SET_NAME', your_name); This code snippet will change the state of the application and set any value assigned to your_name for the name property inside our repository.
MUTATIONS SYNCHRONNY
Imagine that we have a list of names stored in a database on a remote server. The server provides us with an endpoint that returns an array of names that can be used in our application Vue.js. Of course, we can use Axios to make an endpoint request and retrieve data.
let {data} = await Axios.get('https://myapiendpoint.com/api/names'); After that, we can pass the returned array to our store Vuex state using a mutation. Easy, right? But not really. Mutations are synchronous, and we cannot run asynchronous operations, such as API calls, within the mutation.
What should we do in this case? Create Actions .
Actions are like mutations, but instead of changing the state directly, they mutate. Sounds confusing? Let's look at the action announcement.
actions: { SET_NAME: (context, payload) { context.commit('SET_NAME', payload); }, } We defined an action named SET_NAME that takes context and payload as parameters. The action performs the SET_NAME mutation created earlier with the data passed to it, that is, your_name .
Now, instead of calling the mutation directly, our components launch the SET_NAME action with the new name as data:
this.$store.dispatch('SET_NAME', your_name); Then the action initiates a mutation with the data passed to it, that is, your_name .
But why?
You may wonder why an action declaration is required if we can simply initiate mutations with a new value directly from our components. As mentioned above, mutations are synchronous, but actions are not.
In the example above, a case is considered when you need to update the value of a name, not only in its state, but also in the database running on a remote server. I'm sure that this is how you intend to use Vuex in a real project 99% of the time. Take a look at the following code snippet:
mutations: { SET_NAME: (state, name) => { state.name = name; }, }, actions: { SET_NAME: async (context, name) => { let {data} = await Axios.post('http://myapiendpoint.com/api/name', {name: name}); if (data.status == 200) { context.commit('SET_NAME', name); } }, } The code itself does not require explanation. We use Axios to send a name to the endpoint. If the POST request was successful and the value of the field name was successfully changed on the server, we initiate the SET_ NAME mutation to update the value of the name within our state.
TAKE PLAYING FOR PRACTICE NEVER INITIATE MUTATIONS DIRECTLY. FOR THIS, ALWAYS USE ACTIONS.
Configuring Vuex Storage in Vue.JS
Let's dive deeper and find out how we can implement Vuex in a real application.
Step 1. Install Vuex
npm install --save vuex Step 2. Create the Vuex repository
- Create a store directory in the root of our application.
- Create an index.js file in this directory and use the code below to create a new repository.
import Vue from 'vue'; import Vuex from 'vuex'; Vue.use(Vuex); export const store = new Vuex.Store({ state: {}, getters: {}, mutations: {}, actions: {}, }); Step 3. Adding the Vuex repository to the Vue.JS application
1. Import the repository into the main.js file:
import {store} from './store'; 2. Add the repository to the Vue instance, as shown below:
new Vue({ el: '#app', store, router, render: h => h(App), }); Now we can add state variables, getters, mutations, and actions to our Vuex repository.
')
Example
Take a look at the Vuex repository for a simple to-do list application. “Just not another to-do list !!!”. Yes? Do not worry. At the end of this article, you will learn to use all the power and strength of Vuex.
import Vue from 'vue'; import Vuex from 'vuex'; import Axios from 'axios'; Vue.use(Vuex); export const store = new Vuex.Store({ state: { todos: null, }, getters: { TODOS: state => { return state.todos; }, }, mutations: { SET_TODO: (state, payload) => { state.todos = payload; }, ADD_TODO: (state, payload) => { state.todos.push(payload); }, }, actions: { GET_TODO: async (context, payload) => { let {data} = await Axios.get('http://yourwebsite.com/api/todo'); context.commit('SET_TODO', data); }, SAVE_TODO: async (context, payload) => { let {data} = await Axios.post('http://yourwebsite.com/api/todo'); context.commit('ADD_TODO', payload); }, }, }); Adding a new item to the to-do list
Inside your component, initiate the SAVE_TODO action by passing a new to-do item to it, as shown in the code snippet below.
let item = 'Get groceries'; this.$store.dispatch('SAVE_TODO', item); The SAVE_TODO action makes a POST request to the endpoint, and then triggers the ADD_TODO mutation , which adds a to-do item to the state variable todos .
Getting To Do List Items
Inside the component's mounted () block, initiate the second action GET_TODO , which takes all the elements of the to-do list from the endpoint and saves them to the todos state variable, triggering the SET_TODO mutation:
mounted() { this.$store.dispatch('GET_TODO'); } Access to to-do items within a component
To access the todos element inside a component, create a calculated property:
computed: { todoList() { return this.$store.getters.TODOS; }, } Inside the component, you can access the calculated property:
<div class="todo-item" v-for="item in todoList"></div> Using the mapGetters method
There is an even easier way to access to-do items within a component using the mapGetters method provided by Vuex.
import {mapGetters} from 'vuex; computed : { ...mapGetters(['TODOS']), // } You may have already guessed that the code inside the template should be changed, as shown in the snippet below.
<div class="todo-item" v-for="item in TODOS"></div> Notice how we used the ES6 propagation operator [...] within our computed properties.
VUEX STORAGE IS NOT A SIMPLE SOURCE OF THE CURRENT STATE OF YOUR APP. IT ALSO IS THE ONLY POINT THAT MUST CHANGE THIS CONDITION.
This requires a little explanation. We have already learned how to create actions for getting and installing to-do items in our repository. What if we need to update an item and tag it? Where do we run the code for this?
On the Internet, you can find different opinions on this subject. The documentation also does not have clear instructions regarding this.
I would recommend storing all API calls inside actions in your Vuex repository. Thus, each state change occurs only inside the repository, thus making it easier to debug and simplify understanding of the code, and also makes editing the code easier.
Code organization
Saving all state variables, getters, actions and mutations in one file will quickly make it cumbersome as soon as you start working with large applications. Let's see how you can organize the repository in several files as modules.
Create a new directory inside your repository and name it modules . Add todos.js file containing the following code in the created directory:
const state = {}; const getters = {}; const mutations = {}; const actions = {}; export default { state, getters, mutations, actions, }; Now we can move state variables, getters, mutations, and actions from the index.js file to the todos.js file. Do not forget to import Axios . All we have to do is let Vuex know that we have created a storage module and where to find it. The updated index.js file should look something like this:
import Vue from 'vue'; import Vuex from 'vuex'; import Axios from 'axios'; import todos from './modules/todos'; Vue.use(Vuex); export const store = new Vuex.Store({ state: {}, getters: {}, mutations: {}, actions: {}, modules: { todos, }, }); The todos.js file will look like this:
import Axios from 'axios'; state = { todos: null, }; getters = { TODOS: state => { return state.todos; }, }; mutations = { SET_TODO: (state, payload) => { state.todos = payload; }, ADD_TODO: (state, payload) => { state.todos.push(payload); }, }; actions = { GET_TODO: async (context, payload) => { let {data} = await Axios.get('http://yourwebsite.com/api/todo'); context.commit('SET_TODO', data); }, SAVE_TODO: async (context, payload) => { let {data} = await Axios.post('http://yourwebsite.com/api/todo'); context.commit('ADD_TODO', payload); }, }; export default { state, getters, mutations, actions, }; Summary
- Application state is stored as one large JSON object.
- Getters are used to access values stored in the repository.
- Mutations update your condition. It should be remembered that the mutations are synchronous.
- All asynchronous operations must be performed inside actions . Actions change state by initiating mutations.
- Make it a rule to initiate mutations exclusively through actions .
- Modules can be used to organize your repository in several small files.
Vuex makes working with Vue much easier and more fun. If you are a beginner, it may be difficult for you to decide whether to use Vuex in certain areas of your application. Follow your instinct. You will reach high speed pretty quickly.
Source: https://habr.com/ru/post/421551/
All Articles