How Headless Chrome Works
Already from the name it is clear that a headless browser is something without a head. In the context of the frontend, it is an indispensable developer tool with which you can test the code, check the quality and conformity of the layout. Vitaly Slobodin on Frontend Conf decided that it was necessary to get acquainted with the device of this tool more closely.
Under the cut are the components and features of Headless Chrome, interesting scenarios for using Headless Chrome. The second part about Puppeteer is a convenient Node.js library for managing Headless mode in Google Chrome and Chromium.
About the speaker: Vitaly Slobodin - a former PhantomJS developer - the one who closed it and buried it. Sometimes Konstantin Tokarev ( annulen ) helps in the "resurrected" version of QtWebKit - the very QtWebKit, where there is support for ES6, Flexbox and many other modern standards.
')
Vitali loves to explore browsers, digging into WebKit, Chrome, and so on, in his free time. About browsers today and talk, namely about the headless browsers and their entire family of ghosts.
What is a headless browser?
Already from the name it is clear that this is something without a head. In the context of the browser, this means the following.
This is how a typical WebKit-based browser looks like. You can not get a grasp of the components - it's just a visual image.

We are only interested in the top Browser UI component. This is the same user interface - windows, menus, pop-up notifications and everything else.

It looks like a headless browser. Notice the difference? We completely remove the user interface. He is no more. Only the browser remains .
Today we will talk about Headless Chrome (). What is the difference between them? In fact, Chrome is a branded version of Chromium, which has proprietary codecs, the same H.264, integration with Google services and everything else. Chromium is just an open implementation.
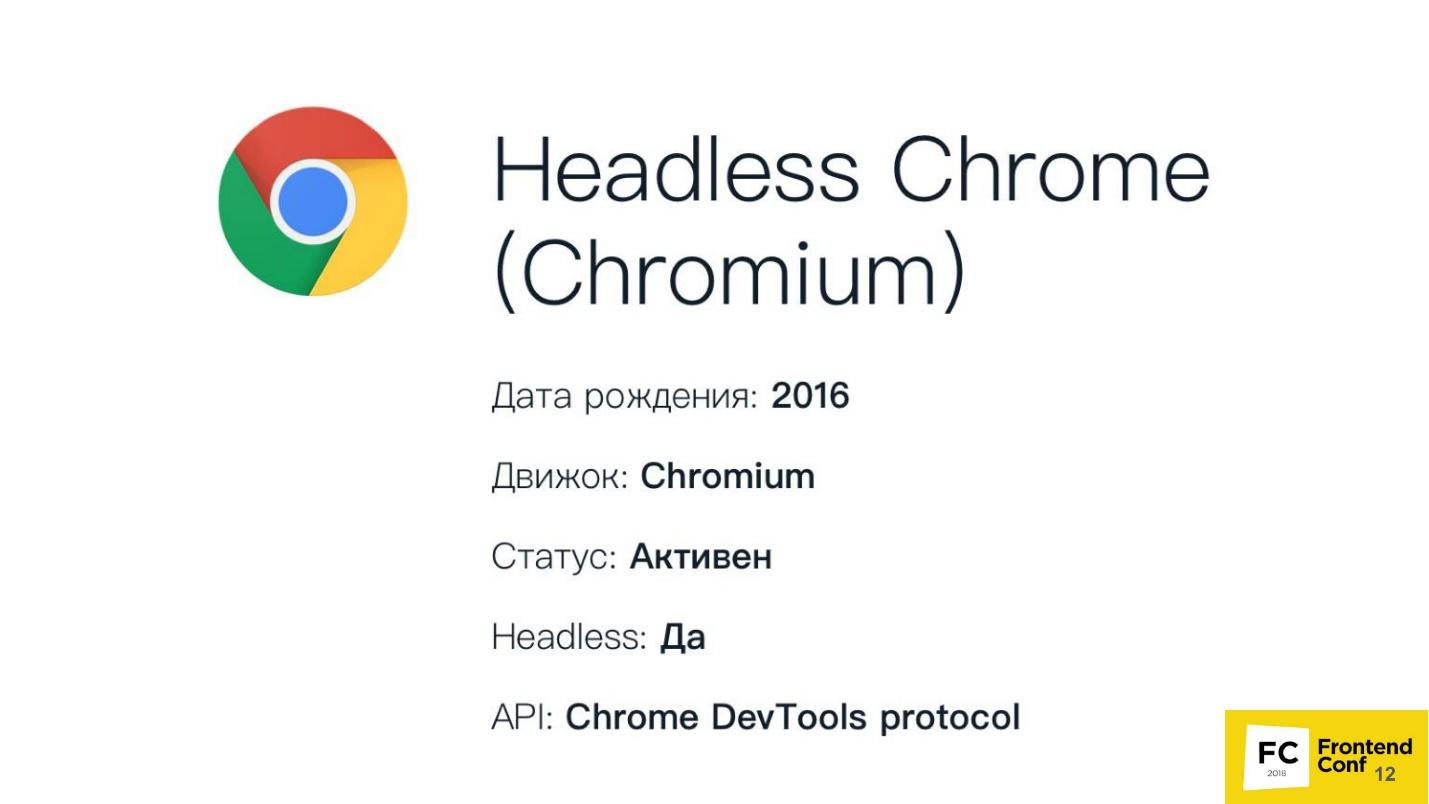
Date of birth Headless Chrome: 2016. If you came across it, you can ask me a tricky question: “How so, I remember the news of 2017?” The fact is that a team of engineers from Google contacted the developers of PhantomJS in 2016, when they just started to implement Headless -mode in chrome. We wrote whole gugldoki, how we will implement the interface and stuff. Then Google wanted to make the interface fully compatible with PhantomJS. It was only later that a team of engineers came to the decision not to make such compatibility.
About the management interface (API), which is the Chrome DevTools protocol, we'll talk later and see what you can do with it.
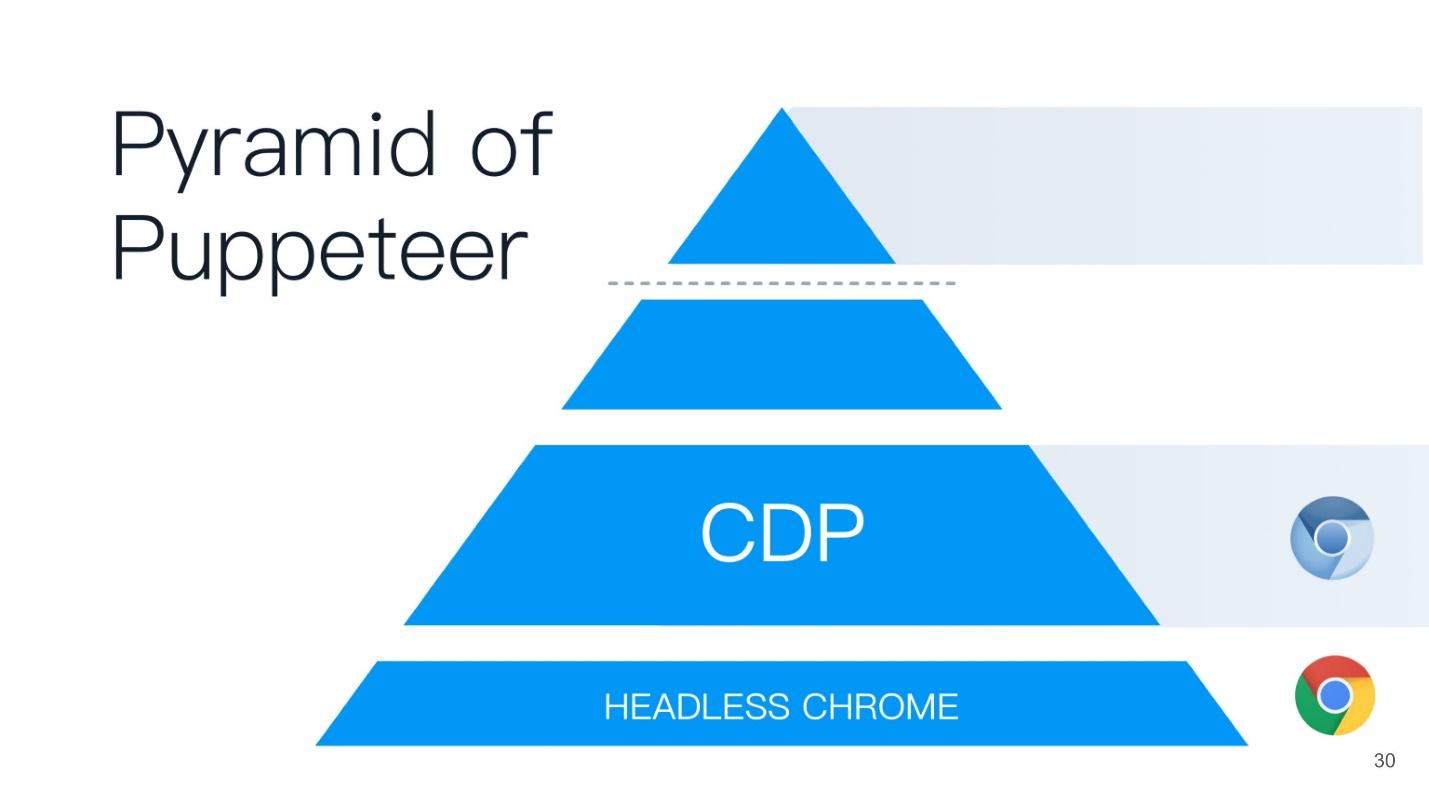
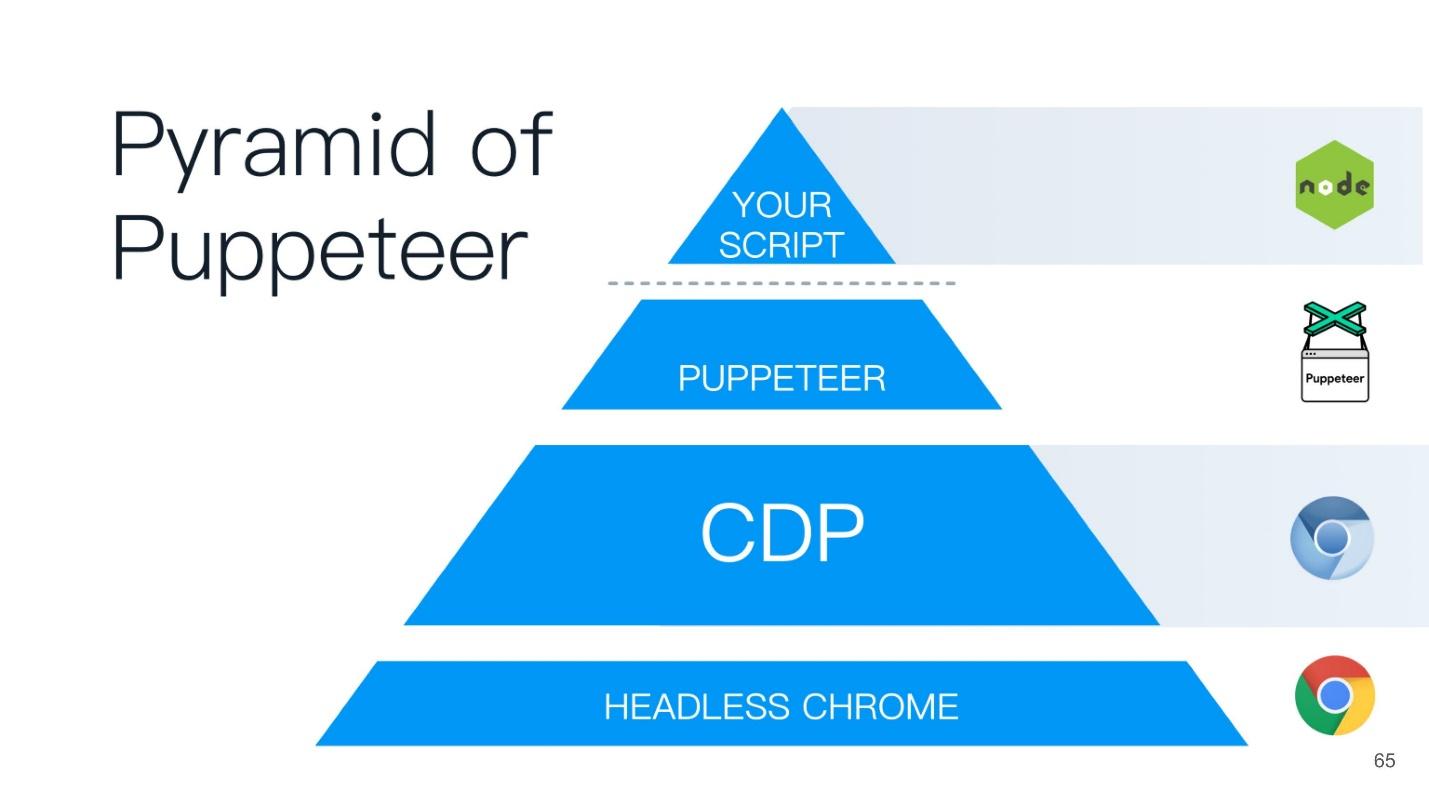
This article will be built on the principle of the pyramid Puppeteer (with the English. Puppeteer). A good name is chosen - the puppeteer is the one who controls all the others!
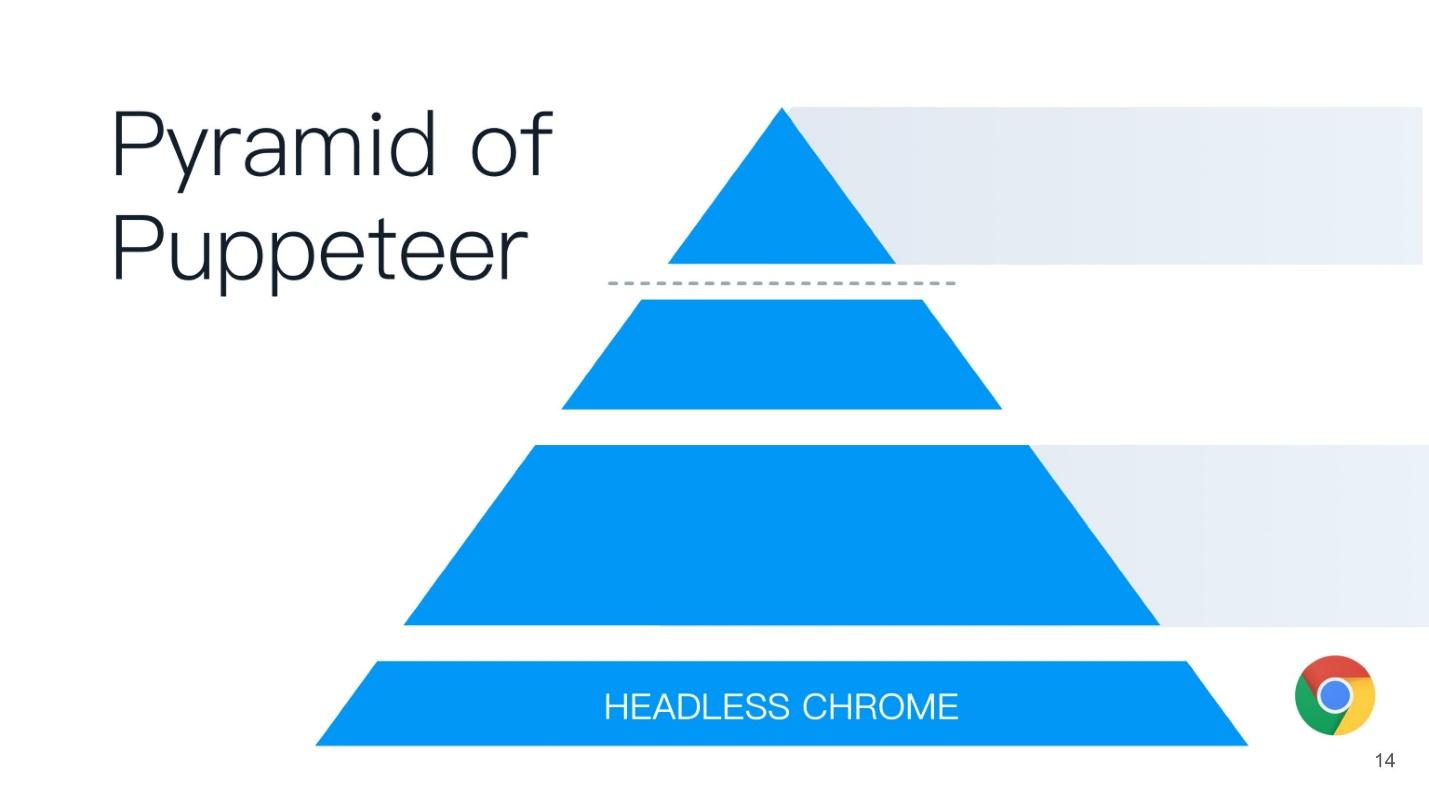
At the base of the pyramid is Headless Chrome - headless Chrome - what is it?
Headless chrome
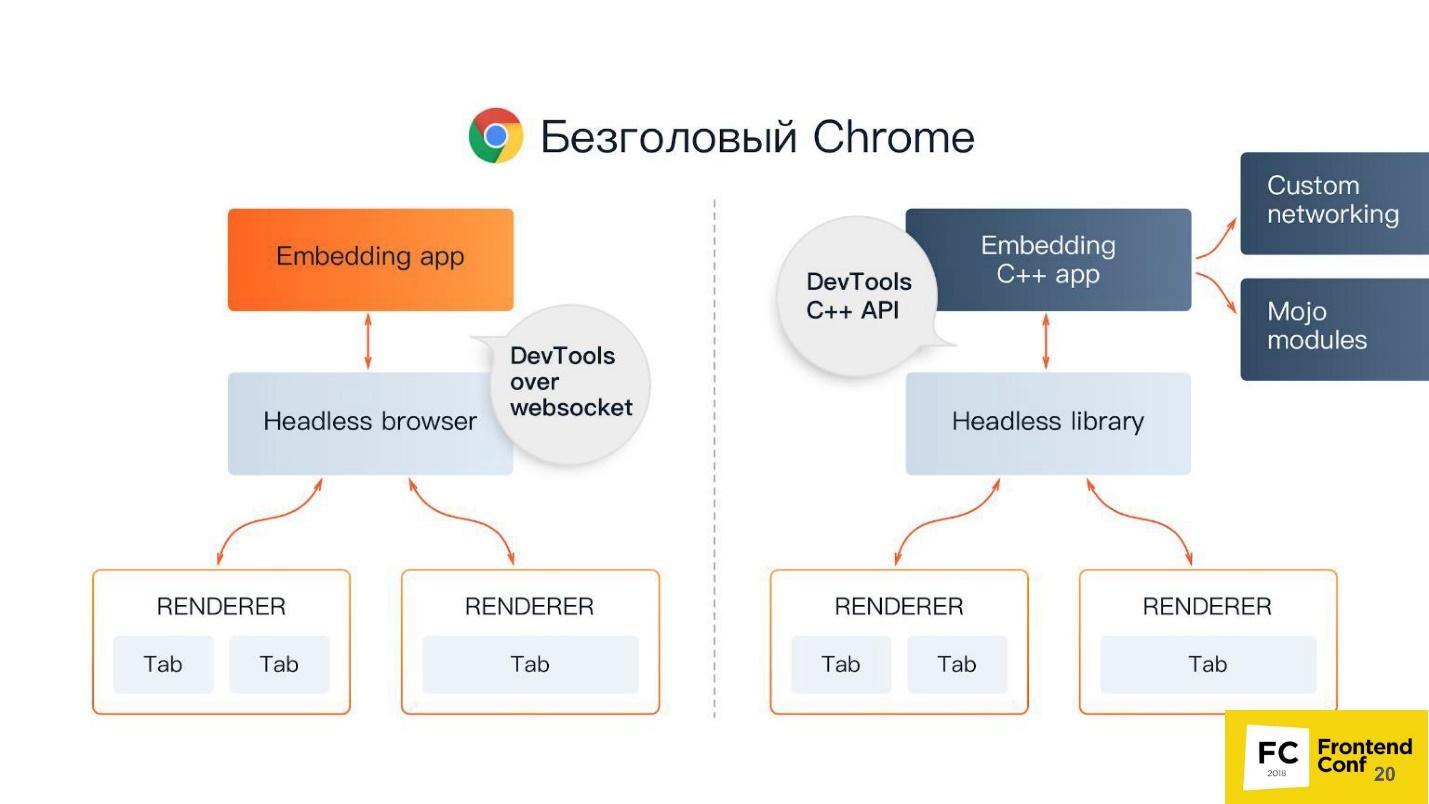
In the center - Headless browser - the same Chromium or Chrome (usually Chromium). It has the so-called Renders (RENDERER) - the processes that draw the contents of the page (your window). Moreover, each tab needs its own renderer, so if you open a lot of tabs, then Chrome will launch the same number of processes for drawing.
Over all this is your application. If we take Chromium or Headless Chrome, then on top of it will be Chrome, or some kind of application in which you can embed it. The closest analogue can be called Steam. Everyone knows that in essence Steam is just a browser to the Steam site. He is certainly not headless, but looks like this scheme.
There are 2 ways to embed headless Chrome in your application (or use it):
You ask why C ++ is on the front end? The answer is DevTools C ++ API. You can differently implement and use the power of headless Chrome. If you use Puppeteer, communication with a headless browser will be done via web sockets. If you embed the Headless library in a desktop application, you will use the native interface, which is written in C ++.
But besides all this, you still have additional things, including:
Chromium components
Again I hear the tricky question: “Why do I need this terrible scheme? I am writing under (insert the name of your favorite framework). "
Because in which case, say, a fatal mistake or a very serious bug in production, you have to deal with the “guts”, and you can just get lost there - where, what and how. If you, for example, write tests or use Headless Chrome, you can also face some of its odd behavior and bugs. Therefore, I will briefly tell you what components Chromium has. When you see a large stack trace, you will already know which way to dig and how it can be fixed.
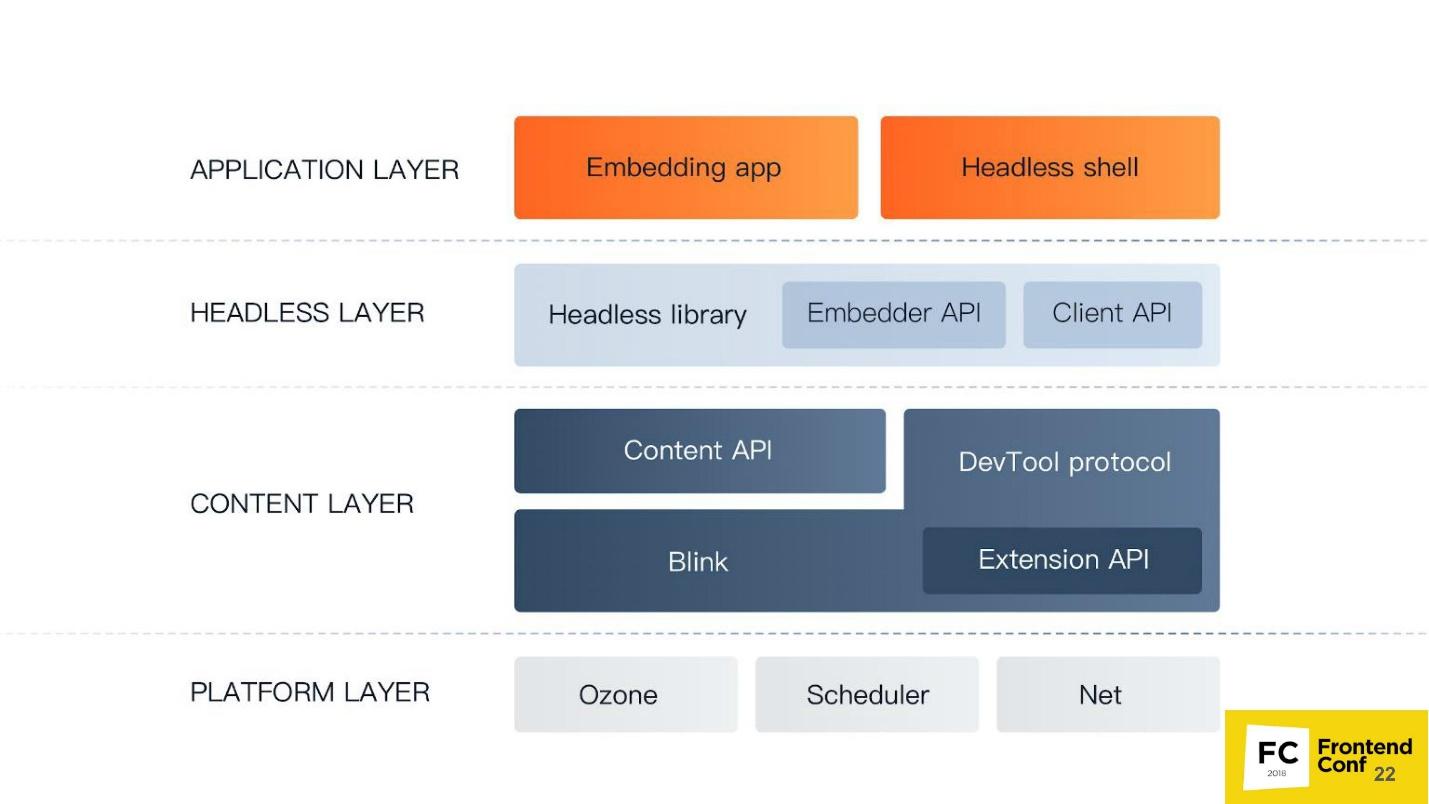
The lowest level of the Platform layer . Its components are:
Content layer is the largest component in Chrome. It includes:
Headless layer - a headless browser level:
Application layer :
Now let's go up from the depths a little higher, activate - now the front end will go.
Chrome DevTools protocol
We all came across the Chrome DevTools protocol because we use the Chrome developer panel or a remote debugger - the same development tools. If you run the developer’s tools remotely, communication with the browser takes place using the DevTools protocol. When you set up a debugger, see code coverage, use geolocation or something else - everything is managed with DevTools.
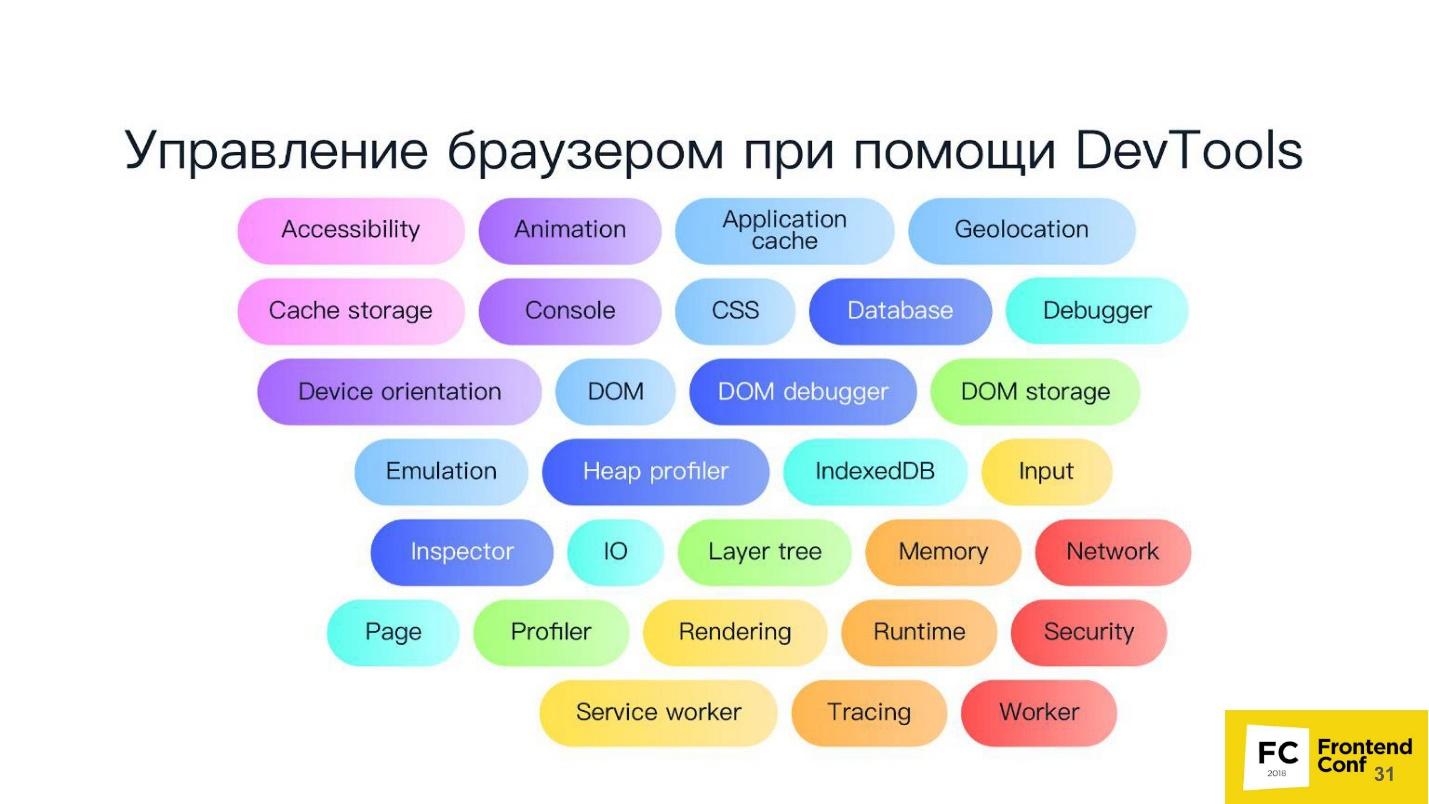
In fact, the DevTools protocol itself has a huge number of methods. Your developer tool does not have access, probably, to 80% of them. Actually there you can do everything!
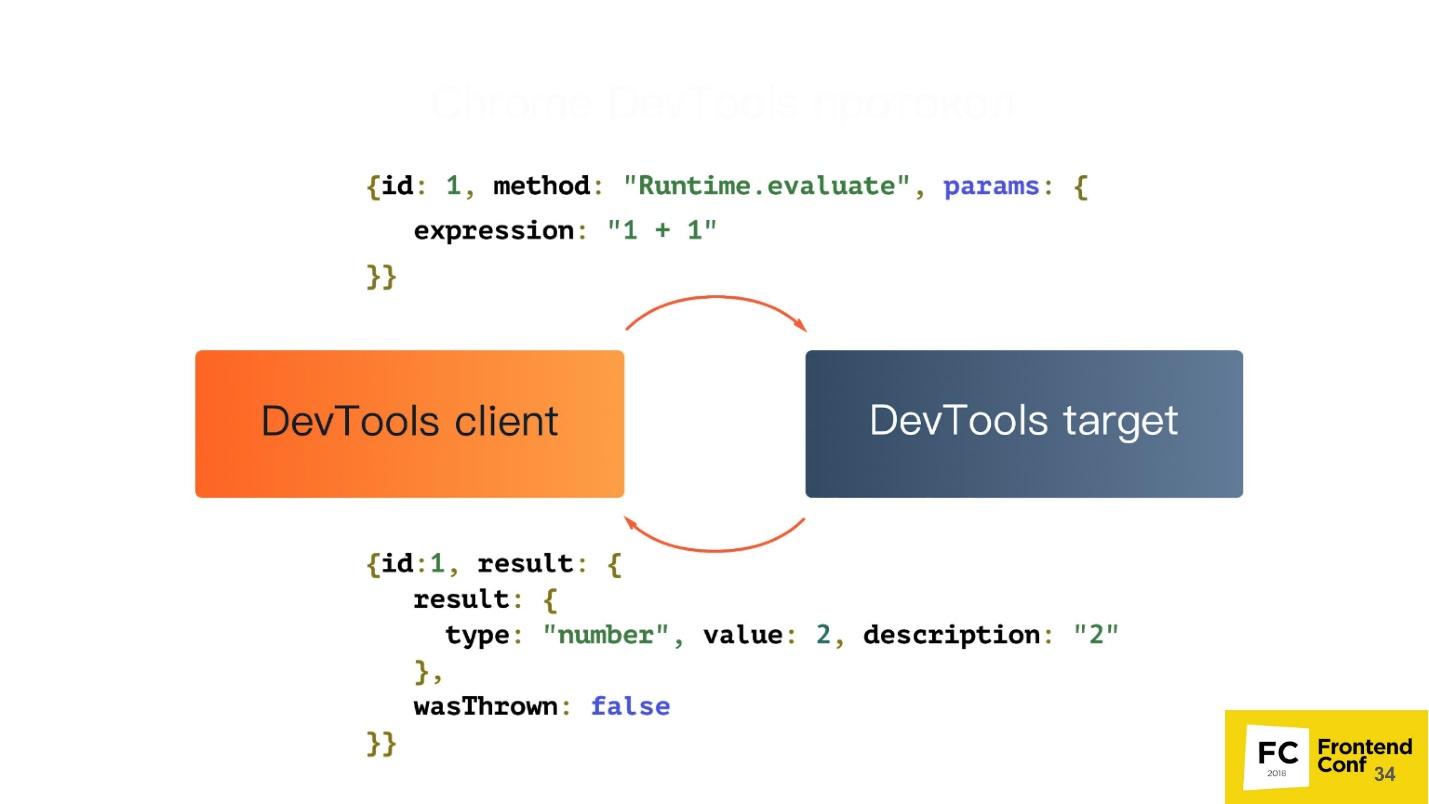
Let's take a look at what this protocol is. In fact, it is very simple. It has 2 components:
They communicate using simple JSON:
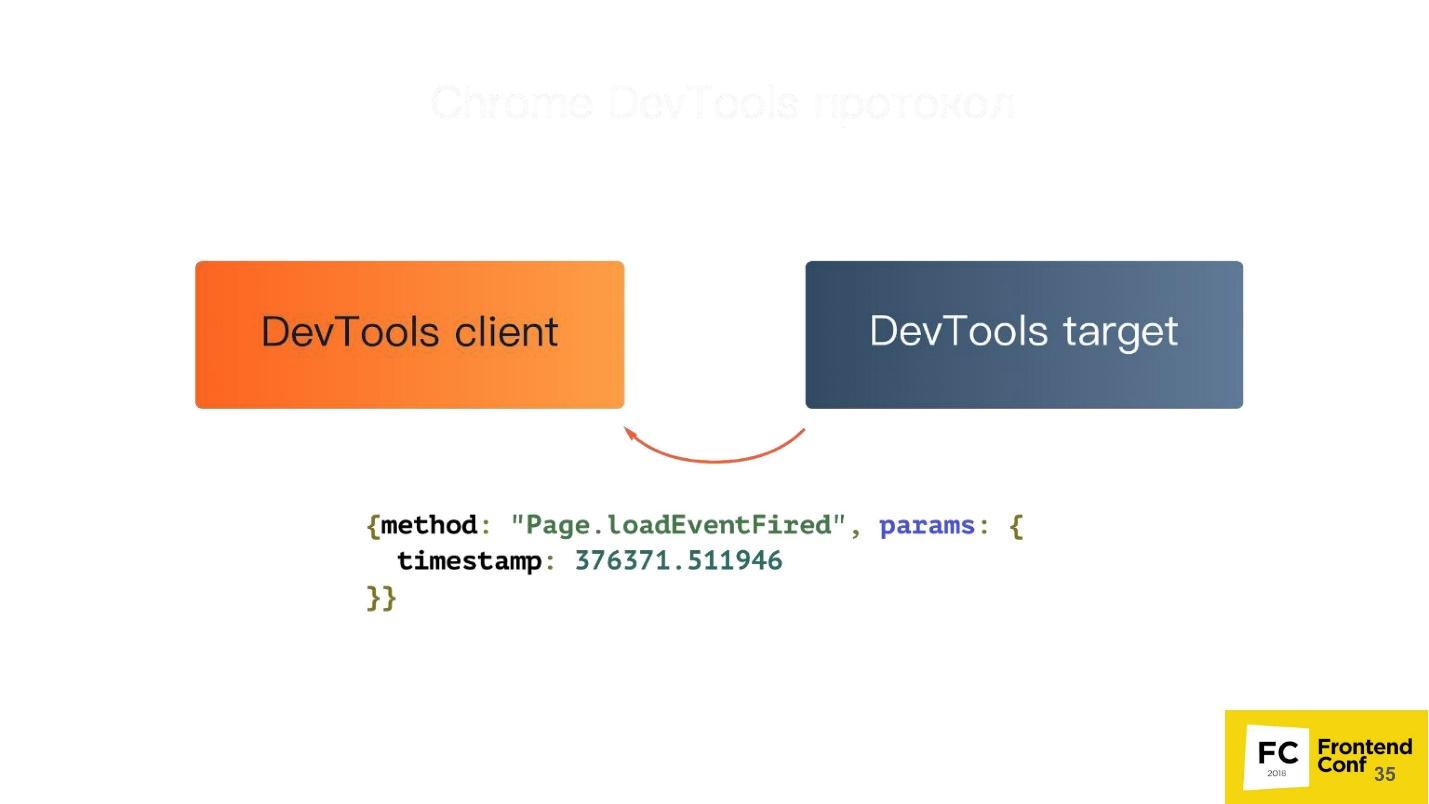
But among other things, your tab can send events back to you. Suppose that when an event occurred on a page, or there was an exception on a page, you will receive a notification via this protocol.

Puppeteer
You can install Puppeteer with your favorite package manager - be it yarn, npm or whatever.
It is also easy to use it - just request it in your Node.js-script, and already, in fact, you can use it.
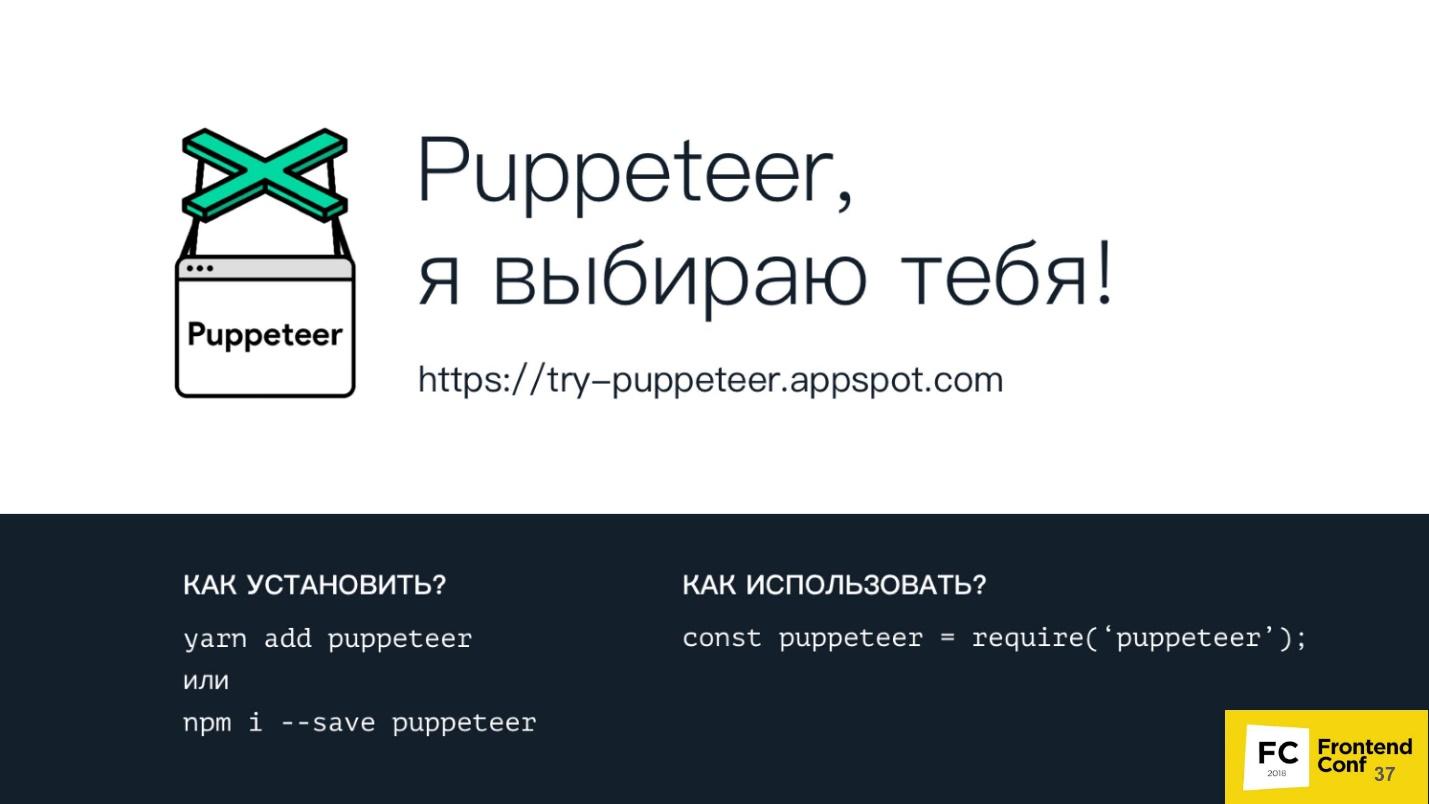
Under the link https://try-puppeteer.appspot.com you can write a script directly on the site, execute it and get the result directly in the browser. All this will be implemented using Headless Chrome.
Consider the simplest script under Node.js:
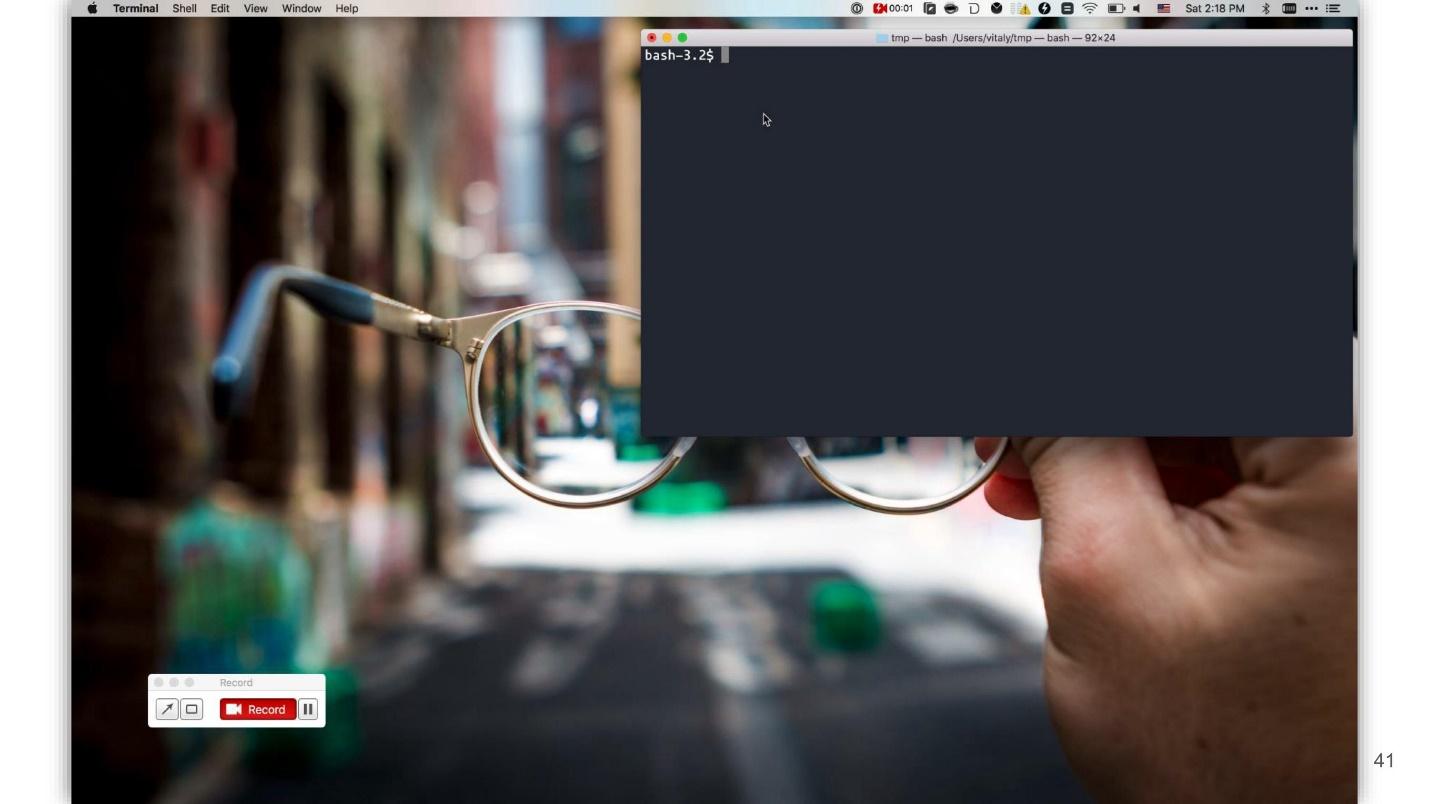
Here we just open the page and print it in PDF. Let's see the work of this script in real time:
Everything will be cool, but it is not clear what is inside. Of course, we have a headless browser, but we see nothing. Therefore, the Puppeteer has a special flag called headless: false:
It is needed to launch a headless browser in headful mode, when you can see a window and see what happens to your page in real time, that is, how your script interacts with your page.
This is what the same script will look like when we add this flag. On the left, a browser window appears - more clearly.
Pluses of Puppeteer:
+ This is the Node.js library for headless Chrome.
+ Support for legacy versions of Node.js> = 6.
+ Easy installation.
+ High-level API to control this whole gigantic machine.
Headless Chrome installs easily and without interfering with the system. When you first install, Puppeteer downloads the Chromium version and installs it directly into the node_modules folder just for your architecture and OS. You do not need to download anything extra, it does it automatically. You can also use your favorite version of Chrome, which is installed on your system. This can also be done - Puppeteer provides you with this API.
Unfortunately, there are also disadvantages, if we take exactly the basic installation.
Cons Puppeteer :
- No top-level functions : synchronization of bookmarks and passwords; profile support; hardware acceleration, etc.
- Software rendering is the most significant minus. All calculations and rendering occur on your CPU. But even here, Google engineers will soon surprise us - the work on the implementation of hardware acceleration is already underway. Already, you can try to use it if you are brave and courageous.
- Until recently, there was no support for extensions - now there IS! If you are a clever developer, you can take your favorite AdBlock, indicate how Puppeteer will use it, and all ads will be blocked.
- No audio / video support . Because, well, why headless-browser audio and video.
What can the Puppeteer:
And a couple of cool things that I will show a little further.
Session isolation
What is it, what is it eaten with, and will we not feed ourselves? - Do not choke!
Session isolation is a separate “repository” for each tab . When you launch Puppeteer, you can create a new page, and each new page can have a separate repository, including:
All pages will live independently of each other. This is necessary, for example, to maintain the atomicity of tests.
Session isolation saves resources and time when running parallel sessions . Suppose you are testing a site that is built in a development mode, that is, the bundle is not minimized, and weighs 20 MB. If you just want to cache it, you can tell Puppeteer to use the cache shared by all pages that are created, and this bundle will be cached.
You can serialize sessions for later use . You write a test that checks some action on your site. But you have a problem - the site requires authorization. You will not constantly add before each test for authorization on the site. Puppeteer allows you to log in to the site once, and then reuse this session in the future.
Virtual timers
You may already be using virtual timers. If you moved the slider in a developer tool that speeds up or slows down the animation (and washed your hands after that, of course!), Then at that moment you used virtual timers in the browser.
The browser can use virtual timers instead of real ones in order to “scroll” time forward to speed up page loading or end animation. Suppose you have the same test, you go to the main page, and there is animation for 30 seconds. It is unprofitable for anyone to wait for the test all this time. Therefore, you can simply speed up the animation so that it will be completed instantly when the page loads, and your test continues.
You can stop the time while the network request is running . For example, you are testing your application's reaction to when a request that goes to the backend is executed for a very long time, or returns with an error. You can stop time - Puppeteer allows it.
On the slide below there is another option: stop and continue the work of the renderer. In the experimental mode, it was possible to tell the browser not to engage in rendering, and later, if necessary, request a screenshot. Then the headless Chrome would quickly draw everything, give a screenshot, and again stop drawing anything. Unfortunately, the developers have already managed to change the principle of operation of this API, and such a function no longer exists.
A schematic view of the virtual timers below.
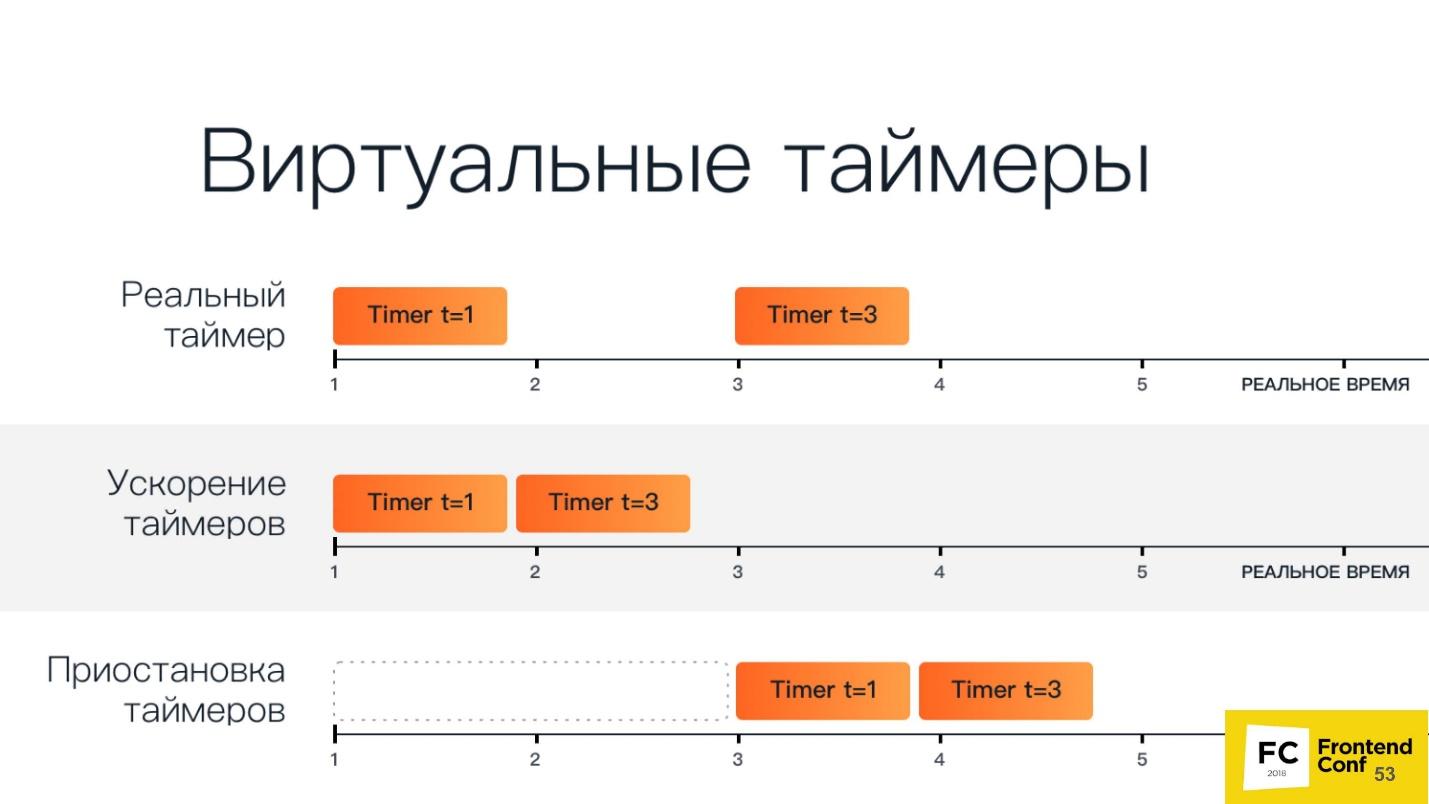
In the top line there are two usual timers: the first starts in the first unit of time and is executed in one unit of time, the second starts in the third unit of time and is executed in three units of time.
Acceleration timers - they run one after the other. When we suspend them, we have a period of time, after which all the timers start.
Consider this by example. Below is a cropped piece of code that essentially just loads a page with an animation with codepen.io and waits:
This is a demonstration of performance during the report - just an animation.
Now, using the Chrome DevTools protocol, we’ll send a method called Animation.setPlaybackRate, passing in the parameters to it the playbackRate with the value 12:
We load the same link, and the animation began to work much faster. This is due to the fact that we used a virtual timer and accelerated the animation playback 12 times.
Let's now conduct an experiment - pass the playbackRate: 0 - and see what happens. And there will be this: there is no animation at all, it does not play. Zero and negative values simply pause the entire animation.
Work with network queries
You can intercept network requests by setting the following flag:
In this mode, an additional event appears that triggers when a network request is sent or arrives.
You can change the query on the fly . This means that you can completely change all its contents (body) and its headers, inspect, even cancel the request.
This is required in order to handle authorization or authentication , including basic HTTP authentication.
You can also cover code (JS / CSS) . With the help of Puppeteer you can automate all this. We all know utilities that can load a page, show which classes are used in it, etc. But are we satisfied with them? I think no.
Again, the Chrome DevTools protocol comes to the rescue:
In the first two lines we launch a relatively new feature that allows you to find out the coverage of the code. We launch JS and CSS, go to some page, then say - stop - and we can see the results. And these are not some imaginary results, but those that the browser sees precisely at the expense of the engine.
In addition, there is already a plug-in, which for the Puppeteer all this is exported to istanbul.
At the top of the Puppeteer pyramid is a script that you wrote on Node.js - he is like the godfather to all the lower points.
But ... "not everything is calm in the Danish kingdom ..." - as William Shakespeare wrote.
What is wrong with headless browsers?
Headless browsers have problems despite the fact that all their cool features can do so much.
The difference in rendering pages on different platforms
I really love this item and constantly talk about it. Let's look at this picture.

Here is a regular page with plain text: on the right - drawing in Chrome on Linux, on the left - under Windows. Those who test with screenshots know that a value is always set, called the “error threshold”, which determines when the screenshot is considered identical and when it is not.
In fact, the problem is that no matter how hard you try to set this threshold, the error will always go beyond this limit, and you will still receive false positive results. This is due to the fact that all pages, and even web fonts are rendered differently on all three platforms - on Windows using the same algorithm, on MacOS differently, on Linux in general the zoo. You can not just take and test screenshots .
You will say: "I just need a reference machine, where I will run all these tests and compare screenshots." But in fact, this is wildly inconvenient, because you have to wait for CI, and you want to check here and now locally on the machine that you have not broken anything. If your reference screenshots are made on a Linux machine, and you have a Mac, then there will be false results.
By the way, if you still want to test with screenshots, there is a wonderful article by Roman Dvornov " Unit-testing with screenshots: breaking the sound barrier ." This is straight detective fiction.
Locks
Many large content providers do not like it when you do scraping or get their content in an illegal way. Imagine that I am a large content provider, and I want to play one game with you. There are two GET requests in two different browsers.
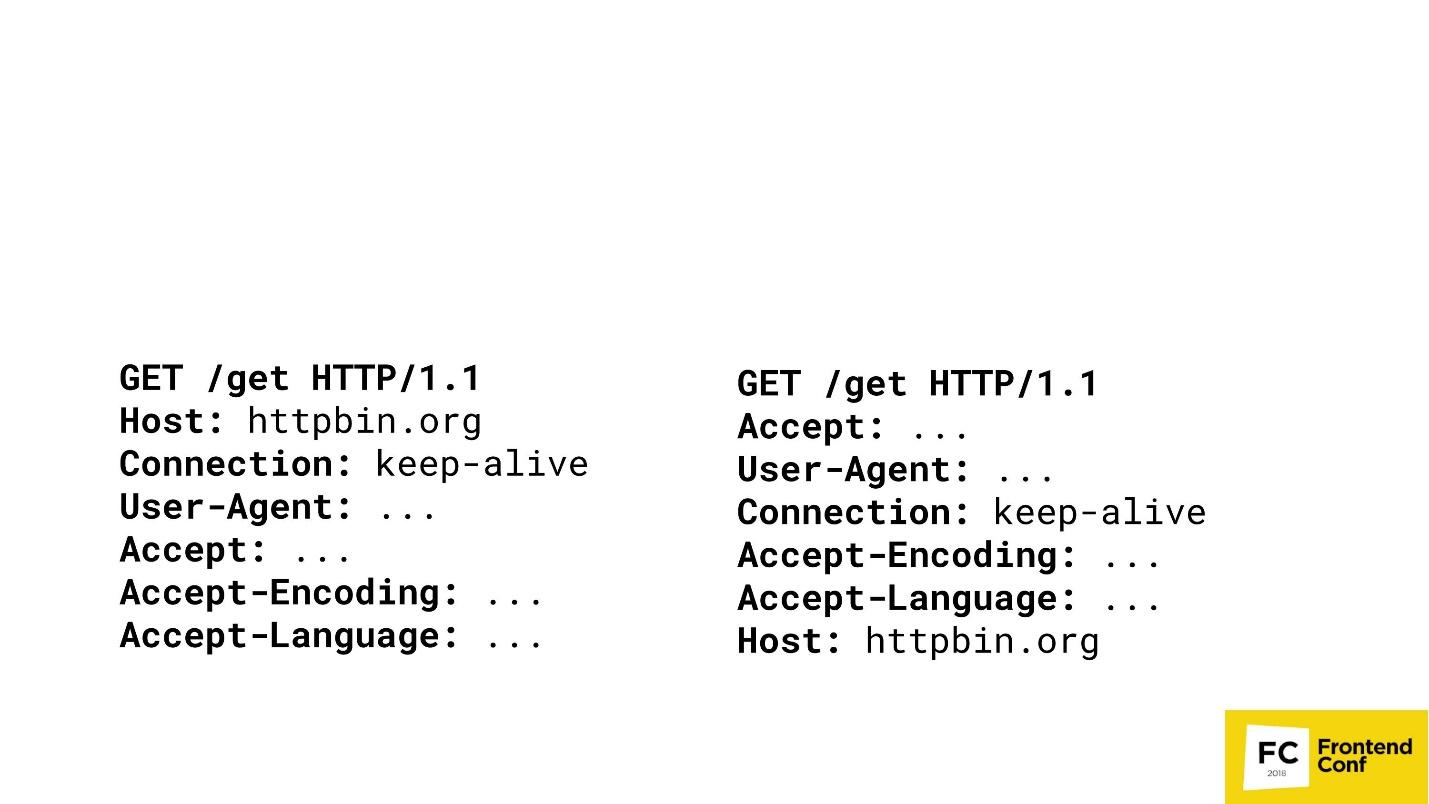
Can you guess where Chrome is here? Option "both" is not accepted - Chrome there is only one. Most likely, you will not be able to answer this question, and I, as a large content provider, can: on the right, PhantomJS, and on the left, Chrome.

I can go to such an extent that I will detect your browsers (which is exactly Chrome or FireFox) by matching the order of the HTTP headers in your requests. If the host goes first - I clearly know - this is Chrome. Then I can not compare. Yes, of course, there are more complex algorithms - we check not only the order, but also the values, etc. etc. But the important thing is that I can compare your headlines with molds, check who you are, and then just block you or not block.
Unable to implement some functions (Flash)
Have you ever studied in depth, right hardcore, Flash in browsers? Once I looked in - then I didn’t sleep for half a year.
We all remember how we used to watch YouTube when there was still a Flash: the movie is spinning, everything is fine. But the moment an embedded object is created on a Flash-type page, it always requests a real window from your OS. That is, besides the window of your browser, inside the YouTube-window Flash there was another window of your OS. Flash cannot work if you do not give it a real window - and not just a real window, but a window that is visible on your screen. Therefore, it is impossible to implement some functions in headless browsers, including Flash.
Full automation and bots
As I said earlier, large content providers are very afraid when you write spiders or grabbings, which simply steal information that is provided for a fee.
In the course are different tricks. There are articles on how to detect headless browsers. I can say that you can’t find headless browsers . All the methods that are described there are bypassed. For example, there were detection methods using Canvas. I remember there was even one script that watched the mouse move across the screen and filled in the Canvas. We are people and move the mouse rather slowly, and Headless Chrome is much faster. The script understood that the Canvas filled up too quickly means that this is most likely Headless Chrome. We also bypassed it, just slowing down the browser is not a problem.
No standard (single) API
If you watched headless implementations in other browsers - be it Safari or FireFox - there it is all implemented using the webdriver API. Chrome has the Chrome DevTools protocol. In Edge nothing is clear at all - what is there, what is not.
WebGL?
People also ask WebGL in headless mode. From this link you can get on the Google Chrome bugtracker. There, developers are actively voting for the implementation of the headless mode for WebGL, and he can already draw something. They are now simply held back by hardware rendering. As soon as the implementation of hardware rendering is completed, WebGL will automatically be available, that is, something can be done in the background.
But it is not all that bad!
We have a second player on the market - on May 11, 2018 there was news that Microsoft, in its Edge browser, decided to implement almost the same protocol that is used in Google Chrome. They specially created a consortium where they discuss the protocol they want to bring to the industry standard so that you can take your script and run it under Edge, and under Chrome, and under FireFox.
But there is one “but” - Microsoft Edge has no headless mode, unfortunately. They have a vote where people write: “Give us a headless mode!” - but they are silent. Probably something sawing in secret.
TODO (conclusion)
I told it all so that you could come to your manager, or, if you are a manager, to the developer, and say: “That's it! We do not want Selenium anymore - give us a Puppeteer! We will test it. If this happens, I will be happy.
But if you can study, like me, browsers using Puppeteer, actively post bugs, or send a pull request, then I will be glad even more. This tool in OpenSource is on GitHub, written in Node.js - you can just take it and contribute to it.
The case of Puppeteer is unique in that there are two teams in Google: one is Puppeteer, the other is the headless mode. If the user finds a bug, writes about it on GitHub, then if this bug is not in Puppeteer, but in Headless Chrome, the bug goes to the Headless Chrome team. If they fix it there, the Puppeteer updates very quickly. Due to this, it turns out a single ecosystem when the community helps to improve the browser.
Therefore, I urge you to help improve the tool that is used not only by you, but also by other developers and testers.
Contacts:
Under the cut are the components and features of Headless Chrome, interesting scenarios for using Headless Chrome. The second part about Puppeteer is a convenient Node.js library for managing Headless mode in Google Chrome and Chromium.
About the speaker: Vitaly Slobodin - a former PhantomJS developer - the one who closed it and buried it. Sometimes Konstantin Tokarev ( annulen ) helps in the "resurrected" version of QtWebKit - the very QtWebKit, where there is support for ES6, Flexbox and many other modern standards.
')
Vitali loves to explore browsers, digging into WebKit, Chrome, and so on, in his free time. About browsers today and talk, namely about the headless browsers and their entire family of ghosts.
What is a headless browser?
Already from the name it is clear that this is something without a head. In the context of the browser, this means the following.
- It has no real content rendering , that is, it draws everything in memory.
- Due to this, it consumes less memory , because you do not need to draw pictures or gigabyte PNGs that people are trying to put on the backend using a bomb.
- It works faster because it doesn’t need to draw anything on a real screen.
- It has a software interface for management . You ask - it does not have an interface, buttons, windows? How to manage it? Therefore, of course, it has an interface for management.
- An important feature is the ability to install on a bare Linux server . This is necessary so that if you have a freshly installed Ubuntu or Red Hat, you can just throw a binary there or put a package, and the browser will work out of the box. No shamanism or voodoo magic is needed.
This is how a typical WebKit-based browser looks like. You can not get a grasp of the components - it's just a visual image.
We are only interested in the top Browser UI component. This is the same user interface - windows, menus, pop-up notifications and everything else.
It looks like a headless browser. Notice the difference? We completely remove the user interface. He is no more. Only the browser remains .
Today we will talk about Headless Chrome (). What is the difference between them? In fact, Chrome is a branded version of Chromium, which has proprietary codecs, the same H.264, integration with Google services and everything else. Chromium is just an open implementation.
Date of birth Headless Chrome: 2016. If you came across it, you can ask me a tricky question: “How so, I remember the news of 2017?” The fact is that a team of engineers from Google contacted the developers of PhantomJS in 2016, when they just started to implement Headless -mode in chrome. We wrote whole gugldoki, how we will implement the interface and stuff. Then Google wanted to make the interface fully compatible with PhantomJS. It was only later that a team of engineers came to the decision not to make such compatibility.
About the management interface (API), which is the Chrome DevTools protocol, we'll talk later and see what you can do with it.
This article will be built on the principle of the pyramid Puppeteer (with the English. Puppeteer). A good name is chosen - the puppeteer is the one who controls all the others!
At the base of the pyramid is Headless Chrome - headless Chrome - what is it?
Headless chrome
In the center - Headless browser - the same Chromium or Chrome (usually Chromium). It has the so-called Renders (RENDERER) - the processes that draw the contents of the page (your window). Moreover, each tab needs its own renderer, so if you open a lot of tabs, then Chrome will launch the same number of processes for drawing.
Over all this is your application. If we take Chromium or Headless Chrome, then on top of it will be Chrome, or some kind of application in which you can embed it. The closest analogue can be called Steam. Everyone knows that in essence Steam is just a browser to the Steam site. He is certainly not headless, but looks like this scheme.
There are 2 ways to embed headless Chrome in your application (or use it):
- Standard when you take a Puppeteer and use Headless Chrome.
- When you take a component of the Headless library , that is, a library that implements headless mode, and embeds it in your application, say, in C ++.
You ask why C ++ is on the front end? The answer is DevTools C ++ API. You can differently implement and use the power of headless Chrome. If you use Puppeteer, communication with a headless browser will be done via web sockets. If you embed the Headless library in a desktop application, you will use the native interface, which is written in C ++.
But besides all this, you still have additional things, including:
- Custom networking - custom implementation of interaction with the network. Suppose you work in a bank or in a government structure that consists of three letters and starts with “F”, and you use a very clever authentication or authorization protocol, which is not supported by browsers. Therefore, you may need a custom handler for your network. You can simply take your already implemented library and use it in Chrome.
- Mojo modules . The closest analogue of Mojo are the native binding in Node.js to your native libraries, written in C ++. Mojo does the same thing - you take your native library, write the Mojo interface for it, and then you can call the methods of your native library in your browser.
Chromium components
Again I hear the tricky question: “Why do I need this terrible scheme? I am writing under (insert the name of your favorite framework). "
I believe that a developer should know how his tool works. If you are writing under React, you need to know how React works. If you write under Angular, you should know that Angular is under the hood.
Because in which case, say, a fatal mistake or a very serious bug in production, you have to deal with the “guts”, and you can just get lost there - where, what and how. If you, for example, write tests or use Headless Chrome, you can also face some of its odd behavior and bugs. Therefore, I will briefly tell you what components Chromium has. When you see a large stack trace, you will already know which way to dig and how it can be fixed.
The lowest level of the Platform layer . Its components are:
- Ozone , the abstract window manager in Chrome, is what the window manager of the operating system interacts with. On Linux, this is either X-server or Wayland. On Windows, this is the windows window manager.
- Scheduler is the same scheduler without which we are nowhere, because we all know that Chrome is a multi-process application, and we need to somehow manage all the threads, processes and everything else.
- Net - the browser should always have a component to work with the network, for example, HTTP parsing, creating headers, editing, etc.
Content layer is the largest component in Chrome. It includes:
- Blink is a WebCore based web engine. It can take HTML as a string, parse, execute javascript and that's it. He doesn’t know anything else anymore: neither work with the network, nor draw - all this happens on top of Blink.
Blink includes: a heavily modified version of WebCore - a web engine for working with HTML and CSS; V8 (JavaScript engine); as well as an API for all the extensions we use in Chrome, for example, the ad blocker. It also includes the DevTools protocol. - Content API is an interface with which you can very easily use all the features of the web engine. Since there are so many things inside Blink (probably more than a million interfaces), in order not to get lost in all these methods and functions, we need a Content API. You enter HTML, the engine will automatically process it, parse the DOM, build OM OM, execute JavaScript, start timers, handlers and everything else.
Headless layer - a headless browser level:
- Headless library .
- Embedder API interface for embedding Headless library into the application.
- Client API is the interface that Puppeteer uses.
Application layer :
- Your application ( Embedding app );
- Gadgets, for example, Headless shell .
Now let's go up from the depths a little higher, activate - now the front end will go.
Chrome DevTools protocol
We all came across the Chrome DevTools protocol because we use the Chrome developer panel or a remote debugger - the same development tools. If you run the developer’s tools remotely, communication with the browser takes place using the DevTools protocol. When you set up a debugger, see code coverage, use geolocation or something else - everything is managed with DevTools.
In fact, the DevTools protocol itself has a huge number of methods. Your developer tool does not have access, probably, to 80% of them. Actually there you can do everything!
Let's take a look at what this protocol is. In fact, it is very simple. It has 2 components:
- DevTools target — the tab you are inspecting;
- DevTools client - let's say this is a developer panel that is running remotely.
They communicate using simple JSON:
- There is a command identifier, the name of the method to be executed, and some parameters.
- We send a request and get a response, which also looks very simple: an identifier that is needed because all the commands that are executed using the protocol are asynchronous. So that we can always compare which answer to which team came to us, we need an identifier.
- Is there a result. In our case, it is a result object with the following attributes: type: "number", value: 2, description: "2" , an exception was not thrown: wasThrown: false.
But among other things, your tab can send events back to you. Suppose that when an event occurred on a page, or there was an exception on a page, you will receive a notification via this protocol.
Puppeteer
You can install Puppeteer with your favorite package manager - be it yarn, npm or whatever.
It is also easy to use it - just request it in your Node.js-script, and already, in fact, you can use it.
Under the link https://try-puppeteer.appspot.com you can write a script directly on the site, execute it and get the result directly in the browser. All this will be implemented using Headless Chrome.
Consider the simplest script under Node.js:
const puppeteer = require('puppeteer'); (async() => { const browser = await puppeteer.launch() ; const page = await browser.newPage(); await page.goto('http://devconf.ru/') ; await page.emulateMedia('screen') ; await page.pdf({ path: './devconf.pdf, printBackground: true }); await browser.close() ; })(); Here we just open the page and print it in PDF. Let's see the work of this script in real time:
Everything will be cool, but it is not clear what is inside. Of course, we have a headless browser, but we see nothing. Therefore, the Puppeteer has a special flag called headless: false:
const browser = await puppeteer.launch({ headless: false }); It is needed to launch a headless browser in headful mode, when you can see a window and see what happens to your page in real time, that is, how your script interacts with your page.
This is what the same script will look like when we add this flag. On the left, a browser window appears - more clearly.
Pluses of Puppeteer:
+ This is the Node.js library for headless Chrome.
+ Support for legacy versions of Node.js> = 6.
+ Easy installation.
+ High-level API to control this whole gigantic machine.
Headless Chrome installs easily and without interfering with the system. When you first install, Puppeteer downloads the Chromium version and installs it directly into the node_modules folder just for your architecture and OS. You do not need to download anything extra, it does it automatically. You can also use your favorite version of Chrome, which is installed on your system. This can also be done - Puppeteer provides you with this API.
Unfortunately, there are also disadvantages, if we take exactly the basic installation.
Cons Puppeteer :
- No top-level functions : synchronization of bookmarks and passwords; profile support; hardware acceleration, etc.
- Software rendering is the most significant minus. All calculations and rendering occur on your CPU. But even here, Google engineers will soon surprise us - the work on the implementation of hardware acceleration is already underway. Already, you can try to use it if you are brave and courageous.
- Until recently, there was no support for extensions - now there IS! If you are a clever developer, you can take your favorite AdBlock, indicate how Puppeteer will use it, and all ads will be blocked.
- No audio / video support . Because, well, why headless-browser audio and video.
What can the Puppeteer:
- Isolation sessions.
- Virtual timers.
- Interception of network requests.
And a couple of cool things that I will show a little further.
Session isolation
What is it, what is it eaten with, and will we not feed ourselves? - Do not choke!
Session isolation is a separate “repository” for each tab . When you launch Puppeteer, you can create a new page, and each new page can have a separate repository, including:
- cookes;
- local storage;
- cache
All pages will live independently of each other. This is necessary, for example, to maintain the atomicity of tests.
Session isolation saves resources and time when running parallel sessions . Suppose you are testing a site that is built in a development mode, that is, the bundle is not minimized, and weighs 20 MB. If you just want to cache it, you can tell Puppeteer to use the cache shared by all pages that are created, and this bundle will be cached.
You can serialize sessions for later use . You write a test that checks some action on your site. But you have a problem - the site requires authorization. You will not constantly add before each test for authorization on the site. Puppeteer allows you to log in to the site once, and then reuse this session in the future.
Virtual timers
You may already be using virtual timers. If you moved the slider in a developer tool that speeds up or slows down the animation (and washed your hands after that, of course!), Then at that moment you used virtual timers in the browser.
The browser can use virtual timers instead of real ones in order to “scroll” time forward to speed up page loading or end animation. Suppose you have the same test, you go to the main page, and there is animation for 30 seconds. It is unprofitable for anyone to wait for the test all this time. Therefore, you can simply speed up the animation so that it will be completed instantly when the page loads, and your test continues.
You can stop the time while the network request is running . For example, you are testing your application's reaction to when a request that goes to the backend is executed for a very long time, or returns with an error. You can stop time - Puppeteer allows it.
On the slide below there is another option: stop and continue the work of the renderer. In the experimental mode, it was possible to tell the browser not to engage in rendering, and later, if necessary, request a screenshot. Then the headless Chrome would quickly draw everything, give a screenshot, and again stop drawing anything. Unfortunately, the developers have already managed to change the principle of operation of this API, and such a function no longer exists.
A schematic view of the virtual timers below.
In the top line there are two usual timers: the first starts in the first unit of time and is executed in one unit of time, the second starts in the third unit of time and is executed in three units of time.
Acceleration timers - they run one after the other. When we suspend them, we have a period of time, after which all the timers start.
Consider this by example. Below is a cropped piece of code that essentially just loads a page with an animation with codepen.io and waits:
(async() => { const browser = await puppeteer.launch(); const page = await browser.newPage(); const url = 'https ://codepen.o/ajerez/full/EaEEOW/'; // # 1 await page.goto(url, { waitUnitl: 'load' }); // # 2 })(); This is a demonstration of performance during the report - just an animation.
Now, using the Chrome DevTools protocol, we’ll send a method called Animation.setPlaybackRate, passing in the parameters to it the playbackRate with the value 12:
const url = 'https://codepen.o/ajerez/full/EaEEOW/'; // # 1 await page._client.send('Animation.setPlaybackRate', { playbackRate: 12 }); // # 3 await page.goto(url, { waitUntil: 'load' }); // # 2 We load the same link, and the animation began to work much faster. This is due to the fact that we used a virtual timer and accelerated the animation playback 12 times.
Let's now conduct an experiment - pass the playbackRate: 0 - and see what happens. And there will be this: there is no animation at all, it does not play. Zero and negative values simply pause the entire animation.
Work with network queries
You can intercept network requests by setting the following flag:
await page.setRequestlnterception(true); In this mode, an additional event appears that triggers when a network request is sent or arrives.
You can change the query on the fly . This means that you can completely change all its contents (body) and its headers, inspect, even cancel the request.
This is required in order to handle authorization or authentication , including basic HTTP authentication.
You can also cover code (JS / CSS) . With the help of Puppeteer you can automate all this. We all know utilities that can load a page, show which classes are used in it, etc. But are we satisfied with them? I think no.
The browser knows better which selectors and classes are used - the same browser! He always knows which JavaScript is executed, which is not, which CSS is used, and which is not.
Again, the Chrome DevTools protocol comes to the rescue:
await Promise.all ( [ page.coverage.startJSCoverage(), page.coverage.startCSSCoverage() ]); await page.goto('https://example.com'); const [jsCoverage, cssCoverage] = await Promise,all([ page.coverage.stopJSCoverage(), page.coverage.stopCSSCoverage() ]): In the first two lines we launch a relatively new feature that allows you to find out the coverage of the code. We launch JS and CSS, go to some page, then say - stop - and we can see the results. And these are not some imaginary results, but those that the browser sees precisely at the expense of the engine.
In addition, there is already a plug-in, which for the Puppeteer all this is exported to istanbul.
At the top of the Puppeteer pyramid is a script that you wrote on Node.js - he is like the godfather to all the lower points.
But ... "not everything is calm in the Danish kingdom ..." - as William Shakespeare wrote.
What is wrong with headless browsers?
Headless browsers have problems despite the fact that all their cool features can do so much.
The difference in rendering pages on different platforms
I really love this item and constantly talk about it. Let's look at this picture.
Here is a regular page with plain text: on the right - drawing in Chrome on Linux, on the left - under Windows. Those who test with screenshots know that a value is always set, called the “error threshold”, which determines when the screenshot is considered identical and when it is not.
In fact, the problem is that no matter how hard you try to set this threshold, the error will always go beyond this limit, and you will still receive false positive results. This is due to the fact that all pages, and even web fonts are rendered differently on all three platforms - on Windows using the same algorithm, on MacOS differently, on Linux in general the zoo. You can not just take and test screenshots .
You will say: "I just need a reference machine, where I will run all these tests and compare screenshots." But in fact, this is wildly inconvenient, because you have to wait for CI, and you want to check here and now locally on the machine that you have not broken anything. If your reference screenshots are made on a Linux machine, and you have a Mac, then there will be false results.
That's why I say that do not test with screenshots at all - forget it.
By the way, if you still want to test with screenshots, there is a wonderful article by Roman Dvornov " Unit-testing with screenshots: breaking the sound barrier ." This is straight detective fiction.
Locks
Many large content providers do not like it when you do scraping or get their content in an illegal way. Imagine that I am a large content provider, and I want to play one game with you. There are two GET requests in two different browsers.
Can you guess where Chrome is here? Option "both" is not accepted - Chrome there is only one. Most likely, you will not be able to answer this question, and I, as a large content provider, can: on the right, PhantomJS, and on the left, Chrome.
I can go to such an extent that I will detect your browsers (which is exactly Chrome or FireFox) by matching the order of the HTTP headers in your requests. If the host goes first - I clearly know - this is Chrome. Then I can not compare. Yes, of course, there are more complex algorithms - we check not only the order, but also the values, etc. etc. But the important thing is that I can compare your headlines with molds, check who you are, and then just block you or not block.
Unable to implement some functions (Flash)
Have you ever studied in depth, right hardcore, Flash in browsers? Once I looked in - then I didn’t sleep for half a year.
We all remember how we used to watch YouTube when there was still a Flash: the movie is spinning, everything is fine. But the moment an embedded object is created on a Flash-type page, it always requests a real window from your OS. That is, besides the window of your browser, inside the YouTube-window Flash there was another window of your OS. Flash cannot work if you do not give it a real window - and not just a real window, but a window that is visible on your screen. Therefore, it is impossible to implement some functions in headless browsers, including Flash.
Full automation and bots
As I said earlier, large content providers are very afraid when you write spiders or grabbings, which simply steal information that is provided for a fee.
In the course are different tricks. There are articles on how to detect headless browsers. I can say that you can’t find headless browsers . All the methods that are described there are bypassed. For example, there were detection methods using Canvas. I remember there was even one script that watched the mouse move across the screen and filled in the Canvas. We are people and move the mouse rather slowly, and Headless Chrome is much faster. The script understood that the Canvas filled up too quickly means that this is most likely Headless Chrome. We also bypassed it, just slowing down the browser is not a problem.
No standard (single) API
If you watched headless implementations in other browsers - be it Safari or FireFox - there it is all implemented using the webdriver API. Chrome has the Chrome DevTools protocol. In Edge nothing is clear at all - what is there, what is not.
WebGL?
People also ask WebGL in headless mode. From this link you can get on the Google Chrome bugtracker. There, developers are actively voting for the implementation of the headless mode for WebGL, and he can already draw something. They are now simply held back by hardware rendering. As soon as the implementation of hardware rendering is completed, WebGL will automatically be available, that is, something can be done in the background.
But it is not all that bad!
We have a second player on the market - on May 11, 2018 there was news that Microsoft, in its Edge browser, decided to implement almost the same protocol that is used in Google Chrome. They specially created a consortium where they discuss the protocol they want to bring to the industry standard so that you can take your script and run it under Edge, and under Chrome, and under FireFox.
But there is one “but” - Microsoft Edge has no headless mode, unfortunately. They have a vote where people write: “Give us a headless mode!” - but they are silent. Probably something sawing in secret.
TODO (conclusion)
I told it all so that you could come to your manager, or, if you are a manager, to the developer, and say: “That's it! We do not want Selenium anymore - give us a Puppeteer! We will test it. If this happens, I will be happy.
But if you can study, like me, browsers using Puppeteer, actively post bugs, or send a pull request, then I will be glad even more. This tool in OpenSource is on GitHub, written in Node.js - you can just take it and contribute to it.
The case of Puppeteer is unique in that there are two teams in Google: one is Puppeteer, the other is the headless mode. If the user finds a bug, writes about it on GitHub, then if this bug is not in Puppeteer, but in Headless Chrome, the bug goes to the Headless Chrome team. If they fix it there, the Puppeteer updates very quickly. Due to this, it turns out a single ecosystem when the community helps to improve the browser.
Therefore, I urge you to help improve the tool that is used not only by you, but also by other developers and testers.
Contacts:
- github.com/vitallium
- vk.com/vitallium
- twitter.com/vitalliumm
Frontend Conf Moscow - a specialized conference of front-end developers will be held on October 4 and 5 in Moscow , in Infospace. The list of accepted reports has already been published on the conference website.
In our newsletter, we regularly do thematic reviews of speeches, talk about transcripts and future events that have come out - subscribe to be the first to receive news.
And this is a link to our Youtube channel on the frontend; it contains all the presentations related to the development of the client side of projects.
Source: https://habr.com/ru/post/421137/
All Articles