How to stretch images without losing quality in Photoshop in a quick way
I greet this beautiful Habr! This post is a small tutorial in which you will learn a very interesting and useful life hack. The other day ( in late March ) to participate in the exhibition "Step into the Future" I had to draw posters for the stand. The dimensions of the sidewalls are meter per meter , the central part is two meters per meter . To avoid any problems with printing in the office, I created full-size files in Photoshop. And then the problems started with me.
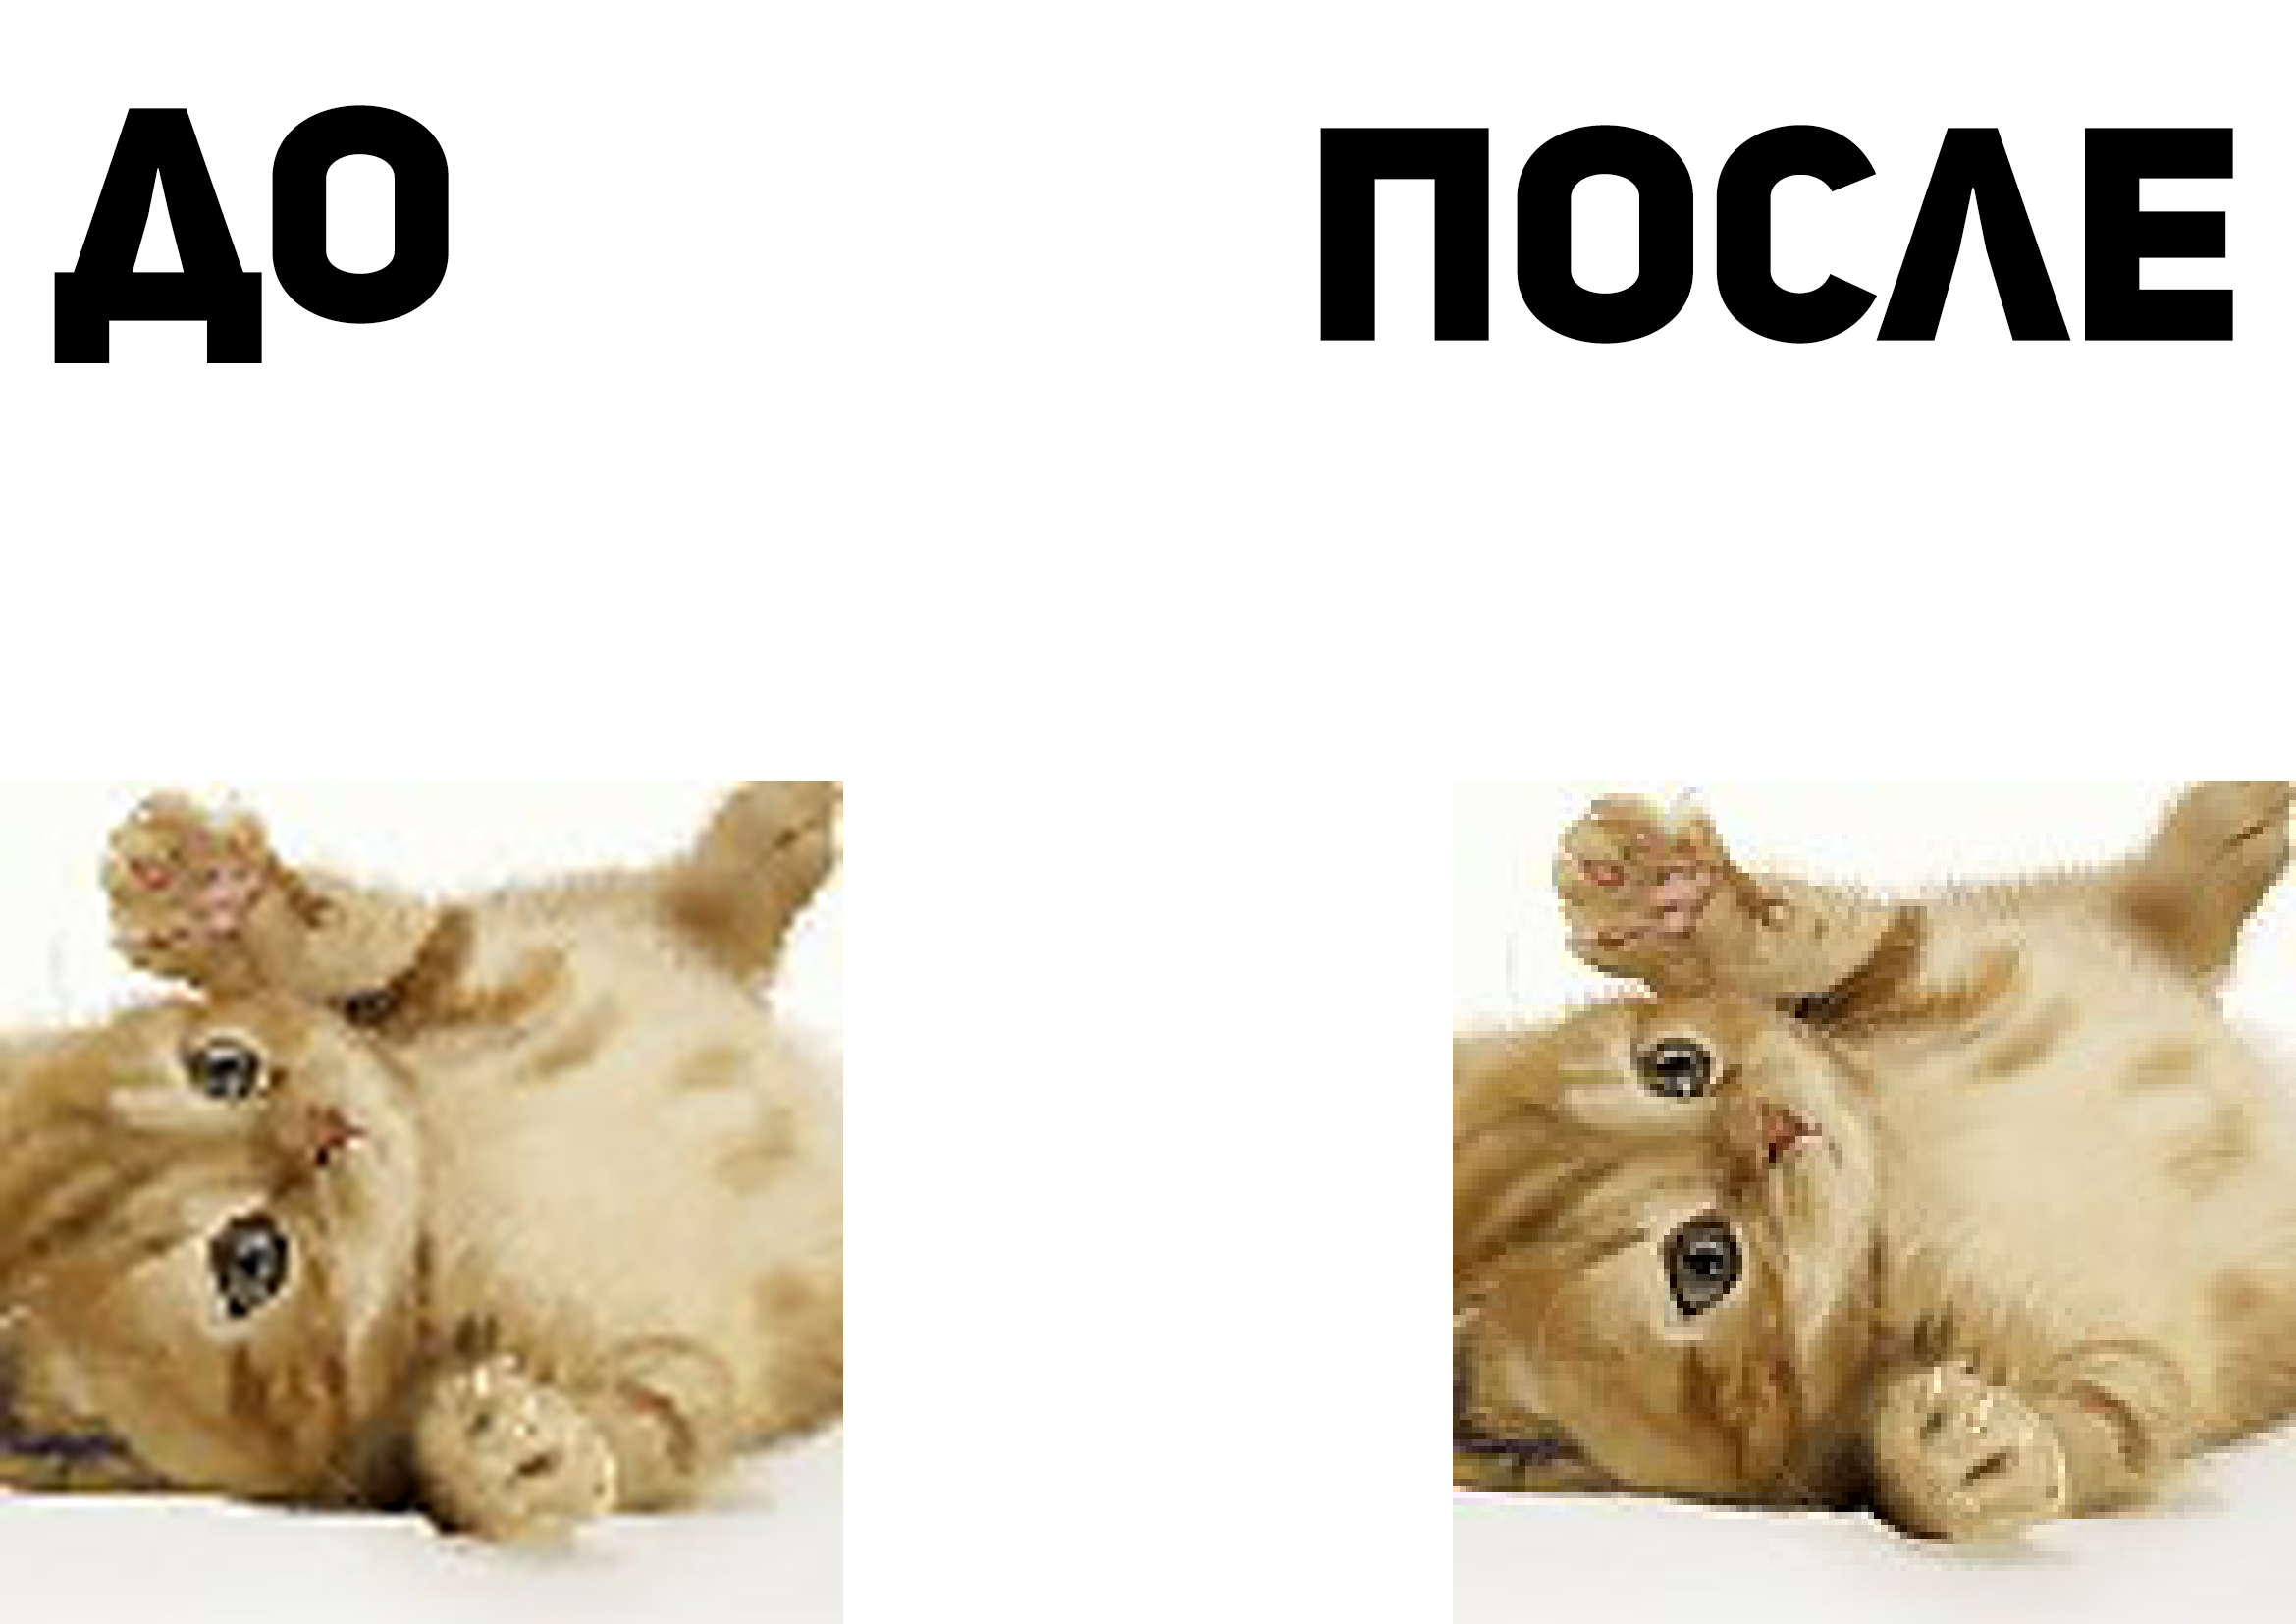
The fact is that all the graphs, charts, diagrams and other graphic materials for the stand were in such a small resolution that it did not exceed 1000x1000 px. Actually, this is not good for a gigantic cloth of approximately 50000x12500 px, because in the original size the objects look very small, and in the stretched one - a set of squares from some kind of mosaic. The problem is also aggravated by the fact that my toolkit is limited only by Adobe Photoshop CC editor, and I naturally don’t have time to master and install other software. Climbing on foreign forums, I did find her solution. To demonstrate it, take this picture.

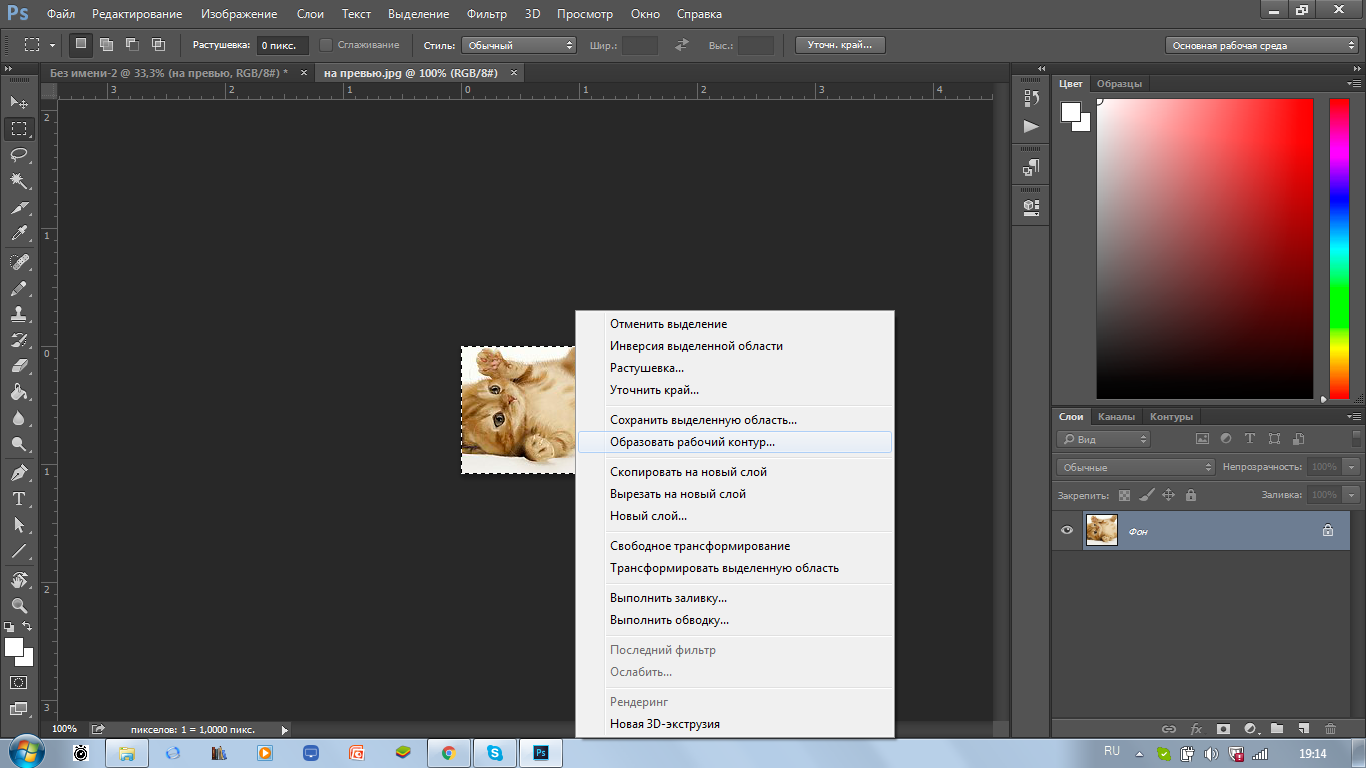
Original image size: 128x128 px. Stretch it so that it takes ~ 1/4 of A4 sheet. To do this, open our image in Photoshop and select it with a rectangular frame as a whole. After we make a click with the right mouse button, and select the option "Form a working path", then set the tolerance value to 1 pixel.
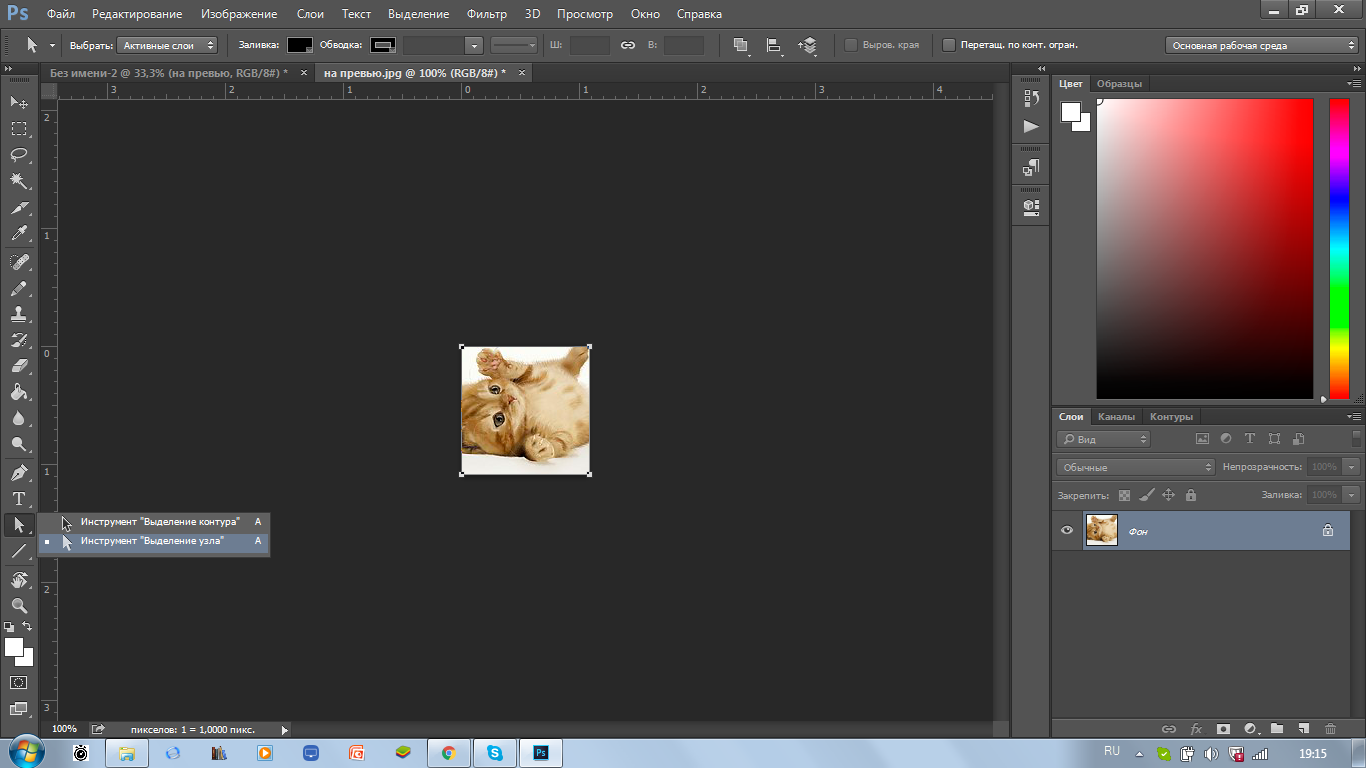
The next step is to select the node selection tool, the picture shows where it is located.
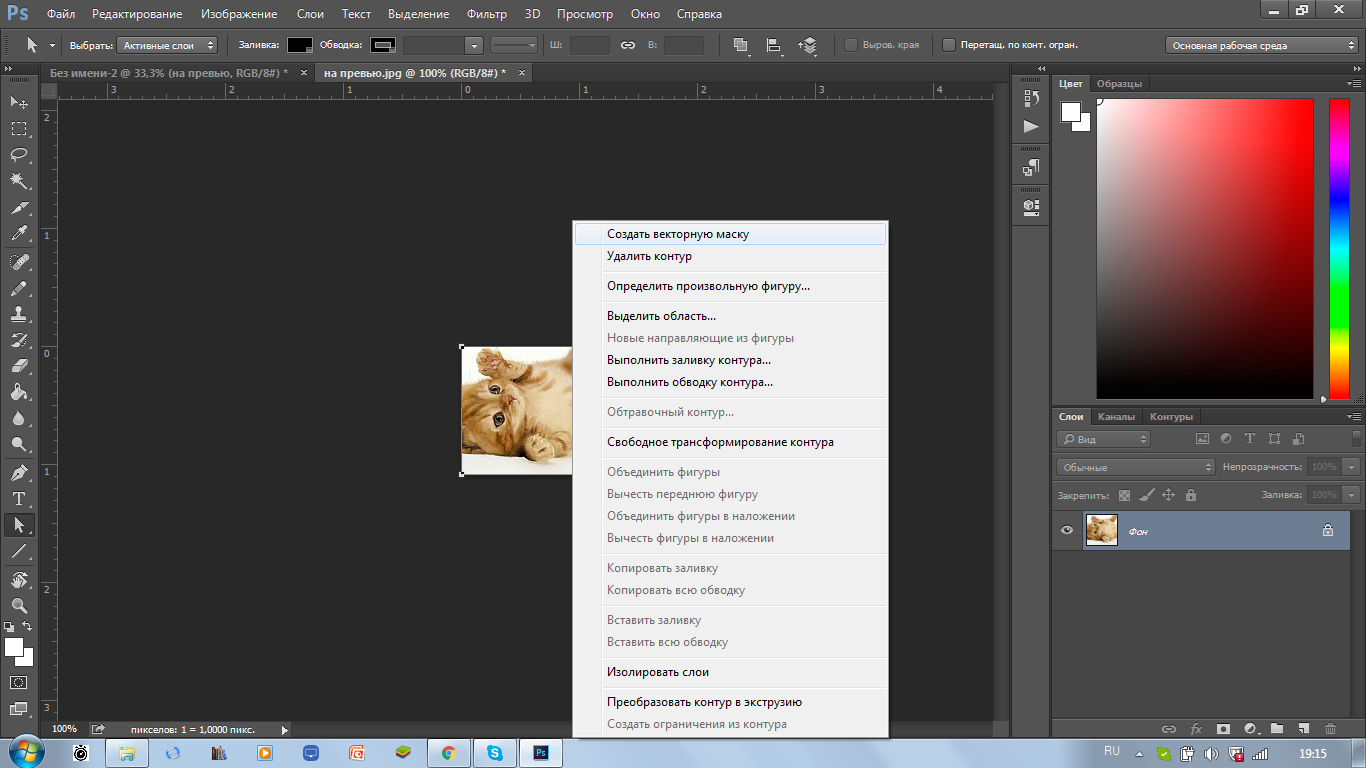
Right-click on the image and select the option "Create vector mask".
EVERYTHING! Now save our picture, then Drag'n'Drop'om transfer it to A4 sheet and stretch as we want. The main thing to remember to press Enter to apply the transformation. Well, the comparison of stretching without these "dances with a tambourine" and with them you already saw in the preview. And that's all, thank you for your attention!
PS Who is interested in this stand turned out.

')
Source: https://habr.com/ru/post/420427/
All Articles