Making a radio station from GTA: San Andreas
Did you want to switch between radio stations the way you did in San Andreas?
The soundtrack from GTA is famous for a good selection of music and fun inserts. Rockstar did an excellent job creating radio stations for this game - by the way, you can even buy music from Vice City and San Andreas as CD sets.
')
To make her listening more enjoyable - and to learn something, I decided to hack the radio so that it receives game radio stations.
The idea is that you can rotate the receiver tuning knob and switch between virtual stations, just as you would with a real receiver. The main obstacle was the software - I would like each virtual station to play its music, even when I do not listen to it. Again, as in the real world.
Let's start!
I would love to use for such a project, with portable and embedded equipment, something like Arduino, since the architecture of such boards is much simpler than that of single-board computers.

But to play dozens of files at the same time requires powerful brains, so I stopped at the Raspberry Pi. I have already used it for other projects, and I feel confident when working with it. And I chose Python as a programming language, simply because I had this mood. Are there any other reasons? ..
After that, I needed to choose a library for Python that could:
To build a virtual radio, I only need to download several files at once and control the playback volume. In fact, in reality, this is what happens: each station is an audio source, and the tuning knob changes the volume of these sources, from the listener's point of view.
After a hard and lengthy testing of various options (pygame-mixer, python-sounddevice, puredata with a patch for the mixer), I stopped at swmixer. He even knows how to play files streaming, without loading them into memory as a whole, which was very convenient for me, because I wanted for each station to merge all the music into one file. I had to fork this library and correct the error in it, since it was no longer supported.
I decided to use the Raspberry Pi 3, as the 2B somehow clamped the audio output. Without becoming to understand why this is happening, but simply satisfied with the fact that everything works on a new board, I moved on to the next step.

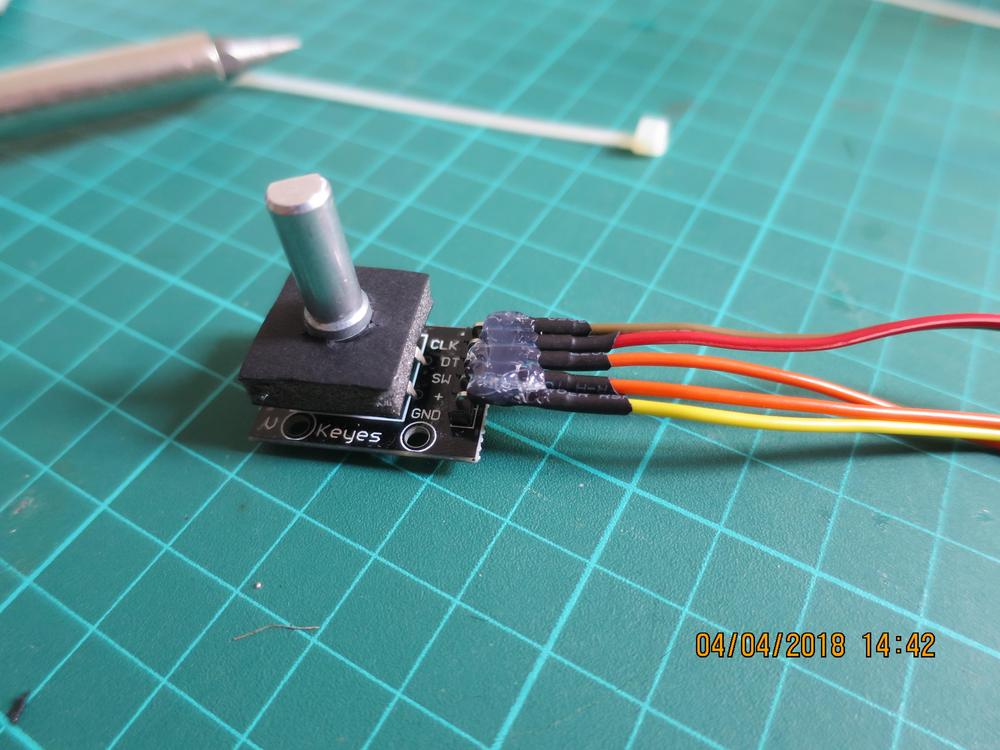
The best library for Python at that time for DUP KY040 was a library called KY040 , but it didn't quite fit my needs, and besides, I wanted to try to make my own, first, real module for Python, that's why I wrote pyKY040 .
It provides:
Settings:
He allowed me to delegate the logic of the DUP and concentrate on what happens when I interact with it.
Only the following lines belong to the DUP in the main code:
Now I could play files and I had an interface for working with DUP. It's time to write the code for virtual radio.
It works like a virtual radio band. At certain virtual frequencies (or HF), you can hear the sound - these are the swmixer channels. Between the two HF heard a mixture of two audio sources.
The virtual frequency is actually just an integer that increases or decreases depending on your interaction with the DUP.
To leave more freedom when calculating the volume during switching between two HF, this process is processed by a single function that returns the volume of a given station for a given HF. So far, this value varies linearly, but it can be changed by making a louder and more unstable volume curve.
If we apply this example to channel n-1, it will intersect with channel n, with the result that you get a mix of audio from these two sources.
In pseudocode, it looks like this:
All the details are in the code. Start at the end of the file, where the callouts for the DUP are described, and then follow the trail.
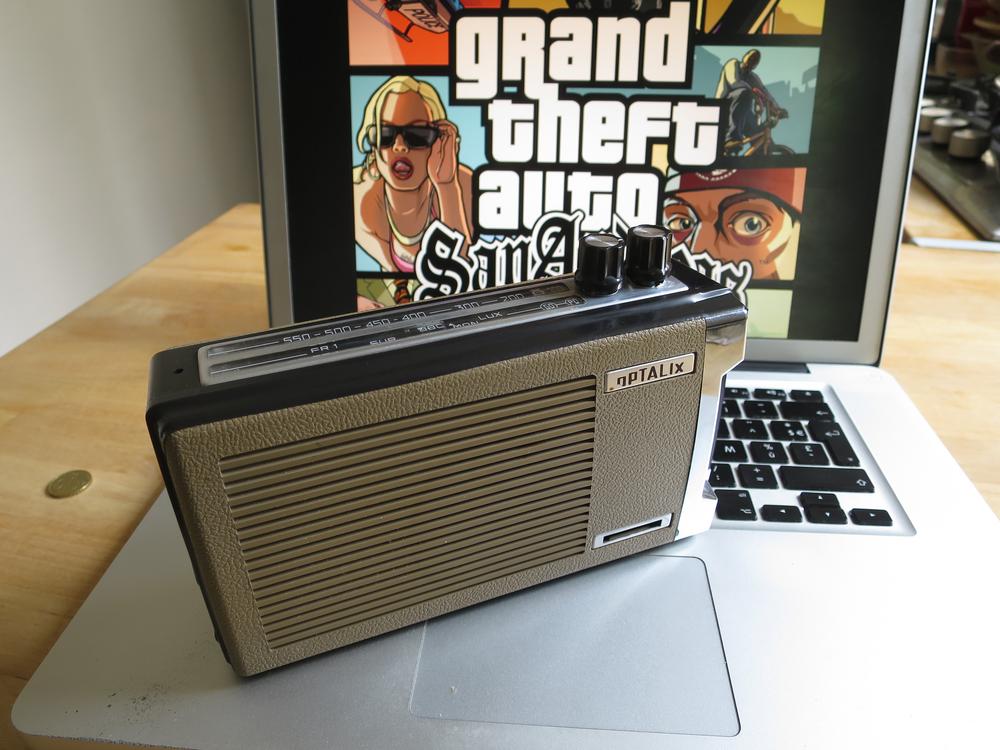
My grandfather's radio receiver, Optalix TO100, was the donor. Outside of France, I believe, it will not be easy to find. For about € 20, you can get a cool, vintage and compact receiver that you can carry with you in your bag.
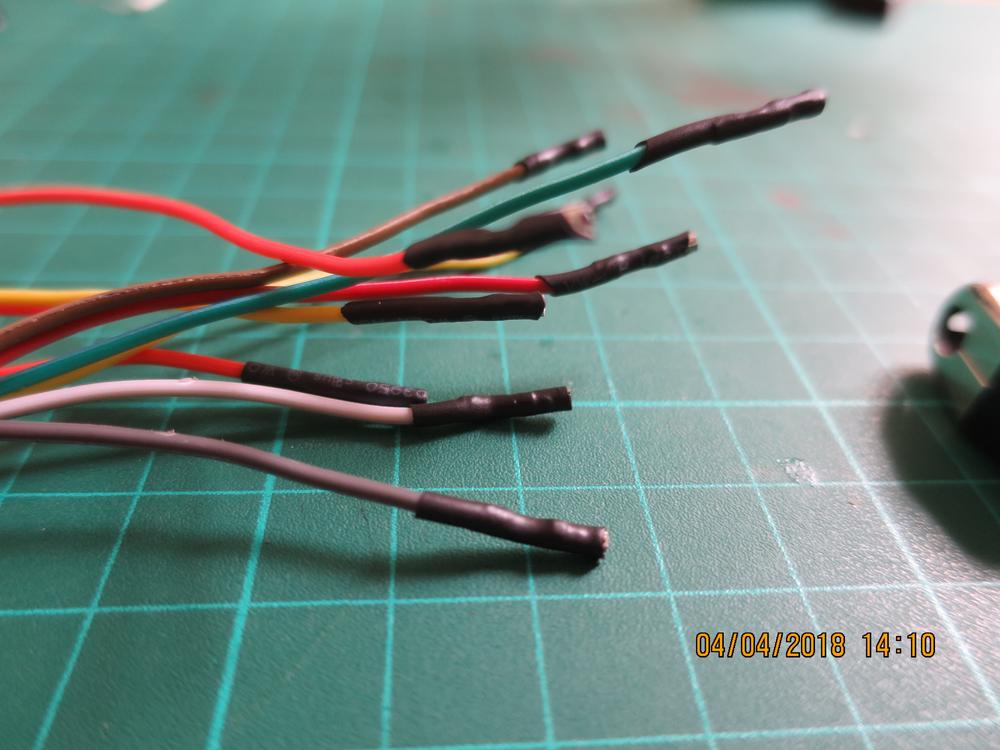
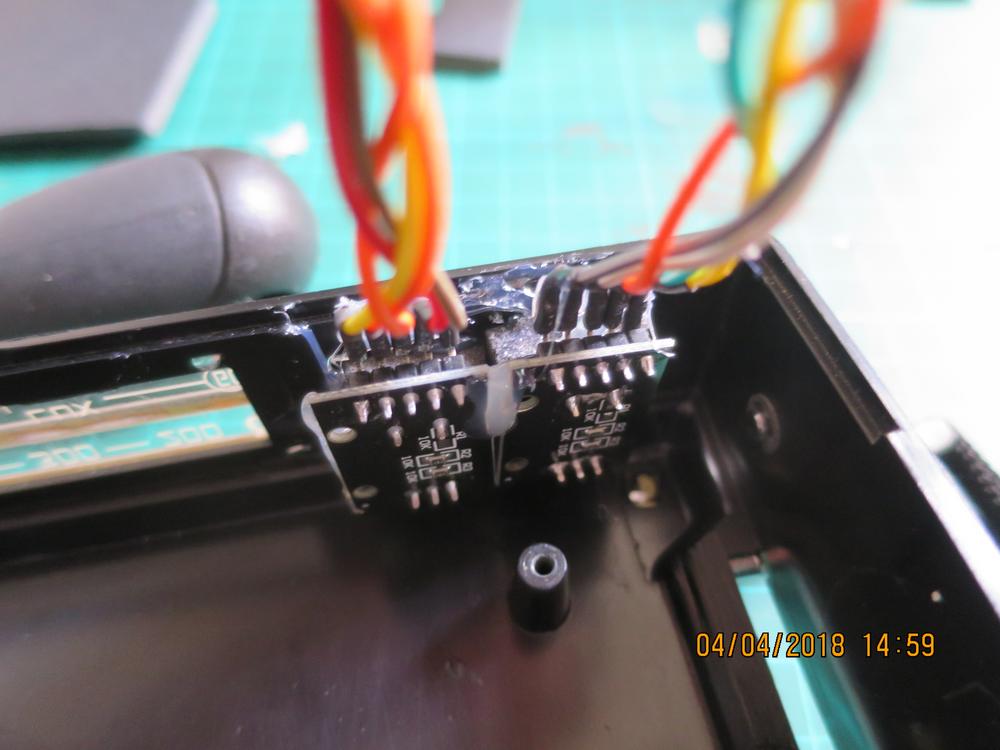
By themselves, the DUP climbed just in such a way that it was possible to close the case - but after connecting the jumper wires, the design turned out to be too big. I had to remove the original plastic connectors and replace them with heat shrinkage so that it could be bent.
Those DUP, which I bought myself, did not have a thread - I had to improvise with attaching them to the body with the help of cardboard and thermoplastic glue. Clay decides, as always.

I transferred the power connector to the case, instead of plugging the cable directly into Pi - as a result, I could choose how to place the computer in the case without thinking about where the power connector should be attached to the case.
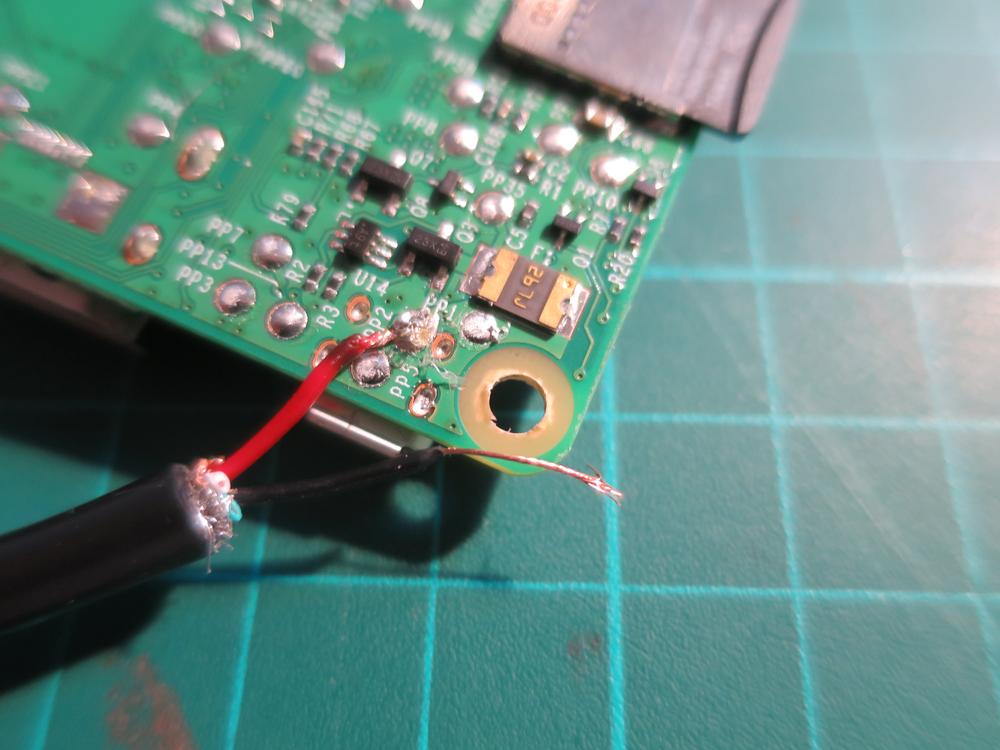
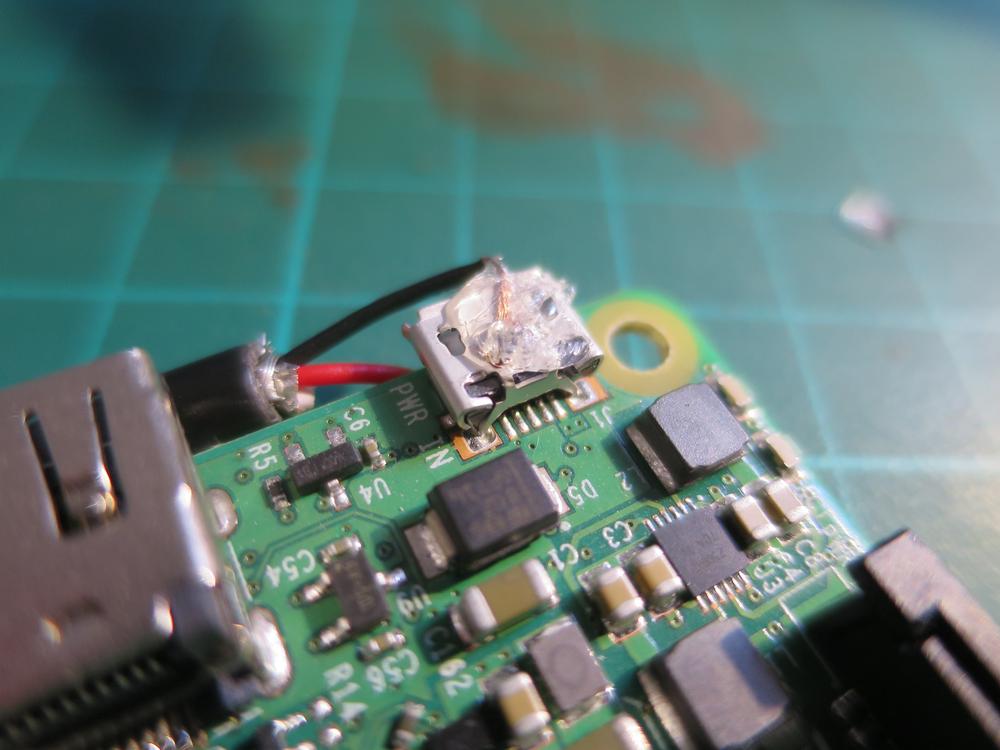
I used the cable with micro-USB connectors "mother" and "dad", but to make more space, I cleaned the cable and directly soldered to Pi - plus to PP2 and minus to the connector that is grounded (another option is PP5). And certainly more glue, so as not to break off.

The speaker is the original 5W from the TO100 receiver. It is connected to an amplifier, which is connected to a 3.5 mm audio plug, which is plugged into a cheap USB DAC .
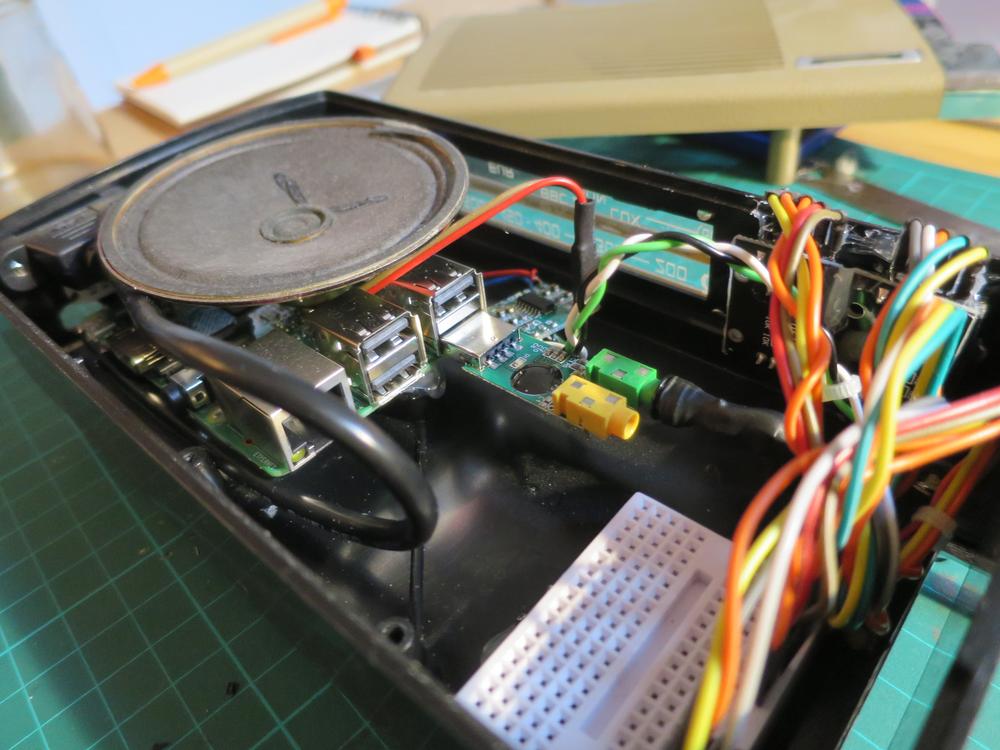
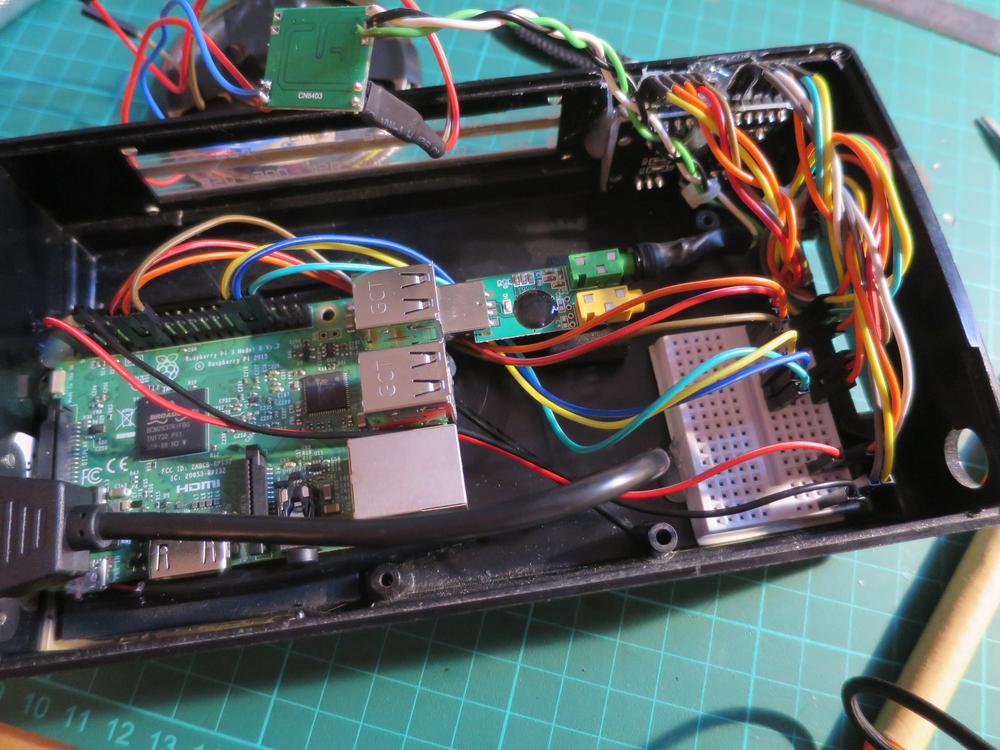
Everything is connected through a prototyping board and is ready to close forever.
The soundtrack from GTA is famous for a good selection of music and fun inserts. Rockstar did an excellent job creating radio stations for this game - by the way, you can even buy music from Vice City and San Andreas as CD sets.
')
To make her listening more enjoyable - and to learn something, I decided to hack the radio so that it receives game radio stations.
The idea is that you can rotate the receiver tuning knob and switch between virtual stations, just as you would with a real receiver. The main obstacle was the software - I would like each virtual station to play its music, even when I do not listen to it. Again, as in the real world.
Let's start!
1. Equipment
I would love to use for such a project, with portable and embedded equipment, something like Arduino, since the architecture of such boards is much simpler than that of single-board computers.
But to play dozens of files at the same time requires powerful brains, so I stopped at the Raspberry Pi. I have already used it for other projects, and I feel confident when working with it. And I chose Python as a programming language, simply because I had this mood. Are there any other reasons? ..
2. Python software mixer
After that, I needed to choose a library for Python that could:
- Work with multiple audio sources.
- Gave a high-level interface to work with them.
To build a virtual radio, I only need to download several files at once and control the playback volume. In fact, in reality, this is what happens: each station is an audio source, and the tuning knob changes the volume of these sources, from the listener's point of view.
After a hard and lengthy testing of various options (pygame-mixer, python-sounddevice, puredata with a patch for the mixer), I stopped at swmixer. He even knows how to play files streaming, without loading them into memory as a whole, which was very convenient for me, because I wanted for each station to merge all the music into one file. I had to fork this library and correct the error in it, since it was no longer supported.
I decided to use the Raspberry Pi 3, as the 2B somehow clamped the audio output. Without becoming to understand why this is happening, but simply satisfied with the fact that everything works on a new board, I moved on to the next step.
3. High Level Steering Angle Sensor (DUP) (see pyKY040)
The best library for Python at that time for DUP KY040 was a library called KY040 , but it didn't quite fit my needs, and besides, I wanted to try to make my own, first, real module for Python, that's why I wrote pyKY040 .
It provides:
- Kolbek to increase the value.
- Kolbek to decrease.
- Kolbek to change.
- Kolbek pushing a button.
Settings:
- Scale mode (internal counter changes within bounds from X to Y, is passed as an argument to callback functions).
- Ring scale mode (X to Y, then X again).
- Setting the step size on the scale.
He allowed me to delegate the logic of the DUP and concentrate on what happens when I interact with it.
Only the following lines belong to the DUP in the main code:
tuning_encoder = pyky040.Encoder(CLK=17, DT=27, SW=22) tuning_encoder.setup(scale_min=MIN_VFREQ, scale_max=MAX_VFREQ, step=1, chg_callback=vfreq_changed) tuning_thread = threading.Thread(target=tuning_encoder.watch) volume_encoder = pyky040.Encoder(CLK=5, DT=6, SW=13) volume_encoder.setup(scale_min=0, scale_max=10, step=1, inc_callback=inc_global_volume, dec_callback=dec_global_volume, sw_callback=toggle_mute) global_volume_thread = threading.Thread(target=volume_encoder.watch) tuning_thread.start() global_volume_thread.start() 4. Virtual radio (code)
Now I could play files and I had an interface for working with DUP. It's time to write the code for virtual radio.
It works like a virtual radio band. At certain virtual frequencies (or HF), you can hear the sound - these are the swmixer channels. Between the two HF heard a mixture of two audio sources.
Chn 1 Chn 2 Chn 3 Chn 4 Chn n | | | | | |--------------|--------------|--------------|-------------| <----------------------------------------------------------> The virtual frequency is actually just an integer that increases or decreases depending on your interaction with the DUP.
To leave more freedom when calculating the volume during switching between two HF, this process is processed by a single function that returns the volume of a given station for a given HF. So far, this value varies linearly, but it can be changed by making a louder and more unstable volume curve.
VOLUME /-\ /-\ /- | --\ /-- | --\ -- | --\ /-- | -- | --\ /-- | | -\ /- | | --\ /-- | | --\ /-- | | --\ /-- | | /-- | | /-- --\ | | /-- --\ | | /-- --\ | | /- -\ | | /-- --\ | -\ | /-- --\ | /- --\ | /-- --\ | /-- ------------------------------------------------------- | vfreq | If we apply this example to channel n-1, it will intersect with channel n, with the result that you get a mix of audio from these two sources.
In pseudocode, it looks like this:
( ) -> [ -> [ ( ) , 0 ] ] -> All the details are in the code. Start at the end of the file, where the callouts for the DUP are described, and then follow the trail.
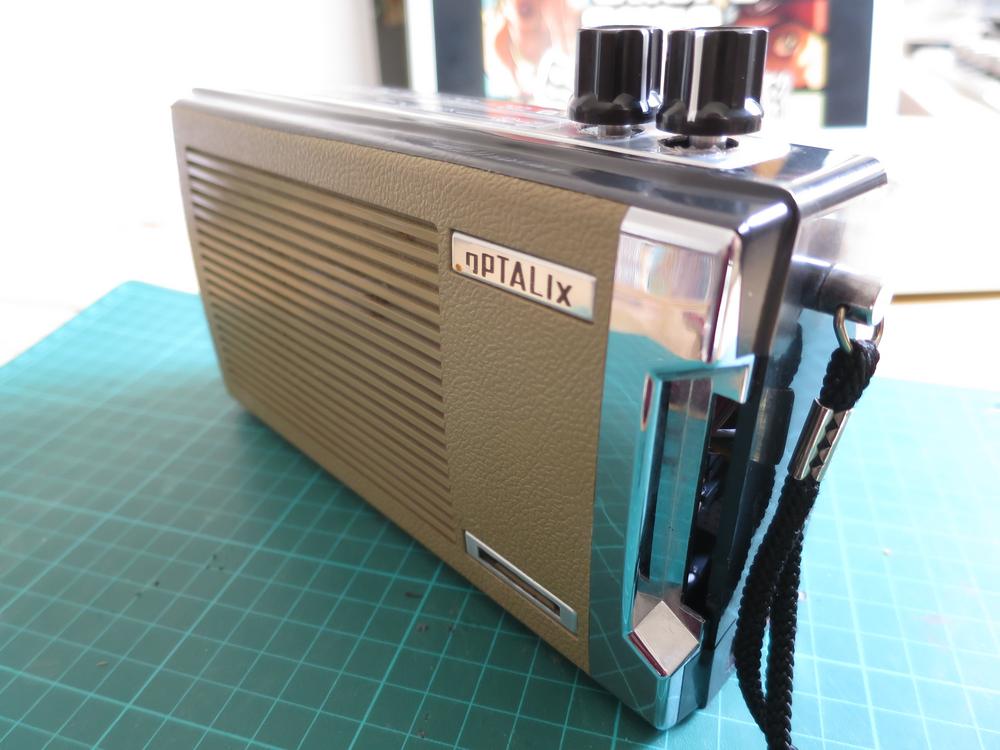
5. Breaking into the radio housing
My grandfather's radio receiver, Optalix TO100, was the donor. Outside of France, I believe, it will not be easy to find. For about € 20, you can get a cool, vintage and compact receiver that you can carry with you in your bag.
DUP
By themselves, the DUP climbed just in such a way that it was possible to close the case - but after connecting the jumper wires, the design turned out to be too big. I had to remove the original plastic connectors and replace them with heat shrinkage so that it could be bent.
Those DUP, which I bought myself, did not have a thread - I had to improvise with attaching them to the body with the help of cardboard and thermoplastic glue. Clay decides, as always.
Raspberry pi
I transferred the power connector to the case, instead of plugging the cable directly into Pi - as a result, I could choose how to place the computer in the case without thinking about where the power connector should be attached to the case.
I used the cable with micro-USB connectors "mother" and "dad", but to make more space, I cleaned the cable and directly soldered to Pi - plus to PP2 and minus to the connector that is grounded (another option is PP5). And certainly more glue, so as not to break off.
Speaker
The speaker is the original 5W from the TO100 receiver. It is connected to an amplifier, which is connected to a 3.5 mm audio plug, which is plugged into a cheap USB DAC .
Everything is connected through a prototyping board and is ready to close forever.
Source: https://habr.com/ru/post/419661/
All Articles