How to search for users on GitHub using React + RxJS 6 + Recompose

This article is intended for people with experience with React and RxJS. I am only sharing templates that I find useful to create such a UI.
Here is what we do:
No classes, work with life cycle or setState .
Training
All you need is in my GitHub repository.
git clone https://github.com/yazeedb/recompose-github-ui cd recompose-github-ui yarn install In the master branch is the finished project. Switch to the start branch if you want to progress in steps.
git checkout start And run the project.
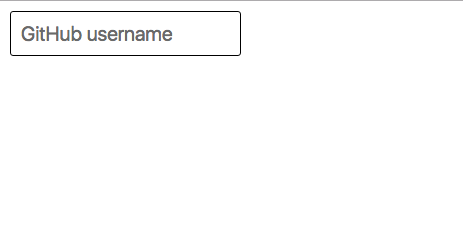
npm start The application should start at localhost:3000 and here is our initial UI.

Launch your favorite editor and open the src/index.js .

Recompose
If you are not familiar with Recompose yet, this is a wonderful library that allows you to create React components in a functional style. It contains a large set of functions. Here are my favorite ones.
It's like Lodash / Ramda, only for React.
I am also very glad that it supports the Observer pattern. Citing documentation :
It turns out that most of the React Component API can be expressed in terms of the Observer pattern.
Today we will practice with this concept!
Stream component
So far, our App is the most common React component. Using the componentFromStream function from the Recompose library, we can get it through an observable object.
The componentFromStream function starts rendering with each new value from our observable. If there are no values yet, it null .
Configuration
Recompose streams follow the ECMAScript Observable Proposal document. It describes how Observable objects should work when they are implemented in modern browsers.
For now we will use libraries such as RxJS, xstream, most, Flyd, etc.
Recompose does not know which library we use, so it provides the setObservableConfig function. With it, you can convert all that we need to ES Observable.
Create a new file in the src folder and name it observableConfig.js .
To connect RxJS 6 to Recompose, write the following code in it:
import { from } from 'rxjs'; import { setObservableConfig } from 'recompose'; setObservableConfig({ fromESObservable: from }); Import this file into index.js :
import './observableConfig'; C this all!
Recompose + RxJS
Add the import componentFromStream to index.js :
import { componentFromStream } from 'recompose'; Let's start overriding the App component:
const App = componentFromStream(prop$ => { ... }); Note that componentFromStream takes as its argument a function with the parameter prop$ , which is an observable version of props . The idea is that using map to turn ordinary props into React components.
If you used RxJS, you should be familiar with the map operator.
Map
As the name implies, map turns Observable(something) into Observable(somethingElse) . In our case, Observable(props) in Observable(component) .
Import the map statement:
import { map } from 'rxjs/operators'; Let's add our component App :
const App = componentFromStream(prop$ => { return prop$.pipe( map(() => ( <div> <input placeholder="GitHub username" /> </div> )) ) }); With RxJS 5, we use pipe instead of a chain of statements.
Save the file and check the result. Nothing changed!
Adding an event handler
Now we will make our input field a little reactive.
Add an import createEventHandler :
import { componentFromStream, createEventHandler } from 'recompose'; We will use this:
const App = componentFromStream(prop$ => { const { handler, stream } = createEventHandler(); return prop$.pipe( map(() => ( <div> <input onChange={handler} placeholder="GitHub username" /> </div> )) ) }); The object created by createEventHandler has two interesting fields: handler and stream .
Under the hood, handler - event source (event emiter), which transmits values to stream . And stream in turn, is an observable object that passes values to subscribers.
We link stream and prop$ to each other to get the current value of the input field.
In our case, using a combineLatest function is a good choice.
The problem of eggs and chicken
To use combineLatest , both stream and prop$ must release values. But stream will not release anything until some value releases prop$ and vice versa.
You can fix this by setting the stream initial value.
Port the startWith statement from RxJS:
import { map, startWith } from 'rxjs/operators'; Create a new variable to get the value from the updated stream :
// App component const { handler, stream } = createEventHandler(); const value$ = stream.pipe( map(e => e.target.value) startWith('') ); We know that stream will issue events when the input field changes, so let's translate them into text right away.
And since the default value for the input field is an empty string, we initialize the value$ object with the value$ '' .
Tying together
Now we are ready to link both threads. Import combineLatest as a method for creating Observable objects, not as an operator .
import { combineLatest } from 'rxjs'; You can also import the tap operator to examine incoming values.
import { map, startWith, tap } from 'rxjs/operators'; Use it like this:
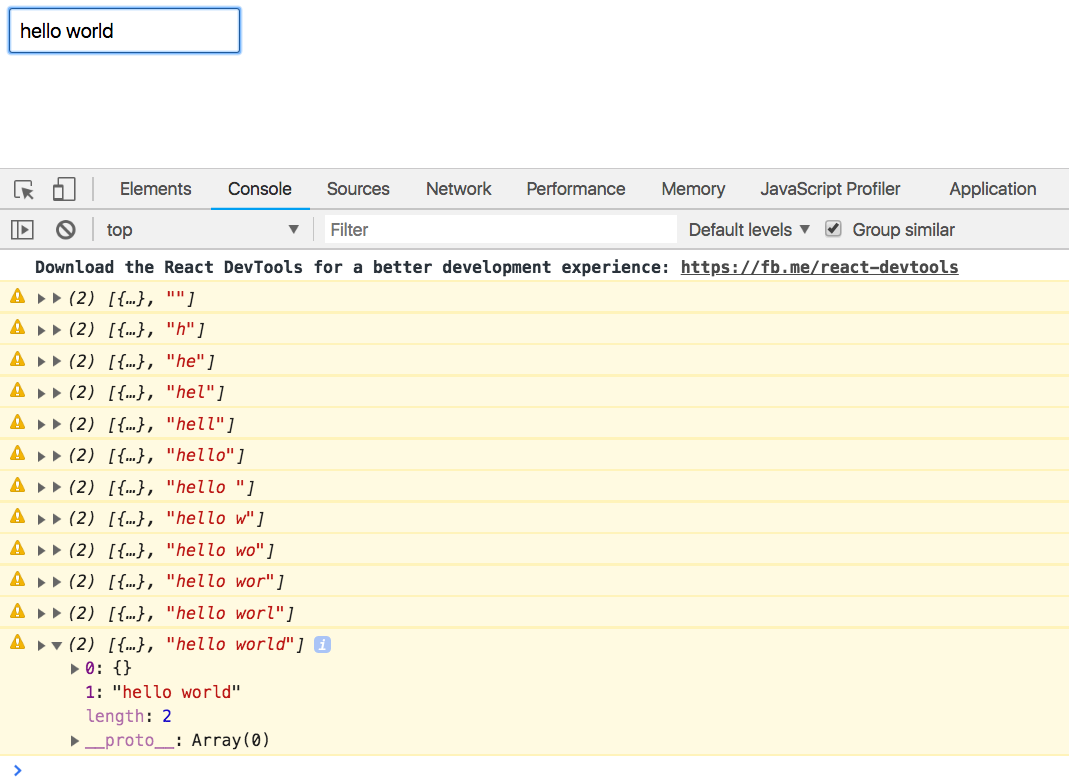
const App = componentFromStream(prop$ => { const { handler, stream } = createEventHandler(); const value$ = stream.pipe( map(e => e.target.value), startWith('') ); return combineLatest(prop$, value$).pipe( tap(console.warn), // <--- map(() => ( <div> <input onChange={handler} placeholder="GitHub username" /> </div> )) ) }); Now, if you start typing something into our input field, the values [props, value] will appear in the console.
User component
This component will be responsible for displaying the user whose name we will pass on to it. It will receive the value from the App component and translate it into an AJAX request.
JSX / CSS
All of this is based on the great GitHub Cards project. Most of the code, especially styles, are copied or adapted.
Create a folder src/User . Create a User.css file in it and copy this code into it.
And copy this code into the src/User/Component.js file.
This component simply fills the template with data from the call to the GitHub API.
Container
Now this component is “stupid” and we are not on the way with it, let's make a “smart” component.
Here is src/User/index.js
import React from 'react'; import { componentFromStream } from 'recompose'; import { debounceTime, filter, map, pluck } from 'rxjs/operators'; import Component from './Component'; import './User.css'; const User = componentFromStream(prop$ => { const getUser$ = prop$.pipe( debounceTime(1000), pluck('user'), filter(user => user && user.length), map(user => ( <h3>{user}</h3> )) ); return getUser$; }); export default User; We defined the User as componentFromStream , which returns an Observable prop$ object converting incoming properties to <h3> .
debounceTime
Our User will receive new values each time a key is pressed on the keyboard, but we do not need this behavior.
When the user starts typing, debounceTime(1000) will skip all events that last less than one second.
pluck
We expect the user object to be passed as props.user . The pluck operator takes the specified field from the object and returns its value.
filter
Here we will make sure that the user passed and is not an empty string.
map
Make the user tag <h3> .
We connect
Let's src/index.js back to src/index.js and import the User component:
import User from './User'; Pass the value value as user parameter:
return combineLatest(prop$, value$).pipe( tap(console.warn), map(([props, value]) => ( <div> <input onChange={handler} placeholder="GitHub username" /> <User user={value} /> </div> )) ); Now our value is displayed on the screen with a delay of one second.
Not bad, now we need to get information about the user.
Data request
GitHub provides an API for getting user information: https://api.github.com/users/${user} . We can easily write a helper function:
const formatUrl = user => `https://api.github.com/users/${user}`; And now we can add a map(formatUrl) after the filter :
const getUser$ = prop$.pipe( debounceTime(1000), pluck('user'), filter(user => user && user.length), map(formatUrl), // <-- map(user => ( <h3>{user}</h3> )) ); And now instead of the username on the screen displays the URL.
We need to make a request! switchMap and ajax come to the switchMap .
switchMap
This operator is ideal for switching between multiple observables.
Let's say the user typed a name, and we will make a request inside switchMap .
What happens if the user enters something else before the response from the API comes? Should we be worried about previous queries?
Not.
The switchMap operator switchMap cancel the old request and switch to the new one.
ajax
RxJS provides its own ajax implementation that works great with switchMap !
We try
We import both operators. My code looks like this:
import { ajax } from 'rxjs/ajax'; import { debounceTime, filter, map, pluck, switchMap } from 'rxjs/operators'; And we use them like this:
const User = componentFromStream(prop$ => { const getUser$ = prop$.pipe( debounceTime(1000), pluck('user'), filter(user => user && user.length), map(formatUrl), switchMap(url => ajax(url).pipe( pluck('response'), map(Component) ) ) ); return getUser$; }); The switchMap operator switches from our input field to an AJAX request. When the answer comes, it passes it to our "stupid" component.
And here is the result!
Error processing
Try entering a non-existent username.
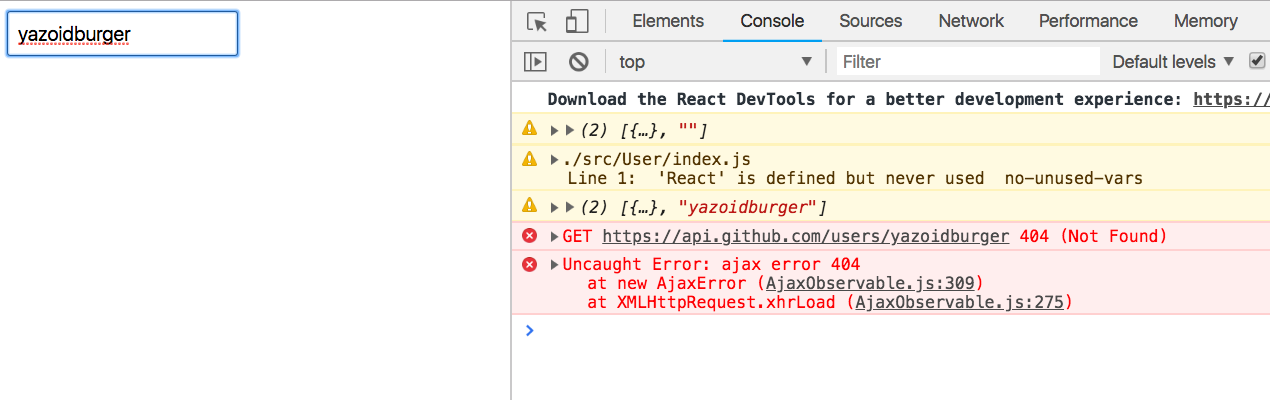
Our application is broken.
catchError
With the catchError operator catchError we can display a sane answer, instead of quietly breaking.
We import:
import { catchError, debounceTime, filter, map, pluck, switchMap } from 'rxjs/operators'; And insert it at the end of our AJAX request:
switchMap(url => ajax(url).pipe( pluck('response'), map(Component), catchError(({ response }) => alert(response.message)) ) ) 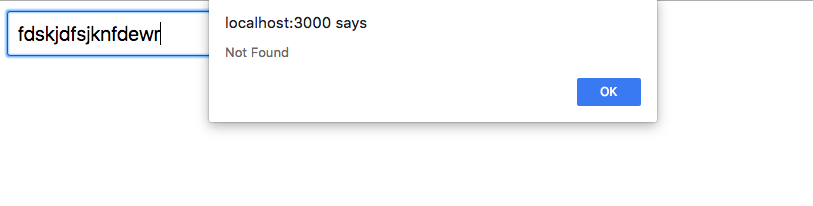
Not bad, but of course you can do better.
Error component
Create a file src/Error/index.js with the contents:
import React from 'react'; const Error = ({ response, status }) => ( <div className="error"> <h2>Oops!</h2> <b> {status}: {response.message} </b> <p>Please try searching again.</p> </div> ); export default Error; It will nicely display the response and status our AJAX request.
We import it into User/index.js , and at the same time the operator of from RxJS:
import Error from '../Error'; import { of } from 'rxjs'; Remember that the function passed to componentFromStream must return observable. We can achieve this using the operator of :
ajax(url).pipe( pluck('response'), map(Component), catchError(error => of(<Error {...error} />)) ) Now our UI looks much better:
Load indicator
It's time to introduce state management. How else can a load indicator be implemented?
What if the place setState we will use BehaviorSubject ?
The Recompose documentation suggests the following:
Instead of setState (), combine multiple threads
Ok, you need two new imports:
import { BehaviorSubject, merge, of } from 'rxjs'; The BehaviorSubject object will contain the download status, and merge will associate it with the component.
Inside the componentFromStream :
const User = componentFromStream(prop$ => { const loading$ = new BehaviorSubject(false); const getUser$ = ... The BehaviorSubject object is initialized with an initial value, or "state". Once we do nothing, until the user starts typing the text, we initialize it to false .
We will change the state of loading$ using the tap operator:
import { catchError, debounceTime, filter, map, pluck, switchMap, tap // <--- } from 'rxjs/operators'; We will use it like this:
const loading$ = new BehaviorSubject(false); const getUser$ = prop$.pipe( debounceTime(1000), pluck('user'), filter(user => user && user.length), map(formatUrl), tap(() => loading$.next(true)), // <--- switchMap(url => ajax(url).pipe( pluck('response'), map(Component), tap(() => loading$.next(false)), // <--- catchError(error => of(<Error {...error} />)) ) ) ); Immediately before the switchMap and the AJAX request, we pass true value to loading$ , and after a successful response, false .
And now we just connect loading$ and getUser$ .
return merge(loading$, getUser$).pipe( map(result => (result === true ? <h3>Loading...</h3> : result)) ); Before we look at work, we can import the delay operator so that the transitions are not too fast.
import { catchError, debounceTime, delay, filter, map, pluck, switchMap, tap } from 'rxjs/operators'; Add delay before the map(Component) :
ajax(url).pipe( pluck('response'), delay(1500), map(Component), tap(() => loading$.next(false)), catchError(error => of(<Error {...error} />)) ) Result?
Everything :)
')
Source: https://habr.com/ru/post/419559/
All Articles