Smart lamp that shows the mood in your city

Everyone knows this feeling when an obsessive desire arises to do something: buy something, create something, write something, call someone ... So I had a desire to do something with my own hands. In search of a suitable project on instructables.com, I came across this one and understood - this is what you need!
First of all, I adapted this lamp project for myself:
- instead of the mood of the whole world, I decided to take the mood of my city
- instead of raspberry pi, I decided to use arduino (since it was already available)
- I also slightly changed the design of the plexiglass box at my discretion
- the ability to configure the lamp without flashing through sd card.
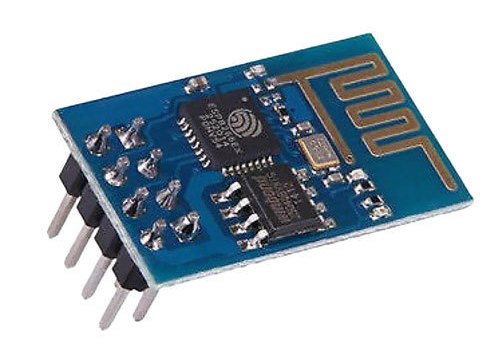
The first step I decided to write a program for arduino. The problem was that the arduino had no wifi, but the solution was found rather quickly - esp8266. ESP8266 - microcontroller with Wi-Fi interface. In addition to Wi-Fi, the microcontroller features the ability to execute programs from external flash memory with an SPI interface. Programming of the ESP8266 is done via a serial adapter, which can be used as an arduino. In addition, writing and flashing programs can also be done through the arduino IDE.
')
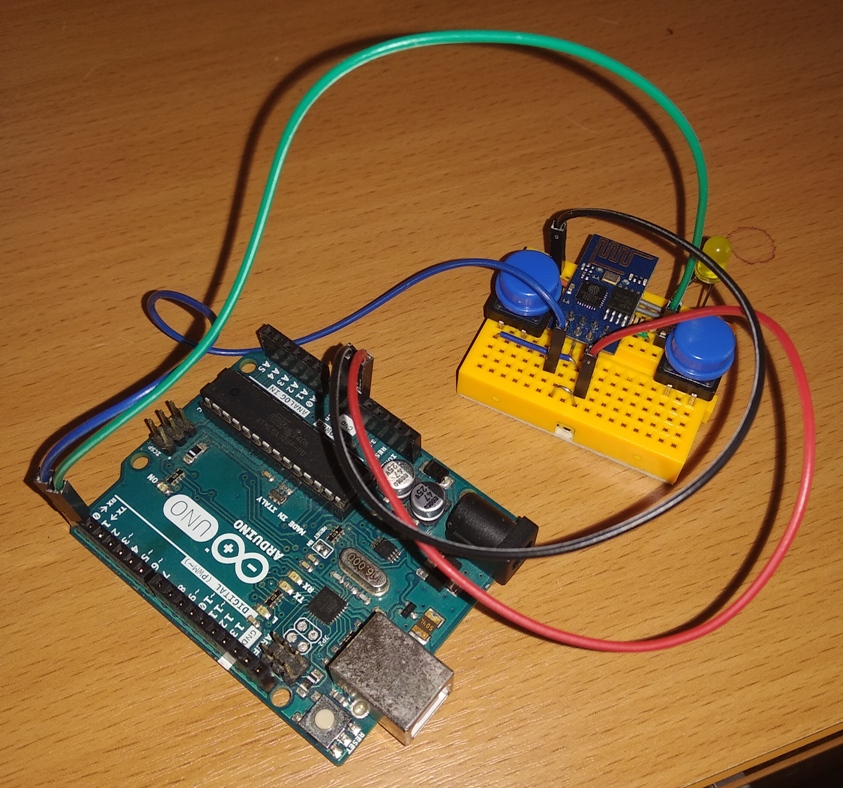
While working with the ESP-01 board, I quickly realized that using the arduino uno + ESP-01 bundle is not the best solution. The fact is that for programming the board, it was necessary to assemble a small programmer circuit. This, of course, is easy, but very inconvenient: for the module firmware, you need to connect the ESP-01 through the programmer to the arduino uno, which works in the serial adapter mode, and to test the program, you need to reconnect the ESP-01 directly to the arduino uno in the pants mode so that the two boards can exchange information via the serial port.
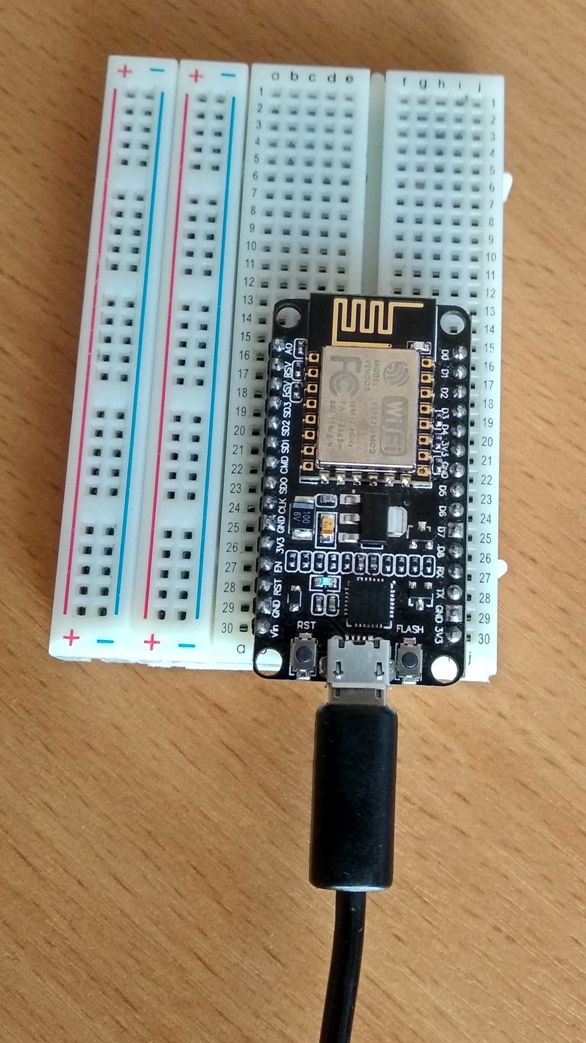
Therefore, I decided to use a NodeMCU board as a microcontroller, which is something like esp8266 and arduino mini on one board. In addition, it has a micro usb input, which greatly simplifies the procedure for working with it.
The program itself turned out pretty simple. First, it connects to the wifi network, the login and password to which is stored on the sd card. After that, json is downloaded from the site ip-api.com/json to determine the location of the lamp (only the name of the city and geographical coordinates are taken from the package). When the location of the lamp becomes known, the program begins to generate requests for twitter, using keywords that describe each programmed "mood". After finishing the processing of requests, the program counts the total number of tweets and determines the percentage of each mood on the current cycle. To make the calculation of the current mood more "alive" - the program compares the current mood with the previous one and calculates the percentage change. For example, if on the first cycle of work, the distribution of moods was 0.4 for happiness and 0.05 for romance, and on the second cycle, 0.5 and 0.1, respectively, the program would select “romance” as the current mood (since the increase in happiness was 25%, and romance - 100 %). This approach allows you to quickly respond to sharp changes in mood in the city, as well as track mixed moods (if the mass fraction of the two moods is about the same, the program will switch between them in turn).
The second stage was the assembly of the lamp housing. I immediately decided on the material - frosted plexiglass (44% light transmission) 2 mm thick. At the same time, according to the idea, the bottom shelf - where all the electronics are located, was made of transparent plexiglass. At the same time, there is a feeling that when the lamp is working, the light as it pours out from below and creates the illusion of levitation of the lamp itself.
I wanted to glue the walls cut from plexiglass together with hot glue. But such a design turned out to be unstable (possibly due to the small width of the walls) and was constantly falling apart. Then I decided to fasten the walls with the help of corners and screws. This option turned out to be more reliable (although not so cute), so I stopped at it.
After assembling the case, I moved on to the third and final stage - installing the electronics on the bottom shelf. It was all pretty simple, except that instead of the planned 4 LEDs, I used 8 - the additional 4 are directed downwards to create a levitation effect. The fact is that I missed the size of the lamp and 30% of the shelf ate a compartment for 4 AA batteries, blocking the light of the LEDs.
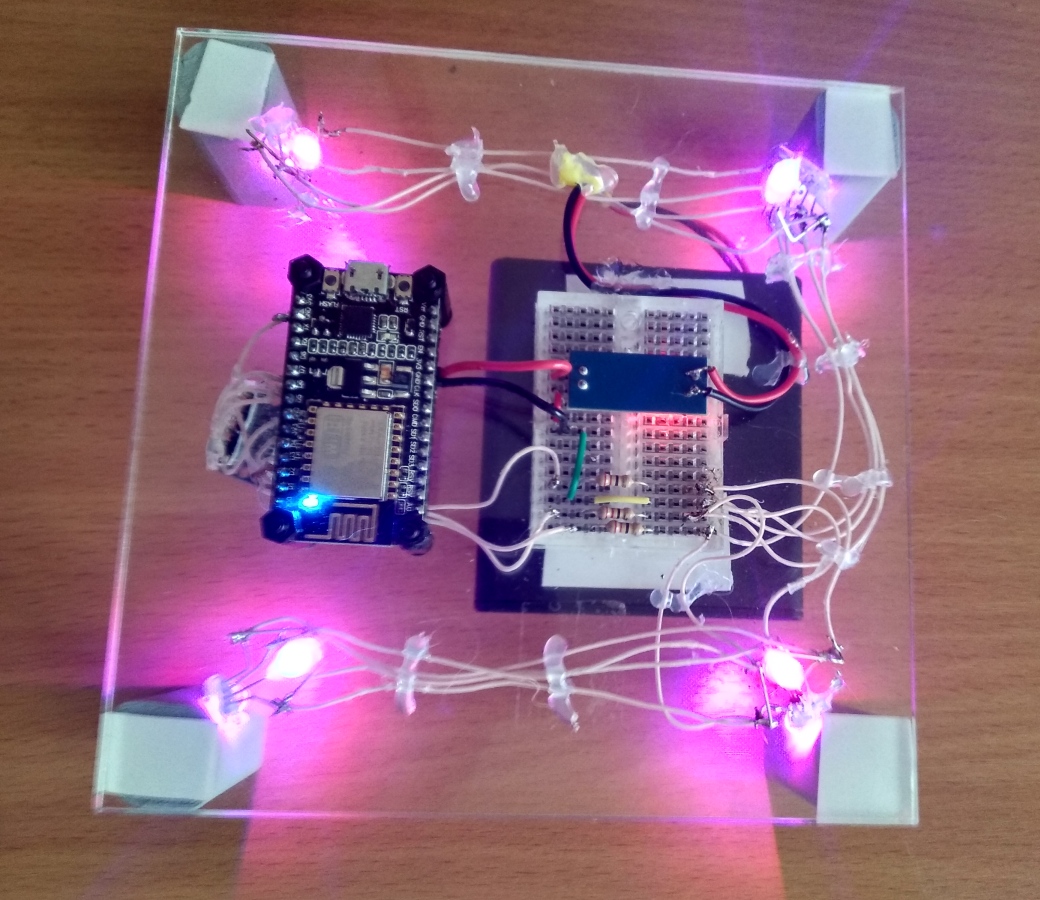
It was also found that the LEDs I purchased did not cope well with the display of complex colors. Therefore, we had to limit ourselves to the 7th simple ones: red, green, blue, pink (red + blue), yellow (red + green), turquoise (green + blue) and white.
The final result of the work can be seen in the video .
In this video, the lamp is in demo mode - it quickly switches all the wired color combinations in random order. In the “normal” mode of operation, the lamp every ten minutes polls twitter to calculate the current mood and changes color according to the results of the calculation.
The project budget amounted to a little more than 2 thousand rubles. At the same time, the most expensive parts: 4x AA batteries 700r, frosted plexiglass sheet 600r, Chinese nodemcu 500r.
What can be improved:
- When assembling the case, you can use transparent corners so that they do not stand out so much.
- The cost of the plexiglass box can be significantly reduced if you buy a large sheet of plexiglass and cut it yourself.
- You can use more expensive LEDs that allow you to display intermediate colors like orange, violet, etc. normally.
- You can use another power source, such as a crown. This is primarily due to the fact that the battery compartment for 4x AA batteries is too large and blocks a lot of light from the bottom of the lamp. The truth is not known how long the lamp will be able to work from one crown.
- You can make a simple web interface to configure the lamp. Since the library for working with sd cards does not support the Russian language, it is not possible to set keywords for searching in this way.
The program code can be found on the githaba . If it is interesting, I can tell you more about the program in a separate article.
Source: https://habr.com/ru/post/419299/
All Articles