Browser Network Shooter on Node.js
The development of multiplayer games is difficult for many reasons: their hosting can be expensive, the structure is not obvious, and the implementation is difficult. In this tutorial, I will try to help you overcome the last barrier.
This article is intended for developers who can create games and are familiar with JavaScript, but who have never written multiplayer online games before. Having completed this tutorial, you will master the implementation of the basic network components in your game and will be able to develop it into something more! Here is what we will create:

Play in the finished game here ! When you press the W or "up" keys, the ship approaches the cursor; when you click the mouse, it shoots. (If no one is online, then to check how multiplayer works, open two browser windows on one computer, or one of them on the phone,). If you want to run the game locally, the full source code is uploaded to GitHub .
When creating the game, I used graphics resources from Kenney's Pirate Pack and the Phaser game framework. In this tutorial, you are assigned the role of a network programmer. The starting point will be a fully functional single-player version of the game, and our task will be to write a server on Node.js using Socket.io for the network part. In order not to overload the tutorial, I will focus on the parts related to the multiplayer, and skip the concepts related to Phaser and Node.js.
')
You do not need to configure anything locally, because we will create this game entirely in the browser on the site Glitch.com ! Glitch is a great tool for building web applications, including backend, databases and everything else. It is great for prototyping, learning, and collaboration, and I’m very happy to introduce you to its capabilities in this tutorial.
Let's get started.
I posted a draft of the project on Glitch.com .
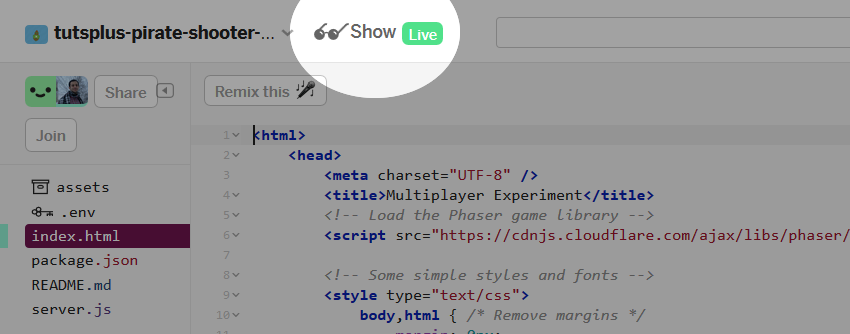
Interface Tips: You can launch an application preview by clicking on the Show button (top left).
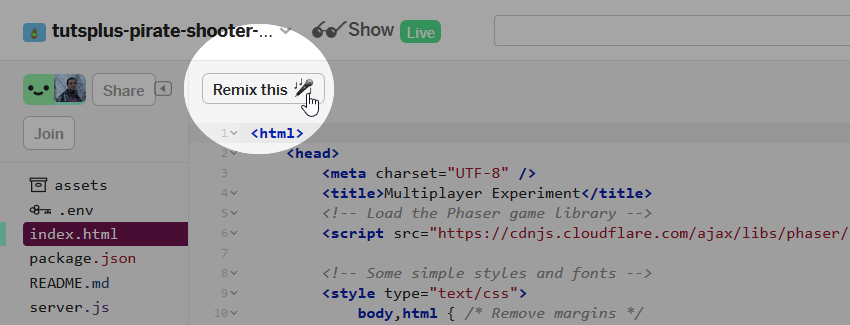
The vertical sidebar on the left contains all the application files. To edit this application you need to create its "remix". So we will create a copy of it in our account (or "fork" in the git jargon). Click on the Remix this button.
At this stage, you are editing the application under an anonymous account. To save your work, you can log in (top right).
Now, before moving on, it is important for you to get acquainted with the game, in which we will add a multiplayer mode. Look at index.html . It has three important functions that you need to know about:
If you prefer to learn by practicing, then make sure that you understand the work of the game by completing the following tasks:
Socket.io is a library for managing real-time communications inside the browser using WebSockets (instead of using protocols like UDP, which are used to create classic multiplayer games). In addition, the library has backup ways to ensure operation, even when WebSockets are not supported. That is, it deals with messaging protocols and allows the use of a convenient event-based messaging system.
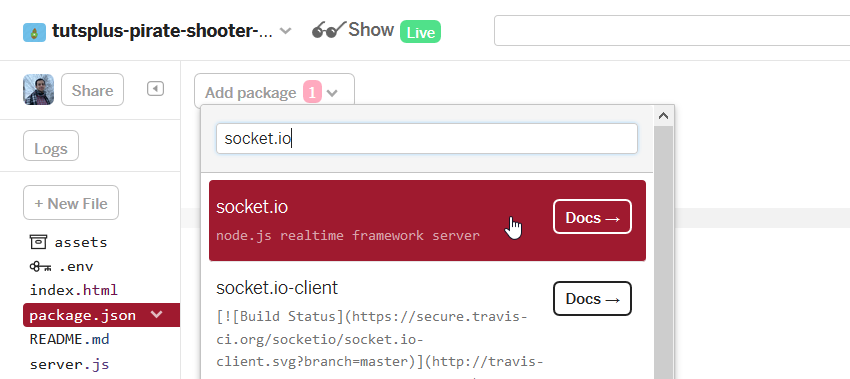
The first thing we need to do is install the Socket.io module. In Glitch, you can do this by going to the package.json file, and then either by entering the required module in the dependencies, or by clicking Add package and entering "socket.io".
Now is the right time to figure out the server logs. Click the Logs button on the left to open the server log. You should see that it installs Socket.io with all its dependencies. This is where you need to look for all the errors and output data of the server code.

Now let's go to server.js . This is where our server code is located. So far there is only some basic boilerplate-code for serving our HTML. Add a line to the top of the file to enable Socket.io:
Now we also need to enable Socket.io in the client, so let's go back to index.html and add the following lines inside the
Note: Socket.io automatically handles client library uploading along this path, so this line works even if your folders do not have the /socket.io/ directory.
Socket.io is now included in the project and ready to go!
Our first real step is to accept connections on the server and create new players in the client.
Add this code to the bottom of server.js :
So we ask Socket.io to listen to all
To check that it works, return to the client ( index.html ) and add this line to the create function somewhere:
If you start the game and look at the server log (click on the Logs button), then you will see that the server has registered this connection event!
Now when you connect a new player, we expect that he will give us information about his condition. In our case, we need to know at least x , y and angle in order to correctly create it at the desired point.
The
If you run this code, then while in the server log you will not see anything, because we have not yet told the client to generate this event
We can send a message to all other connected players so that they know that a new player has appeared. Socket.io has a convenient function for this:
When you call
The
The server code should now look like this:
That is, each time a player connects, we expect him to send us a message with his location data, and we send this data to all other players so that they can create his sprite.
Now, to complete this cycle, we need to perform two actions in the client:
To perform the first action after creating the player in the create function (approximately on line 135), we can generate a message containing the location data we need to send:
We do not need to worry about serializing the data being sent. You can transfer them to any type of object, and Socket.io itself will process it for us.
Before proceeding further, we will test the operation of the code . We should see a similar message in the server logs:
Now we know that our server receives an alert when a new player is connected and correctly reads its location data!
Next, we want to listen to requests to create a new player. We can place this code immediately after generating the message, it should look like this:
Now test the code . Open two windows with the game and make sure that it works.
You should see that after opening two clients, the first client has two ships created, and the second has just one.
I hope you tried to figure it out on your own! The following happens: when the first player connects, the server sends a
That is, the problem is that the second player connects to the game later and he needs to know the state of the game. We must inform all new connecting players that players already exist (as well as other events that have occurred in the world) so that they can navigate. Before we get to the solution of this problem, I have a brief warning.
There are two approaches to the implementation of synchronization of all players. The first is to send the network a minimum amount of information about the changes. That is, each time a new player connects, we will send all other players only information about this new player (and this new player will send a list of all other players in the world), and after it is turned off, we inform all players that this particular player has disconnected.
The second approach is to transfer the entire state of the game. In this case, we simply send everybody a complete list of all the players every time you connect or disconnect.
The first approach is better in that it minimizes the amount of information transmitted over the network, but it can be very difficult to implement it, and it has the possibility of players getting out of sync. The second ensures that players will always be synchronized, but in each message you will have to send more data.
In our case, instead of trying to send messages when a player connects to create it and when disconnected to delete it, as well as when moving to update its position, we can combine it all into one common
To implement such a scheme, I will do the following:
You can try to implement this system yourself, because these actions are quite simple ( my function tip may be useful here). Here is what a complete implementation might look like:
The client side is a bit more complicated. On the one hand, now we should only care about the
Here is how I handle this event in the client:
On the client side, I store the ships in the
Now let's test the code . You should be able to create multiple clients and see the correct number of ships created in the correct positions!
Here begins a very interesting part. We want to synchronize ship positions on all clients. This will show the simplicity of the structure that we have created at the moment. We already have an update event that can synchronize the locations of all ships. We need to do the following:
And that should be enough! Now it's your turn to try to implement it yourself.
If you are completely confused and you need a hint, then look at the finished project .
The most straightforward method of implementation is to update the positions of all players each time they receive a move event from any player. It is great if players always get the latest information immediately after it appears, but the number of messages transmitted over the network can easily grow to hundreds per frame. Imagine that you have 10 players, each of whom send a message about the movement in each frame. The server should send them back to all 10 players. This is already 100 messages per frame!
It will be better to do this: wait until the server receives all messages from all players, and then send all players a big update containing all the information. Thus, we will reduce the number of transmitted messages to the number of users present in the game (instead of the square of this number). The problem here is that all users will experience the same delay as the player with the slowest connection.
Another solution is to send the server updates at a constant frequency, regardless of the number of messages received from the player. A common standard is to update the server about 30 times per second.
However, when choosing the structure of your server, you should estimate the number of messages transmitted in each frame at the early stages of game development.
We are almost done! The last serious part is to synchronize the shells over the network. We can implement it the same way we synchronized the players:
But there is a problem.
If you redirect everything that the client sends as the true positions of the shells, the player will be able to cheat easily by modifying his client and giving you false data, such as shells teleporting to the positions of the ships. You can easily check this yourself by downloading the web page, changing the code in JavaScript and opening it again. And this is a problem not only for browser games. In general, we can never trust the data coming from the user.
To partially cope with this problem, we will try to use a different scheme:
Thus, the client is responsible for the position of the projectile, but not for its speed and not for its further movement. The client can change the position of the shells for himself, but this does not change what other customers see.
To implement this scheme, we will add a message generation when fired. I will no longer create the sprite myself, because its existence and location will be entirely determined by the server. Now our new projectile shot at index.html will look like this:
Also now we can comment out the entire code snippet that updates the shells in the client:
Finally, we need to force the client to listen to the updates of the shells. I decided to implement it the same way as with the players, that is, the server simply sends an array of all the positions of the shells in an event called
, . , , , , .
server.js . , :
:
60 :
— - ( for):
! , , . , , , . , , , , , , .
, . , , , ( ). , .
— , , . , . :
. , - 0:
( ). , - - :
, ( ).
, , , . , .
, . ! , - !
, . , , :
. , , , .
. , , : . — . , , - . , , , .
, .
. update, , :
update ( ) :
, 30 , 60 fps - !
. : , , , . -.
, , . , .
, , . — ( ). — . , , , , .
— , . , , , . . . .
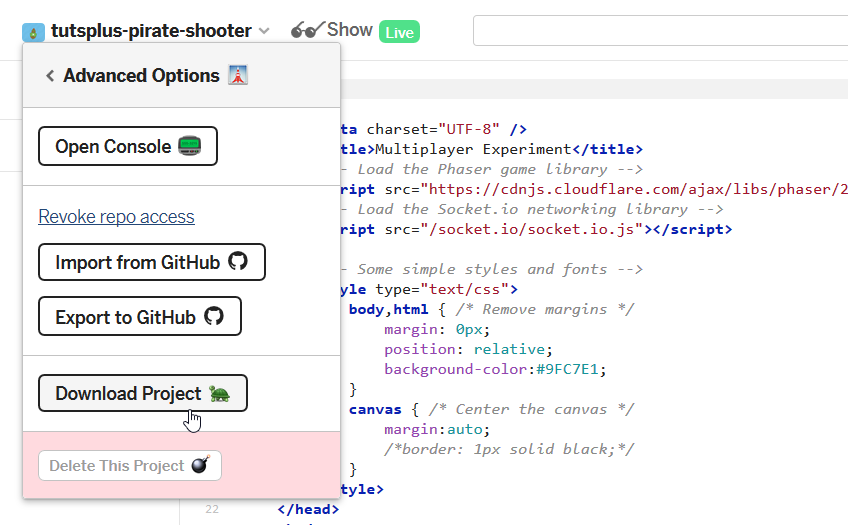
Glitch, (Advanced Options) :
This article is intended for developers who can create games and are familiar with JavaScript, but who have never written multiplayer online games before. Having completed this tutorial, you will master the implementation of the basic network components in your game and will be able to develop it into something more! Here is what we will create:
Play in the finished game here ! When you press the W or "up" keys, the ship approaches the cursor; when you click the mouse, it shoots. (If no one is online, then to check how multiplayer works, open two browser windows on one computer, or one of them on the phone,). If you want to run the game locally, the full source code is uploaded to GitHub .
When creating the game, I used graphics resources from Kenney's Pirate Pack and the Phaser game framework. In this tutorial, you are assigned the role of a network programmer. The starting point will be a fully functional single-player version of the game, and our task will be to write a server on Node.js using Socket.io for the network part. In order not to overload the tutorial, I will focus on the parts related to the multiplayer, and skip the concepts related to Phaser and Node.js.
')
You do not need to configure anything locally, because we will create this game entirely in the browser on the site Glitch.com ! Glitch is a great tool for building web applications, including backend, databases and everything else. It is great for prototyping, learning, and collaboration, and I’m very happy to introduce you to its capabilities in this tutorial.
Let's get started.
1. Preparation
I posted a draft of the project on Glitch.com .
Interface Tips: You can launch an application preview by clicking on the Show button (top left).
The vertical sidebar on the left contains all the application files. To edit this application you need to create its "remix". So we will create a copy of it in our account (or "fork" in the git jargon). Click on the Remix this button.
At this stage, you are editing the application under an anonymous account. To save your work, you can log in (top right).
Now, before moving on, it is important for you to get acquainted with the game, in which we will add a multiplayer mode. Look at index.html . It has three important functions that you need to know about:
preload (line 99), create (line 115) and GameLoop (line 142), as well as the player's object (line 35).If you prefer to learn by practicing, then make sure that you understand the work of the game by completing the following tasks:
- Increase the size of the world (line 29) - note that there is a separate world size for the in-game world and a window size for the page canvas itself .
- Make it so that you could move forward with the help of the "space" (line 53).
- Change the player’s ship type (line 129).
- Slow the movement of shells (line 155).
Install Socket.io
Socket.io is a library for managing real-time communications inside the browser using WebSockets (instead of using protocols like UDP, which are used to create classic multiplayer games). In addition, the library has backup ways to ensure operation, even when WebSockets are not supported. That is, it deals with messaging protocols and allows the use of a convenient event-based messaging system.
The first thing we need to do is install the Socket.io module. In Glitch, you can do this by going to the package.json file, and then either by entering the required module in the dependencies, or by clicking Add package and entering "socket.io".
Now is the right time to figure out the server logs. Click the Logs button on the left to open the server log. You should see that it installs Socket.io with all its dependencies. This is where you need to look for all the errors and output data of the server code.
Now let's go to server.js . This is where our server code is located. So far there is only some basic boilerplate-code for serving our HTML. Add a line to the top of the file to enable Socket.io:
var io = require('socket.io')(http); // http Now we also need to enable Socket.io in the client, so let's go back to index.html and add the following lines inside the
<head> tag: <!-- Socket.io --> <script src="/socket.io/socket.io.js"></script> Note: Socket.io automatically handles client library uploading along this path, so this line works even if your folders do not have the /socket.io/ directory.
Socket.io is now included in the project and ready to go!
2. Recognition and spawning of players
Our first real step is to accept connections on the server and create new players in the client.
Accepting server connections
Add this code to the bottom of server.js :
// Socket.io io.on('connection', function(socket){ console.log("New client has connected with id:",socket.id); }) So we ask Socket.io to listen to all
connection events that automatically occur when a client connects. The library creates a new socket object for each client, where socket.id is the unique identifier for this client.To check that it works, return to the client ( index.html ) and add this line to the create function somewhere:
var socket = io(); // 'connection' If you start the game and look at the server log (click on the Logs button), then you will see that the server has registered this connection event!
Now when you connect a new player, we expect that he will give us information about his condition. In our case, we need to know at least x , y and angle in order to correctly create it at the desired point.
The
connection event was a built-in event triggered by Socket.io. We can listen to any self-defined events. I will call my event new-player , and expect the client to send it as soon as it connects with its position information. It will look like this: // Socket.io io.on('connection', function(socket){ console.log("New client has connected with id:",socket.id); socket.on('new-player',function(state_data){ // new-player console.log("New player has state:",state_data); }) }) If you run this code, then while in the server log you will not see anything, because we have not yet told the client to generate this event
new-player . But let's pretend for a minute that we have already done this and continue working on the server. What should happen after getting the location of a new joining player?We can send a message to all other connected players so that they know that a new player has appeared. Socket.io has a convenient function for this:
socket.broadcast.emit('create-player',state_data); When you call
socket.emit message is simply sent to that one client. When you call socket.broadcast.emit it is sent to every client connected to the server, except for the one on whose socket this function was called.The
io.emit function sends a message to every client connected to the server with no exceptions. In our scheme, we do not need this, because if we receive a message from the server requesting the creation of our own ship, we will have a duplicate sprite, because we have already created our own ship when the game starts. Here is a handy tip on the different kinds of messaging features that we will use in this tutorial.The server code should now look like this:
// Socket.io io.on('connection', function(socket){ console.log("New client has connected with id:",socket.id); socket.on('new-player',function(state_data){ // new-player console.log("New player has state:",state_data); socket.broadcast.emit('create-player',state_data); }) }) That is, each time a player connects, we expect him to send us a message with his location data, and we send this data to all other players so that they can create his sprite.
Spawn in the client
Now, to complete this cycle, we need to perform two actions in the client:
- Generate a message with the data of our location after the connection.
- Play
create-playerevents and create a player at this point.
To perform the first action after creating the player in the create function (approximately on line 135), we can generate a message containing the location data we need to send:
socket.emit('new-player',{x:player.sprite.x,y:player.sprite.y,angle:player.sprite.rotation}) We do not need to worry about serializing the data being sent. You can transfer them to any type of object, and Socket.io itself will process it for us.
Before proceeding further, we will test the operation of the code . We should see a similar message in the server logs:
New player has state: { x: 728.8180247836519, y: 261.9979387913289, angle: 0 } Now we know that our server receives an alert when a new player is connected and correctly reads its location data!
Next, we want to listen to requests to create a new player. We can place this code immediately after generating the message, it should look like this:
socket.on('create-player',function(state){ // CreateShip - , CreateShip(1,state.x,state.y,state.angle) }) Now test the code . Open two windows with the game and make sure that it works.
You should see that after opening two clients, the first client has two ships created, and the second has just one.
Task: can you figure out why this happened? Or how can you fix it? Step through the client / server logic we wrote and try to debug it.
I hope you tried to figure it out on your own! The following happens: when the first player connects, the server sends a
create-player event to all other players, but there are not yet any players who can receive it. After connecting the second player, the server sends its messages again, and the first player receives it and correctly creates the sprite, while the second player missed the message of the first player.That is, the problem is that the second player connects to the game later and he needs to know the state of the game. We must inform all new connecting players that players already exist (as well as other events that have occurred in the world) so that they can navigate. Before we get to the solution of this problem, I have a brief warning.
Game Status Synchronization Warning
There are two approaches to the implementation of synchronization of all players. The first is to send the network a minimum amount of information about the changes. That is, each time a new player connects, we will send all other players only information about this new player (and this new player will send a list of all other players in the world), and after it is turned off, we inform all players that this particular player has disconnected.
The second approach is to transfer the entire state of the game. In this case, we simply send everybody a complete list of all the players every time you connect or disconnect.
The first approach is better in that it minimizes the amount of information transmitted over the network, but it can be very difficult to implement it, and it has the possibility of players getting out of sync. The second ensures that players will always be synchronized, but in each message you will have to send more data.
In our case, instead of trying to send messages when a player connects to create it and when disconnected to delete it, as well as when moving to update its position, we can combine it all into one common
update event. This update event will always send every player's position to all customers. This is what the server should do. The client’s task is to keep the world consistent with the resulting state.To implement such a scheme, I will do the following:
- I will keep a dictionary of players, the key of which will be their ID, and the value will be their location data.
- Add a player to this dictionary when it is connected and send an update event.
- Delete a player from this dictionary when it is disabled and send an update event.
You can try to implement this system yourself, because these actions are quite simple ( my function tip may be useful here). Here is what a complete implementation might look like:
// Socket.io // 1 - / var players = {}; io.on('connection', function(socket){ console.log("New client has connected with id:",socket.id); socket.on('new-player',function(state_data){ // new-player console.log("New player has state:",state_data); // 2 - players[socket.id] = state_data; // io.emit('update-players',players); }) socket.on('disconnect',function(){ // 3- delete players[socket.id]; // }) }) The client side is a bit more complicated. On the one hand, now we should only care about the
update-players event, but on the other hand, we should consider creating new ships if the server sends more ships than we know, or deleting if there are too many of them.Here is how I handle this event in the client:
// // : - other_players = {} socket.on('update-players',function(players_data){ var players_found = {}; // for(var id in players_data){ // if(other_players[id] == undefined && id != socket.id){ // , var data = players_data[id]; var p = CreateShip(1,data.x,data.y,data.angle); other_players[id] = p; console.log("Created new player at (" + data.x + ", " + data.y + ")"); } players_found[id] = true; // if(id != socket.id){ other_players[id].x = players_data[id].x; // , , other_players[id].y = players_data[id].y; other_players[id].rotation = players_data[id].angle; } } // for(var id in other_players){ if(!players_found[id]){ other_players[id].destroy(); delete other_players[id]; } } }) On the client side, I store the ships in the
other_players dictionary, which I simply defined at the top of the script (it is not shown here). Since the server sends player data to all players, I have to add a check so that the client does not create an extra sprite for itself. (If you have problems with structuring, here is the full code , which should be in index.html at the moment).Now let's test the code . You should be able to create multiple clients and see the correct number of ships created in the correct positions!
3. Synchronization of ship positions
Here begins a very interesting part. We want to synchronize ship positions on all clients. This will show the simplicity of the structure that we have created at the moment. We already have an update event that can synchronize the locations of all ships. We need to do the following:
- Get the client to generate a message each time it moves to a new position.
- Teach the server to listen to this move message and update the item with the player's data in the
playersdictionary. - Generate update event for all clients.
And that should be enough! Now it's your turn to try to implement it yourself.
If you are completely confused and you need a hint, then look at the finished project .
A note on minimizing network data
The most straightforward method of implementation is to update the positions of all players each time they receive a move event from any player. It is great if players always get the latest information immediately after it appears, but the number of messages transmitted over the network can easily grow to hundreds per frame. Imagine that you have 10 players, each of whom send a message about the movement in each frame. The server should send them back to all 10 players. This is already 100 messages per frame!
It will be better to do this: wait until the server receives all messages from all players, and then send all players a big update containing all the information. Thus, we will reduce the number of transmitted messages to the number of users present in the game (instead of the square of this number). The problem here is that all users will experience the same delay as the player with the slowest connection.
Another solution is to send the server updates at a constant frequency, regardless of the number of messages received from the player. A common standard is to update the server about 30 times per second.
However, when choosing the structure of your server, you should estimate the number of messages transmitted in each frame at the early stages of game development.
4. Synchronization of shells
We are almost done! The last serious part is to synchronize the shells over the network. We can implement it the same way we synchronized the players:
- Each client sends the position of all its shells in each frame.
- The server redirects them to each player.
But there is a problem.
Cheating Protection
If you redirect everything that the client sends as the true positions of the shells, the player will be able to cheat easily by modifying his client and giving you false data, such as shells teleporting to the positions of the ships. You can easily check this yourself by downloading the web page, changing the code in JavaScript and opening it again. And this is a problem not only for browser games. In general, we can never trust the data coming from the user.
To partially cope with this problem, we will try to use a different scheme:
- The client generates a message on the fired projectile with its position and direction.
- The server simulates the movement of shells.
- The server updates the data of each client, passing the position of all the shells.
- Clients render shells in positions received from the server.
Thus, the client is responsible for the position of the projectile, but not for its speed and not for its further movement. The client can change the position of the shells for himself, but this does not change what other customers see.
To implement this scheme, we will add a message generation when fired. I will no longer create the sprite myself, because its existence and location will be entirely determined by the server. Now our new projectile shot at index.html will look like this:
// if(game.input.activePointer.leftButton.isDown && !this.shot){ var speed_x = Math.cos(this.sprite.rotation + Math.PI/2) * 20; var speed_y = Math.sin(this.sprite.rotation + Math.PI/2) * 20; /* , , var bullet = {}; bullet.speed_x = speed_x; bullet.speed_y = speed_y; bullet.sprite = game.add.sprite(this.sprite.x + bullet.speed_x,this.sprite.y + bullet.speed_y,'bullet'); bullet_array.push(bullet); */ this.shot = true; // , socket.emit('shoot-bullet',{x:this.sprite.x,y:this.sprite.y,angle:this.sprite.rotation,speed_x:speed_x,speed_y:speed_y}) } Also now we can comment out the entire code snippet that updates the shells in the client:
/* , // for(var i=0;i<bullet_array.length;i++){ var bullet = bullet_array[i]; bullet.sprite.x += bullet.speed_x; bullet.sprite.y += bullet.speed_y; // , if(bullet.sprite.x < -10 || bullet.sprite.x > WORLD_SIZE.w || bullet.sprite.y < -10 || bullet.sprite.y > WORLD_SIZE.h){ bullet.sprite.destroy(); bullet_array.splice(i,1); i--; } } */ Finally, we need to force the client to listen to the updates of the shells. I decided to implement it the same way as with the players, that is, the server simply sends an array of all the positions of the shells in an event called
bullets-update , and the client creates or destroys the shells to maintain synchronization. Here is what it looks like: // socket.on('bullets-update',function(server_bullet_array){ // , for(var i=0;i<server_bullet_array.length;i++){ if(bullet_array[i] == undefined){ bullet_array[i] = game.add.sprite(server_bullet_array[i].x,server_bullet_array[i].y,'bullet'); } else { // ! bullet_array[i].x = server_bullet_array[i].x; bullet_array[i].y = server_bullet_array[i].y; } } // , for(var i=server_bullet_array.length;i<bullet_array.length;i++){ bullet_array[i].destroy(); bullet_array.splice(i,1); i--; } }) , . , , , , .
server.js . , :
var bullet_array = []; // :
// shoot-bullet socket.on('shoot-bullet',function(data){ if(players[socket.id] == undefined) return; var new_bullet = data; data.owner_id = socket.id; // id bullet_array.push(new_bullet); }); 60 :
// 60 function ServerGameLoop(){ for(var i=0;i<bullet_array.length;i++){ var bullet = bullet_array[i]; bullet.x += bullet.speed_x; bullet.y += bullet.speed_y; // , if(bullet.x < -10 || bullet.x > 1000 || bullet.y < -10 || bullet.y > 1000){ bullet_array.splice(i,1); i--; } } } setInterval(ServerGameLoop, 16); — - ( for):
// , , io.emit("bullets-update",bullet_array); ! , , . , , , . , , , , , , .
5.
, . , , , ( ). , .
— , , . , . :
- , - .
- , - .
- .
. , - 0:
player.sprite.alpha = 0; ( ). , - - :
for(var id in other_players){ if(other_players[id].alpha < 1){ other_players[id].alpha += (1 - other_players[id].alpha) * 0.16; } else { other_players[id].alpha = 1; } } , ( ).
, , , . , .
6.
, . ! , - !
, . , , :
- , .
- , . , .
. , , , .
. , , : . — . , , - . , , , .
, .
. update, , :
// if(id != socket.id){ other_players[id].target_x = players_data[id].x; // , , other_players[id].target_y = players_data[id].y; other_players[id].target_rotation = players_data[id].angle; } update ( ) :
// , for(var id in other_players){ var p = other_players[id]; if(p.target_x != undefined){ px += (p.target_x - px) * 0.16; py += (p.target_y - py) * 0.16; // , / var angle = p.target_rotation; var dir = (angle - p.rotation) / (Math.PI * 2); dir -= Math.round(dir); dir = dir * Math.PI * 2; p.rotation += dir * 0.16; } } , 30 , 60 fps - !
Conclusion
. : , , , . -.
, , . , .
, , . — ( ). — . , , , , .
— , . , , , . . . .
Glitch, (Advanced Options) :
Source: https://habr.com/ru/post/418411/
All Articles