Simple server with GraphQL instead of REST, java implementation

I was offered to get acquainted with GraphQL. See if you can apply at work. Searching, I realized that mostly information in English and partly old, there is 3 version of the library, and already 5 is. I want to fill this gap. In this embodiment, there will be an example on servlets, i.e. without spring and without spring-boot.
Theoretical part:
GraphQL - a new look at the API. Part 1 from VladimirZaets
Comparing REST and GraphQL from bevalorous
Immediately show the code, because GraphQL is an abstraction. And if you discuss abstraction for a long time, then you can get lost. The original is here .
I changed the code a bit, because newer versions do not have some classes.
')
Create an empty maven project. Add dependencies to the comme:
<dependency> <groupId>com.graphql-java</groupId> <artifactId>graphql-java</artifactId> <version>8.0</version> </dependency> <dependency> <groupId>com.graphql-java</groupId> <artifactId>graphql-java-tools</artifactId> <version>5.0.0</version> </dependency> <dependency> <groupId>com.graphql-java</groupId> <artifactId>graphql-java-servlet</artifactId> <version>5.0.0</version> </dependency> <dependency> <groupId>javax.servlet</groupId> <artifactId>javax.servlet-api</artifactId> <version>3.0.1</version> <scope>provided</scope> </dependency> In order not to think about the server, take jetty:
<plugin> <groupId>org.eclipse.jetty</groupId> <artifactId>jetty-maven-plugin</artifactId> <version>9.4.6.v20170531</version> </plugin> Differences from tutorial:
- Inheritance from SimpleGraphQLServlet with a call to the constructor is now “deprecated”, you need to use the builder, which is not possible with inheritance, use composition.
- In the servlet, you can create a SimpleGraphQLServlet object.
- GraphQLRootResolver - no longer, you can use specific ones: GraphQLMutationResolver and GraphQLQueryResolver
The base is ready. We will do it by tutorial, without a spring or JAX-RS. In general, the usual servlet:
@WebServlet(urlPatterns = "/graphql") public class GraphQLEndpoint extends HttpServlet { private SimpleGraphQLServlet graph; public GraphQLEndpoint() { graph = SimpleGraphQLServlet.builder(buildSchema()).build(); } private static GraphQLSchema buildSchema() { LinkRepository linkRepository = new LinkRepository(); return SchemaParser.newParser() .file("schema.graphqls") .resolvers(new Query(linkRepository), new Mutation(linkRepository)) .build() .makeExecutableSchema(); } @Override protected void service(HttpServletRequest req, HttpServletResponse resp) throws ServletException, IOException { graph.service(req, resp); } } In it, the service method transfers data to the SimpleGraphQLServlet. All on this our business ends.
Normal code (dto Link and LinkRepository)
public class Link { private final String url; private final String description; public Link(String url, String description) { this.url = url; this.description = description; } public String getUrl() { return url; } public String getDescription() { return description; } } public class LinkRepository { private final List<Link> links; public LinkRepository() { links = new ArrayList<>(); //add some links to start off with links.add(new Link("http://howtographql.com", "Your favorite GraphQL page")); links.add(new Link("http://graphql.org/learn/", "The official docks")); } public List<Link> getAllLinks() { return links; } public void saveLink(Link link) { links.add(link); } } Now the request code (GET requests in REST) and mutations (requests for changes)
import com.coxautodev.graphql.tools.GraphQLQueryResolver; public class Query implements GraphQLQueryResolver { private final LinkRepository linkRepository; public Query(LinkRepository linkRepository) { this.linkRepository = linkRepository; } public List<Link> allLinks() { return linkRepository.getAllLinks(); } } import com.coxautodev.graphql.tools.GraphQLMutationResolver; public class Mutation implements GraphQLMutationResolver { private final LinkRepository linkRepository; public Mutation(LinkRepository linkRepository) { this.linkRepository = linkRepository; } public Link createLink(String url, String description) { Link newLink = new Link(url, description); linkRepository.saveLink(newLink); return newLink; } } We launch through jetty: run and we throw request:
http://localhost:8080/graphql?query={allLinks{url}} We get the answer:
{"data": {"allLinks": [ {"url":"http://howtographql.com"}, {"url":"http://graphql.org/learn/"} ] } } And here the first main point: Dto, we have 2 fields, url and description, and we received only url in response. And rightly, we only url and asked in the request {allLinks {url}}. If you change the request to this:
http://localhost:8080/graphql?query={allLinks{url,description}} The answer is:
{"data": {"allLinks": [ { "url":"http://howtographql.com", "description":"Your favorite GraphQL page" }, { "url":"http://graphql.org/learn/", "description":"The official docks" } ] } } Now we got the url and description. And all because we asked them.
Request to change data.
Here it is a little more difficult and much easier to use the UI utility.
1. Go to the address
2. Copy the entire index.html file
3. Replace 2 lines:
These:
<link rel="stylesheet" href="./node_modules/graphiql/graphiql.css" /> <script src="./node_modules/graphiql/graphiql.js"></script> On those:
<link rel="stylesheet" href="//cdn.jsdelivr.net/npm/graphiql@0.11.2/graphiql.css" /> <script src="//cdn.jsdelivr.net/npm/graphiql@0.11.2/graphiql.js"></script> 4. Replace index.html in the project ... \ src \ main \ webapp \ index.html with the one just written off.
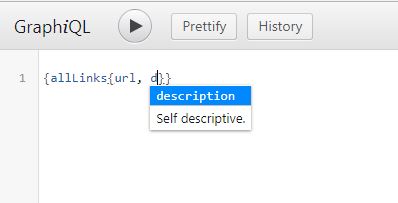
We restart the project, go to localhost: 8080 and get to this page

First bonus: on the left there is a Docs button behind which there is already ready documentation for your project. Not much, fields that can be requested and methods that can be called and what to pass to them.

It also gives your favorite autocomplices.
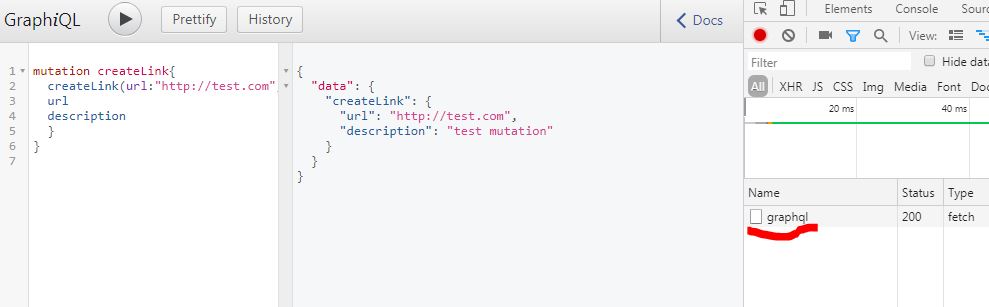
Now use it to send a request for a mutation. We have one mutation, “add link”.

request text:
A little later, I learned that the word mutation is enough (createLink does not have to be written after it)
mutation createLink{ createLink(url:"http://test.com", description:"test mutation"){ url description } } A little later, I learned that the word mutation is enough (createLink does not have to be written after it)
mutation { createLink(url:"http://test.com", description:"test mutation"){ url description } } Those. we simply call the method by its name and pass parameters to it. You can also betray what information we want to get back.
How to view the request mutations
1. Open the developer tab F12 and open the network, send a request.
2. On the sent request PKM -> copy -> copy as cURL (bash)
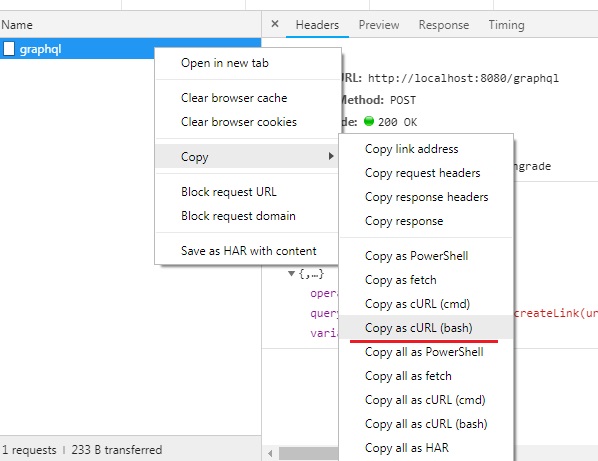
2.1. For those who use curl this is enough, for those who want to see postman go ahead
3. Open the postman and click on top import at the top left.

4. In the window that opens, select Paste Raw Text and paste the copied request curl there

And we can see the request body:
2. On the sent request PKM -> copy -> copy as cURL (bash)
2.1. For those who use curl this is enough, for those who want to see postman go ahead
3. Open the postman and click on top import at the top left.
4. In the window that opens, select Paste Raw Text and paste the copied request curl there
And we can see the request body:
{"query":"mutation createLink{\n createLink(url:\"http://test.com\", description:\"test mutation\"){\n\t\turl\n description\n }\n}","variables":null,"operationName":"createLink"} “\n”. By this stage, there is already a simple server, there is a repository, and we set the url for requests.
I liked the idea. The front can determine for itself what information it needs at the moment, by which it is possible to save traffic. When adding new functionality, the old one continues to work, the front continues to receive only what is needed, no more, no less.
Sample code on github
2 branches:
master - as done in the official tutorial
update_version - updated version, with new versions of dependencies.
References:
1. Docks
2. official tutorial (for different languages)
3. Video, which gave the first understanding
Source: https://habr.com/ru/post/418083/
All Articles