Tilt Shift Lens Effect
There is something attractive in tiny things, they are fascinating in nature. Tilt-shift photography is a great example of how large real-life objects can be made into miniature works of art.
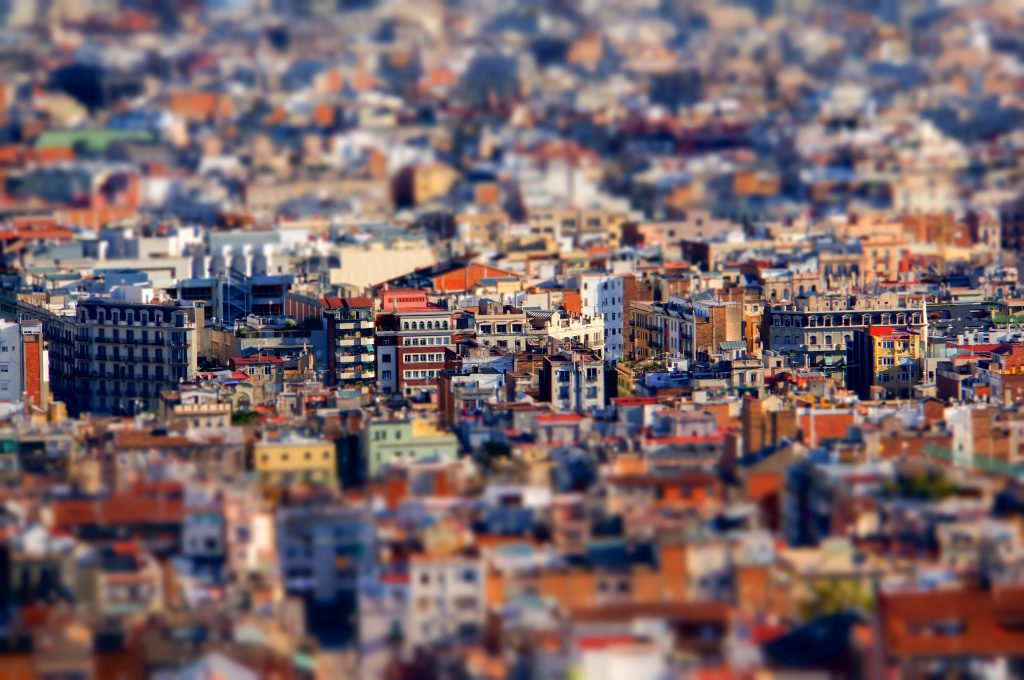
Tilt-Shift is a type of photo where you can manipulate focus and depth of field to get photos that mimic miniature models by selective focusing.
The effect can be achieved with special Tilt-shift lenses, but you can also simulate this effect when post-processed in Photoshop.
')
If you do not want to spend $ 2500 on such a lens to achieve the desired effect, I will give some tips that will help to do this with Photoshop CC.
In addition to directly retouching and software, I will give some tips for getting the most appropriate source images.
There are several ways to get a tilt-shift effect using Photoshop CC, but we will use a simple method that will give exactly the same result as using specialized equipment.
1. Choose the most appropriate image.
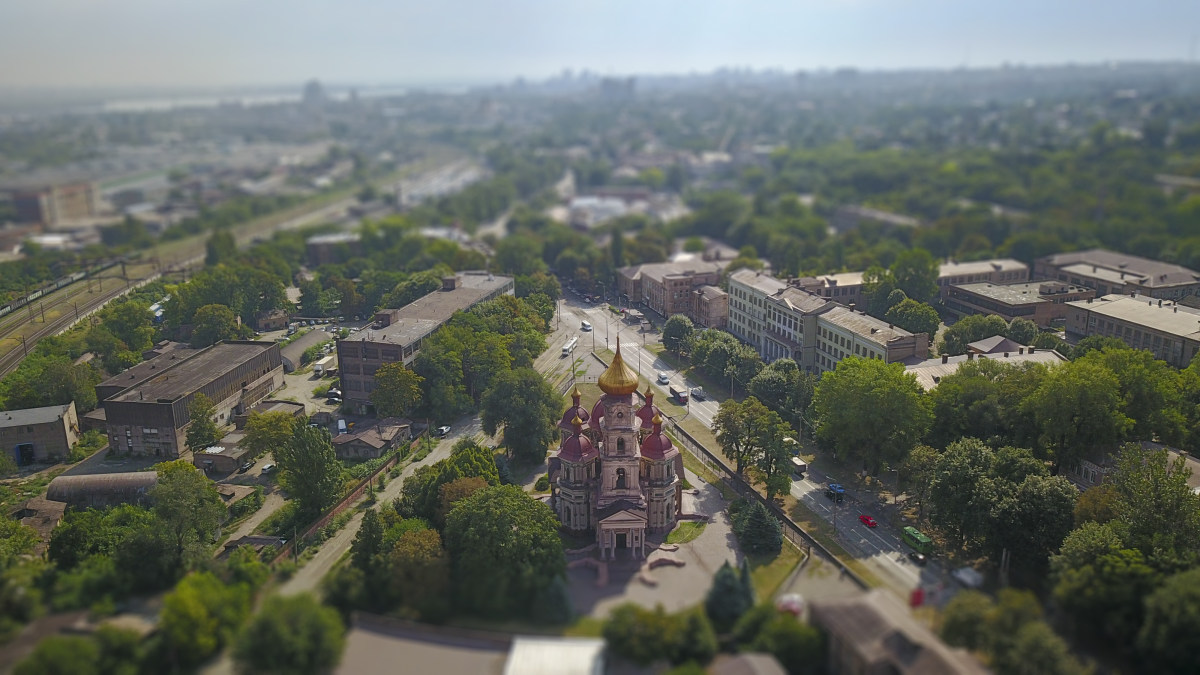
Choose a high point of shooting (in your DJI Mavic Pro , Mavic Air or Phantom 4 copter, I think it will be easy for you to do this) in order to achieve the model's atmosphere (we always look at the models from a height). Choose a photo with enough detail, with lots of elements and a small number of “empty” places to give a greater effect to your photo.
2. Step two
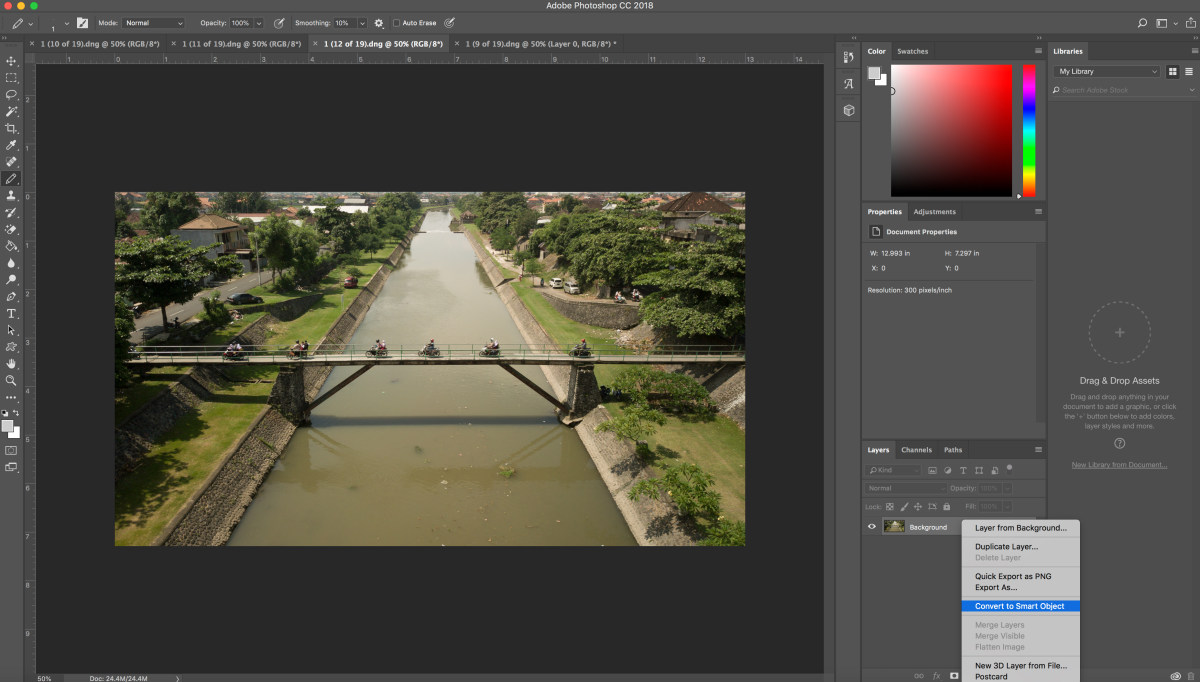
In the “layers” menu, right-click on the preview, in the drop-down menu, select “convert to smart object”.
3. Step three
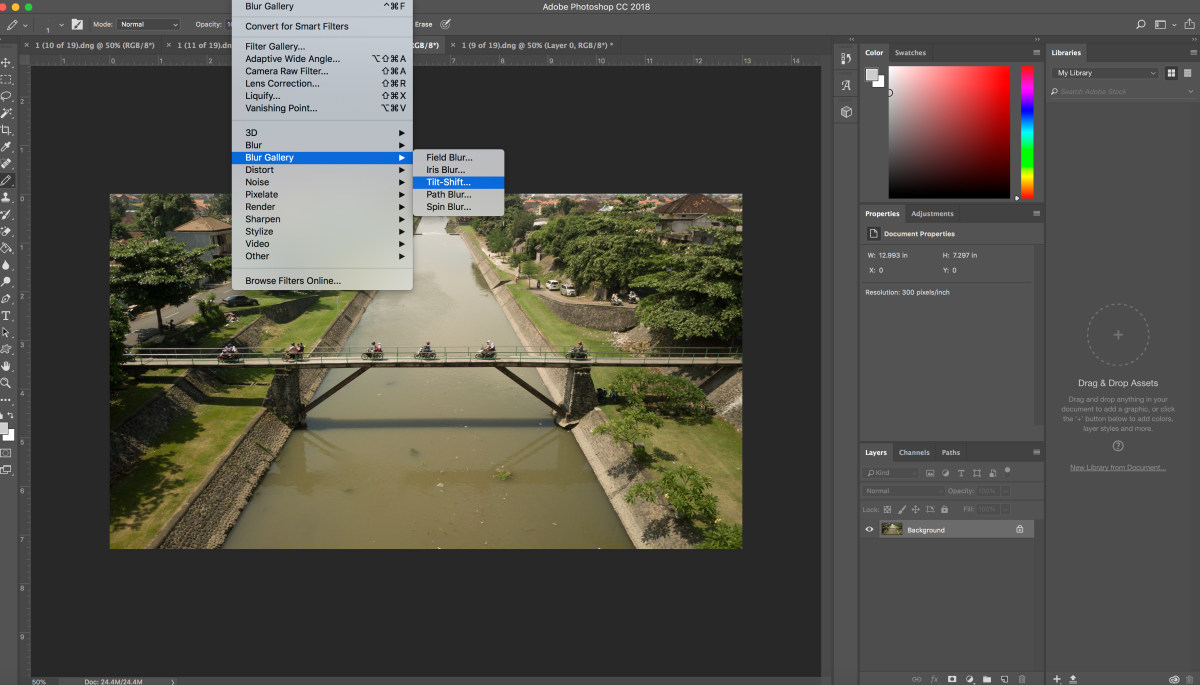
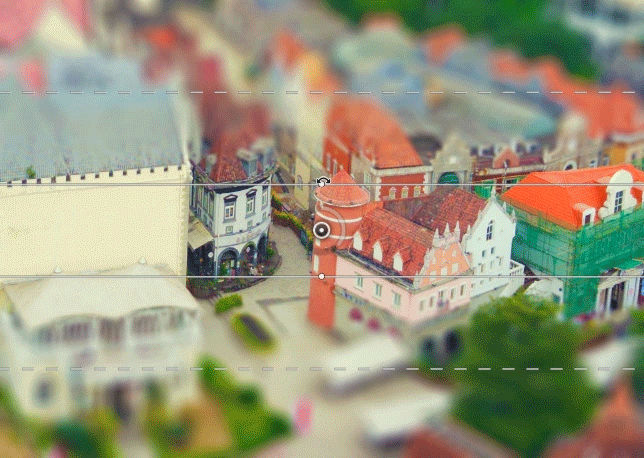
Now in the top menu, click "filter", then a pointer to the "gallery blur", then select "tilt-offset".
4. Step four

On the right side of the screen there are 2 panels: the basic blur tools at the top with options and tilt-shift filter settings and the “blur” panel at the bottom, with some additional “bokeh” settings.
To move the field of sharpness, simply click in the center and drag to a new location, then release the mouse button. To change the impact force, click on the “button” and you can move the lines up and down to change the place of the blur.
5. Step Five

You can decide in your own way, but I choose “symmetric distortion”
6. Step Six
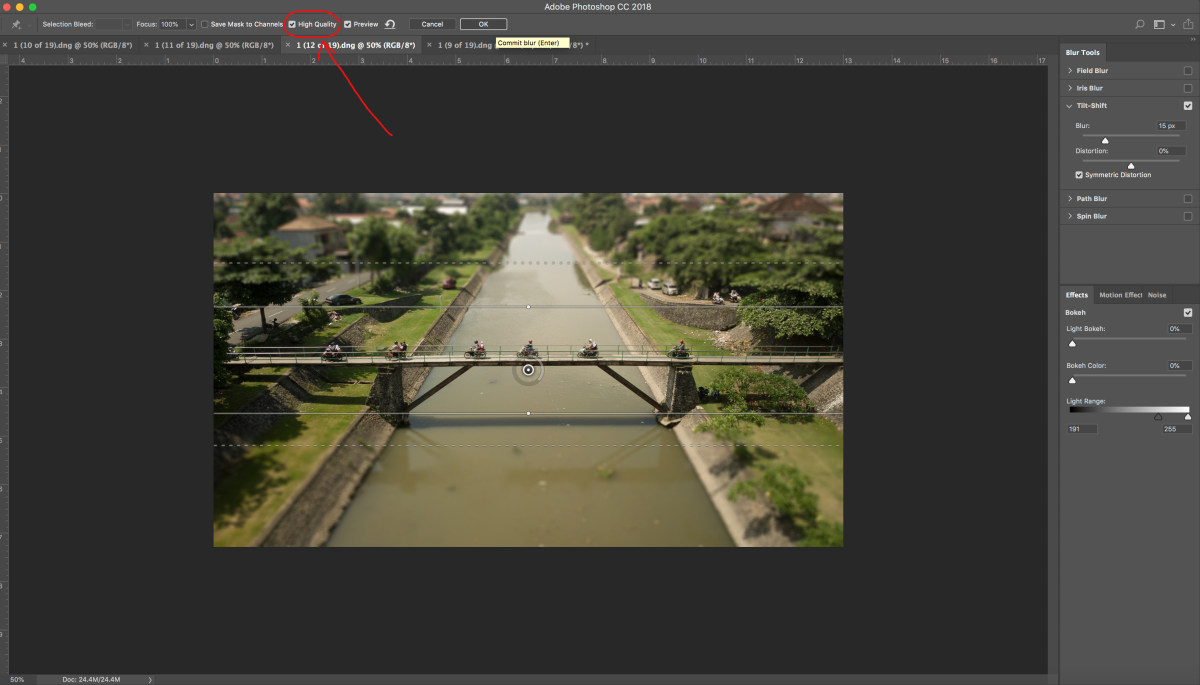
Select the “high quality” option for better details. In order to achieve the greatest “toy” effect, it may make sense to slightly edit the colors (it may be worth adding a little saturation). Top menu-image-correction-color tone / saturation. Another important step that should not be forgotten is the correction of brightness curves. Top menu-image-correction-curves. And finally, the last step - adding sharpness. I recommend a small cropping of the image to remove all unnecessary environments to achieve a greater tilt-shift effect.
As for colors, curves and adding sharpness - do not overdo it.
I hope that these short tips will help you discover a new nice way to take pictures and then add a tilt-shift effect to some of your photos.
Thanks for reading, enjoy flying with your copter.
ps: tilt-shift effect works not only in photography, you can also use this technique with your video material. I use Final Cut Pro X, which makes it easy to add this effect to the video sequence.
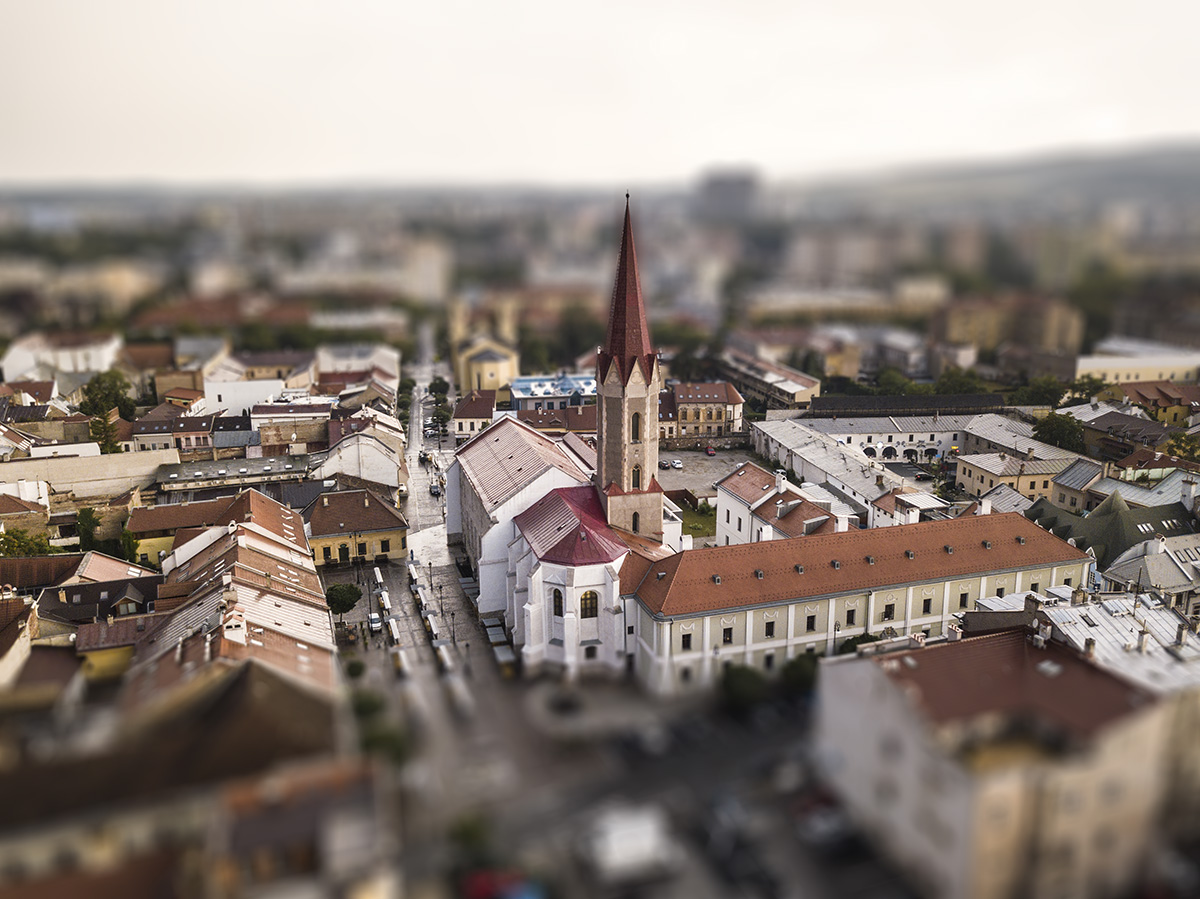
Dominican Church
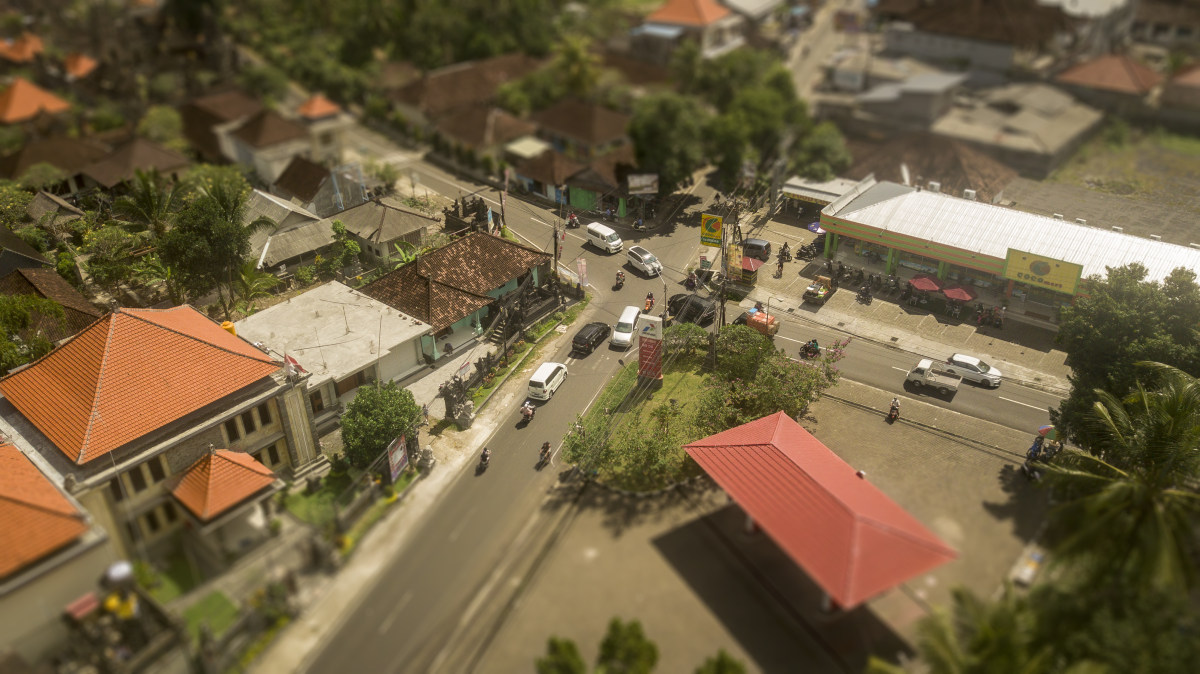
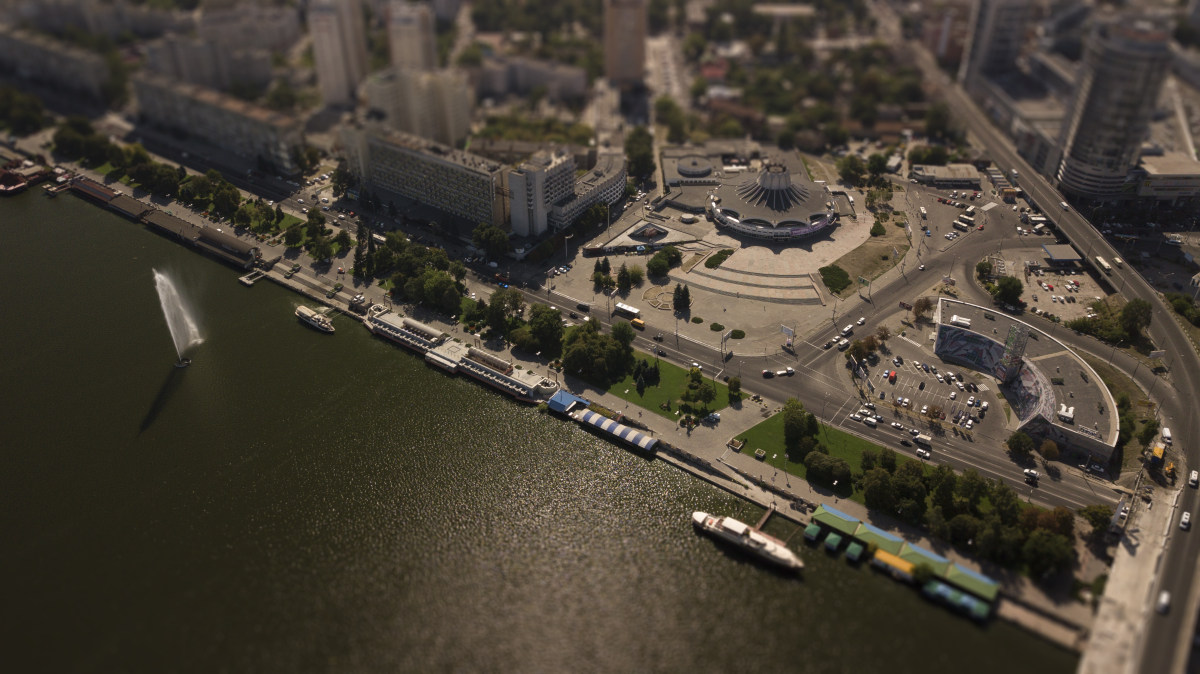
Crossroads
Embankment
Rock uluwatu

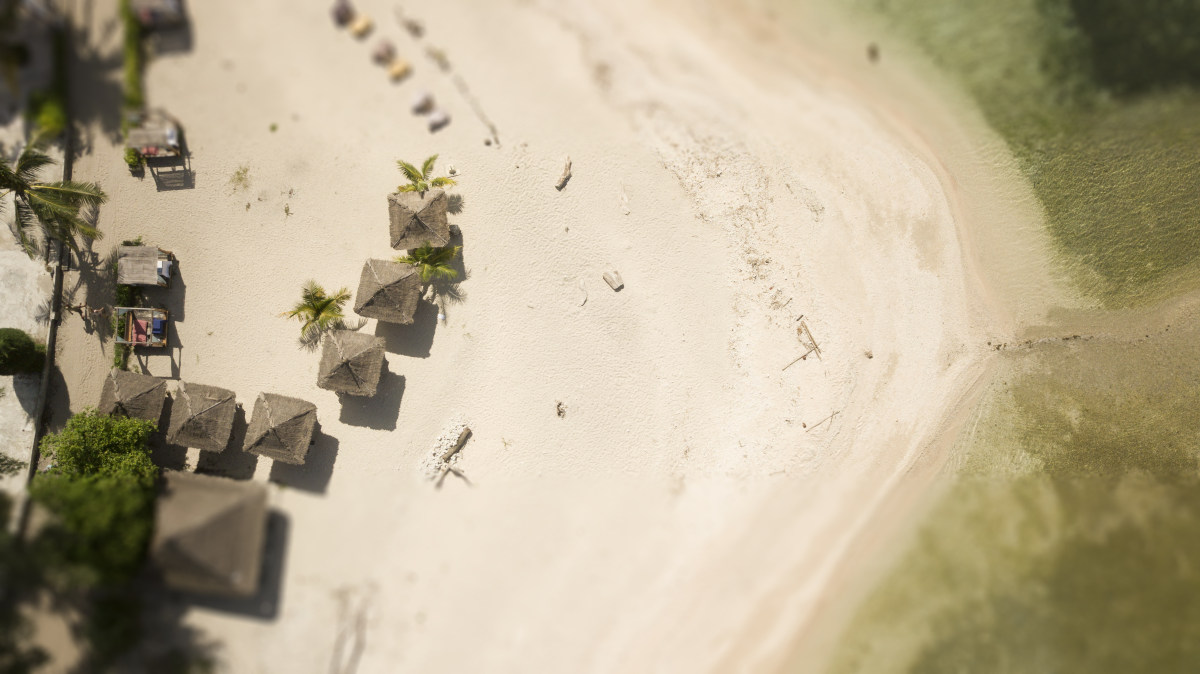
Nusa Dua Beach

Church

Rice terraces

Gili
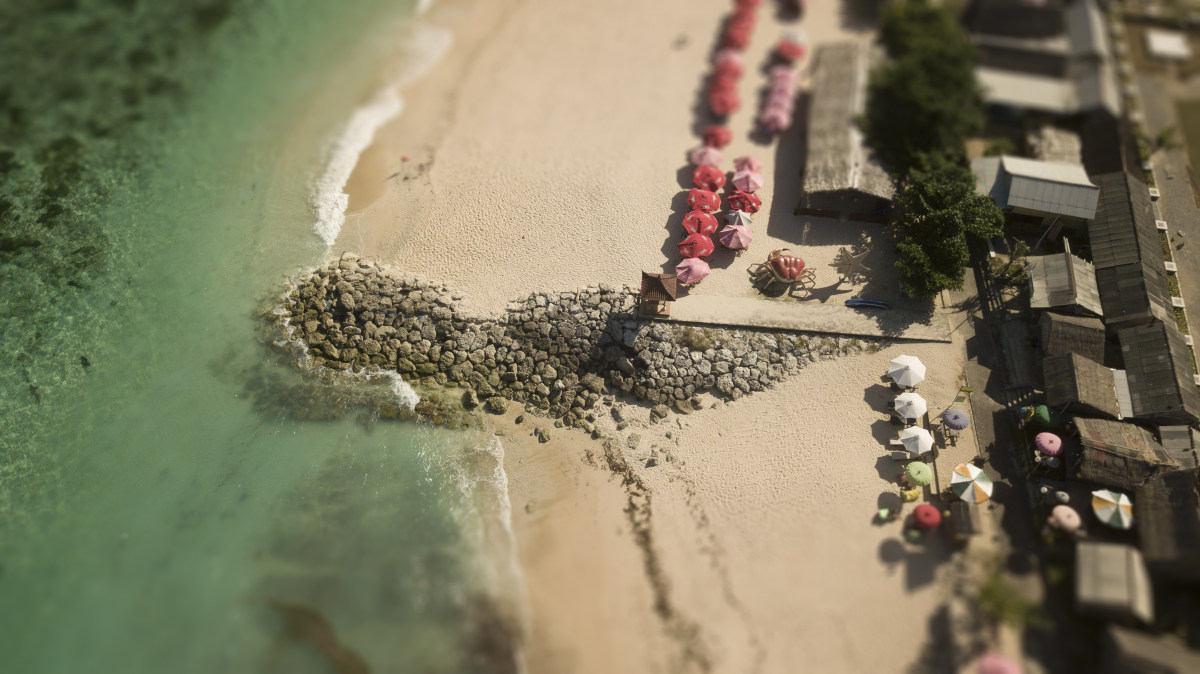
Pandawa pier
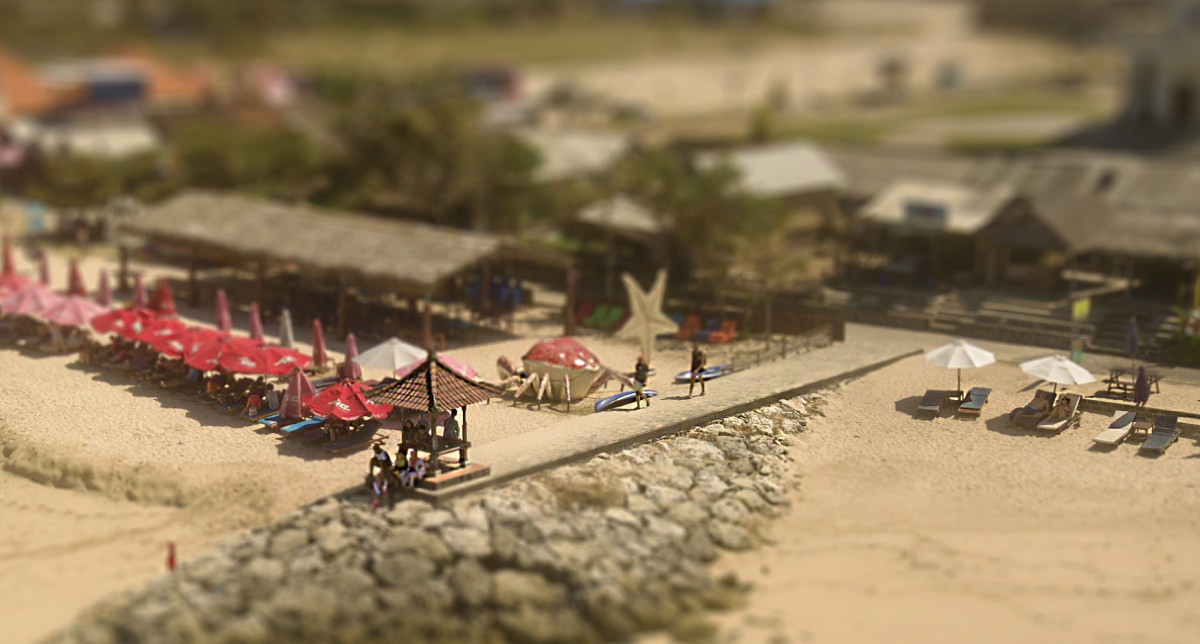
Pandawa Pier Part II
Tilt-Shift is a type of photo where you can manipulate focus and depth of field to get photos that mimic miniature models by selective focusing.
The effect can be achieved with special Tilt-shift lenses, but you can also simulate this effect when post-processed in Photoshop.
')
If you do not want to spend $ 2500 on such a lens to achieve the desired effect, I will give some tips that will help to do this with Photoshop CC.
In addition to directly retouching and software, I will give some tips for getting the most appropriate source images.
There are several ways to get a tilt-shift effect using Photoshop CC, but we will use a simple method that will give exactly the same result as using specialized equipment.
1. Choose the most appropriate image.
Choose a high point of shooting (in your DJI Mavic Pro , Mavic Air or Phantom 4 copter, I think it will be easy for you to do this) in order to achieve the model's atmosphere (we always look at the models from a height). Choose a photo with enough detail, with lots of elements and a small number of “empty” places to give a greater effect to your photo.
2. Step two
In the “layers” menu, right-click on the preview, in the drop-down menu, select “convert to smart object”.
3. Step three
Now in the top menu, click "filter", then a pointer to the "gallery blur", then select "tilt-offset".
4. Step four
On the right side of the screen there are 2 panels: the basic blur tools at the top with options and tilt-shift filter settings and the “blur” panel at the bottom, with some additional “bokeh” settings.
To move the field of sharpness, simply click in the center and drag to a new location, then release the mouse button. To change the impact force, click on the “button” and you can move the lines up and down to change the place of the blur.
5. Step Five
You can decide in your own way, but I choose “symmetric distortion”
6. Step Six
Select the “high quality” option for better details. In order to achieve the greatest “toy” effect, it may make sense to slightly edit the colors (it may be worth adding a little saturation). Top menu-image-correction-color tone / saturation. Another important step that should not be forgotten is the correction of brightness curves. Top menu-image-correction-curves. And finally, the last step - adding sharpness. I recommend a small cropping of the image to remove all unnecessary environments to achieve a greater tilt-shift effect.
As for colors, curves and adding sharpness - do not overdo it.
I hope that these short tips will help you discover a new nice way to take pictures and then add a tilt-shift effect to some of your photos.
Thanks for reading, enjoy flying with your copter.
ps: tilt-shift effect works not only in photography, you can also use this technique with your video material. I use Final Cut Pro X, which makes it easy to add this effect to the video sequence.
Photo processing examples
Dominican Church
Crossroads
Embankment
Rock uluwatu
Nusa Dua Beach
Church
Rice terraces
Gili
Pandawa pier
Pandawa Pier Part II
Source: https://habr.com/ru/post/417389/
All Articles