Sewn electronics for children: expectation and reality
Sew Electric is a trendy and new direction in which technology merges with fashion. Everything from LEDs to microcontrollers is sewn into clothes, creating modern techno clothing. We thought, why not make a course on the creation of such technological clothing in Moscow for beginners. The course participants should have been our club students. About how the "reverse" side of Sew Electric looks in children's educational projects, as well as instructions for creating the very first project for beginners in our article.
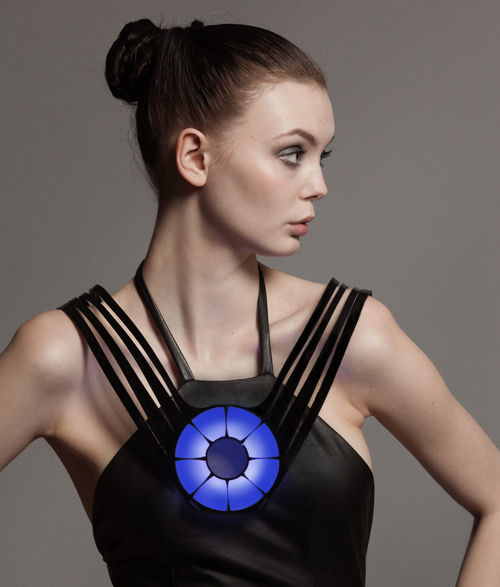
If you go online and select the request “clothes with LEDs”, you will immediately see hundreds of photos with sneakers, jackets, dresses and other clothes with LEDs.
Project with a heartbeat sensor
')
Fiber Skirt
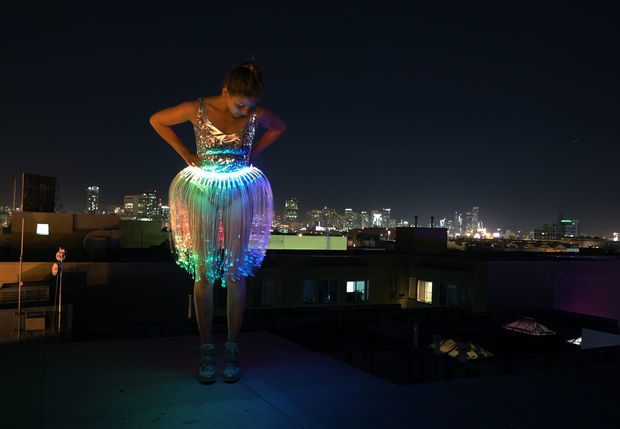
Skirt with LEDs and programmable color.

“Cool and simple - we thought. “It's strange, why is this still not in Russia in circles?”
As a team of brave guys who are not afraid of new tasks, we started studying and preparing a course for the children of our club.
We want to share with you the sources that we used:


Of course, there is little information in Russian about this direction, but in English it is already enough to start. Everything seemed pretty simple.
One of the serious difficulties that we have encountered is equipment. To create projects you need lillypad LEDs, sensors and other electronic components, as well as the most important ingredient - the conductive thread. But it turned out that there is practically no such equipment in Moscow or its cost is too high for a master class. We did not consider online ordering options due to serious time constraints. Thanks Amperke, who helped us solve this problem at that time.
The next step for us was to sort out beautiful, but difficult projects and real ones for children 7-12 years old (at least we thought so). As a result, from the original dream of creating “smart” clothes, we returned to the very beginning - to teach our children to sew a LED on the course, and then a sequence of LEDs.
And here we were waiting for the opening! From the age of 3, modern children master the tablet, from 7-8 years old they are already programming games, and in 10 they assemble robots freely, but perform simple tasks: measure a rectangle along a straight line and cut a rectangle out of paper and felt, thread a needle and make a pair stitches, etc. - equivalent to 13 feats of Hercules.
For the implementation of the first projects, we recommend using such convenient sewing material as felt. It is bright and dense enough, does not crumble and does not require additional processing. Only after sufficient training on the felt (or other available material), transfer sewing to your favorite T-shirt or baseball cap.
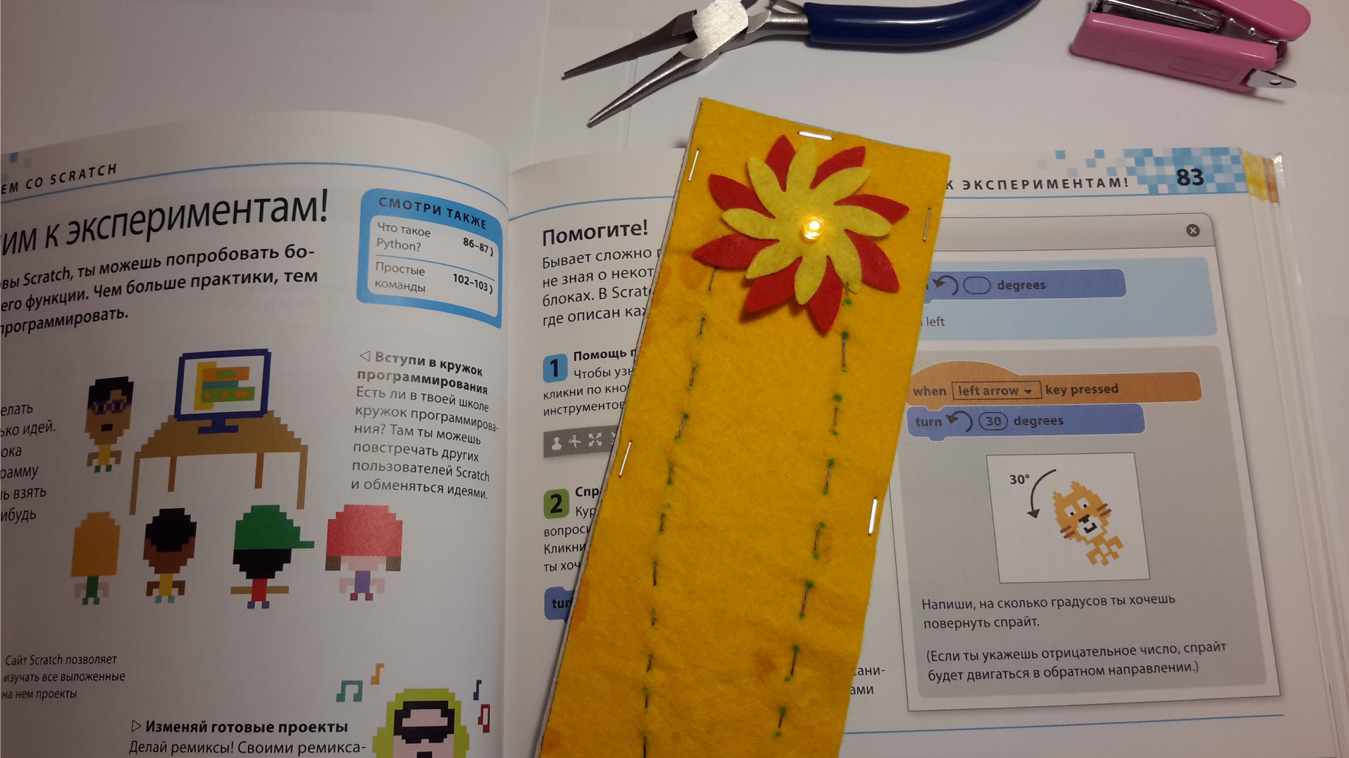
We want to share with you the instructions for the very first step in Sew Electric - creating a bookmark with LED.
Electronics for the project:
And also will be needed:
The first step is to prepare a cardboard base (cut out a rectangle 20x5 cm), an overlay of felt, the size equal to the base, to get a felt appliqué.
Next we have to pierce the felt application and the cover with a LED.
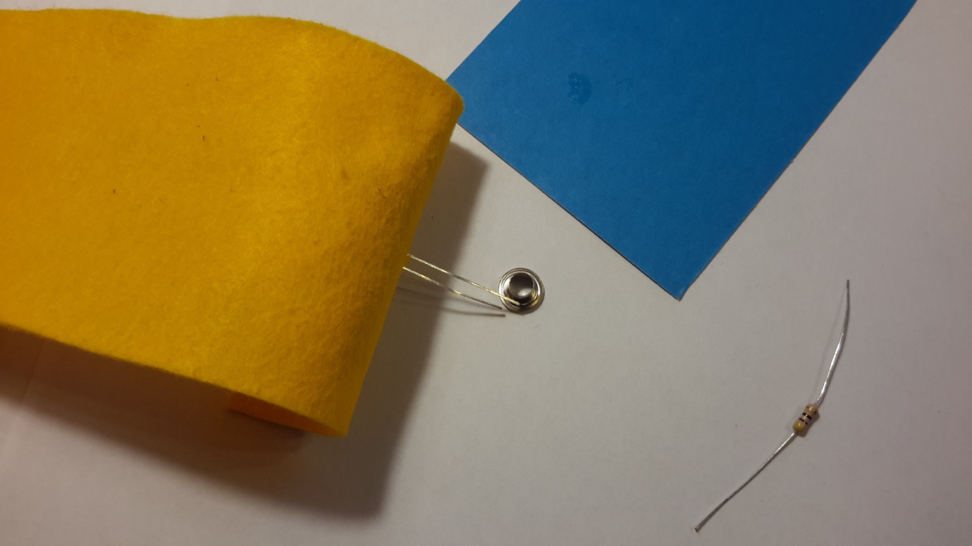
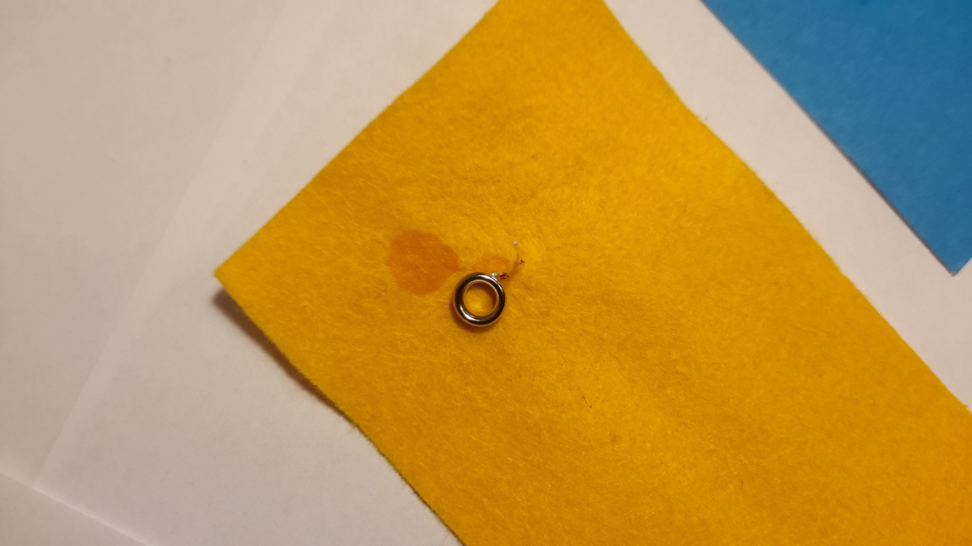
Having practiced a couple of times, we realized that open wires look very unaesthetic and therefore it was decided to use eyelets. As it turns out, they have a good electrical current, if they are metallic and without colored spraying.
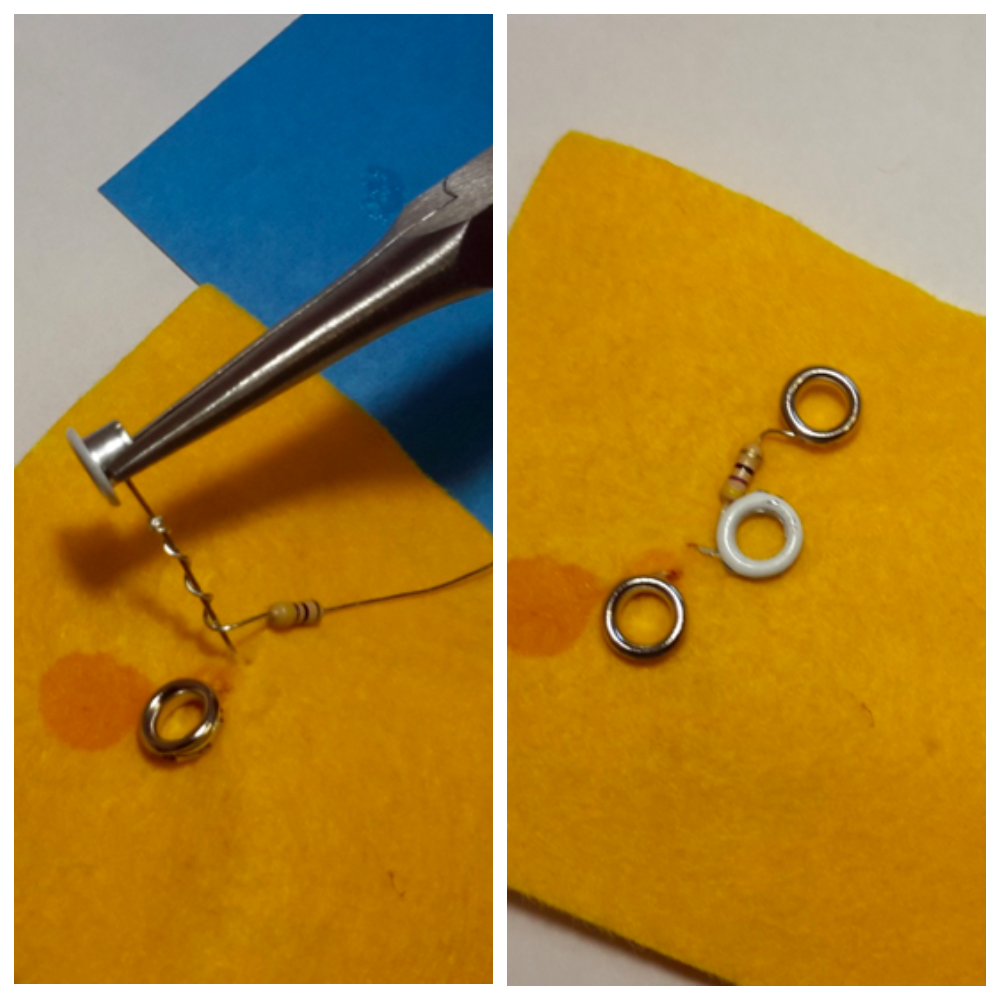
We have introduced the rule that resistance will always join the short leg of the LED. And, therefore, we immediately wrap the long leg around the grommet using elongated pliers and clamp. Note: the grommets are crimped by a manual machine, similar to pliers, very hard.
Further, on a short leg we wind one of the conclusions of resistance. After that, take the grommet, wrap around the twisted contacts and clamp it. By the way, for this step, you can use a grommet with a coating, because it does not conduct current. Immediately compress the second output resistance.
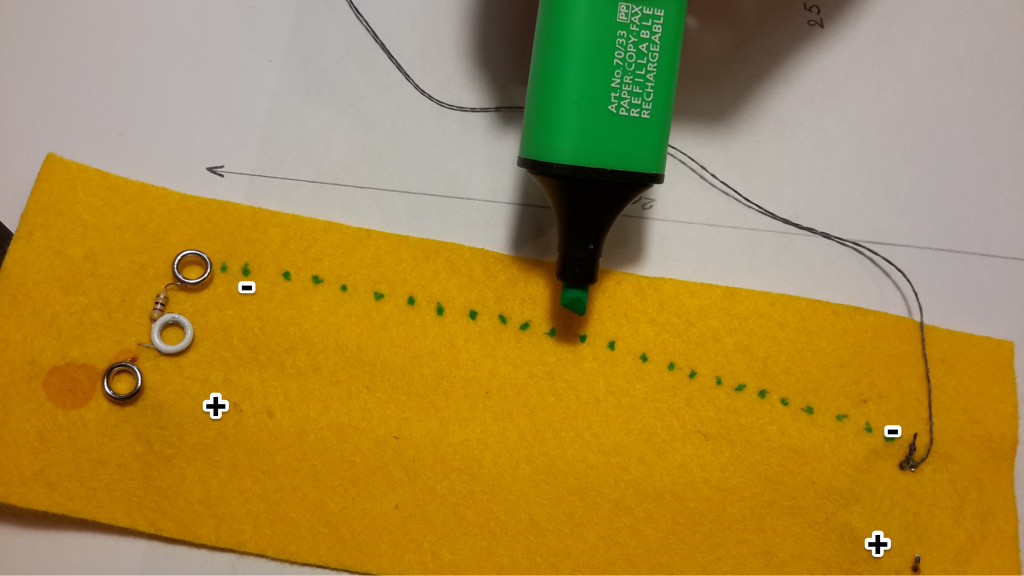
Now we proceed to the most difficult part - working with the battery compartment. The compartment must be attached so that the long leg of the LED is on one side of the positive terminal of the compartment. Mark the path of the thread with a marker, fix the end of the thread at the output of the compartment, bend the output, and begin to sew. (The length of the thread should be 5 centimeters longer than the seam distance). Do the same for the second conclusion.
After that, insert the battery and check that the LED should light up. We glue our blank on the cardboard and the bookmark is ready.
But what are the options for the guys at our master class:
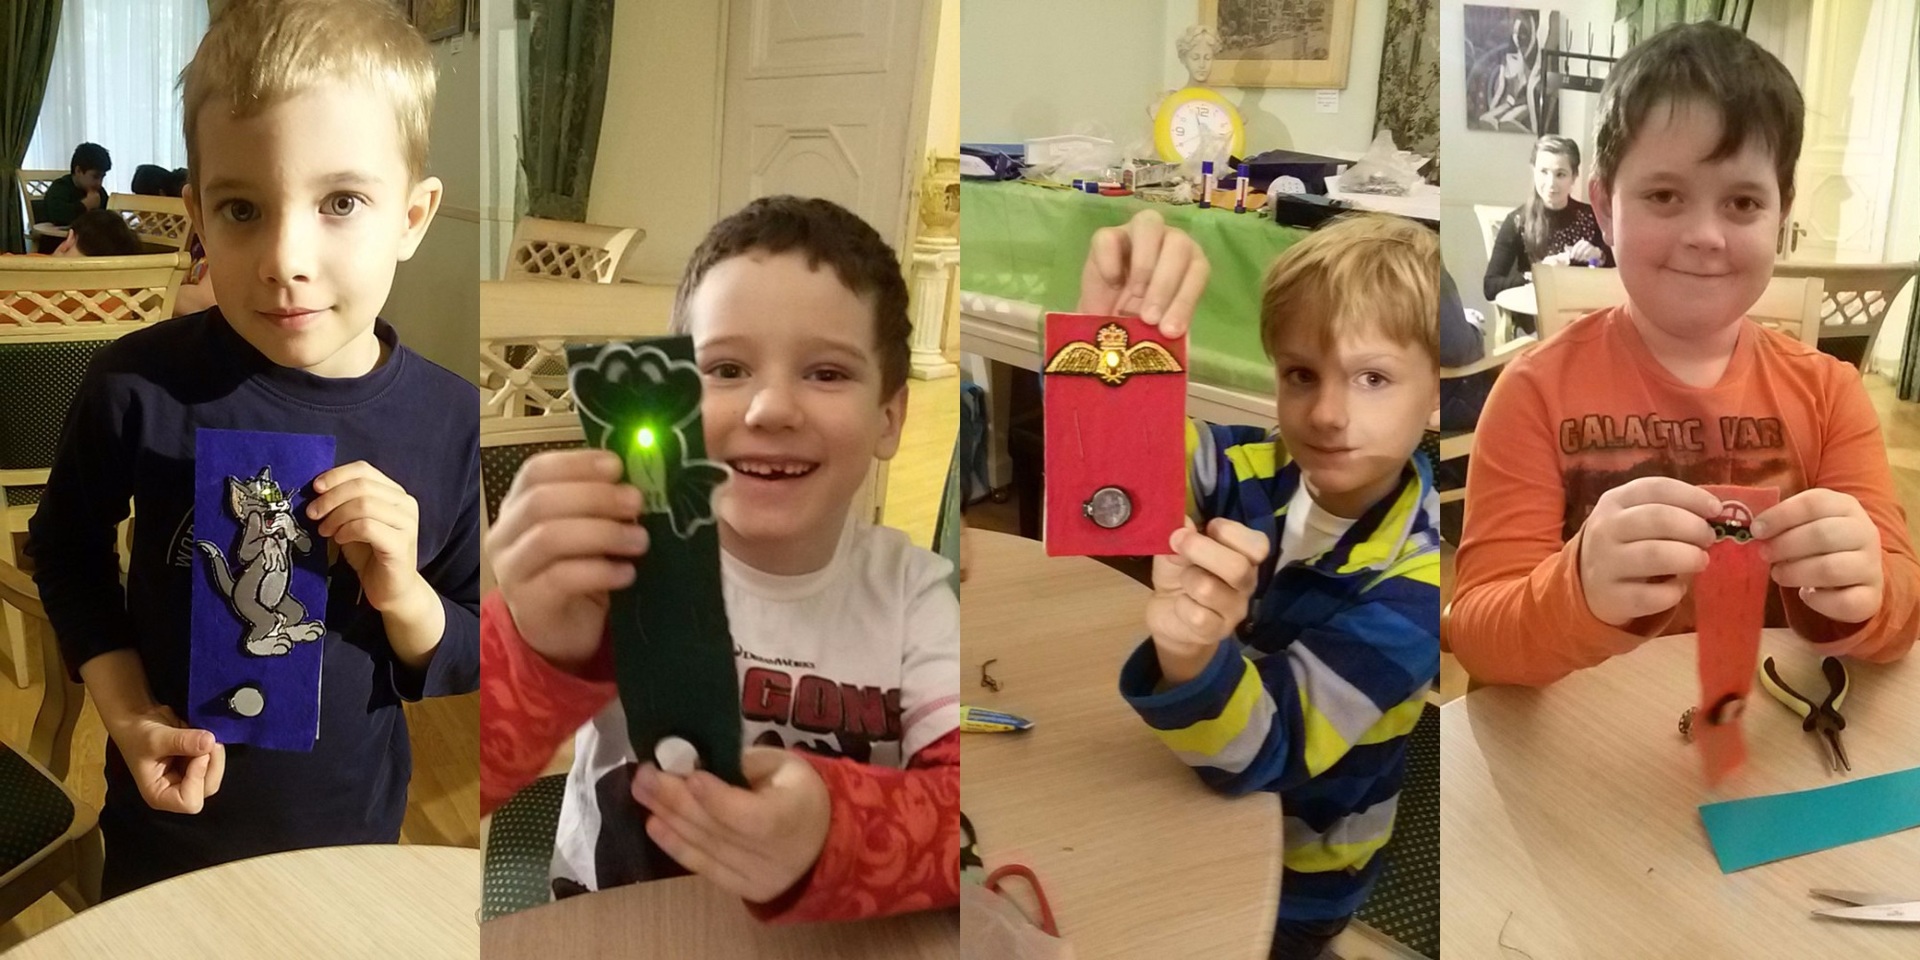
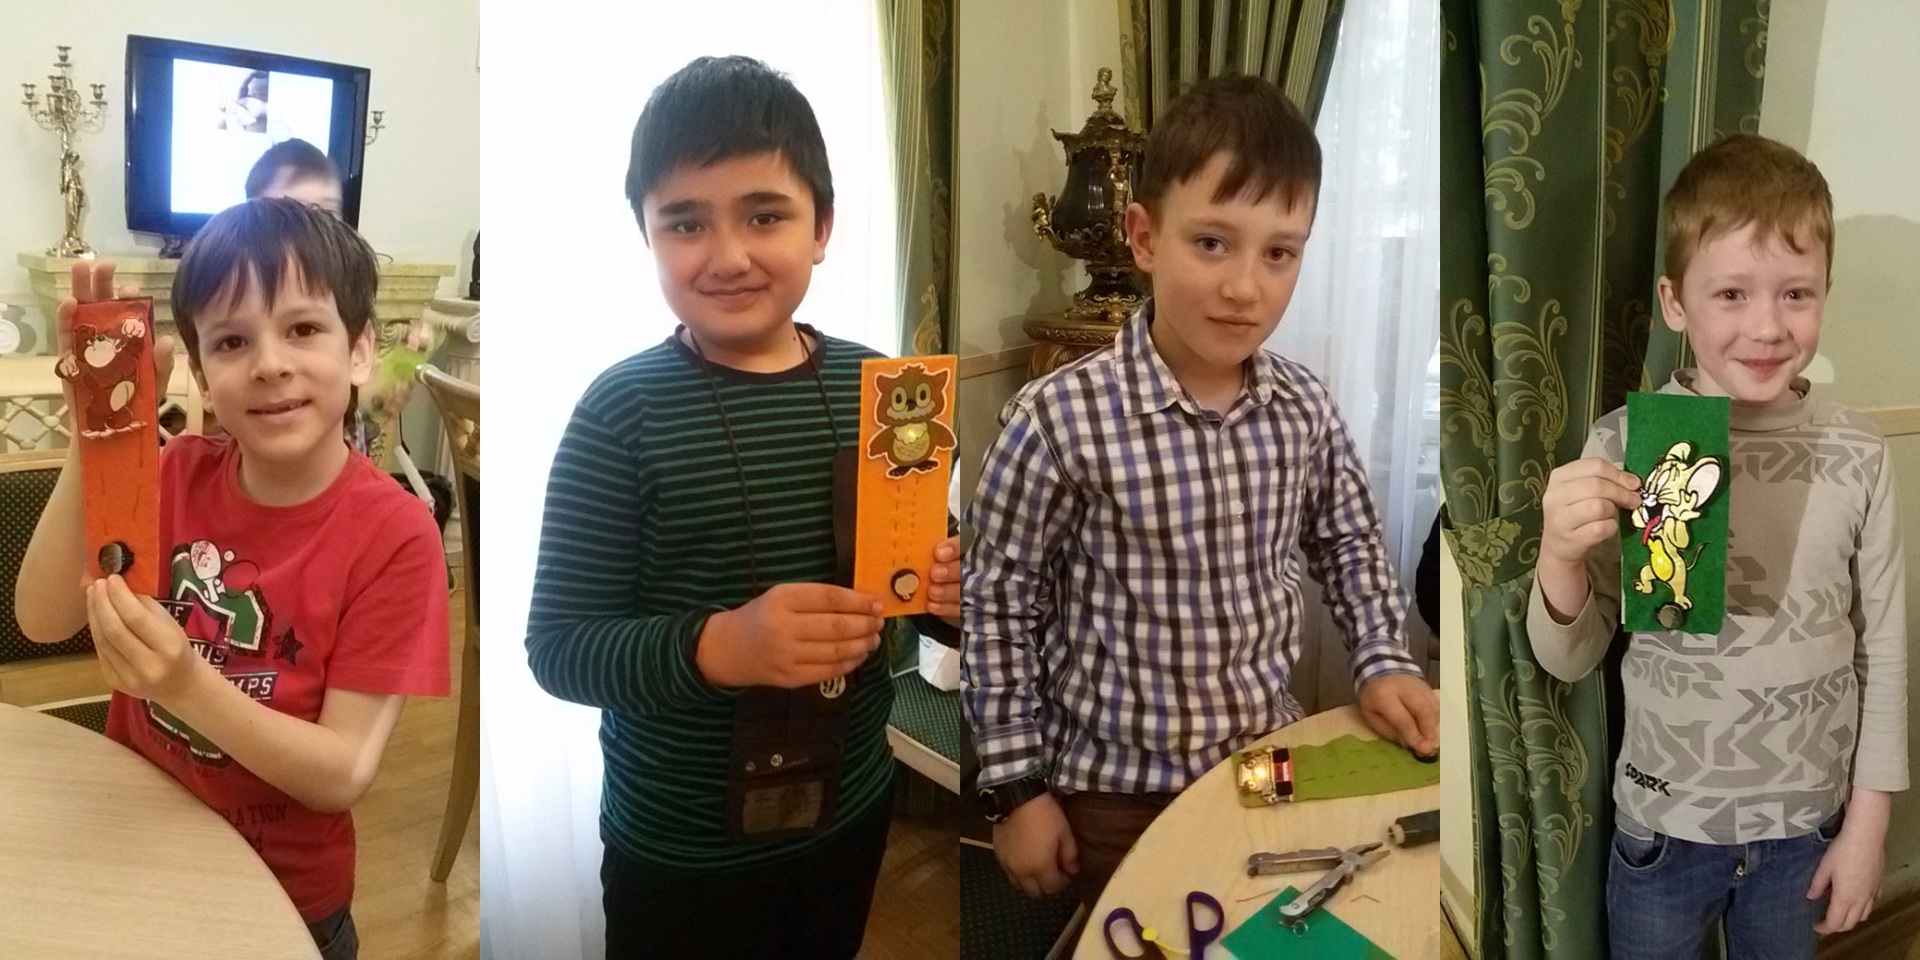
The children were very pleased with the bookmarks and the absolutely unique bracelets with flashing LEDs that appeared in them, but our team was slightly disappointed.
First, the cost and problems with the purchase of equipment, even in Moscow, do not allow creating these cool projects that would be really impressive. The use of cheaper materials (simple LEDs and battery compartments in our case) only create more difficulties and problems for children and teachers. We really exhausted, tying the conductive thread to the terminals of the compartment under the battery.
Secondly, such projects can be successfully done at home or perhaps with older children (or even just girls because of their greater perseverance and interest), because most of the time is used to explain simple actions with cutting, drawing a straight line, and so on. , skills of which were previously given in kindergarten and elementary school (when it develops now is the question). Because of this, the speed of project implementation slows down. Moreover, even for children with experience, it is not easy to understand the connection scheme of the LED from the Designer Connoisseur and the diagram in the same tab. Therefore, we must be patient and after a certain time children will succeed)))
In general, our expectations about the reality of creating clothes with LEDs by non-professional techno-fashion did not materialize. We did not wait for the luminous clothes performed by children on that specials. course, but still moved from scratch. In Moscow, enthusiastic teachers periodically appear, who also try to implement Sew Electric in children's projects. However, beautiful in the pictures, in reality, these projects are still not within the power of students, even with experience in electronics. Maybe it will become fashionable, and everyone will start creating robots rather than creating robots. Time will tell.
And we are not standing still, and this year we continue experiments with electronics - in May we will conduct an absolutely new course for children on the subject of “ Space Automation ”. We hope that everything will work out!
If you go online and select the request “clothes with LEDs”, you will immediately see hundreds of photos with sneakers, jackets, dresses and other clothes with LEDs.
Project with a heartbeat sensor
')
Fiber Skirt
Skirt with LEDs and programmable color.
“Cool and simple - we thought. “It's strange, why is this still not in Russia in circles?”
As a team of brave guys who are not afraid of new tasks, we started studying and preparing a course for the children of our club.
We want to share with you the sources that we used:
- Sew Electric is a book and website sewelectric.org . Here we found the most understandable and seemingly feasible projects.
- Website for DIY fans or just homemade - www.instructables.com . There we found some interesting examples and ideas for implementation.
- All videos on the Internet, which could find a couple of fragmentary articles and books in English and German.
Of course, there is little information in Russian about this direction, but in English it is already enough to start. Everything seemed pretty simple.
One of the serious difficulties that we have encountered is equipment. To create projects you need lillypad LEDs, sensors and other electronic components, as well as the most important ingredient - the conductive thread. But it turned out that there is practically no such equipment in Moscow or its cost is too high for a master class. We did not consider online ordering options due to serious time constraints. Thanks Amperke, who helped us solve this problem at that time.
The next step for us was to sort out beautiful, but difficult projects and real ones for children 7-12 years old (at least we thought so). As a result, from the original dream of creating “smart” clothes, we returned to the very beginning - to teach our children to sew a LED on the course, and then a sequence of LEDs.
And here we were waiting for the opening! From the age of 3, modern children master the tablet, from 7-8 years old they are already programming games, and in 10 they assemble robots freely, but perform simple tasks: measure a rectangle along a straight line and cut a rectangle out of paper and felt, thread a needle and make a pair stitches, etc. - equivalent to 13 feats of Hercules.
For the implementation of the first projects, we recommend using such convenient sewing material as felt. It is bright and dense enough, does not crumble and does not require additional processing. Only after sufficient training on the felt (or other available material), transfer sewing to your favorite T-shirt or baseball cap.
We want to share with you the instructions for the very first step in Sew Electric - creating a bookmark with LED.
Electronics for the project:
- one LED of any color
- resistance (47 Ohms),
- conductive thread
- battery (CR2032) and
- battery compartment.
And also will be needed:
- cardboard sheet,
- sheet of fine felt,
- application (fabric or from felt).
The first step is to prepare a cardboard base (cut out a rectangle 20x5 cm), an overlay of felt, the size equal to the base, to get a felt appliqué.
Next we have to pierce the felt application and the cover with a LED.
Having practiced a couple of times, we realized that open wires look very unaesthetic and therefore it was decided to use eyelets. As it turns out, they have a good electrical current, if they are metallic and without colored spraying.
We have introduced the rule that resistance will always join the short leg of the LED. And, therefore, we immediately wrap the long leg around the grommet using elongated pliers and clamp. Note: the grommets are crimped by a manual machine, similar to pliers, very hard.
Further, on a short leg we wind one of the conclusions of resistance. After that, take the grommet, wrap around the twisted contacts and clamp it. By the way, for this step, you can use a grommet with a coating, because it does not conduct current. Immediately compress the second output resistance.
Now we proceed to the most difficult part - working with the battery compartment. The compartment must be attached so that the long leg of the LED is on one side of the positive terminal of the compartment. Mark the path of the thread with a marker, fix the end of the thread at the output of the compartment, bend the output, and begin to sew. (The length of the thread should be 5 centimeters longer than the seam distance). Do the same for the second conclusion.
After that, insert the battery and check that the LED should light up. We glue our blank on the cardboard and the bookmark is ready.
But what are the options for the guys at our master class:
The children were very pleased with the bookmarks and the absolutely unique bracelets with flashing LEDs that appeared in them, but our team was slightly disappointed.
First, the cost and problems with the purchase of equipment, even in Moscow, do not allow creating these cool projects that would be really impressive. The use of cheaper materials (simple LEDs and battery compartments in our case) only create more difficulties and problems for children and teachers. We really exhausted, tying the conductive thread to the terminals of the compartment under the battery.
Secondly, such projects can be successfully done at home or perhaps with older children (or even just girls because of their greater perseverance and interest), because most of the time is used to explain simple actions with cutting, drawing a straight line, and so on. , skills of which were previously given in kindergarten and elementary school (when it develops now is the question). Because of this, the speed of project implementation slows down. Moreover, even for children with experience, it is not easy to understand the connection scheme of the LED from the Designer Connoisseur and the diagram in the same tab. Therefore, we must be patient and after a certain time children will succeed)))
In general, our expectations about the reality of creating clothes with LEDs by non-professional techno-fashion did not materialize. We did not wait for the luminous clothes performed by children on that specials. course, but still moved from scratch. In Moscow, enthusiastic teachers periodically appear, who also try to implement Sew Electric in children's projects. However, beautiful in the pictures, in reality, these projects are still not within the power of students, even with experience in electronics. Maybe it will become fashionable, and everyone will start creating robots rather than creating robots. Time will tell.
And we are not standing still, and this year we continue experiments with electronics - in May we will conduct an absolutely new course for children on the subject of “ Space Automation ”. We hope that everything will work out!
Source: https://habr.com/ru/post/403717/
All Articles