Backspace Invaders or how to connect a 64x64 LED display to Arduino
4095 LEDs and all-all-all
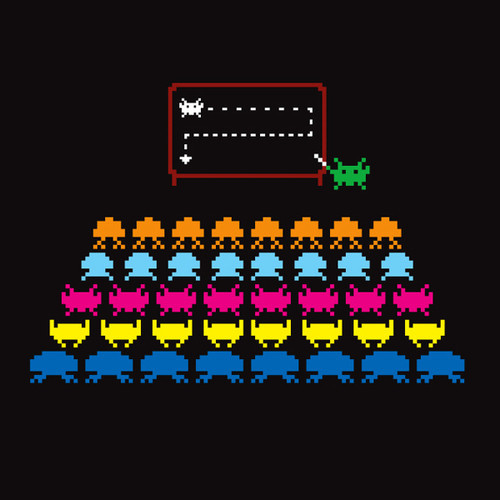
Surprisingly, the ATmega328 controller, which underlies the Arduino Uno, handles the display of the image on such a display. From this all turned out "pocket" console (weighing several kilograms), in which the game is stitched based on the Space Invaders. Plans to come up with something else, because the free memory is left full.
Under the cat you can read about how such a display is arranged and how it can be controlled.
Sometimes, instead of finding old computers in a collection , I make them myself from scrap materials .
')
This time I wanted to do something compact with a resolution at the level of consoles and computers of the early 80s. True, the display at 64x64 pixels does not reach the Atari 2600, but by as much as 64 pixels more than the display of the Nokia 3310, where the games were also. So it should have been enough for a margin of at least for a comfortable game of Tetris or Pong.

In addition to the display, I got a board that is compatible with the Arduino Uno, and began to think as if now with all this good to take off.
Adafruit sells such displays and you can find examples of their use on its website. There is also a link to the library to work with them. The library supports Arduino Uno and Arduino Mega.
This library organizes video memory, where it stores the colors of the pixels. The user program repaints these pixels, and the image is displayed in the timer interrupt handler. With small displays it works well, but in my case this method is not suitable. Even if you allocate half a byte for each pixel (one bit for R, G, B, and one extra bit), then for the 64x64 matrix you will need 2 kilobytes of memory. And this is all that ATmega328P has. You can, of course, take the processor more powerful, but this is not the Jedi way.
After all, who makes us keep all the lines of the screen at once? You can re-evaluate each line before displaying it. For primitive graphics from several sprites, these calculations should not take too much time, so everything should work.
It was in the
- We expose on the inputs of the display the output line address
- Fill the array with colors of pixels of sprites that intersect with the current line
- Push all the pixels one by one into the shift register that controls the LEDs
- We snap the data and submit them to the outputs of the registers
As a result, an array with the size of only four lines of the screen is allocated for video memory. Why four? This is because at the same time we push the data in two lines - because the matrix has two groups of inputs: R1 / G1 / B1 and R2 / G2 / B2. They control two lines that are 16 pixels apart.
But then why not two lines, but four? It turns out that the 64x64 matrix consists of two independent 32x64 matrices. It would be possible to connect individual processor outputs to each, but the ATmega328 does not have enough of them. Fortunately, the caring manufacturer provided for the cascading of these matrices - the output of the shift register of one can be connected to the input of the other. Then a 32x128 logical matrix will be obtained, which is physically displayed as 64x64. That is, in each phase we need to push two lines of 128 pixels into the registers - and this is the 4 lines of the physical screen.

We made a prototype of the console during the summer computer school. The first game was something that remotely resembled Space Invaders .
In reality, the LEDs are very much burned eyes. Adjusting their brightness with the help of PWM is unlikely to succeed - the performance of the ATmega is not enough. We must take some kind of ARM or FPGA.
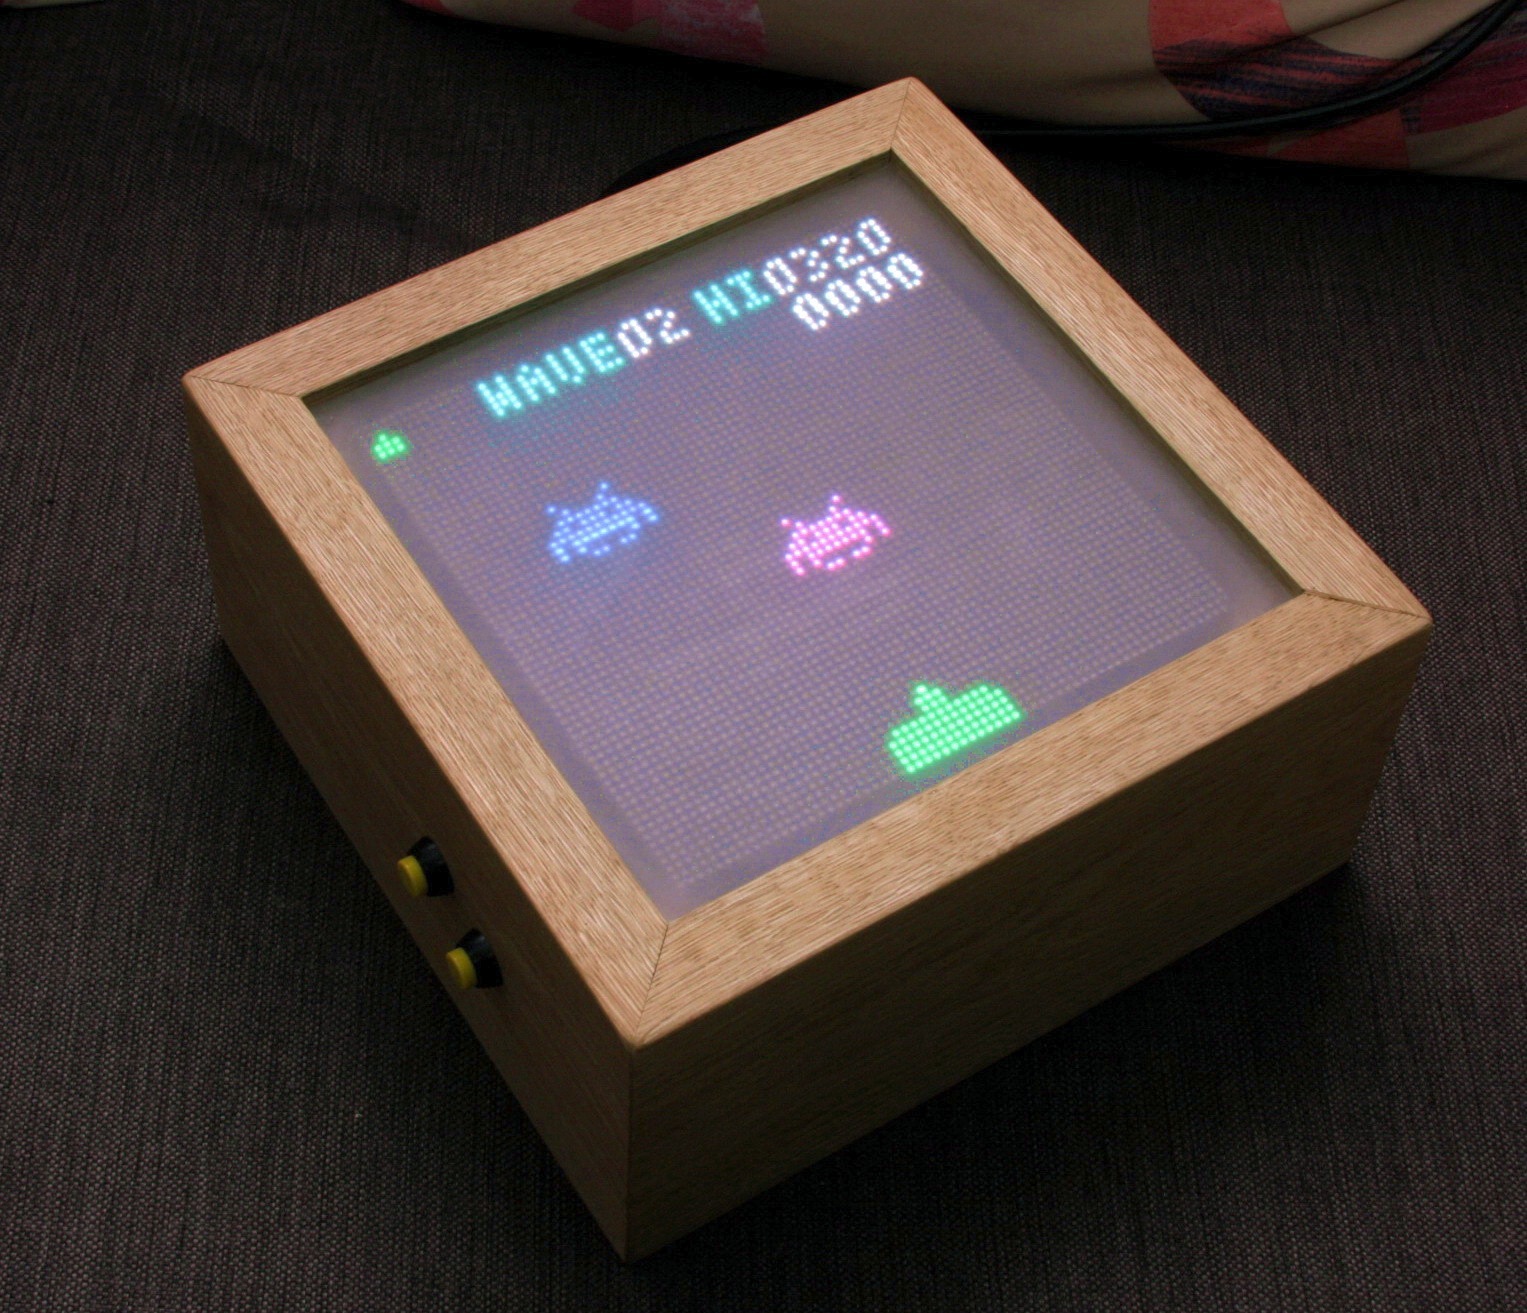
The final version I designed in a wooden case. The screen is protected by sanded plexiglass. Due to the scattering of light, the eyes are no longer burned, but now it’s more difficult to remove the console’s video work - the whole image becomes blurred.
The whole program uses 1101 bytes (53%) of RAM and 6432 (19%) bytes of ROM. There is still a place to make a few games and a menu to select them.
Links
- Project sources: github.com/Dovgalyuk/BackspaceInvaders
- Description of the matrix on the site adafruit: learn.adafruit.com/32x16-32x32-rgb-led-matrix
- Adafruit library for matrix management: github.com/adafruit/RGB-matrix-Panel
- Adafruit library for drawing graphic primitives: github.com/adafruit/Adafruit-GFX-Library
- A similar project on a more powerful processor: learn.adafruit.com/ledgames-beaglebone-black-64x64-led-game/overview
- An article about managing a smaller display: geektimes.ru/post/275548
Source: https://habr.com/ru/post/403231/
All Articles