Course Overview - Building robots and other devices on the Arduino (week 1)
“It is not in iron that is power, but in knowledge,” one might say in our day.
Now electronics and robotics has become much more accessible than it was before - a choice has appeared, the threshold of entry has decreased. But without knowledge of how it works, and how to work with it - this electronics will remain only "iron" (and how it happens - the sets can be idle). Knowledge is much more difficult to obtain, based on personal experience and practice.
That's why beginner courses are so appreciated. There are paid and free courses - but to ensure relevance, course maintenance, compatibility with iron and feedback is not just a matter, especially to find in Russian.
About one of these online courses we want to tell you - " We build robots and other devices on the Arduino. From a traffic light to a 3D printer ." The course was developed jointly by Cyberphysics and MIPT (Moscow Institute of Physics and Technology). Text and video training materials are available for free on Coursera. The course is divided into 6 parts (each week), and for each part - the corresponding iron is sent.
It is always better to tell on the basis of our experience, therefore, we will talk about the course and impressions "in real time" as we go through. Sharing impressions will be one of the participants of our hackspace.
Week 1
Hello! My name is Anton, and I want to tell you in a six-week series of publications about the experience of participating in an online course from MIPT.
A small preface. My education and current work is related to IT. Knowledge in electronics and circuitry ends with a university course in electronics. Occasionally I use a soldering iron, I can carry out simple calculations for any scheme.
There is no programming experience for Arduino. I write scripts mostly in Python and Bash, with a C-like syntax I know in PHP and JavaScript. In fact, C had no experience writing programs.
After my brother and I wrote a review of three sets of electronics for children , a representative of the “Cyberphysics” project offered to take an online course “Building robots and other devices on the Arduino” on the Coursera website. Since I previously held several courses (non-IT related) on the platform, I assumed that the material would be trivial and unpretentious, as in most of the introductory courses on the Coursera platform, or at the level of assignments from manuals of similar electronic sets. But as it turned out, this was a delusion. The creators themselves position the course as an introduction to robotics for students and high school students, where students learn what robots and other “smart” devices are, how they interact with the outside world, how they interact with humans and, most importantly, how to learn to create such devices yourself.
It is interesting to note that according to the authors of the course, two thirds of the audience, and these are 13.5 thousand people, people aged 25 to 45! And you can understand why: the list of topics is quite wide - from simple sensors and flashing lights to a 3D printer device, and all this is supported by the necessary theory, for example, device and electrical circuit parameters, types and parameters of signals, etc. ... The material is presented in a simple and accessible language. After the passage of the first week, the news that the average grade was 4.9 out of 5 points did not become news for me either.
Since the training is aimed primarily at practical problem solving, for the first weeks the authors of the course provided me with a set of “Cyber Physics” Robots and devices. Start + .

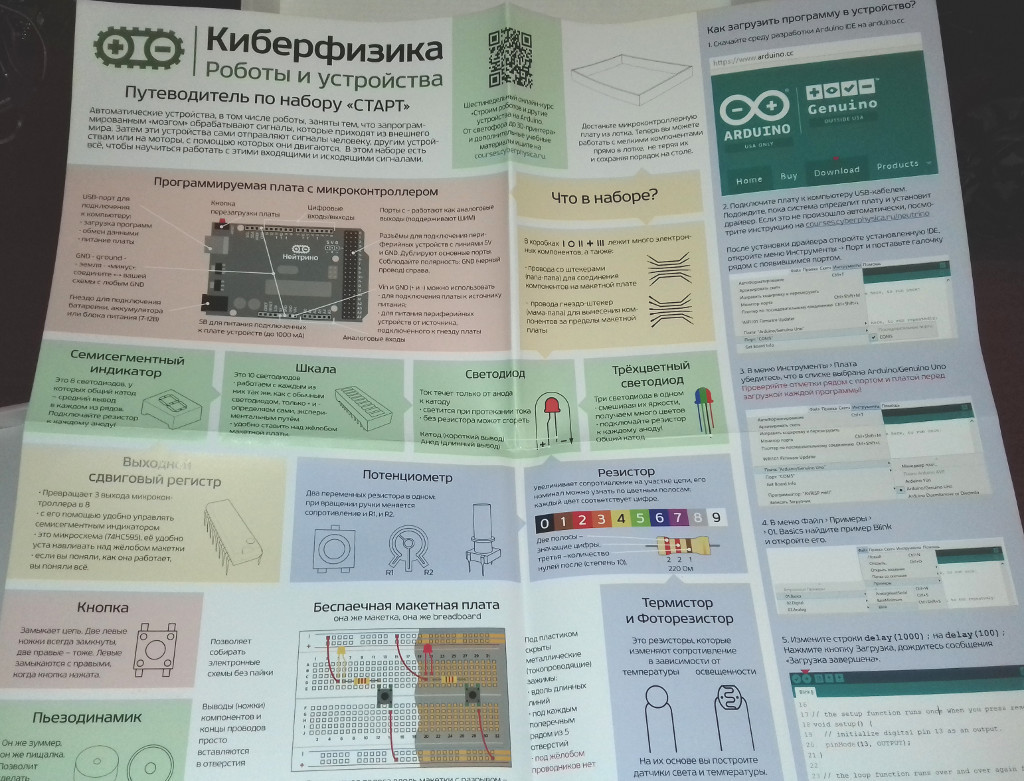
Inside we are greeted with a booklet describing the set and the Neutrino board.

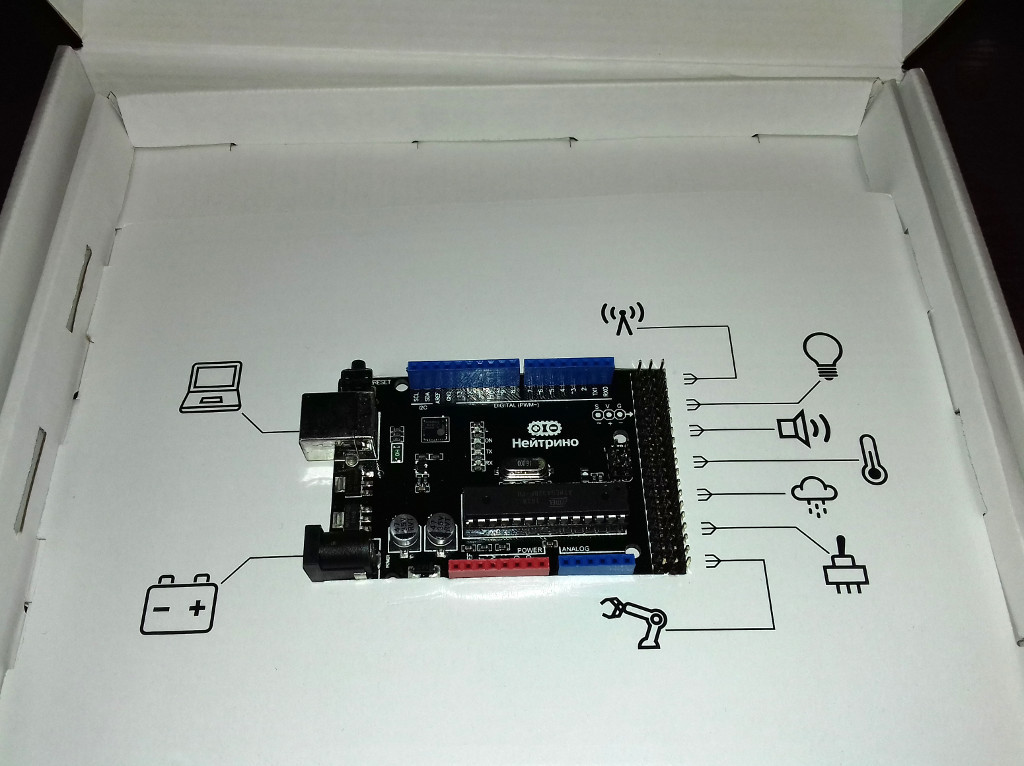
Immediately after the booklet is the Neutrino board itself, which is analogous to the Arduino Uno, but one thing immediately draws attention to itself - there are 20 three-pin pins for connecting various sensors on the board. It sincerely pleased me, since for the other boards that I saw earlier, it was necessary to install an additional shield in order to connect the peripherals.
Inside, everything is laid out in small boxes. All bags with content are signed.


The kit also put a strange device with a tube. After a quick search on the Internet, this turned out to be a submersible pump, which, apparently, will be used in the next week of classes.
Also, as the authors of the course suggested to me (and what is written in the booklet :)), the tray from the board can also be used - collect diagrams in it and keep it “wasted” so that between classes the details will not run away. I learned about it after the end of the first week, but I hope in the future I will appreciate the benefit of the tray.

Now let's talk about the course itself. It lasts six weeks. The first three weeks are evaluated using tests, and in the fourth and subsequent weeks you can perform an additional task and send them to your fellow students for evaluation.
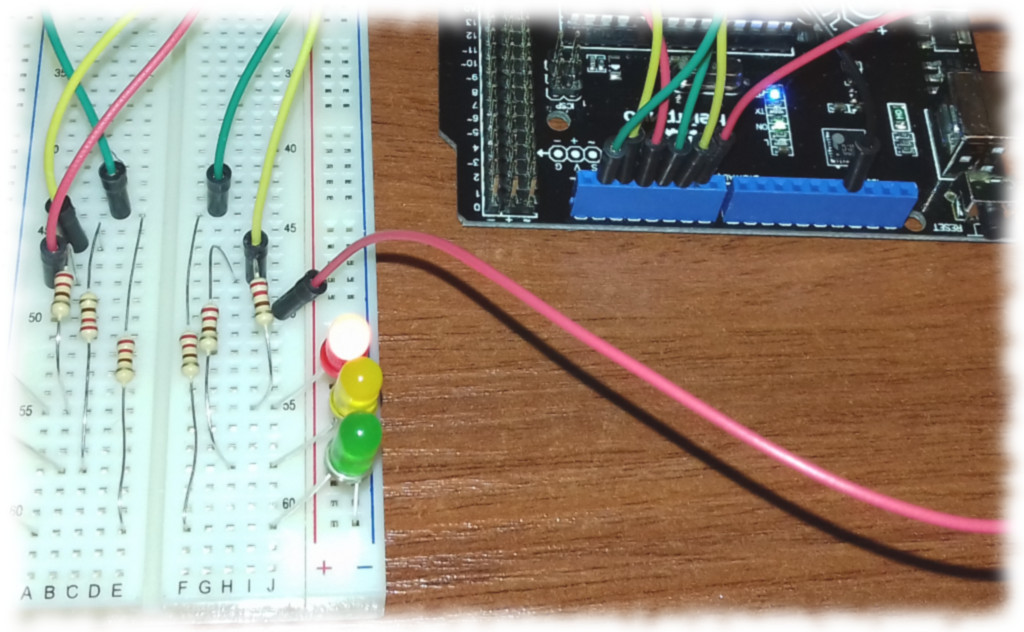
In the first week, the teacher first told the basics of circuit design, then gradually collected and refined the traffic light model, both in the Fritzing graphical environment and on the real board. At the beginning, a manually controlled traffic light was assembled and gradually turned into an automatic one using an Arduino. Along the way, the basics of the Arduino programming language were explained.
It is worth noting that, despite the small size, the video lectures are very informative, which certainly pleases. Here is a rough list of the topics of the first week, which I noted for myself:
- The principle of operation and the device breadboard
- The device is the simplest electrical circuit. Electricity. LEDs
- Ways of presenting electronic circuits. Circuit diagrams, graphical diagrams in the Fritzing environment
- Measurement of electrical circuit parameters. Current, voltage, resistance
- Arduino Boards and Variants. Arduino IDE
- Basics of programming in the Arduino IDE. Variables, macros, loops
At the conclusion of the first week, I honestly passed the test with 80% correct answers from the first time, making 4 errors, one of which was due to ignorance of the equipment (the findings of the LED and the rule for connecting it to the circuit), the rest were due to inattention. From the second attempt, I managed to pass the test with only one mistake :)
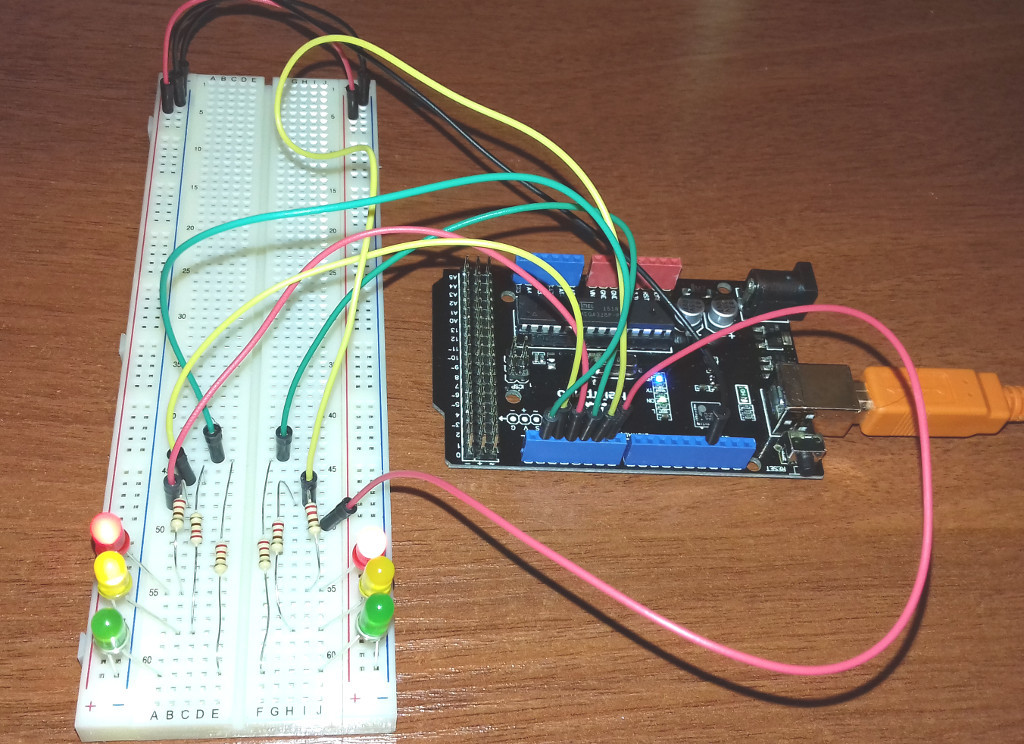
As a practice, I also decided to try to assemble a traffic light. Since it seemed to me a bit boring to repeat the exercise one-on-one, I immediately decided to put together two traffic lights that mimic the work of the intersection.
The program was written roughly and "in the forehead," but it works exactly as I intended. I honestly tried to rewrite the code and do it beautifully - with arrays and functions, but I was immediately affected by the lack of C language - for example, I could not figure out in a few minutes how to create multidimensional arrays and fill them with C values. These topics will be discussed in the third week, so I decided not to get ahead of myself and calmly continue to study the curriculum.
#define PIN_1_G 1 #define PIN_1_Y 2 #define PIN_1_R 3 #define PIN_2_G 4 #define PIN_2_Y 5 #define PIN_2_R 6 int green_on = 5000; int red_on = 5000; void setup() { pinMode(PIN_1_G, OUTPUT); pinMode(PIN_1_Y, OUTPUT); pinMode(PIN_1_R, OUTPUT); pinMode(PIN_2_G, OUTPUT); pinMode(PIN_2_Y, OUTPUT); pinMode(PIN_2_R, OUTPUT); digitalWrite(PIN_1_G, LOW); digitalWrite(PIN_1_Y, LOW); digitalWrite(PIN_1_R, HIGH); digitalWrite(PIN_2_G, HIGH); digitalWrite(PIN_2_Y, LOW); digitalWrite(PIN_2_R, LOW); } void loop() { delay(green_on); for (int i = 0; i < 3; i++) { digitalWrite(PIN_2_G, LOW); delay(500); digitalWrite(PIN_2_G, HIGH); delay(500); } digitalWrite(PIN_2_G, LOW); digitalWrite(PIN_2_Y, HIGH); delay(2000); digitalWrite(PIN_2_Y, LOW); digitalWrite(PIN_2_R, HIGH); delay(1500); digitalWrite(PIN_1_Y, HIGH); delay(2000); digitalWrite(PIN_1_Y, LOW); digitalWrite(PIN_1_R, LOW); digitalWrite(PIN_1_G, HIGH); delay(green_on); for (int i = 0; i < 3; i++) { digitalWrite(PIN_1_G, LOW); delay(500); digitalWrite(PIN_1_G, HIGH); delay(500); } digitalWrite(PIN_1_G, LOW); digitalWrite(PIN_1_Y, HIGH); delay(2000); digitalWrite(PIN_1_Y, LOW); digitalWrite(PIN_1_R, HIGH); delay(1500); digitalWrite(PIN_2_Y, HIGH); delay(2000); digitalWrite(PIN_2_Y, LOW); digitalWrite(PIN_2_R, LOW); digitalWrite(PIN_2_G, HIGH); } Enrollment
Since March 27, enrollment is open: Build robots and other devices on the Arduino. From traffic light to 3D printer
')
Source: https://habr.com/ru/post/402677/
All Articles