3D pen for 3D printer, fixed jogging
Almost all have heard about 3D pens. Many have tried them, many have them. So, perhaps, this gadget no longer surprise anyone. And, probably, if there is a 3D printer at home, then a pen on its background will look very funny. But ... Do not rush, 3D-pen can become an indispensable tool and a very convenient tool for any maker. Now I will show by my example how easy it is to save a three-dimensional model that was printed for 41 hours using a 3D pen.
Let's start with the inspection of the gadget.

')

Everything is standard, the box, the instructions in it, the power supply and the pen itself.

The length of the wire from the power supply 1.4 m, should be enough for most outlets, which are next to the tables.

The power supply is 12 volts, 3 amperes.

At idle, it easily gives out the declared volts, did not measure the current, then excuse me. Go directly to the test.

Pen like a pen . From the interesting - this is the specified diameter of the nozzle - 0.7 mm. The big plus for me personally is that the handle is omnivorous. You can print both PLA and ABS. There is also a manual temperature adjustment.


The choice of modes is intuitively simple. You just need to press the buttons on the sides of the screen.

Next, click on the feed button, you can once and release. The heating starts. Heats up quickly, faster than a 3D printer.

When the desired temperature is reached, the indicator to the left of the screen of red turns green.

In addition to adjusting the temperature on the handle there is a plastic feed adjustment (speed).
On the other side of the feed adjustment, there are 2 buttons - “press out” and “pull out”.
Corrected for the first test piece of plastic left over from the last seal.

On the first pitch you can see that there was already some kind of plastic in the nozzle. This is good, as the pen really checked. Some printer manufacturers supply them with a printed figure on the table, the user immediately sees that the device is working and prints as it should.
I didn’t have the test plastic right away, I refueled the transparent SBS, it is soft enough and there are often problems with it on the printer. Then everything went right briskly.
A small lyrical digression.
I was given a set of plastic along with a pen .
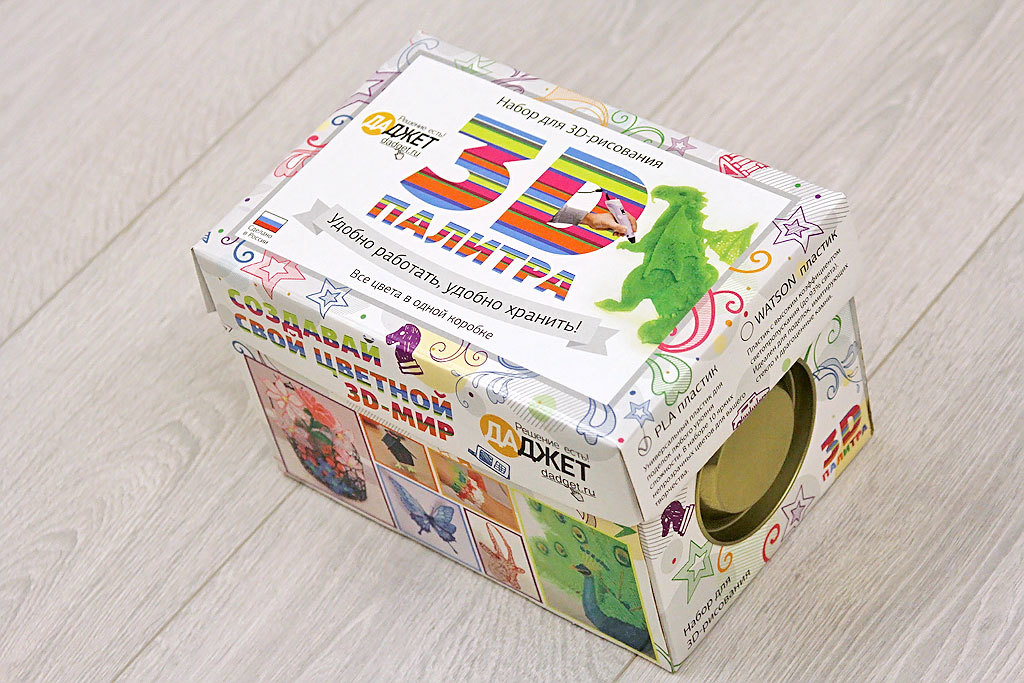
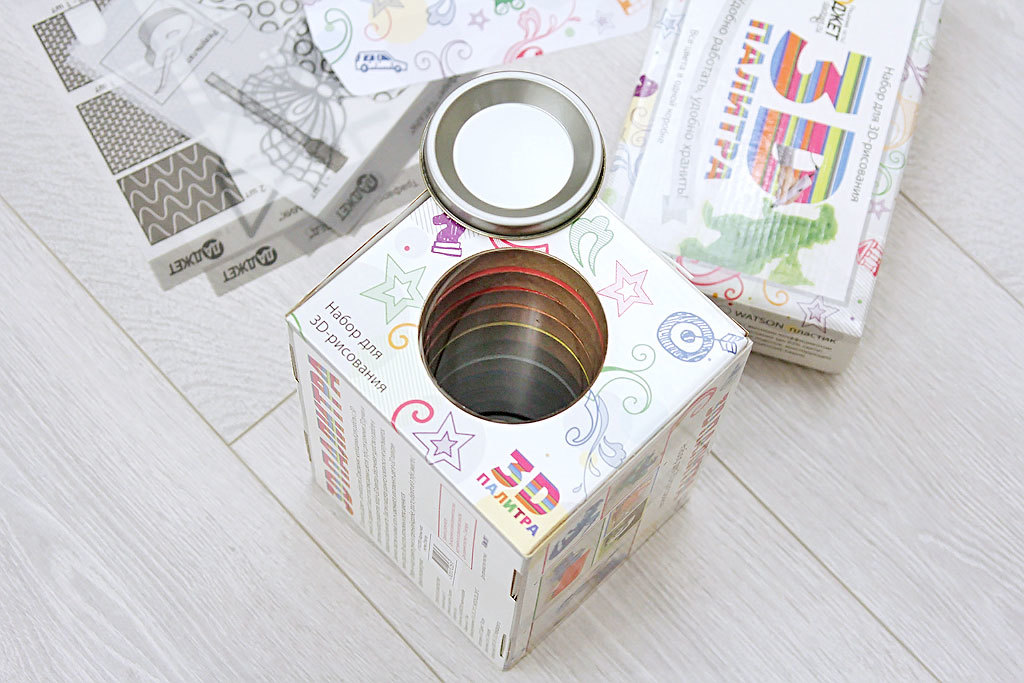
3D palette.

By the way, a very good addition to the 3D-pen. In addition to the conveniently located plastic on individual pockets, there is a compartment for storing the handle, as well as an envelope with sketches on tracing paper for easy creation of volumetric models.


Before the case, check the handle on a simple model.

Take the tracing paper and draw the glasses along the contour.

When the plastic cools, it can easily be removed from tracing paper. We remove.

We draw the second shackle.

Next, we melt the bows to the points.

PLA plastic is very pleasant to use, it softens easily and sticks to each other. But there is one drawback, it should not be overheated, it becomes too fluid, but more on that later.
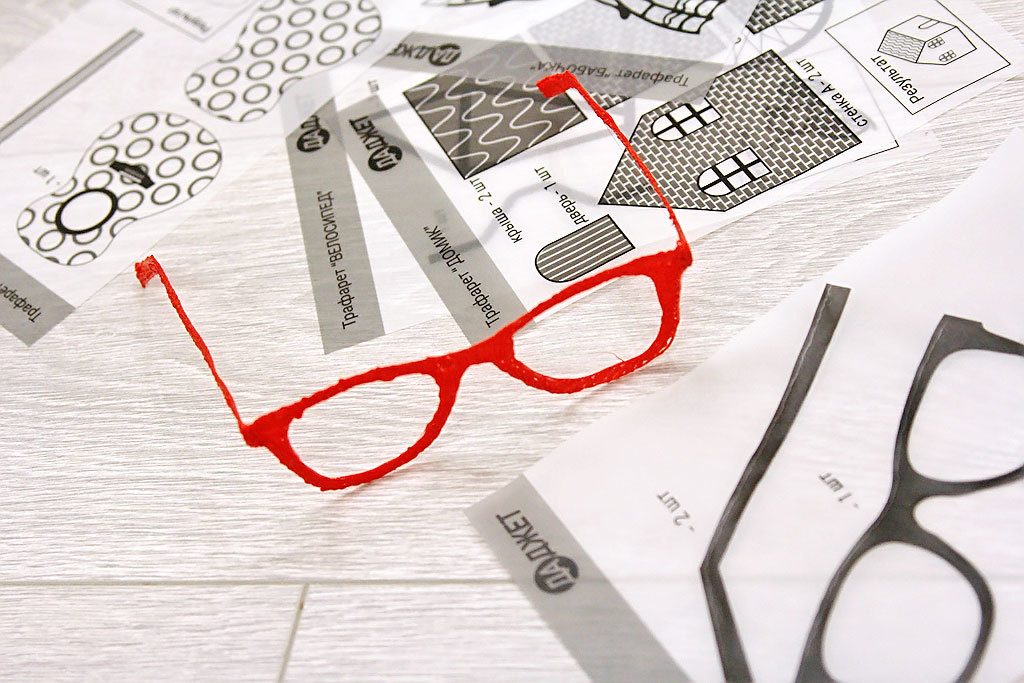
Points are ready.

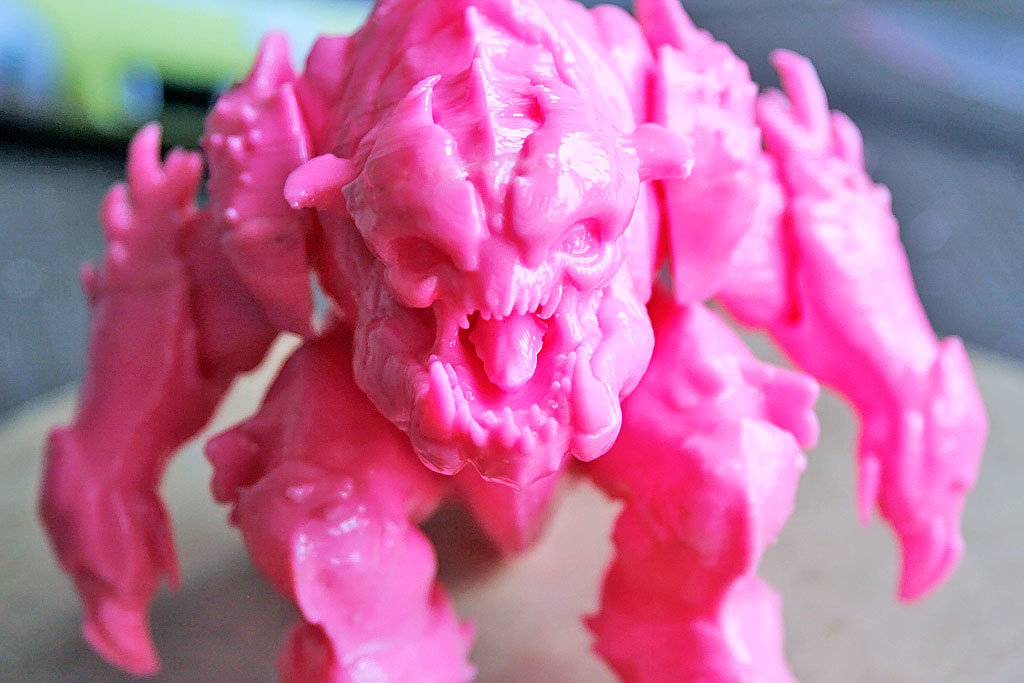
Now to the point. I printed the figure of the monster Pinky from DOOM 3. The printing did not come straight away, the model is very complex, with spikes sticking out in all directions and other details. Printed in 2 extruders with HIPS support, and with support generated in MeshMixer. But when you go to the top of your hands, something always falls off and you have to stop printing. Perhaps plastic is to blame, it is almost a year old and it was stored without a package and a box, just like that.
In general, for the third time I combined the printing methods and added support from HIPS plastic to the model with support from MeshMixer. In the middle of the print, I saw that my hands were torn off again, but I spat and finished to the end, having decided to simply glue the damaged parts.

The details were reprinted and now with the help of a 3D pen I will easily paste them onto the main model.

It is with such a shovchik that glued parts are obtained, but firmly. A protruding excess plastic can be whipped off or cut with a knife after treatment with dichloromethane.

Saw off the face.

And glue new, high quality.

It turns out darn creation of Frankenstein.

Here you can see in comparison the quality of the old and the new muzzle.
Go to the hands. Here it is more difficult, in some places a large gap has turned out.

But, in principle, the handle easily copes with wide slots.

It remains only to process the seams.

I did not begin to skin and sharpen them to dry. I decided to process the entire model with methylene chloride, it dissolves both PLA and ABS equally well.


The seams have become smoother, but the most important thing is that the top layer of plastic has become soft and is easily cut off with a knife, like plasticine. Align all the seams, cutting off the excess, and once again pass the brush with DXM.


And here is the result:
Finally, look inside the 3D pen.
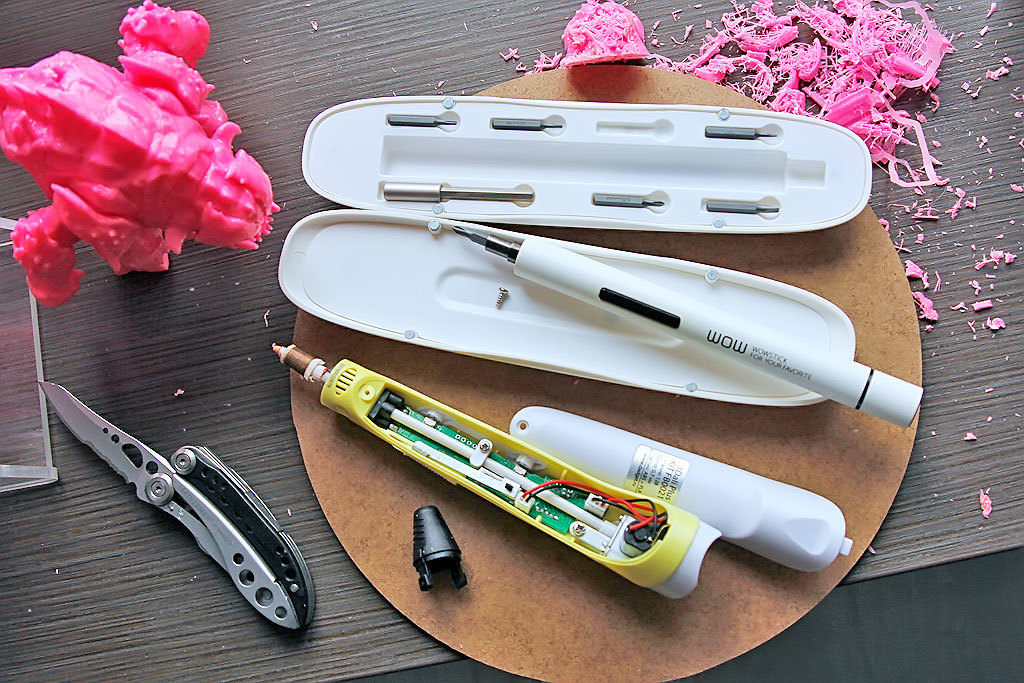
We take out the black tip and unscrew one single screw.
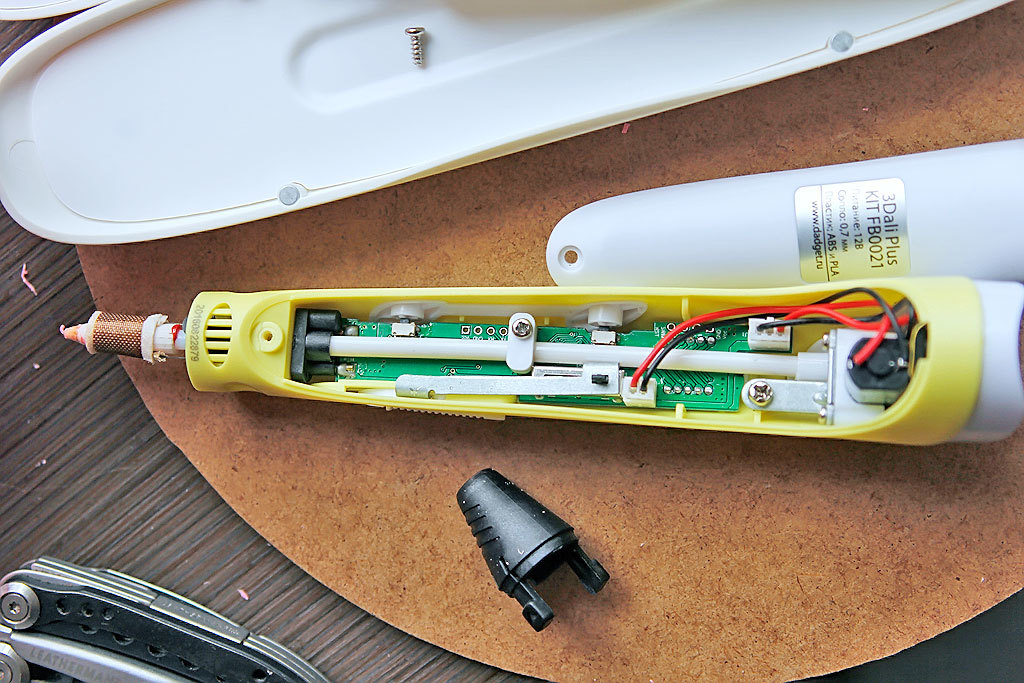
Here you can see a ceramic nozzle with a heater and a thermistor, a short tube a la Bowden and an extruder on a simple brush motor. Feed is governed by the speed of rotation of the motor shaft. On the little engine there is a small brass gear that pushes the plastic, on the other hand it all presses a small bearing with a flat side. In general, everything is very simple, like Kalash. Yes, and remember, I wrote about the fact that you should not overheat PLA plastic. In the photo in a disassembled form, it is noticeable that on the back of the heater, where the tube enters it, there is something red. This is just PLA plastic, I drew a little of it in the heating mode for ABS, and it became so liquid that it went in the opposite direction. If this is abused, then I think it can accumulate there a lot and this will lead to overheating and failure of the handle. Be careful.
In conclusion, I will say that before when I did not have a pen, I was angry ... Sorry. :) Previously, when I didn’t have such a pen, I would seal the damaged seal with a soldering iron. Well helped soldering iron with temperature control. But ... you know, this is not the best repair tool. It is necessary to hold the soldering iron with one hand, feed the bar with the other, and with the third to hold the part itself. Another option is to chemically dissolve plastic and seal gaps. But when the solution dries, it sits down strongly and dips appear. Ideally, it turns out exactly 3D-pen. Of the shortcomings of the pen itself, I will note only the power supply to 12 V. Since now there are already 5 V handles and you can carry them with you and power them from a USB battery, it’s more convenient than sitting at the outlet.
Let's start with the inspection of the gadget.
')
Everything is standard, the box, the instructions in it, the power supply and the pen itself.
The length of the wire from the power supply 1.4 m, should be enough for most outlets, which are next to the tables.
The power supply is 12 volts, 3 amperes.
At idle, it easily gives out the declared volts, did not measure the current, then excuse me. Go directly to the test.
Pen like a pen . From the interesting - this is the specified diameter of the nozzle - 0.7 mm. The big plus for me personally is that the handle is omnivorous. You can print both PLA and ABS. There is also a manual temperature adjustment.
The choice of modes is intuitively simple. You just need to press the buttons on the sides of the screen.
Next, click on the feed button, you can once and release. The heating starts. Heats up quickly, faster than a 3D printer.
When the desired temperature is reached, the indicator to the left of the screen of red turns green.
In addition to adjusting the temperature on the handle there is a plastic feed adjustment (speed).
On the other side of the feed adjustment, there are 2 buttons - “press out” and “pull out”.
Corrected for the first test piece of plastic left over from the last seal.
On the first pitch you can see that there was already some kind of plastic in the nozzle. This is good, as the pen really checked. Some printer manufacturers supply them with a printed figure on the table, the user immediately sees that the device is working and prints as it should.
I didn’t have the test plastic right away, I refueled the transparent SBS, it is soft enough and there are often problems with it on the printer. Then everything went right briskly.
A small lyrical digression.
I was given a set of plastic along with a pen .
3D palette.
By the way, a very good addition to the 3D-pen. In addition to the conveniently located plastic on individual pockets, there is a compartment for storing the handle, as well as an envelope with sketches on tracing paper for easy creation of volumetric models.
Before the case, check the handle on a simple model.
Take the tracing paper and draw the glasses along the contour.
When the plastic cools, it can easily be removed from tracing paper. We remove.
We draw the second shackle.
Next, we melt the bows to the points.
PLA plastic is very pleasant to use, it softens easily and sticks to each other. But there is one drawback, it should not be overheated, it becomes too fluid, but more on that later.
Points are ready.
Now to the point. I printed the figure of the monster Pinky from DOOM 3. The printing did not come straight away, the model is very complex, with spikes sticking out in all directions and other details. Printed in 2 extruders with HIPS support, and with support generated in MeshMixer. But when you go to the top of your hands, something always falls off and you have to stop printing. Perhaps plastic is to blame, it is almost a year old and it was stored without a package and a box, just like that.
In general, for the third time I combined the printing methods and added support from HIPS plastic to the model with support from MeshMixer. In the middle of the print, I saw that my hands were torn off again, but I spat and finished to the end, having decided to simply glue the damaged parts.
The details were reprinted and now with the help of a 3D pen I will easily paste them onto the main model.
It is with such a shovchik that glued parts are obtained, but firmly. A protruding excess plastic can be whipped off or cut with a knife after treatment with dichloromethane.
Saw off the face.
And glue new, high quality.
It turns out darn creation of Frankenstein.
Here you can see in comparison the quality of the old and the new muzzle.
Go to the hands. Here it is more difficult, in some places a large gap has turned out.
But, in principle, the handle easily copes with wide slots.
It remains only to process the seams.
I did not begin to skin and sharpen them to dry. I decided to process the entire model with methylene chloride, it dissolves both PLA and ABS equally well.
The seams have become smoother, but the most important thing is that the top layer of plastic has become soft and is easily cut off with a knife, like plasticine. Align all the seams, cutting off the excess, and once again pass the brush with DXM.
And here is the result:
Finally, look inside the 3D pen.
We take out the black tip and unscrew one single screw.
Here you can see a ceramic nozzle with a heater and a thermistor, a short tube a la Bowden and an extruder on a simple brush motor. Feed is governed by the speed of rotation of the motor shaft. On the little engine there is a small brass gear that pushes the plastic, on the other hand it all presses a small bearing with a flat side. In general, everything is very simple, like Kalash. Yes, and remember, I wrote about the fact that you should not overheat PLA plastic. In the photo in a disassembled form, it is noticeable that on the back of the heater, where the tube enters it, there is something red. This is just PLA plastic, I drew a little of it in the heating mode for ABS, and it became so liquid that it went in the opposite direction. If this is abused, then I think it can accumulate there a lot and this will lead to overheating and failure of the handle. Be careful.
In conclusion, I will say that before when I did not have a pen, I was angry ... Sorry. :) Previously, when I didn’t have such a pen, I would seal the damaged seal with a soldering iron. Well helped soldering iron with temperature control. But ... you know, this is not the best repair tool. It is necessary to hold the soldering iron with one hand, feed the bar with the other, and with the third to hold the part itself. Another option is to chemically dissolve plastic and seal gaps. But when the solution dries, it sits down strongly and dips appear. Ideally, it turns out exactly 3D-pen. Of the shortcomings of the pen itself, I will note only the power supply to 12 V. Since now there are already 5 V handles and you can carry them with you and power them from a USB battery, it’s more convenient than sitting at the outlet.
Potential buyers
With a 10% discount , the Dali Plus 3D Pen and the PLA Palette can be purchased using the GT-3D promo code.
Source: https://habr.com/ru/post/402387/
All Articles