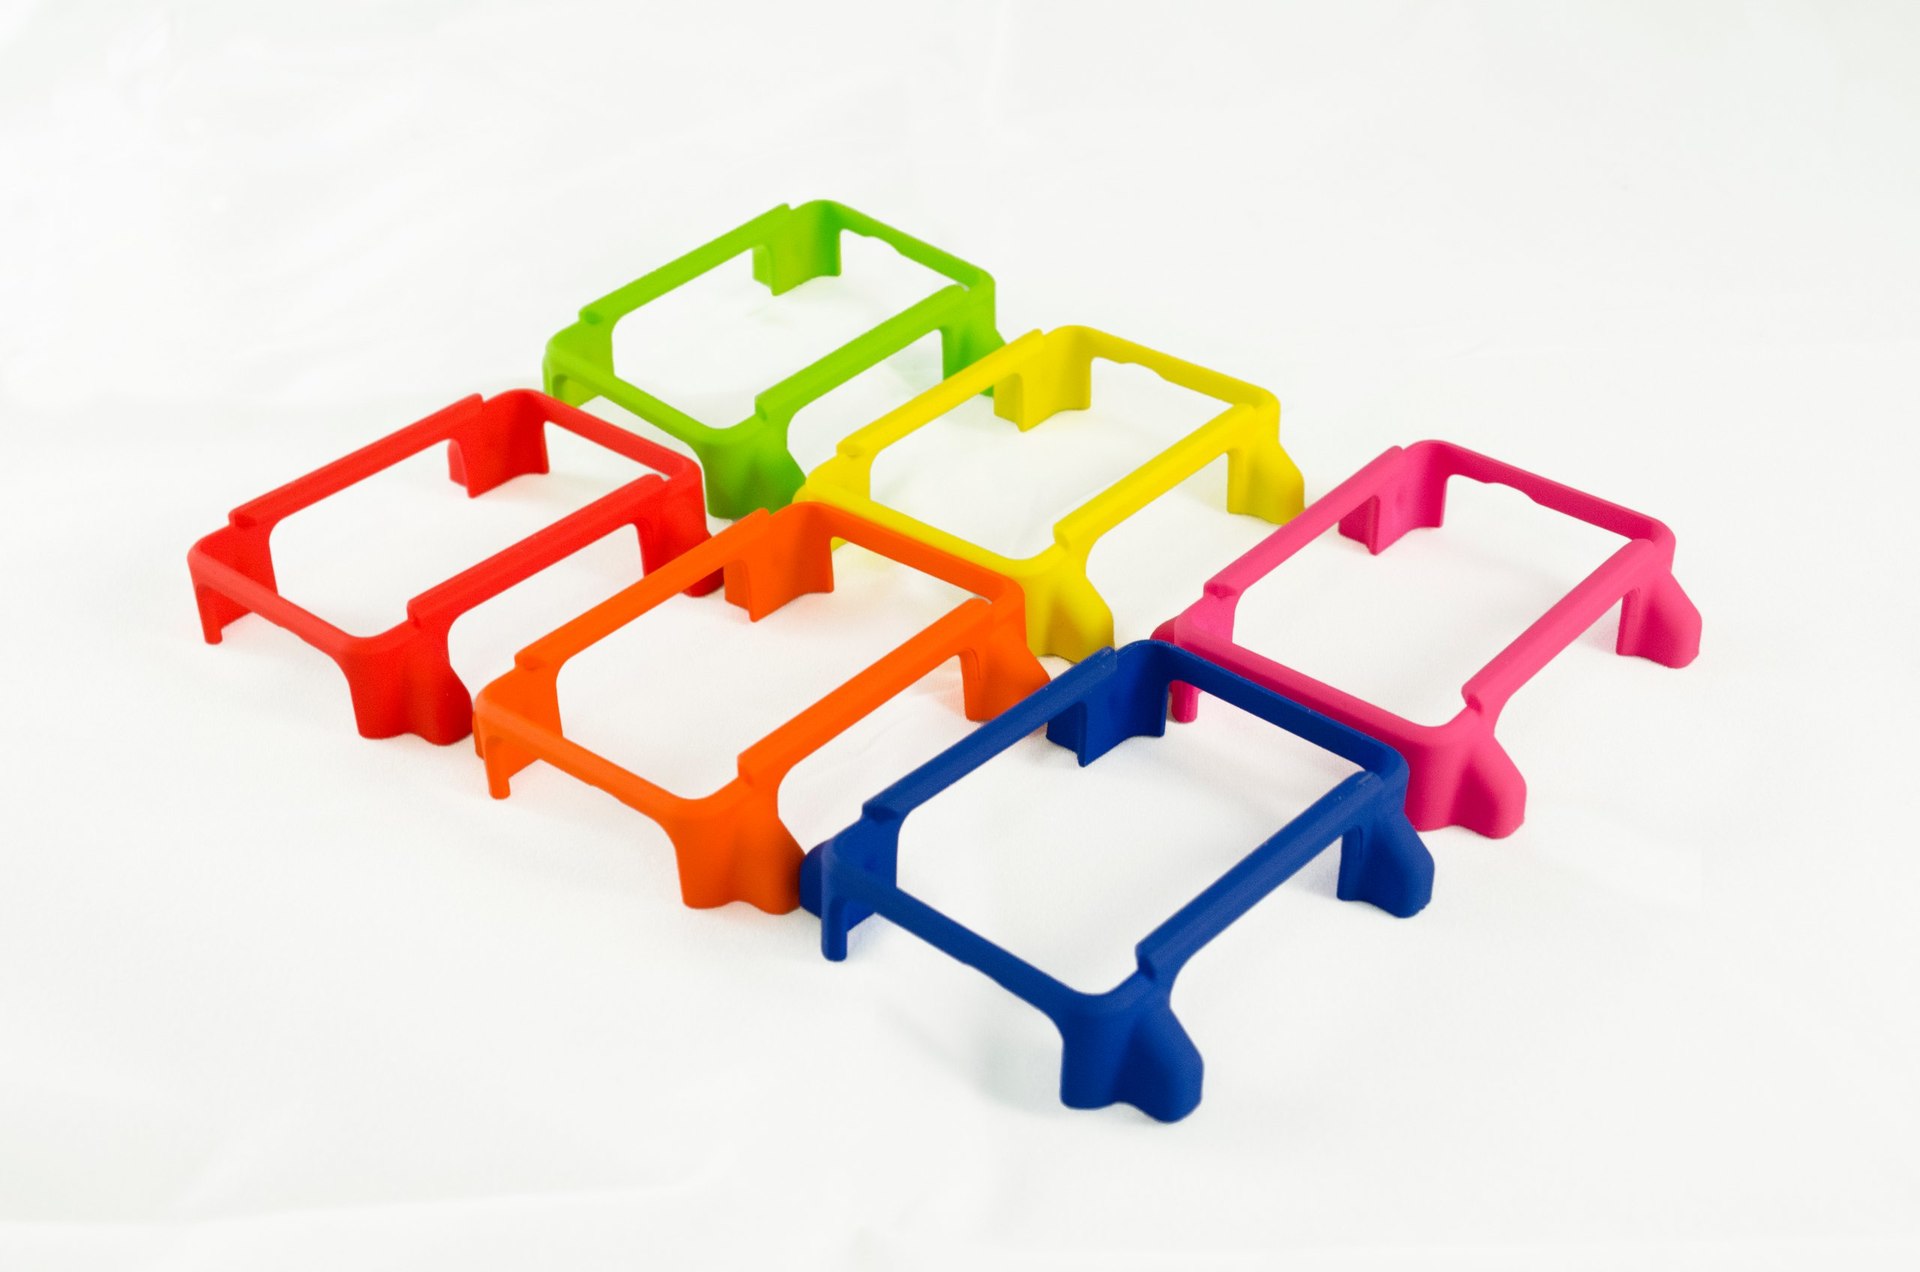
Small-scale production of cases by 3D printing: we give a “factory” look
You are determined to release your development to the mass market.
The first stumbling block faced by many is how to make a high-quality device case in small batches?
How to make a “candy” from a 3D-printed model, which will not be ashamed to sell?
')
One of the options - processing and painting. On the intricacies of polyamide coloring - under the cut. A lot of photos!
Why precisely polyamide?
Let's take a look at the comparative table from Can-touch (not advertising, but the guys know their business and don't mention them: at prices above the market, they are responsible for the quality and solve problems without “freezing”).

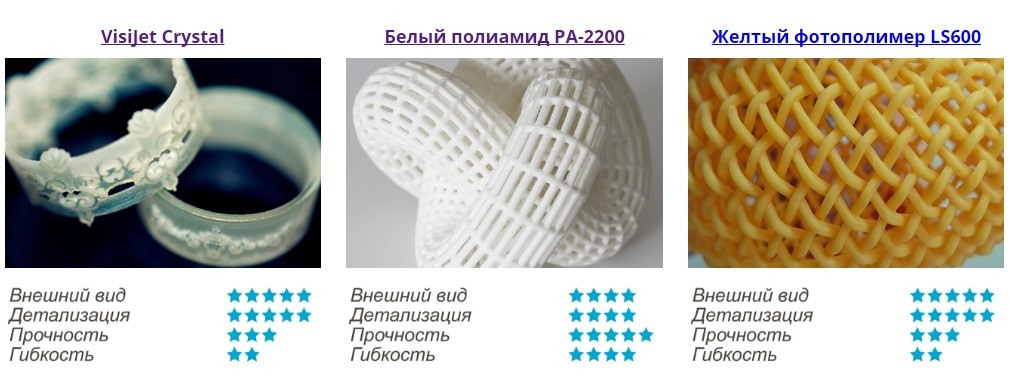
- Parts made of polyamide are durable and quite suitable for use as the final product.
- Detailing is better than printing with plastic, but worse than printing with photopolymer.
- SLS printing with polyamide is quite inexpensive and, depending on the size of the part, costs even less than molding into silicone molds.
- In addition, casting is a rather labor-intensive process, and the productivity of the casting shop is rather limited, the detailing does not always allow for the realization of ideas either.
- Small elements (for example, latches) may simply not be cast.
- Polyamide is well machined - skins, polished, etc.
These properties make it an excellent material for small series of buildings.
Next is a guide on how to get a “factory” part with soft-touch coating.
Instruments:
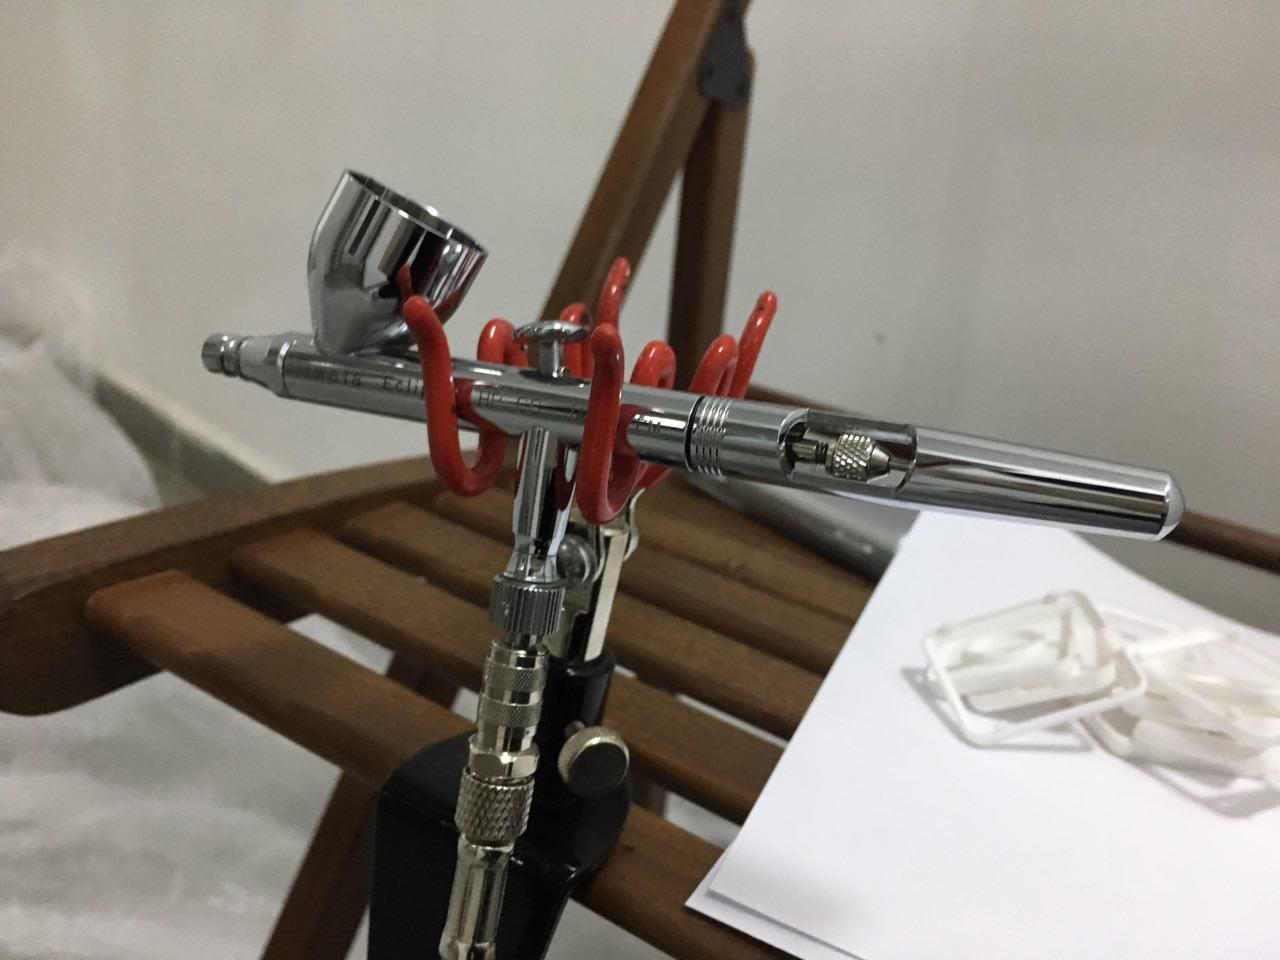
Airbrush / spray gun:
I use IWATA Eclipse, but it will be more modest. It is better to consult in the shops engaged in modeling. The key for us is the size of the stain and the size of the tank: you should not take a huge half-liter for painting fences. For painting models fit almost everything.
Compressor with pressure reducer:
We look in the same store for modellers.

Libra:
Be sure to (!) Accurately mix paint with hardener.

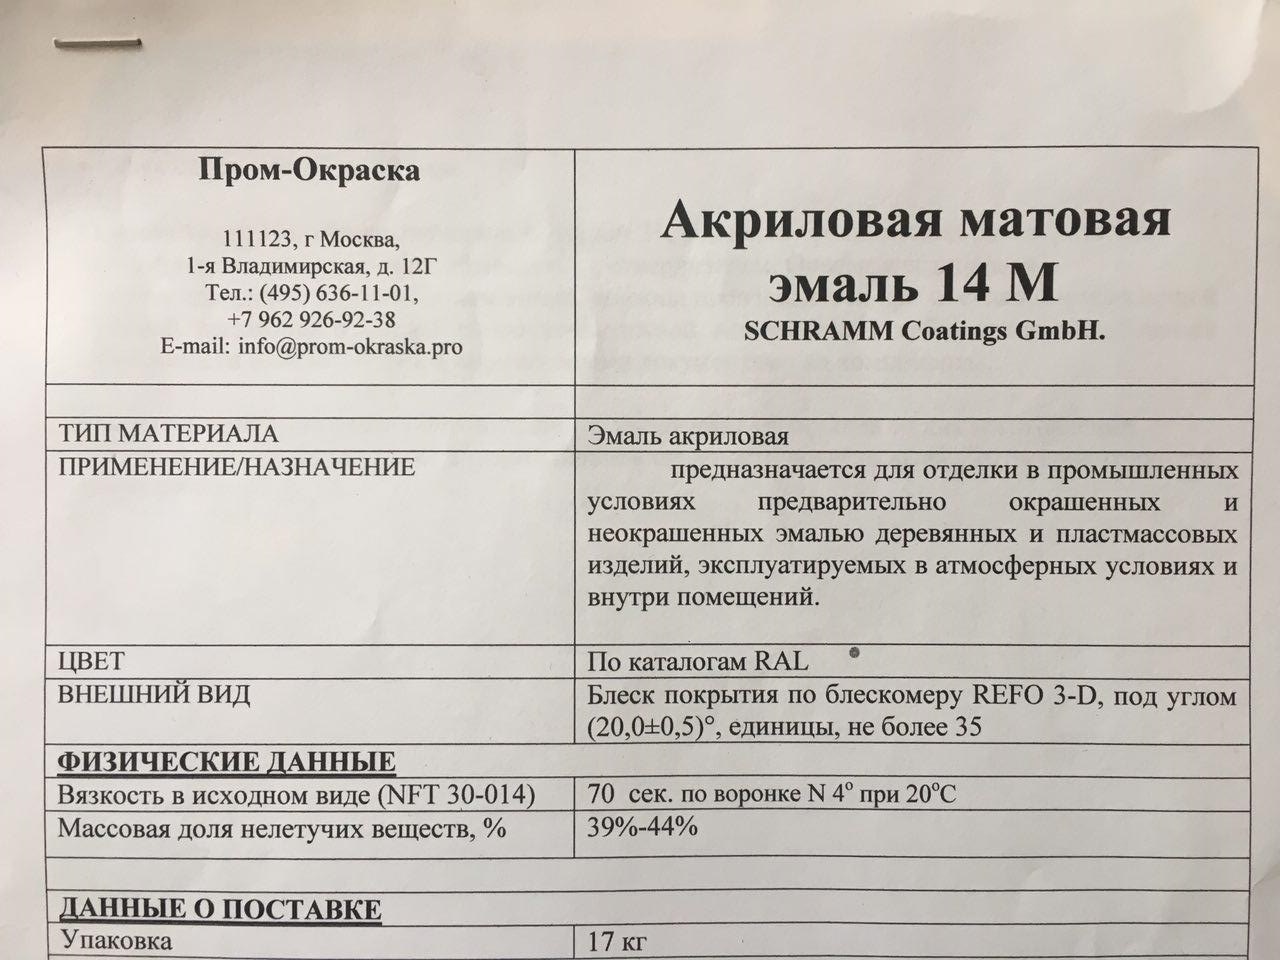
Primer, paint, varnish, film, solvent, etc.:
Paint, varnish and primer can be purchased at Prom Coloring, as well as get additional advice or painting to order (the guys are competent, painting to order is done well, only now they are often loaded).

Preparation for painting:
Polyamide is printed using the technology of selective laser sintering: the model is obtained with good detailing along horizontal axes and small “steps” along the vertical axis.
In addition, the surface turns porous - it is necessary to otshkurit it thoroughly to a perfectly smooth state.
This is the most important stage of the process - all the irregularities after painting will be visible!
Therefore, we first use the P400-P500 grit sandpaper. Then grind to a perfectly smooth surface with grain P700-P800.
Before:

After:

As you can see, the steps from this are not particularly disappeared. At this stage, only the horizontal surface is well processed - not visible in the photo, but it feels smooth to the touch. The ends are still rough. With sandpaper, we remove the bulges, but in order to remove the pores, we will have to grind off half the wall — it will not do.
Primer:
In order to ensure good adhesion between the paint and the material, a primer is used. In addition, the primer allows you to fill irregularities and make the surface perfectly smooth. All the proportions and drying parameters are in the attached specifications. For polyamide, I used:

Important!
It is necessary to apply a primer in a very thick layer, until all the irregularities are filled, remove too much during the grinding process. The airbrush / spray gun inflates the paint to the sides, preventing it from lying down in a thick layer, so you will need a second one, as thick as possible. To speed up the process, you can put parts in the oven at a temperature of 50-70 degrees.
Single layer:
After drying and processing:

One layer is not enough to get a good result! Not all pores are eliminated, the surface is not ideally smooth everywhere.
Do not start painting until you get a perfectly smooth to the touch surface!
Paint it will not hide.
You may need to apply a third layer of soil, dry and scrape. The skins are the same: first - with a large sandpaper, then with small sandpaper (it is better to use waterproof sandpaper, as it gets clogged quite quickly, and it is better to wash it).
Two layers, smooth surface:
If islands appeared somewhere, in principle, nothing terrible, if only the touch was smooth and all pores in the plastic closed.
Painting:
Thoroughly wash the airbrush with a solvent after previous use (at the end of painting it is recommended to pour solvent into the tank and drive it through the nozzle - after that it will be easier to clean it).
We mix paint according to the specification:
We apply with a uniform layer: it is better to feed less paint and drive more with your hand. We keep the airbrush away from the body in order not to accidentally leave smudges (it’s better to practice on paper if you haven’t had airbrushing).
At this stage it will be clear how well you have primed / polished the surface. If everything is done correctly, the magic of turning into an ideal detail will occur before your eyes. Paint a lot is not necessary - just a couple of dense layers. Then we dry in the oven, but for now it dries - we clean the airbrush for soft-touch lacquer.

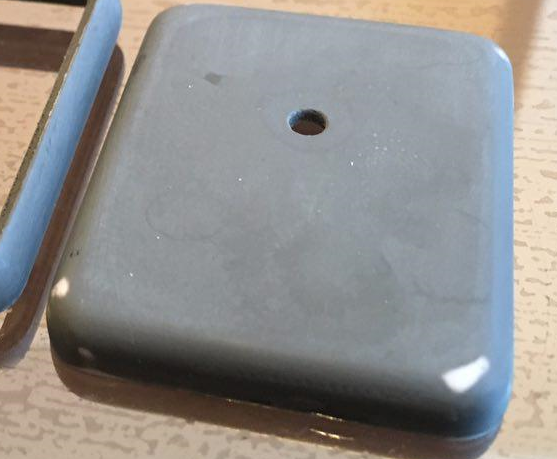
Cover the soft-touch varnish:
After painting, the part will seem fantastic to you, but the soft-touch coating will create the same
The “wow effect” will hide minor surface irregularities and also protect the paint from damage.

It is important to apply lacquer to dry perfectly smooth paint. If after painting surface roughness appeared, you can gently (VERY ACCURATE) lightly smooth the smallest sandpaper to smooth the surface.
Be sure to practice on different surfaces in the application of varnish - should be applied in 1-1.5 layers. Apply after finished work, it is recommended to immediately clean the tank from varnish with a solvent.
We remove the parts into the oven to dry, along with some kind of test piece, also coated with varnish (the temptation to touch the part is too large, and the fingerprint on the wet part is no longer covered up, so it’s better to touch the one you don’t feel sorry for).
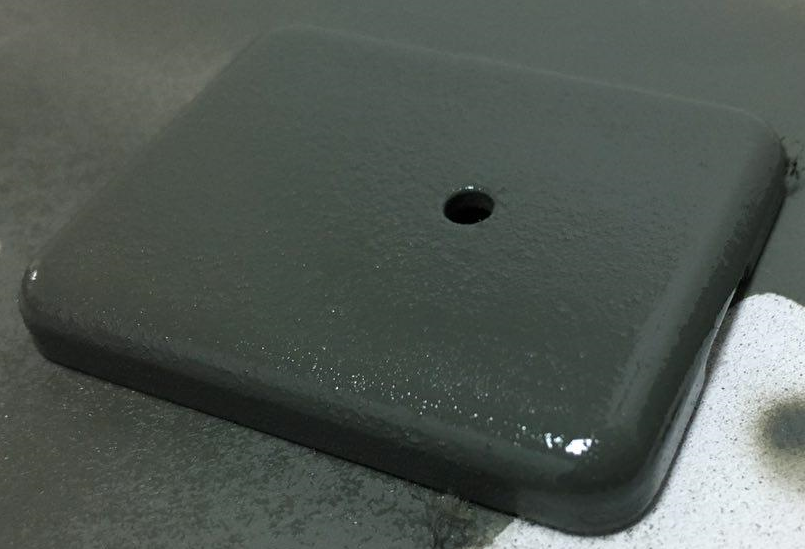
The result is an excellent velvet coating, which is not a shame to sell / show.

You will not even believe that this can be achieved with your own hands, and having mastered the technology, do not hesitate to delegate the process.
I hope someone this post was helpful. If you have questions, I will answer as much as possible.
Source: https://habr.com/ru/post/401847/
All Articles