Assembling a linear LED lamp
Now one of the most popular and fashionable lighting solutions are linear LED lights. In this article we will understand how modern LED lighting systems are arranged and assemble one lamp with your own hands.
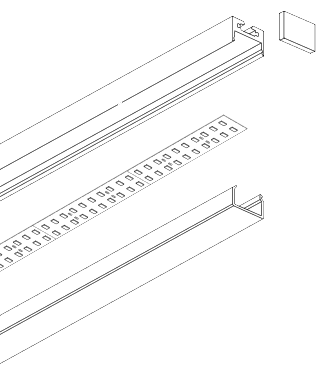
Linear luminaire includes: aluminum LED profile with polycarbonate light-scattering glass, light source (LED strip or LED ruler), LED driver. Also, the profiles are offered a huge variety of components (suspensions, plugs, fasteners, and many others.)
One of the advantages of such a simple design is the wide possibilities of configuration and choice. Almost every such lamp is unique. The undeniable advantage of linear lighting systems is that we can make lamps of any length.
Linear lamps are: recessed, pendant, overhead. They differ in the method of installation, which is provided by the manufacturer.
')
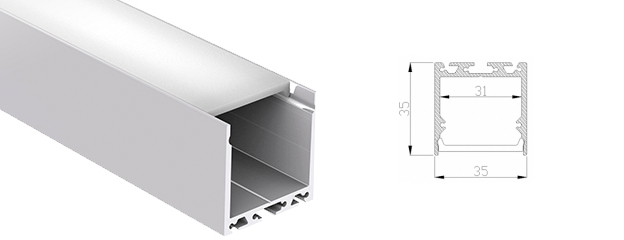
We decided to assemble a pendant lamp, which will find its application both in the garage and in the office. Among the wide range of aluminum LED profiles we found the right one. Our choice was on a profile called U-S35. The dimensions of this profile are 35 * 35 * 2500mm.

After examining the market for LED strips, looking at reviews and reading reviews, we wanted to apply a novelty to our future fixture.
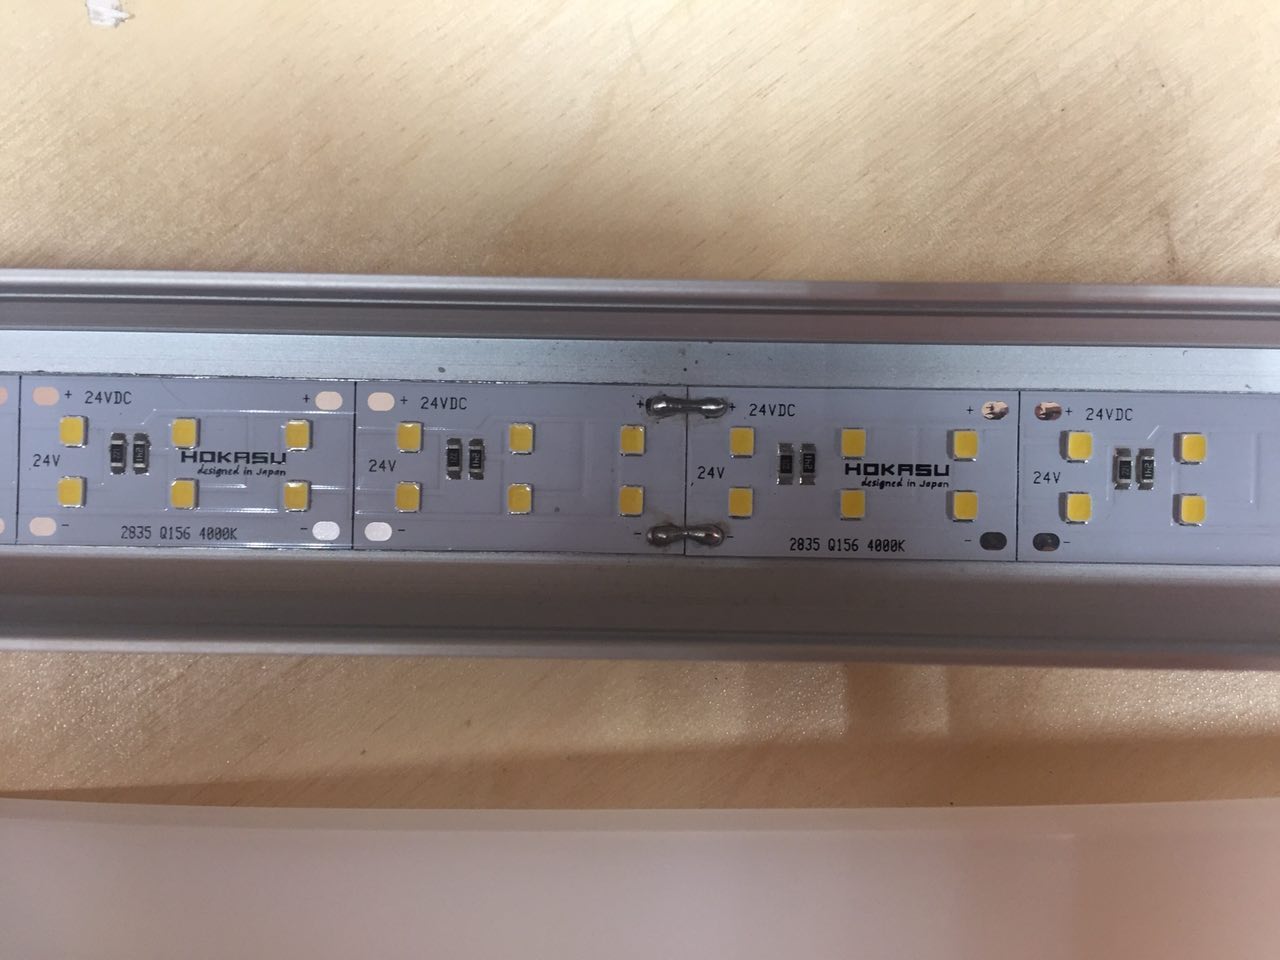
Japanese LED module HOKASU. The module has a huge advantage over LED strip.
So, the characteristics in the studio:
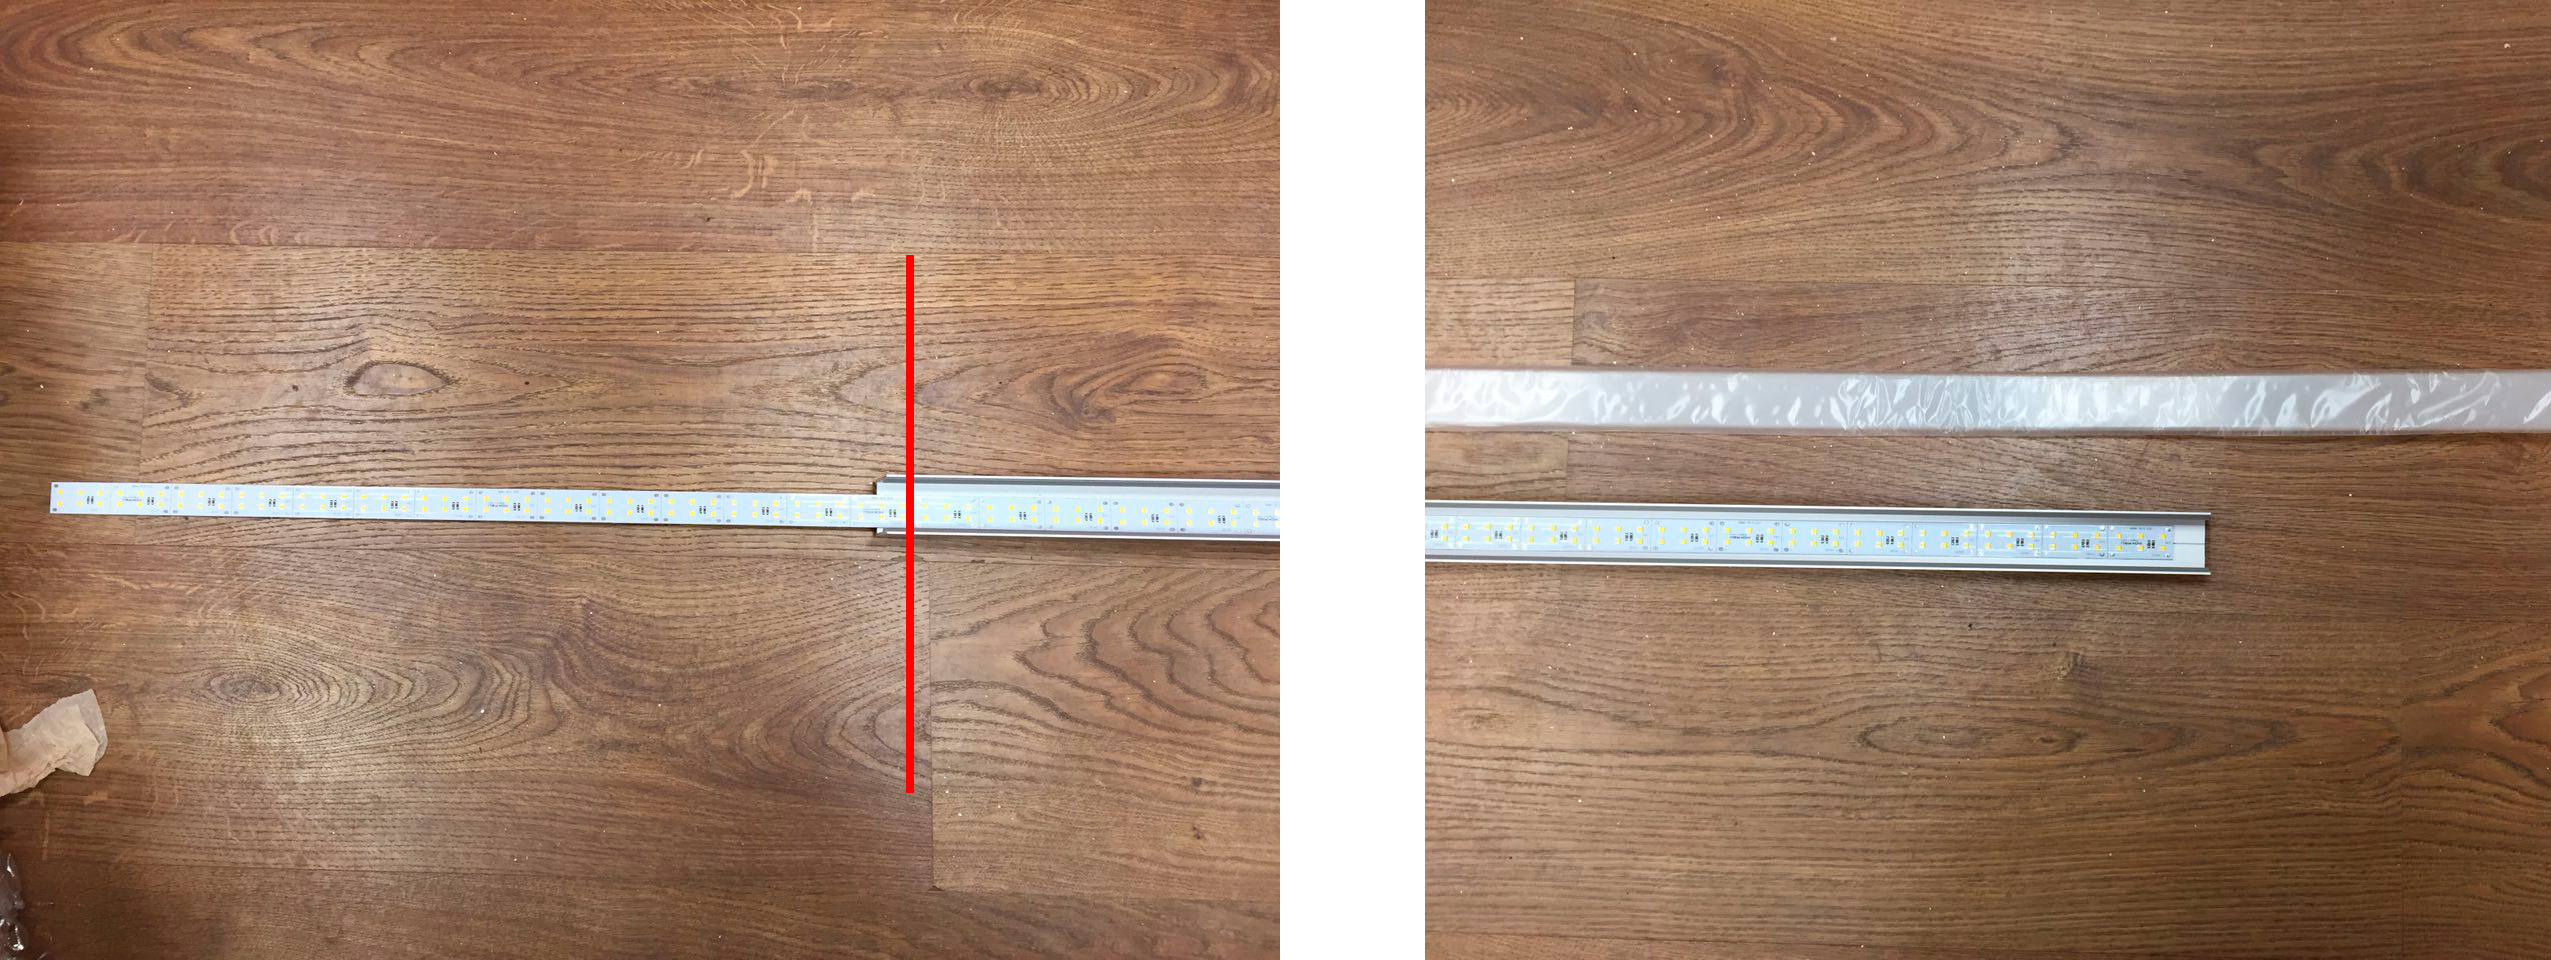
To begin with, we will try on rulers in the profile and trim them to the size we need.
By the way, they can be cut every 4 cm.

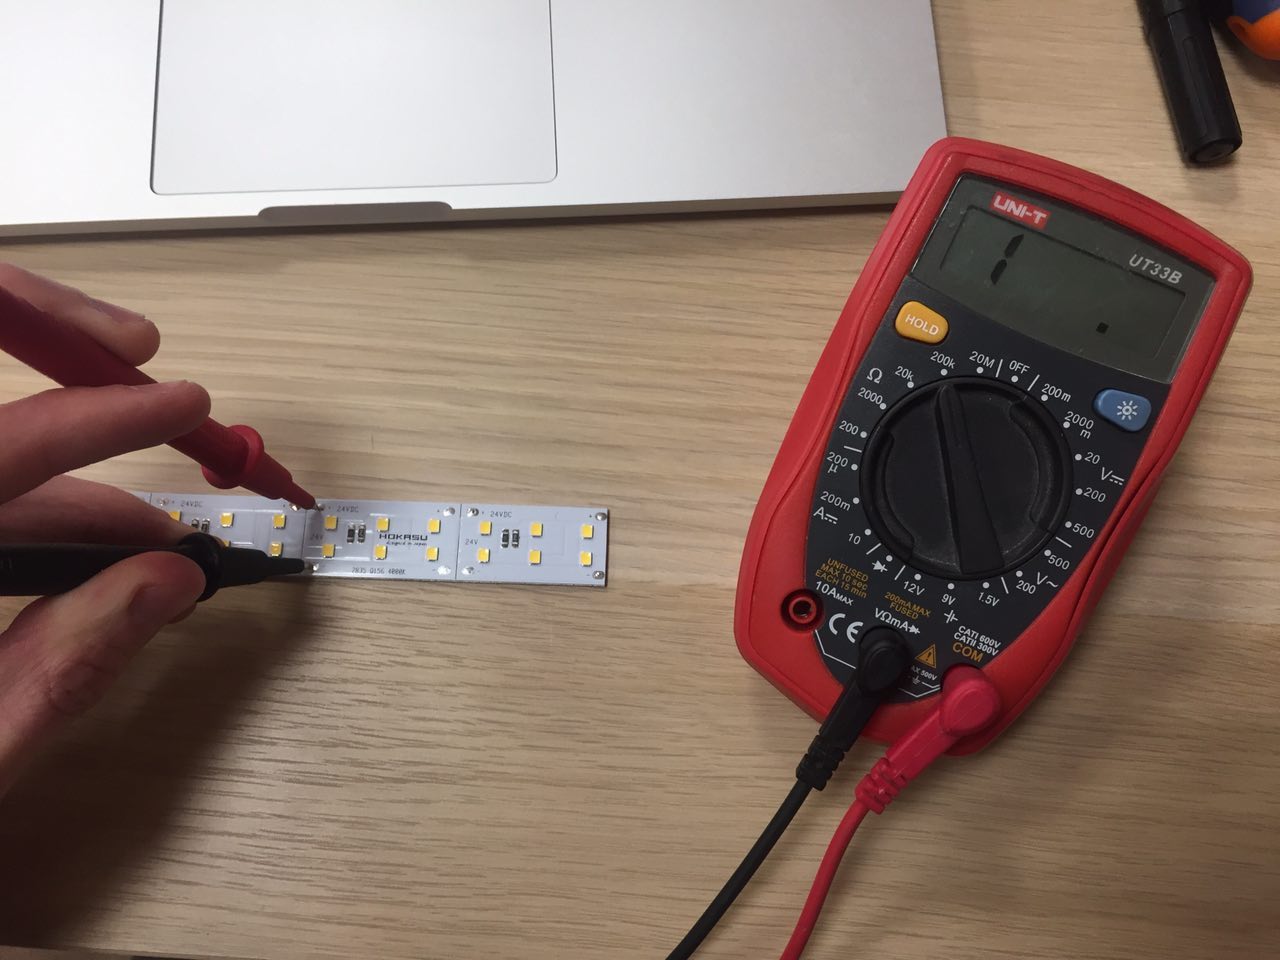
After we cut the ruler, it is advisable to test it for resistance, because after the first attempt, when I cut with an ordinary saw, the ruler closed from the very edge.
This is due to the fact that the base is made of aluminum and conducts current. And with an inaccurate cut from the end, the copper tracks touch the substrate.
Next, we glue the rulers (they have an adhesive layer of 3M):

Now our lamp is almost ready, we have to solder all the lines between them. According to the manufacturer: serial connection up to 3m is permissible. (This we will check later, measuring the total power of the finished linear lamp.)
Solder the wire from one end and close the screen. (You need to make a hole for the wire and put it behind the profile, but for now we will not do it.)
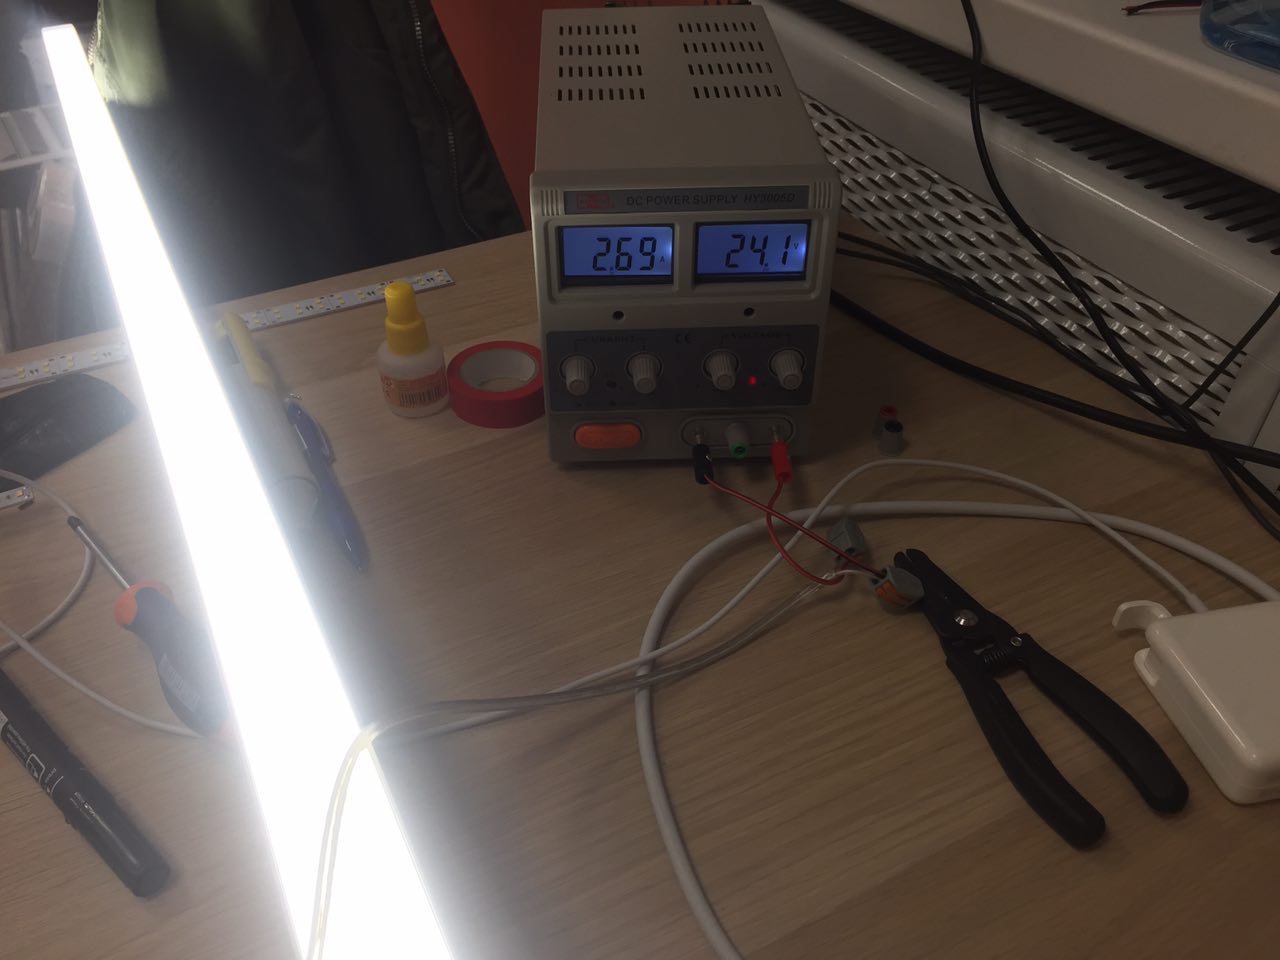
I connected the lamp to a laboratory power supply in order to see what kind of current LEDs consume. Quite a common problem that when connecting high-power tapes over 2m, there is a loss of power. This is due to the lack of conductivity of the copper tracks. I got that the total power of the lamp 2.7 * 24 = 64.8W (26 W / m).
Indicators jumped on temperature, but averaged 26 W / m. Given the fact that the declared power of one module is 26W, I think this is an ideal indicator.
For clarity, I hung a lamp over the desktop and took a few photos. In the future I will find him a permanent place.

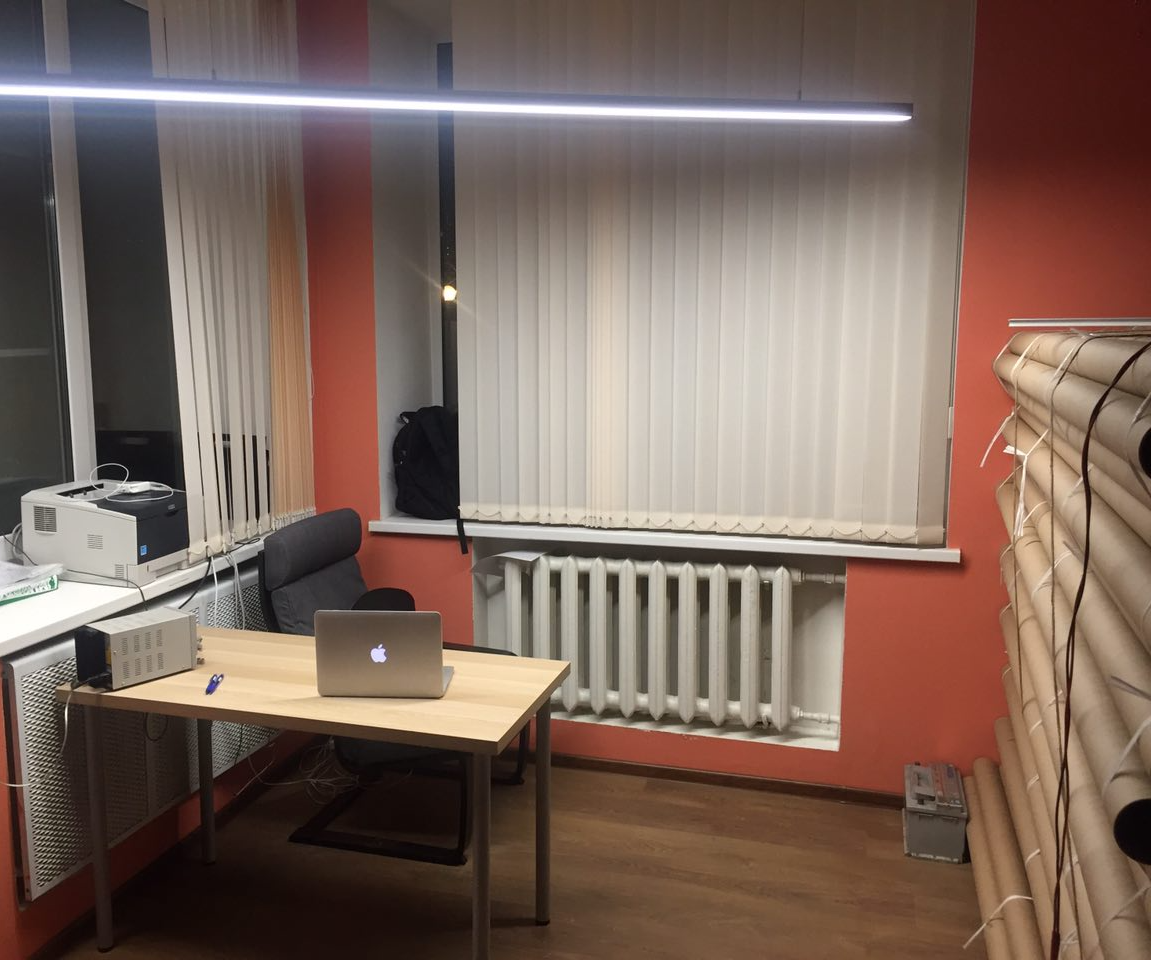

Linear lamp 65W, 2.5m.
Total: 6220r.
One such lamp is enough for 2 or even 3 jobs. It can be cut in half and set over different tables by connecting to the same power source.
Design
Linear luminaire includes: aluminum LED profile with polycarbonate light-scattering glass, light source (LED strip or LED ruler), LED driver. Also, the profiles are offered a huge variety of components (suspensions, plugs, fasteners, and many others.)
One of the advantages of such a simple design is the wide possibilities of configuration and choice. Almost every such lamp is unique. The undeniable advantage of linear lighting systems is that we can make lamps of any length.
Varieties
Linear lamps are: recessed, pendant, overhead. They differ in the method of installation, which is provided by the manufacturer.
')
Let's get started
Body selection
We decided to assemble a pendant lamp, which will find its application both in the garage and in the office. Among the wide range of aluminum LED profiles we found the right one. Our choice was on a profile called U-S35. The dimensions of this profile are 35 * 35 * 2500mm.
Light source selection
After examining the market for LED strips, looking at reviews and reading reviews, we wanted to apply a novelty to our future fixture.
Japanese LED module HOKASU. The module has a huge advantage over LED strip.
The worst enemy of LEDs is warm. From the temperature that high-power LEDs emit, LEDs are degrading, losing percentages of their original brightness. Instantaneous removal of point heat, which is concentrated at the very base of the crystal, is very important. Since the LED strip is a flexible conductor with smd LEDs, when mounted on a cooling surface, we get a thermal gap. The tape is not very tightly glued to the surface, glue interferes with instant heat removal (double adhesive tape 3M). Rulers lack this disadvantage, since the board is soldered to the aluminum strip at the factory, which in turn is already attached to the surface.
So, the characteristics in the studio:
- Power supply, V: 24
- Luminous flux, lm / m: 2700
- Power, W / m: 26
- LED size: 2835 (2.8x3.5mm)
- Color temperature, K: 4000
Equipment
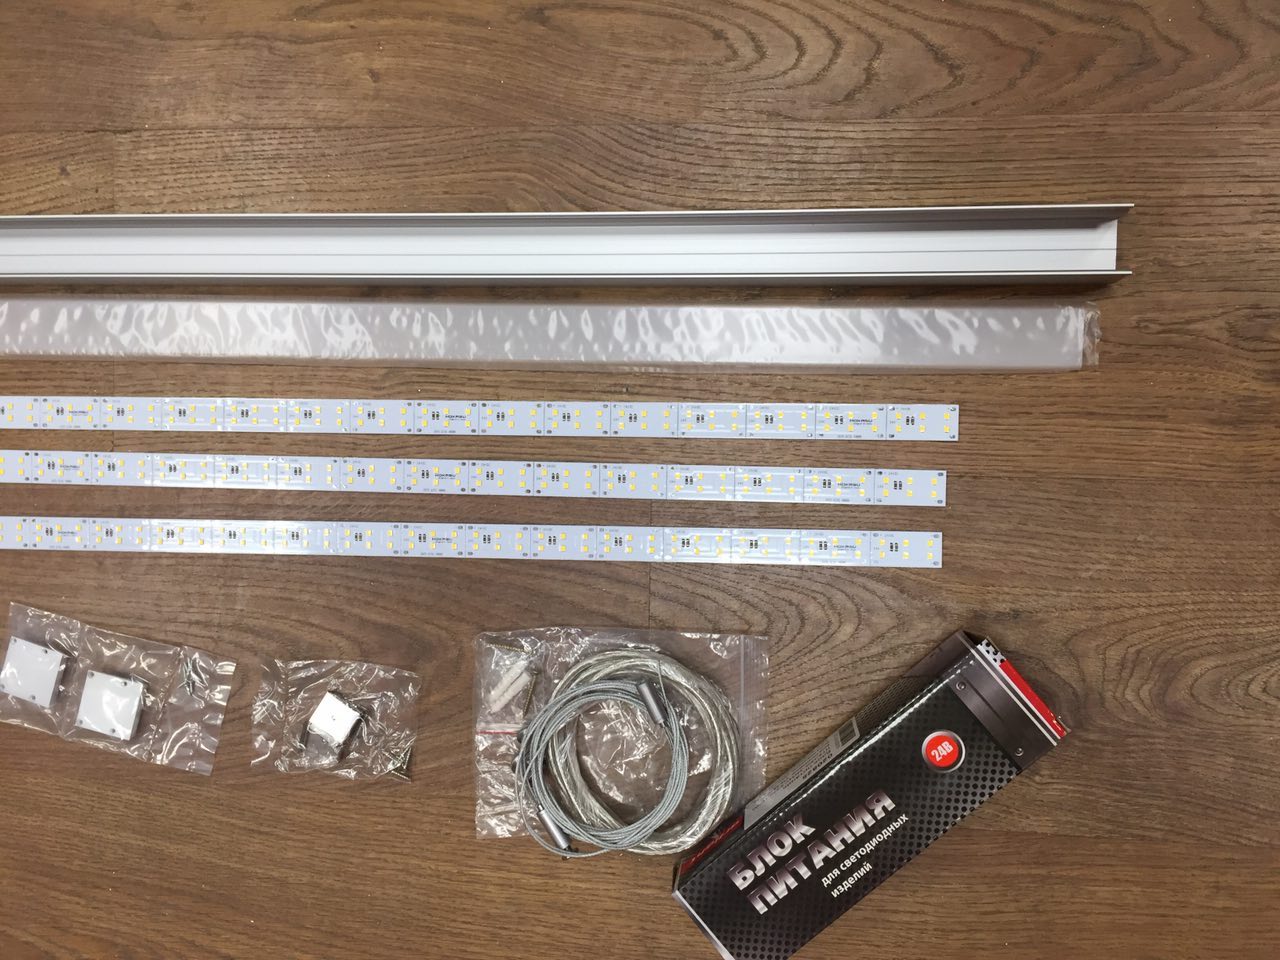
From the materials we used
- Aluminum profile
- Plugs + suspensions + fasteners for surface mounting
- LED modules
- Power supply 24v 150w
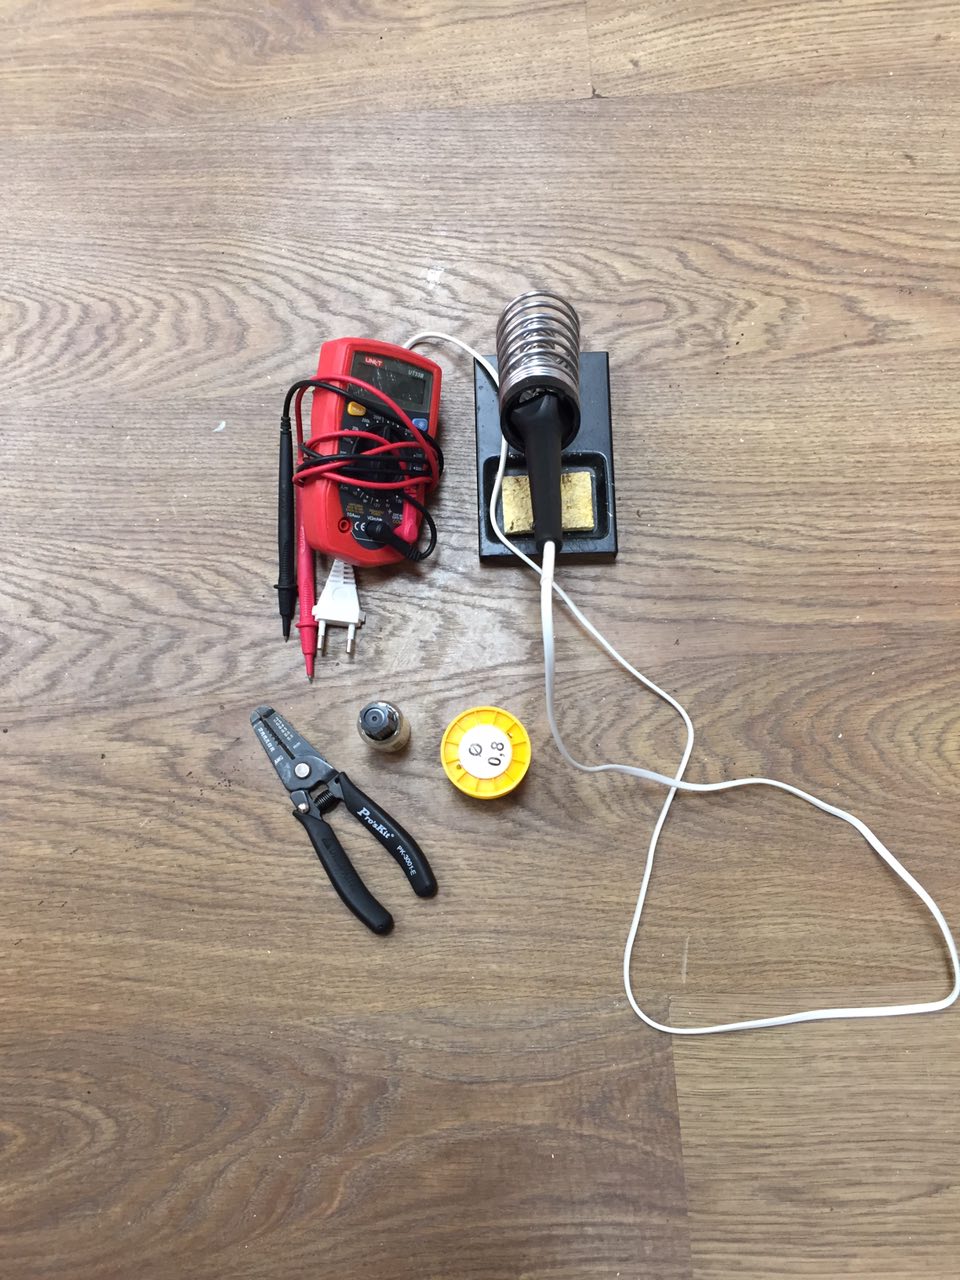
For the assembly we need
- Soldering iron
- Multimeter
- Wire cutting and stripping tongs
- Flux, tin
- Straight arms
Assembly
To begin with, we will try on rulers in the profile and trim them to the size we need.
By the way, they can be cut every 4 cm.
After we cut the ruler, it is advisable to test it for resistance, because after the first attempt, when I cut with an ordinary saw, the ruler closed from the very edge.
This is due to the fact that the base is made of aluminum and conducts current. And with an inaccurate cut from the end, the copper tracks touch the substrate.
Next, we glue the rulers (they have an adhesive layer of 3M):
Now our lamp is almost ready, we have to solder all the lines between them. According to the manufacturer: serial connection up to 3m is permissible. (This we will check later, measuring the total power of the finished linear lamp.)
Solder the wire from one end and close the screen. (You need to make a hole for the wire and put it behind the profile, but for now we will not do it.)
I connected the lamp to a laboratory power supply in order to see what kind of current LEDs consume. Quite a common problem that when connecting high-power tapes over 2m, there is a loss of power. This is due to the lack of conductivity of the copper tracks. I got that the total power of the lamp 2.7 * 24 = 64.8W (26 W / m).
Indicators jumped on temperature, but averaged 26 W / m. Given the fact that the declared power of one module is 26W, I think this is an ideal indicator.
Applicability
For clarity, I hung a lamp over the desktop and took a few photos. In the future I will find him a permanent place.
Cost of
Linear lamp 65W, 2.5m.
- Profile U-S35: 2400r
- HOKASU modules: 2370
- Accessories: ~ 300r
- Power Source: 1150r
Total: 6220r.
One such lamp is enough for 2 or even 3 jobs. It can be cut in half and set over different tables by connecting to the same power source.
Source: https://habr.com/ru/post/401807/
All Articles