Modular 3D-printer "3D-Start" as a source of interest for 3D-cats
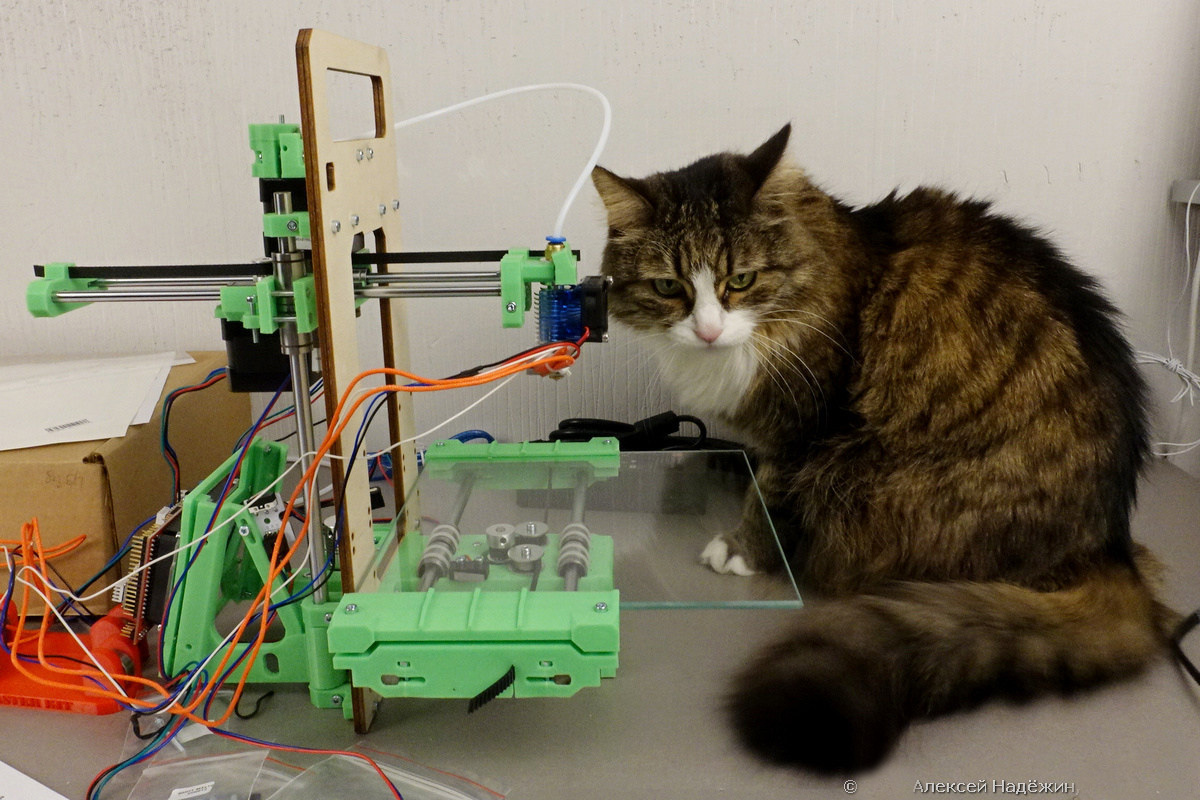
I collected the 3D Start 3D printer from Dadzhet, then I had to leave immediately, and when I returned, I found the cat at the crime scene. After all, he understands that it is impossible to climb here, but curiosity takes over.
I have seen many different 3D printers at various trade shows and would never have thought that self-printing on a 3D printer could be so exciting. When I was offered to test it, I certainly agreed. The company Dadzhet developed, produces and sells a simple modular 3D printer called "3D-Start". Collect yourself. From ready-made and customized modules. The feeling, when quite a tangible thing is born out of nothing, is difficult to convey. And when I managed to print the first part, I was absolutely delighted. Earlier there was another review of this 3D printer.
')
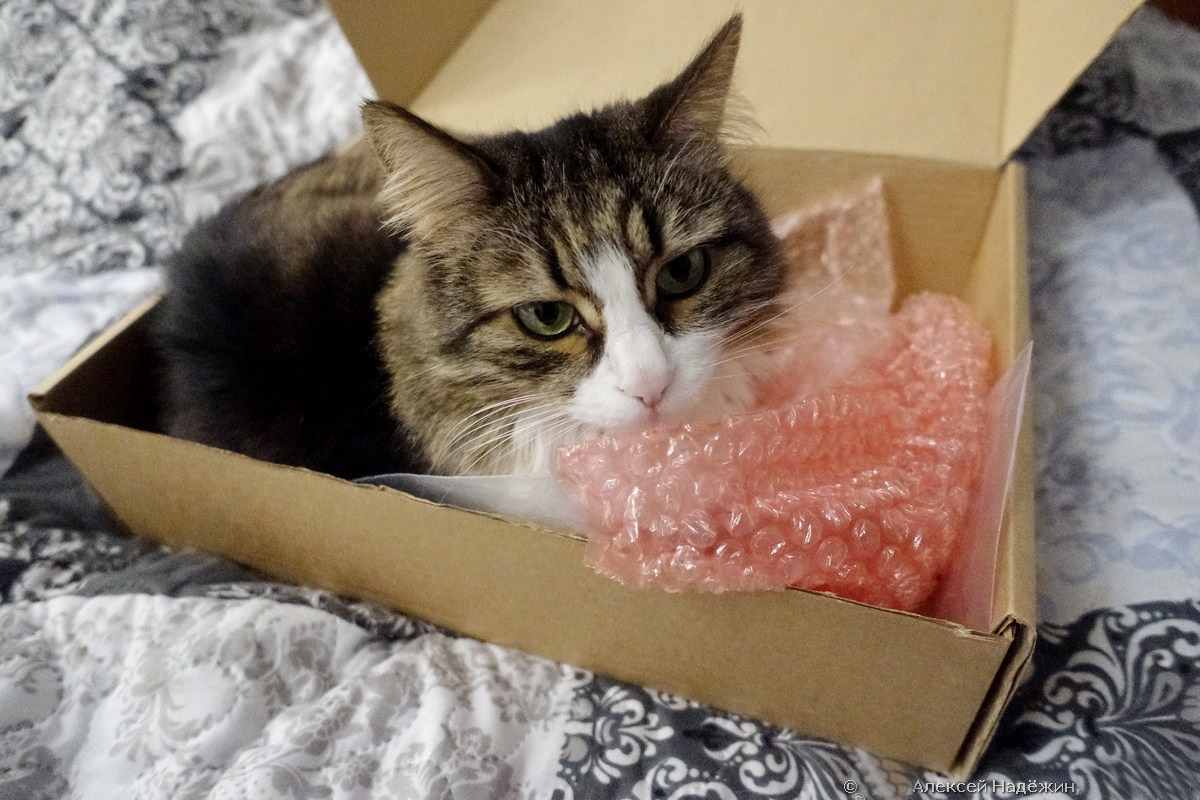
Complete feline bliss - take a box with a warm and soft "pimple". In this case, Glafira in the box from the 3D-Start.
This printer is not equivalent to any Chinese model.
It was developed in Moscow and produced there using 3D printing (yes, yes, almost “robots create robots,” more precisely, a 3D printer prints new 3D printers).

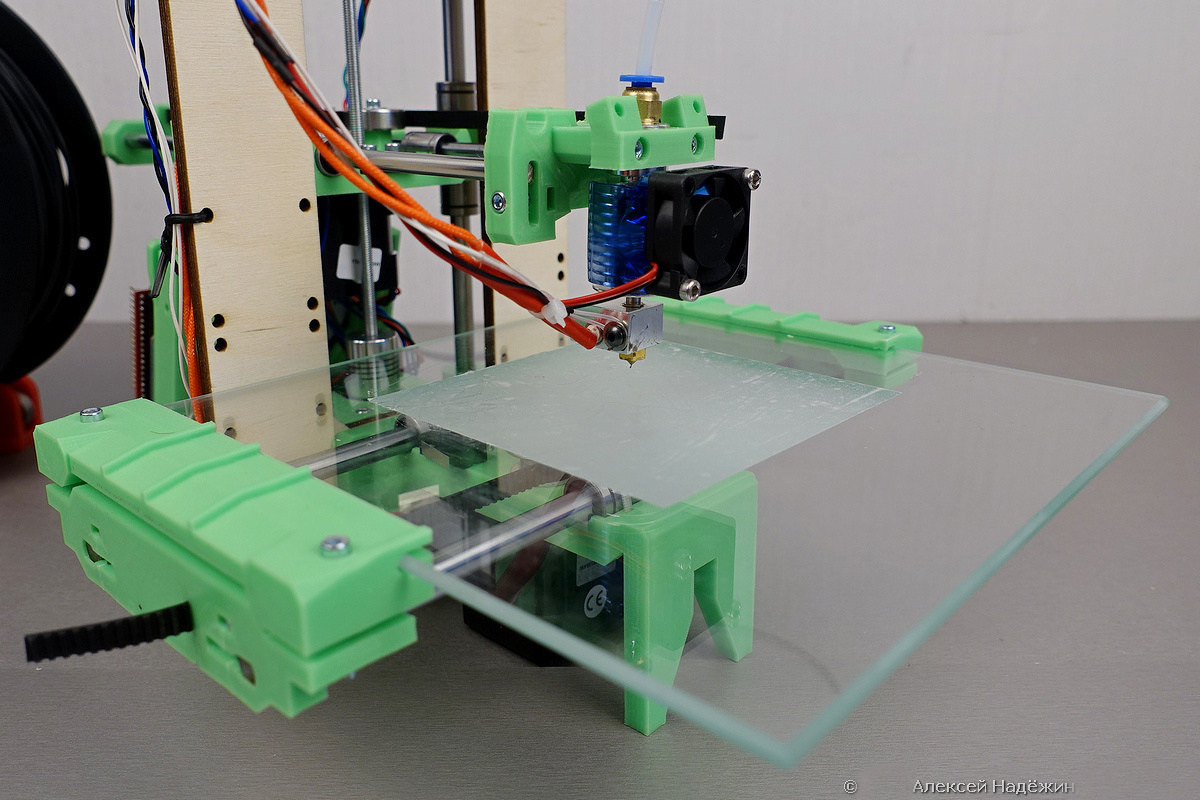
Glass is used as a table for “3D-Start” and it can work only with PLA plastic. For ABS plastic you need a heated table (which you can soon buy as an option). Yesterday I found out what the heating of the table is for. The fact is that the ABS plastic tends to decrease in size by about 5% as it cools down if the table does not heat up, the part bends. As I understand it, PLA plastic for accurate printing is even better - it is harder, stronger and allows you to more accurately observe the dimensions of the parts.
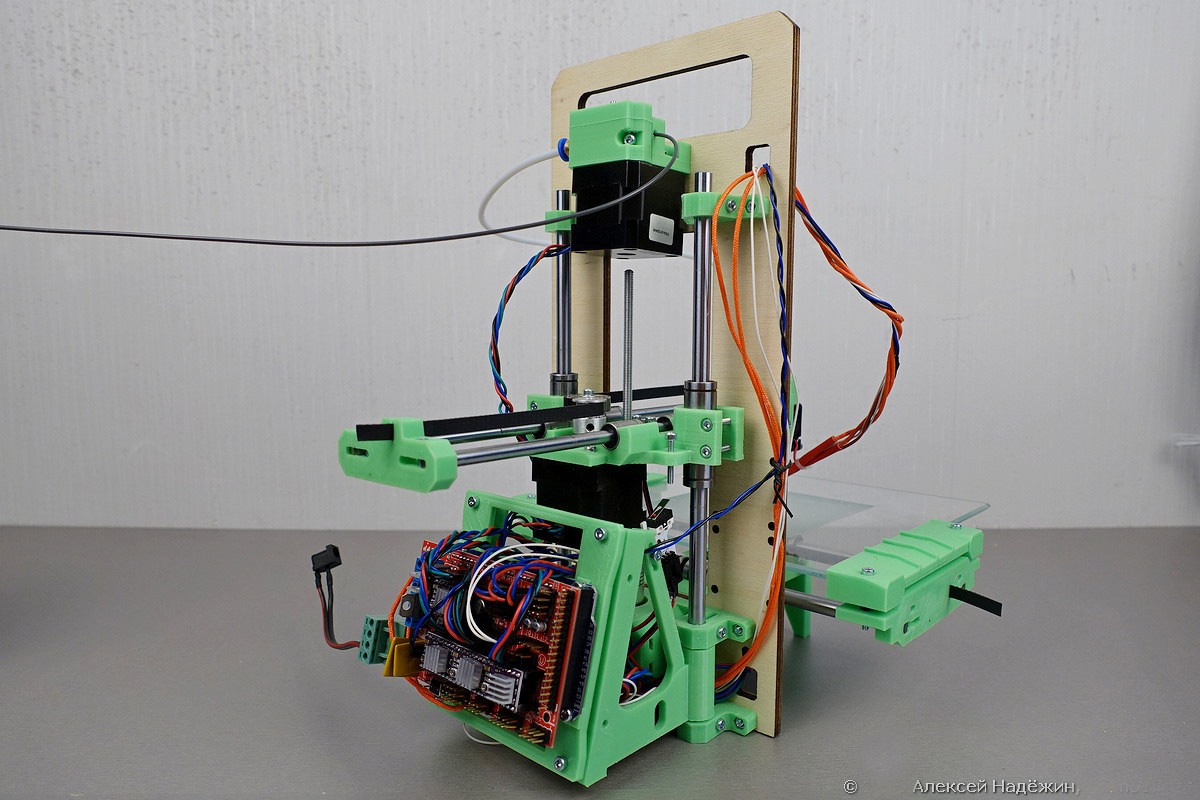
The printer is sold as a partially assembled designer.
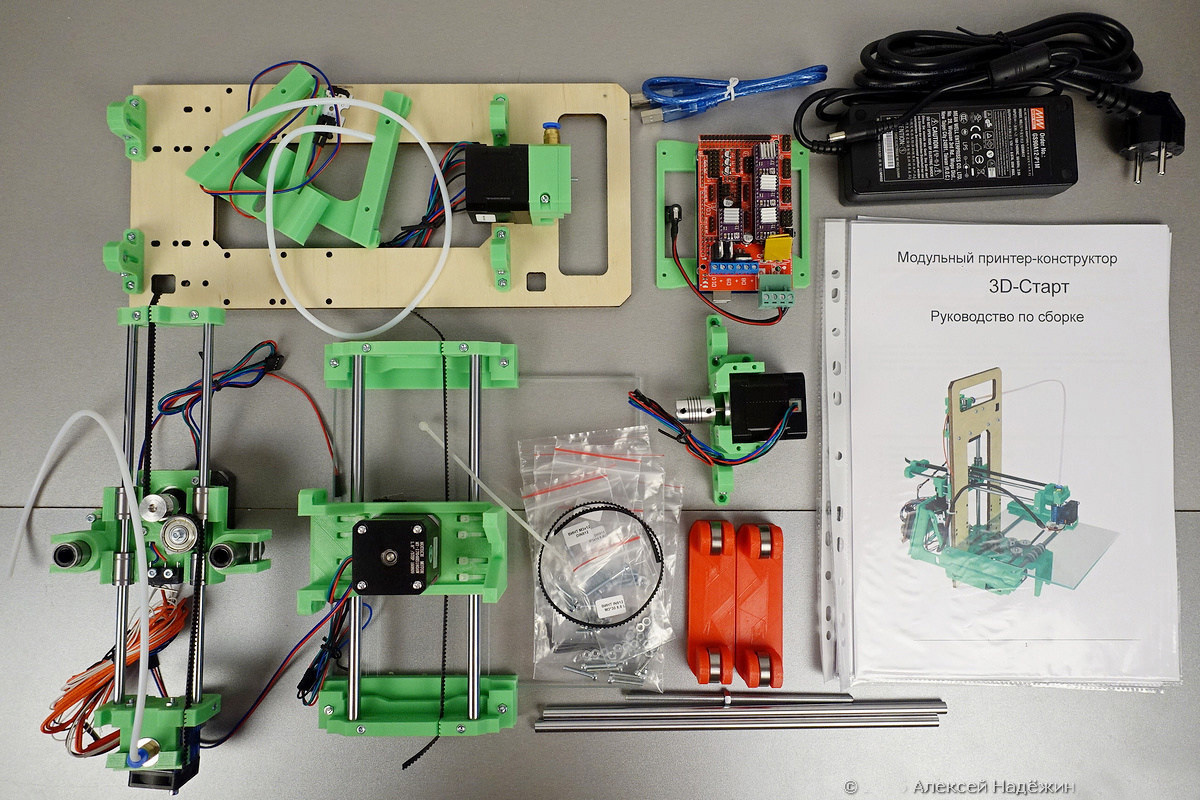
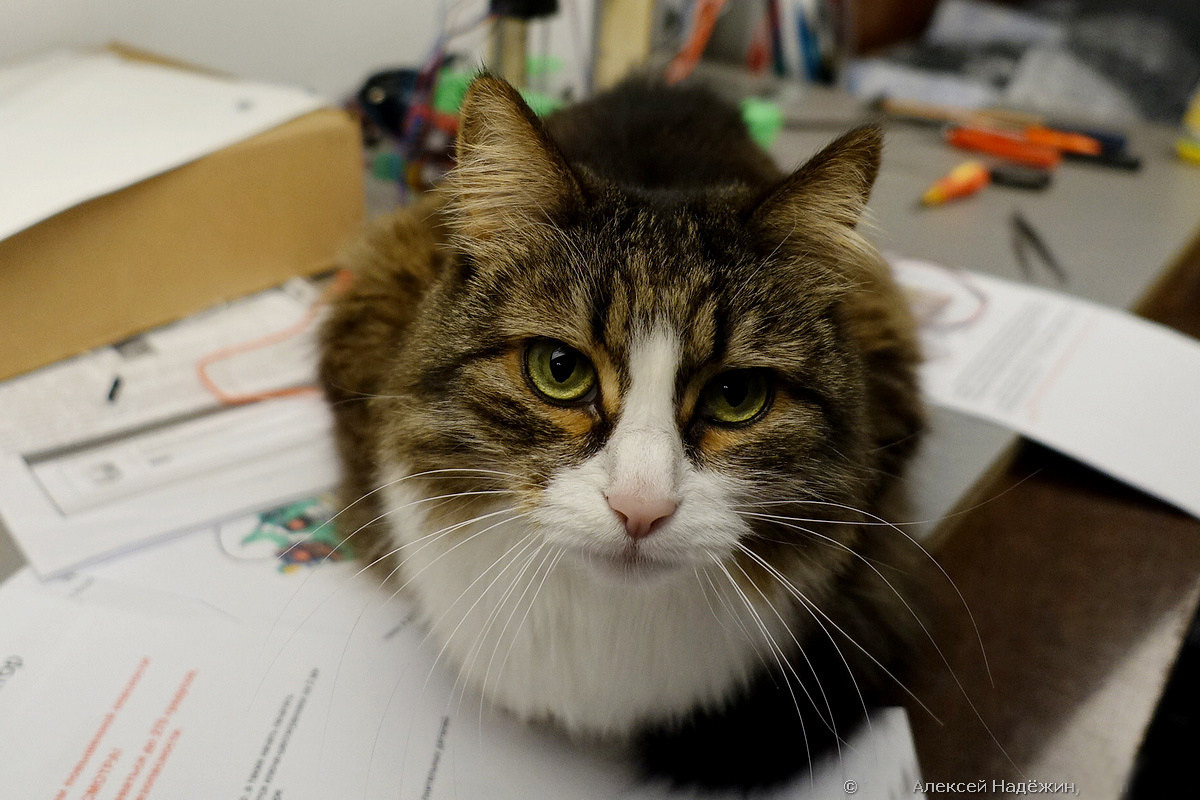
It must be assembled from five parts and properly connect the wires. The site claims that it will take half an hour. It took me 40 minutes to assemble and another 20 minutes to connect the wires. Glafira tried to help with all her might.

The printer is assembled and ready to start.
My mistake was that I collected it according to the attached instructions. It turned out that it is much easier to assemble the printer and connect the wires by watching the video instruction:
Next you need to download and install the Arduino software and the drivers and the Repetier-Host program for controlling the printer.
First of all, you need to check the zero positions on the X and Y axes, then calibrate the zero position on the vertical (Z axis) and align the table. Everything must be done carefully - if the print head rests on the glass, it may crack. Fortunately, the design of the printer is not rigid and it withstands a small error - the X-axis bar just bends slightly. The table is aligned with the help of four screws - it is necessary to ensure that in the zero position a sheet of paper hardly moves between the nozzle and the table at any point.
Next you need to fill the plastic thread and adjust the flow so that the thread moves reliably without slipping.
The biggest problem with 3D printing is applying the first, lowest layer. The plastic should lie flat on the table surface and stick to it. It sticks badly to glass. Recommend or smear the glass with glue-pencil or stick a special film on it. A4 sheet of such a film is included in the printer. The film lasts for a long time, but it still wears out, so for the time being I stuck a small square in the center of the glass so that I could stick the rest of the film on all the glass.
Before the first printing, it is necessary to load the printer profile, which can be downloaded from the Dadget site, into the slicer — a component of the printing program that forms the algorithm for the movement of the printer head.
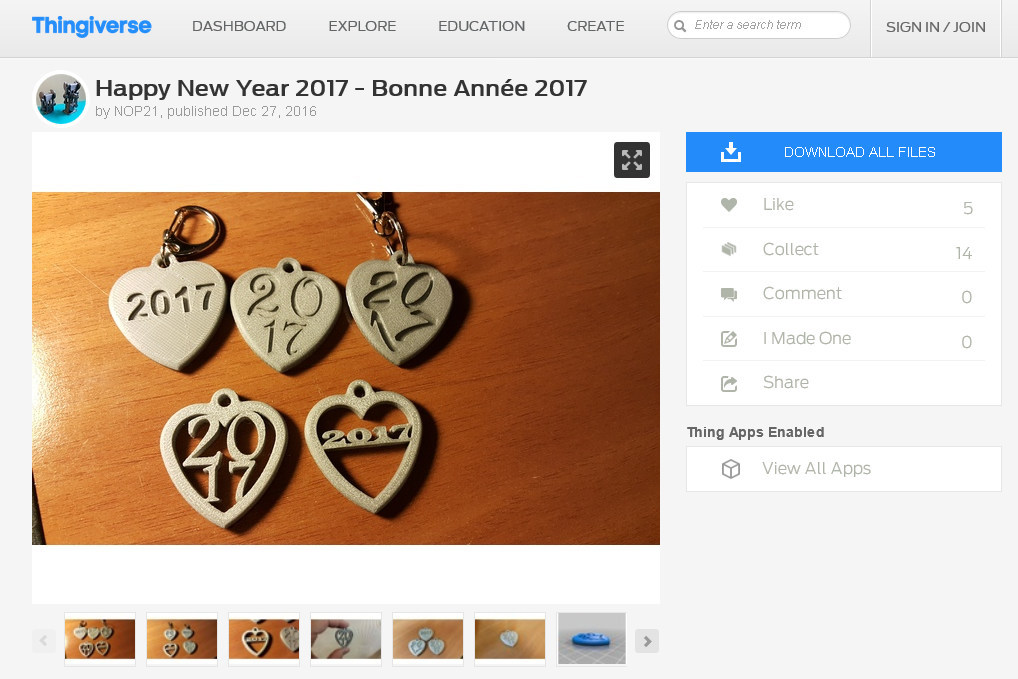
The site has almost 700 thousand user-loaded models for printing on 3D-printers. For a start, I downloaded from there models of New Year's key chains.

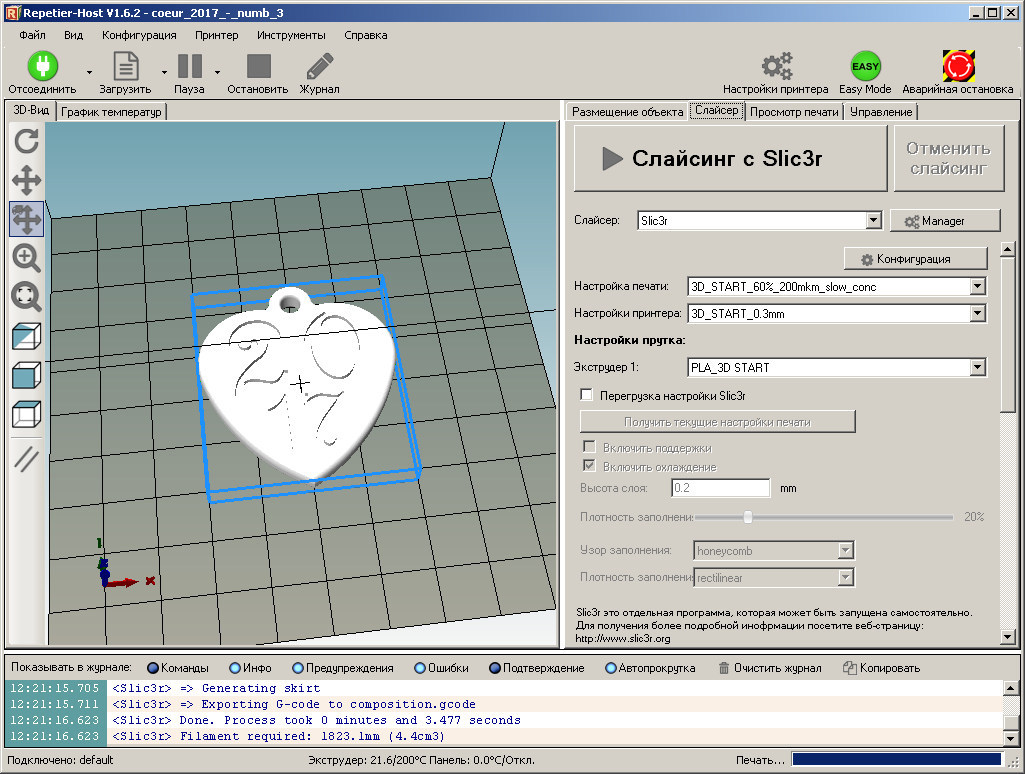
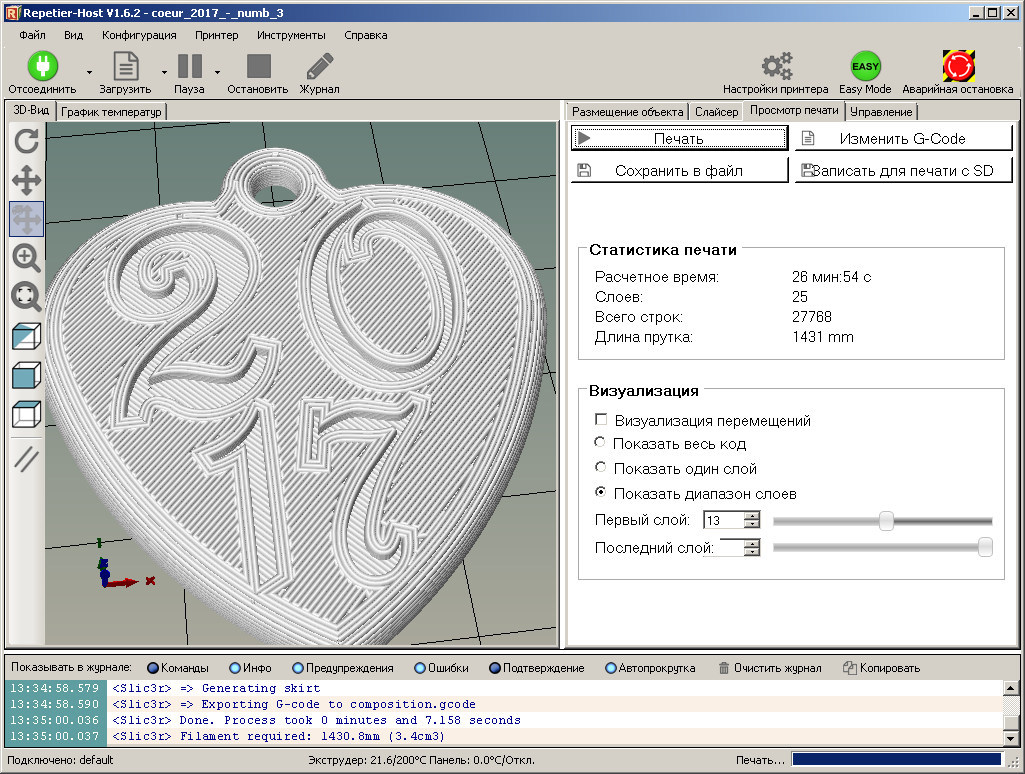
Open the model in Repetier and start slicing.
The program shows that the part will be printed for 27 minutes, it will have 25 layers and for its manufacture it will take 1.4 meters of plastic.
Run the print.
That's what happened.
Many owners of 3D printers print only ready-made models, but I need a printer in order to print parts for my homemade products. First of all, I decided to print a sealing ring for the ventilation system. Models can be created in multiple editors, but the easiest way is to use the online editor at www.tinkercad.com . In just a few minutes, I figured out how to create in it a pipe of the desired diameter with the desired wall thickness.

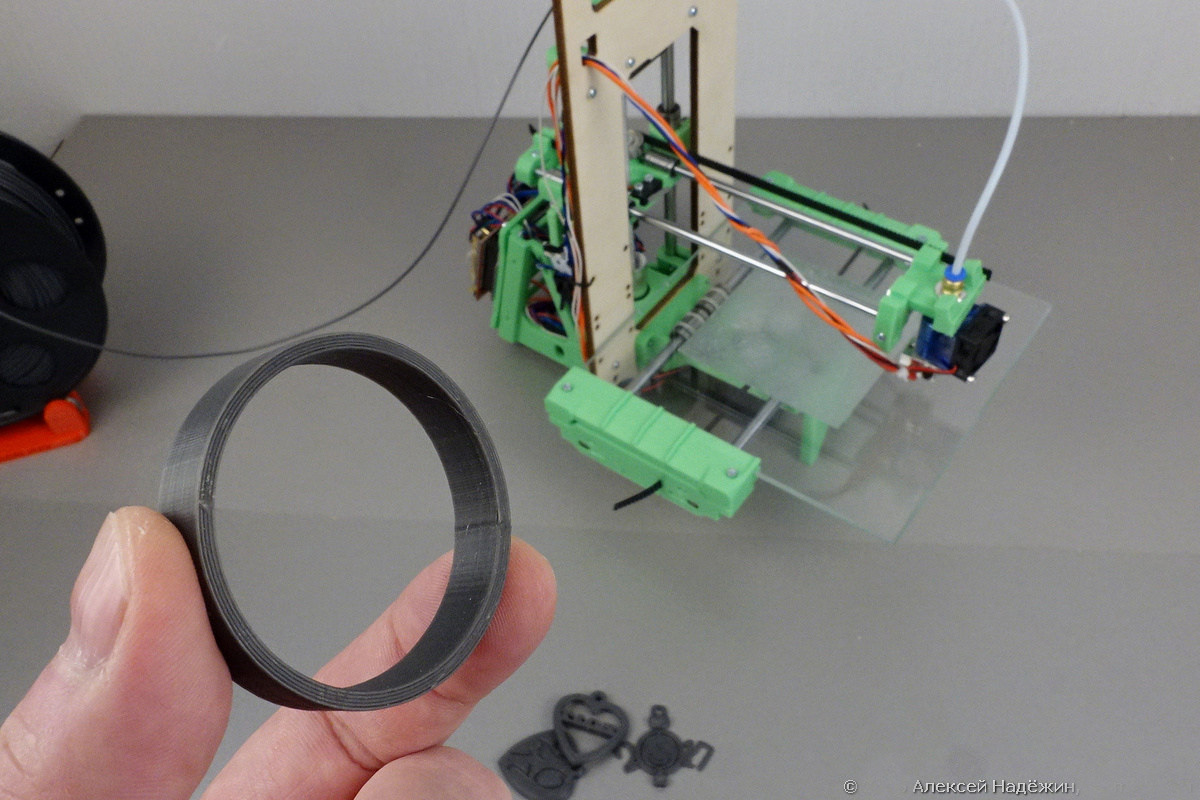
The resulting model is stored and loaded into the print program. After 26 minutes, I received the finished part.
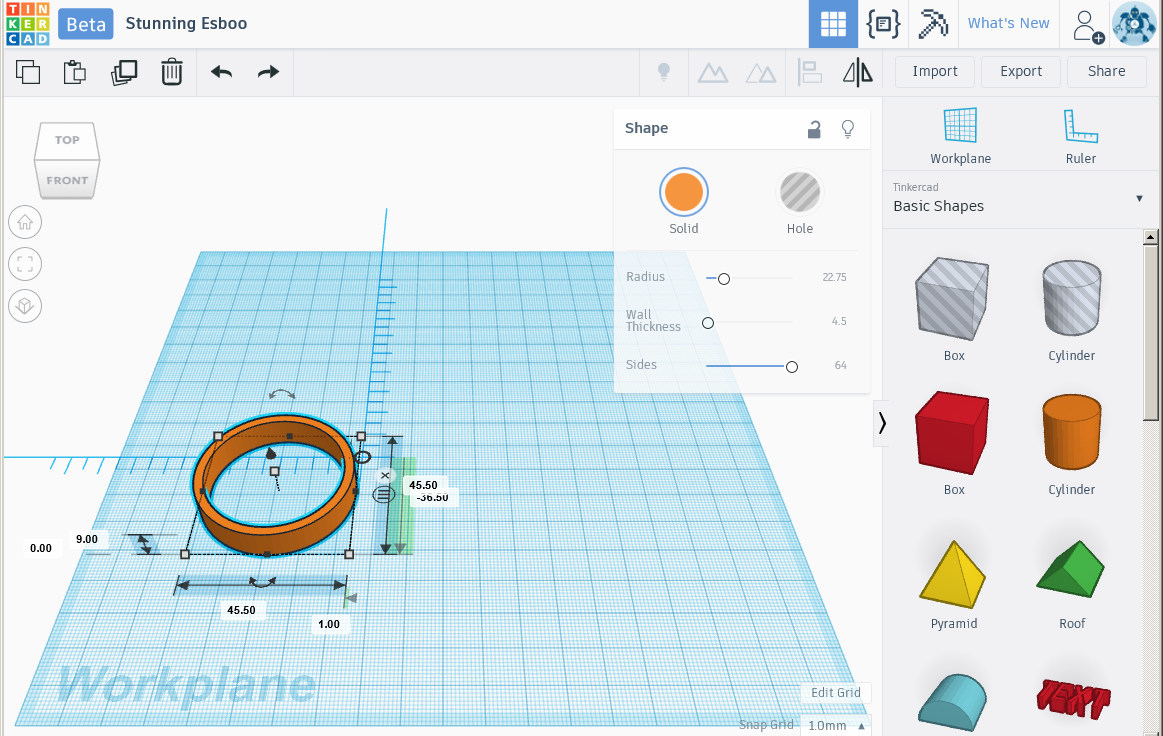
Unfortunately, its dimensions were not very accurate. I asked the diameter of 45.5 mm. It turned out 45.0-45.3 mm. The wall thickness was supposed to be 2.25 mm, it turned out 2.43-2.57 mm, because of this, the internal diameter turned out to be about 40.3 mm, and I needed 41 mm. It is necessary to introduce a correction and make the details of the desired size by the sample method.
3D-Start has a nozzle of 0.3 mm and allows you to create parts up to 165x155x80 mm. Despite the simplicity of the design and lack of rigidity, it is able to print parts that are not inferior in quality to the details printed on expensive professional 3D printers. In the near future, additional modules will be sold to the 3D start printer - a hot table for ABS plastic, a frame that increases the rigidity of the structure.
A huge advantage of this printer is the availability of technical support. Questions (and they will arise necessarily) can be addressed directly to the developers, in addition, any broken part can be ordered separately. When buying a Chinese 3D printer, the user stays one-on-one with him and no one will help with any problems, and most of the details cannot be bought if there is a breakdown.
3D-printer "3D-Start" costs 20,900 rubles. Kilogram coil PLA plastic costs 1600 rubles. It is not included in the starter kit and must be purchased separately. Plastic length is 332 m.
With the GEEKT-3D promotional code, you can get a 10% discount on a printer that can be purchased at the link .
Yesterday I discovered the wonderful world of 3D printing. Already on the first day of working with the printer, I was able to create the part I needed. I feel that with the help of this printer I will be doing a lot of useful things and will probably tell you more than once that I print on it and how I use it.
Author: Alexey Nadyozhin, Moscow
Information for bloggers and authors:
The company "Dadzhet" is interested in publishing independent objective reviews of dadzhetov in various kinds of media. The company “Djadzhet” will gladly provide dadzhetov bloggers and authors who want to test them and write a review.
The device after writing a review remains with the author. The company is not trying to tell the author what to write about our product, but asks to show the article before publication. In this case, it is possible to clarify information and prevent errors. Whether to consider company comments or not is always up to the discretion of the author. Read more ...
I have seen many different 3D printers at various trade shows and would never have thought that self-printing on a 3D printer could be so exciting. When I was offered to test it, I certainly agreed. The company Dadzhet developed, produces and sells a simple modular 3D printer called "3D-Start". Collect yourself. From ready-made and customized modules. The feeling, when quite a tangible thing is born out of nothing, is difficult to convey. And when I managed to print the first part, I was absolutely delighted. Earlier there was another review of this 3D printer.
')
Complete feline bliss - take a box with a warm and soft "pimple". In this case, Glafira in the box from the 3D-Start.
This printer is not equivalent to any Chinese model.
It was developed in Moscow and produced there using 3D printing (yes, yes, almost “robots create robots,” more precisely, a 3D printer prints new 3D printers).
Glass is used as a table for “3D-Start” and it can work only with PLA plastic. For ABS plastic you need a heated table (which you can soon buy as an option). Yesterday I found out what the heating of the table is for. The fact is that the ABS plastic tends to decrease in size by about 5% as it cools down if the table does not heat up, the part bends. As I understand it, PLA plastic for accurate printing is even better - it is harder, stronger and allows you to more accurately observe the dimensions of the parts.
The printer is sold as a partially assembled designer.
It must be assembled from five parts and properly connect the wires. The site claims that it will take half an hour. It took me 40 minutes to assemble and another 20 minutes to connect the wires. Glafira tried to help with all her might.
The printer is assembled and ready to start.
My mistake was that I collected it according to the attached instructions. It turned out that it is much easier to assemble the printer and connect the wires by watching the video instruction:
Next you need to download and install the Arduino software and the drivers and the Repetier-Host program for controlling the printer.
First of all, you need to check the zero positions on the X and Y axes, then calibrate the zero position on the vertical (Z axis) and align the table. Everything must be done carefully - if the print head rests on the glass, it may crack. Fortunately, the design of the printer is not rigid and it withstands a small error - the X-axis bar just bends slightly. The table is aligned with the help of four screws - it is necessary to ensure that in the zero position a sheet of paper hardly moves between the nozzle and the table at any point.
Next you need to fill the plastic thread and adjust the flow so that the thread moves reliably without slipping.
The biggest problem with 3D printing is applying the first, lowest layer. The plastic should lie flat on the table surface and stick to it. It sticks badly to glass. Recommend or smear the glass with glue-pencil or stick a special film on it. A4 sheet of such a film is included in the printer. The film lasts for a long time, but it still wears out, so for the time being I stuck a small square in the center of the glass so that I could stick the rest of the film on all the glass.
Before the first printing, it is necessary to load the printer profile, which can be downloaded from the Dadget site, into the slicer — a component of the printing program that forms the algorithm for the movement of the printer head.
The site has almost 700 thousand user-loaded models for printing on 3D-printers. For a start, I downloaded from there models of New Year's key chains.
Open the model in Repetier and start slicing.
The program shows that the part will be printed for 27 minutes, it will have 25 layers and for its manufacture it will take 1.4 meters of plastic.
Run the print.
That's what happened.
Many owners of 3D printers print only ready-made models, but I need a printer in order to print parts for my homemade products. First of all, I decided to print a sealing ring for the ventilation system. Models can be created in multiple editors, but the easiest way is to use the online editor at www.tinkercad.com . In just a few minutes, I figured out how to create in it a pipe of the desired diameter with the desired wall thickness.
The resulting model is stored and loaded into the print program. After 26 minutes, I received the finished part.
Unfortunately, its dimensions were not very accurate. I asked the diameter of 45.5 mm. It turned out 45.0-45.3 mm. The wall thickness was supposed to be 2.25 mm, it turned out 2.43-2.57 mm, because of this, the internal diameter turned out to be about 40.3 mm, and I needed 41 mm. It is necessary to introduce a correction and make the details of the desired size by the sample method.
3D-Start has a nozzle of 0.3 mm and allows you to create parts up to 165x155x80 mm. Despite the simplicity of the design and lack of rigidity, it is able to print parts that are not inferior in quality to the details printed on expensive professional 3D printers. In the near future, additional modules will be sold to the 3D start printer - a hot table for ABS plastic, a frame that increases the rigidity of the structure.
A huge advantage of this printer is the availability of technical support. Questions (and they will arise necessarily) can be addressed directly to the developers, in addition, any broken part can be ordered separately. When buying a Chinese 3D printer, the user stays one-on-one with him and no one will help with any problems, and most of the details cannot be bought if there is a breakdown.
3D-printer "3D-Start" costs 20,900 rubles. Kilogram coil PLA plastic costs 1600 rubles. It is not included in the starter kit and must be purchased separately. Plastic length is 332 m.
With the GEEKT-3D promotional code, you can get a 10% discount on a printer that can be purchased at the link .
Yesterday I discovered the wonderful world of 3D printing. Already on the first day of working with the printer, I was able to create the part I needed. I feel that with the help of this printer I will be doing a lot of useful things and will probably tell you more than once that I print on it and how I use it.
Author: Alexey Nadyozhin, Moscow
Information for bloggers and authors:
The company "Dadzhet" is interested in publishing independent objective reviews of dadzhetov in various kinds of media. The company “Djadzhet” will gladly provide dadzhetov bloggers and authors who want to test them and write a review.
The device after writing a review remains with the author. The company is not trying to tell the author what to write about our product, but asks to show the article before publication. In this case, it is possible to clarify information and prevent errors. Whether to consider company comments or not is always up to the discretion of the author. Read more ...
Source: https://habr.com/ru/post/400519/
All Articles