Installing FreeRTOS for Stm32vlDiscovery
Good day.
Understanding the Stm32 microcontroller programming, I decided to try installing (real-time operating system) RTOS - FreeRTOS and encountered a number of difficulties. There are many articles on the Internet, but I haven’t found any clear instructions, so I’m asking anyone interested in what’s interesting.
So first we decide what is necessary to have:
If you have already developed something for the Keil STM32F1x family, you can skip this paragraph. First you need to install development packages for the STM32F1x family, this is done as follows:
This completes the preparation of the development environment.
We proceed directly to creating a project using FreeRTOS.
The first thing that needs to be done is to download the latest distribution of the RTOS from the official site www.freertos.org , at the time of this writing, the latest version was FreeRTOSv9.0.0. So, we got an impressive archive, unpack it in any place (I’ll say that we don’t need 99% of it, so don’t be intimidated by the resulting folder, I have more than 200 MB).
Now we need to create a new project in Keil.

')
I called it FreeRTOSDemo, you can choose any suitable name, the main thing is that there are no spaces and Russian letters in the way of project placement.
Now we need to choose our chip, I tested it on the debug board of STM32VLDiscovery with the chip of STM32F100RB and chose it accordingly.


After selecting the chip, you must select the libraries that we will use. We need a library of CMSIS and StdPeriph. The figures below show the minimum selection of components to test the operation of the RTOS and blink diodes (this applies to the StdPeriph library, CMSIS is required).


So we created a project, it looks like this:

Further, for convenience in the project, we create several groups so that later the confusion from the files does not turn out.

Everything is ready to copy the RTOS files into the project. Create a folder FreeRTOS in the project folder.
From the FreeRTOSv9.0.0 \ FreeRTOS \ Source \ folder, copy all * .c files into the created FreeRTOS folder. There we copy the include folder.
From the FreeRTOSv9.0.0 \ FreeRTOS \ Source \ portable \ RVDS \ ARM_CM3 \ folder, copy the * . and * .h files to their respective locations in the FreeRTOS folder of our project.
From the folder FreeRTOSv9.0.0 \ FreeRTOS \ Source \ portable \ MemMang \ copy the file heap_2.c.
From the FreeRTOSv9.0.0 \ FreeRTOS \ Demo \ CORTEX_STM32F103_Keil \ folder, copy the FreeRTOSConfig.h file.
After all the manipulations, you should get the following:


Next, we need to add files to the appropriate groups in the project, as well as create the main.cc file with the main program text.
The result should be the following project structure.

In order for the project to be compiled in its settings, you must specify all the paths to the * .h files, as well as prescribe the USE_STDPERIPH_DRIVER directive.

Now it remains to change a few lines in the FreeRTOSConfig.h file, for correct operation:
And add the following lines after the #define FREERTOS_CONFIG_H
After that, in the main.c file, we write the simplest program for flashing LEDs.
Now you can assemble the project and upload the firmware to the microcontroller, after the reboot observe the flashing LEDs.
Understanding the Stm32 microcontroller programming, I decided to try installing (real-time operating system) RTOS - FreeRTOS and encountered a number of difficulties. There are many articles on the Internet, but I haven’t found any clear instructions, so I’m asking anyone interested in what’s interesting.
So first we decide what is necessary to have:
- Stm32VLDiscovery debug board
- Installed IDE Keil ARM 5 and above
- The desire to razrazratsya new
If you have already developed something for the Keil STM32F1x family, you can skip this paragraph. First you need to install development packages for the STM32F1x family, this is done as follows:
- Launch Keil.
- Click on the Pack Installer button in the panel
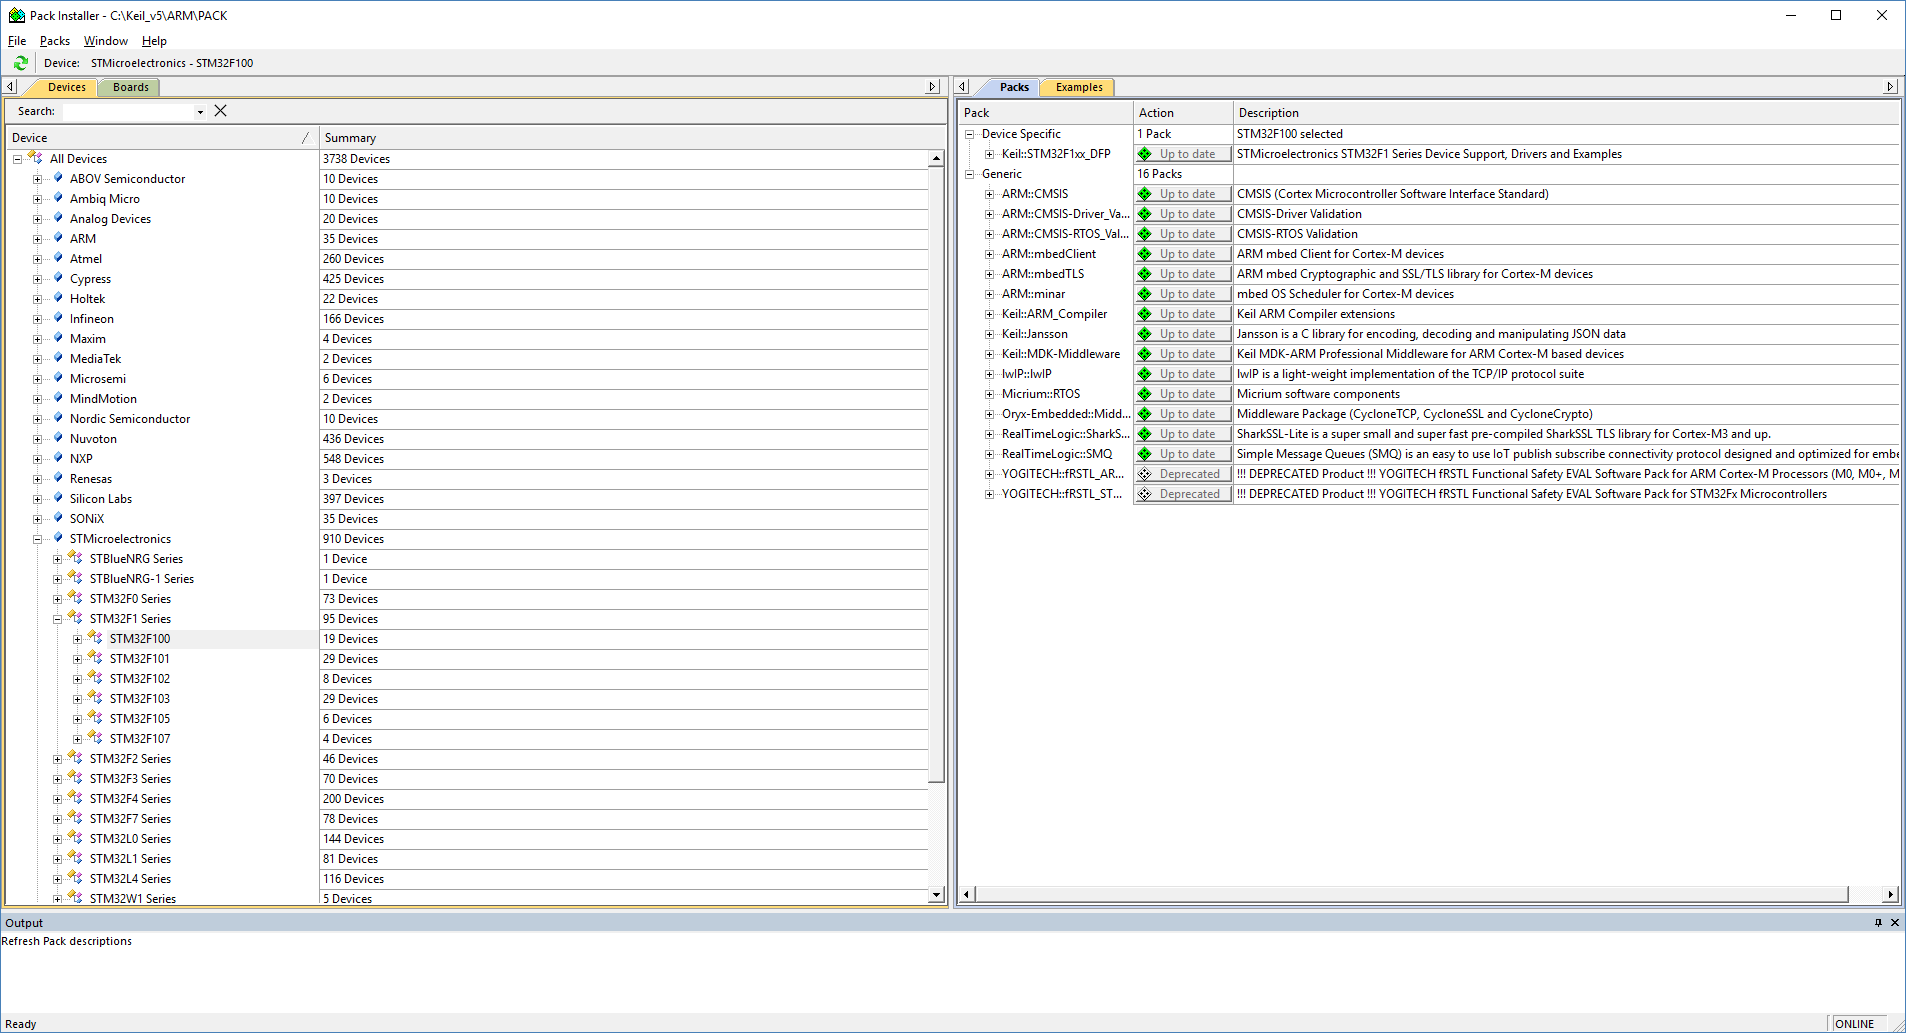
- In the window that opens, click the Check For Updates button (waiting for the update of the package list)
- Select the STMicroelectronics-> STM32F1 Series-> STM32F100 in the tree and install all the packages.
This completes the preparation of the development environment.
We proceed directly to creating a project using FreeRTOS.
The first thing that needs to be done is to download the latest distribution of the RTOS from the official site www.freertos.org , at the time of this writing, the latest version was FreeRTOSv9.0.0. So, we got an impressive archive, unpack it in any place (I’ll say that we don’t need 99% of it, so don’t be intimidated by the resulting folder, I have more than 200 MB).
Now we need to create a new project in Keil.
')
I called it FreeRTOSDemo, you can choose any suitable name, the main thing is that there are no spaces and Russian letters in the way of project placement.
Now we need to choose our chip, I tested it on the debug board of STM32VLDiscovery with the chip of STM32F100RB and chose it accordingly.
After selecting the chip, you must select the libraries that we will use. We need a library of CMSIS and StdPeriph. The figures below show the minimum selection of components to test the operation of the RTOS and blink diodes (this applies to the StdPeriph library, CMSIS is required).
So we created a project, it looks like this:
Further, for convenience in the project, we create several groups so that later the confusion from the files does not turn out.
Everything is ready to copy the RTOS files into the project. Create a folder FreeRTOS in the project folder.
From the FreeRTOSv9.0.0 \ FreeRTOS \ Source \ folder, copy all * .c files into the created FreeRTOS folder. There we copy the include folder.
From the FreeRTOSv9.0.0 \ FreeRTOS \ Source \ portable \ RVDS \ ARM_CM3 \ folder, copy the * . and * .h files to their respective locations in the FreeRTOS folder of our project.
From the folder FreeRTOSv9.0.0 \ FreeRTOS \ Source \ portable \ MemMang \ copy the file heap_2.c.
From the FreeRTOSv9.0.0 \ FreeRTOS \ Demo \ CORTEX_STM32F103_Keil \ folder, copy the FreeRTOSConfig.h file.
After all the manipulations, you should get the following:
Next, we need to add files to the appropriate groups in the project, as well as create the main.cc file with the main program text.
The result should be the following project structure.
In order for the project to be compiled in its settings, you must specify all the paths to the * .h files, as well as prescribe the USE_STDPERIPH_DRIVER directive.
Now it remains to change a few lines in the FreeRTOSConfig.h file, for correct operation:
#define configCPU_CLOCK_HZ ( ( unsigned long ) 72000000 ) /**/ #define configCPU_CLOCK_HZ ( ( unsigned long ) 24000000 ) #define configTOTAL_HEAP_SIZE ( ( size_t ) ( 17 * 1024 ) ) /**/ #define configTOTAL_HEAP_SIZE ( ( size_t ) ( 5 * 1024 ) ) And add the following lines after the #define FREERTOS_CONFIG_H
#define xPortSysTickHandler SysTick_Handler #define xPortPendSVHandler PendSV_Handler #define vPortSVCHandler SVC_Handler After that, in the main.c file, we write the simplest program for flashing LEDs.
#include "FreeRTOS.h" #include "task.h" #include "queue.h" #include "stm32f10x.h" #include "stm32f10x_gpio.h" #include "stm32f10x_rcc.h" GPIO_InitTypeDef port; uint8_t state; void vFreeRTOSInitAll() { RCC_APB2PeriphClockCmd(RCC_APB2Periph_GPIOC, ENABLE); GPIO_StructInit(&port); port.GPIO_Mode = GPIO_Mode_Out_PP; port.GPIO_Pin = GPIO_Pin_9|GPIO_Pin_8; port.GPIO_Speed = GPIO_Speed_50MHz; GPIO_Init(GPIOC, &port); } void vLedTask (void *pvParameters) { while(1) { if (state == 0) { GPIO_SetBits(GPIOC,GPIO_Pin_9); GPIO_ResetBits(GPIOC,GPIO_Pin_8); state = 1; vTaskDelay(500); } else { GPIO_ResetBits(GPIOC,GPIO_Pin_9); GPIO_SetBits(GPIOC,GPIO_Pin_8); state = 0; vTaskDelay(500); } } vTaskDelete(NULL); } int main(void) { vFreeRTOSInitAll(); xTaskCreate(vLedTask,(signed char*)"LedTask", configMINIMAL_STACK_SIZE, NULL, tskIDLE_PRIORITY + 1, NULL); vTaskStartScheduler(); } Now you can assemble the project and upload the firmware to the microcontroller, after the reboot observe the flashing LEDs.
Source: https://habr.com/ru/post/399907/
All Articles