Photo Studio for plasticine shooting
Hello! In the life of almost every game developer, there comes a moment when he fights off the pack, digs a hole for himself, and begins to do alone the “best game in the world, not that these things”. 2 years ago it happened to me. Not having the skills of an artist, I decided to aim a blow at the stop-motion animation and make all the graphics out of clay.

Plasticine in games is not a new idea. After The Neverhood and the slightly less popular Skull Monkeys, there have been many attempts to use plasticine textures. These were arcades, quests, logic games, platformers and even strategies. Although none of the visual followers of Neverhud became really popular, the gaming community always warmly accepted games made “by hand” (I think it is clear what I mean by the word “manually”).
In my game an isometric map is used and a number of problems and limitations follow from this:
')
1. All objects must be photographed from the same angle above the horizon.
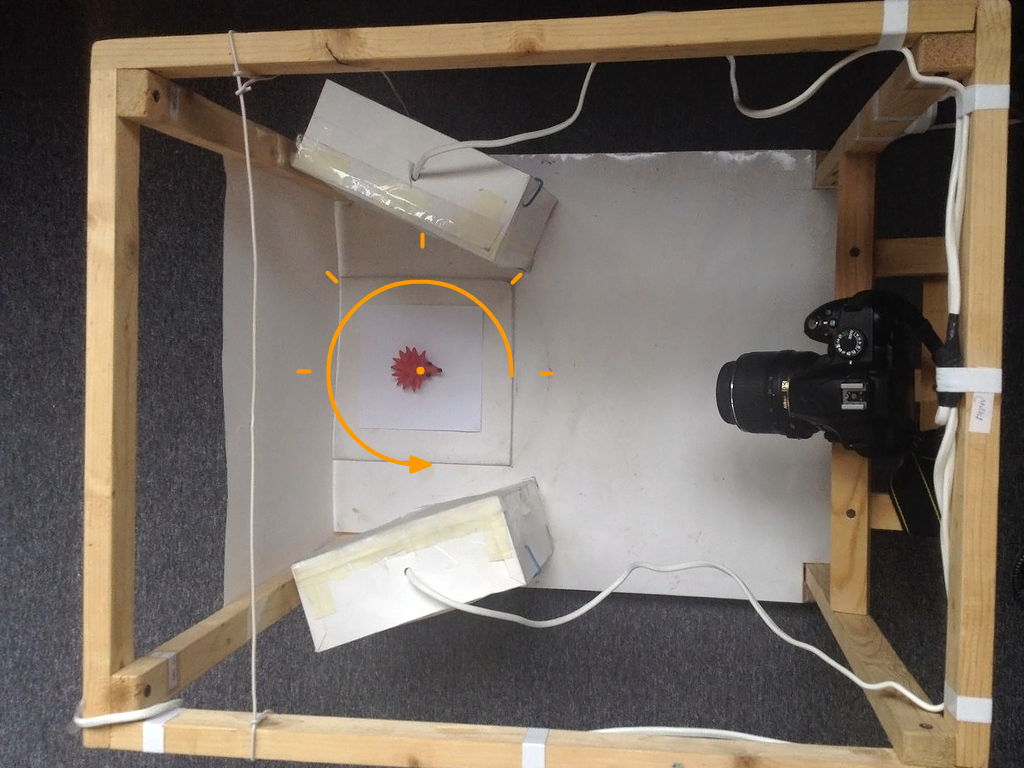
For this (and for the implementation of the points below) I had this construction:

Of course, the photos are obtained with a perspective, but it is not needed for an isometry. But, firstly, on small objects it is almost negligible, and secondly, the perspective can be removed by squeezing the photo on the trapezoid:

2. Objects that can move around the map should be removed from at least 5 different sides (3 of them can be mirrored and in total there will be 8 directions of movement)
For this purpose, a rotating serif platform is provided in the construction above (I call it “photocube”):
3. Light should fall equally in all 8 directions of movement.
This is quite problematic, given that 3 projections are obtained by mirror image of the opposite - you can not use the light source from the left-top or right-top. The option with a source exactly on top gives a not very good result visually (the relief is not well transmitted), the same with the option top-front. Absolutely uniform illumination is, firstly, difficult to achieve, and secondly, it is also visually quite boring.
Strange, but according to the result, an acceptable solution turned out to be lighting with two sources that are symmetrical with respect to the center (the actual position of the lamps can be seen in the photo of the “photo tube” above). The relief is well transmitted and there are no problems with horizontal reflection:

Fortunately, in a game that does not pretend to realism, the origin of the two sources of light does not cause much confusion.
4. If the object is animated frame by frame, then, accordingly, each frame must be shot from the same 5 sides.
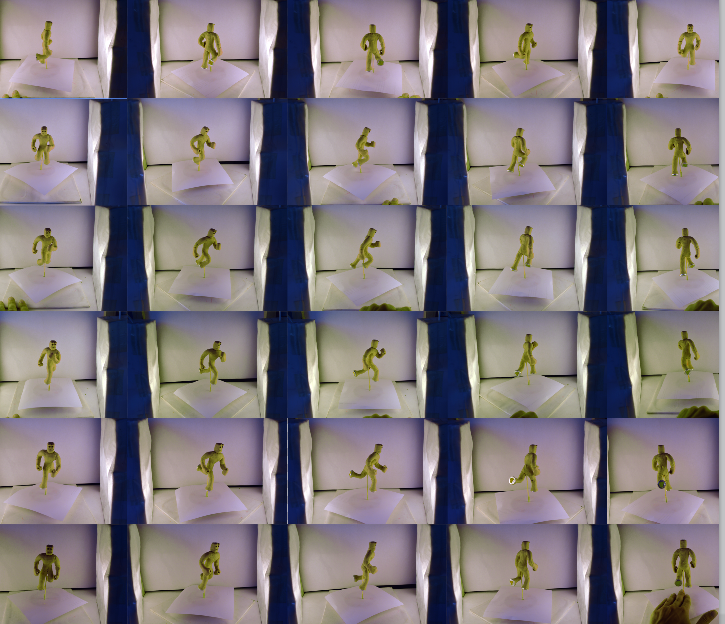
Here again, a rotating platform helps - each subsequent state of the plasticine figure is clearly removed from 5 fixed sides:

These 40 photos are just an animation of the hedgehog removing the needles:

The whole process, although it looks complicated and long, actually turned out to be no more difficult than hand-drawing the sprites. Of course, the elapsed time cannot be compared with the animations of 3D models (and by the result, what can we say, the quality and smoothness of the level of 3D programs cannot be achieved), but if we talk about styling, then clay did not let us down.
Statistics of 20 months of development says that I spent about 7% of the time on modeling. Another 13% - photo processing and various manipulations to introduce them into the game.

Yes, you can see from the photos above that I did not use chroma key. Numerous attempts to automatically select objects from photos did not suit me for the quality of the result. Plus, manual processing still could not be avoided: on each object it is necessary to straighten the chromaticity / brightness / etc., correct the flaws, sketch the sticks sticking out of people — so that they do not fall
In total, the game, which takes place in about 10 hours, took about 8,000 photos:

And this is despite the fact that in some situations you could use one photo with the help of you-know-what program several times:

To imitate some materials, photographs had to be seriously processed:
But, basically, only color correction was needed:

Some facts, awareness of which came in the process of work:
1. If you leave the plasticine model for "filming," the next day it will be completely different. Even if you keep it in the fridge. Therefore, it is necessary to shoot in one go.
2. Time-lapse footage shot - hell hell. To bring the model after a series of manipulations to its original state is extremely difficult. It is necessary to have on paper a sketch of each state, but this does not guarantee a result.
3. Adding two or three shades of color to a solid is done quickly, but significantly improves the appearance:

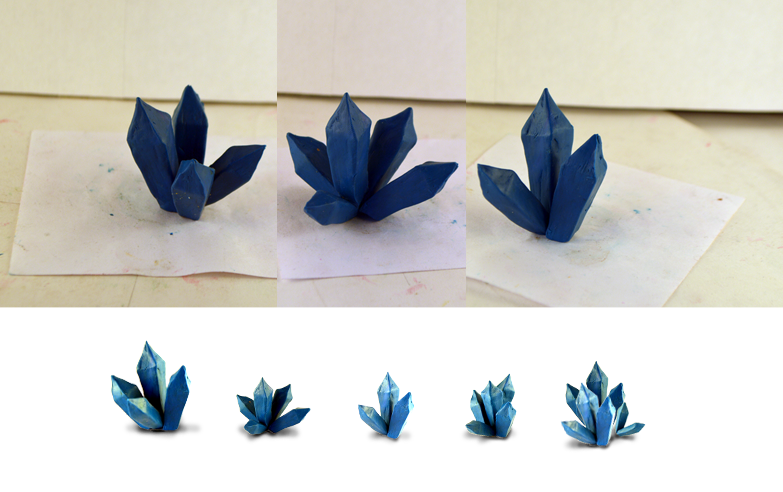
4. "Cheap" way to diversify the environment - to photograph the same object from different sides:

5. Details. Instead of a thousand words:

Thanks for attention!
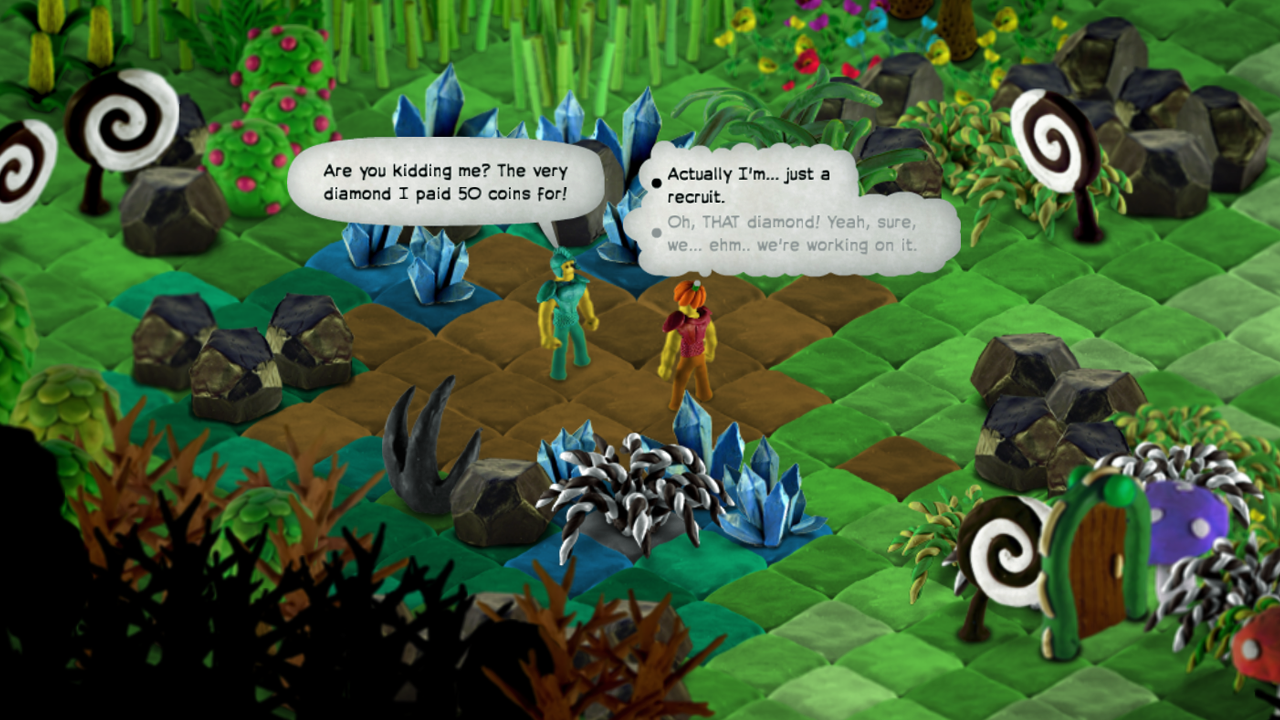
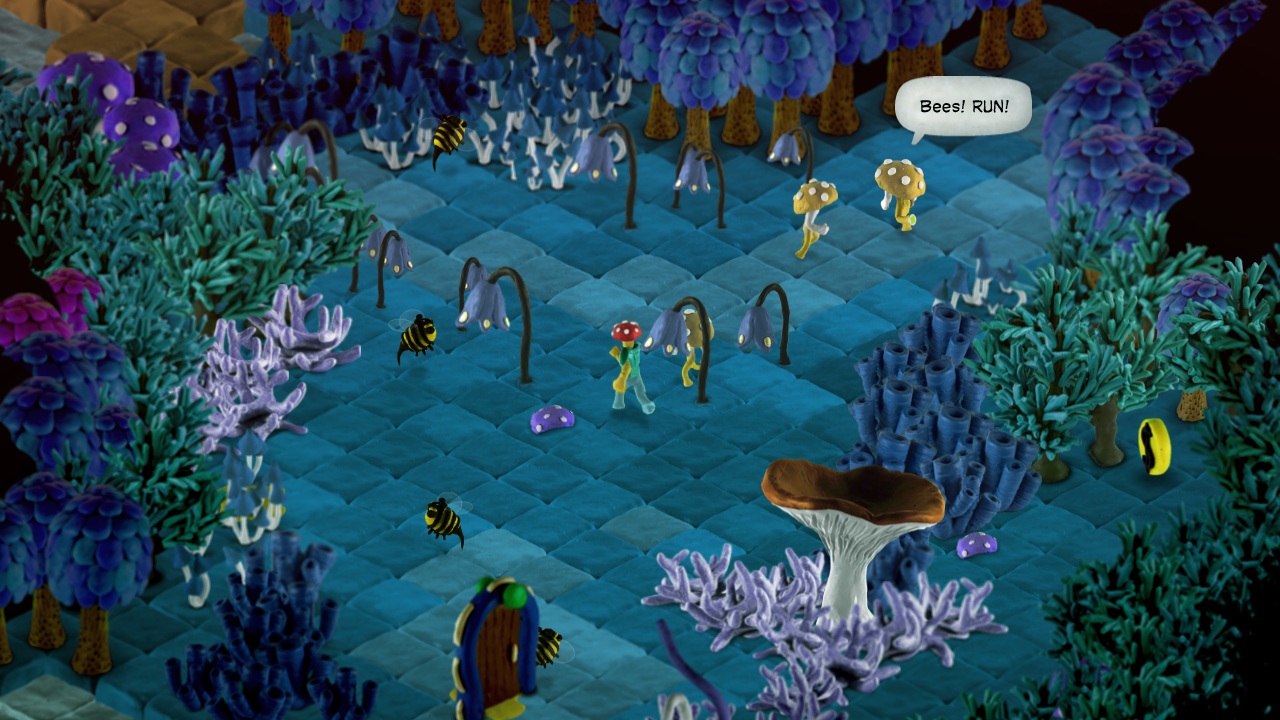
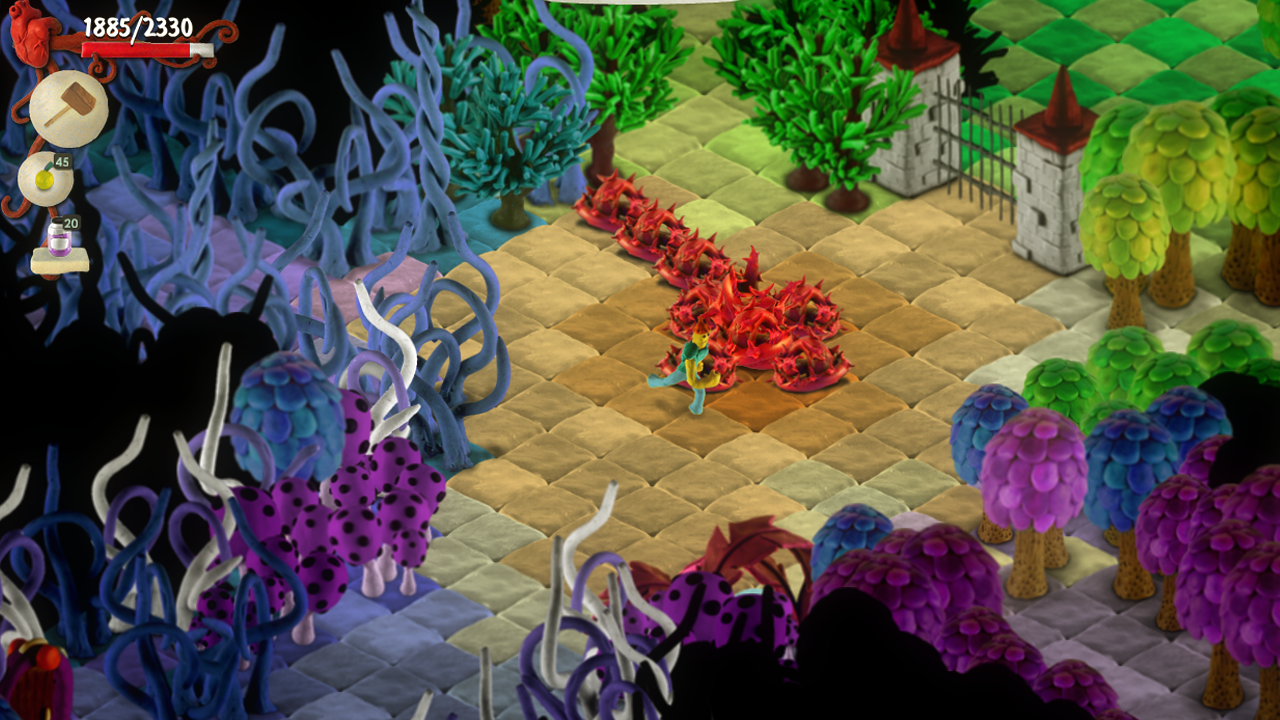
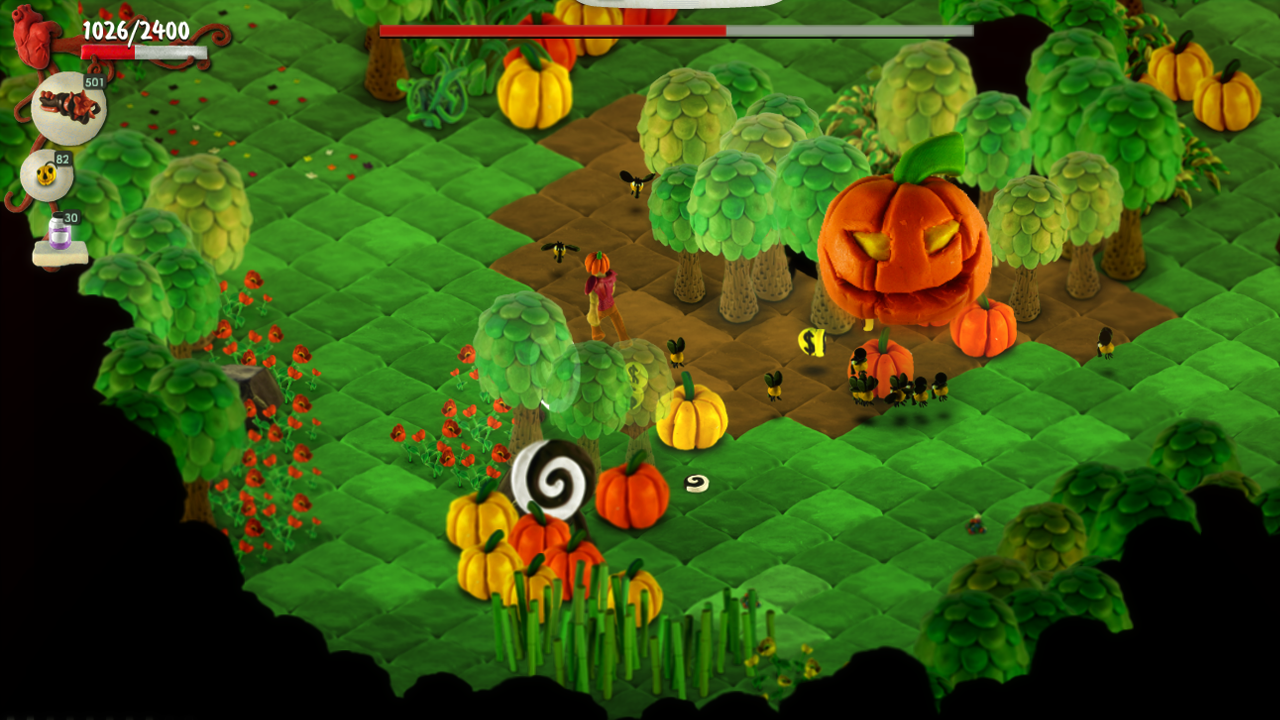
Who cares about the result - a few screenshots of the resulting clay world:
Plasticine in games is not a new idea. After The Neverhood and the slightly less popular Skull Monkeys, there have been many attempts to use plasticine textures. These were arcades, quests, logic games, platformers and even strategies. Although none of the visual followers of Neverhud became really popular, the gaming community always warmly accepted games made “by hand” (I think it is clear what I mean by the word “manually”).
In my game an isometric map is used and a number of problems and limitations follow from this:
')
1. All objects must be photographed from the same angle above the horizon.
For this (and for the implementation of the points below) I had this construction:
Of course, the photos are obtained with a perspective, but it is not needed for an isometry. But, firstly, on small objects it is almost negligible, and secondly, the perspective can be removed by squeezing the photo on the trapezoid:
2. Objects that can move around the map should be removed from at least 5 different sides (3 of them can be mirrored and in total there will be 8 directions of movement)
For this purpose, a rotating serif platform is provided in the construction above (I call it “photocube”):
3. Light should fall equally in all 8 directions of movement.
This is quite problematic, given that 3 projections are obtained by mirror image of the opposite - you can not use the light source from the left-top or right-top. The option with a source exactly on top gives a not very good result visually (the relief is not well transmitted), the same with the option top-front. Absolutely uniform illumination is, firstly, difficult to achieve, and secondly, it is also visually quite boring.
Strange, but according to the result, an acceptable solution turned out to be lighting with two sources that are symmetrical with respect to the center (the actual position of the lamps can be seen in the photo of the “photo tube” above). The relief is well transmitted and there are no problems with horizontal reflection:
Fortunately, in a game that does not pretend to realism, the origin of the two sources of light does not cause much confusion.
4. If the object is animated frame by frame, then, accordingly, each frame must be shot from the same 5 sides.
Here again, a rotating platform helps - each subsequent state of the plasticine figure is clearly removed from 5 fixed sides:
These 40 photos are just an animation of the hedgehog removing the needles:
The whole process, although it looks complicated and long, actually turned out to be no more difficult than hand-drawing the sprites. Of course, the elapsed time cannot be compared with the animations of 3D models (and by the result, what can we say, the quality and smoothness of the level of 3D programs cannot be achieved), but if we talk about styling, then clay did not let us down.
Statistics of 20 months of development says that I spent about 7% of the time on modeling. Another 13% - photo processing and various manipulations to introduce them into the game.
Yes, you can see from the photos above that I did not use chroma key. Numerous attempts to automatically select objects from photos did not suit me for the quality of the result. Plus, manual processing still could not be avoided: on each object it is necessary to straighten the chromaticity / brightness / etc., correct the flaws, sketch the sticks sticking out of people — so that they do not fall
In total, the game, which takes place in about 10 hours, took about 8,000 photos:
And this is despite the fact that in some situations you could use one photo with the help of you-know-what program several times:
To imitate some materials, photographs had to be seriously processed:
But, basically, only color correction was needed:
Some facts, awareness of which came in the process of work:
1. If you leave the plasticine model for "filming," the next day it will be completely different. Even if you keep it in the fridge. Therefore, it is necessary to shoot in one go.
2. Time-lapse footage shot - hell hell. To bring the model after a series of manipulations to its original state is extremely difficult. It is necessary to have on paper a sketch of each state, but this does not guarantee a result.
3. Adding two or three shades of color to a solid is done quickly, but significantly improves the appearance:
4. "Cheap" way to diversify the environment - to photograph the same object from different sides:
5. Details. Instead of a thousand words:
Thanks for attention!
Who cares about the result - a few screenshots of the resulting clay world:
Screenshots


Source: https://habr.com/ru/post/399563/
All Articles