How to connect a semiconductor laser with a power of more than 1 W (1000 mW) to a 3D printer, CNC machine, coordinate table
I often encountered queries on how to connect a more powerful laser to a 3D printer, CNC or coordinate table, if the board itself either does not have a separate laser power supply, or the current supplied through the control board is very limited, for example, 0.5A.
Mainly on the DIY engravers and MakeBlock boards, 9-12 volts and not more than 0.5-1 Ampere are served.
Diode lasers with a power of 1 W typically require 1 to 3 Amps and 12 Volts, while lasers with a power above 5 W require more than 3 Amps.
For example, on coordinate tables (plotters such as MakeBlock XY plotter 2.0 KIT), it is necessary to organize additional food, exactly like on the small Neje engraver. Therefore, in order to deliver a more powerful laser, a separate power supply and driver are needed.
Description of the proposed scheme
')
Let's call it “Endurance circuit MO 1”:
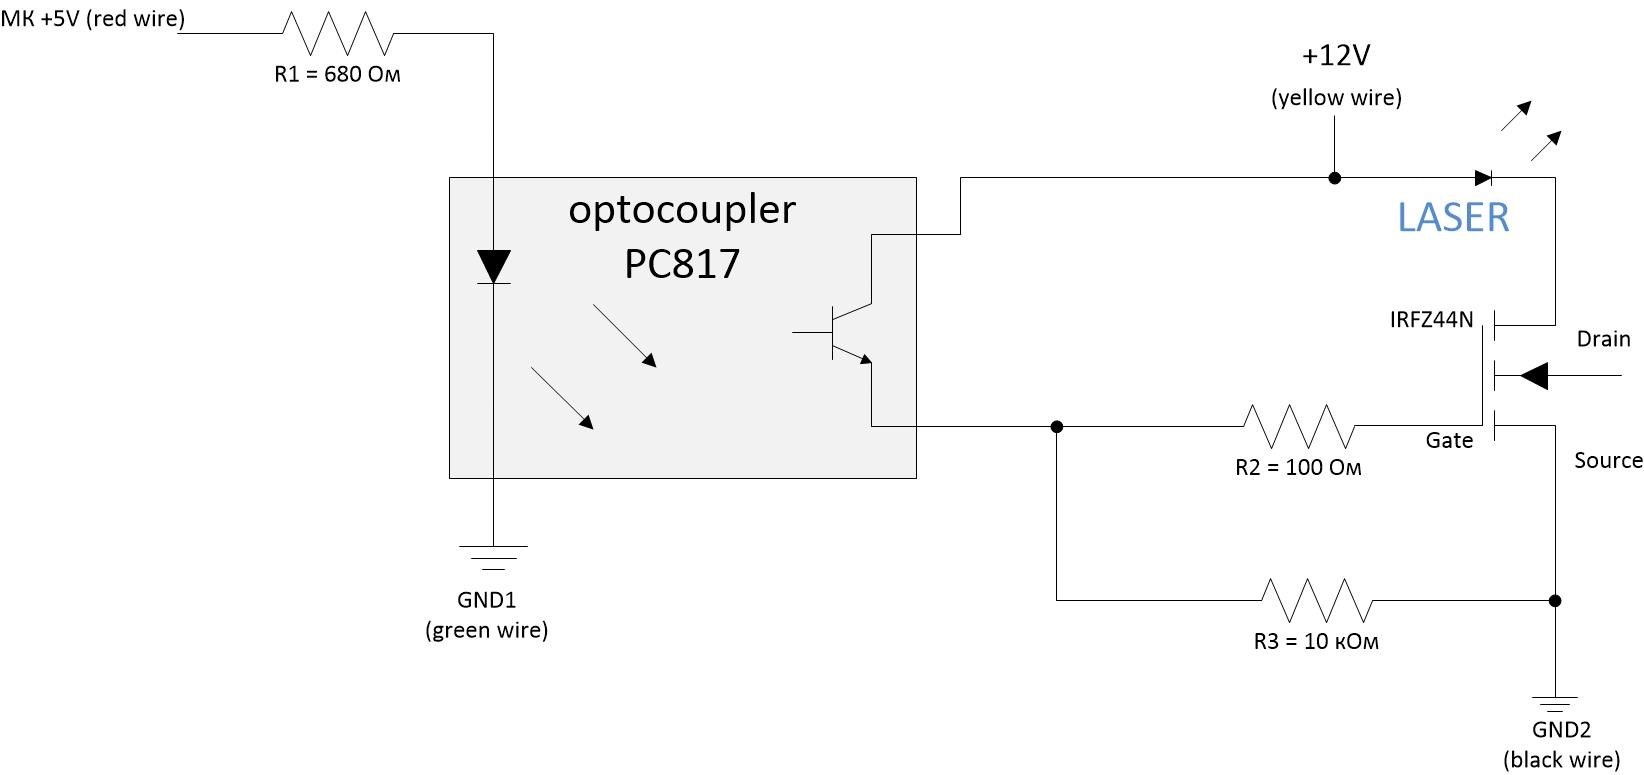
Connect the laser control to the pins MK (Microcontroller) and GND1. Supply no more than 24V. Connect the “+” contact of your laser to the “+ 12V” contact, the “-” contact of the laser to the “Drain” contact of the field-effect transistor.
It is not necessary to place the pins GND1 and GND2 on the same line. Contacts "+ 12V" and "GND2" can be taken from the lead-acid battery.
To accommodate the elements, it is enough to have a development board of size 20x20 mm
This scheme allows to power more powerful 12 V lasers and a current of 5 amperes or more (according to the characteristics of the used mosfets). Use a DIY power supply or an optional power supply to power the laser.
An example of connecting this circuit:
At the top right of the photograph of the NEJE engraver's electronic board, the Laser contacts “+” and “-” are controllers, that is, connect them to the Endurance circuit MO 1 contacts, respectively, to “MK” and “GND1”.
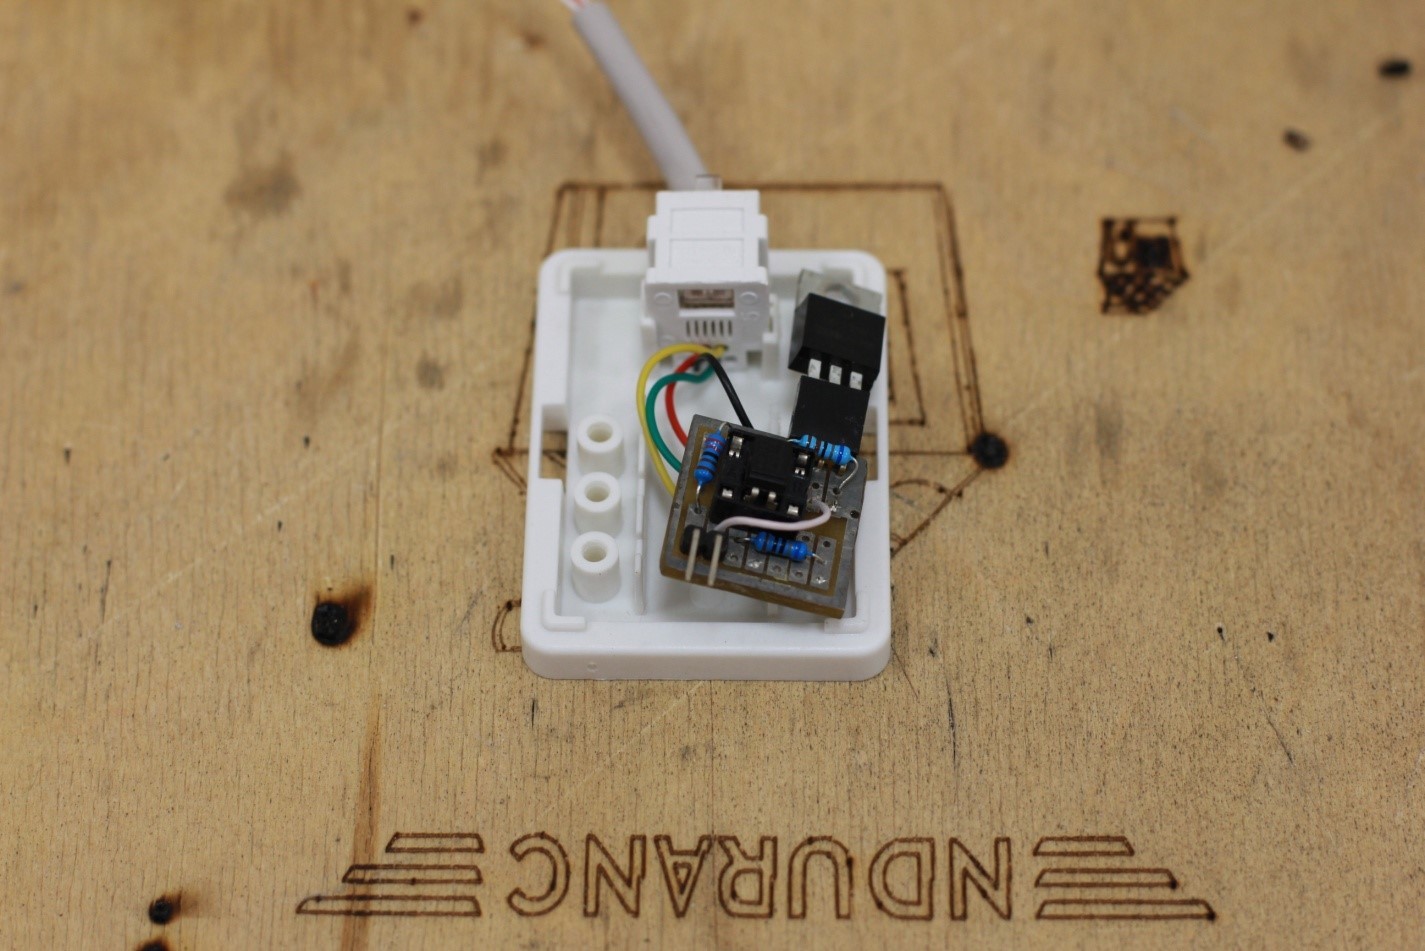
Use the telephone distribution box (plastic) to place the Endurance circuit MO 1 board. When choosing the type of wires, keep in mind that a current of 1-5 A will flow through them depending on the laser power. For example, a 5.6 W laser consumes up to 3.5A.
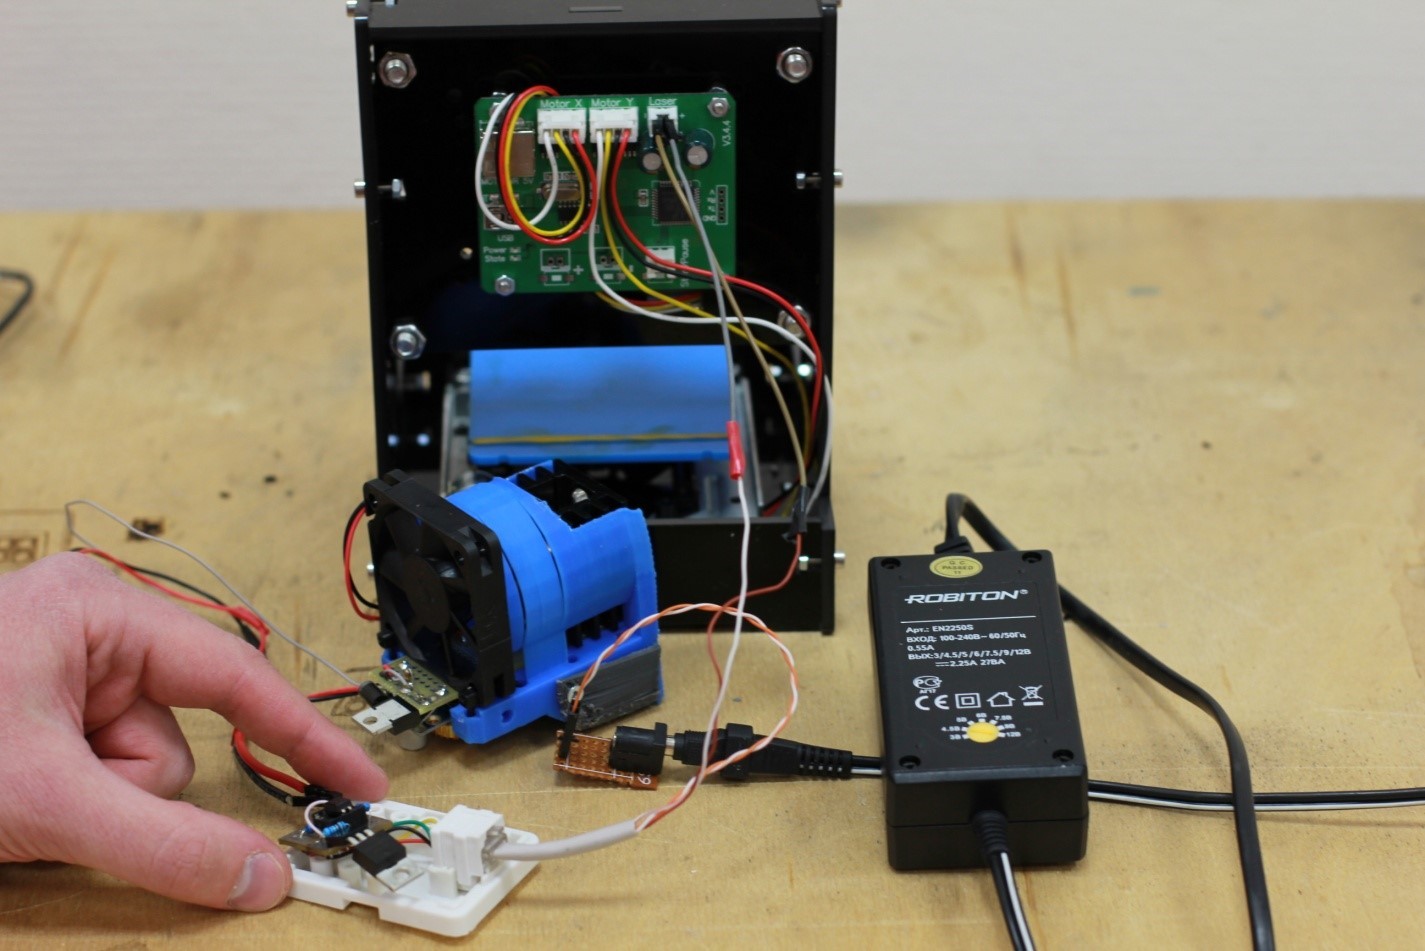
An example of connecting the Endurance circuit MO 1 to the Neje mini engraver:
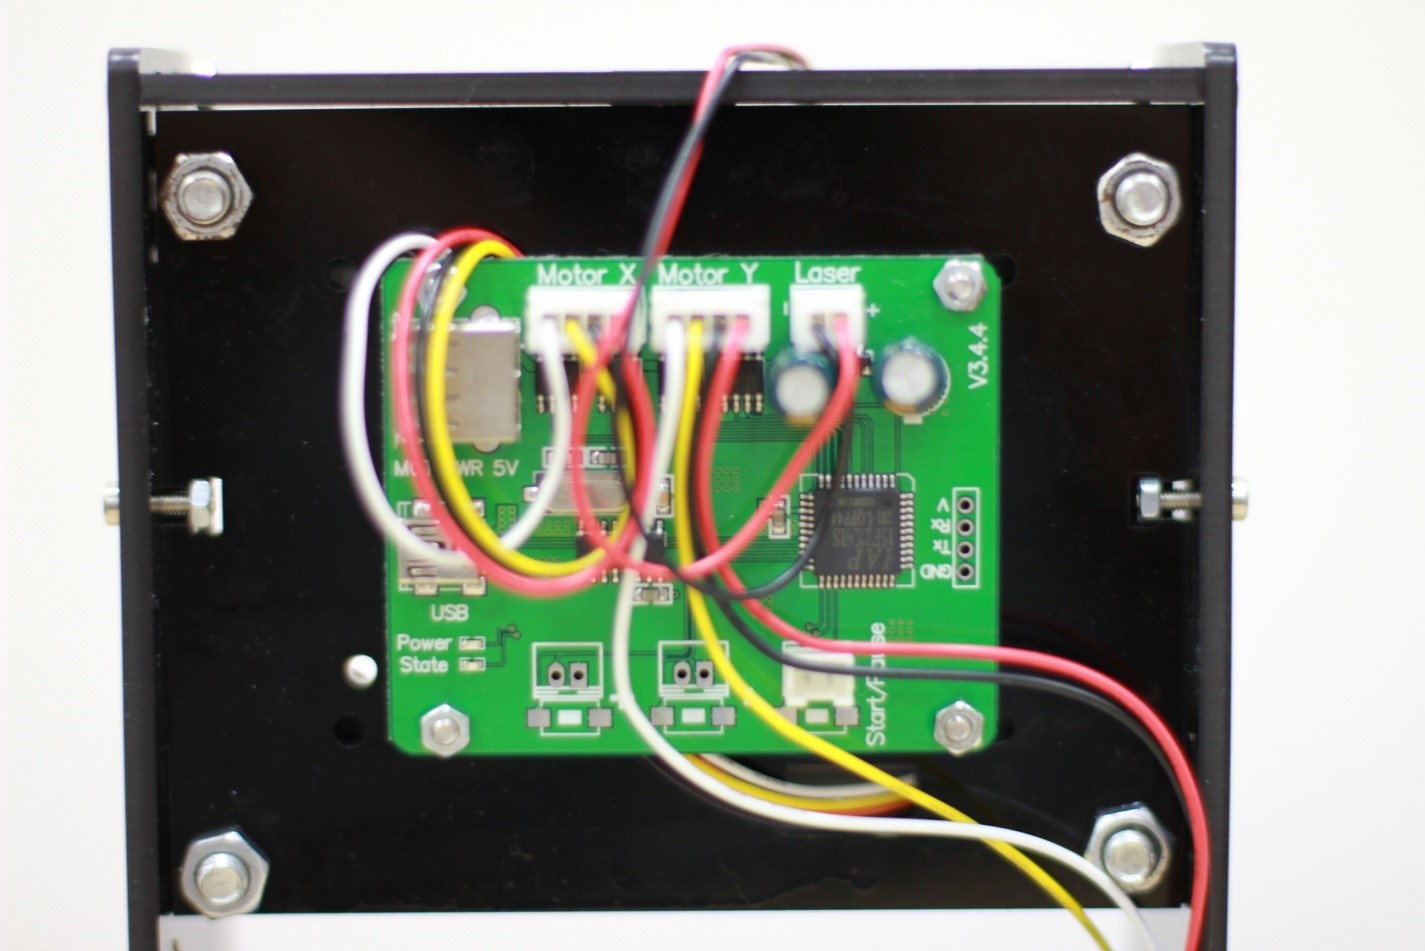
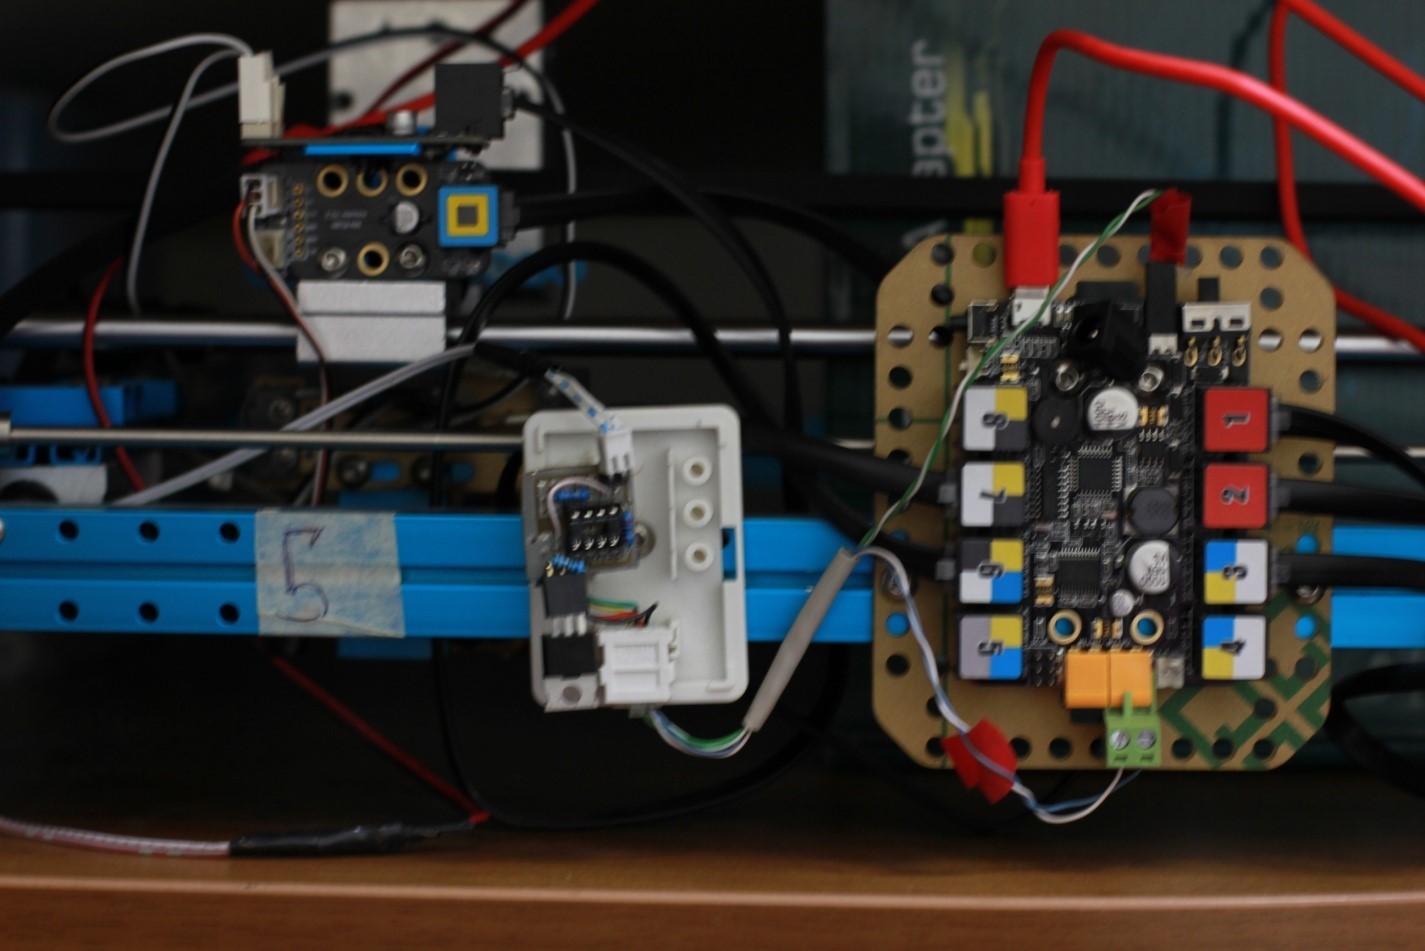
An example of how the Endurance scheme looks on MakeBlock plotter XY 2.0:
If you wish, each of you can solder the circuit yourself according to the concept in the beginning of the article. I am glad to provide useful technologies to the community of fans of laser and laser engraving!
Mainly on the DIY engravers and MakeBlock boards, 9-12 volts and not more than 0.5-1 Ampere are served.
Diode lasers with a power of 1 W typically require 1 to 3 Amps and 12 Volts, while lasers with a power above 5 W require more than 3 Amps.
For example, on coordinate tables (plotters such as MakeBlock XY plotter 2.0 KIT), it is necessary to organize additional food, exactly like on the small Neje engraver. Therefore, in order to deliver a more powerful laser, a separate power supply and driver are needed.
Description of the proposed scheme
')
Let's call it “Endurance circuit MO 1”:
Connect the laser control to the pins MK (Microcontroller) and GND1. Supply no more than 24V. Connect the “+” contact of your laser to the “+ 12V” contact, the “-” contact of the laser to the “Drain” contact of the field-effect transistor.
It is not necessary to place the pins GND1 and GND2 on the same line. Contacts "+ 12V" and "GND2" can be taken from the lead-acid battery.
To accommodate the elements, it is enough to have a development board of size 20x20 mm
This scheme allows to power more powerful 12 V lasers and a current of 5 amperes or more (according to the characteristics of the used mosfets). Use a DIY power supply or an optional power supply to power the laser.
An example of connecting this circuit:
At the top right of the photograph of the NEJE engraver's electronic board, the Laser contacts “+” and “-” are controllers, that is, connect them to the Endurance circuit MO 1 contacts, respectively, to “MK” and “GND1”.
Use the telephone distribution box (plastic) to place the Endurance circuit MO 1 board. When choosing the type of wires, keep in mind that a current of 1-5 A will flow through them depending on the laser power. For example, a 5.6 W laser consumes up to 3.5A.
An example of connecting the Endurance circuit MO 1 to the Neje mini engraver:
An example of how the Endurance scheme looks on MakeBlock plotter XY 2.0:
If you wish, each of you can solder the circuit yourself according to the concept in the beginning of the article. I am glad to provide useful technologies to the community of fans of laser and laser engraving!
Life hacking
However, if you want to get a ready-made Endurance circuit MO 1 fee, write to gf@EnduranceRobots.com and they will send it to you.
Source: https://habr.com/ru/post/399265/
All Articles