See the invisible, connect the non-connected or squeeze all the juice from Seek Thermal

Life will never be the same again. Seeing familiar and seemingly everyday things, one and the same thought loomed in his head: “I wonder how this looks in the thermal range?”.
Initially, I planned to make a sample review of the device, but something went wrong ...
One day, a quiet weekday, the thermal imager of the Seek Thermal XR for Android phone came into my hands. I will say right away that I had been thinking about an inexpensive thermal imager for a long time, starting in 2011, when I was still working in the field of electric power industry. Then he even planned to buy one copy with a resolution of 320 x 240 for 230 thousand rubles for the diagnosis of power circuits, but something didn’t grow together and the management decided that for now it’s not worth spending money.
But, progress does not stand still and this baby appeared on the market, with quite worthy characteristics:
')
Thermal matrix resolution: 206 x 156
Measured thermal range: from -40 to +330 degrees Celsius
Angle of view: 20 degrees
Focus: customizable
The number of frames per second (fps): 9.
In principle, if necessary - detailed specifications can be found on the manufacturer's website or on the website of the company “Dadzhet”.
I, in this article, want to go into more detail at the moments of connecting the device and its practical use.
Connect to Android
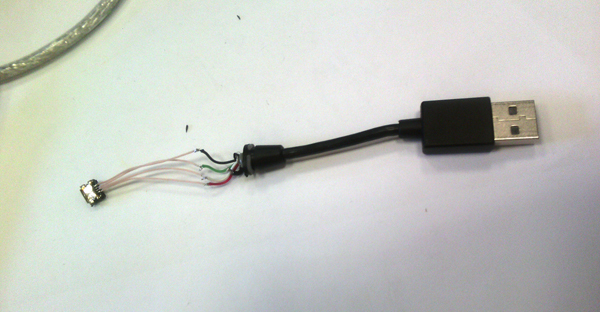
My version of the thermal imager is equipped with a microUSB "dad" connector. There is also a modification with a connector for the iPhone.
According to the logic of the creators - the user must plug the device into the slot on the phone, install the application and then use the device without any problems. But it was at this stage that the first unpleasant surprise came out. Fly IQ4403, which has been serving me for more than two years, let me down for the first time. He simply refused to install the application, as it turned out - there is no USB OTG support on the phone.
Began the search for a "suitable" phone.
A colleague was found Samsung, on which everything seems to be got. The only thing, due to the circumstances, was that I had to install the application not from the market, but from the Dadzhet website.
But I want to immediately warn you - the application there is very outdated and on my device - it gave a strong error in measuring the temperature. Lies degrees to 10 in the direction of overestimate.
It is better to still swing the latest version of the application from the play market.
So, the phone is found, the application is installed, we take the first photos:

Then the device went on the phones of colleagues, where the interesting moments of operation were found out, which are not found in the official documentation:
1) On Samsung phones, the device looks in the right direction (towards the main camera);
2) On Asus phones and Lenovo tablets - the USB connector is deployed in the opposite direction, so we get an excellent thermal “selfie” camera.

3) On Sony phones, the USB connector is located on the side, as a result, the imager image is rotated 90 degrees relative to the screen. It’s not very convenient to work with such an arrangement of the camera, it’s impossible to flip the image from the thermal camera programmatically on the phone, as a result, sony users only have the option with an external cord.
4) During operation - the imager periodically adjusts its diaphragm, while the device clicks. This is a normal process, do not be afraid of him.
After playing enough with a thermal imager on other people's phones, I began to think what to do. My current phone suits me in everything, keeps the battery in working mode for a week and performs all the basic functions perfectly, changing it just for the sake of OTG - there was no point.
In my head I began to see a chain of ideas:
USB OTG = USB Host,
USB Host = USB PC.
So there is a theoretical possibility to connect the imager to a laptop.
PC connection
Googling on Russian sites issued only one-type reviews of the device with photos of domestic cats. I started to search abroad, they have already sold the device since 2012, there must be people who bother connecting to a regular computer.
And so, a thread was found that led me to a forum where the experience of connecting Seek Thermal to a PC with enthusiasts from Germany had already been painted.
While I delved into what and in what sequence to install on a PC, a colleague Ilya soldered a test adapter on his knee:
To save time for everyone else, I post the general algorithm of actions necessary for connecting to a PC (Windows 7 64bit PC was used):
1) We are looking for or soldering an adapter microUSB "mother" - USB A "dad" (we consider pinout). Hike to the nearest shops did not give tangible results. You could certainly search for aliexpress, but that’s a long time. Therefore, I made my adapter that evening.
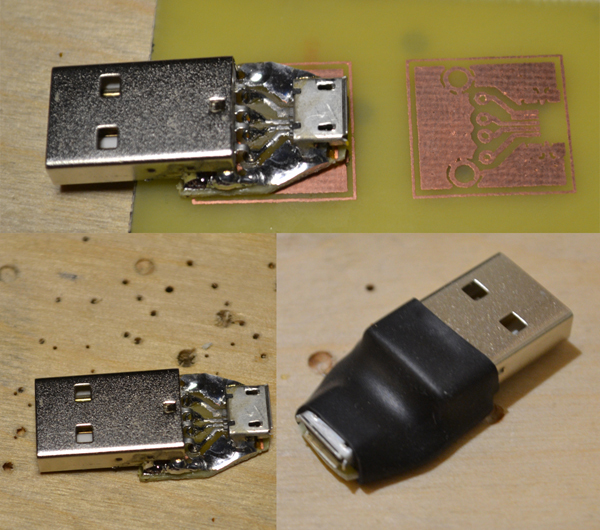
2) We connect the camera through an adapter to a computer, two new devices will appear in the system:

3) Install the driver. It is difficult to find them, but on the same forum they actively recommend using the program , through it the necessary drivers are installed automatically.
4) Next we need software to view pictures from a thermal camera. You can write your own using libraries, for example, this one, or use ready-made software from enthusiasts. The ThermoVision JoeC program, which supports a wide variety of thermal imagers, can be found here .
5) Run the software, close the software, run it again (such frauds are required for the program to find the file with the English interface, when you first start all the inscriptions in the program in German) - in the left column we find the SeekThermal device - we connect to it and, if everyone did right - see the picture.
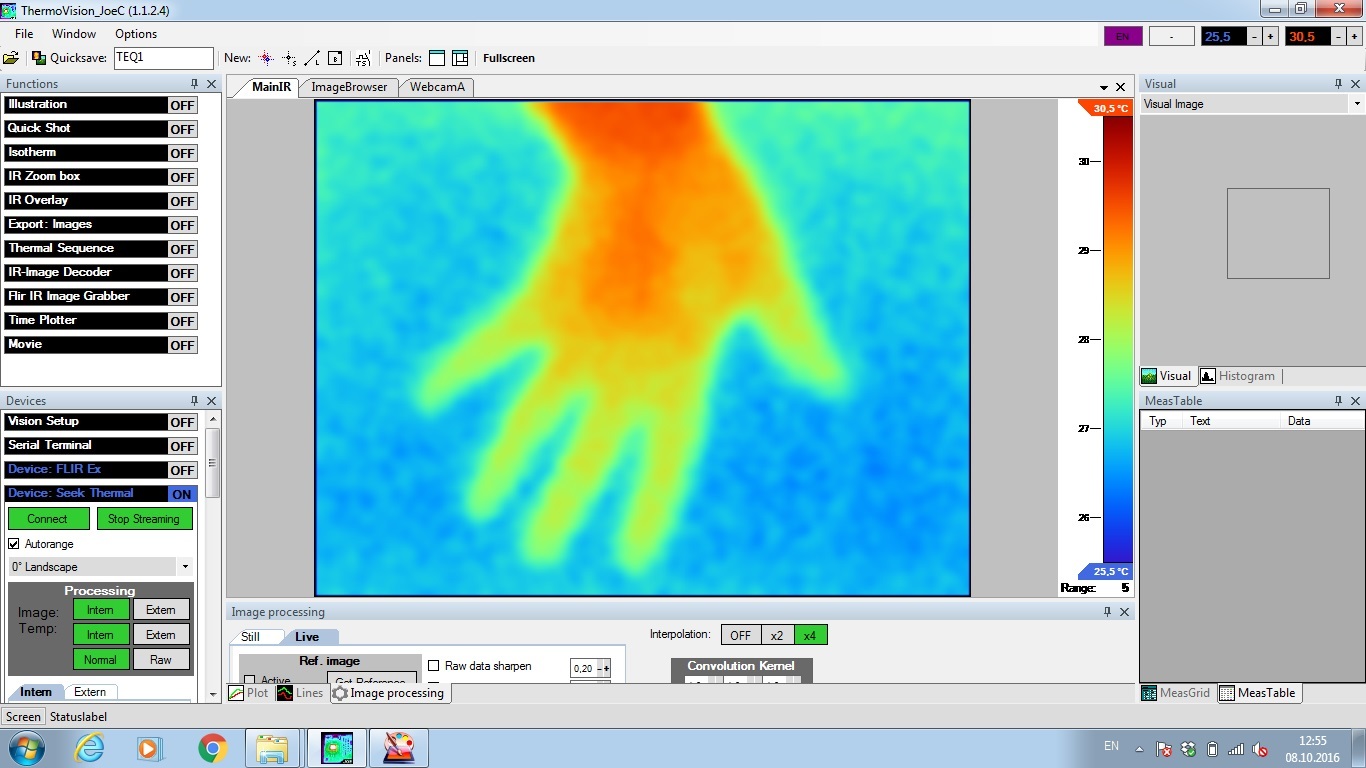
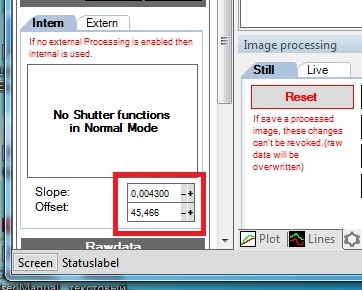
6) Calibrate the camera, according to previously known temperatures (for example, on a boiling kettle) by changing these two parameters:
7) If, in addition to the thermal picture, we also want to see the real image of objects, then we connect a webcam to the same computer, direct it in the same direction as the thermal imager and combine the pictures on the screen.
The percentage of transparency can be set manually from 0 to 100%, with 40% of the output we get something like this:
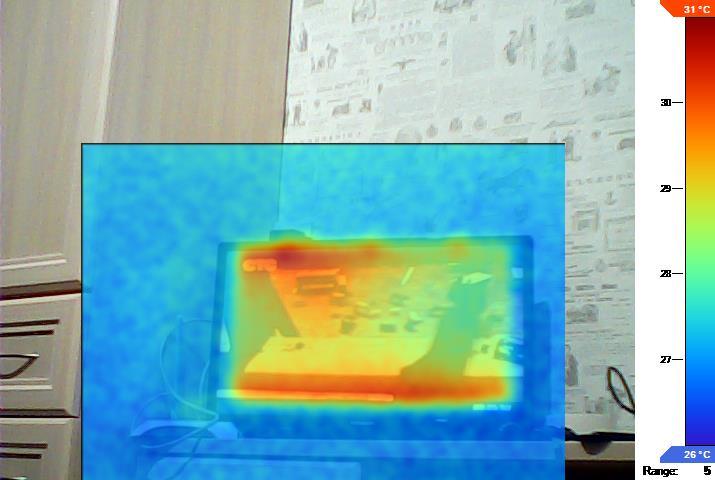
The program also allows you to impose blur filters on the IR image, make an interpolation increase in the resolution of the original image, select the IR image backlight mode and other necessary and unnecessary things.
One disadvantage of connecting to a PC is that the webcam, which is responsible for the usual picture for some reason periodically falls off, has to be restarted in the program several times during a session. Perhaps this is the problem of the web itself (I took it for 400 rubles especially for tests).
As a result, having played enough with all possible connection options - I made a conclusion for myself: it is most convenient to use the device together with a large tablet (10 or more inches). Fortunately, just at the beginning of the main field tests of the device - I had a birthday and my wife presented a tablet with USB OTG.
Attaching a thermal imager to it with double-sided tape and connecting your adapter via the OTG + USB cable. I got such a monster, which turned out to be very convenient to work:

With the connection figured out, everyone chose a convenient option for themselves, now go to the main part, for which all the same I needed this device:
Thermal imaging application
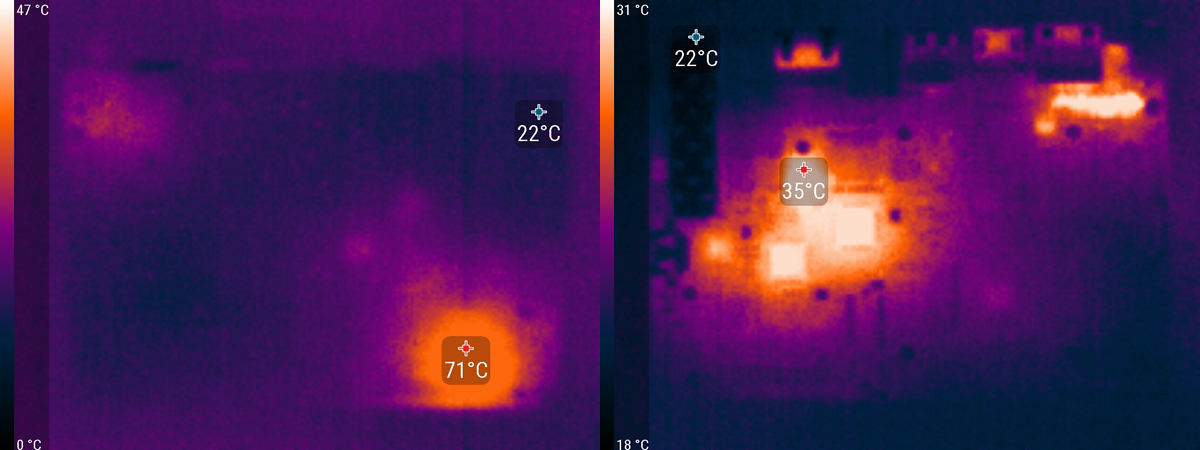
In the development of electronics, it is sometimes necessary to know what is heated on the board and to what temperature it is heated, which neighboring parts heats with his heat and how the overall thermal pattern is distributed throughout the structure.
The same thermal image allows you to immediately identify a short circuit on the board. For example, in this case, during the installation process, one of the microcircuits was not correctly installed (picture on the left). After elimination of the malfunction, the board started up (photo on the right).
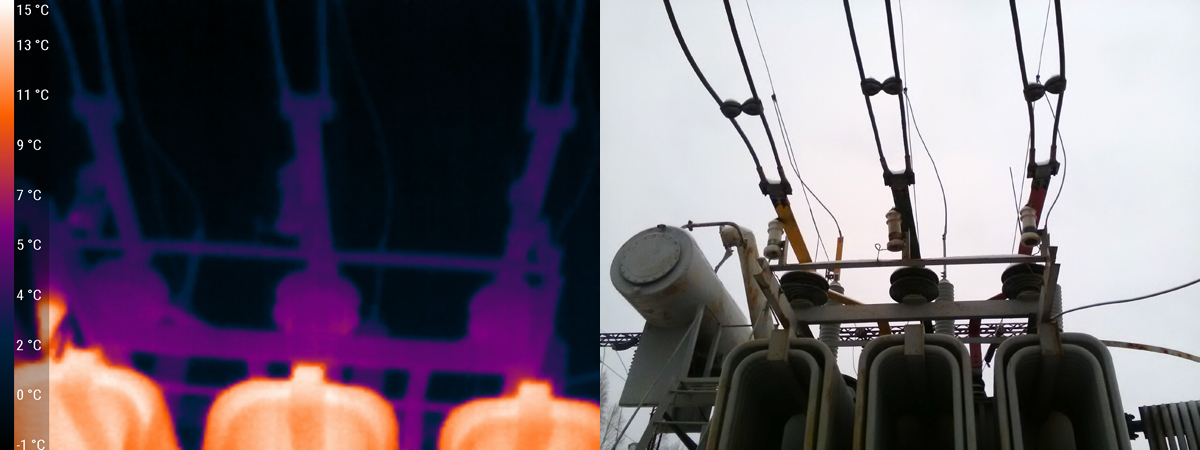
In electric power industry, the thermal imager allows you to identify places where there are hidden problems, such as poorly held contacts.
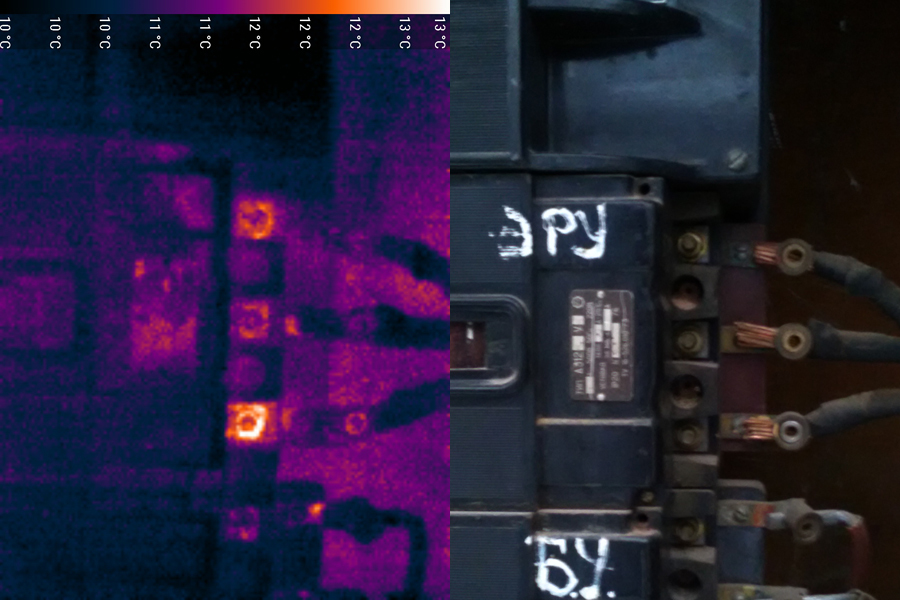
Or the overload of one of the supply phases, in this case, a slight heating of one of the three phase conductors is seen, which may further cause an accident.
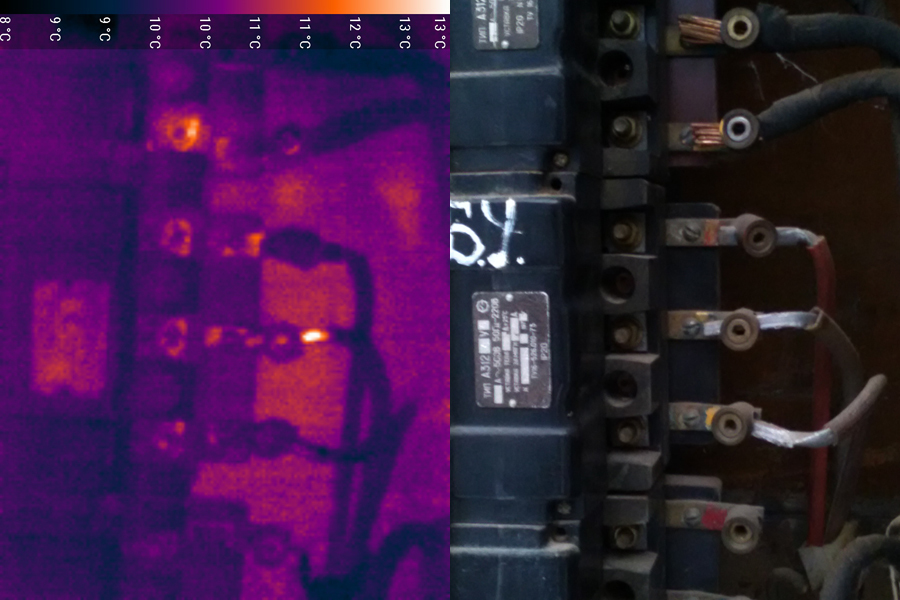
The imager allows you to assess the state of the nodes under voltage, without the need for de-energizing these circuits. The bushing insulators on a 110/6 kilovolt transformer do not have any heat traces, which means there is no leakage through them.

Bolted connections of the bus bridge also do not have traces of heating, so preventive repair is not required.
By the way, the application allows you to get photos at the same time in the visible and infrared range. True because of the differences in camera angles and the distance between the cameras - the pictures are not to scale.

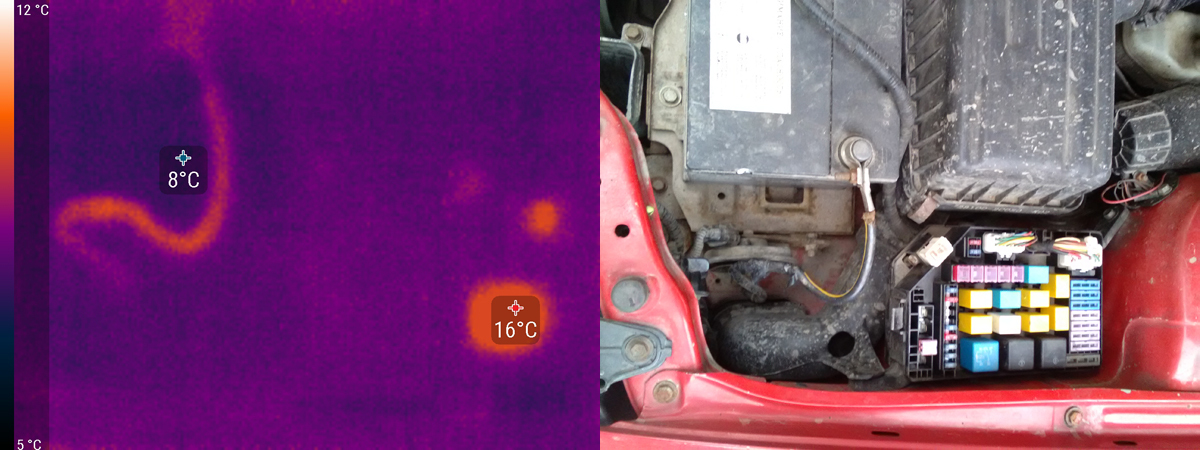
In the car, you can estimate the heating power wiring. In this case, the heating of the negative wire is visible, in view of its small cross section.
One can also see the places of heat loss through broken seals or improperly mounted insulation, because of them the passenger compartment of the car warms up worse in winter, and in the summer the air conditioner cools the street, consuming more fuel.

A larger picture of a fragment of an unheated auto roof.

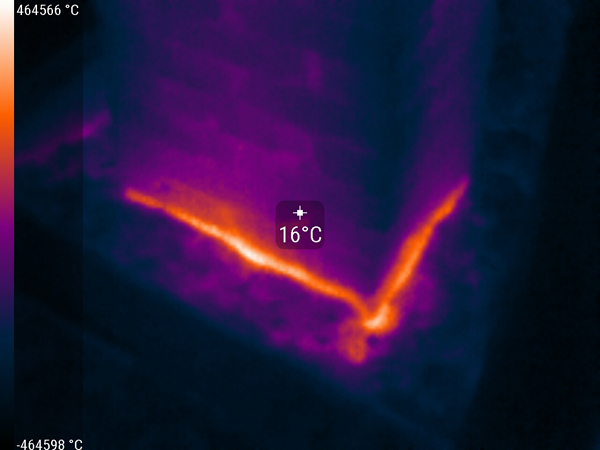
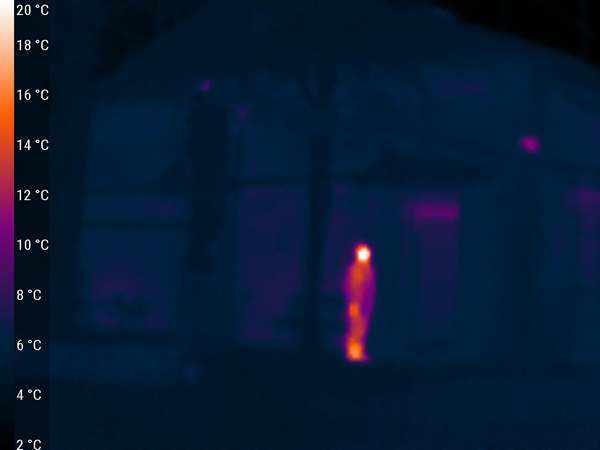
In construction and repair - allows you to find places of heat leakage from the house. And you can also look in advance at the house where you plan to buy an apartment and make sure that you don’t need to pay for street heating in the future.
For the test was chosen log cottage house.
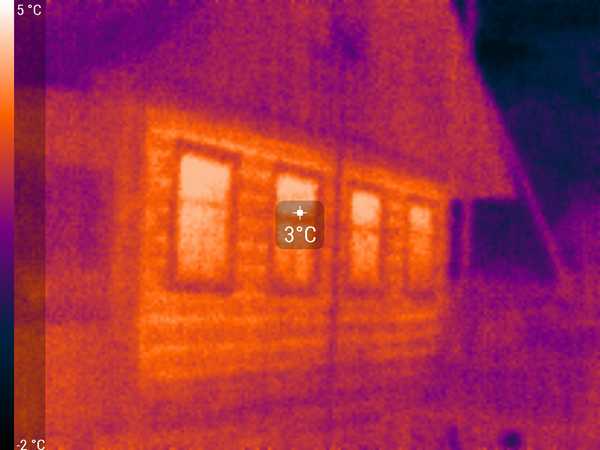
Initially I planned to show the glowing corners - but it turned out that in the log house the gaps between the logs are 2-3 degrees warmer than the logs themselves.
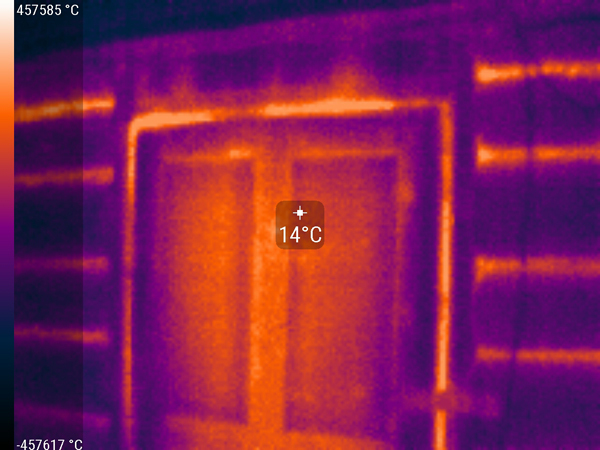
It was also found a heat leak through the dusting of the chimney in the attic.
Well, just a few interesting photos of life and video
Friday, bar, pizza, hookah, kettle of tea, a bottle of beer

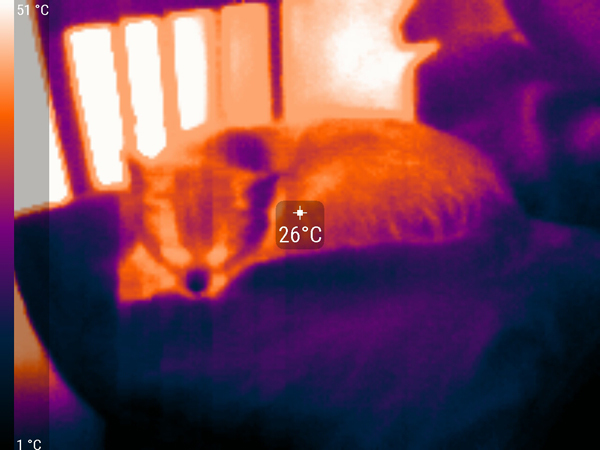
Cat at the stove
Parrot

Man, a cat on the gas pipe and the door ajar
The heat trace from the foot on the laminate, in fact, did not expect that the surface will remain “heated” for so long.
As you can see - the use of a thermal imager allows you to detect heat leaks, identify faults in power circuits, prevent accidents and just bring pleasure. I hope this article will help those who wanted to connect seek thermal to a computer, but did not know how to do it, as well as those who are planning to purchase a thermal imager.
For Geektimes readers, we offer a 10% discount on “Thermal imaging Seek Thermal Android”
GEEKT-ST . And who has an iOS model, they can buy a “Seek Thermal iOS Thermal Imager” with a 10% discount on the same GEEKT-ST code.
As well as information for bloggers and authors:
The company "Dadzhet" is interested in publishing independent objective reviews of dadzhetov in various kinds of media. The company “Djadzhet” will gladly provide dadzhetov bloggers and authors who want to test them and write a review.
The device after writing a review remains with the author. The company is not trying to tell the author what to write about our product, but asks to show the article before publication. In this case, it is possible to clarify information and prevent errors. Whether to consider company comments or not is always up to the discretion of the author. Read more ...
Source: https://habr.com/ru/post/399181/
All Articles