ROS Workshop 2016: analysis of the task of safe robot control
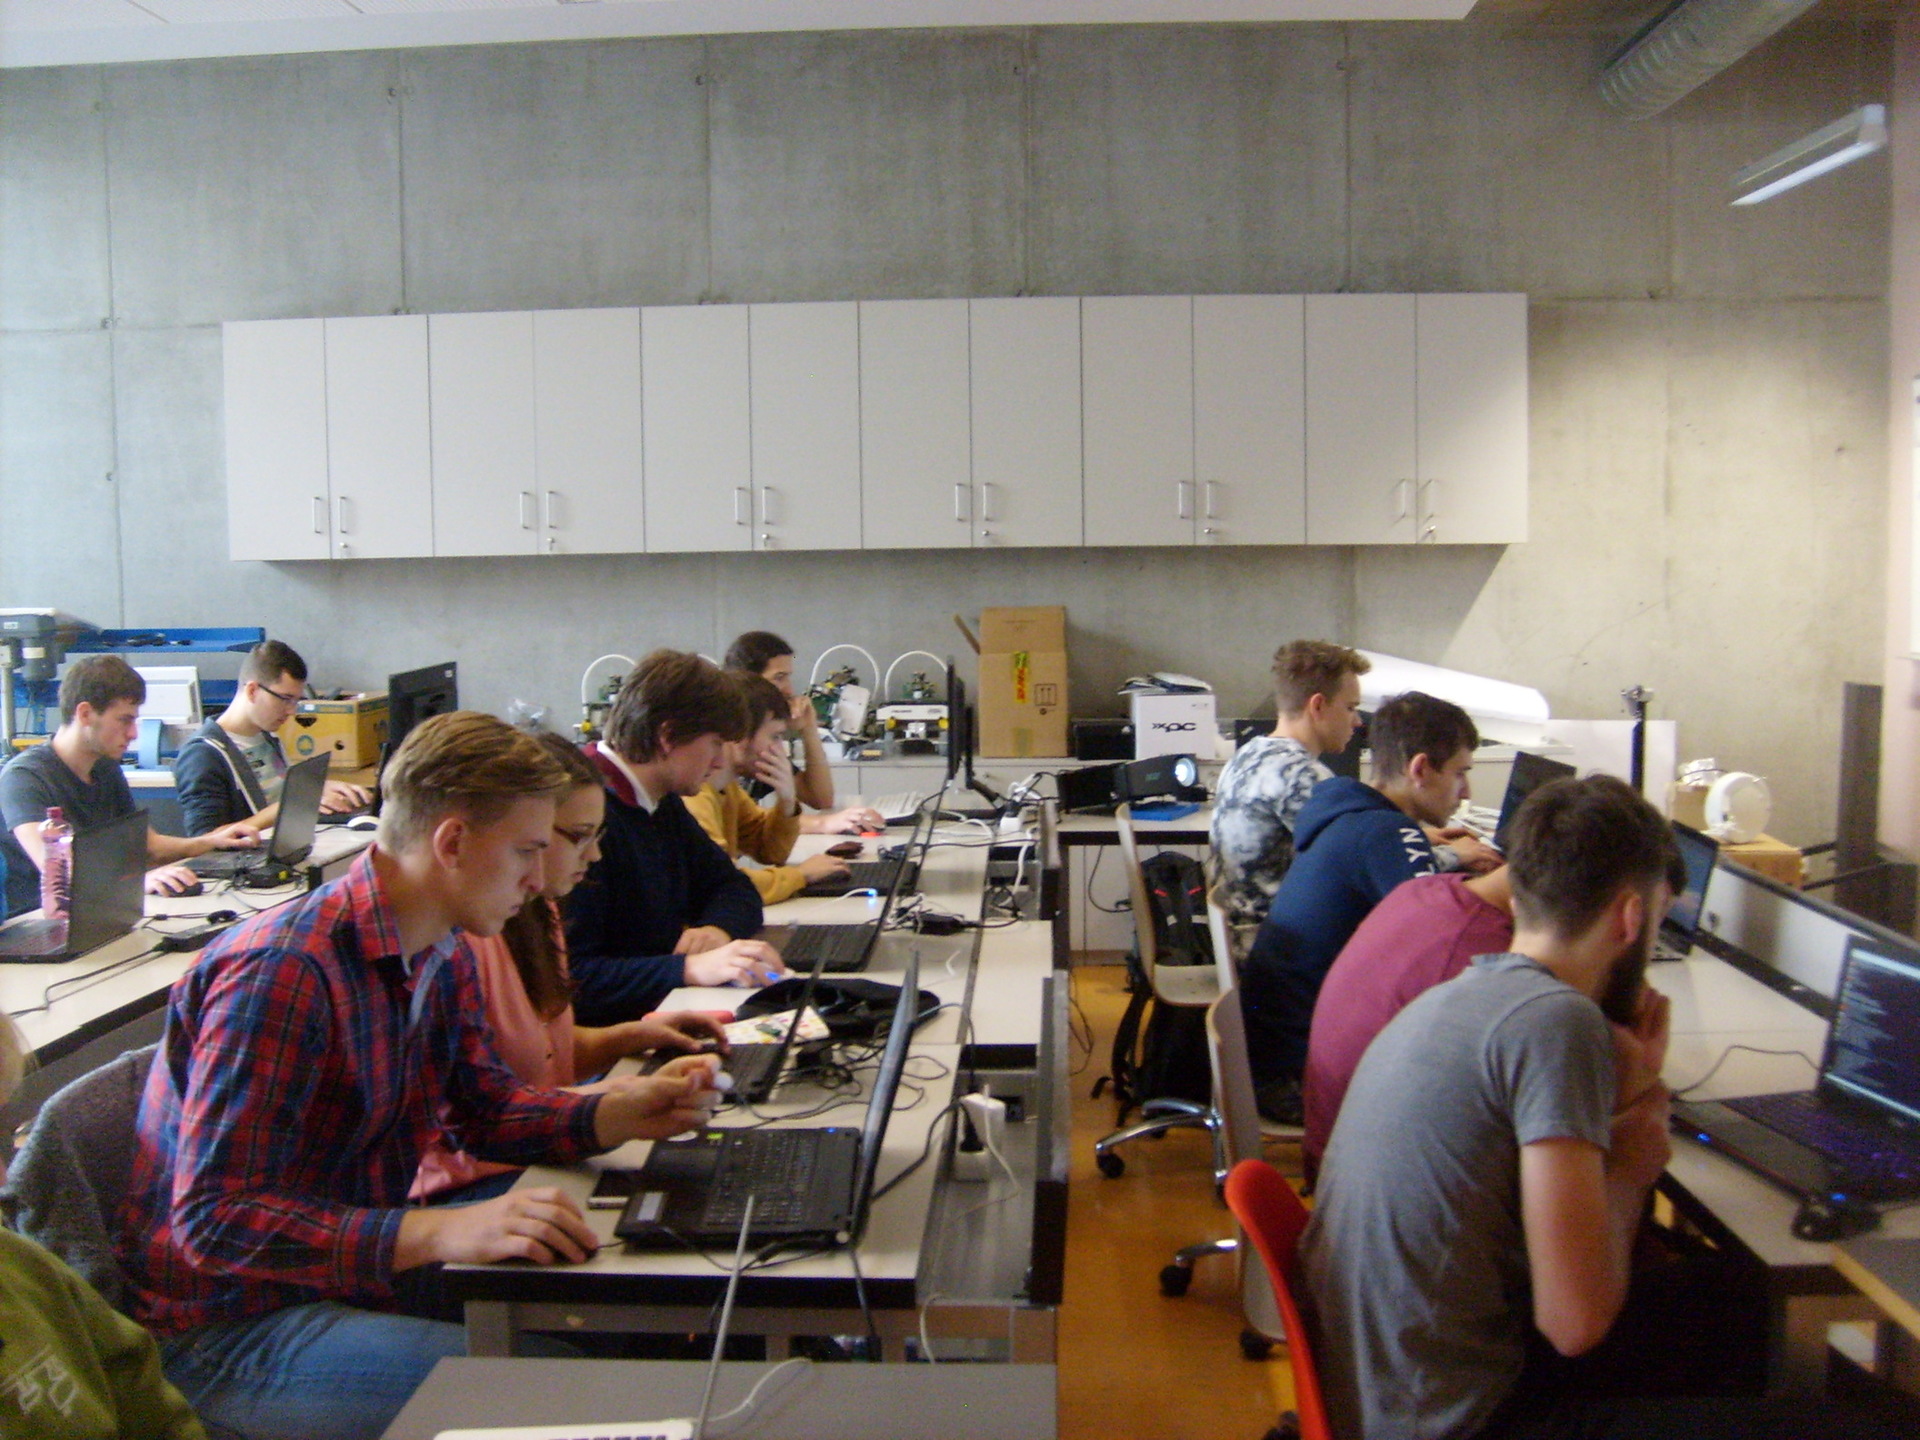
Good afternoon, dear habrachiteli! Last Friday, a practical workshop on the ROS platform - ROS workshop was held in our laboratory. The workshop was organized for students of the Faculty of Information Technology of the Technical University of Brno, wishing to get acquainted with this platform. Unlike previous years (the workshop has been held for 4 years), this time the ROS workshop was focused on independent practical work. In the article I am going to talk about the task that was set for the participants of the workshop. Who cares, I ask under the cat.
The participants were tasked to implement the safe control of the robot with a stop in front of obstacles. The objective of the task is to control the speed of the robot moving forward. The robot receives data from the depth sensor (in our case, ASUS Xtion in the simulator turtlebot_gazebo), finds the nearest obstacle in the direction of motion and determines three zones:
Immediately, I note that the workshop used ROS Indigo on Ubuntu 14.04 to complete the task. I also used ROS Indigo for experiments.
')
So, let's begin! Create a package with roscpp, pcl_ros, pcl_conversions, sensor_msgs and geometry_msgs dependencies:
Add PCL dependencies to package.xml:
and in CMakeLists.txt:
Add the safety_control.cpp script to the src folder:
Add the safety_control.cpp script to CMakeLists.txt:
In the node logic, we subscribe to the data from the topic / camera / depth / points, get a point cloud, calculate the coordinates of the nearest point to the depth sensor in the point cloud and, depending on the situation, publish a linear velocity such as geometry_msgs / Twister in the topic / cmd_vel_mux / input / teleop .
We also need to cut a cloud of points in several axes in a certain range for more efficient processing. In the following lines:
we cut the cloud with the PassThrough method 25 cm down and 20 cm up from the beginning of the coordinate system of the depth sensor (along the y axis).
In the rows:
Cut the cloud by 0.3 m (30 cm) left and right from the beginning of the coordinate system of the sensor (z axis). Then we look for the closest point in the point cloud along the z axis (axis from the center of the depth sensor in the direction of view) - this will be the point of the nearest object:
The speed will also be published on the / mobile_base / commands / velocity topic. Compile the package:
The second task was to test the robot control logic with the TurtleBot simulator in Gazebo. For this you need to install turtlebot_gazebo using apt-get:
Here you can find some useful tutorials on using the simulator. A simulator can be a good solution when you want to study the navigation packages in ROS and there is no real robot at hand. Run the simulator:
The Gazebo window will open as in the picture:
We can zoom in and out with the mouse wheel. Using the left mouse button and the cursor, we can move the image left, right, up and down. Using the mouse wheel and the cursor, you can change the vertical viewing angle. Now we turn the robot to look directly at the cabinet. In the top row of tools above the simulation viewing window, select the third icon:

And click on it. We will see something like this.

Rotate the robot by clicking and pulling the blue arc. We get this picture:

Run rviz:
Add a RobotModel display, as already described in the article . Add the PointCloud2 display and choose the topic / camera / depth / points. As a result, we get the following picture:

For the PointCloud2 display, select RGB8 for the Color Transformer field. We get a cloud of dots in color:

Run our safety_control_node node:
The output in the terminal will be:
Let's display the list of topics:
Among the topics we will see:
Show messages in the topic / mobile_base / commands / velocity:
We get the speed of the robot:
The robot will move towards the cabinet and finally stop next to the cabinet in the Danger zone. In Gazebo we will see a complete stop of the robot:

In the output for the safety_control_node node, we see the messages
And the topic / mobile_base / commands / velocity will now publish a message with zero speed:
Add a PointCloud2 type display with a / output topic in rviz. For the Color Transformer display, select the FlatColor value and the green color in the Color field. This will be our cut of the point cloud from the safety_control_node node:

Move the robot further away, to a safe distance from the obstacle. To do this, click the second icon at the top:

and move the robot by dragging it with the cursor:
In rviz we will see the following:
We will receive such messages from our site:
The speed of the robot will be:
Then everything described earlier will be repeated: a slowdown in the warning zone and a stop near the cabinet.
Now our robot TurtleBot is able to stop in front of any obstacle that the depth sensor is able to detect (ASUS Xtion in the case of ROS Indigo). You can try the control program on a real robot equipped with a Microsoft Kinect type sensor.
That's all. We wrote a simple program to control the speed of the robot in the forward direction using the data from the depth sensor - a cloud of points - and tested it on the simulator of the TurtleBot robot in Gazebo.
Good luck in your experiments and see you soon!
Formulation of the problem
The participants were tasked to implement the safe control of the robot with a stop in front of obstacles. The objective of the task is to control the speed of the robot moving forward. The robot receives data from the depth sensor (in our case, ASUS Xtion in the simulator turtlebot_gazebo), finds the nearest obstacle in the direction of motion and determines three zones:
- Safe - the robot at a safe distance, moving without slowing down
- Warning - the robot approaches an obstacle, issues a warning signal (for example, a sound signal) and slows down.
- Danger - the obstacle is very close, the robot stops
Implementation
Immediately, I note that the workshop used ROS Indigo on Ubuntu 14.04 to complete the task. I also used ROS Indigo for experiments.
')
So, let's begin! Create a package with roscpp, pcl_ros, pcl_conversions, sensor_msgs and geometry_msgs dependencies:
cd ~/catkin_ws/src catkin_create_pkg safety_control_cloud roscpp pcl_ros pcl_conversions sensor_msgs geometry_msgs cd ~/catkin_ws Add PCL dependencies to package.xml:
<build_depend>libpcll-all-dev</build_depend> ... <run_depend>libpcl-all</run_depend> and in CMakeLists.txt:
find_package(PCL REQUIRED) ... include_directories(${PCL_INCLUDE_DIRS}) Add the safety_control.cpp script to the src folder:
safety_control.cpp
#include "ros/ros.h" #include "pcl_conversions/pcl_conversions.h" #include <pcl/pcl_base.h> #include <sstream> #include <sensor_msgs/PointCloud2.h> #include <pcl/filters/passthrough.h> #include <pcl/common/common.h> #include <geometry_msgs/Twist.h> typedef pcl::PointXYZ PointType; typedef pcl::PointCloud<PointType> PointCloud; typedef PointCloud::Ptr PointCloudPtr; ros::Publisher pcd_pub_, cmd_vel_pub_; void pcd_cb(const sensor_msgs::PointCloud2ConstPtr& pcd) { ROS_INFO_STREAM_ONCE("Point cloud arrived"); PointCloudPtr pcd_pcl = PointCloudPtr(new PointCloud), pcd_filtered = PointCloudPtr(new PointCloud); PointType pt_min, pt_max; pcl::fromROSMsg(*pcd, *pcd_pcl); pcl::PassThrough<PointType> pass; pass.setInputCloud(pcd_pcl); pass.setFilterFieldName("y"); pass.setFilterLimits(-0.25,0.20); pass.filter(*pcd_filtered); pass.setInputCloud(pcd_filtered); pass.setFilterFieldName("x"); pass.setFilterLimits(-0.3,0.3); pass.filter(*pcd_pcl); pcl::getMinMax3D(*pcd_pcl, pt_min, pt_max); geometry_msgs::Twist vel; if (pt_min.z > 1.0) { vel.linear.x = 0.2; ROS_INFO_STREAM("Safe zone"); } else if (pt_min.z > 0.5) { vel.linear.x = 0.1; ROS_INFO_STREAM("Warning zone"); } else { vel.linear.x = 0.0; ROS_INFO_STREAM("Danger zone"); } cmd_vel_pub_.publish(vel); sensor_msgs::PointCloud2 pcd_out; pcl::toROSMsg(*pcd_pcl, pcd_out); pcd_pub_.publish(pcd_out); } int main(int argc, char **argv) { /** * The ros::init() function needs to see argc and argv so that it can perform * any ROS arguments and name remapping that were provided at the command line. * For programmatic remappings you can use a different version of init() which takes * remappings directly, but for most command-line programs, passing argc and argv is * the easiest way to do it. The third argument to init() is the name of the node. * * You must call one of the versions of ros::init() before using any other * part of the ROS system. */ ros::init(argc, argv, "safety_control_cloud"); /** * NodeHandle is the main access point to communications with the ROS system. * The first NodeHandle constructed will fully initialize this node, and the last * NodeHandle destructed will close down the node. */ ros::NodeHandle n; ros::Subscriber pcd_sub = n.subscribe("/camera/depth/points", 1, pcd_cb); pcd_pub_ = n.advertise<sensor_msgs::PointCloud2>("/output", 1); cmd_vel_pub_ = n.advertise<geometry_msgs::Twist>("/cmd_vel_mux/input/teleop", 1); ros::spin(); return 0; } Add the safety_control.cpp script to CMakeLists.txt:
add_executable(safety_control_node src/safety_control.cpp) target_link_libraries(safety_control_node ${catkin_LIBRARIES} ${PCL_LIBRARIES}) In the node logic, we subscribe to the data from the topic / camera / depth / points, get a point cloud, calculate the coordinates of the nearest point to the depth sensor in the point cloud and, depending on the situation, publish a linear velocity such as geometry_msgs / Twister in the topic / cmd_vel_mux / input / teleop .
We also need to cut a cloud of points in several axes in a certain range for more efficient processing. In the following lines:
pcl::PassThrough<PointType> pass; pass.setInputCloud(pcd_pcl); pass.setFilterFieldName("y"); pass.setFilterLimits(-0.25,0.20); pass.filter(*pcd_filtered); we cut the cloud with the PassThrough method 25 cm down and 20 cm up from the beginning of the coordinate system of the depth sensor (along the y axis).
In the rows:
pass.setInputCloud(pcd_filtered); pass.setFilterFieldName("x"); pass.setFilterLimits(-0.3,0.3); pass.filter(*pcd_pcl); Cut the cloud by 0.3 m (30 cm) left and right from the beginning of the coordinate system of the sensor (z axis). Then we look for the closest point in the point cloud along the z axis (axis from the center of the depth sensor in the direction of view) - this will be the point of the nearest object:
pcl::getMinMax3D(*pcd_pcl, pt_min, pt_max); The speed will also be published on the / mobile_base / commands / velocity topic. Compile the package:
cd ~/catkin_ws catkin_make source devel/setup.bash Testing in the simulator Turtle Bot in Gazebo
The second task was to test the robot control logic with the TurtleBot simulator in Gazebo. For this you need to install turtlebot_gazebo using apt-get:
sudo apt-get install ros-indigo-turtlebot* Here you can find some useful tutorials on using the simulator. A simulator can be a good solution when you want to study the navigation packages in ROS and there is no real robot at hand. Run the simulator:
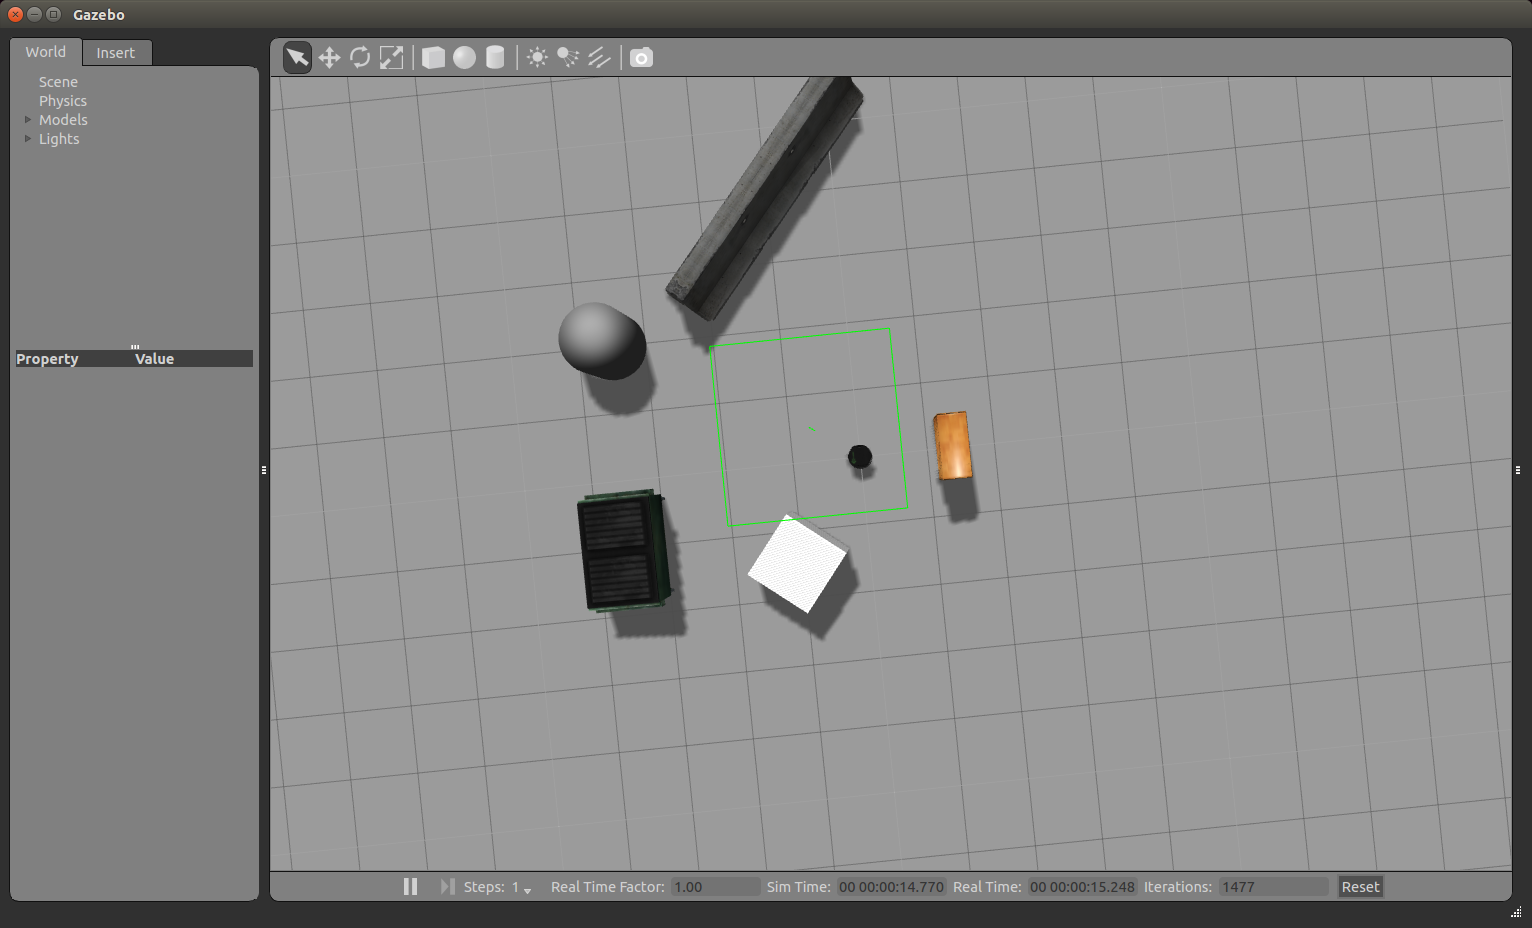
roslaunch turtlebot_gazebo turtlebot_world.launch The Gazebo window will open as in the picture:
We can zoom in and out with the mouse wheel. Using the left mouse button and the cursor, we can move the image left, right, up and down. Using the mouse wheel and the cursor, you can change the vertical viewing angle. Now we turn the robot to look directly at the cabinet. In the top row of tools above the simulation viewing window, select the third icon:
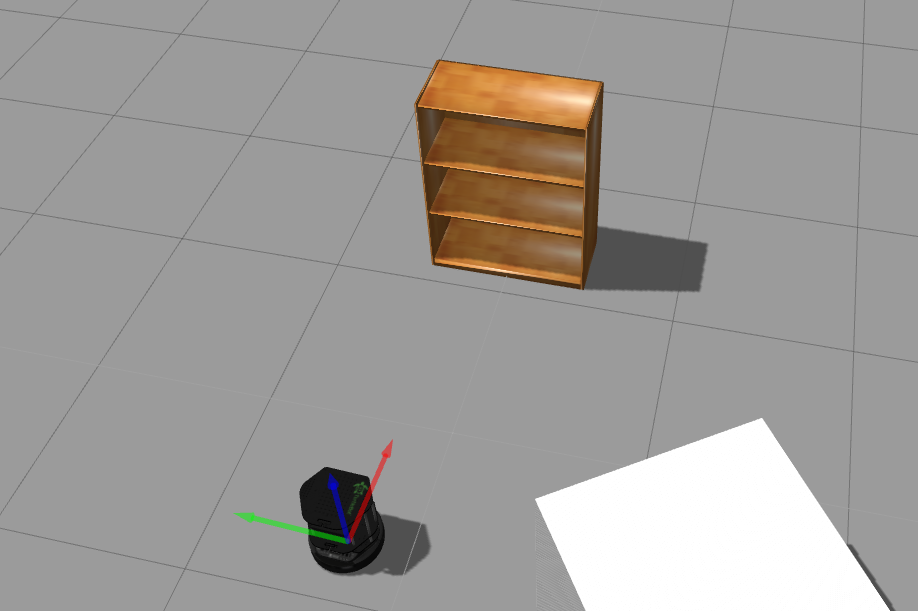
And click on it. We will see something like this.
Rotate the robot by clicking and pulling the blue arc. We get this picture:
Run rviz:
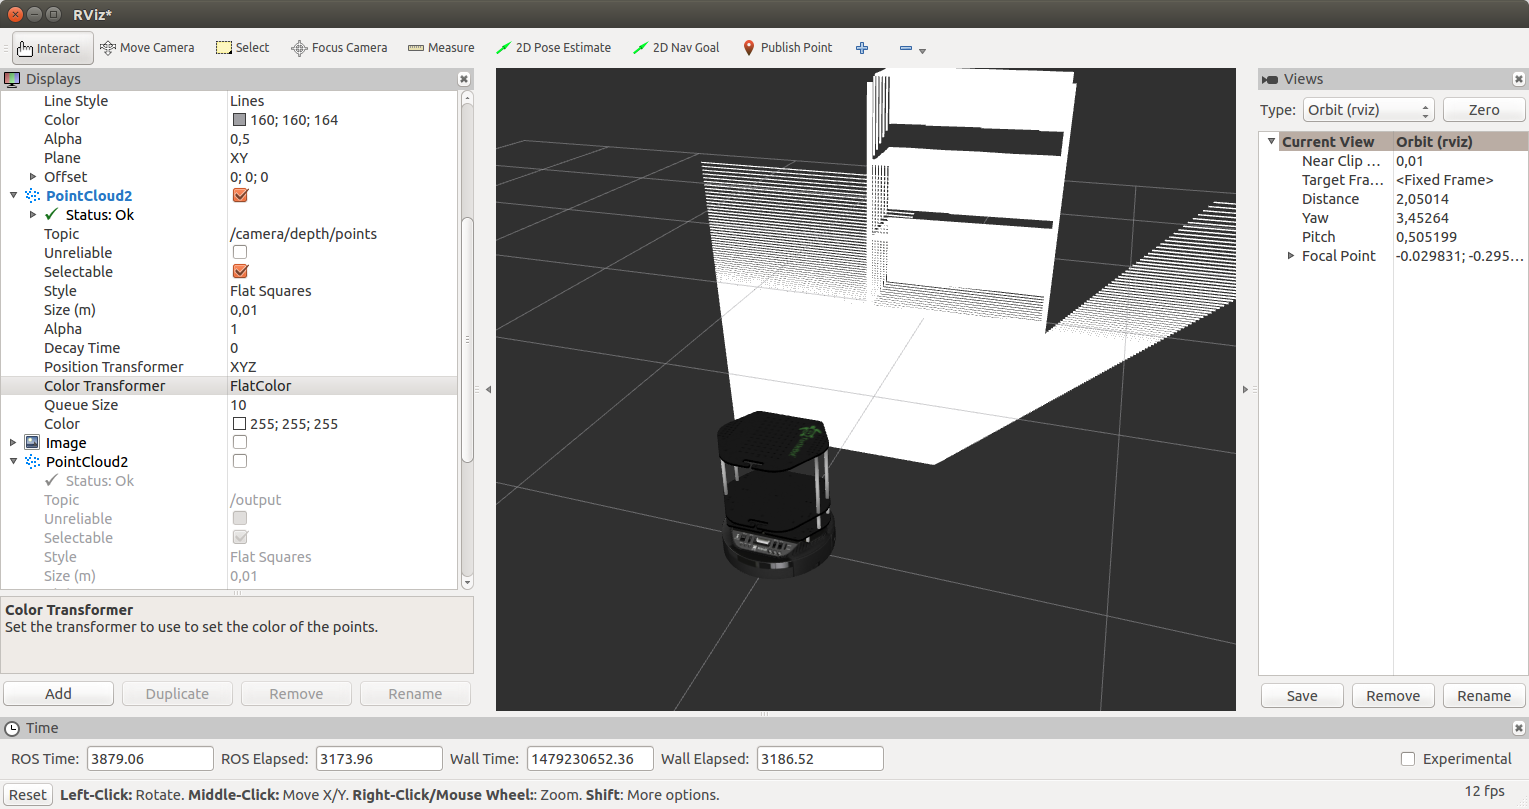
rosrun rviz rviz Add a RobotModel display, as already described in the article . Add the PointCloud2 display and choose the topic / camera / depth / points. As a result, we get the following picture:
For the PointCloud2 display, select RGB8 for the Color Transformer field. We get a cloud of dots in color:
Run our safety_control_node node:
rosrun safety_control_cloud safety_control_node The output in the terminal will be:
[ INFO] [1479229421.537897080, 2653.960000000]: Point cloud arrived [ INFO] [1479229421.572338588, 2654.000000000]: Warning zone [ INFO] [1479229421.641967924, 2654.070000000]: Warning zone Let's display the list of topics:
rostopic list Among the topics we will see:
/cmd_vel_mux/input/teleop ... /mobile_base/commands/velocity Show messages in the topic / mobile_base / commands / velocity:
rostopic echo /mobile_base/commands/velocity We get the speed of the robot:
linear: x: 0.1 y: 0.0 z: 0.0 angular: x: 0.0 y: 0.0 z: 0.0 --- The robot will move towards the cabinet and finally stop next to the cabinet in the Danger zone. In Gazebo we will see a complete stop of the robot:
In the output for the safety_control_node node, we see the messages
[ INFO] [1479229426.604300460, 2658.980000000]: Danger zone [ INFO] [1479229426.717093096, 2659.100000000]: Danger zone And the topic / mobile_base / commands / velocity will now publish a message with zero speed:
linear: x: 0.0 y: 0.0 z: 0.0 angular: x: 0.0 y: 0.0 z: 0.0 --- Add a PointCloud2 type display with a / output topic in rviz. For the Color Transformer display, select the FlatColor value and the green color in the Color field. This will be our cut of the point cloud from the safety_control_node node:
Move the robot further away, to a safe distance from the obstacle. To do this, click the second icon at the top:
and move the robot by dragging it with the cursor:
In rviz we will see the following:
We will receive such messages from our site:
[ INFO] [1479230429.902116395, 3658.000000000]: Safe zone [ INFO] [1479230429.992468971, 3658.090000000]: Safe zone The speed of the robot will be:
--- linear: x: 0.2 y: 0.0 z: 0.0 angular: x: 0.0 y: 0.0 z: 0.0 --- Then everything described earlier will be repeated: a slowdown in the warning zone and a stop near the cabinet.
Now our robot TurtleBot is able to stop in front of any obstacle that the depth sensor is able to detect (ASUS Xtion in the case of ROS Indigo). You can try the control program on a real robot equipped with a Microsoft Kinect type sensor.
That's all. We wrote a simple program to control the speed of the robot in the forward direction using the data from the depth sensor - a cloud of points - and tested it on the simulator of the TurtleBot robot in Gazebo.
Good luck in your experiments and see you soon!
Source: https://habr.com/ru/post/399151/
All Articles