Where is the standard length or how to measure lengths

The idea to sort out this issue and eventually write this text was born here on the site - under one of the publications I saw the statement that the lines sold in stores are calibrated with secondary standards, those with primary, and primary with international ones. This is only a small part true, so if you are interested, let's understand.
Disclaimer: I am not a metrologist, so the text is not a very tedious (I hope) attempt of a popular science story, so there may be some inaccuracies in it that can be reported both in the personal and in the comments as you please.
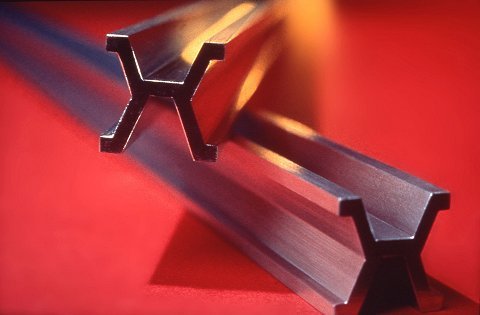
Many probably remember from school that the standard of the meter is kept in the Paris Chamber of Measures and Scales in a glass jar under vacuum
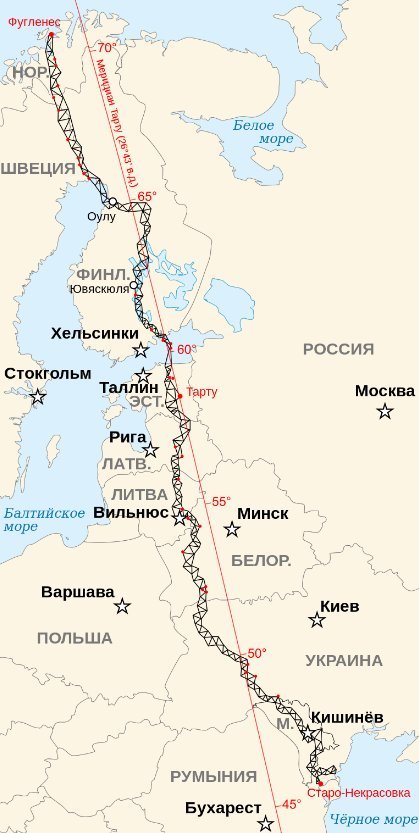
One of the first attempts to create a universal, i.e. reproduced, the measure of length, became in 1668 the length of a (mathematical) pendulum, the half-period of oscillations of which is equal to one second. The idea is good, but during a trip to South America, astronomer Jean Richet had to shorten the length of the standard, since the period of his hesitation increased. This was due to the flatness of the geoid and, accordingly, a decrease in gravity at the equator. In 1790, a clarification was proposed that the length standard should be measured at a latitude of 45 ° N (approximately between Bordeaux and Grenoble), this length is 0.994 modern meters. The proposal, despite the elegance, however, was not accepted. In 1791, the meter was defined by the French Academy as one forty-millionth part of the Paris Meridian (that is, one ten-millionth part of the distance from the north pole to the equator along the surface of the earth's ellipsoid at the longitude of Paris). The simplicity of calibration raises some doubts, but the nautical mile also has a similar reference (moving one nautical mile along the meridian corresponds to a change in geographical coordinates for one minute of latitude). You might think that the effect of uneven terrain will have a catastrophic effect on the accuracy of the standard, but this is not so - a change in height by 1000 meters will lead to a lengthening of the meridian by only 6283 meters, which gives a relative error of one and a half ten-thousandths (the known problem of extending the equator by meter and a fly ). In reality, the measurements were carried out much more accurately, mainly at sea level. Those interested will find here a lot of interesting things. I will confine myself to an impressive picture:
')

Since then, for countries that have adopted the metric system, they began to make reference channels from different alloys, to amend the regulations, for example, to take measurements at a certain temperature to eliminate the effect of thermal expansion (melting point of ice), and also introduced the definition of a kilogram as a mass of water by volume in one cubic decimeter. Gradually, the accuracy of reproduction of the standard increased, reaching a total of 0.1 micron instead of the original 50 microns. Standards were kept under sterile conditions in metrology laboratories around the world until, in 1960, it was decided to abandon the use of a not so reproducible subject of aging, in favor of a physical phenomenon that can be accurately reproduced in the laboratory with the necessary accuracy and after many years . Since then, the meter has been defined as 1,650,763.73 wavelengths of the orange line (6,056 Å) of the spectrum emitted by the krypton 86Kr isotope in a vacuum (transition between 2p 10 and 5d 5 levels). The accuracy of the standard was 4 nanometers. Reference bars are still stored in the same conditions, but no longer as standards, but as well-deserved retirees who may still be useful. In 1983, they went even further and defined the meter as the distance traveled by light in a vacuum for 1/299792458 a split second. By the way, the second has long ceased to be a fraction of the tropical year, now this time is equal to 9192631770 periods of radiation corresponding to the transition between two hyperfine levels of the ground state of the cesium-133 atom that is at rest at a temperature of 0 K. Under all conditions and the introduction of corrections, the reproducibility of meter standard is 0.1 nm (relative error 10 -10 ). The latter value is the characteristic size of an atom.
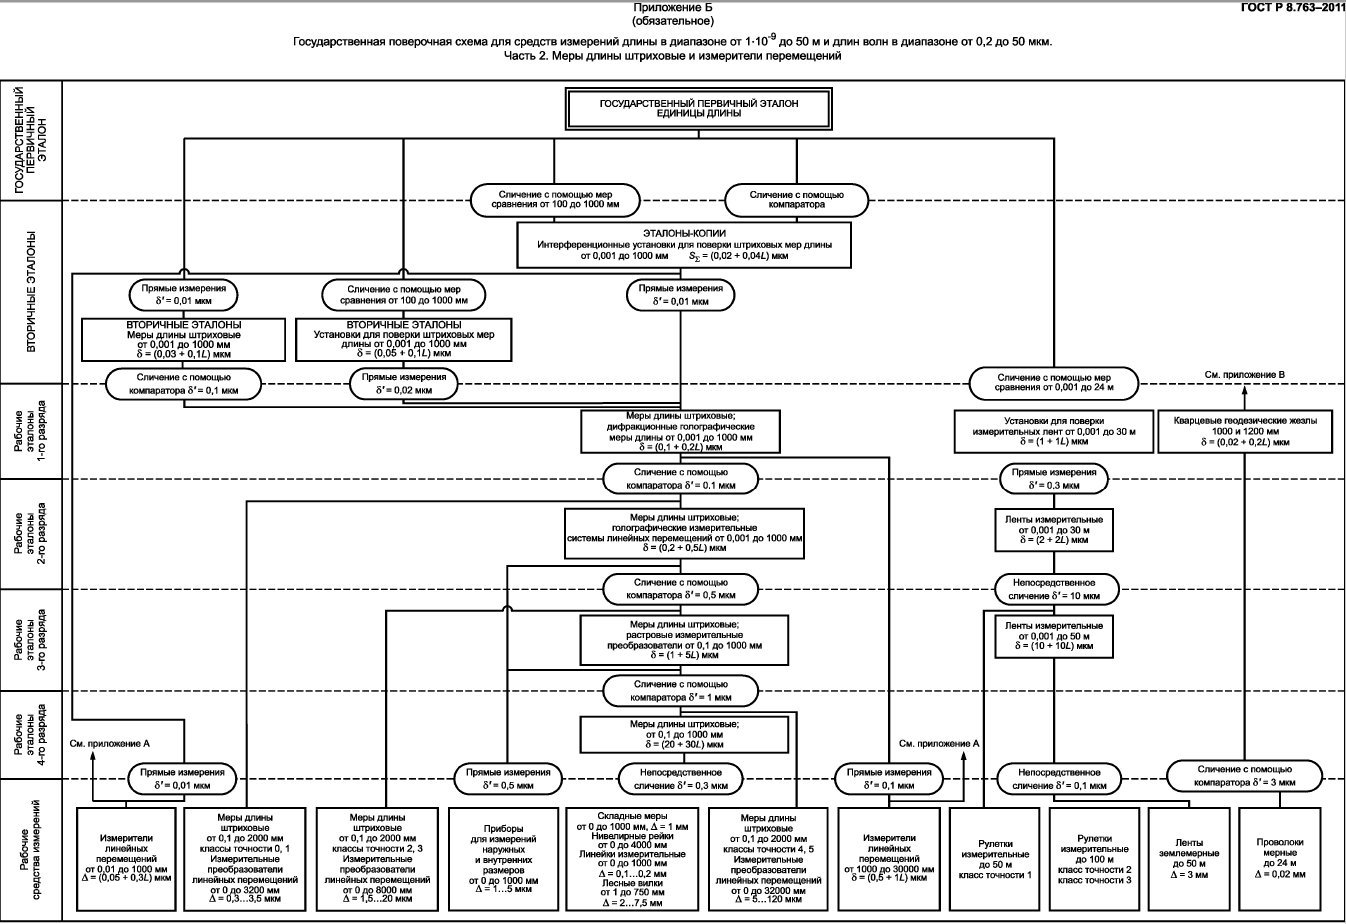
Now we have an international primary standard meter, and we can finally study GOST R 8.763-2011 State system for ensuring the uniformity of measurements. State verification schedule for measuring instruments of length in the range from 1 · 10 -9 to 50 m and wavelengths in the range from 0.2 to 50 μm (introduction date 01/01/2013). GOST was understood only from the second reading, since structurally, it is written completely, in my opinion, wrong, albeit professionally. As a result of the study, we will try to understand how to calibrate and verify the ruler. According to this GOST, our state primary standard is the installation based on a stabilized He-Ne / I laser (a laser stabilized along the saturated absorption line in molecular iodine - 127) and the means of comparison — comparators and interferometers. Its custodian institute is FSUE VNIIM. DI. Mendeleev "(together with the FSUE" VNIIFTRI "they store almost all primary measurement standards).
Now let's deal with the hierarchy of standards. Below are the vertical standards of secondary standards, followed by working standards sequentially from the first to the fourth category, below - working measuring instruments with accuracy classes from 0 to 5 (accurate measuring devices that are hierarchically calibrated, traceable down to the international standard). The latter are used directly for measurements and (at least should) for the manufacture of devices that pose risks (dashes) on mass-produced products — those very rulers, tape measures and other household measuring instruments. In total, I counted 13 steps vertically, which are passed before the manufacture of the final product. In fact, they will be a little less, because working measurement tools split off from the hierarchy at different heights depending on the accuracy class.
The system of standards also has a horizontal division into four independent branches according to the type of measurements taken. These branches are called parts (from first to fourth) and are intended for the following:
Part 1. Sources of radiation and wavelength measuring instruments;
Part 2. Measures of length stroke and displacement meters;
Part 3. Length measures, terminal, plane-parallel;
Part 4. Displacement gauges, relief measures and microscopes in the field of the nano range;
So, let's go over part 2 of interest to us. The primary standard is compared using a comparator with secondary - interference settings for the calibration of line measures of length in the range from 0.001 to 1000 mm. They are compared with the working standards of the 1st category - line length measures, diffraction holographic length measures; then alternately using comparators are compared. The working standards of the 2nd category are linear measures of length, holographic measuring systems of linear displacements. The working standards of the 3rd category are line length gauges, raster measuring transducers. Working standards of the 4th category - stroke measures of length.
Working measuring instruments of zero and first class accuracy are compared with the working standard of the first category, the second and third with the working standard of the second category, the fourth and fifth class with the working standard of the third category. Working standards of the 4th category are used for measurements using direct comparison. Working tools of measurement of the fifth accuracy class, in theory, should be used in the manufacture of dies for the manufacture of rulers and tape measures, or at least for the calibration of machines used in production.
Illustration of GOST (small, but clickable):

I will not write about the principle of operation of optical interference comparators, since it has been described in many places, moreover, it will probably be boring for a wide audience. Those interested can be found here .
At the end of the article, slip a couple of your pictures. At one time it was necessary to check the stability of several generators, for which the simplest comparator circuit was assembled - signals from two generators of a very well-known company are fed to two valves (analogous to a diode), two attenuators stand behind them, then a T-shaped bridge in which mixing occurs signals, at the output of the bridge - the detector. The generators are set at closely spaced frequencies, using attenuators, we achieve equal oscillation amplitudes of the two signals, after which we receive a difference signal from the detector, the frequency of which will be an indicator of the stability of the two generators. Two very good generators in a test lasting three days:
It is seen that the generators are compared with an accuracy of the order of 3 · 10 -9 . The test was conducted on holidays to minimize thermal jumps. There are, however, several sharp bursts with subsequent exponential relaxation. The watchman was quite surprised when I told her what time and how many times she went into the locked lab to pour water into the kettle. Ah ah ah! In the picture below, the red line is a repetition of the previous graph, and the blue one is obtained by mixing the generator from the first pair with a less precise, but
The long-term stability of the domestic is about the same, but the short-term stability is much worse. The price, however, they also differ not weakly.
On this, perhaps all, thank you for your attention and have a good weekend! I hope that was informative and not very tedious.
GOST R 8.763-2011
Source: https://habr.com/ru/post/398553/
All Articles