Rework a budget microphone for professional use.
Completion of a cheap microphone
When conducting webinars on programming, somehow my listeners complained about the poor sound quality. I have never thought about how important high-quality sound is.
Quickly googling, I realized that getting high-quality sound, for example, for podcasts, is a very difficult task that requires good, expensive equipment and good sound processing skills.
')
The question arose: is it possible to get an acceptable sound of a budget microphone for conducting webinars? As it turned out, yes. Below is a detailed guide, as it was done.
As the saying goes: every programmer in the shower is a little carpenter .
Formulation of the problem
I had a classic Genius budget microphone. Here it is.
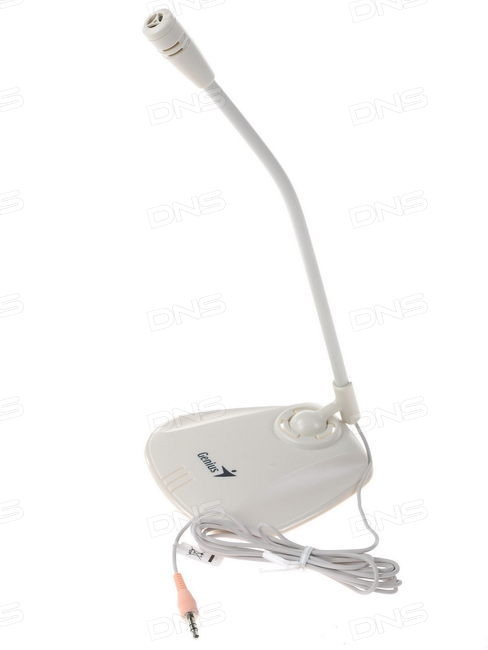
I believe that many of us have such a device. The microphone is normal for its price and objectives. Connected to a Sound Blaster Audigy sound card. But there are a number of serious drawbacks:
1. When the microphone is on the table, all keystrokes are audible while typing on the keyboard. And also any sounds of the table are transmitted through the base.
2. If the microphone is held not near the mouth, but as it should be on the table, the sound is as if the webinar is conducted in a toilet or a “toilet” sound. Again, the microphone is inconvenient to jog in the hands and it is necessary to somehow fix it near the mouth. If you take the microphone in hand, and then put it, the sound volume will be walking. Below you will see this in the video.
3. If you are not too lazy and take the microphone in your hands, then all explosive consonants (for example, “B” and “P”) will directly hit the ears.
How to solve these problems for a modest cheap microphone? Start looking.
If you look at how professionals solve these problems, it looks like this:
1. The transfer of sounds and vibrations to the microphone from the base is solved by hanging the microphone on various springs and suspensions. In general, if you look for a “suspension for a microphone,” then the options there are no fewer. But in the simplest case, it looks like this:
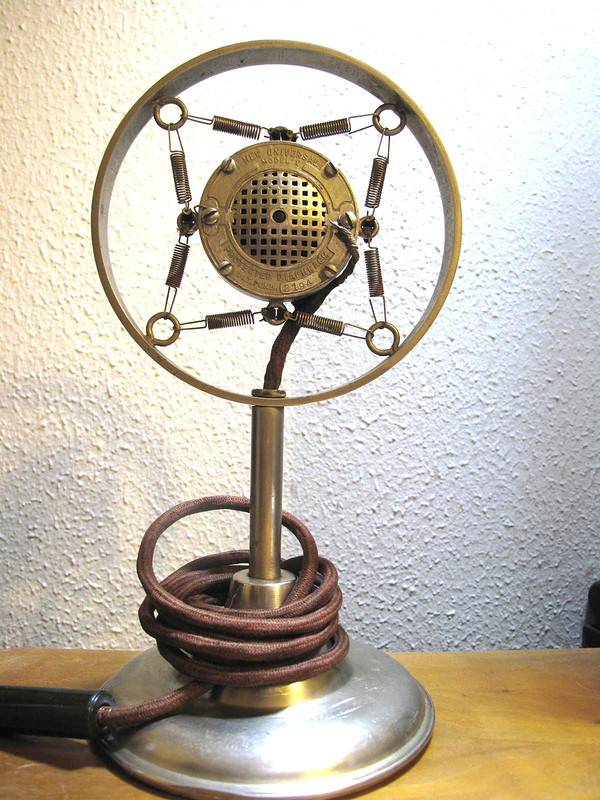
This is a classic vintage radio microphone.
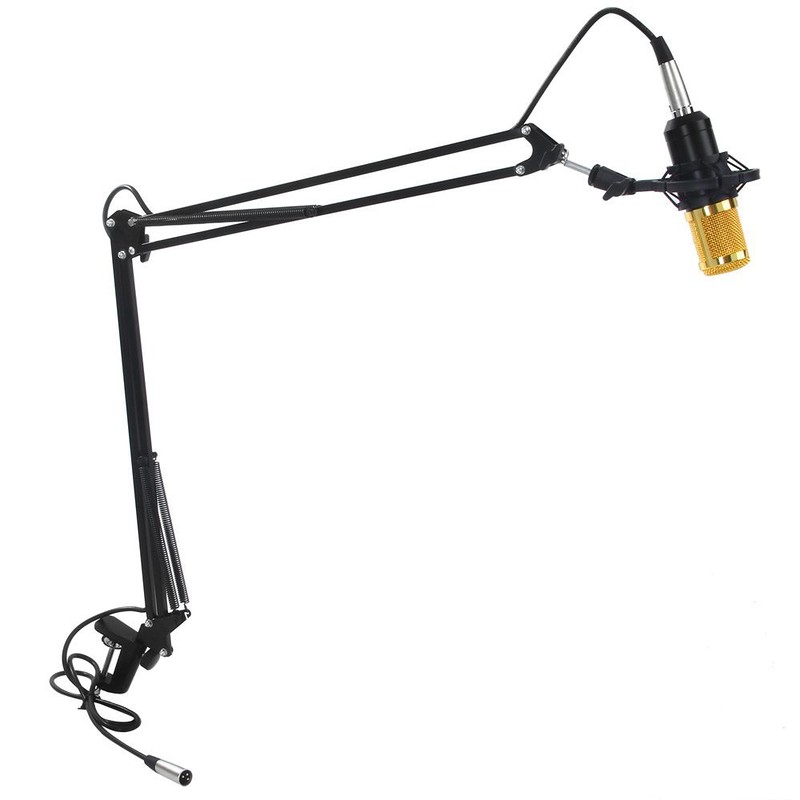
2. In order to keep the microphone in hand, there is such a thing as a pantograph. In fact - this is the rod from the lamp, at the end of which there is a microphone.
3. The third problem is solved by the so-called pop filter. In fact, it is a hoop, in which dense fabric is stretched, for example, from tights. There are factory solutions.
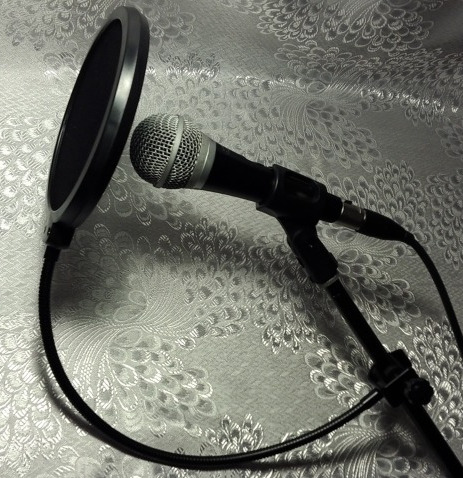
This rag cuts explosive consonants, and the sound is softer.
All of the above products, including professional microphone, you can buy, but nicer to do it yourself. So let's show what we can do.
Sources
As a pantograph, it was decided to use a classic lamp from IKEA, which has served me faithfully for many, many years. The main goal was - not to affect the main functionality - to shine!
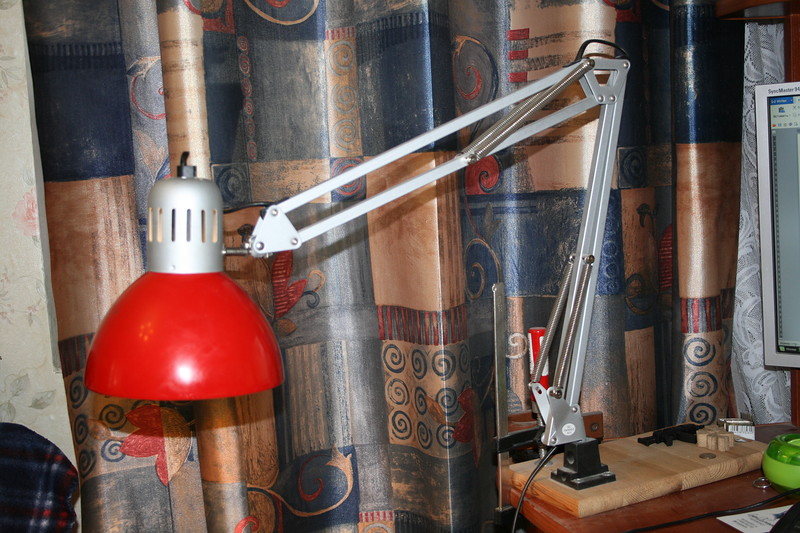
Experimental lamp
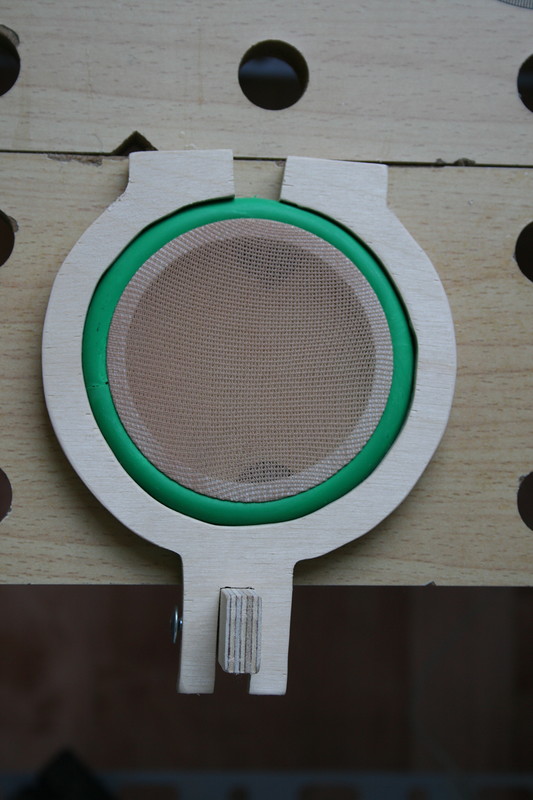
An embroidery hoop with an outer diameter of 90 mm was purchased as a pop filter in a sewing shop. It was very funny when an unshaven, two-meter man in camouflage, berets, and a cloak bought in a sewing shop a hoop.
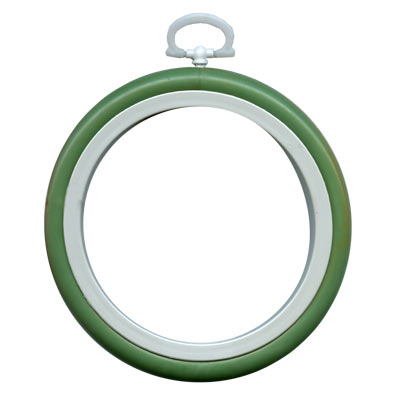
Hoop
And the microphone suspension was decided to be made on coil springs from the clamshell, which were purchased in the near economic.
10 and 20 mm plywood was chosen as the material for manufacturing. All the production went on the jigsaw machine "Corvette 88" .
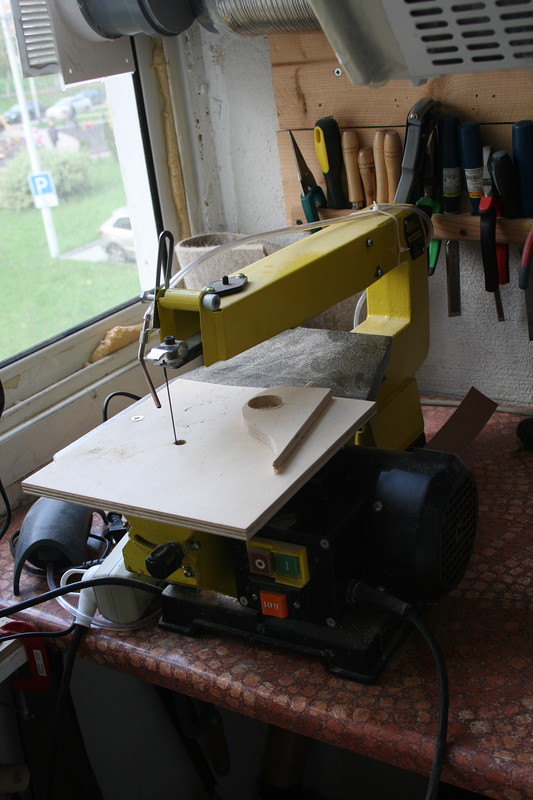
Jigsaw machine "Corvette 88".
Honestly, I don’t understand why every house doesn’t have this thing. An indispensable thing in the economy. Starting from the little things around the house, ending with the training of the child.
Plus, we will need two more M6 bolts with a length of 40-50 mm + two washers and a lamb for them, two M8x35 bolts, one lamb.
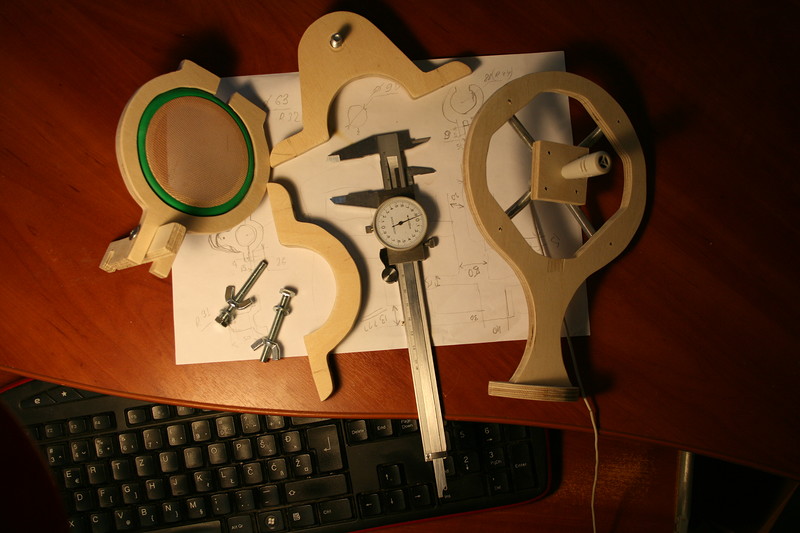
Result
Alas, there will be no photo-guide. Therefore, I will show the result, and then we will analyze the finished product and see its drawings. The photos were taken in the workshop, but there is exactly the same lamp, and there is more light than in the room.
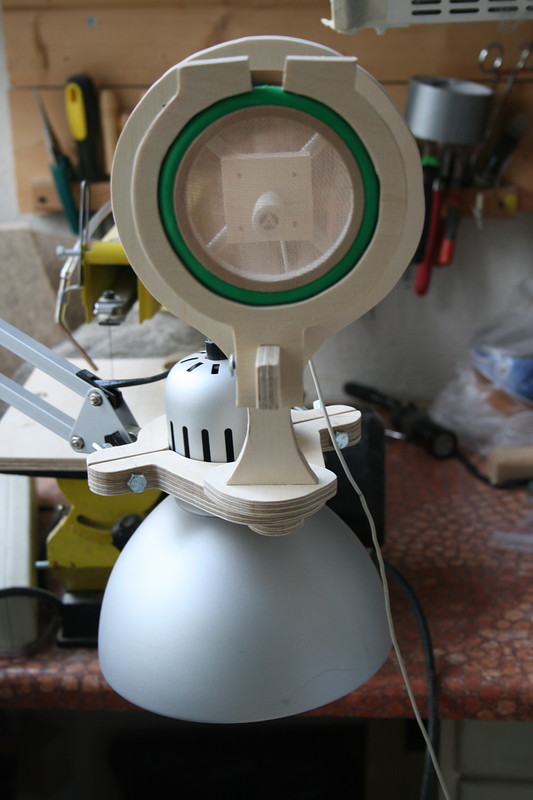
Front view
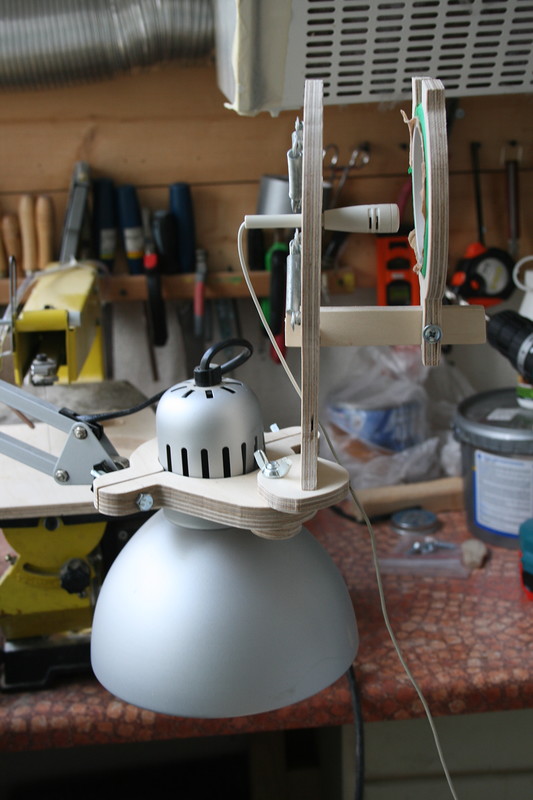
View assembly
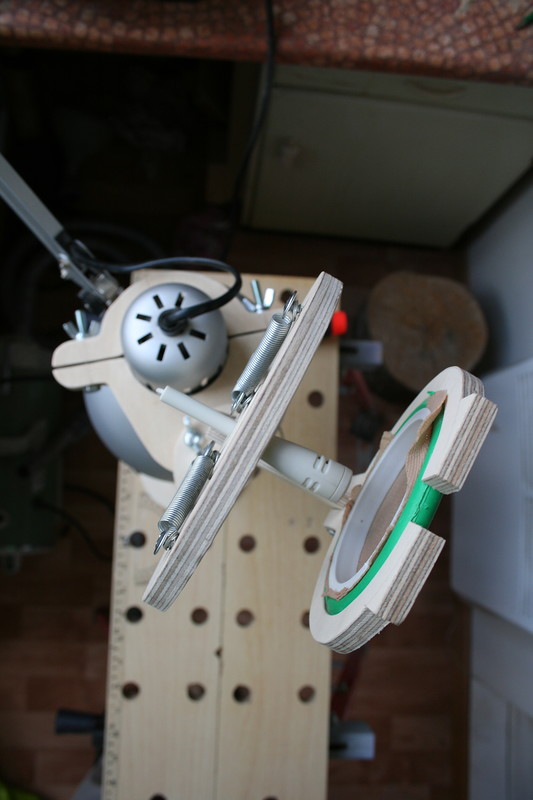
View from above
Among other things, provided the possibility of installation on the table as a stationary microphone.
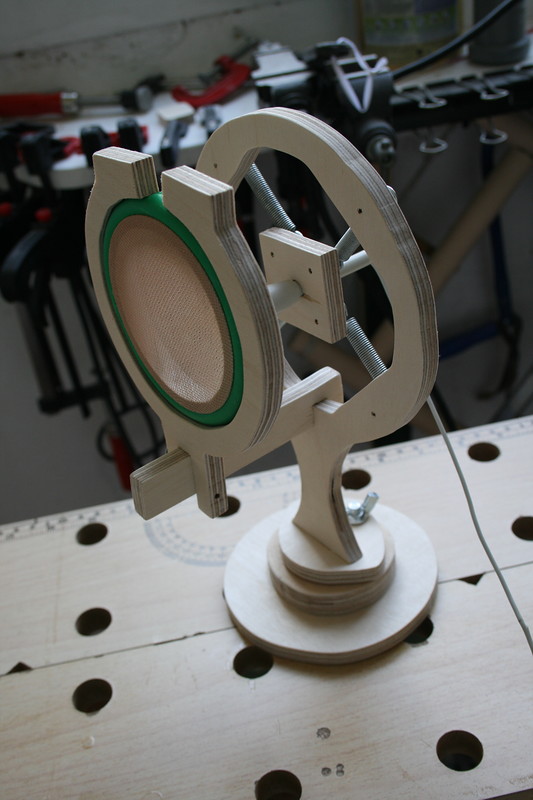
Table option
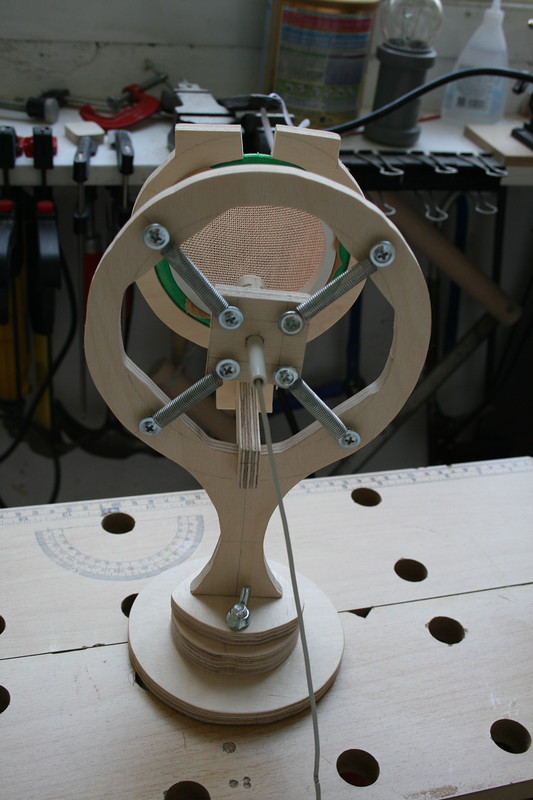
Back view
It so happened that I did this impromptu, almost on the go inventing a design. Therefore, most of the drawings are made after manufacture.
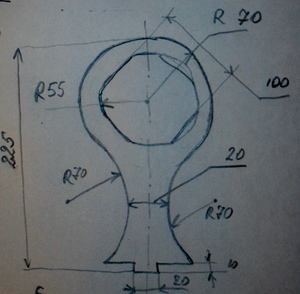
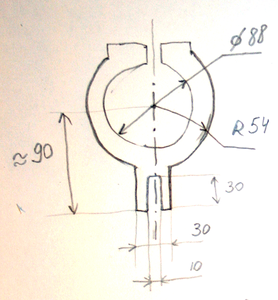
Disassembly Blueprints
Suddenly, someone has access to a laser or a milling machine and will want to repeat this design. Especially for such a person were made drawings with sizes. It remains only to make them into your favorite drawing program.
Main rack
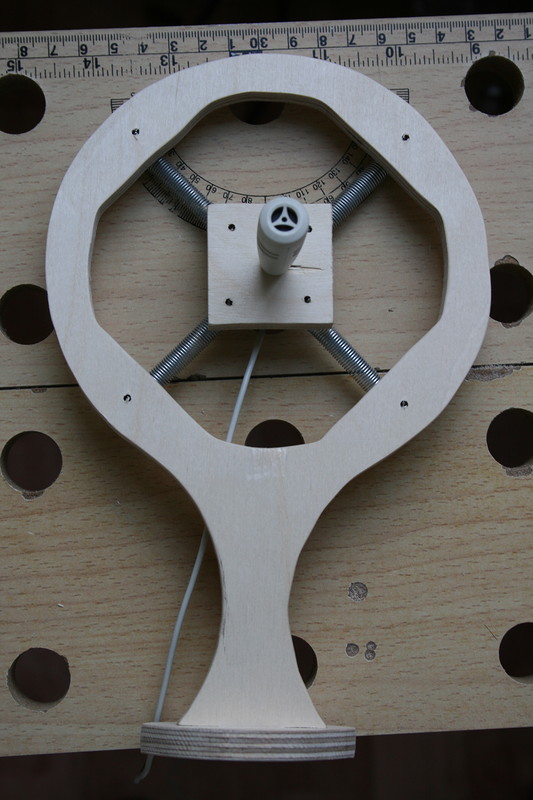
Stand with base removed and pop filter
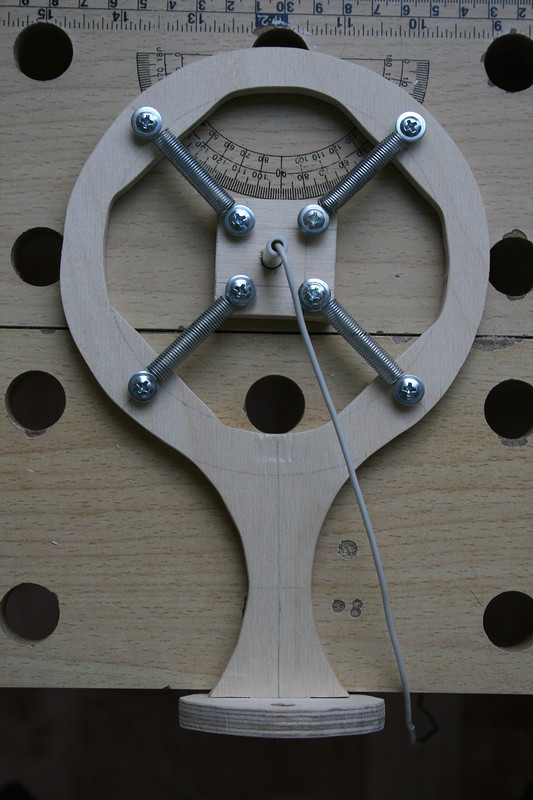
Back view

Base stand
As can be seen from the photo, the microphone had to be cut. To do this, you need to disassemble, solder the microphone itself, insert it into the drilled hole, and only then solder and assemble. Drawing three parts is very simple. The base is held simply by friction (the hole is made smaller than the protruding spike). Putting a hammer.
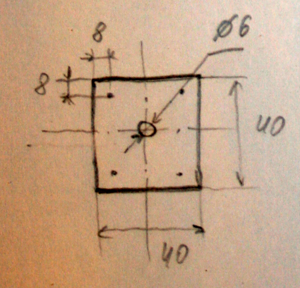
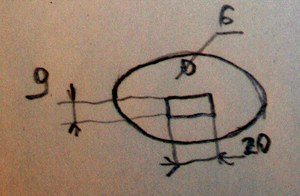
Pop filter
As the fabric used women's stockings in the hoop. The fingers are simply inserted due to friction in the product. Fixed to the remote beam so that you can adjust the length.
The drawing is simple. But the inner diameter is determined by the hoops found.
Lamp mount
The most interesting detail is the mount to the lamp. It is made of 20 mm plywood. The sizes are chosen in such a way that the thumb could rotate freely. Over this detail had to think.
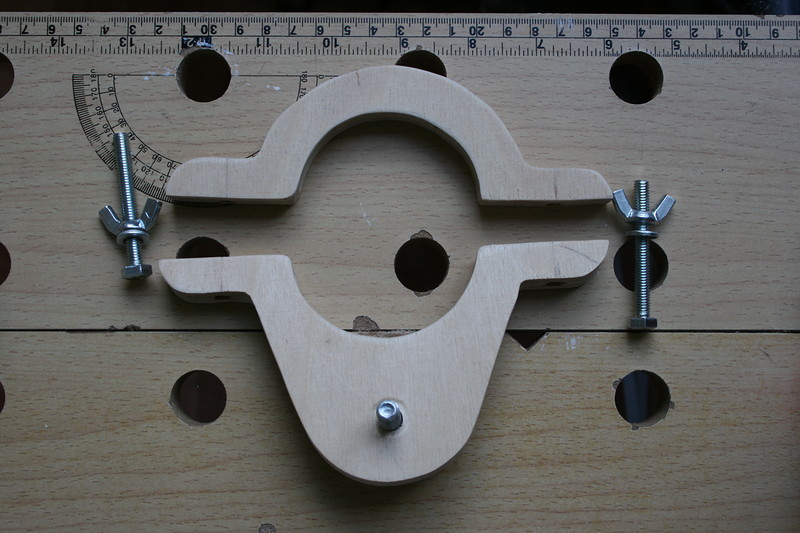
From one
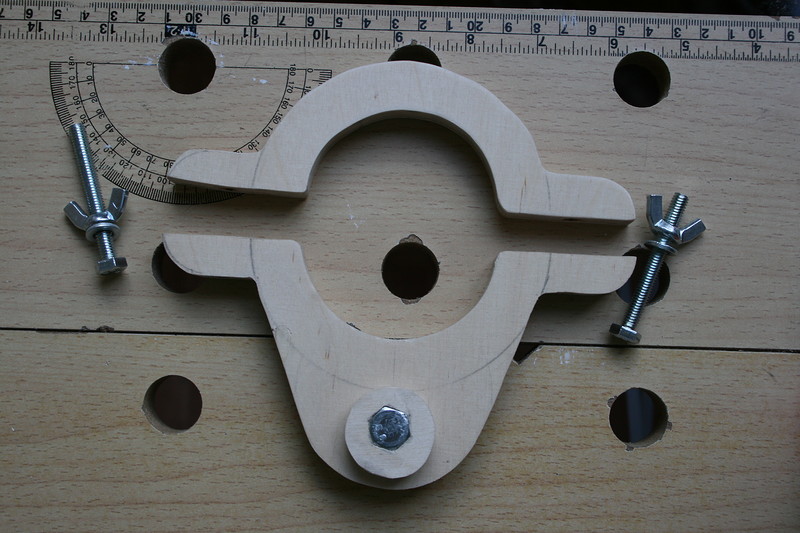
And the other side
As you can see, the bolt is pressed into a 10 mm piece of plywood, which is already glued to the base.

Fastener assembly
Curiously, the diameter of the lamp is 63mm. Not very convenient value. Therefore, I took an inner radius of 32 mm.
Another nuance: it is necessary that the sponges are not tightly attached to each other, so that the lamp is captured. Therefore, after the product was made, 1-2 mm was removed from each sponge (size “1-2” in the drawing).
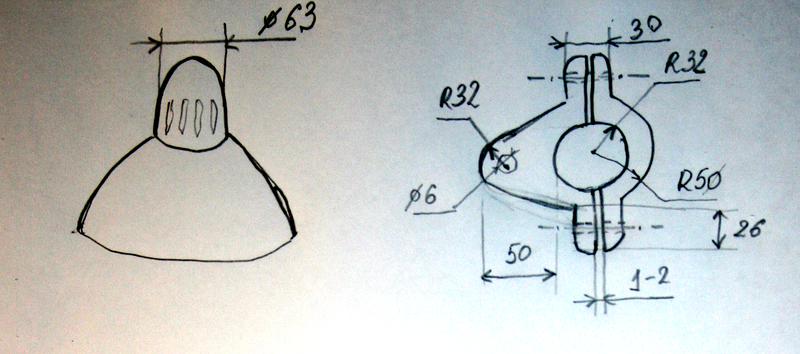
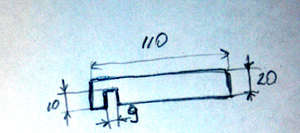
Table base
It is so simple that I did not even begin to take off its size. To weight the top, a 20 mm plywood disc is stuck from the lamp mount. The bolt is pressed from below.
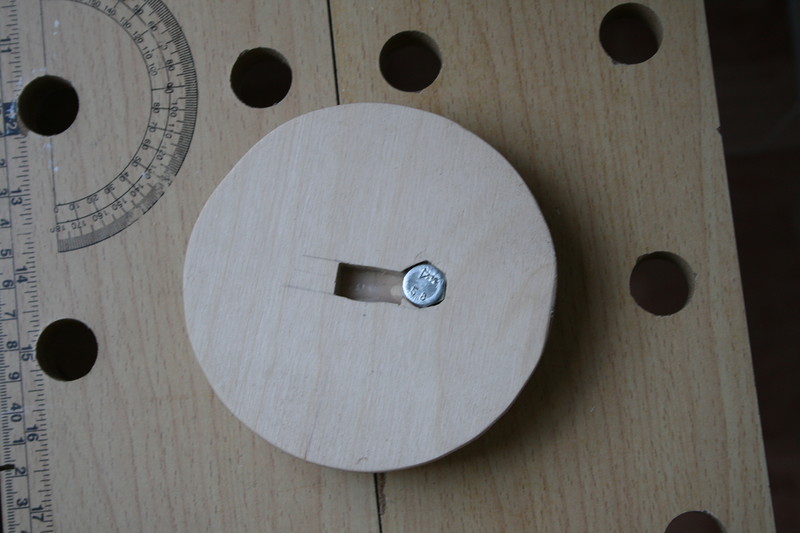
Bottom

Top
For convenience, I cite all the drawings on one sheet.

Total
Answering the question: why did I do it? Yes, it was stupidly interesting, and because I can! Long thought how to fasten a microphone to a lamp. And then sold, and it turned out such parsley.
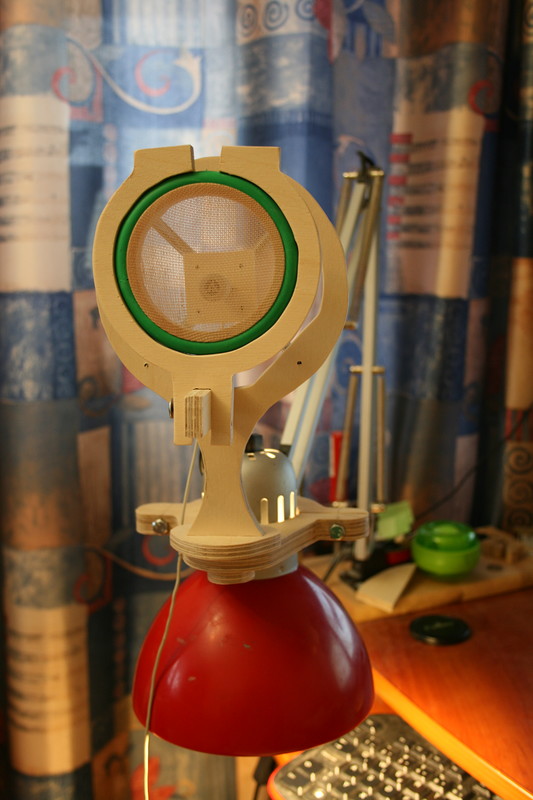
The product in the working interior
Specially made a video, as this microphone sounded and sounds now.
On this video, you can yourself evaluate the positive changes. I did not demonstrate the sound of explosive consonants, let it be homework :) As for me, this is an excellent budget solution for straight hands and a couple of free evenings.
Source: https://habr.com/ru/post/398177/
All Articles