Guide to creating mechanical tentacles at home: part 1
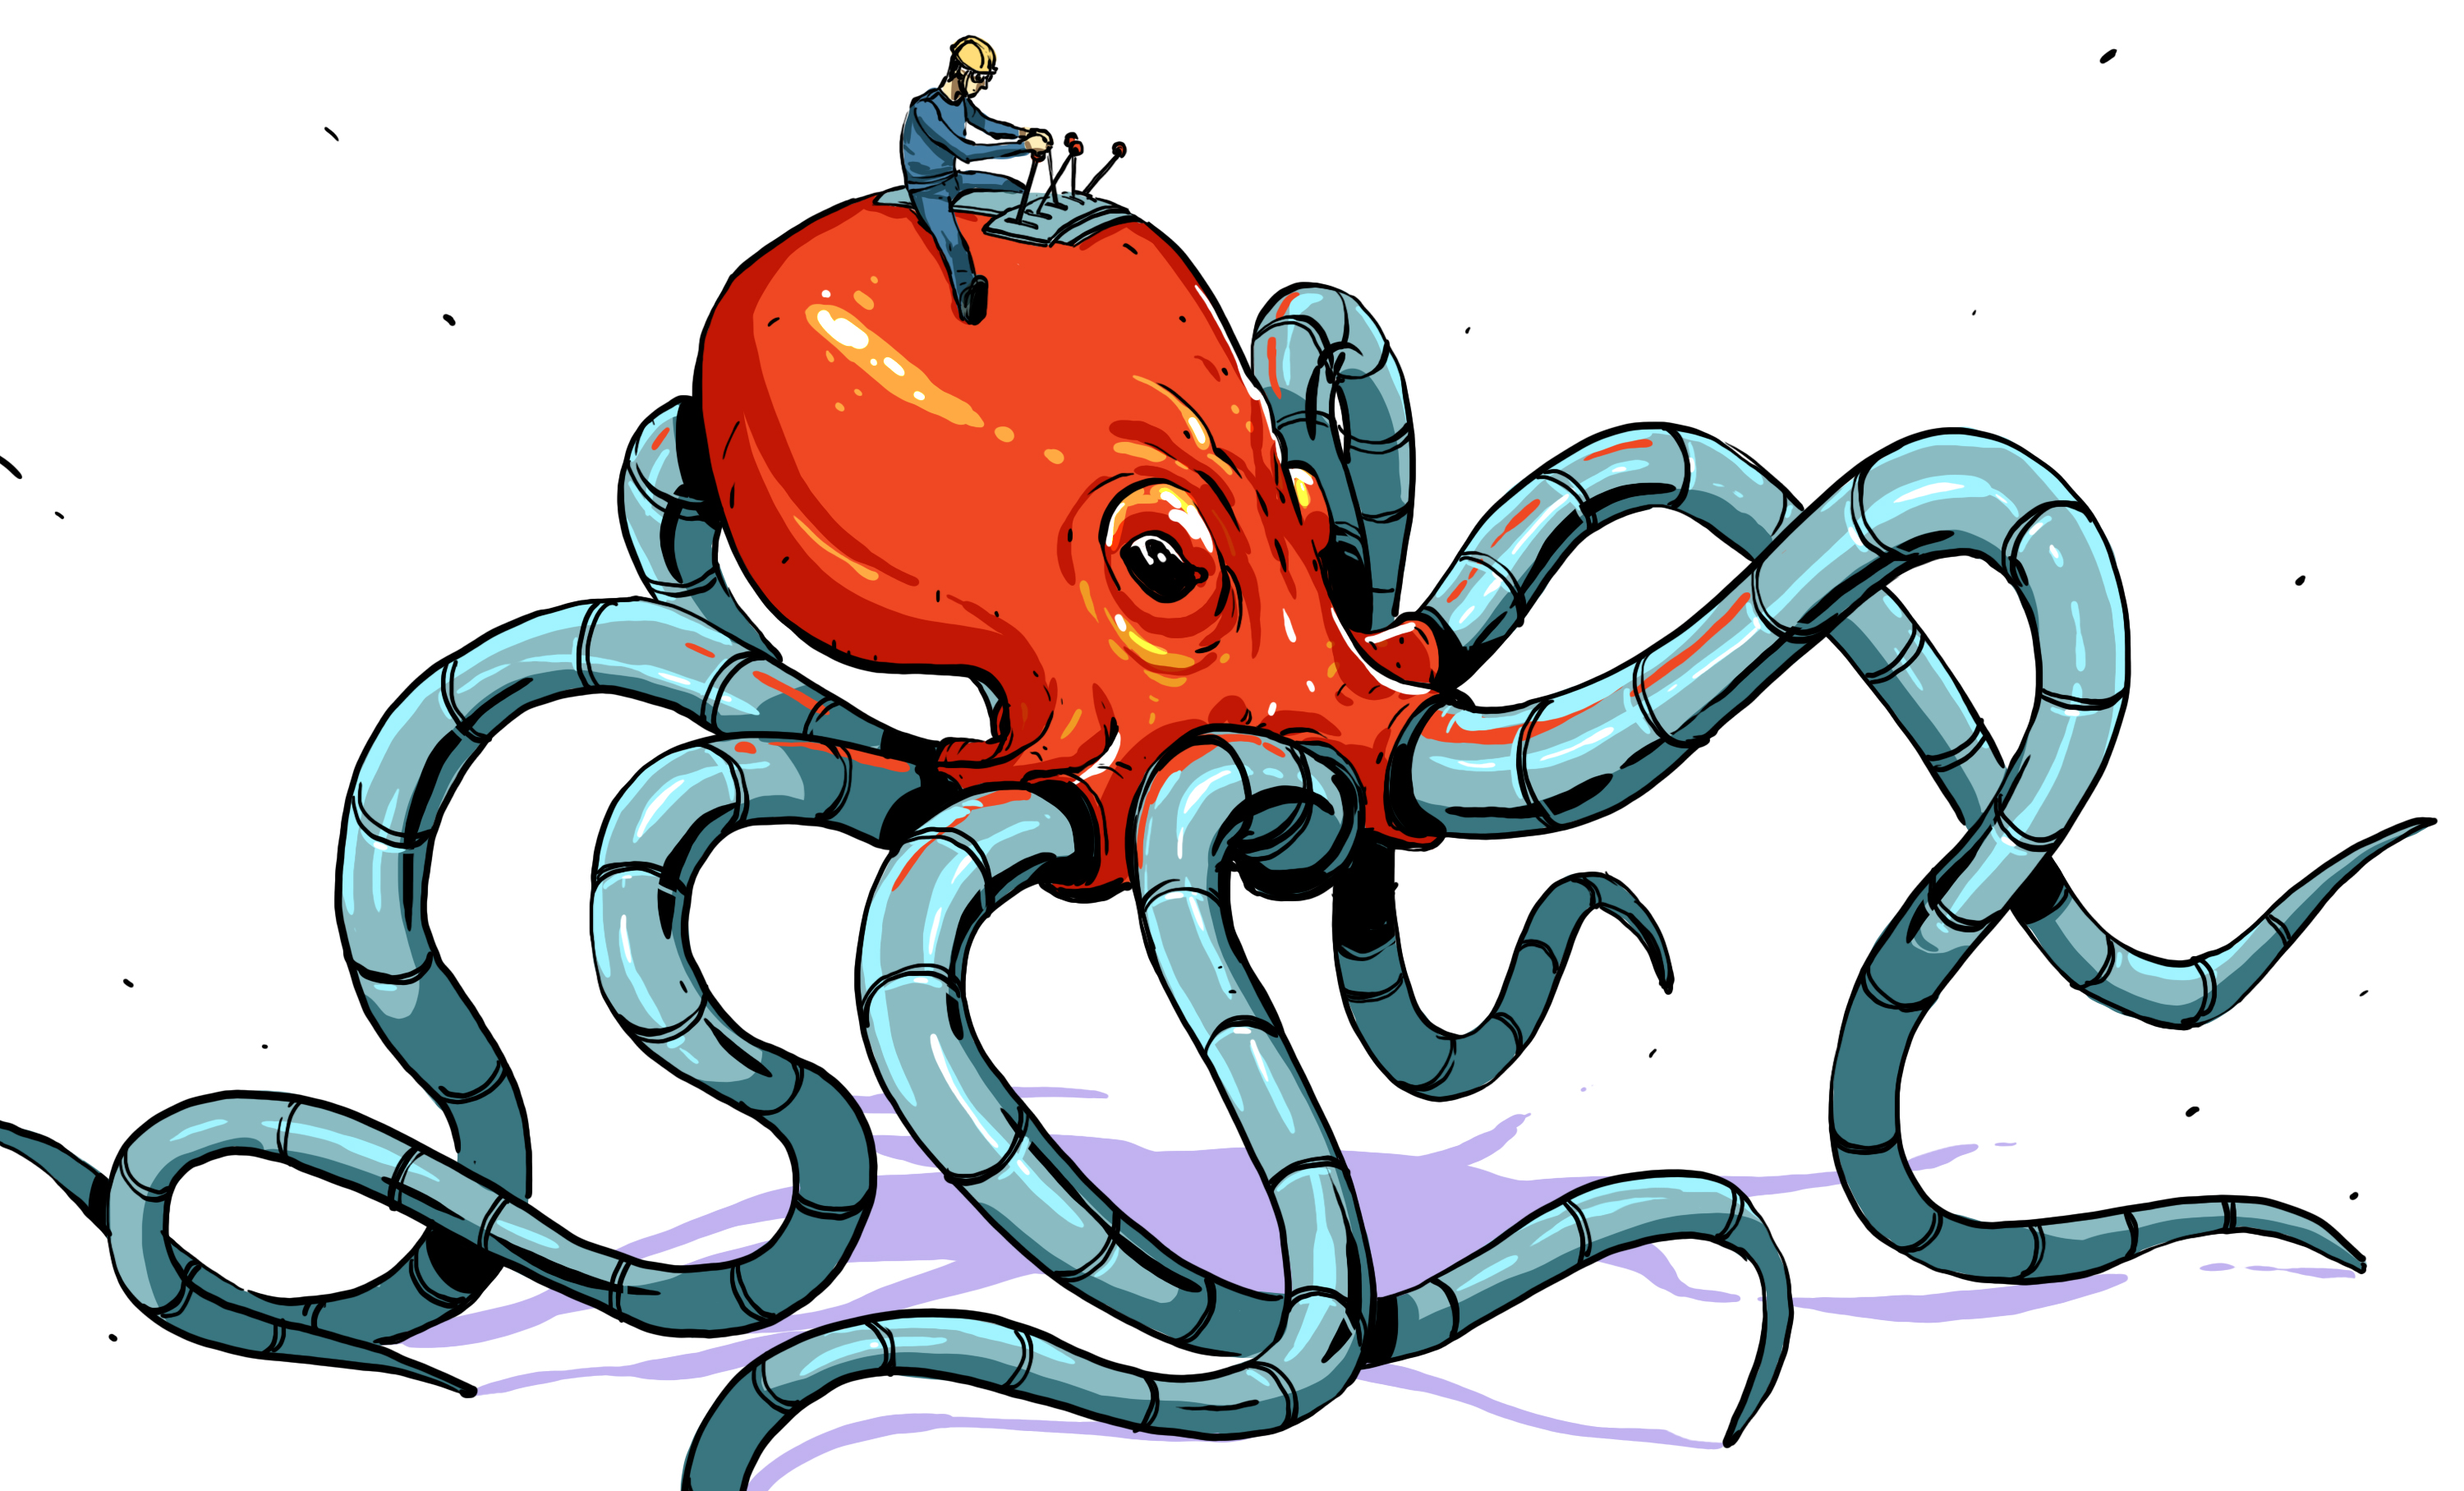
How can we not love animatronics? Bend the silicone skin of any doll, and you will see a cluster of mechatronic magic, giving it life on the big screen. I searched the Internet for good introductory materials on this topic, but I found only one - training videos from Stan Winston . After 30 seconds, I felt the tentacles awaken my basest urge to build tangible things. I'm a crush, I just had to build one such thing ... or more. And so, how you can create a very real animatronic tentacle.
It’s actually better for beginners to start the dive with Stan Winston tutorials. For two hours, instructor Richard Landon describes the general essence, the set of necessary components and the technique of making the mechanism of tentacles using a set of typical tools - not to mention a handful of wonderful examples from the movie. [one]
')
We also get the opportunity to look with one eye into the world of manufacturing more complex devices based on the same principles. I would like to start the story from the moment he finishes - with two-step tentacles bending on 4 sides. In addition, I will make one change to the design of tentacles from Landon. It will allow you to build your own tentacle and controller with just a few pre-made components, polyformaldehyde [derlin] and a laser cutter ... Ok, and from a couple of parts printed on a 3D printer.

How do two-step tentacles work
hackadaycom.files.wordpress.com/2016/08/tentacle_arc_aproximation.png
Both steps of the tentacle, each of which has two degrees of freedom
The tentacle has two degrees, each of which has two degrees of freedom. They allow each step to bend in two perpendicular directions. Combining these degrees of freedom, we get a total of four, allowing us to emulate completely believable organic movements. In the animation, looking closely, you can see the junction of the two stages - approximately in the middle of the tentacle.
With a good build, we can control both parts independently. Ideally. In reality, there is nothing perfect, and our materials have their limitations. We will need to play with tension and intervertebral distance until we achieve satisfactory results.

Ideally, pulling a cable from any of the steps, we will achieve an ideal arc, decreasing in diameter with increasing tension. But because of the friction losses in each of the vertebrae, we cannot achieve the ideal arc, although the result will be good enough to deceive people on the other side of the screen.
Among the tenus postures available to us there is no turning around its axis. This was done on purpose, since the puppeteers of the past viewed such movements as unnatural - for example, for cat tails or elephant trunks. [one].
Tentacle Sketch
To understand the principle of operation, we construct a rough tentacle of two plates and a flexible core. Here is a drawing of our germ:
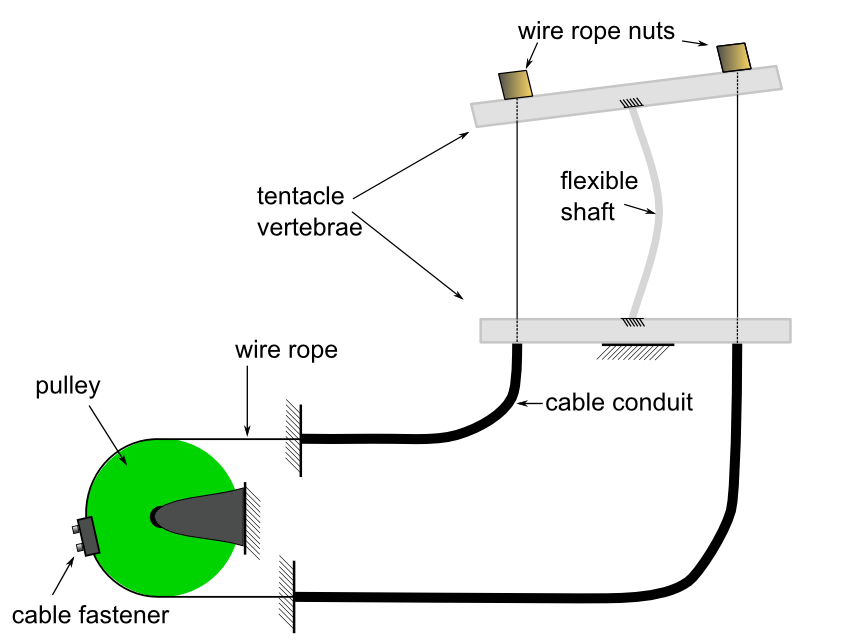
Giving rotation to the pulley, we loosen one cable and stretch the other at the same distance. Shortening the length bends the tentacle toward the wire. Since the cables transmit only tension, they must be made together with complementary ones in order to ensure movement in full amplitude in both directions along one of the degrees of freedom. Therefore, we will have to work with 8 different cables.
The tentacle holds its shape due to its two features. First, the cable conduit channel resists compression. Secondly, the cables are preloaded and rigidly connected to the pulley. Changing the length of the cable is the only way to move the vertebra, and the channel of the cable does not change the length. Therefore, the fixation of the pulley also fixes the tentacle.
Cable channel role
The cable channel plays an important role in the project. Without it, the movement of the upper stage would lead to parasitic movements of the lower, and we do not need this. We need to control both steps independently.
The cable channel allows you to redirect the application of forces from one end of the channel to the other without the appearance of parasitic effects. The channel must remain flexible and still resist compression.
Interestingly, with our scheme we can take on any point of the cable channel and move it without resistance, because:
1. The channel is flexible.
2. Its central part, along which the cable goes, does not change the length.
The bends of the channel do not change its length, so we can bend it as you please, and the tentacle will remain motionless. Comfortable!
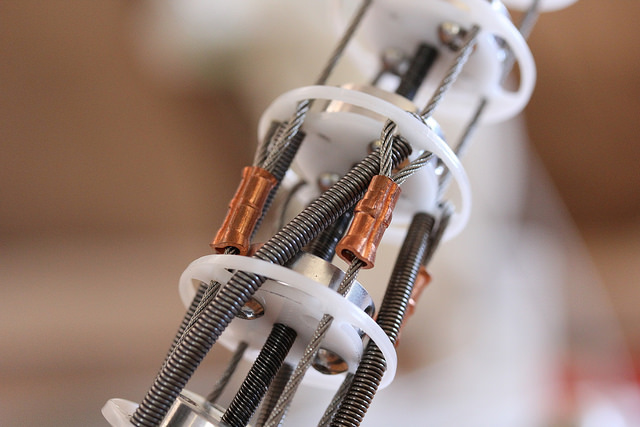
This allows us to do two things at once: to stretch the cables controlling the upper step through the lower step, and to control the upper step through the lower step, without affecting the latter.
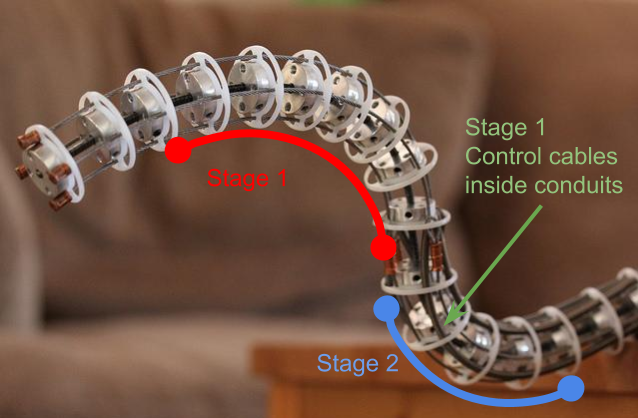
The image shows that the managers of the 1st stage ropes pass through the 2nd stage.
Spare parts
Main material
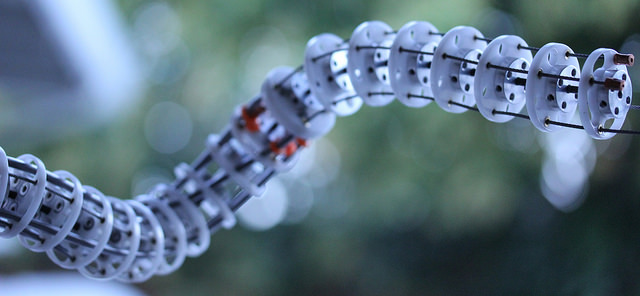
Smooth movements along all degrees of freedom are achieved by building a tentacle of materials that resist rotation around its axis. Most people use cables for speedometers from old cars that have exactly this property. [1] I also used such cables for the first time. Unfortunately, their diameter is only one: 0.125 inch, which is why one cannot make a large doll that does not bend under its own weight. Now I prefer flexible shafts from torque tools . But most of the images in this article are made using speedometer cables.
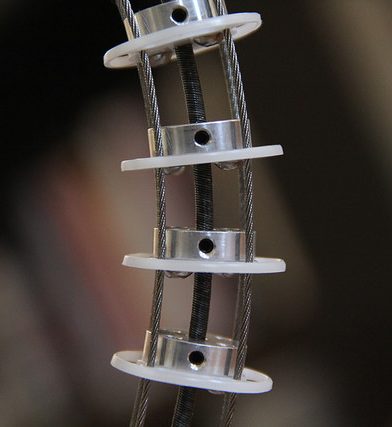
Segments

Each segment-vertebra must be firmly fixed, so that it does not slide and does not spin. They must correctly guide the cable, and in the right places - the cable channel, while being rigidly connected to the speedometer cable. Landon uses CNC machined aluminum parts for this. But I, rummaging in stores, found a simpler way out using ready-made components. Today, spare parts for robots are very popular due to the prevalence of this hobby, and I was able to make vertebrae from a universal sleeve from Pololu [Pololu Universal Aluminum Mounting Hub] and plates from polyformaldehyde [derlin].
Control cable
The control cable will take the same as on bicycles, but the truth is thinner. I successfully used two cable diameters - 1.2 mm and 0.8 mm. You can use expensive cables, which in the manufacture process so that they are not shaggy, or just heat up the cut end of the cable to glow. [3]
Cable channel
For the channel there are a lot of options - nylon tubes, bicycle sheath, springs. We only need the channel to resist compression and be flexible. Resistance to compression should provide an “equal and opposing” force for movement.

Flexibility is needed so that the channel does not prevent other sections of the tentacle from bending. For single-stage mechanisms, any of the listed options is suitable. For multistage flexibility is more important. So far, in my experience, springs working best are the most flexible of all materials.
In the store McMaster-Carr you can buy anything, if you know the correct name. Our cable channel is called “continuous length extension spring” ( 9664K12 ) and costs only $ 4.40 for 36 inches. [300 rub / m]
Smaller diameter springs can be ordered from Dr. Templeman and Co. The cost of the springs will be more, but then the assortment is richer. Very small diameters can be found at Molex .
Bend point
For the first time it was quite difficult for me to imagine the construction of this element. However, having understood the location of the endings of the cables, this detail is simple to construct. Each cable controlling the lower section ends in a loop. At the same vertebra, the cable channels containing the next set of control cables also end. From there, the next set of cables continues.
Alternative designs
Could we use another material for the vertebrae, for example, wood - to save on metal bushes? Perhaps, but such a design was made for a reason.
First, the complexity of the design must be balanced with either finished parts or an affordable method of manufacture (laser cutter and 3D printer). Therefore, such a design can be made even by people with an atypical eye and dexterity.
Secondly, the prototyping technology must be deterministic and repeatable. The device should behave in the same way, being manufactured in any part of the world. You do not need to practice magic and pray to the gods of glue, standing on one foot, while your epoxy freezes at some unusual moisture level. Simple technology that behaves the same everywhere and always.
But look for alternatives to design yourself. I modified the controller and the tentacle, but this does not mean that the work is completed. By the time the third part of the article is completed, all the development will be in your hands, and you will be able to do with it what you want.
Part 2
Links
[1] Stan Winston Cable Mechanism Basics
Detailed training material for creating simple tentacles
[2] Animatronics Demo with Rick Lazzarini 1:21:01
Examples of the use of cables from speedometers
[3] CS235: Applied Robot Design, Lecture 7-Introduction to Cable Transmissions
Introduction to the use of cables in robotics
Source: https://habr.com/ru/post/398165/
All Articles