Post about a bit
Surely many of you have seen the smartphone life hacking: we drop a drop of water on the camera of the smartphone and remain without a camera, we are able to take “macro shots”. I decided to check which photo canvases can be made this way.

In fact, on the website of the project “Simple Science” (guys, whom you all know, they led a cool blog on our website), I saw a cool idea - a contest of photos taken on a smartphone through a drop of water. It's kind of like DIY entertainment for kids: show them what a lens is and how a microscope works. Just one drop - and the present macro. I could not get past such a steep experiment.
Almost every smartphone now has two cameras - the front and the main, any of them can be used to solve the problem. With a front camera it is more comfortable - on the smartphone screen you will immediately see what the camera sees, at any time you can take a picture. But I had to abandon this option, since the protective glass was stuck on the front of the smartphone and not a single drop was “kept” on it.
')
The main camera is usually better, but it is not very convenient to use it for such a “microscope” - so that the droplet does not fall off the camera, the device should be held strictly horizontally. The screen in this case is located below and taking pictures is problematic - if only through headphones, but in this case the image is not visible. As an option - to fence a certain U-shaped "house", but we, as they say, are not looking for easy ways. I decided to leave the phone on the table, the main camera up, and make the photos programmatically - through a computer.
The network has a lot of instructions on how to control the computer from an iPhone, but not so much about how to manage an iPhone from a computer. First, I tried to get full access - I have long wanted to “use the phone” directly via OS X. The option was found, however, via jailbreak:
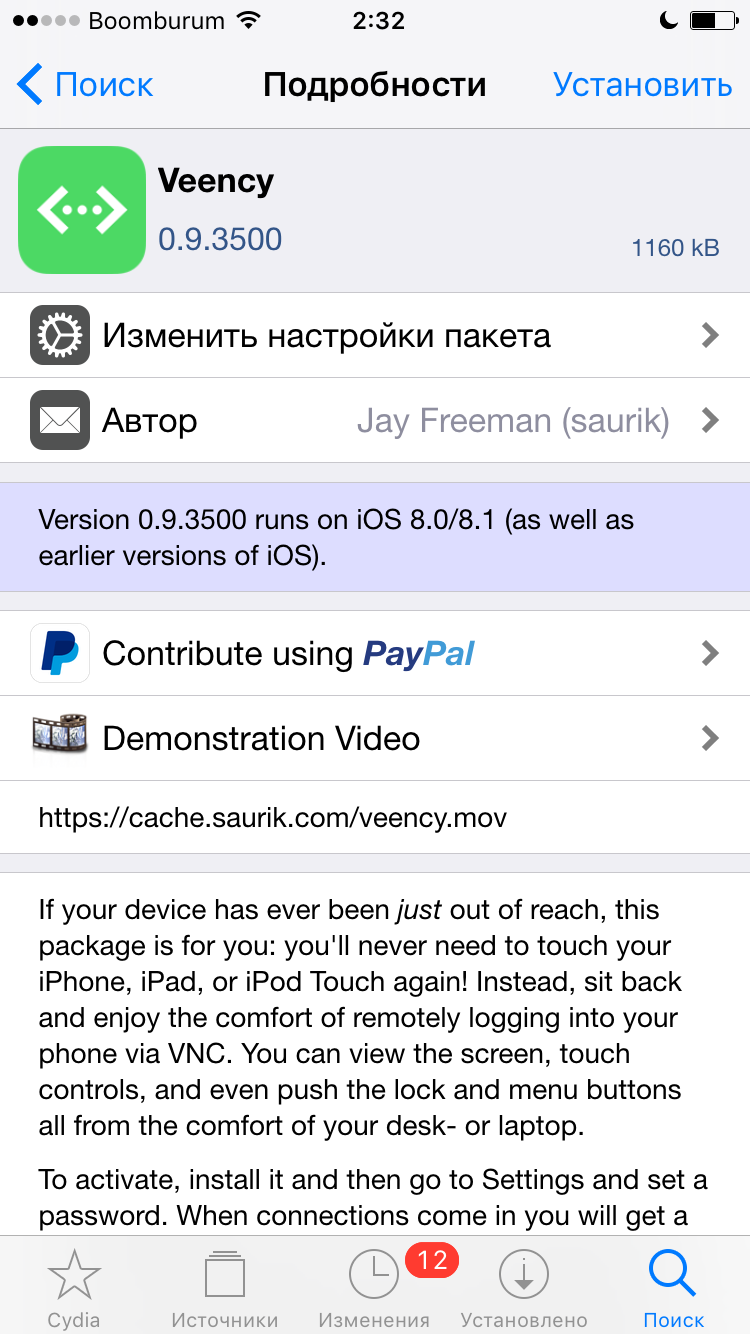
- Go to Cydia, drive in the Veency search - install this tweak. Surely by name, many by ear learned VNC;
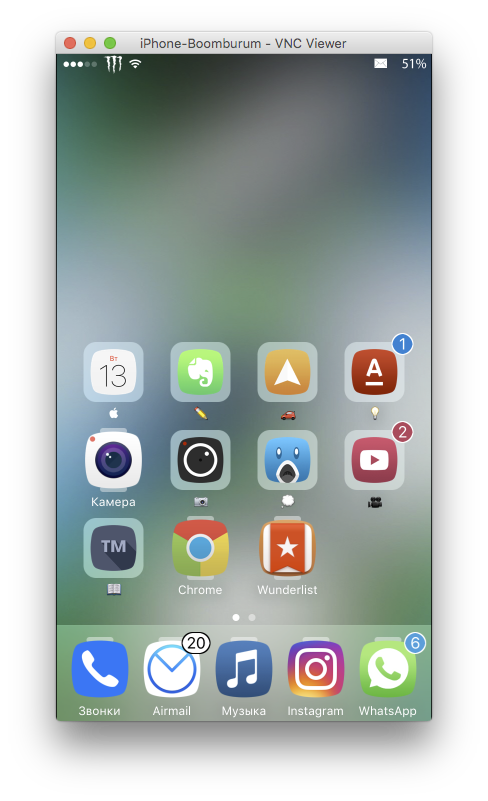
- Open the VNC Viewer (even suitable as a Chrome extension);
- In the settings of the iPhone, we look at its IP address, we connect to it in the VNC Viewer;
- Done. We get real-time full control over the device, including the ability to click on the icons ...
But with such a connection, for some reason, the image from the camera was not shown - instead it was just a black viewfinder, although everything else worked (if you know how to fix it, tell me).
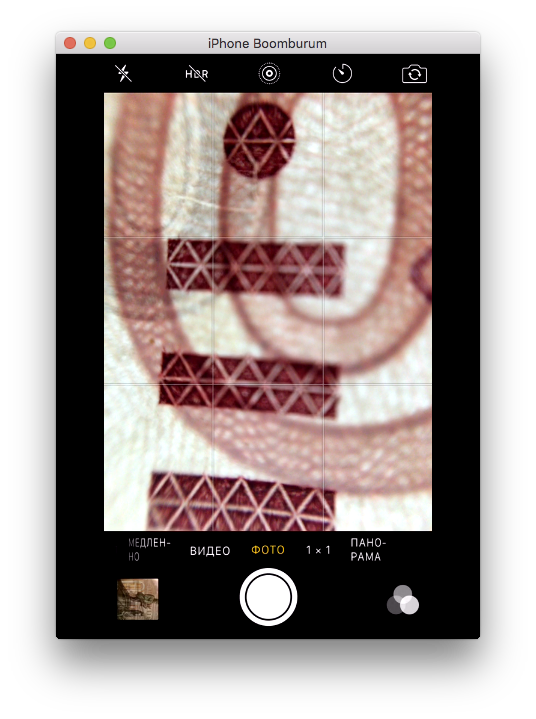
Therefore, we had to use the second option - unlike jailbreak, it is simpler, faster and more versatile. Namely, we are mirroring an image from an iPhone on a computer via AirPlay (for example, through the free Mirroring360 application), and taking photos using a headset (and if not, then you can take a screenshot of the window with a picture from the camera).
UPD: boootloader prompted another way for OS X: we catch an iPhone through the wire, start the regular Quick Time Player, click “New video” and next to the REC button in the drop-down list select the source of the “iPhone” signal - we get a full-fledged “viewfinder”.
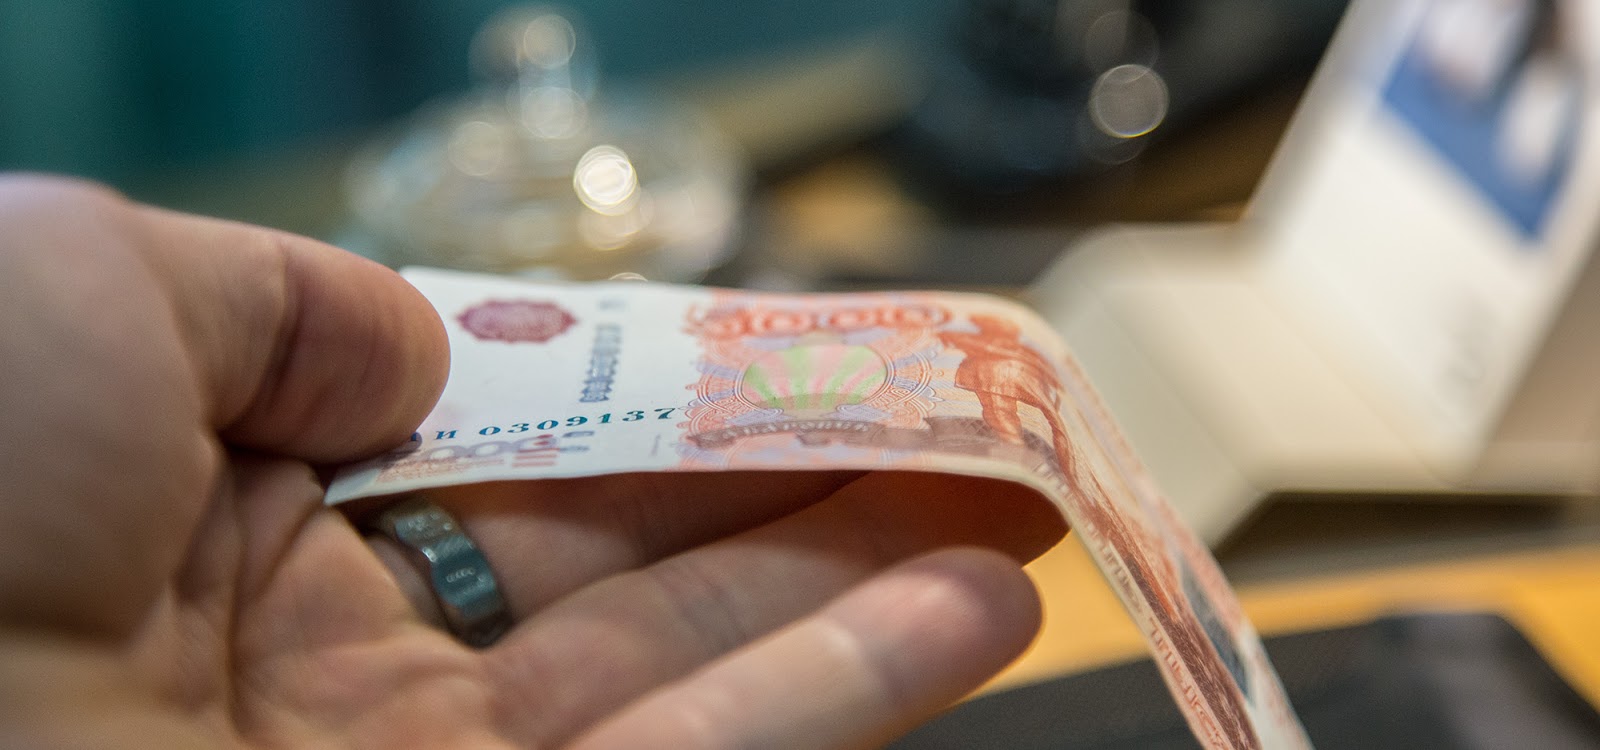
For the experiment, I put a drop of ordinary water - it immediately spread. Therefore, I decided to put a drop of liquid for soaring (the best result - if the mixture is raspberry-flavored; in the post all the pictures are made on coffee flavor)) - it is more “thick” because of the glycerin and propylene glycol contained in the liquid. In general, the smaller the droplet, the greater the increase, but the less clear the image. And vice versa - the larger the drop, the smaller the increase, but the deeper the sharpness. Look for balance.
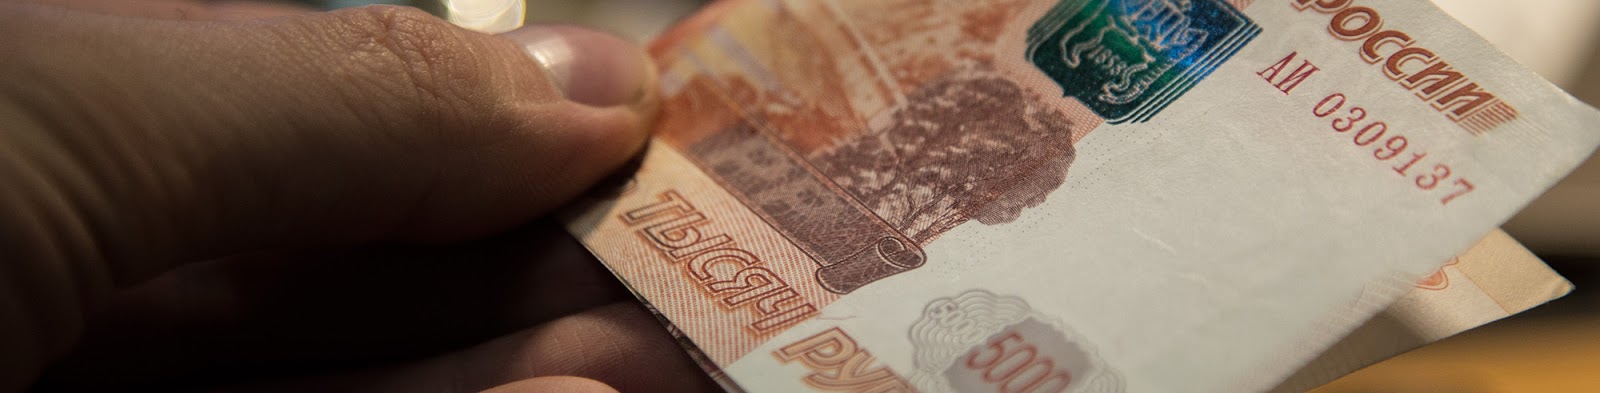
Long thought what to take as objects for shooting. It was possible to take a picture of a finger, a ballpoint pen, or a speaker grid from an earpiece, but what’s the point? As a result, I did not think of anything better than to take a five-thousandth bill - in order to study its protective elements - a number of signs, with the help of which one can distinguish a real bill from fakes. Surely each of you knows them by heart, but once the opportunity arose to examine everything closer ...
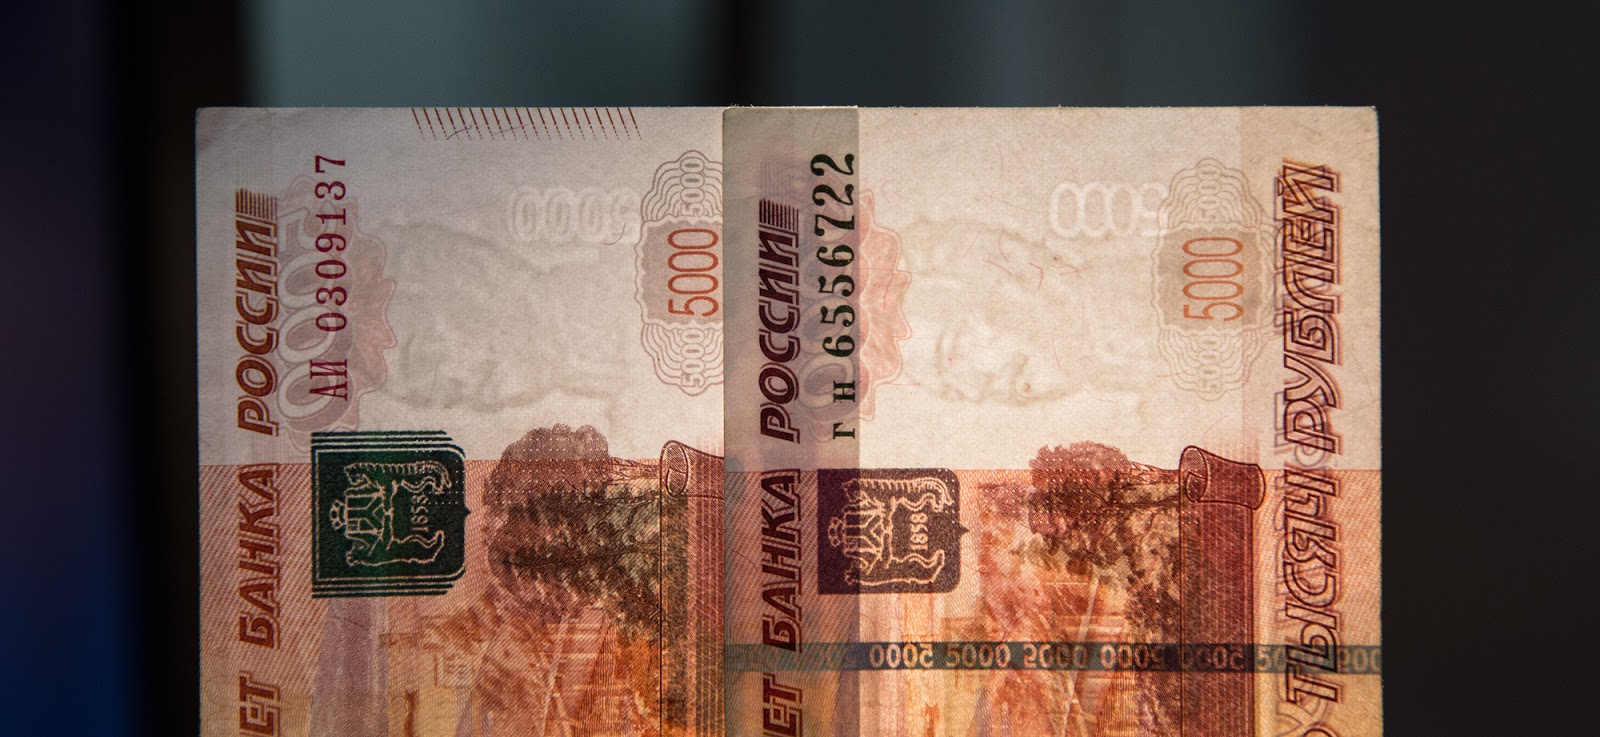
So. The size of the bill is 157 x 69 mm - the same as that of a bill with a nominal value of 1000 rubles, but more than all other bills (150 x 65 mm). This banknote of 1997 sample was put into circulation on July 31, 2006, and was updated on September 6, 2011. It is known that the five-thousandth bill was designed to become the most protected from counterfeit of all Russian paper banknotes.

New (top) and old (bottom)

New (top) and old (bottom)
The list of security features on bills, as well as their difference in samples of different year of manufacture:
There are more than 20 security elements in total, but we will go through only some of them using the example of a new-type banknote. A part of the photo was taken on a zeokalka, a part - on our newly made “microscope”.
1. Metallized strip. The metallized security thread (strip) with a holographic coating, compared to 2006, added 2 mm wide and became half a centimeter wide, now it “emerges” more clearly from thick paper banknotes. The strip shows repeated images of the numbers "5000", some of which are shifted relative to each other at different angles of view.
To the naked eye (against the light):

Under the "microscope":

2. Serial number of the banknote. The height of the digits of the left serial number gradually increases from left to right. But this is already visible, so let's take a better look at the microtext, which is in huge quantity in the bill. Almost everywhere is the number "5000" and the inscription "CBRF":

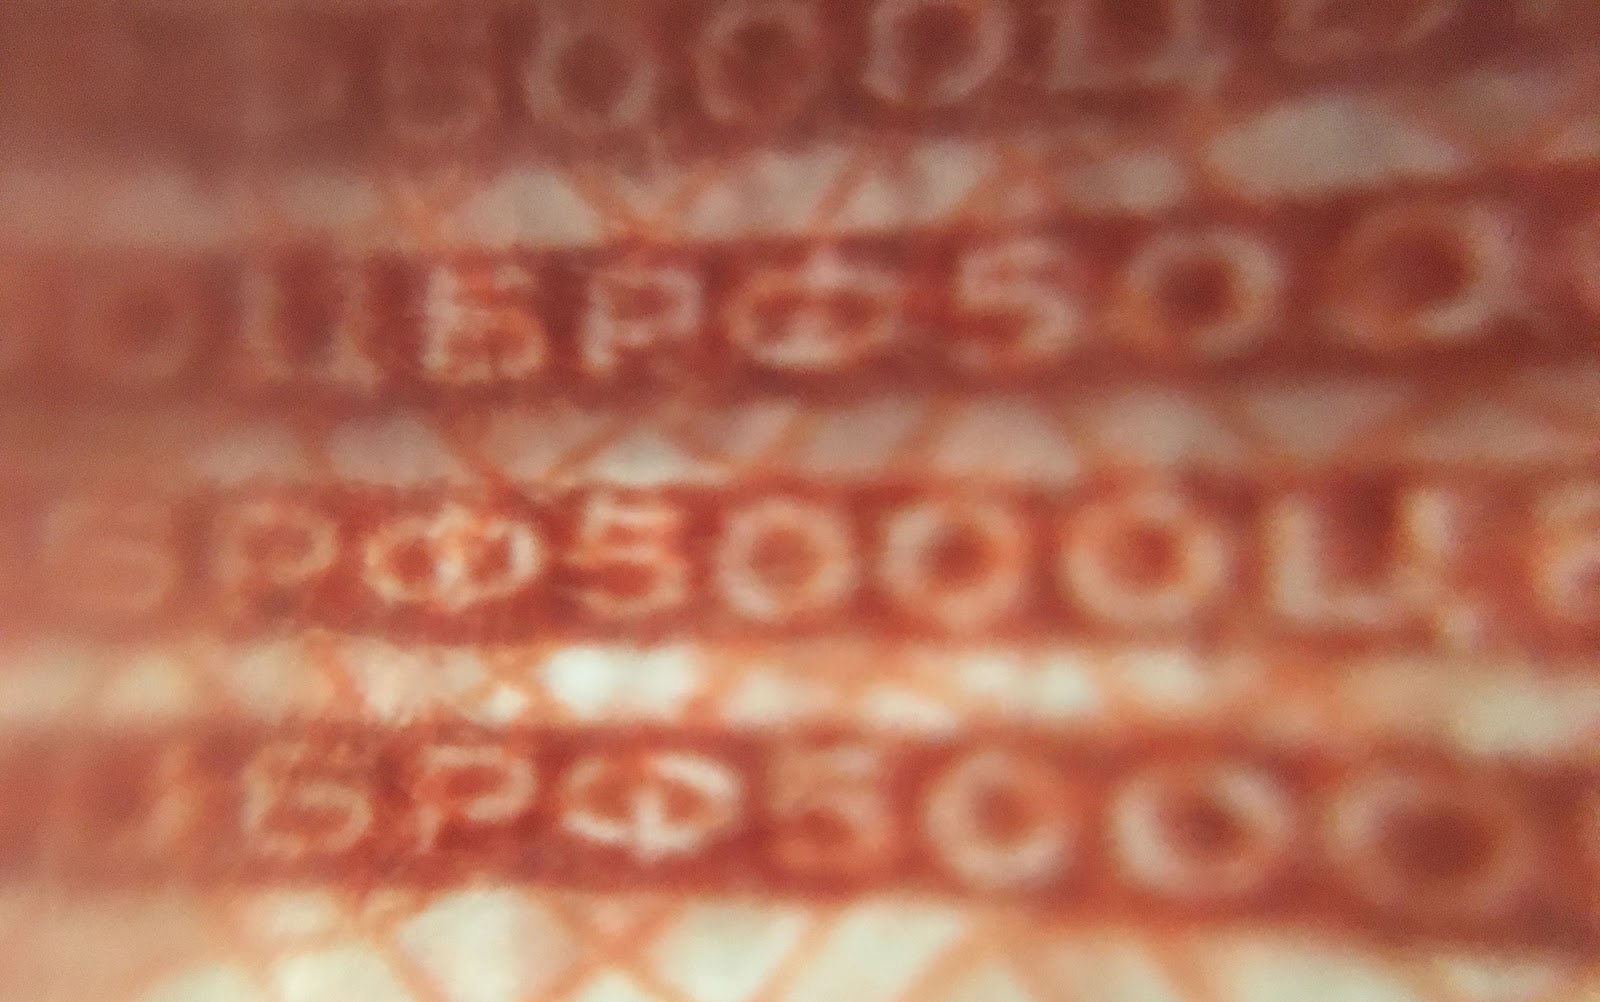
The most interesting microtext is on the side with the image of the monument of N.N. Muravev-Amursky - there he is surrounded by local fauna, namely all sorts of tigers and bears. In the same place inscriptions "" and "". Under the microscope:

More visual picture:

3. In two places of the bill there is a colorless embossing in the form of embossed strokes. In the 2006 version, the embossing was located to the right of the inscription “TICKET BANK OF RUSSIA”, and in the 2011 version, horizontal strokes are located on the left and right fields, which are partially colored, and partly not, this is a relief element with a transition to colorless embossing.
With the naked eye (on the left banknote):
This photo also shows the combined watermarks - a portrait of N.N. Muravyov-Amursky and the digital designation of the denomination of the bill (in which there are areas lighter than the paper itself).
Under the "microscope":


4. Relief mark for visually impaired people. The bills of different denominations, these labels are different:

In general, there are four embossed relief notes on the five thousandth note: the above points, the number “5000”, as well as the inscriptions “Ticket of the Bank of Russia” and “Five Thousand Rubles”.
5. Image with kip effect. As in the rest of Russian banknotes, an image with a KIPP effect (applying a latent image) is present on the 5000 bill - this is when the letters “PP” appear on the ornamental ribbon, if you look at it from a sharp angle against the light source. Depending on how you hold the bill, the letters may be light on a dark background or dark on a light background. Such images are applied by metallographic printing and may be present not only on money, but also on other securities.
With the naked eye:
6. Area with color moire. He MVC-effect - a unique metallography, relief printing, transmitting light and saturated colors. One of the elements by which ordinary people can easily determine the authenticity of bills, because it is almost impossible to fake MVC. The moire effect can be observed when the bill is tilted at an angle.
To the naked eye:
Under the "microscope":

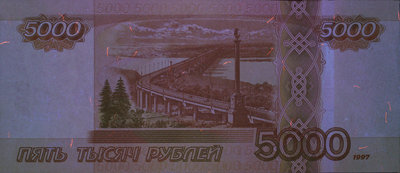
7. Colored protective fibers that glow in UV light. Rumor has it that this is President's hair)

8. Tag modification. On the front side of the modified banknote, in the lower part of the left coupon field to the left of the main image, is the text “MODIFICATION 2010 YEAR”. Yes, right, caps-lock.

9. Microperforation. If you look at the bill against the light source, you can see the number "5000", which is made in even parallel rows, indistinguishable by touch. Needle to make such fail.
To the naked eye:

Through the "microscope":

In addition to the above signs of authenticity that can be seen with the naked eye, there are other, machine-readable signs - for example:
»Image of a banknote in the infrared range of the spectrum (880-1000nm):

Images taken from cbr.ru
»Image of magnetic properties of a banknote:

Images taken from cbr.ru
»Image of banknote elements with luminescence under the influence of ultraviolet radiation (350-380 nm) - moire MVC + bands and protective fibers glow:

Images taken from cbr.ru
There are also a number of non-public signs of authenticity, which are used to study fakes more thoroughly. By the way, all the signs and methods of protection are safely applied and it is almost impossible to fake them - you can only imitate. Therefore, pay attention to these signs and do not let scammers spoil your mood. If in doubt, drop a drop on the camera and carefully remove the elements. Even if the cashier looks askance at you.
And pisyun on weave seen? ) Sramotaaaa!
Of course, we are not talking about any serious microscope - everything written above is nothing more than an experiment to test the performance of a live hacking device. As you can see, it works - having a smartphone and a drop of liquid at hand, you can take a picture of what you can barely see with your eyes. Of course, a digital microscope with a connection to a computer will be much more interesting and useful (if you have a child, then this is an unambiguous mast), but this, as they say, is a completely different story.

Ida upload photos that were made in the same way to kamenty?
In fact, on the website of the project “Simple Science” (guys, whom you all know, they led a cool blog on our website), I saw a cool idea - a contest of photos taken on a smartphone through a drop of water. It's kind of like DIY entertainment for kids: show them what a lens is and how a microscope works. Just one drop - and the present macro. I could not get past such a steep experiment.
Training
Almost every smartphone now has two cameras - the front and the main, any of them can be used to solve the problem. With a front camera it is more comfortable - on the smartphone screen you will immediately see what the camera sees, at any time you can take a picture. But I had to abandon this option, since the protective glass was stuck on the front of the smartphone and not a single drop was “kept” on it.
')
The main camera is usually better, but it is not very convenient to use it for such a “microscope” - so that the droplet does not fall off the camera, the device should be held strictly horizontally. The screen in this case is located below and taking pictures is problematic - if only through headphones, but in this case the image is not visible. As an option - to fence a certain U-shaped "house", but we, as they say, are not looking for easy ways. I decided to leave the phone on the table, the main camera up, and make the photos programmatically - through a computer.
The network has a lot of instructions on how to control the computer from an iPhone, but not so much about how to manage an iPhone from a computer. First, I tried to get full access - I have long wanted to “use the phone” directly via OS X. The option was found, however, via jailbreak:
- Go to Cydia, drive in the Veency search - install this tweak. Surely by name, many by ear learned VNC;
- Open the VNC Viewer (even suitable as a Chrome extension);
- In the settings of the iPhone, we look at its IP address, we connect to it in the VNC Viewer;
- Done. We get real-time full control over the device, including the ability to click on the icons ...
Process screenshots


VNC viewer:

VNC viewer:
But with such a connection, for some reason, the image from the camera was not shown - instead it was just a black viewfinder, although everything else worked (if you know how to fix it, tell me).
Therefore, we had to use the second option - unlike jailbreak, it is simpler, faster and more versatile. Namely, we are mirroring an image from an iPhone on a computer via AirPlay (for example, through the free Mirroring360 application), and taking photos using a headset (and if not, then you can take a screenshot of the window with a picture from the camera).
UPD: boootloader prompted another way for OS X: we catch an iPhone through the wire, start the regular Quick Time Player, click “New video” and next to the REC button in the drop-down list select the source of the “iPhone” signal - we get a full-fledged “viewfinder”.
Let's go!
For the experiment, I put a drop of ordinary water - it immediately spread. Therefore, I decided to put a drop of liquid for soaring (the best result - if the mixture is raspberry-flavored; in the post all the pictures are made on coffee flavor)) - it is more “thick” because of the glycerin and propylene glycol contained in the liquid. In general, the smaller the droplet, the greater the increase, but the less clear the image. And vice versa - the larger the drop, the smaller the increase, but the deeper the sharpness. Look for balance.
Long thought what to take as objects for shooting. It was possible to take a picture of a finger, a ballpoint pen, or a speaker grid from an earpiece, but what’s the point? As a result, I did not think of anything better than to take a five-thousandth bill - in order to study its protective elements - a number of signs, with the help of which one can distinguish a real bill from fakes. Surely each of you knows them by heart, but once the opportunity arose to examine everything closer ...
So. The size of the bill is 157 x 69 mm - the same as that of a bill with a nominal value of 1000 rubles, but more than all other bills (150 x 65 mm). This banknote of 1997 sample was put into circulation on July 31, 2006, and was updated on September 6, 2011. It is known that the five-thousandth bill was designed to become the most protected from counterfeit of all Russian paper banknotes.
New (top) and old (bottom)
New (top) and old (bottom)
The list of security features on bills, as well as their difference in samples of different year of manufacture:
| Way to protect | In circulation since 2006 | In circulation since 2011 | |
| one | Metallized strip | Metallized security thread with a holographic coating, width 3 mm | Wide metallized diving security thread with a holographic coating, 5 mm |
| 2 | Banknote serial number | Increasing font size in the right margin | Increasing font size in the left margin |
| 3 | Colorless embossing | There is no stamping or relief elements on the “Bank of Russia Ticket” label. | Relief elements with transition to colorless embossing from two sides on coupon fields |
| four | Relief mark for visually impaired people | Present | Present |
| five | Visible color bars on MVC | Not | Yes, below |
| 6 | Color moire area | There are no visible bands | Applied MVC +, and in the lower part of the familiar field appeared an element with visible color bars |
| 7 | Coat of arms of Khabarovsk | The coat of arms of Khabarovsk is made with optically variable paint (OVI), the coating of the emblem of the Bank of Russia has a polarizing effect | The emblem of the city of Khabarovsk of green color is made with an optically variable magnetic ink (OVMI) with the effect of moving a bright shiny strip (plus, six stripes are added on the sides of the coat of arms) |
| eight | Colored protective fibers | Red, light green, bicolor and gray fibers. Two-color protective fibers with the naked eye are perceived as purple. Red and light green are in the UV light, respectively, red and yellow-green glow. On the two-color fibers, the red glow has red patches. | Bicolor fibers of variable cross section with alternating patches of red and blue and gray fibers. When exposed to UV light, the red glow has patches of red. Areas of blue and gray fibers do not glow when exposed to UV light. |
| 9 | Modification label | No tag | There is a label "Modification of 2010" |
There are more than 20 security elements in total, but we will go through only some of them using the example of a new-type banknote. A part of the photo was taken on a zeokalka, a part - on our newly made “microscope”.
1. Metallized strip. The metallized security thread (strip) with a holographic coating, compared to 2006, added 2 mm wide and became half a centimeter wide, now it “emerges” more clearly from thick paper banknotes. The strip shows repeated images of the numbers "5000", some of which are shifted relative to each other at different angles of view.
To the naked eye (against the light):
Under the "microscope":
2. Serial number of the banknote. The height of the digits of the left serial number gradually increases from left to right. But this is already visible, so let's take a better look at the microtext, which is in huge quantity in the bill. Almost everywhere is the number "5000" and the inscription "CBRF":
The most interesting microtext is on the side with the image of the monument of N.N. Muravev-Amursky - there he is surrounded by local fauna, namely all sorts of tigers and bears. In the same place inscriptions "" and "". Under the microscope:
More visual picture:
3. In two places of the bill there is a colorless embossing in the form of embossed strokes. In the 2006 version, the embossing was located to the right of the inscription “TICKET BANK OF RUSSIA”, and in the 2011 version, horizontal strokes are located on the left and right fields, which are partially colored, and partly not, this is a relief element with a transition to colorless embossing.
With the naked eye (on the left banknote):
This photo also shows the combined watermarks - a portrait of N.N. Muravyov-Amursky and the digital designation of the denomination of the bill (in which there are areas lighter than the paper itself).
Under the "microscope":
4. Relief mark for visually impaired people. The bills of different denominations, these labels are different:
In general, there are four embossed relief notes on the five thousandth note: the above points, the number “5000”, as well as the inscriptions “Ticket of the Bank of Russia” and “Five Thousand Rubles”.
5. Image with kip effect. As in the rest of Russian banknotes, an image with a KIPP effect (applying a latent image) is present on the 5000 bill - this is when the letters “PP” appear on the ornamental ribbon, if you look at it from a sharp angle against the light source. Depending on how you hold the bill, the letters may be light on a dark background or dark on a light background. Such images are applied by metallographic printing and may be present not only on money, but also on other securities.
With the naked eye:
6. Area with color moire. He MVC-effect - a unique metallography, relief printing, transmitting light and saturated colors. One of the elements by which ordinary people can easily determine the authenticity of bills, because it is almost impossible to fake MVC. The moire effect can be observed when the bill is tilted at an angle.
To the naked eye:
Under the "microscope":
7. Colored protective fibers that glow in UV light. Rumor has it that this is President's hair)
8. Tag modification. On the front side of the modified banknote, in the lower part of the left coupon field to the left of the main image, is the text “MODIFICATION 2010 YEAR”. Yes, right, caps-lock.
9. Microperforation. If you look at the bill against the light source, you can see the number "5000", which is made in even parallel rows, indistinguishable by touch. Needle to make such fail.
To the naked eye:
Through the "microscope":
In addition to the above signs of authenticity that can be seen with the naked eye, there are other, machine-readable signs - for example:
»Image of a banknote in the infrared range of the spectrum (880-1000nm):
Images taken from cbr.ru
»Image of magnetic properties of a banknote:
Images taken from cbr.ru
»Image of banknote elements with luminescence under the influence of ultraviolet radiation (350-380 nm) - moire MVC + bands and protective fibers glow:
Images taken from cbr.ru
There are also a number of non-public signs of authenticity, which are used to study fakes more thoroughly. By the way, all the signs and methods of protection are safely applied and it is almost impossible to fake them - you can only imitate. Therefore, pay attention to these signs and do not let scammers spoil your mood. If in doubt, drop a drop on the camera and carefully remove the elements. Even if the cashier looks askance at you.
And pisyun on weave seen? ) Sramotaaaa!
18+
The end
Of course, we are not talking about any serious microscope - everything written above is nothing more than an experiment to test the performance of a live hacking device. As you can see, it works - having a smartphone and a drop of liquid at hand, you can take a picture of what you can barely see with your eyes. Of course, a digital microscope with a connection to a computer will be much more interesting and useful (if you have a child, then this is an unambiguous mast), but this, as they say, is a completely different story.
Ida upload photos that were made in the same way to kamenty?
Source: https://habr.com/ru/post/397627/
All Articles