SLO: film camera, fully printed on a 3D printer
3D printing is becoming more accessible and common. 3D printers are gradually getting cheaper, the quality of the printing process is improving. Now with the help of such systems you can create a large number of very different objects: parts, device modules and devices themselves, even jewelry.
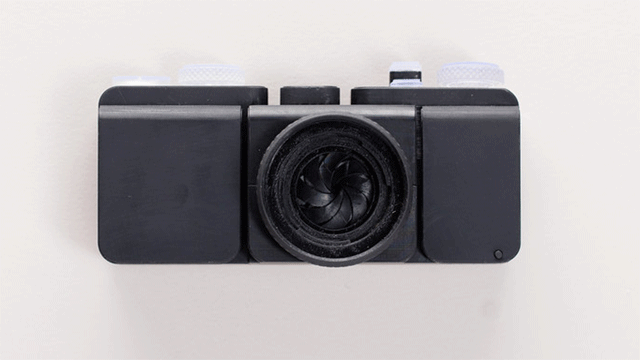
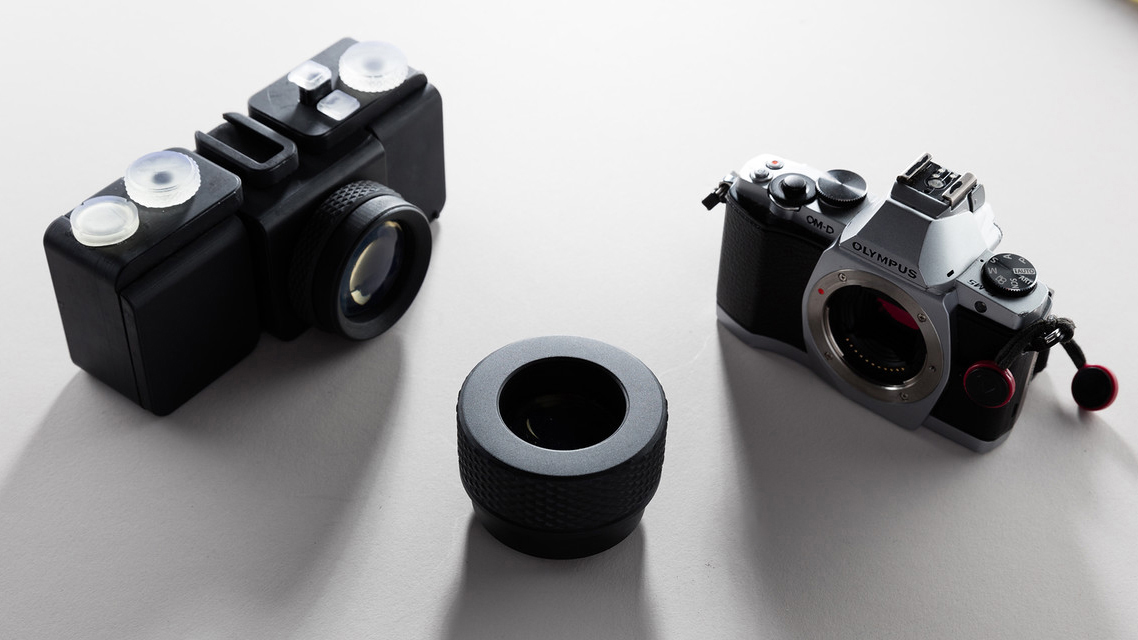
Recently, the network has information that one of the skilled craftsmen printed a film camera on a 3D printer. The news itself does not look particularly impressive, since the printer also printed out more complex devices. But here we are talking about the fact that the camera SLO printed on the printer completely. All mounts, body parts and even lenses are all printed. It would be superfluous to say that the camera is fully functional.
The author of the project, Amos Dudley (Amos Dudley) made the lens and the shutter of the photographic lens removable. They, if desired, can be replaced by others. Unfortunately, the lenses printed out on the printer have to be polished. This work takes about 5-6 hours. Polishing is not manual, but machine - for polishing Dudley uses a DIY device. The camera works with a 35 mm film.
')
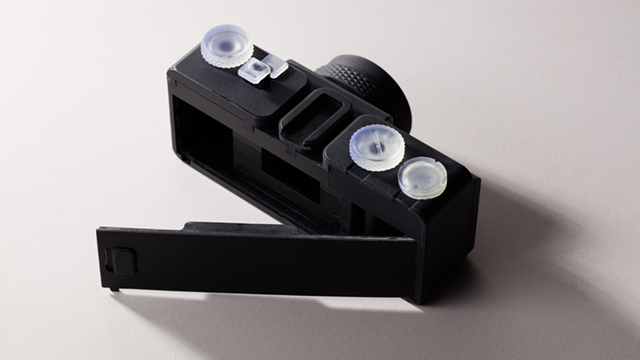
Main elements:
- Cartridge for film;
- Tape drive mechanism;
- Receiving coil for film;
- A set of parts for the tape drive mechanism;
- Gate;
- Lenses;
- Light-proof case (the joints of individual parts are assembled overlapped, in order to prevent light from entering inside);
- Door for access to the film.
The author of the project has repeatedly improved the design of the camera, trying to make it as practical and convenient as possible. As mentioned above, the author decided to make the lenses and shutter removable. This allows you to change the design of the modules without changing the camera itself. A 3D camera model is available for viewing here .
The camera works with a 35 mm film because such a film is still easy to get, and its price is not too high. Compliance with this particular standard made it possible to make the camera small. According to the author, 35 mm camera lenses can be used in a digital camera, as well as smaller sensors like the Olympus Micro 4/3.

For printing, the author used the Form 2 SLA printer. This is the latest model of desktop stereolithographic 3D-printer from the company Formlabs. Developers declare that the printer can print with a jeweler accuracy. Laser stereolithographic printing allows you to achieve resolution, previously unattainable. The layer thickness is 25 microns. The construction area of FORM 2 is 145x145x175 mm. The device is equipped with a system for supplying photopolymer resin through cartridges. Thanks to the new printing technology, we managed to create a camera with lenses. Ordinary printers would not have coped with the task.
Interestingly, even after carefully polishing the lens, the photos were not very clear. According to the author, this indicates the presence of invisible eye scratches on the surface of the optical element. After suffering with such a lens, Dudley decided to try another method, similar to that used in the industrial production of optical lenses. The second attempt was a success thanks to the work with the blank of the necessary form by the author with a layer of so-called lapping powder. It is noteworthy that the first time polishing the lens was carried out manually. This time-consuming and uninteresting process was later managed to be entrusted to an improvised grinding device. After grinding the lens was immersed in a photopolymer resin and "lit".
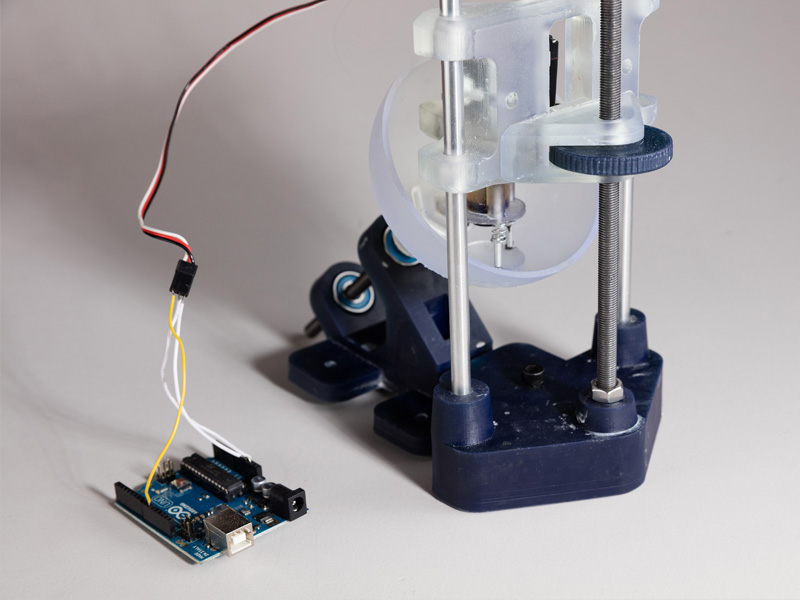
In order not to waste time checking the lenses in a printed camera, the author had to create a small device to check the quality of the lenses. This, according to him, is an overgrown micrometer that allows the lenses to be mounted to the Olympus OM-D Micro Four Thirds camera. And with its help, it is already possible to check how well the lens is polished. Working with optics is not an easy task, especially if you create this optics yourself. But Amos Dudley coped with this task, although, as mentioned above, he had to face a number of difficulties.
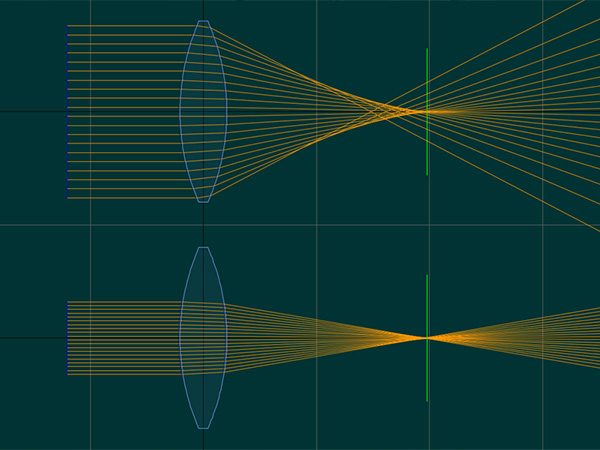
Checking the lens shape and focal length was carried out in the Optical Ray Tracer.
With the shutter, the author also had to work - after a series of tested systems, he stopped at the shutter, the prototype of which was installed in the chamber in 1885, this is Agfa Ansco Shur-Shot. The shutter was not copied, because the original simply would not fit in the body of the camera designed by the craftsman. Therefore, Dudley took as a basis only the principle of its action. To simulate the final design of the shutter, the animation system Blender was used.

All the other elements of the camera, including the body, were able to be designed and implemented without much difficulty, although much time was also spent on this. But why did the author undertake such a laborious job at all? The answer is simple: "Because I wanted to." “Analog photography allows you to capture the moment you like, turning it into a clear image. My 3D printer allowed me to put my thoughts into real shape ... I decided to make a camera entirely on a 3D printer, ”says the author of the project. He also claims that he is completely satisfied with the result, although he plans to further improve his camera.
Amos Dudley ended up with a “warm tube” camera, good in and of itself, as a device for acquiring analogue shots. Plus, the camera can be used as a demonstration of the capabilities of modern 3D printing. As mentioned above, neither the camera, nor its details, nor, especially, lenses could be created on one of the models of 3D printers of previous years. And even taking into account the fact that the new model of the printer prints with very high accuracy, a number of camera elements had to be modified manually.
Examples of photos taken with the SLO camera:
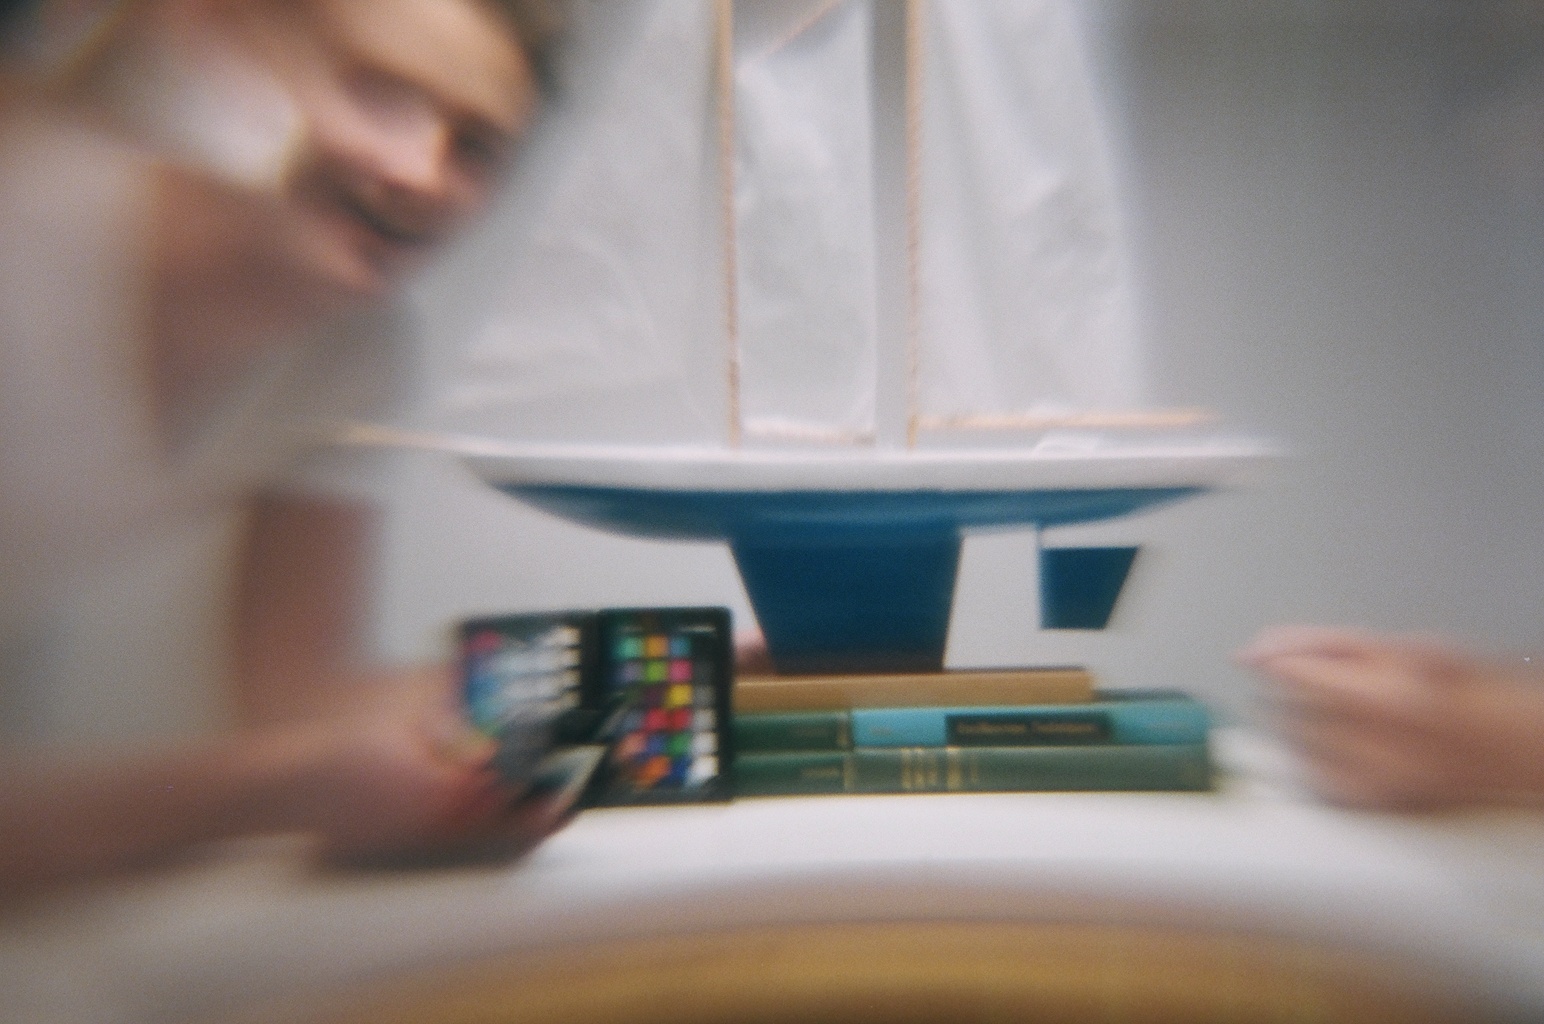
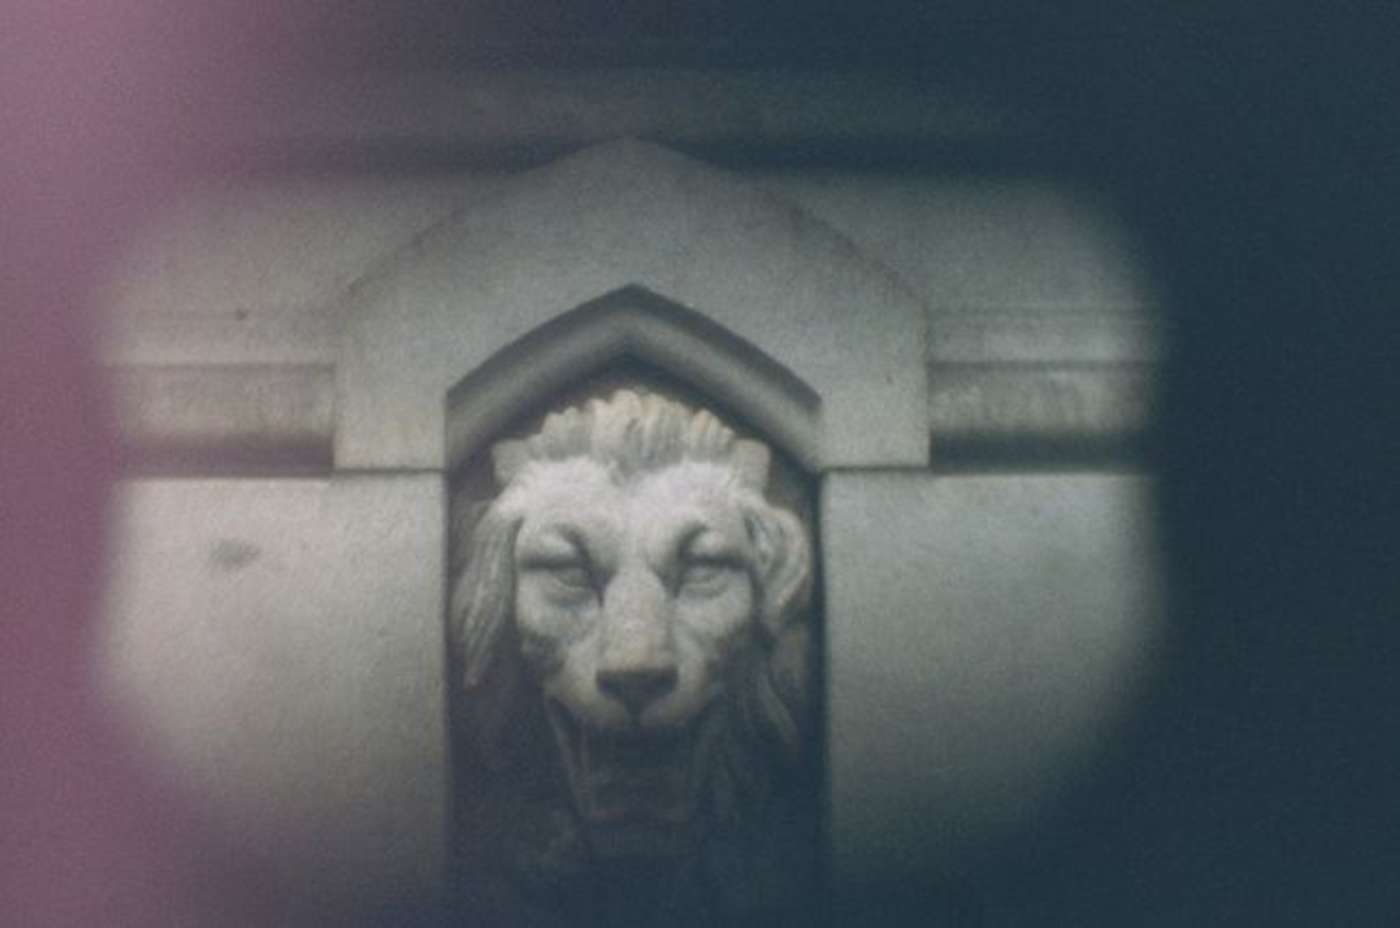

And photos from the author's flickr .
Source: https://habr.com/ru/post/397403/
All Articles