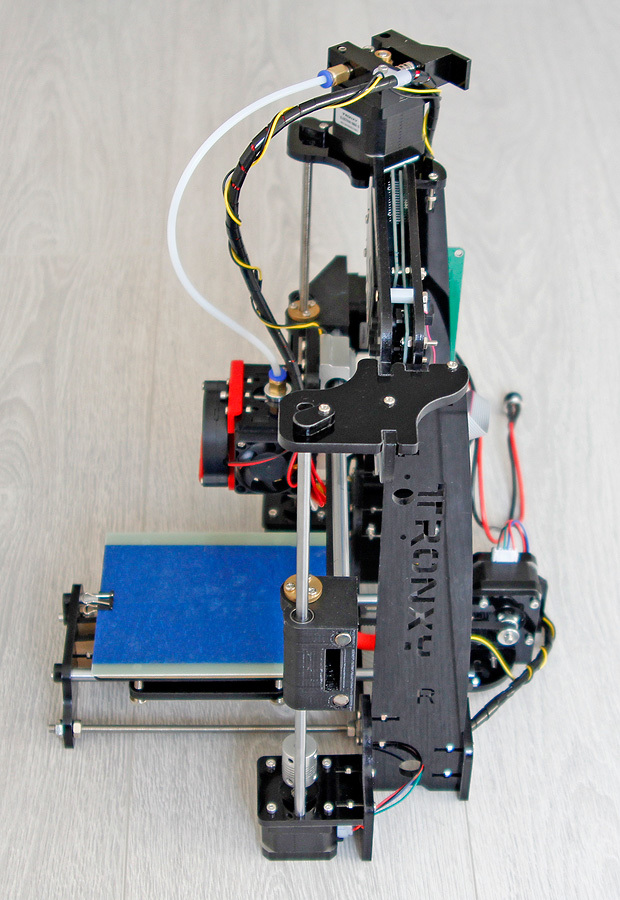
When size is not important, the descendant of ToyRep is a 3D printer from China.
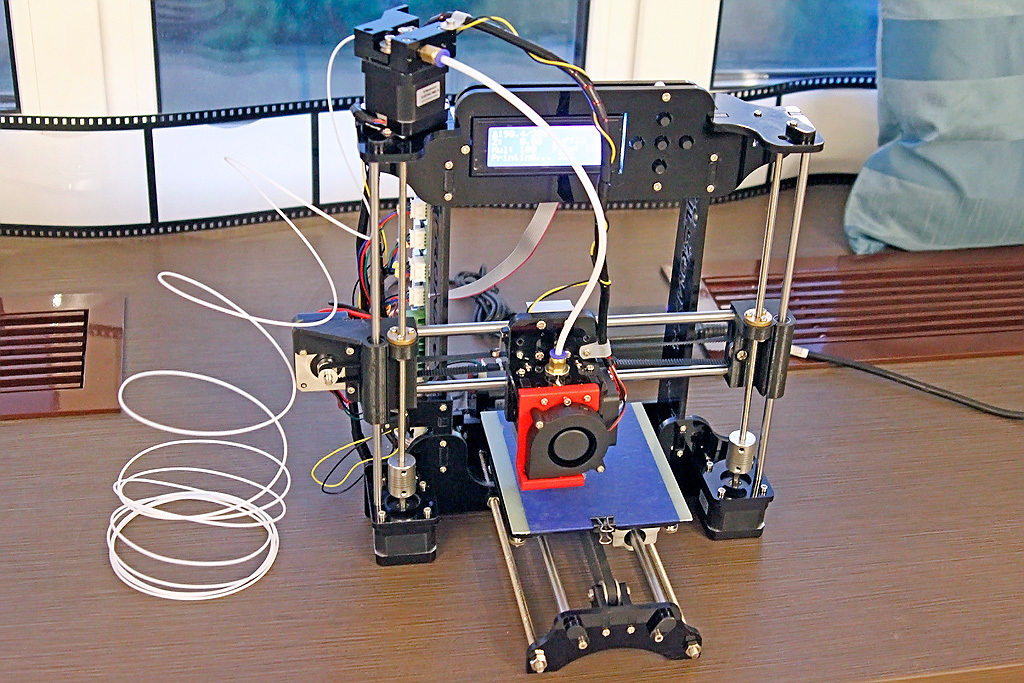
When a year ago I had my first 3D printer, I decided to print a second one for the sake of interest. I chose a small printer with the lowest price and began to slowly collect it. But already in the process of assembly, when everything was 90% ready, it turned out that the cheap motors used in it are very, very weak and move very slowly. More speed, higher heating of the windings, and the details of the printer did not imply the use of motor cooling. That printer was - ToyRep. So he lies half-assembled with me. And now, a year later, when the Prushi have already been studied far and wide and it’s time to take on my own printer project with a print area of 400x400mm, I thought that a large printer is not bad. But it is not always advisable. For example, it is often necessary to print some trifle, and a large printer may be busy for a long time. Large print area - long waiting time for finished results. Having estimated at the prices of spare parts and picking up the “normal” child already, I realized that now in some cases it is more profitable to take a kit for assembly and assemble a printer from it. Resolved, we are looking for a small printer at an inexpensive price. And so I found. TRONXY is a small prnet-like clone of Annet A8.
')
In general, everything arrived surprisingly quickly and without problems with customs. Delivered by courier service Sdek directly into the hands.
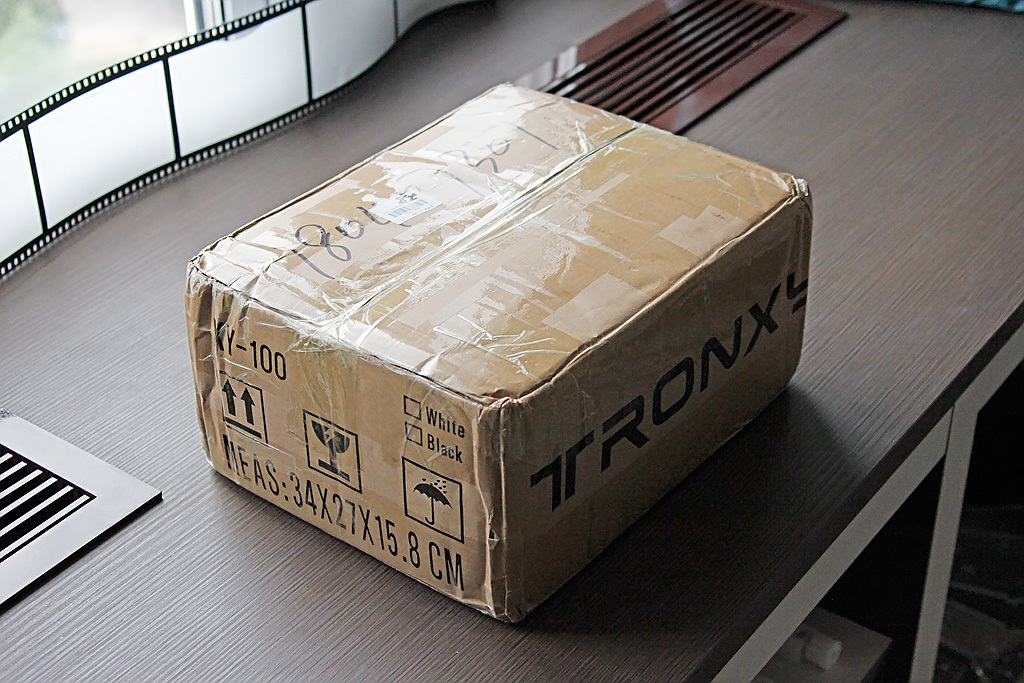
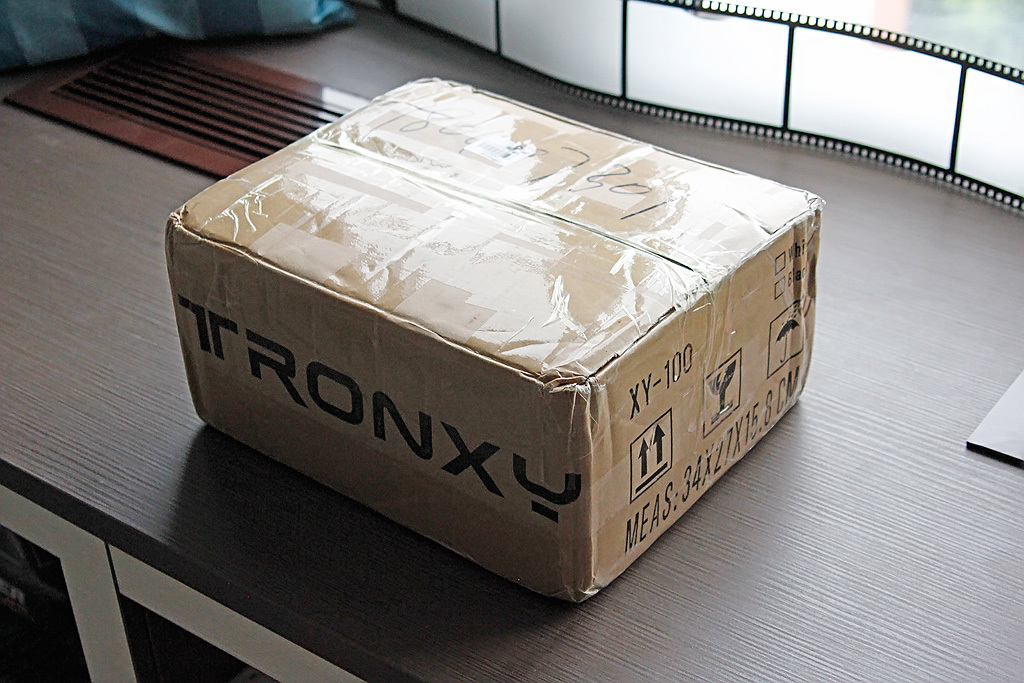
A small box weighing about 5kg.
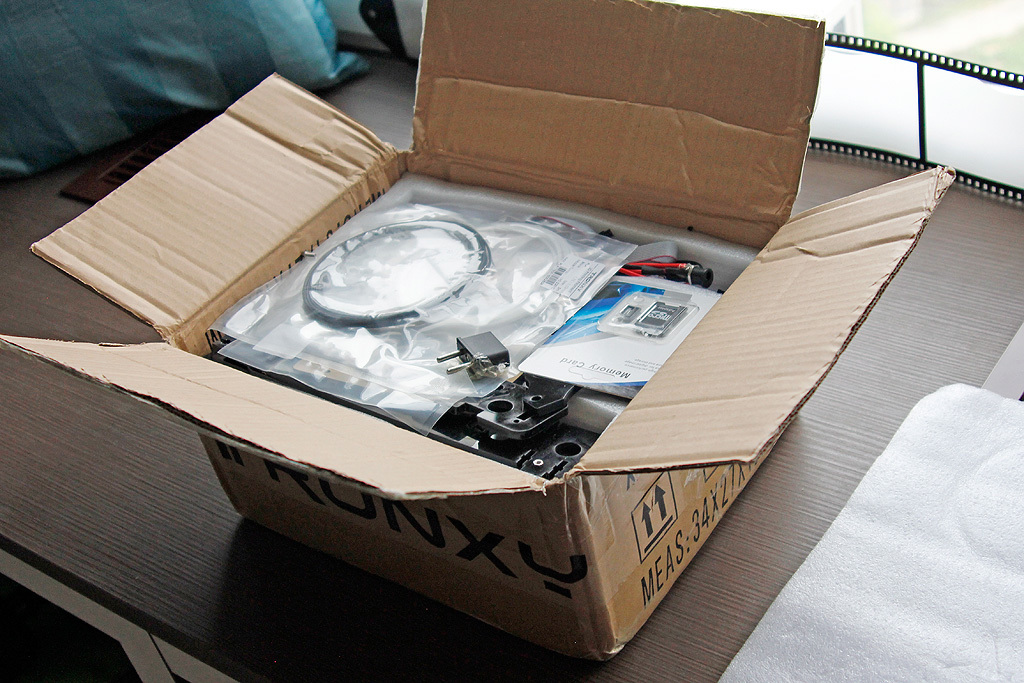
Inside, already familiar to me type of packaging, when all parts are in separate grooves.
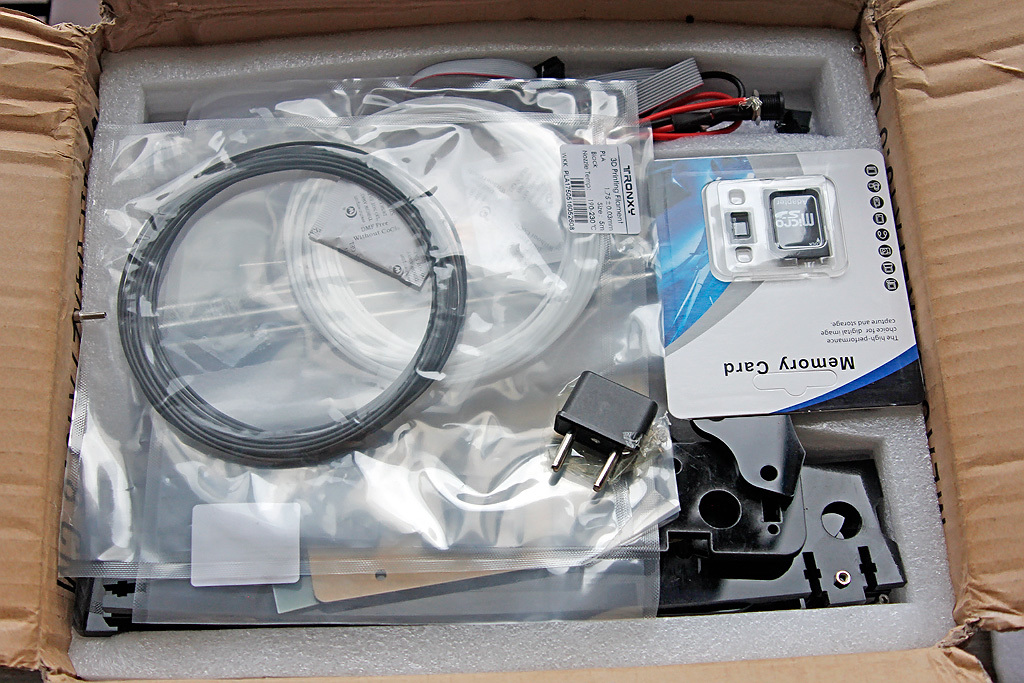
In the box 2 levels. In the first is all the small things and consumables.
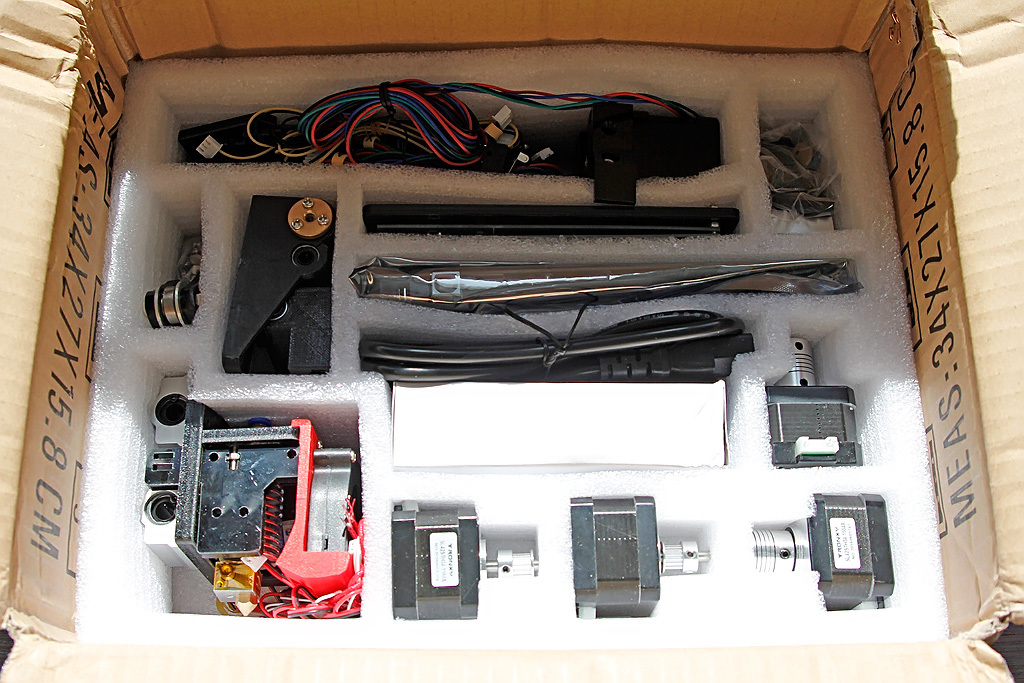
At the second level, more details and electronics with wires.
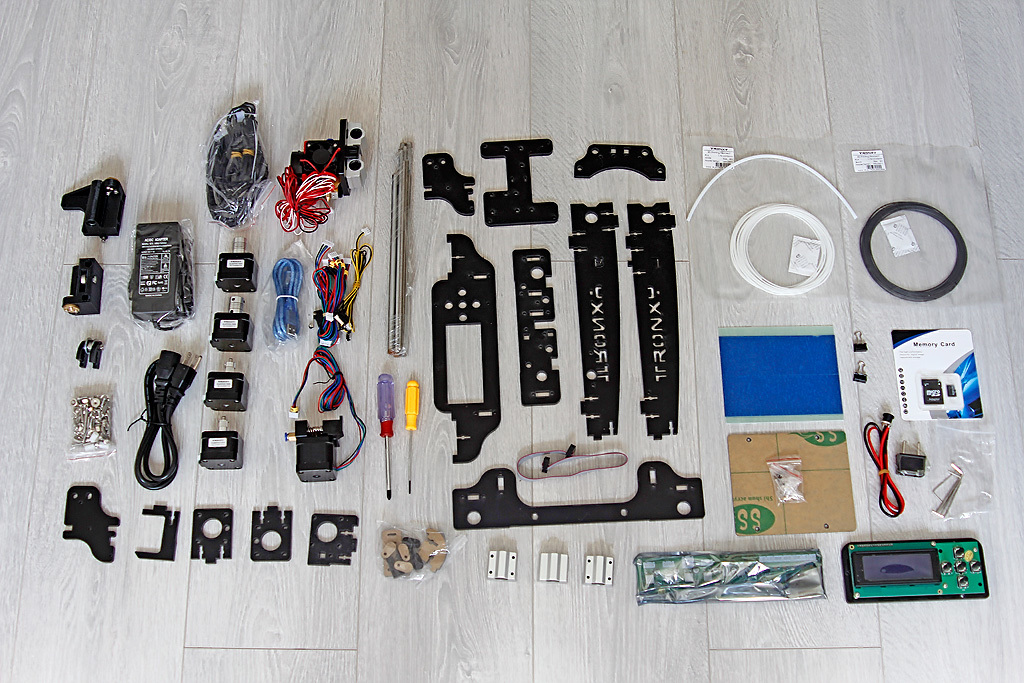
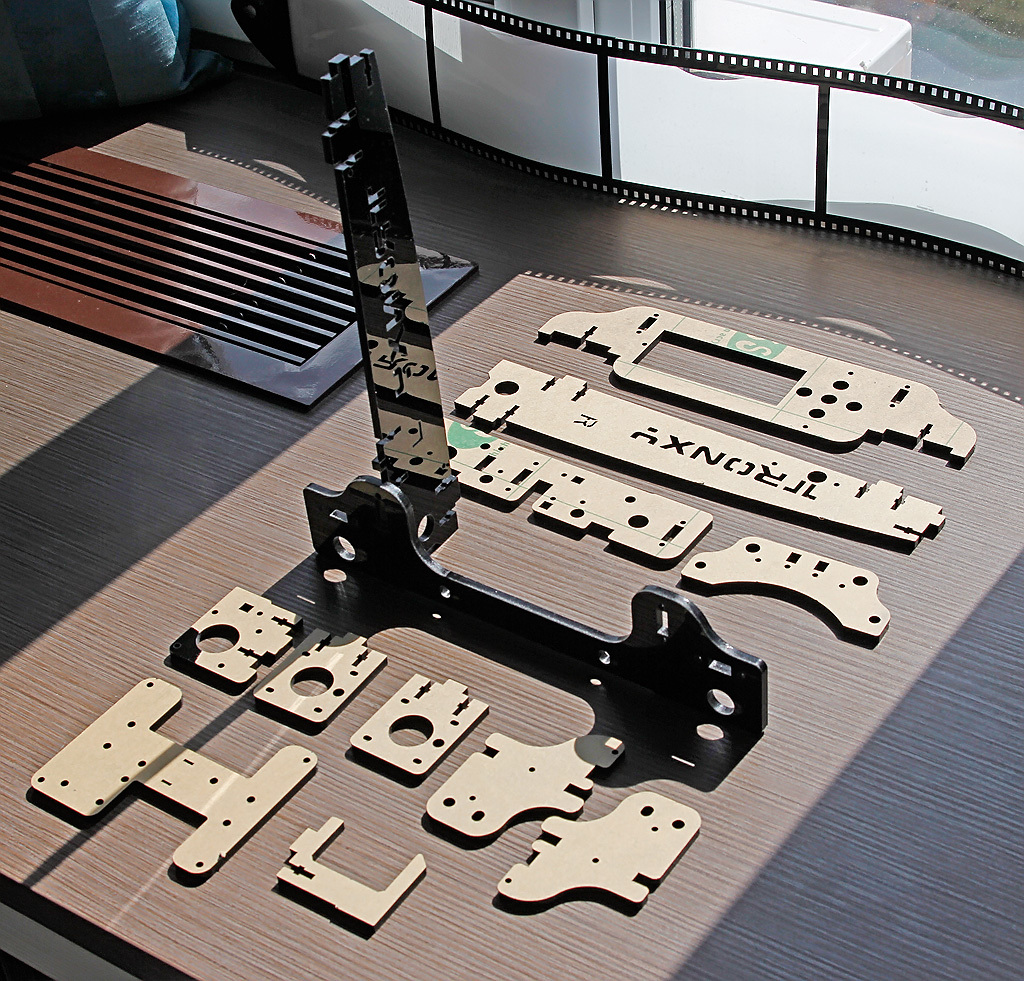
These are all the components that were found in the box. The packaging was additionally wrapped with polyethylene packaging, it saved from the loss of a pair of small screws that somehow fell out of the general bag or could be unscrewed from where ... Let's see.

The only moment I did not find the instructions. And since the memory card was in a blister, it did not look there and took out the card after the assembly. But I’m no stranger to this, I know the Prusha-like printers well :)
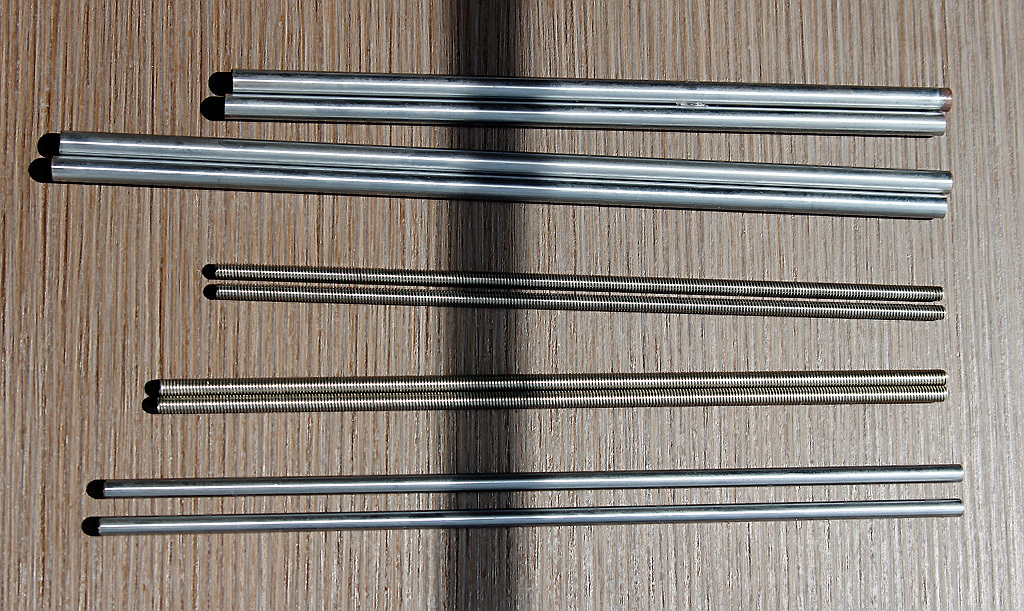
The printer shafts axes X and Y 8mm, but the Z axis for some reason, 6mm. Similarly, the Z axis trapezoid stud is 6mm, but this is a trapezoid and not a construction stud, cool.
We twist the big parts together.
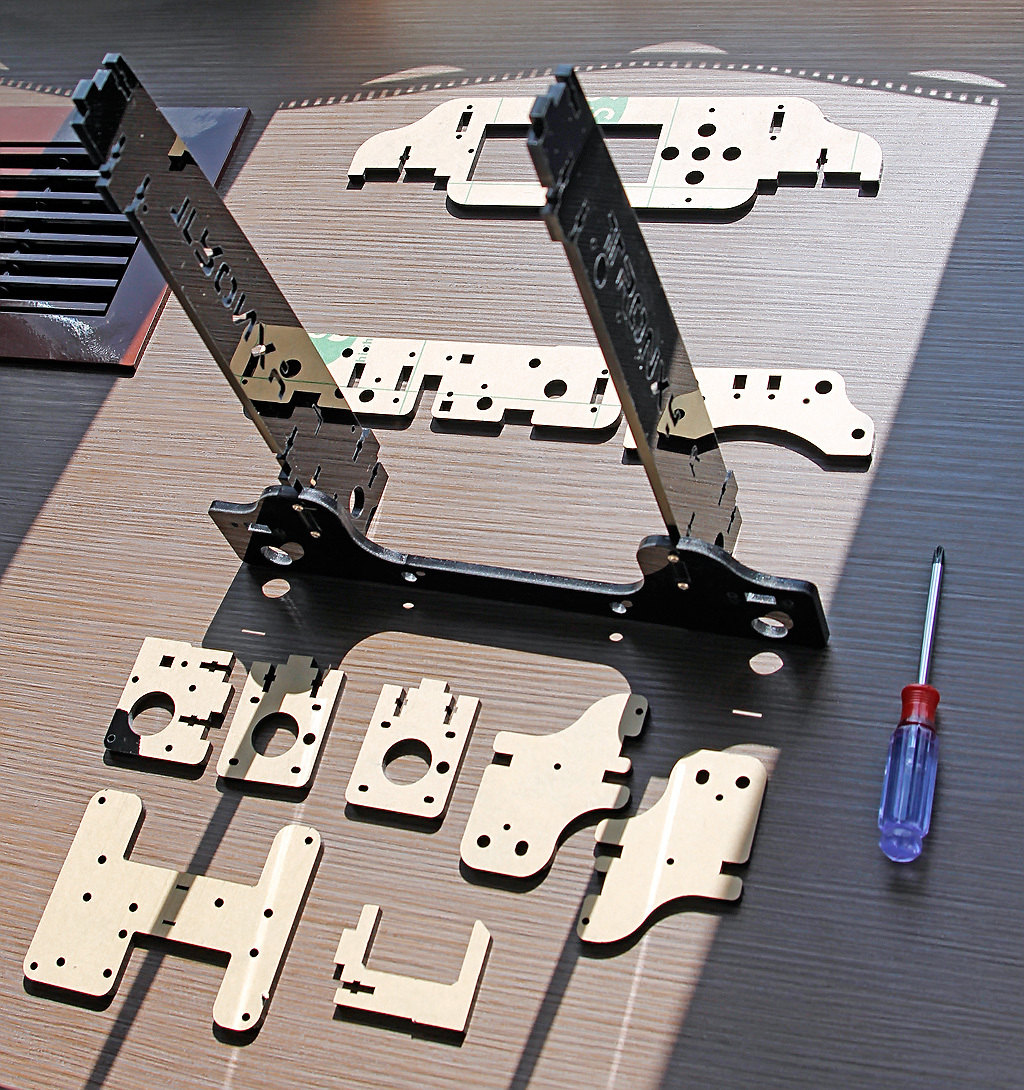
Here, in principle, it is difficult to make a mistake, it is unclear where the right and where left, the panels are signed, but they are almost identical and, in principle, without a difference.
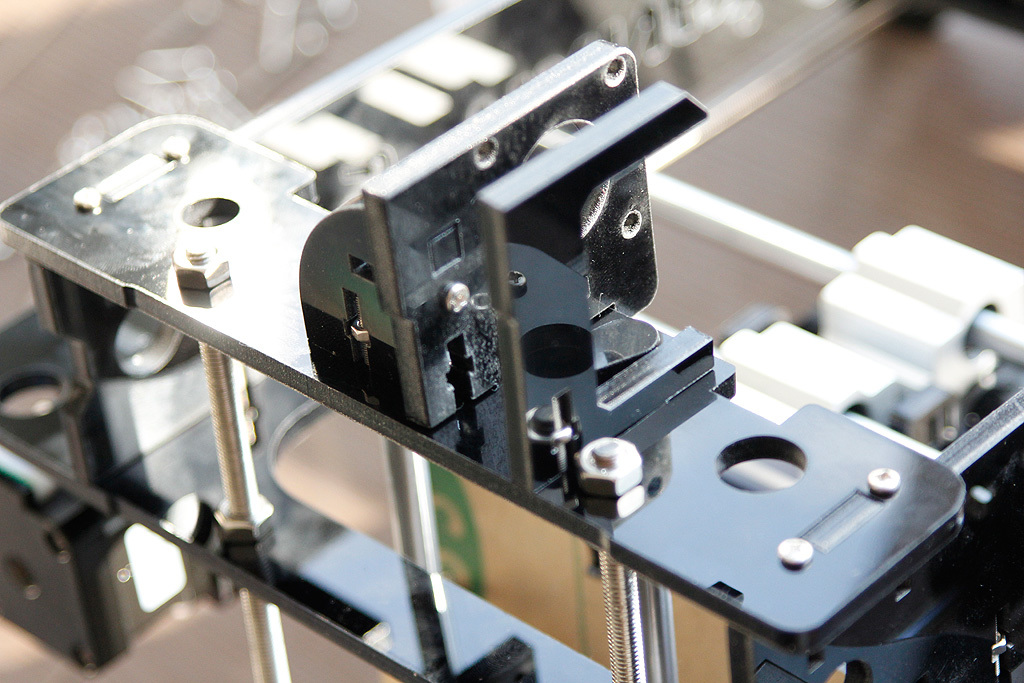
We thread stainless steel studs and fasten the upper with kerchiefs.
Since there are no instructions, I focus on the photos of the assembled printer on the seller’s website. I notice that I mirrored the back wall, a disorder. Need to rebuild or will have to invert the movement of the Y axis in the firmware.
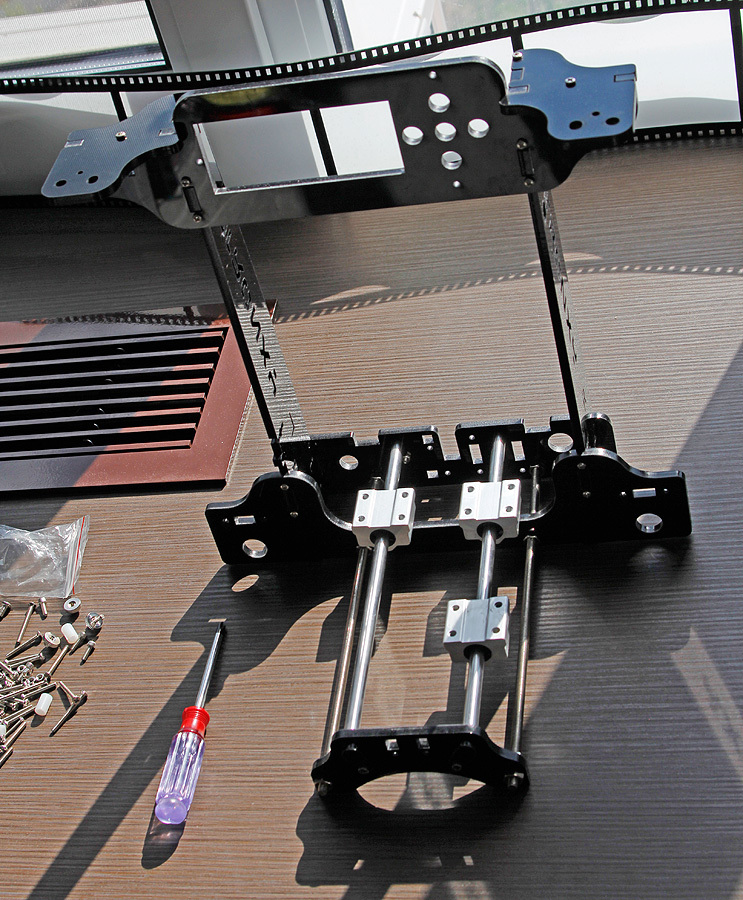
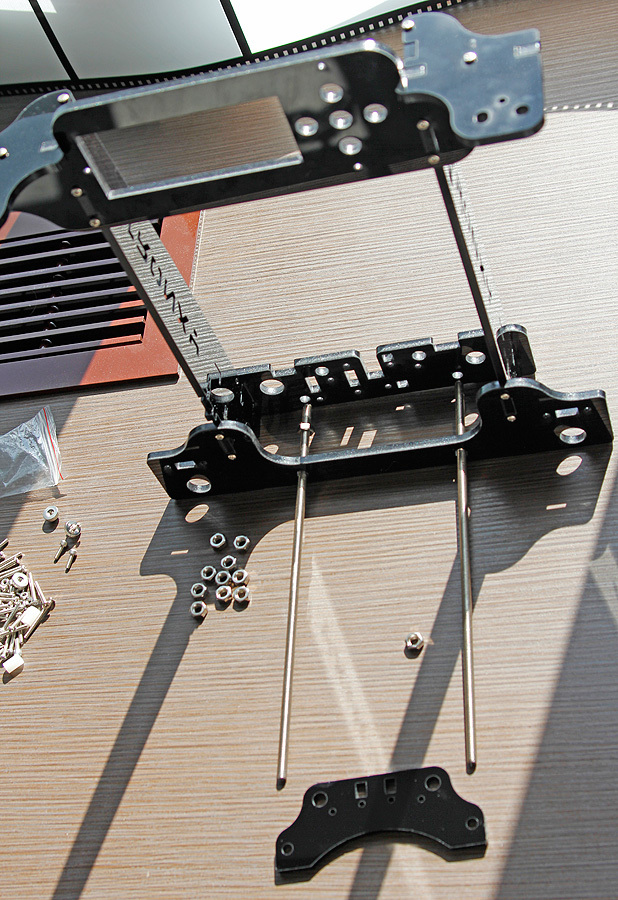
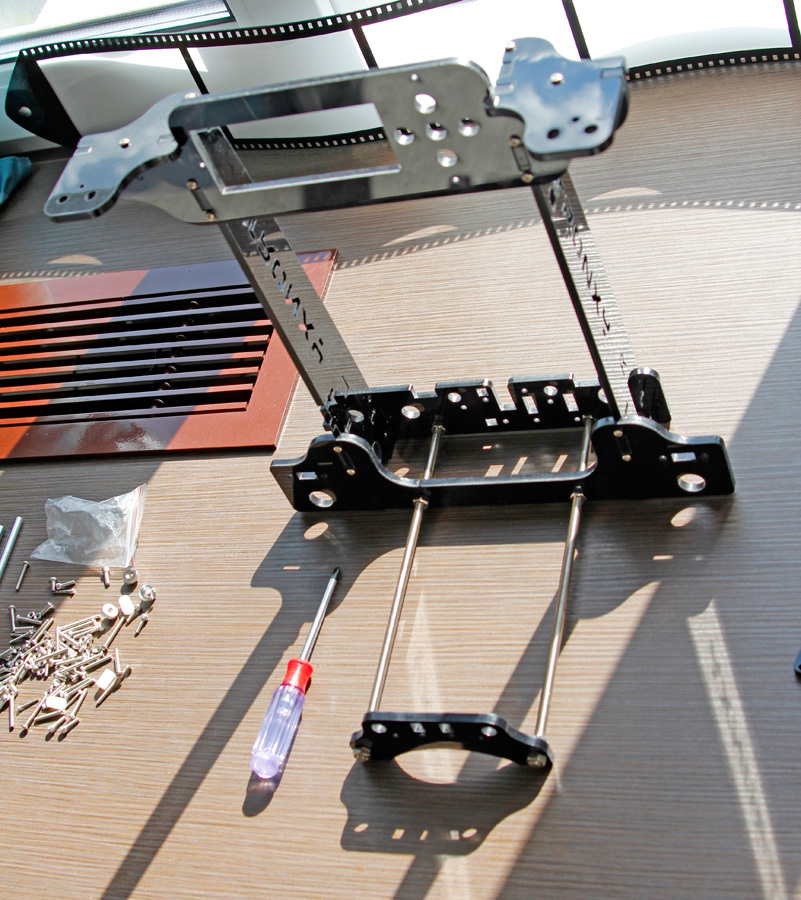
Insert shafts with bearings. LM8UU standard bearings in aluminum mandrels, this gives us positioning accuracy when assembling. Parallelism will be respected!
The trees are fixed with acrylic ears, something resembling those of some funny animals.
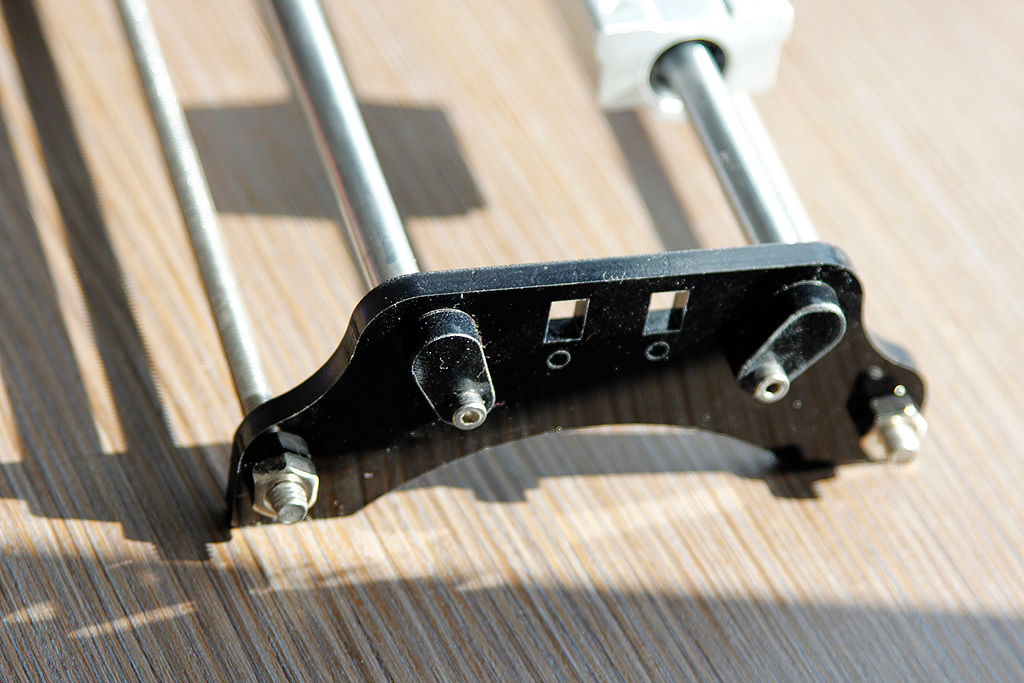
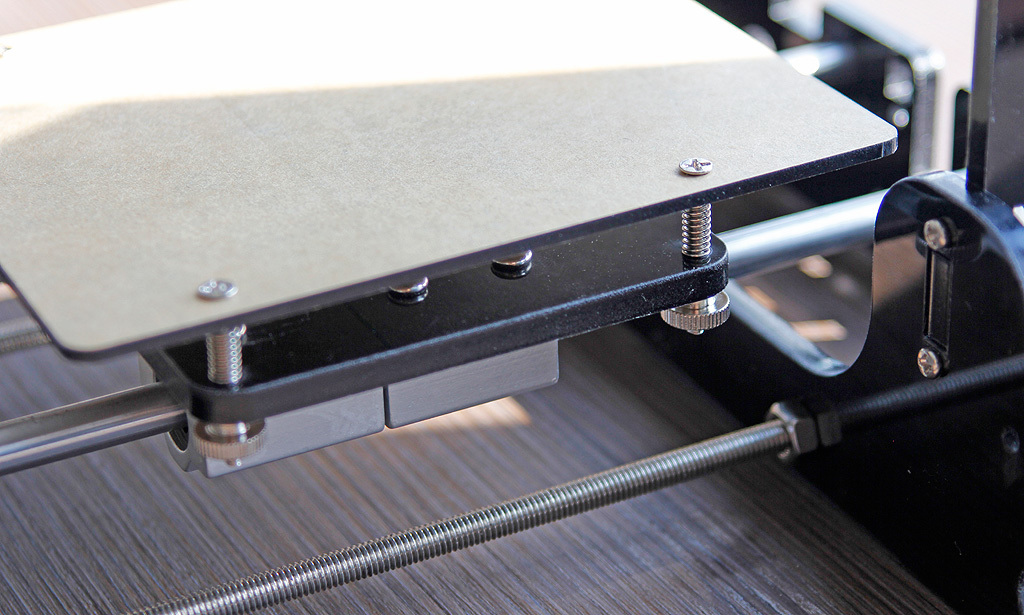
Screw the base of the table. Wow, what a miniature!
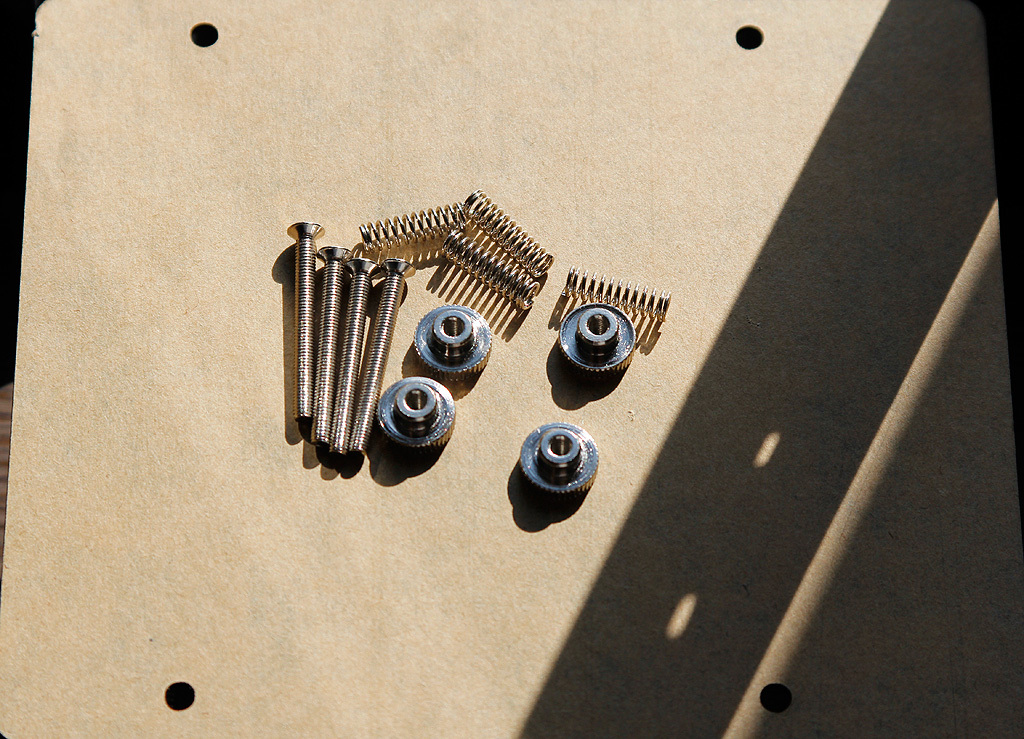
The table is here as usual with height adjustment and parallelism with the help of screws with springs. Judging by the photos of the seller, I have a more advanced version. In the first cases, the distance between the screws was very small, then it was expanded, this is good.
By the way, I was too lazy and left lasting belts for last, it would be better to assemble the table, to stretch them.

Included is a textolite plate with glued blue tape and two stationery clips.
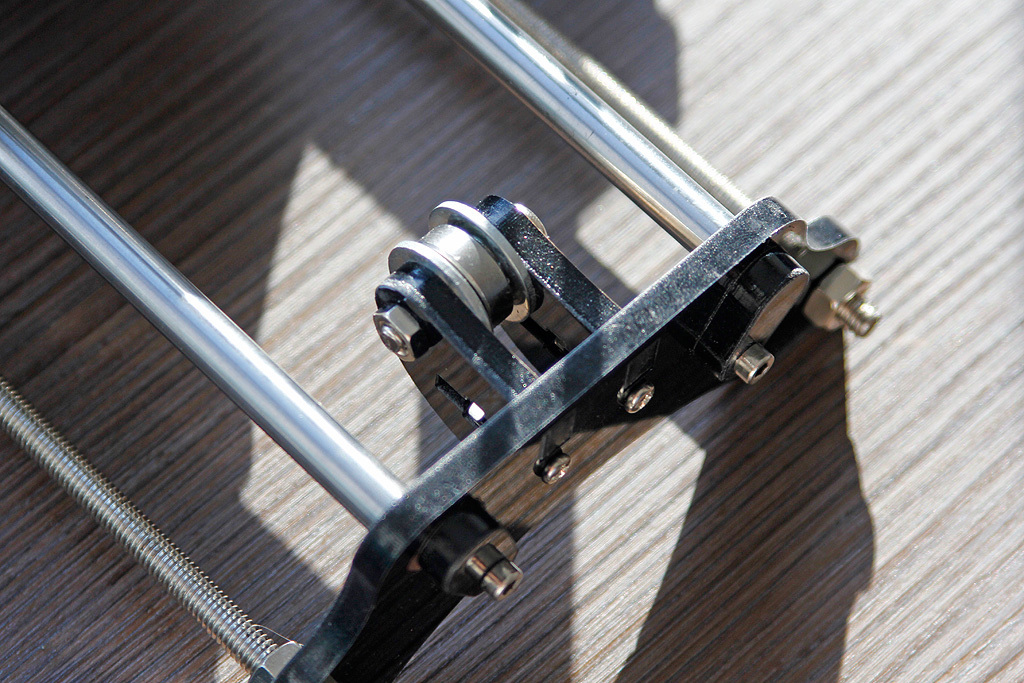
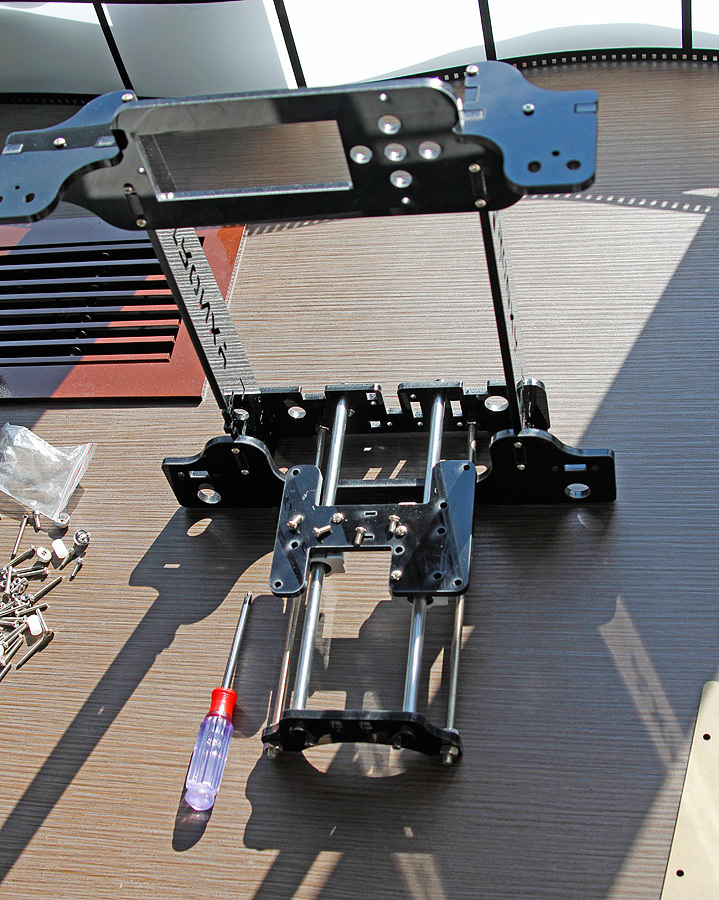
We fasten the roller of the Y-axis belt. It is also assembled at the factory, as well as many important components. This is convenient if, for example, to buy such a printer for a child. There is no way to mess with important details.
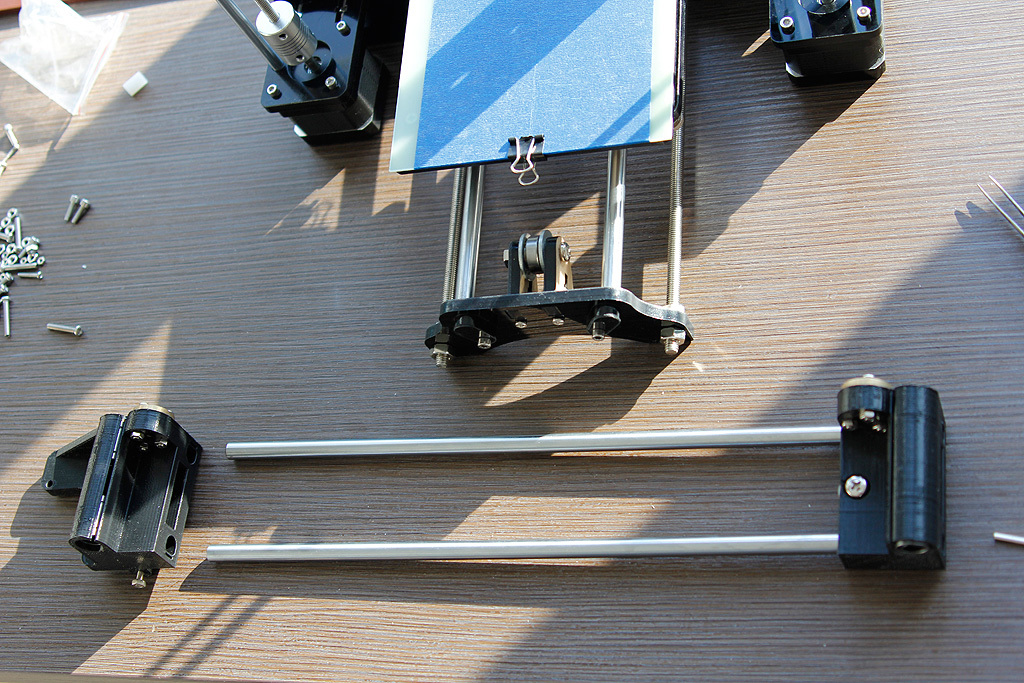
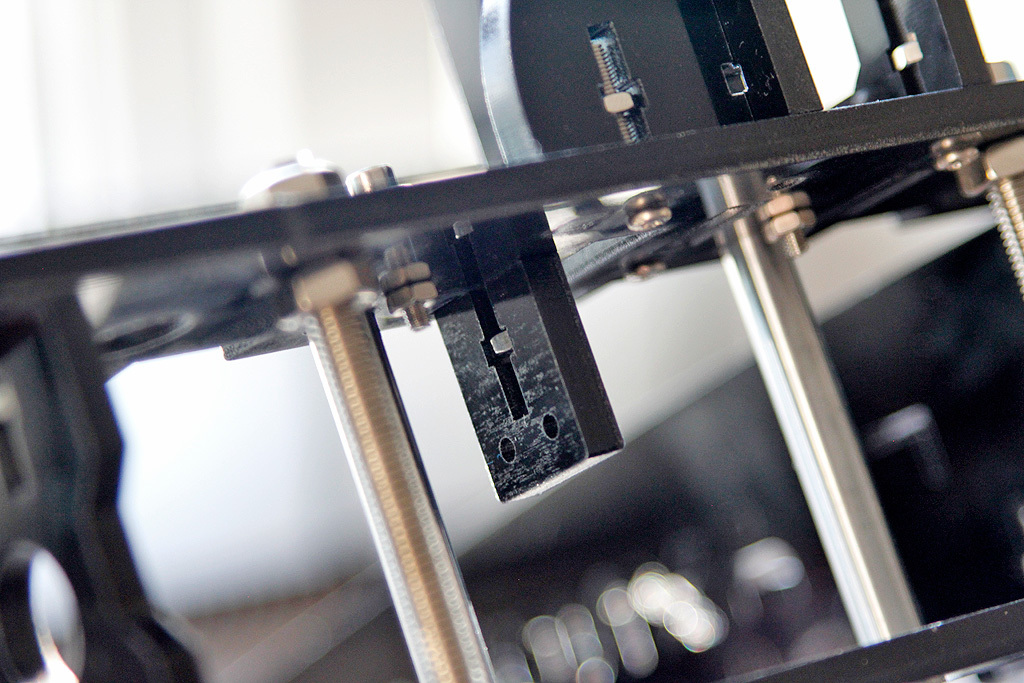
It's time to assemble the X axis. You will need a hammer here :)
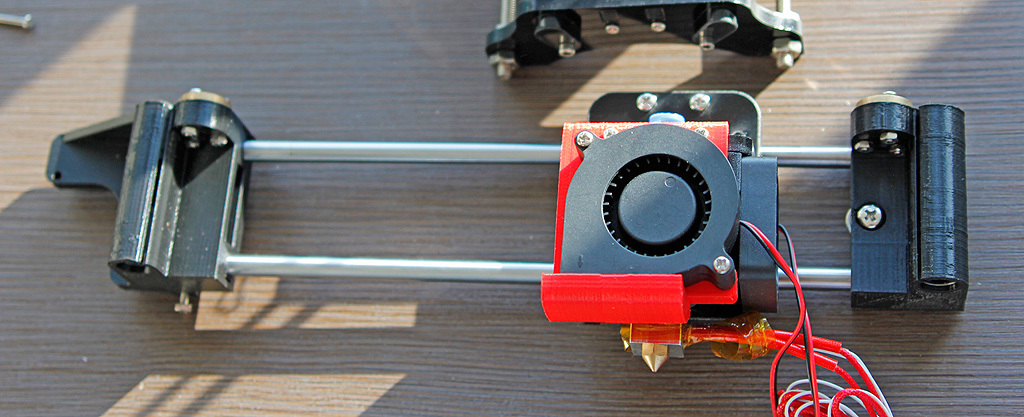
Do not forget to put a carriage with a hot-end and slowly hammer in the shafts in plastic. Details of the mounting shafts are printed, but nothing cracked during assembly, the plastic is good :) Although I have no reason to complain about this, there is no reason. Now the assembly is being tested, then everything will be thrown onto another frame and the printer will have a new kinematics Core-XY.
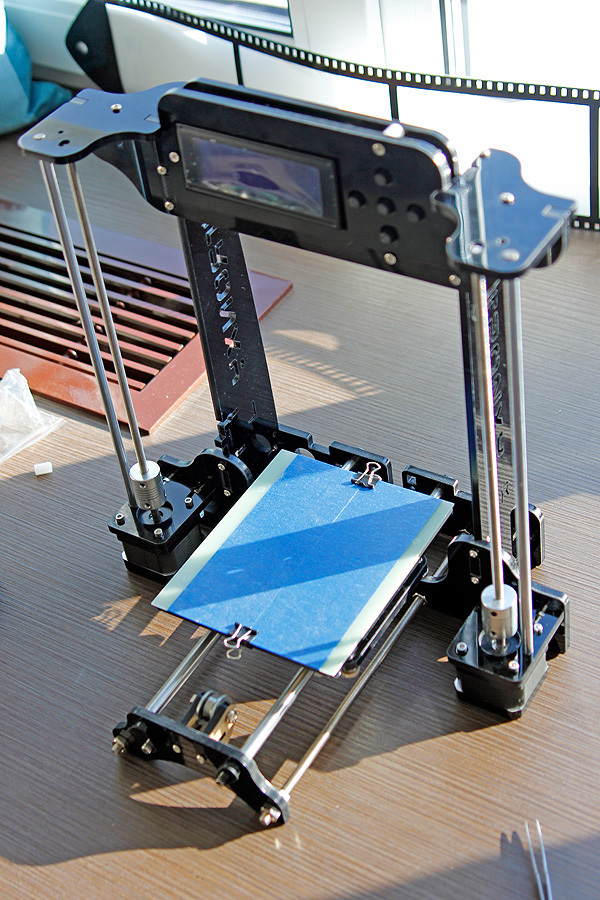
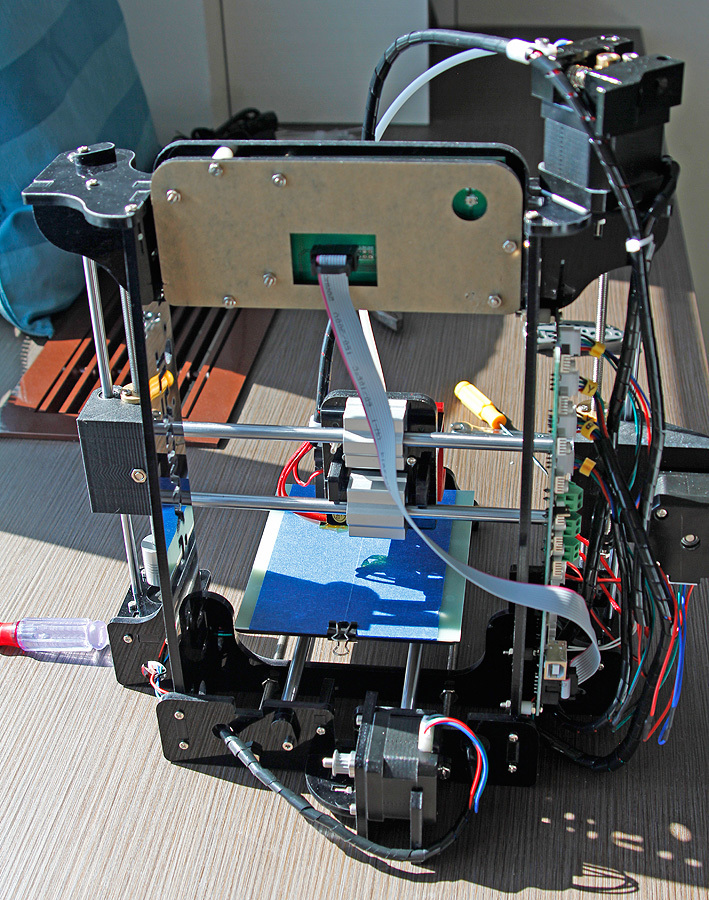
Collected. Left a little.
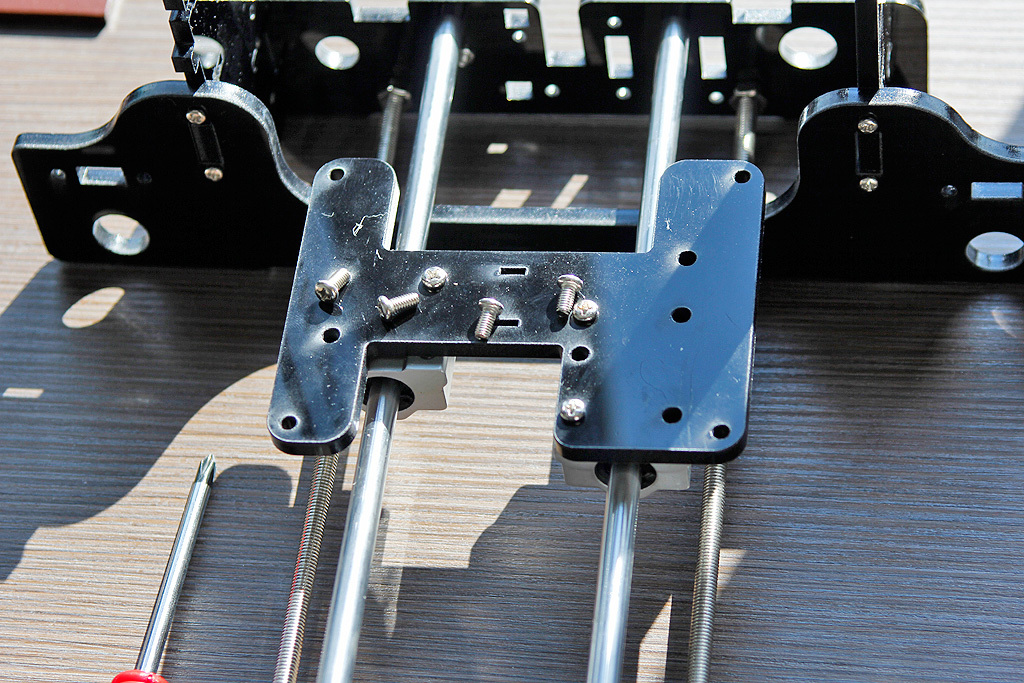
We mount the mount of the Y-axis motor. Everything is somehow very monumental here.
We fasten the bar of the limit switch holder.
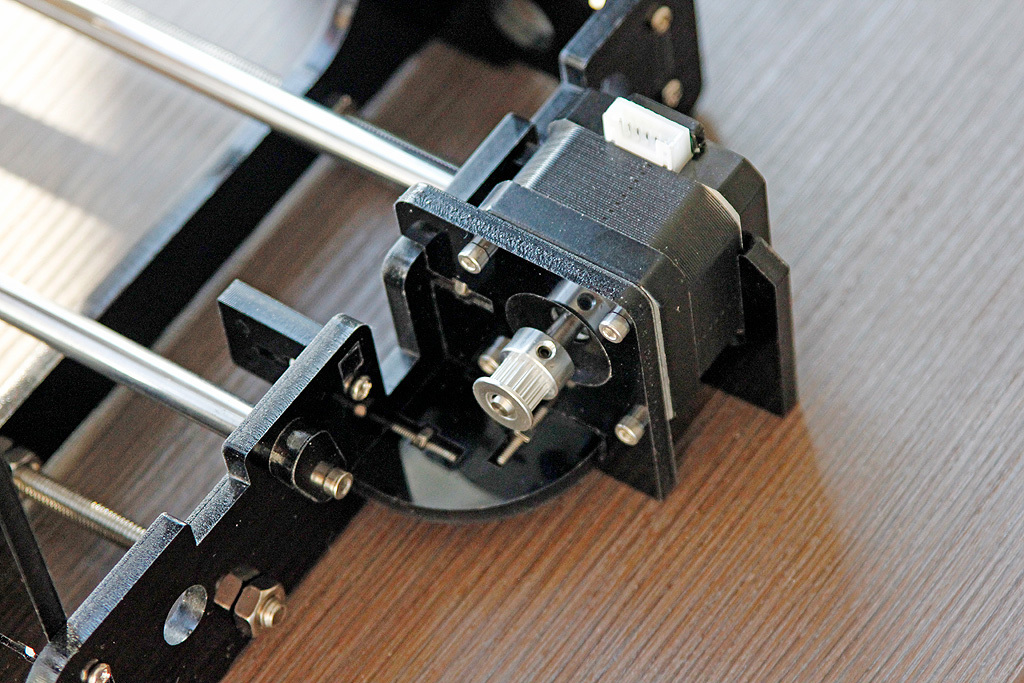
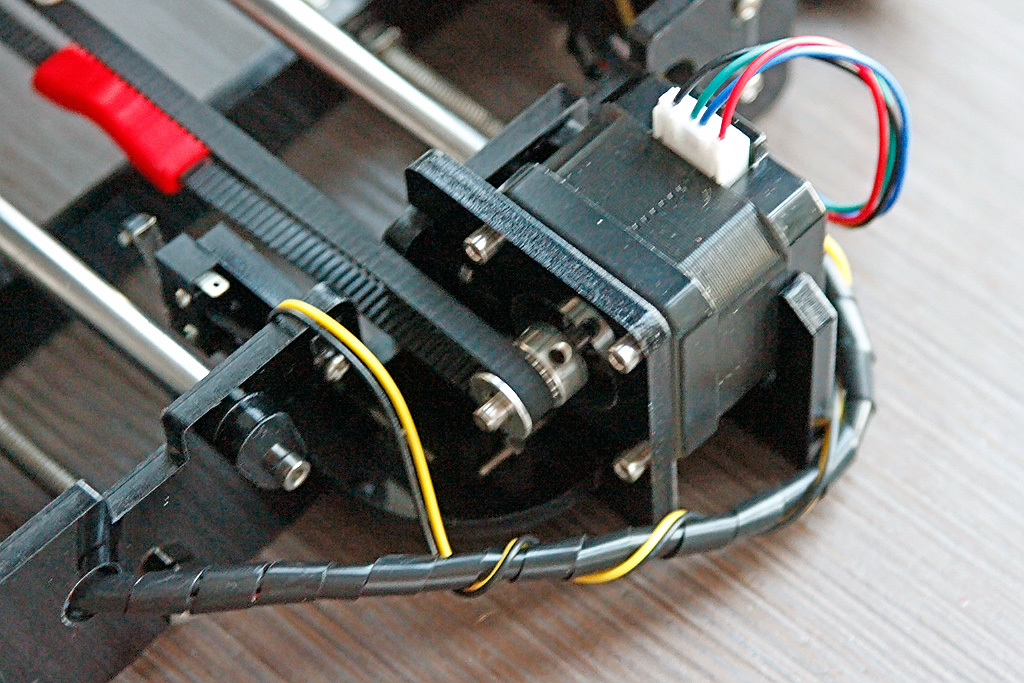
We fasten the motor itself.
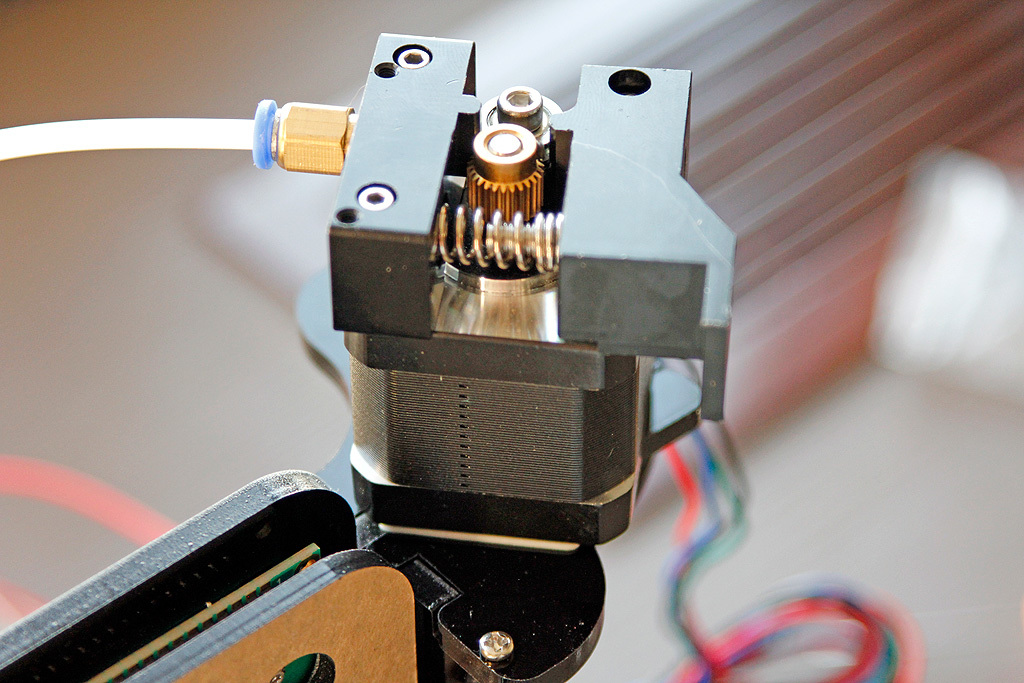
I decided to place the extruder at the top, although I found a mount for it on the wall of the printer. But the bowden tube is a bit short and on the wall it will be very bent. In such a position as I have it is always at the optimum angle. Attached motor on double-sided tape.
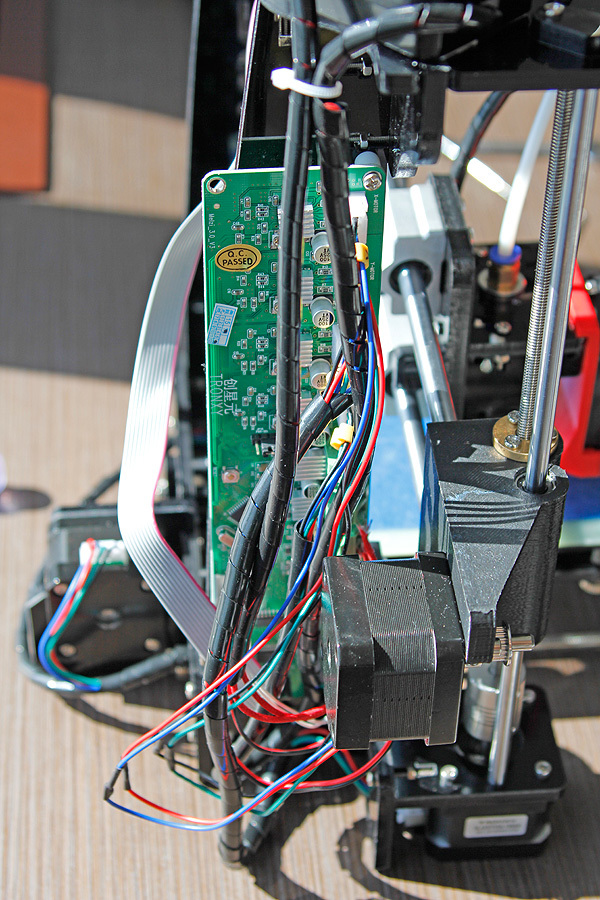
We stretch the wires, wrap them in complete noodles.

The wires are all labeled and on the board everything is clearly signed, what to insert. The board itself is of the Melzi type, I don’t really like them, because there are soldered drivers there and you need to be careful with currents and adjustments in order not to burn anything. Here everything is adjusted from the factory.
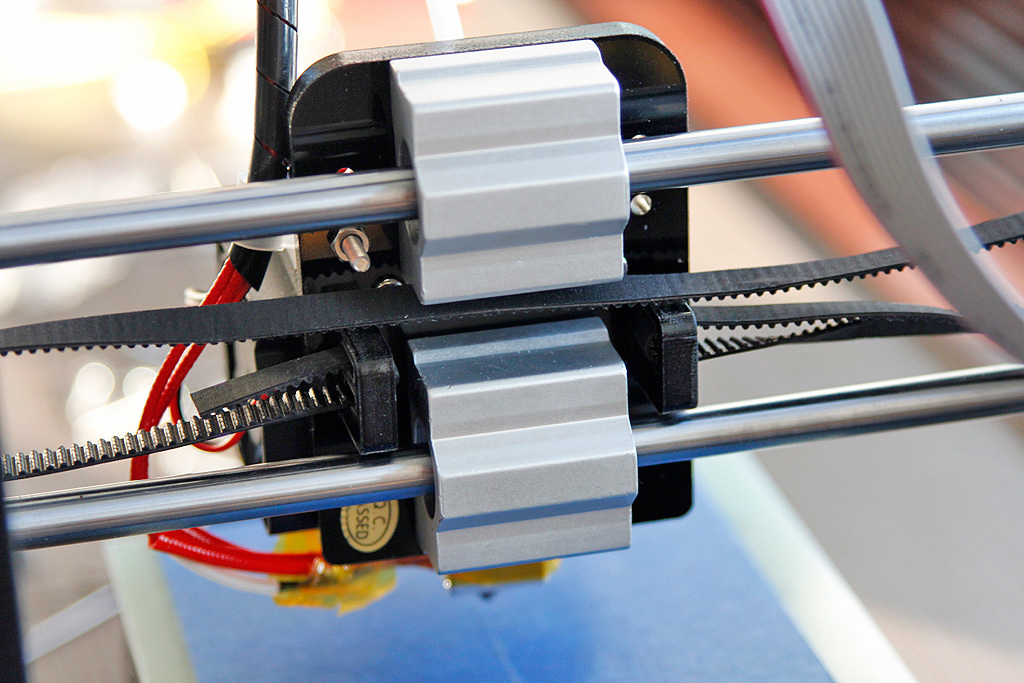
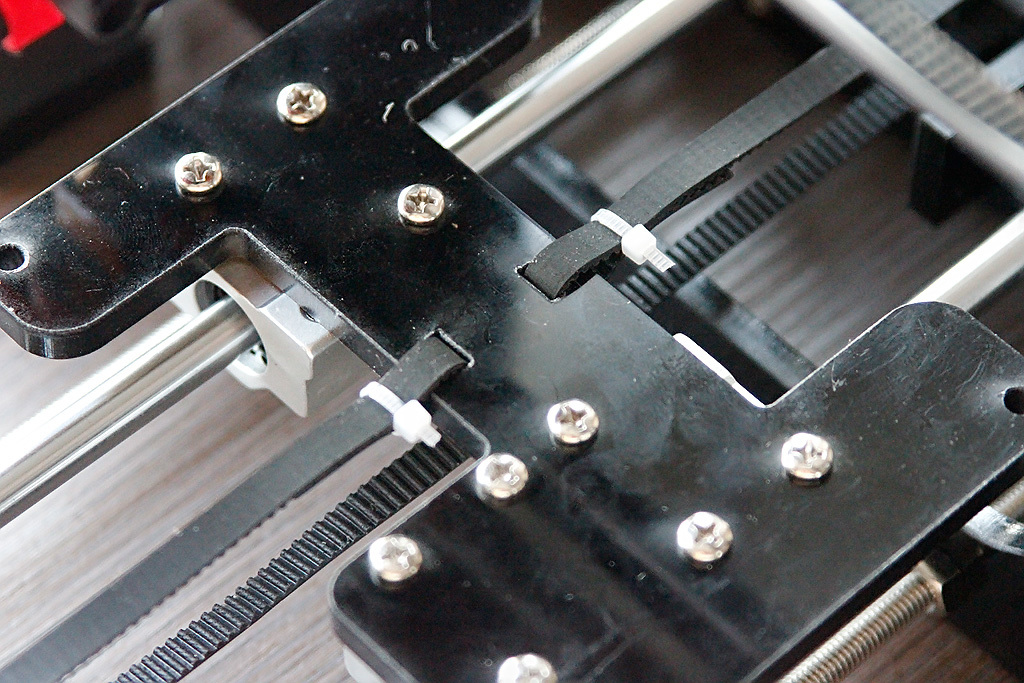
Now we stretch the straps and fix them with ties. Stretching them is not very convenient, there are no adjustable tensioners.
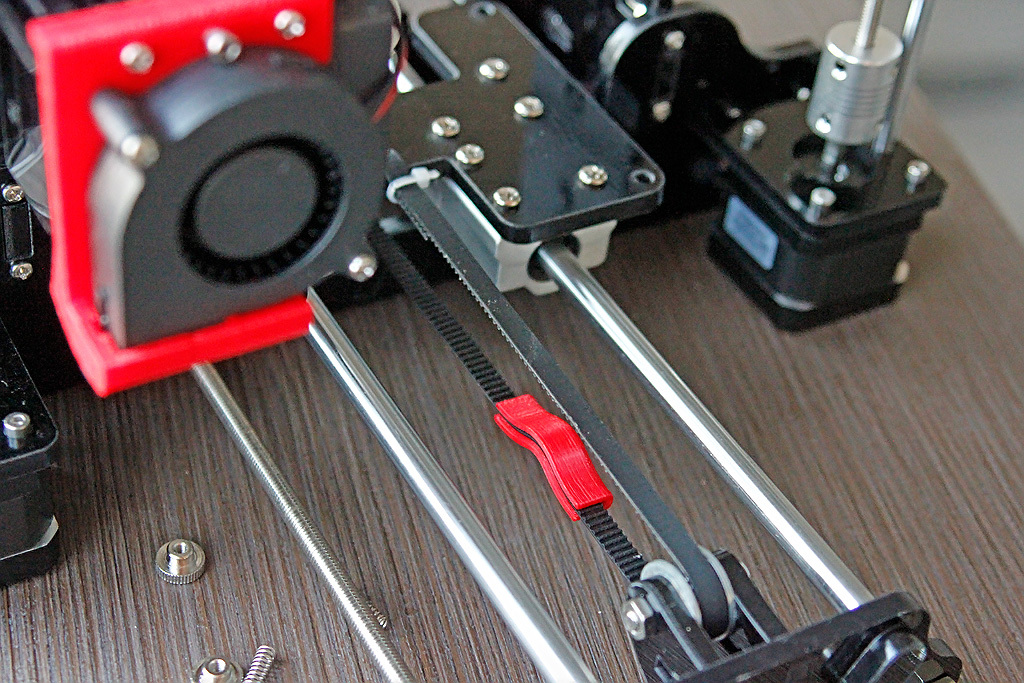
I have one printed tensioner, I put it on the table strap.

The X axis is still without tensioner, later I came up with something there. But this is all, I repeat, temporarily.
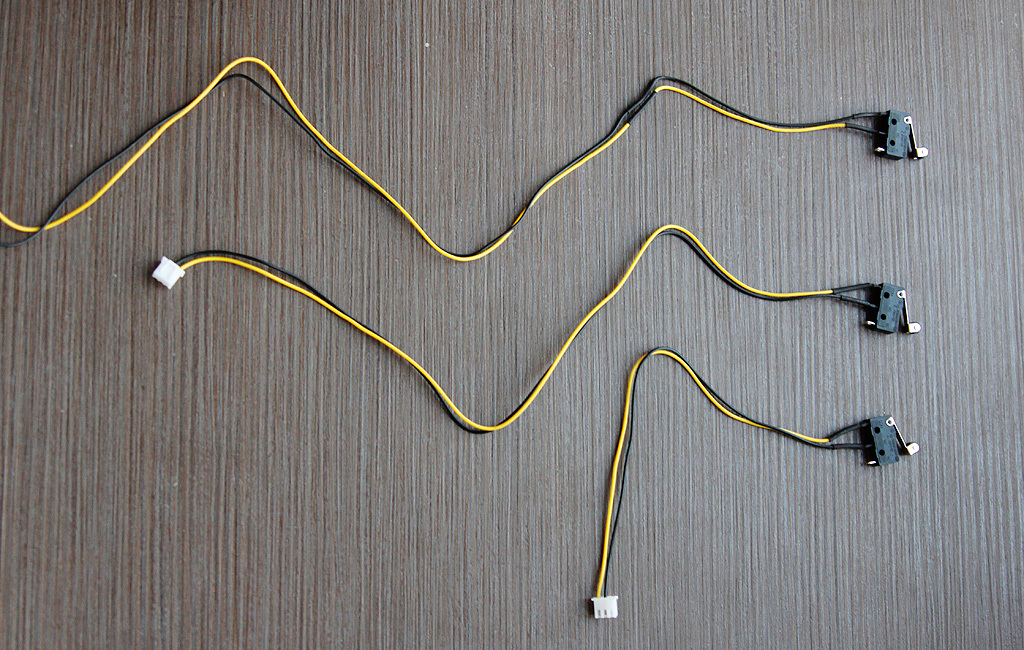
It remains to fasten and connect the switches.
Done, turn on the power supply. He is only 5A here.
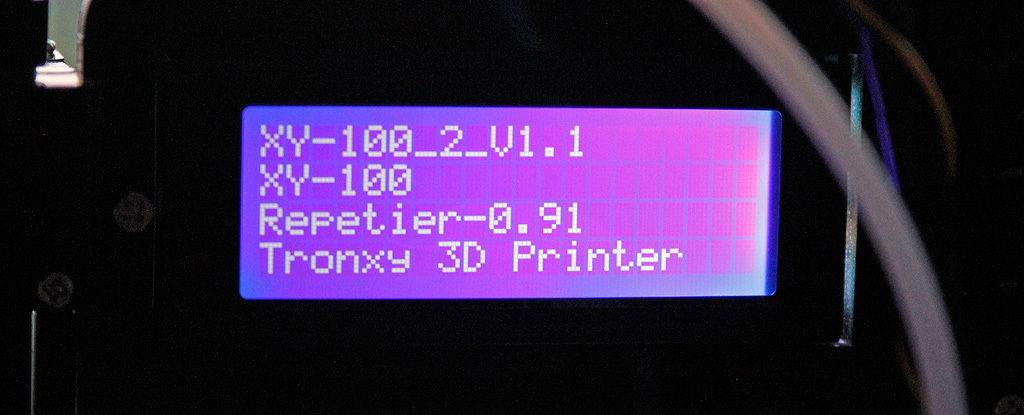
The printer turned on and happily informs us that the control board is using the Repetier-0.91 firmware.
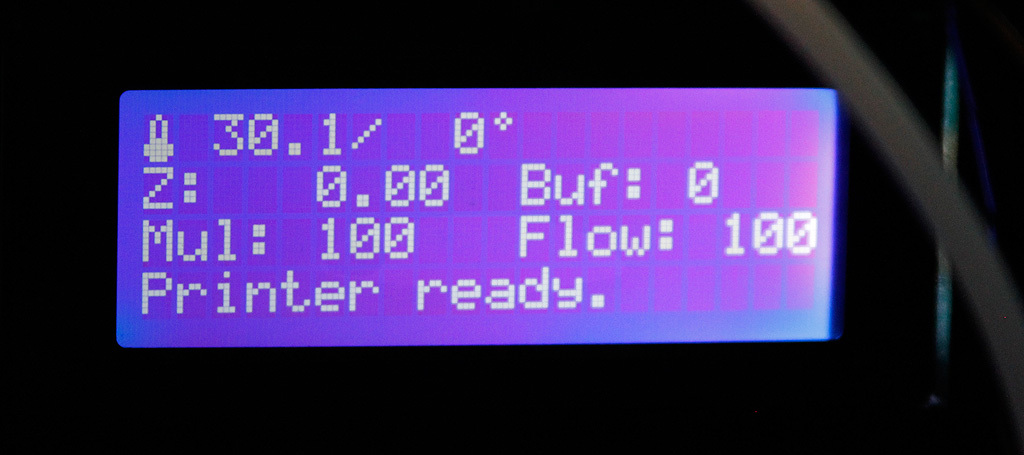
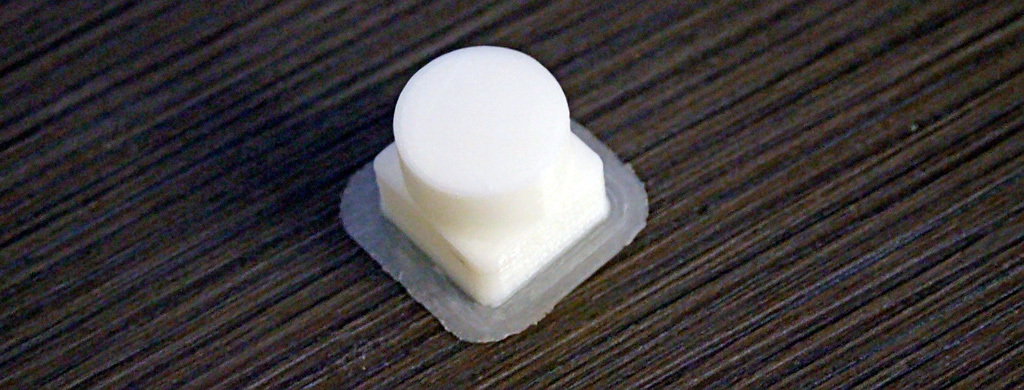
The first seal, as usual lumpy. The gap between the nozzle and the table is too large, reduce it and repeat printing the test cube from the memory card.
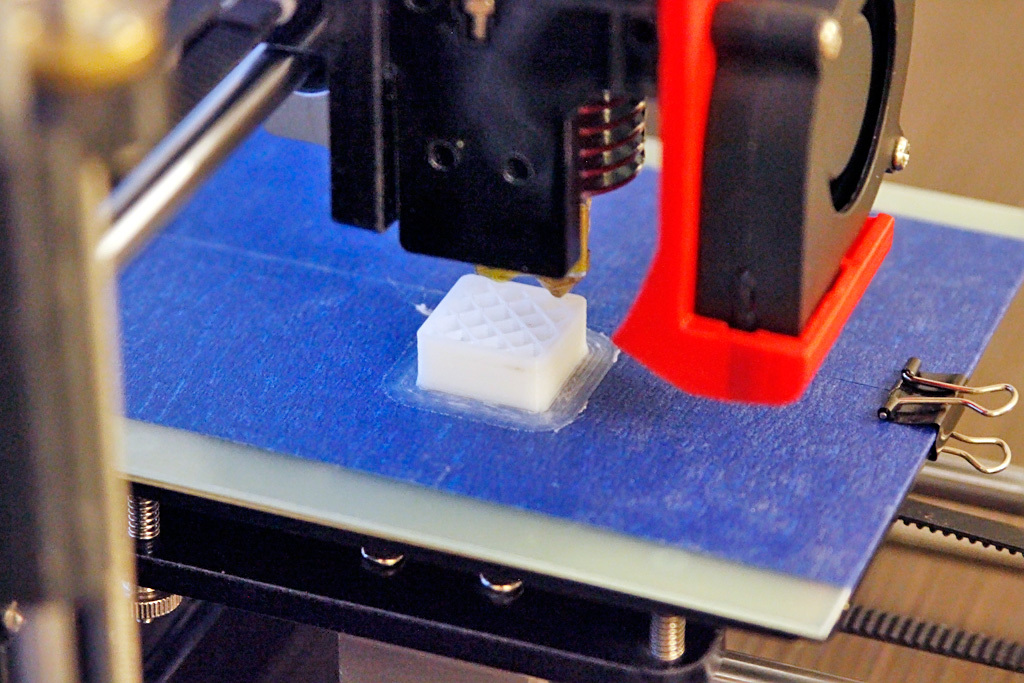
Already better.
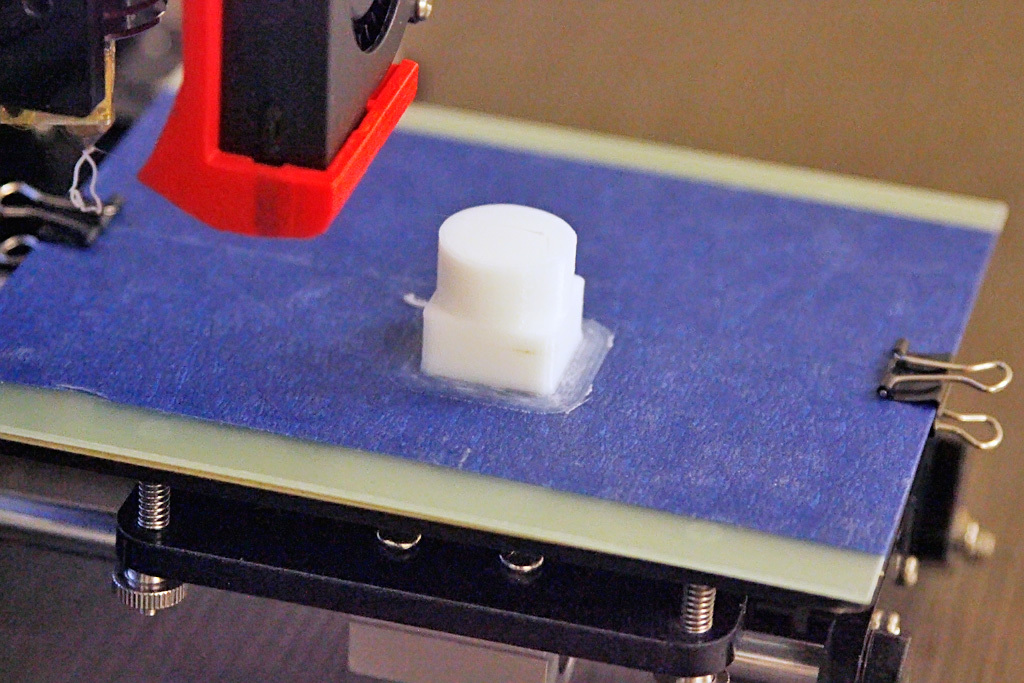
Well, not perfect, of course. It is seen that the layers just walk a little. It is better to tighten the belts.
We play on. We print Marvin from 3DHUBS.
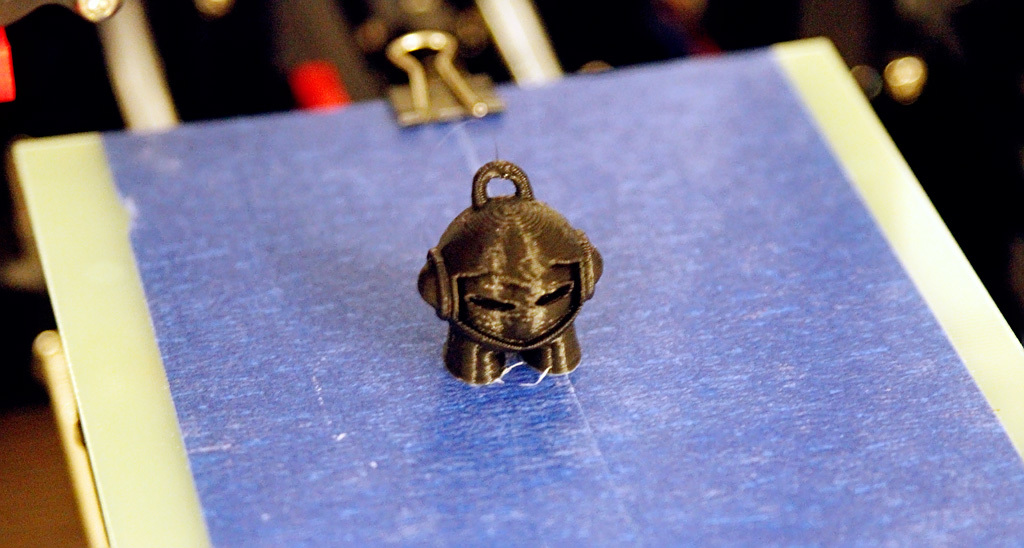
Layer 0.2 does not suit him. We ought to try something thinner. Included are an additional 3 nozzles. from 0.3 to 0.5mm.
Put the nozzle 0.3, tighten the belts and reduce the layer to 0.15mm.
then there did not look
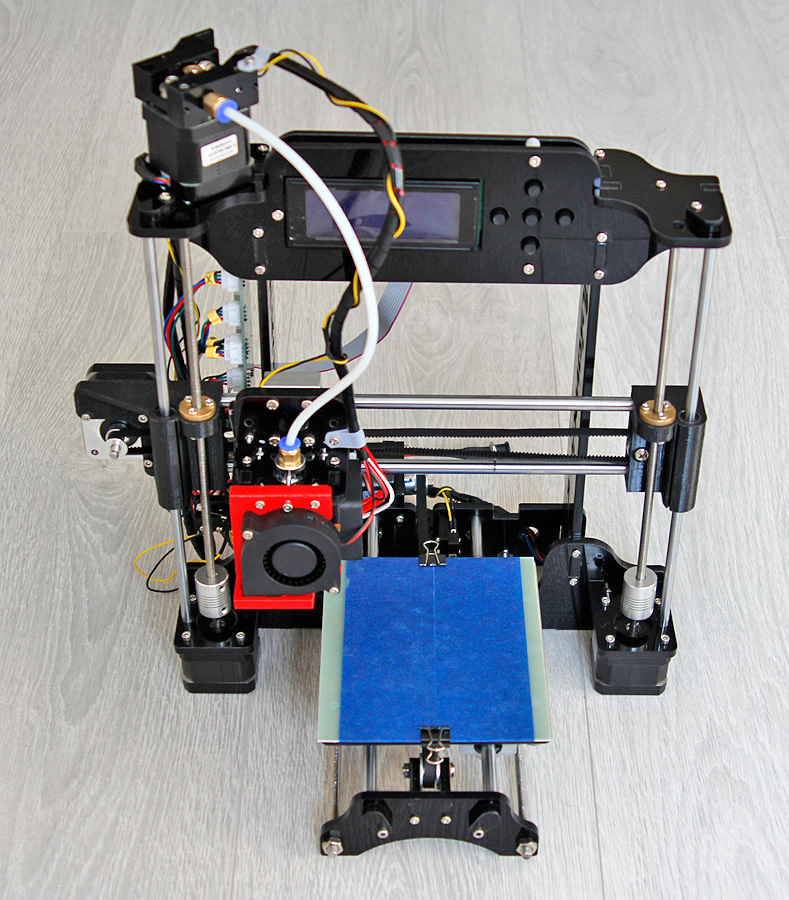
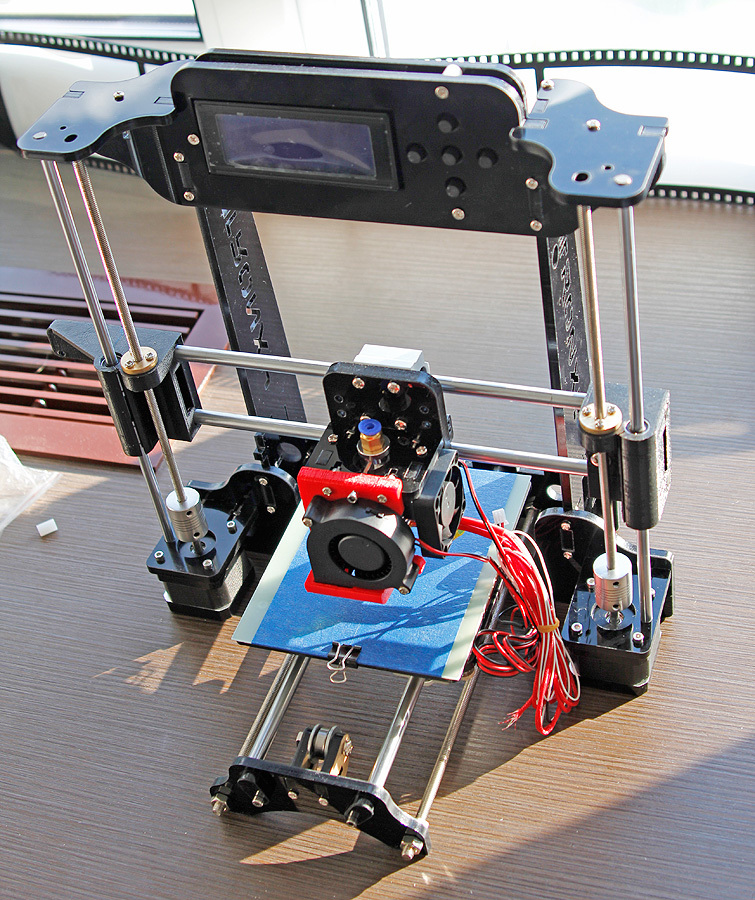
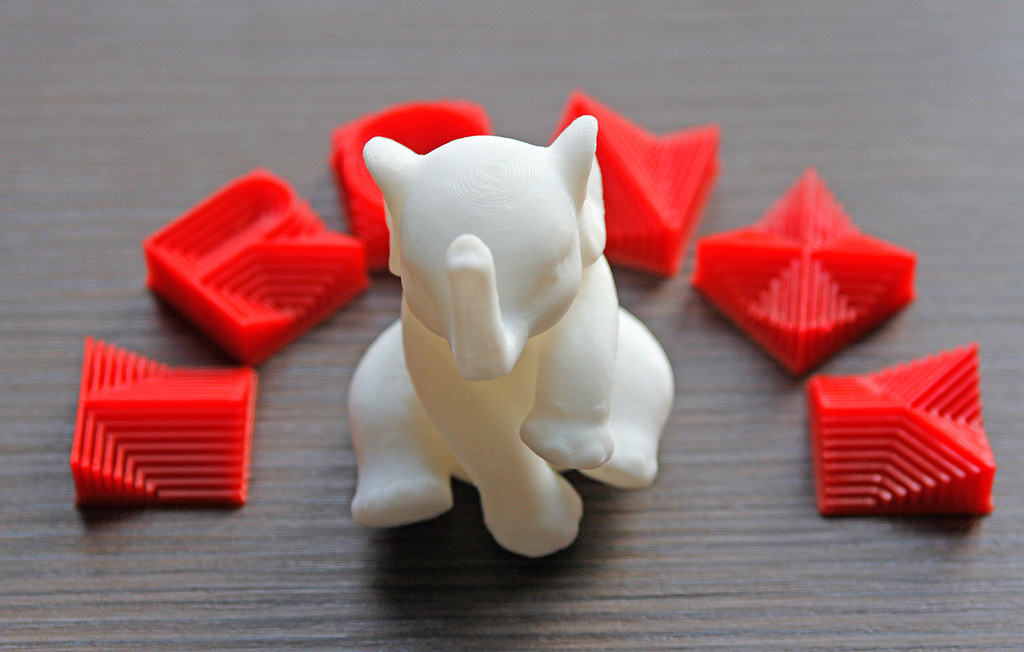
Already not bad. In general, a suitable printer :) It's funny that only 5A of power supply is enough for it, usually the PSU is set more powerful, the ampere is 20-30. But it is understandable, here are used shortened Nema17 and a short heater, there is no heating at the table. For the rest, except for the size, everything is like that of the older brothers. For larger sizes, even, its frame will not be strong enough. He lacks the front wall of the frame and at high altitudes, if he were 2 times more from swinging his head, he would have started to walk left / right, which would affect print quality. Here, the size is small and there are no such problems, I printed a standing needle handle - 80mm high. It turned out fine.
If you need such a baby and you do not plan to print with materials like ABS, then you should pay attention to such a baby.

')
In general, everything arrived surprisingly quickly and without problems with customs. Delivered by courier service Sdek directly into the hands.
A small box weighing about 5kg.
Inside, already familiar to me type of packaging, when all parts are in separate grooves.
In the box 2 levels. In the first is all the small things and consumables.
At the second level, more details and electronics with wires.
These are all the components that were found in the box. The packaging was additionally wrapped with polyethylene packaging, it saved from the loss of a pair of small screws that somehow fell out of the general bag or could be unscrewed from where ... Let's see.
The only moment I did not find the instructions. And since the memory card was in a blister, it did not look there and took out the card after the assembly. But I’m no stranger to this, I know the Prusha-like printers well :)
The printer shafts axes X and Y 8mm, but the Z axis for some reason, 6mm. Similarly, the Z axis trapezoid stud is 6mm, but this is a trapezoid and not a construction stud, cool.
We twist the big parts together.
Here, in principle, it is difficult to make a mistake, it is unclear where the right and where left, the panels are signed, but they are almost identical and, in principle, without a difference.
We thread stainless steel studs and fasten the upper with kerchiefs.
Since there are no instructions, I focus on the photos of the assembled printer on the seller’s website. I notice that I mirrored the back wall, a disorder. Need to rebuild or will have to invert the movement of the Y axis in the firmware.
Insert shafts with bearings. LM8UU standard bearings in aluminum mandrels, this gives us positioning accuracy when assembling. Parallelism will be respected!
The trees are fixed with acrylic ears, something resembling those of some funny animals.
Screw the base of the table. Wow, what a miniature!
The table is here as usual with height adjustment and parallelism with the help of screws with springs. Judging by the photos of the seller, I have a more advanced version. In the first cases, the distance between the screws was very small, then it was expanded, this is good.
By the way, I was too lazy and left lasting belts for last, it would be better to assemble the table, to stretch them.
Included is a textolite plate with glued blue tape and two stationery clips.
We fasten the roller of the Y-axis belt. It is also assembled at the factory, as well as many important components. This is convenient if, for example, to buy such a printer for a child. There is no way to mess with important details.
It's time to assemble the X axis. You will need a hammer here :)
Do not forget to put a carriage with a hot-end and slowly hammer in the shafts in plastic. Details of the mounting shafts are printed, but nothing cracked during assembly, the plastic is good :) Although I have no reason to complain about this, there is no reason. Now the assembly is being tested, then everything will be thrown onto another frame and the printer will have a new kinematics Core-XY.
Collected. Left a little.
We mount the mount of the Y-axis motor. Everything is somehow very monumental here.
We fasten the bar of the limit switch holder.
We fasten the motor itself.
I decided to place the extruder at the top, although I found a mount for it on the wall of the printer. But the bowden tube is a bit short and on the wall it will be very bent. In such a position as I have it is always at the optimum angle. Attached motor on double-sided tape.
We stretch the wires, wrap them in complete noodles.
The wires are all labeled and on the board everything is clearly signed, what to insert. The board itself is of the Melzi type, I don’t really like them, because there are soldered drivers there and you need to be careful with currents and adjustments in order not to burn anything. Here everything is adjusted from the factory.
Now we stretch the straps and fix them with ties. Stretching them is not very convenient, there are no adjustable tensioners.
I have one printed tensioner, I put it on the table strap.
The X axis is still without tensioner, later I came up with something there. But this is all, I repeat, temporarily.
It remains to fasten and connect the switches.
Done, turn on the power supply. He is only 5A here.
The printer turned on and happily informs us that the control board is using the Repetier-0.91 firmware.
The first seal, as usual lumpy. The gap between the nozzle and the table is too large, reduce it and repeat printing the test cube from the memory card.
Already better.
Well, not perfect, of course. It is seen that the layers just walk a little. It is better to tighten the belts.
We play on. We print Marvin from 3DHUBS.
Layer 0.2 does not suit him. We ought to try something thinner. Included are an additional 3 nozzles. from 0.3 to 0.5mm.
Put the nozzle 0.3, tighten the belts and reduce the layer to 0.15mm.
then there did not look
Already not bad. In general, a suitable printer :) It's funny that only 5A of power supply is enough for it, usually the PSU is set more powerful, the ampere is 20-30. But it is understandable, here are used shortened Nema17 and a short heater, there is no heating at the table. For the rest, except for the size, everything is like that of the older brothers. For larger sizes, even, its frame will not be strong enough. He lacks the front wall of the frame and at high altitudes, if he were 2 times more from swinging his head, he would have started to walk left / right, which would affect print quality. Here, the size is small and there are no such problems, I printed a standing needle handle - 80mm high. It turned out fine.
If you need such a baby and you do not plan to print with materials like ABS, then you should pay attention to such a baby.
Source: https://habr.com/ru/post/395767/
All Articles