Building an Observatory with Remote Control
Passion for amateur astrofoto is associated with the use of one very limited resource - time. To obtain a high-quality image, you need to take pictures with a total exposure from several hours to several days. In addition, several factors must coincide: a couple of days / nights of free time, good weather, the moon in the right phase. In winter, when you can get up to 10 hours overnight, there is a non-zero chance of becoming an icicle. And in the summer - to become food for mosquitoes and flies, and the sky is given for only a couple of hours. Add to this the need to move away from the city and the light, the weight and dimensions of the equipment, the diesel generator, multiply by the chance that the weather will suddenly deteriorate - and that's it - the event turns into Mission Impossible, and two or three pictures in a year - to the utmost.
But you can't just build an observatory.
')
Construction of the observatory must begin with a plot of land. The requirements for it are a good overview, stable and fast Internet, the presence of a reliable person nearby, because, firstly, the cost of equipment, and secondly, anything can happen and go over 100km to juggle a hung device is not always convenient.
It so happened that last summer I met a fellow
In Google SketchUp the project of astrobuds for two seats was drawn and calculated.
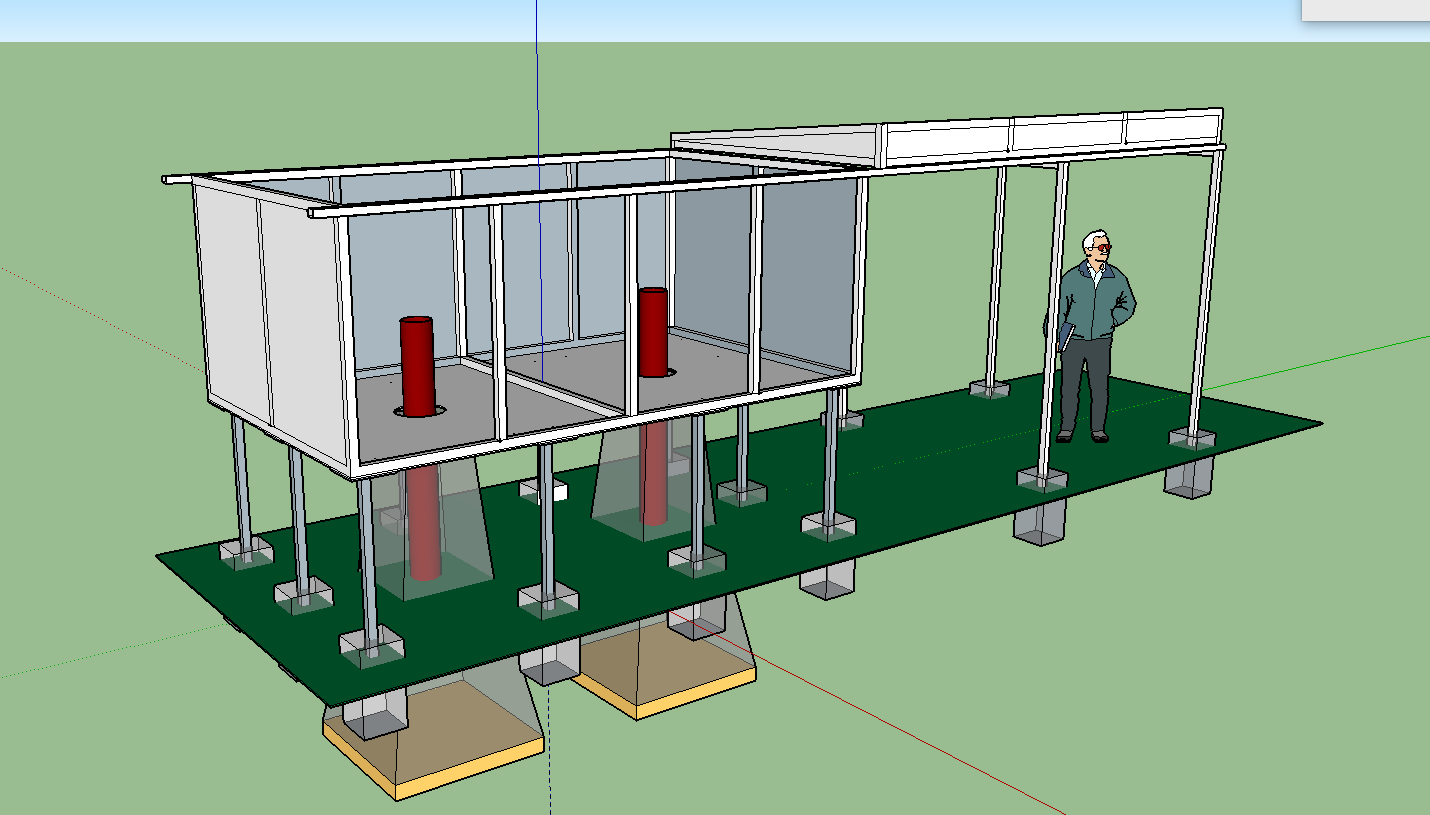
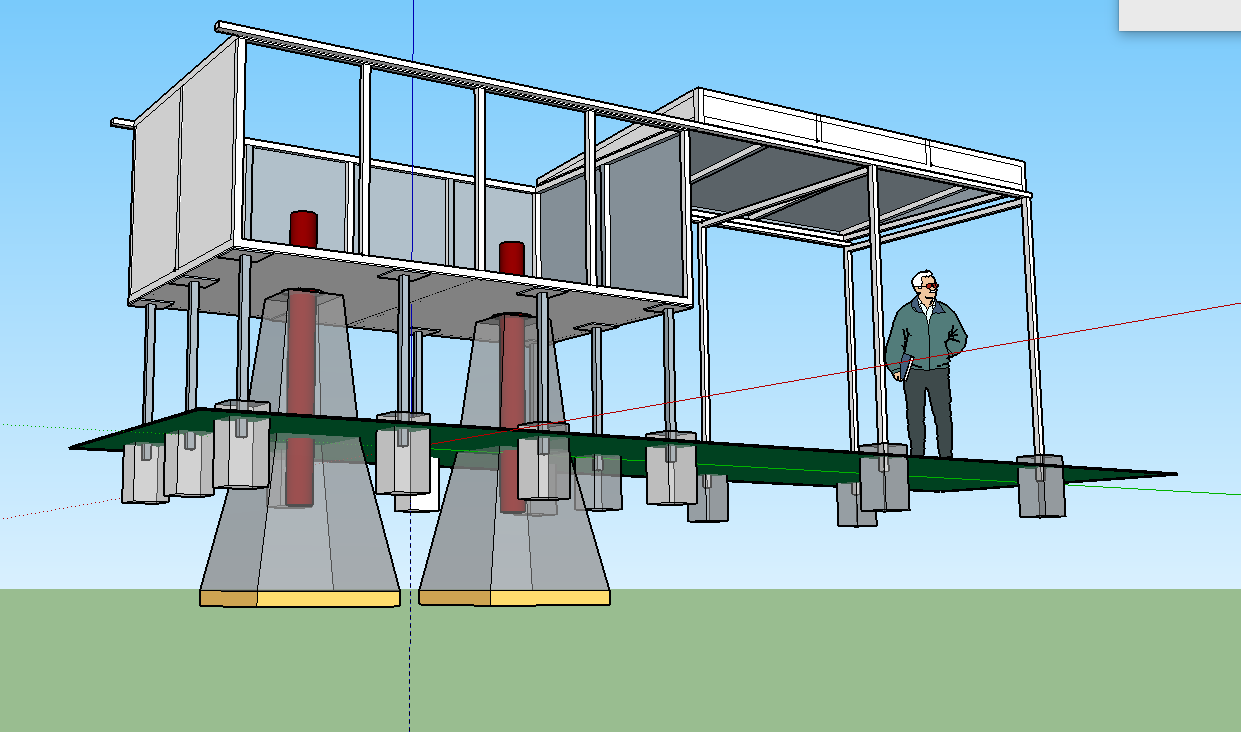
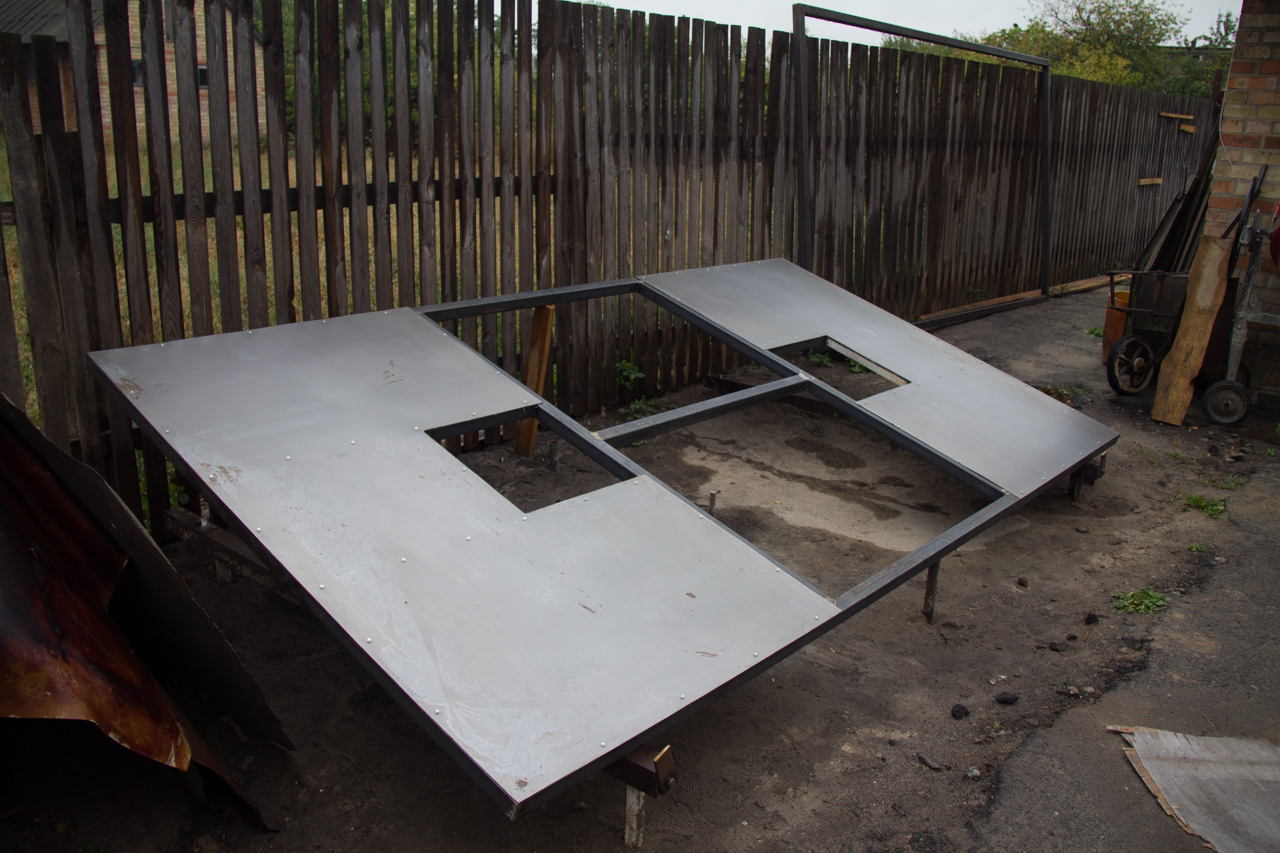
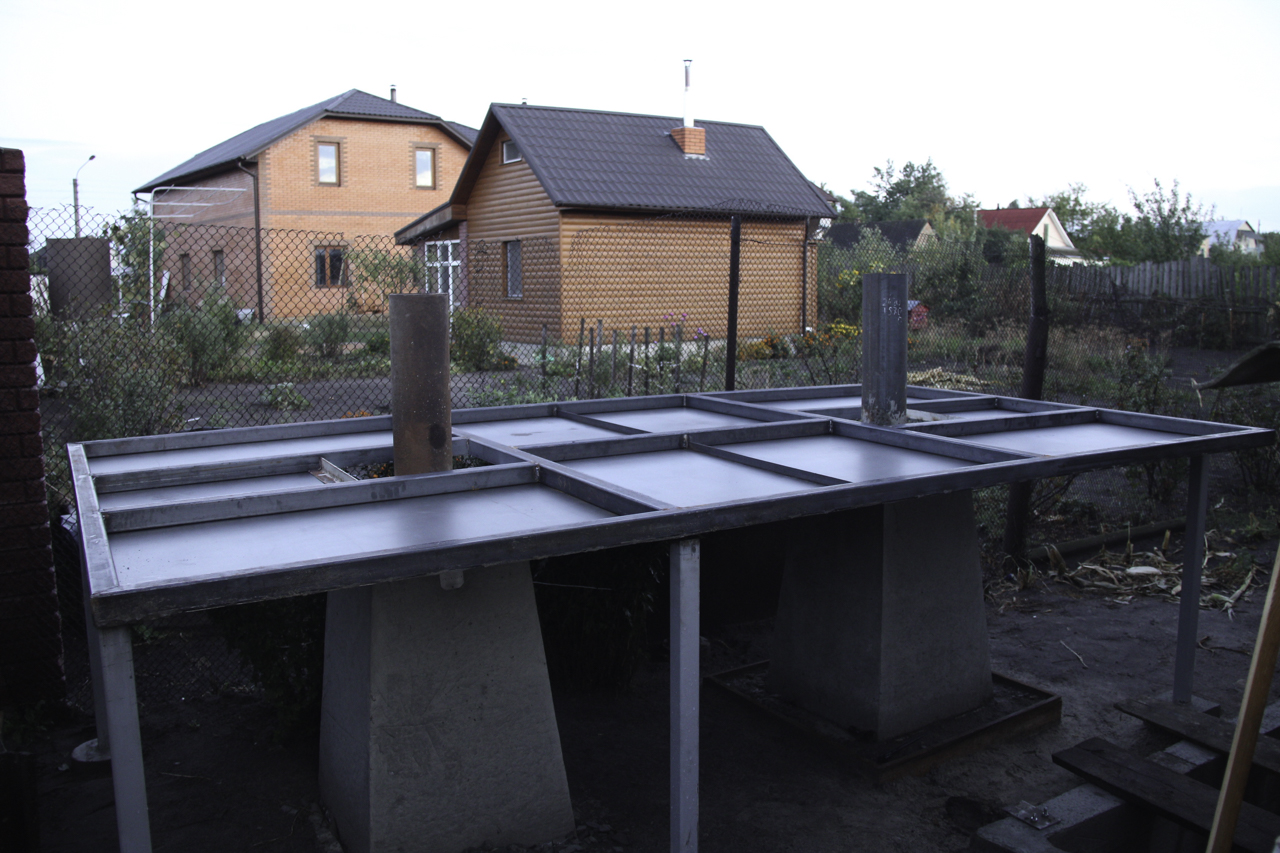
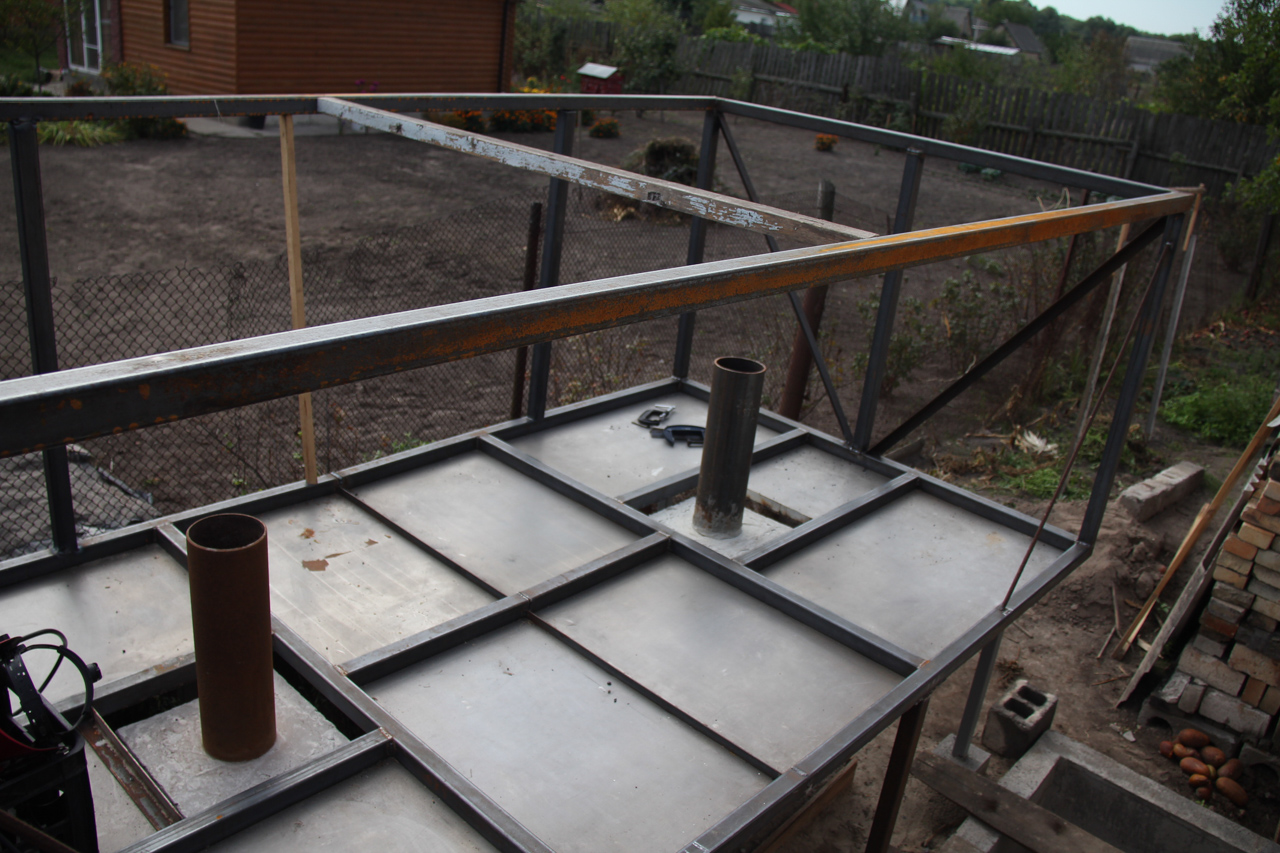
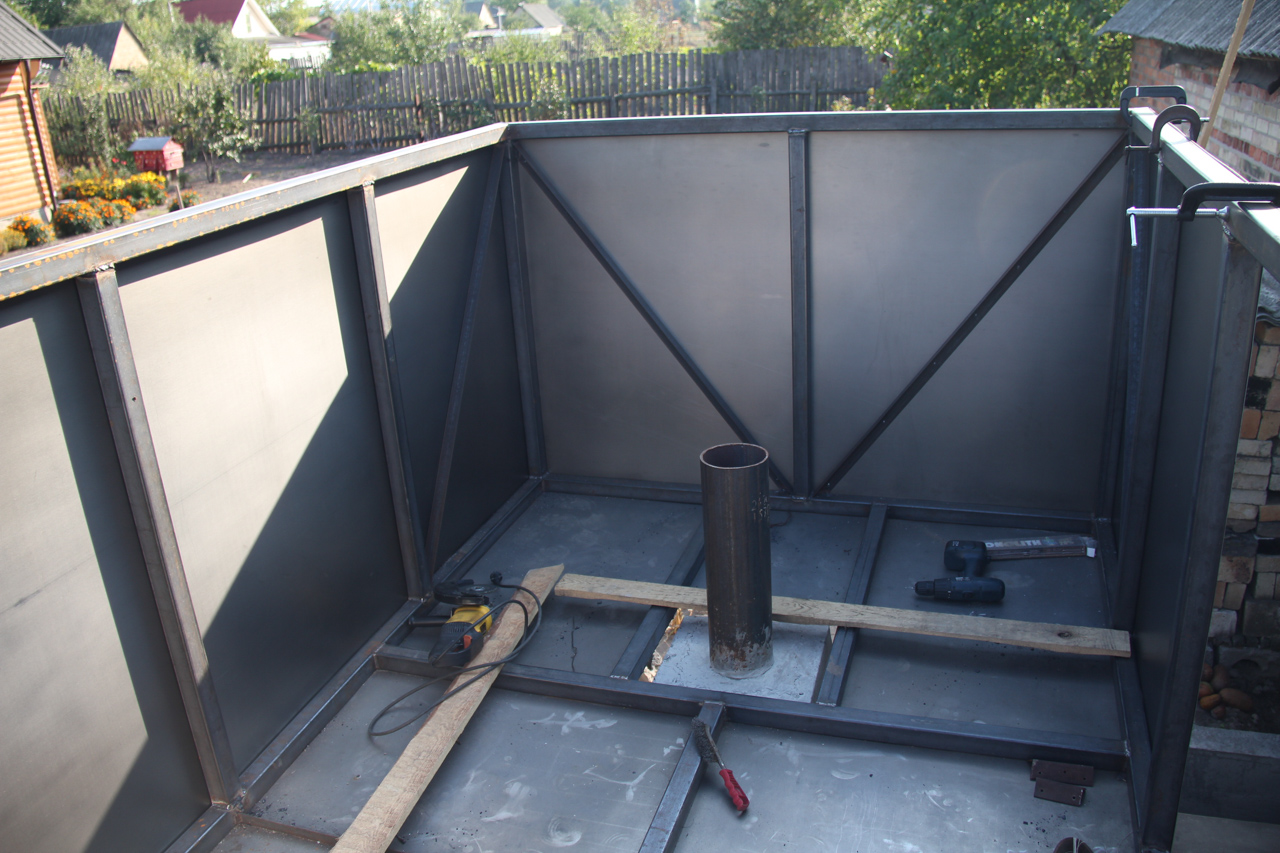
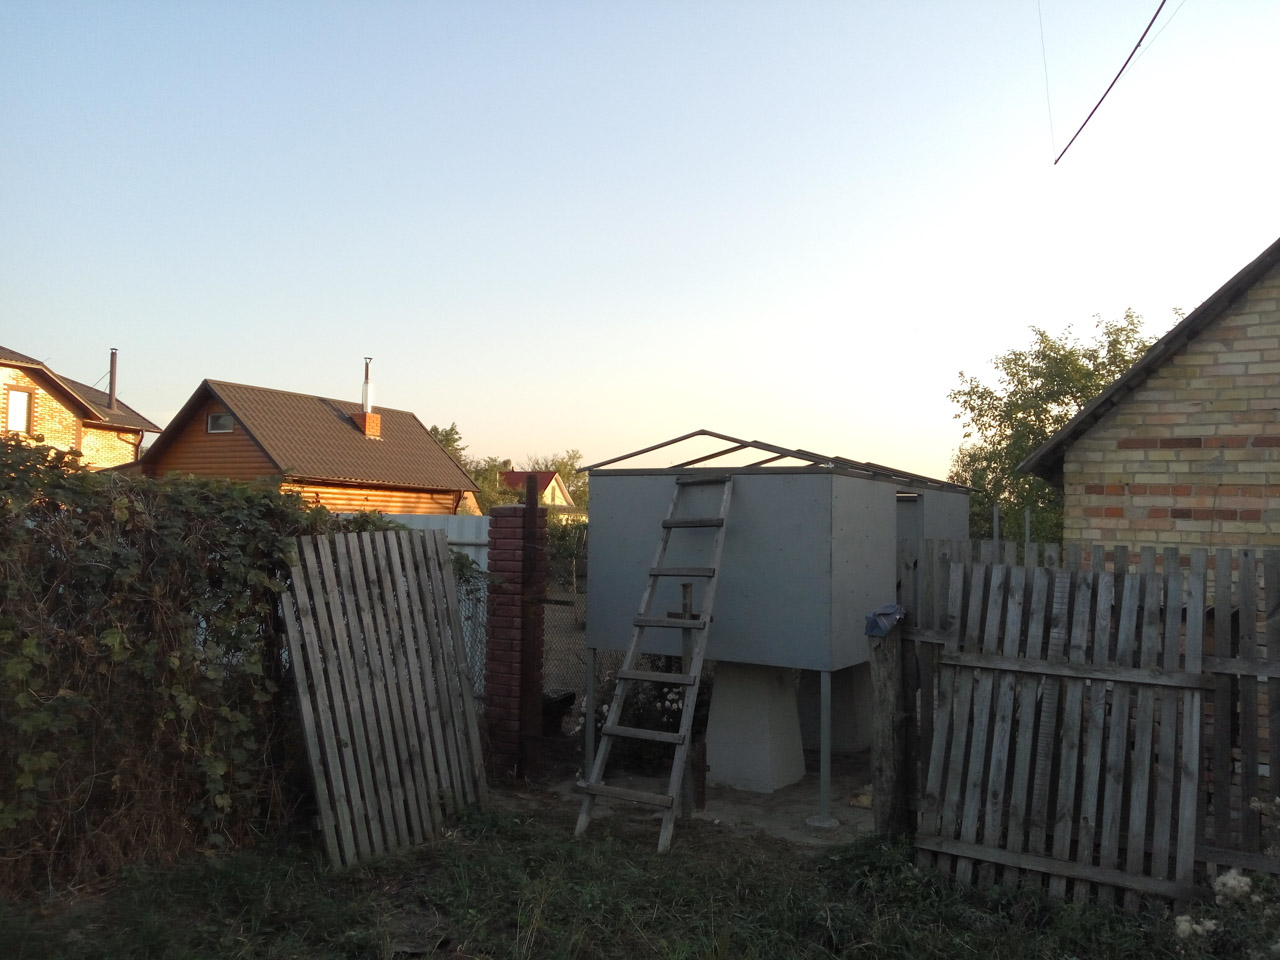
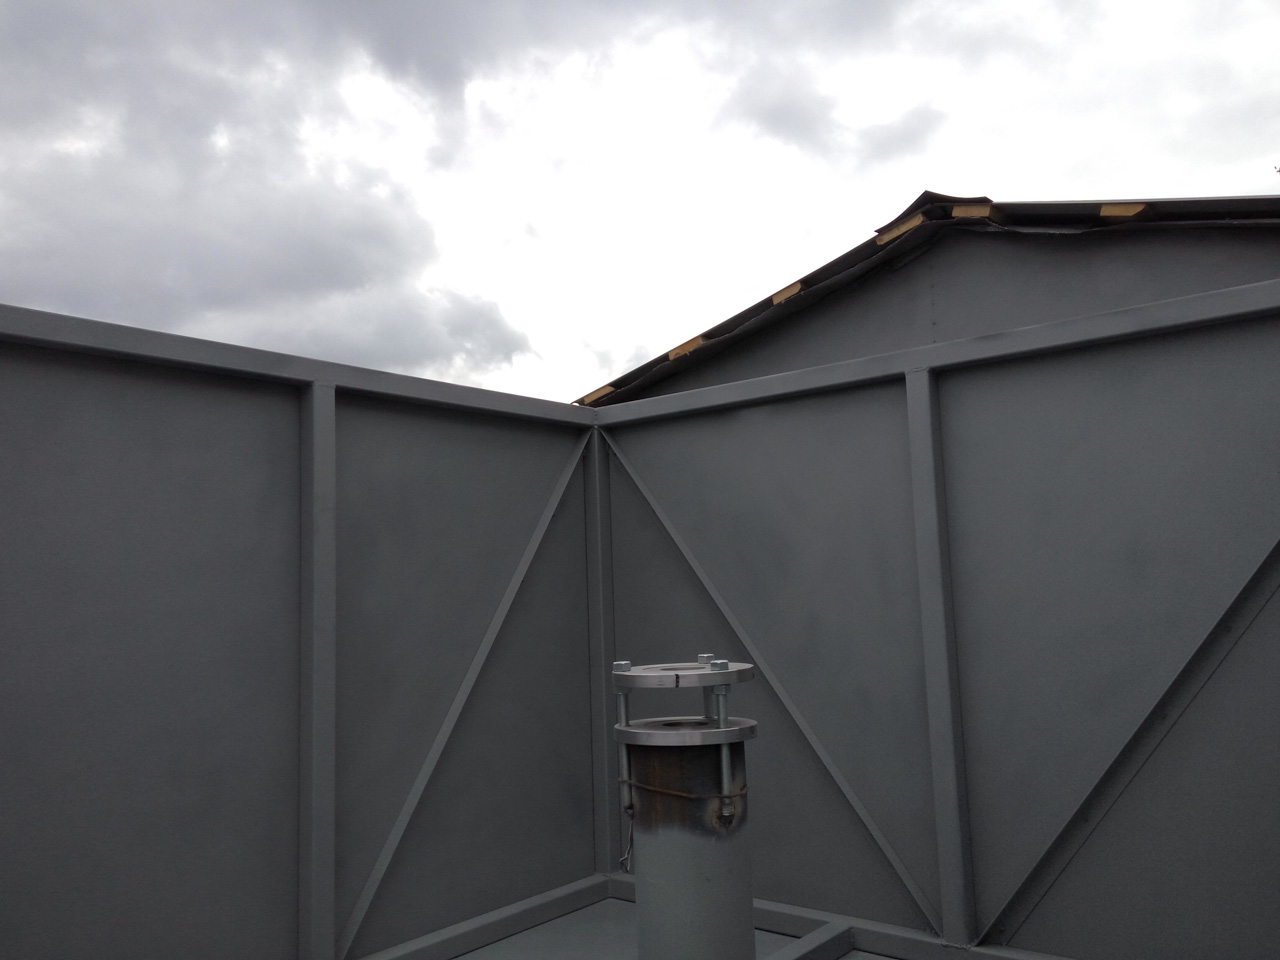
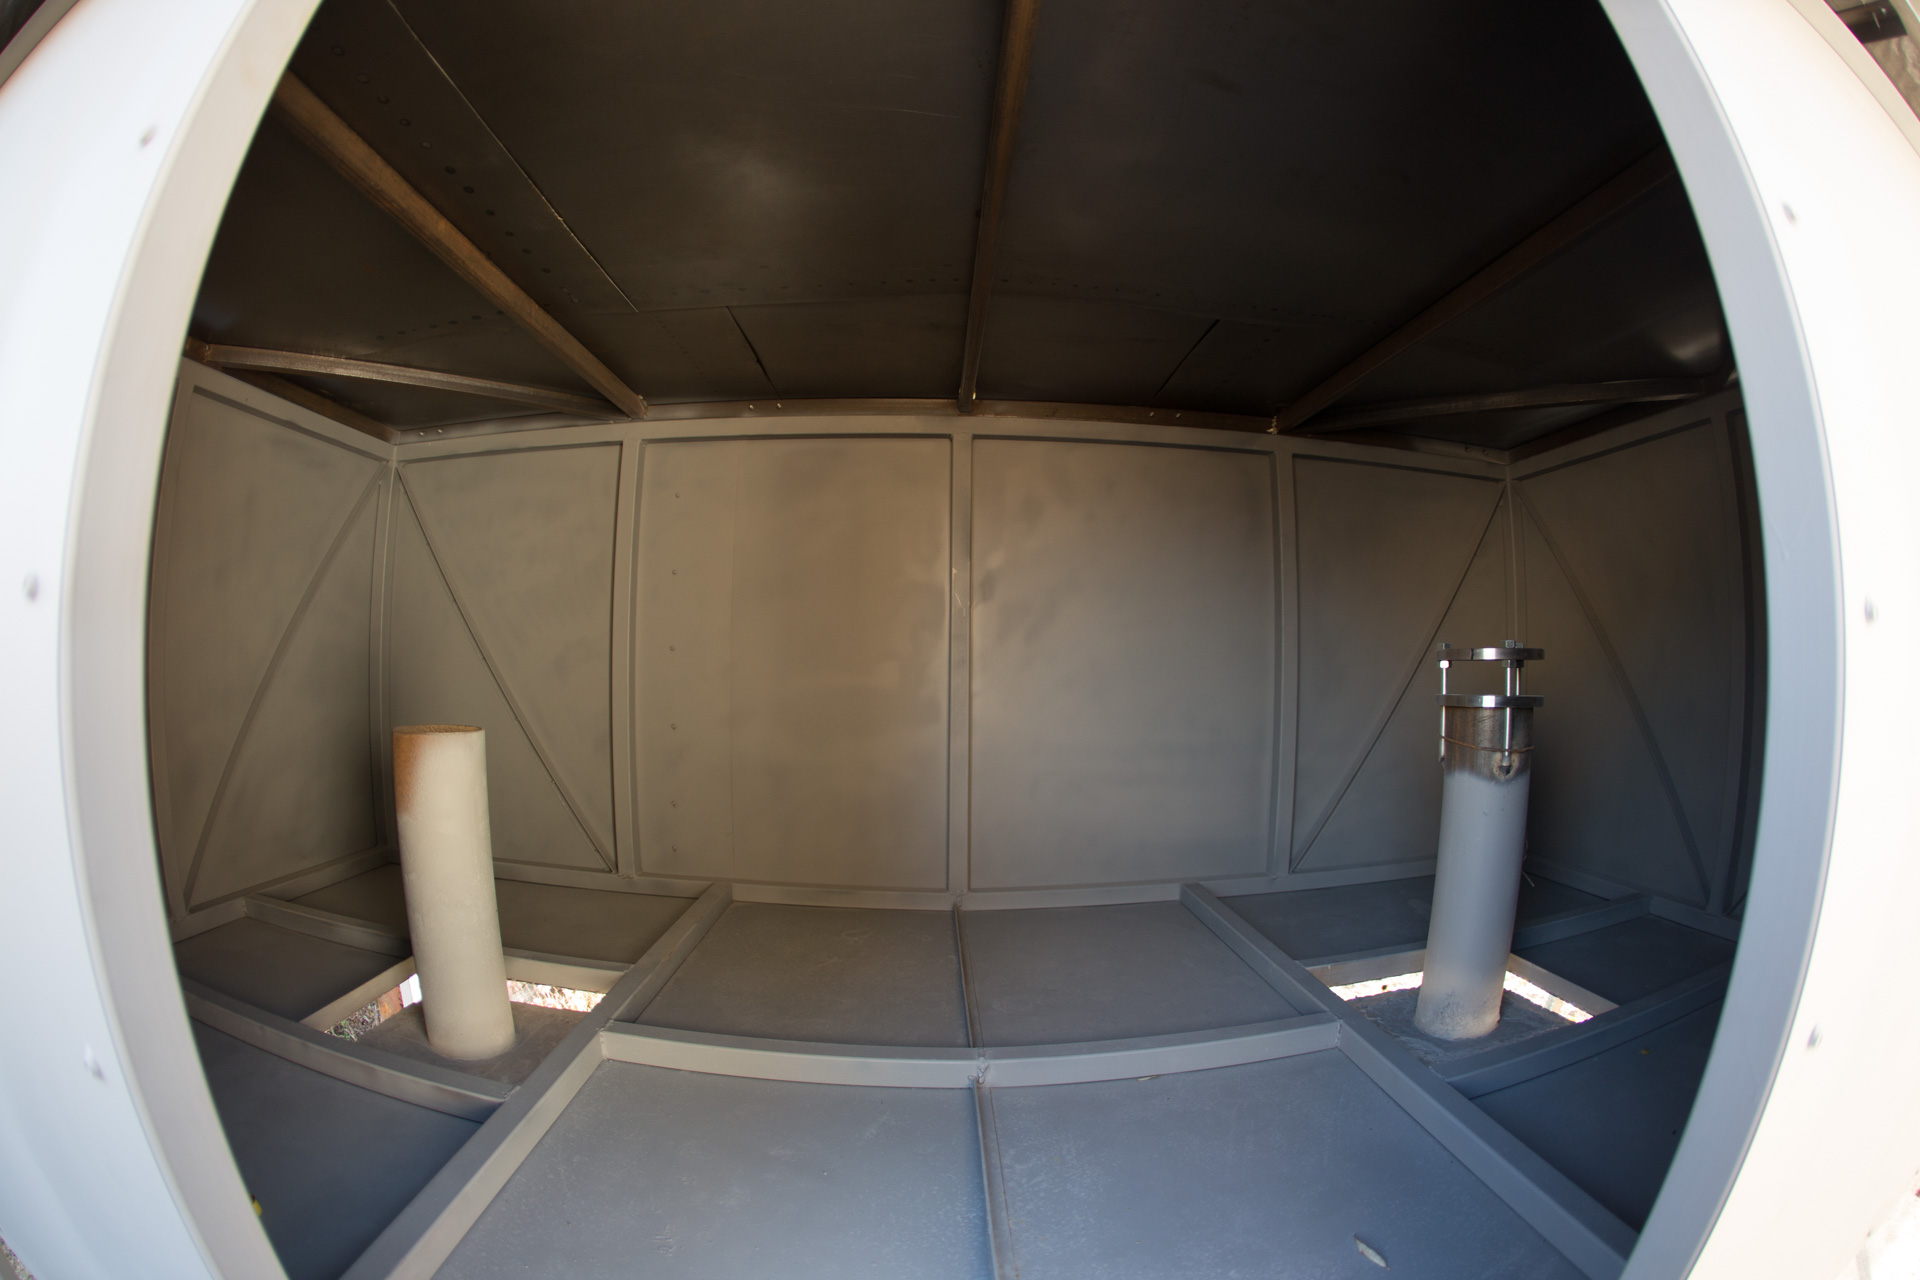
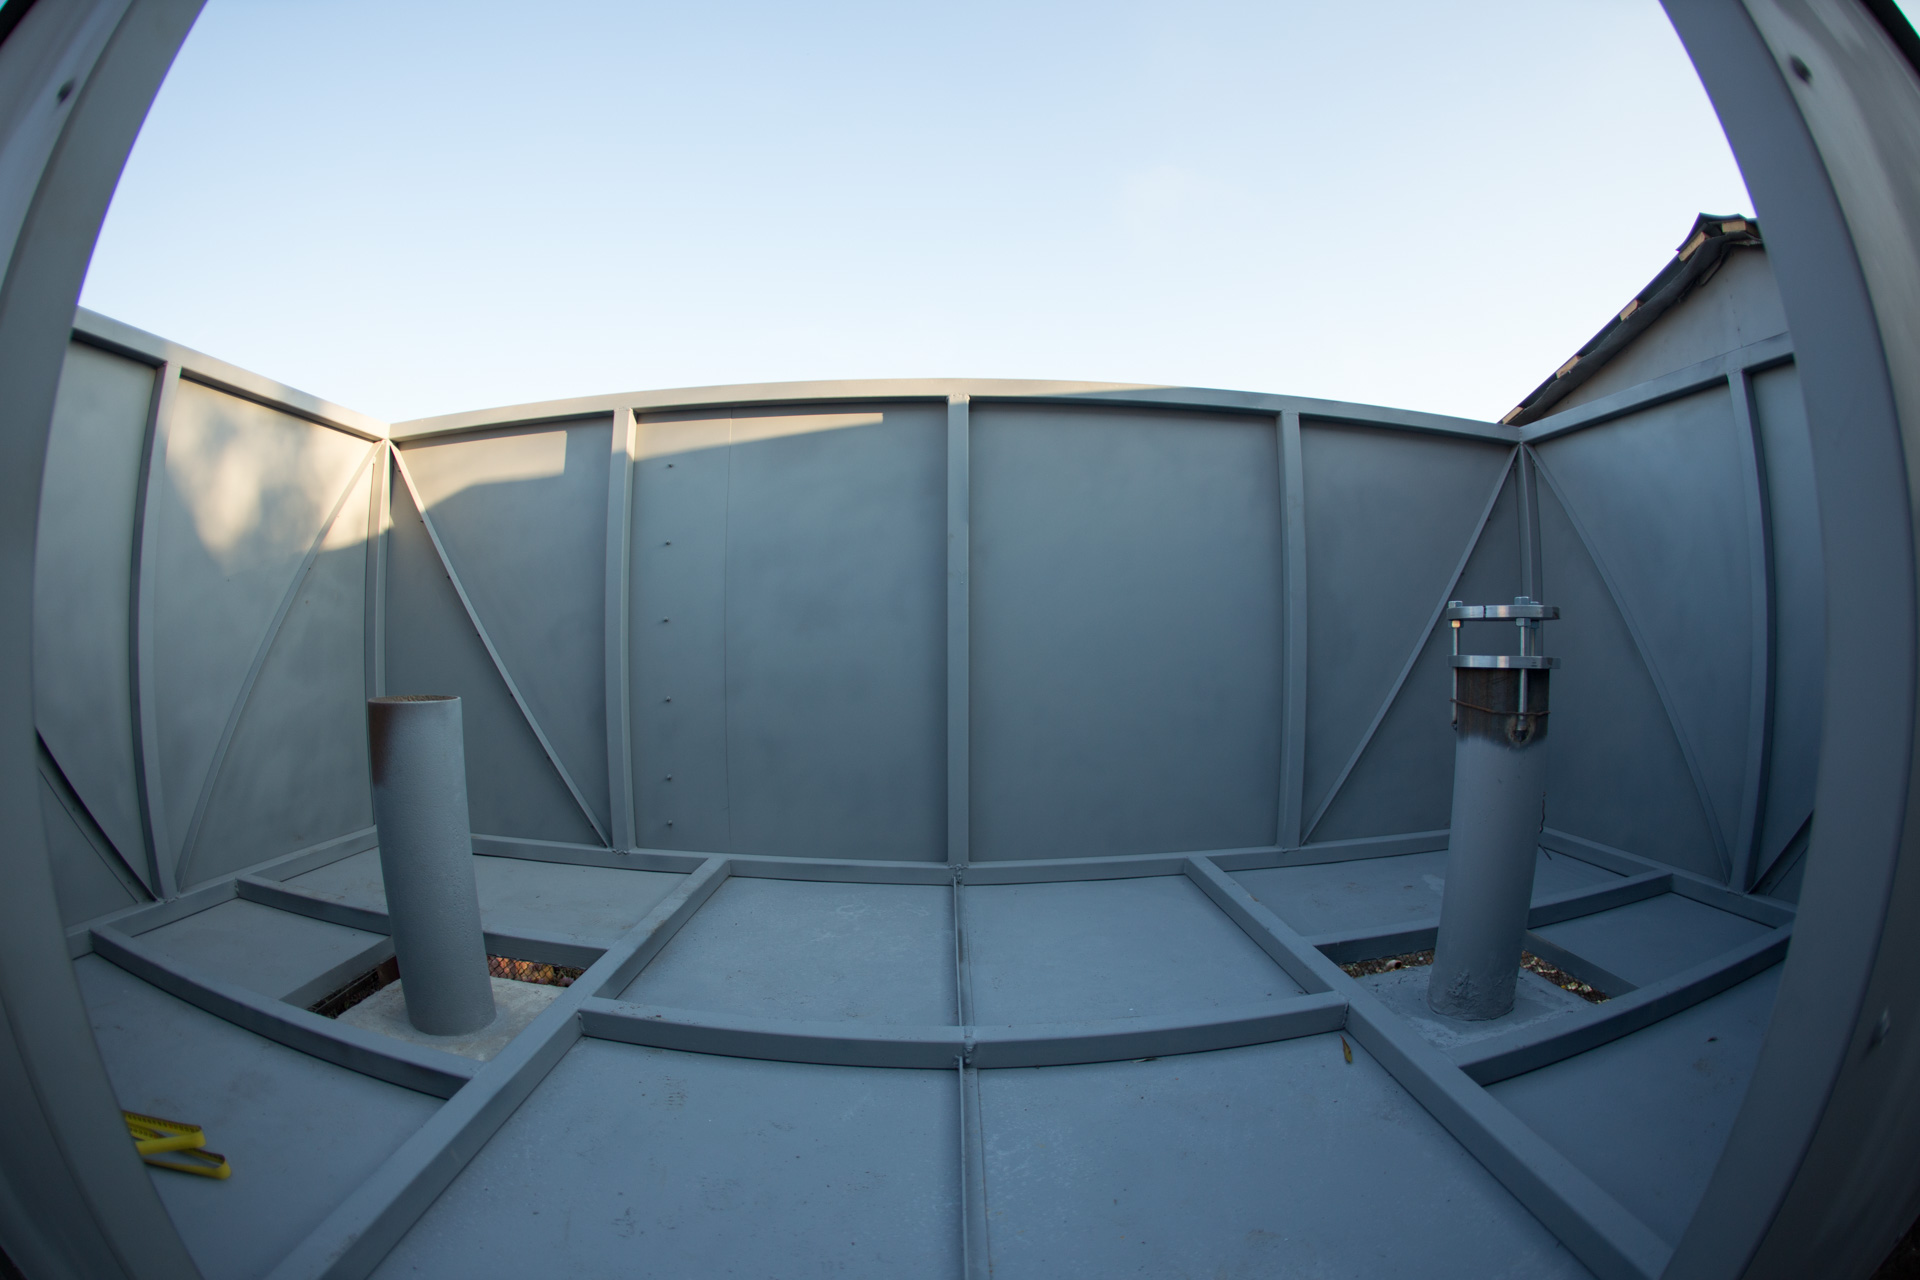
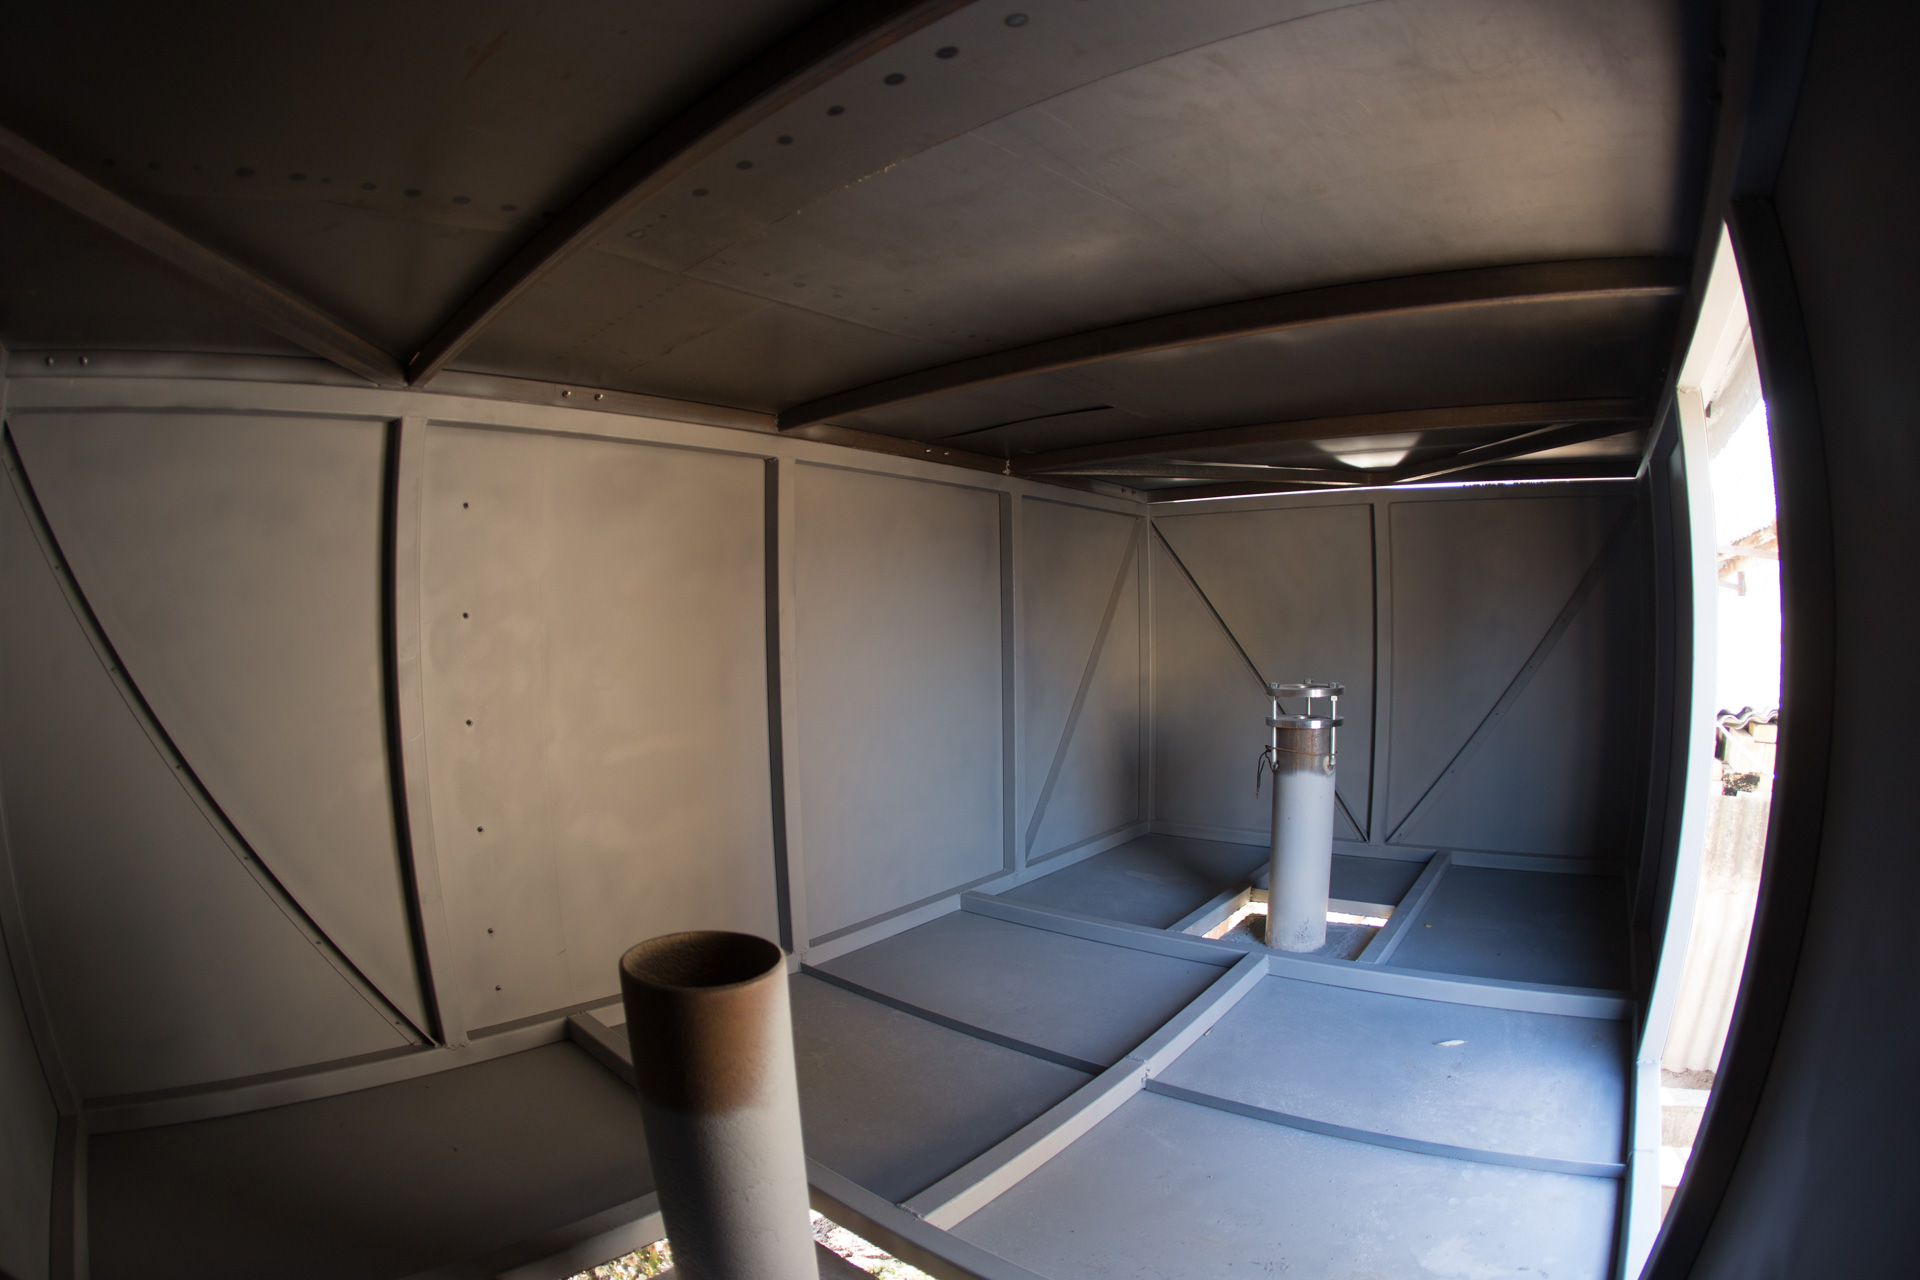
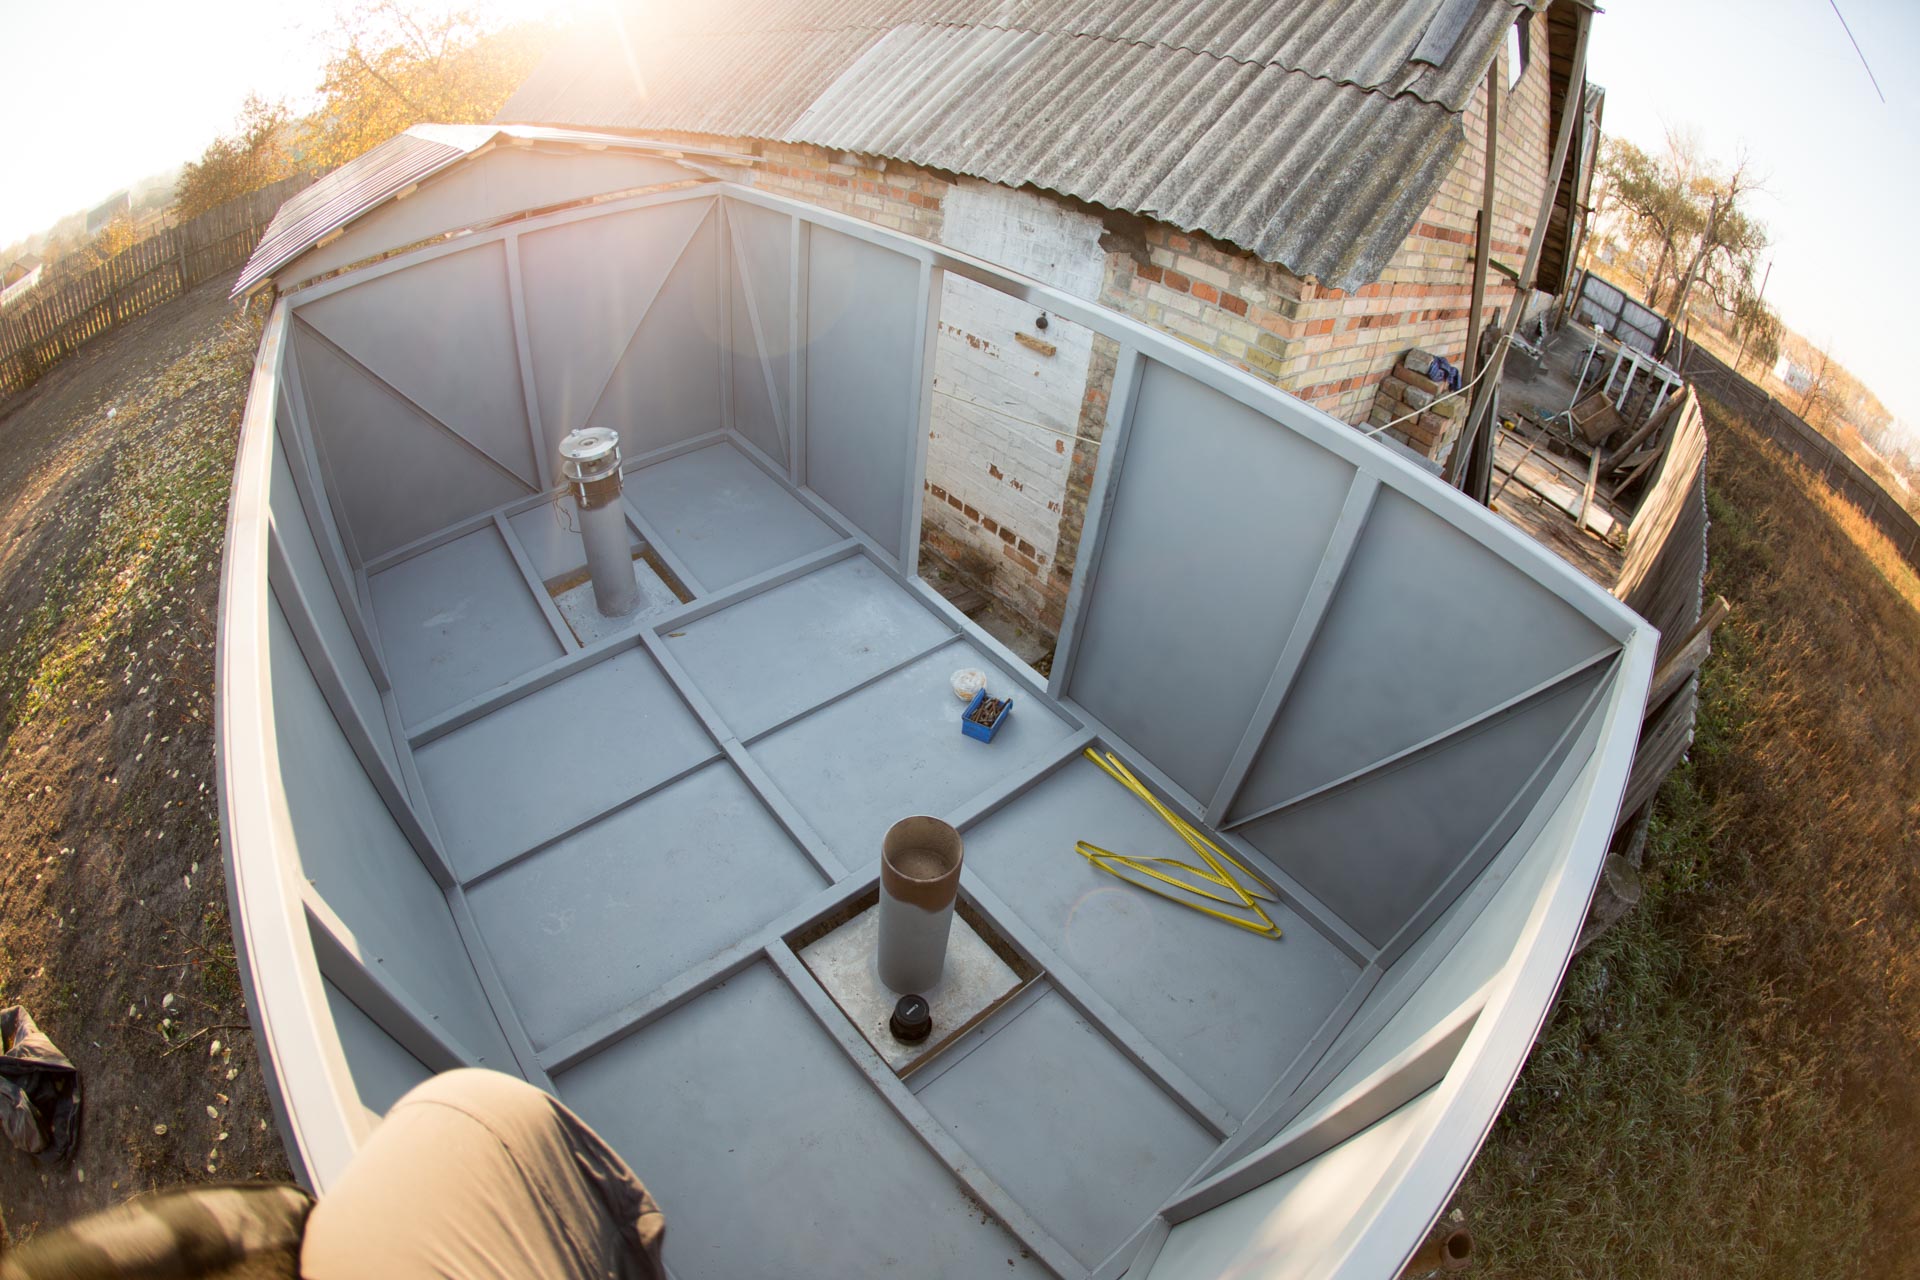
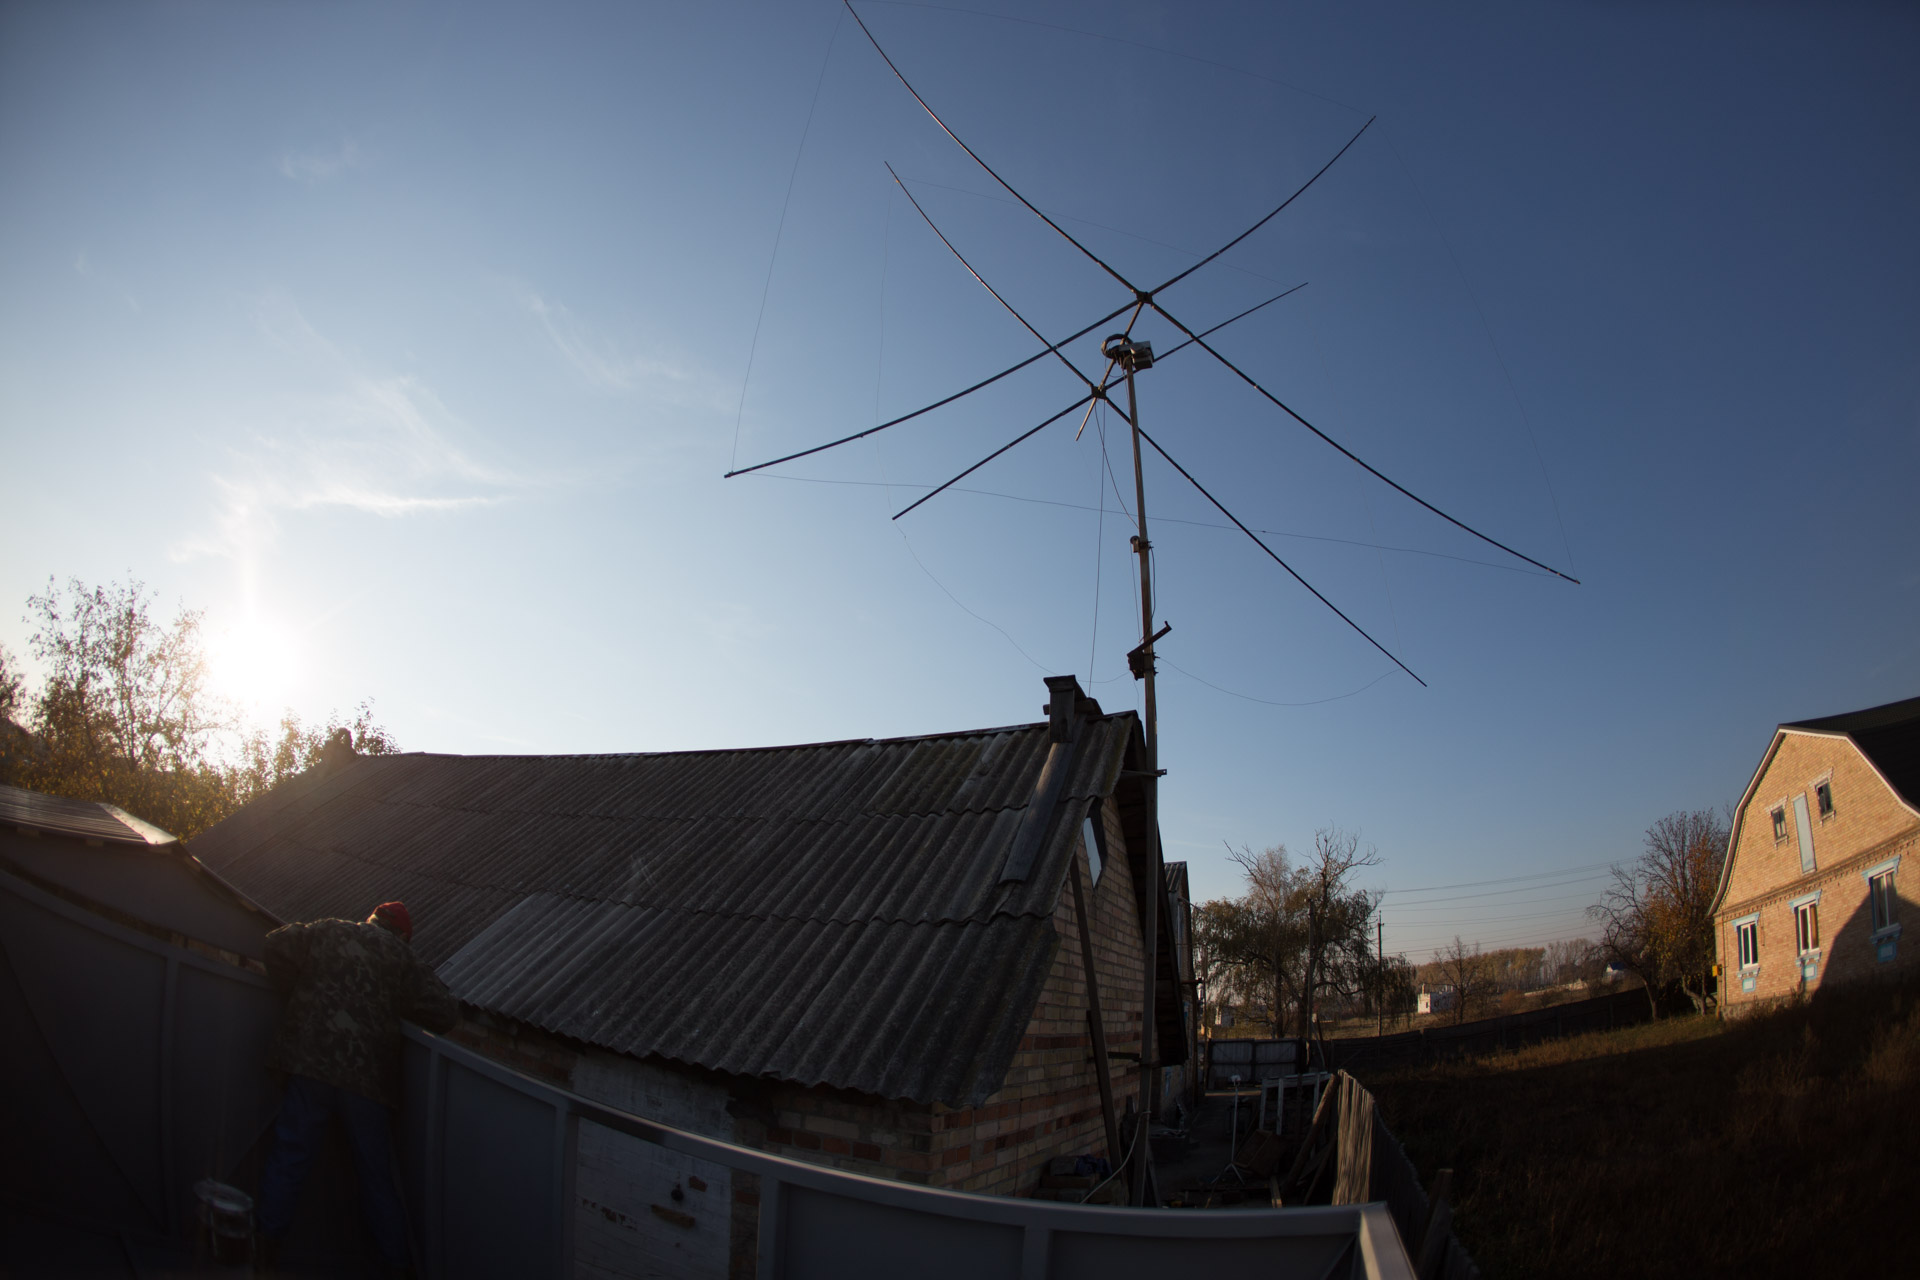
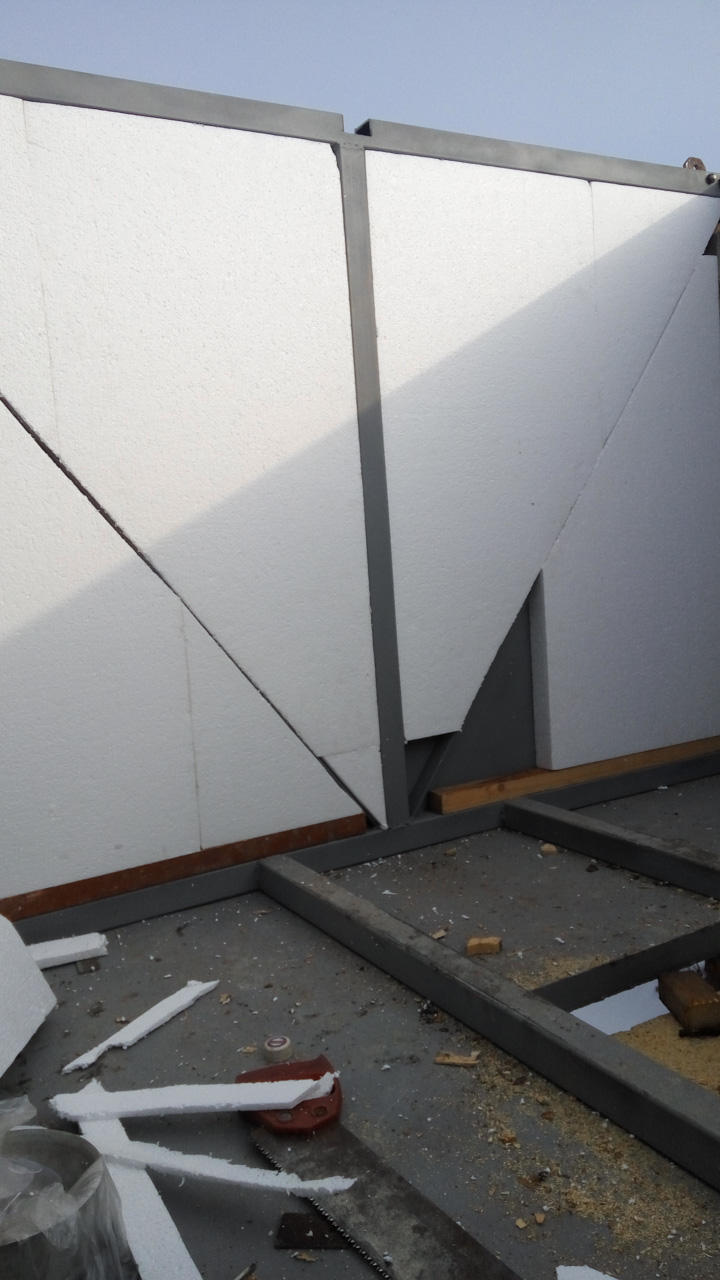
The domed roof, which is familiar to observatories, is in itself difficult to manufacture, moreover, it is not suitable if there are more than one tool. Therefore, we decided to just move it aside. At the base are two columns on a sand cushion, with a depth / height of up to 1.5 meters, with a concrete pipe. There will be tools on these columns, and the massive monolithic construction should suppress all possible vibrations. Raise the building above the ground had to because it is located near the building. Steel construction itself.
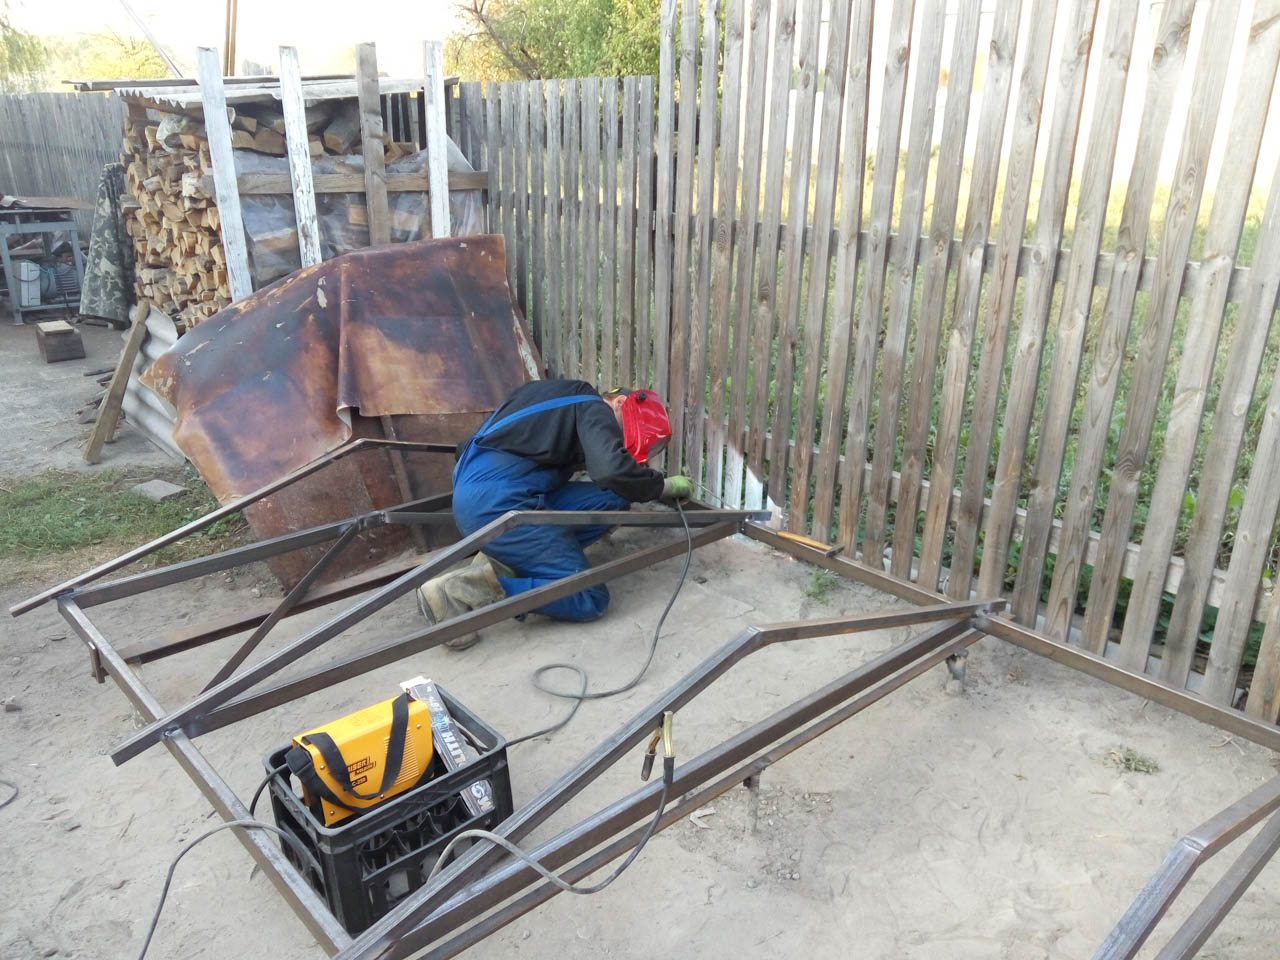
The cutting was calculated, the estimate was compiled (the result was, as usual, x3), the construction began.
Fill columns
Frame for the column:

Site preparation:

Install and fill:


Installation of the column:


A week later, when everything was grabbed, they repeated it again:

Well, a small time-lapse process:
Site preparation:
Install and fill:
Installation of the column:
A week later, when everything was grabbed, they repeated it again:
Well, a small time-lapse process:
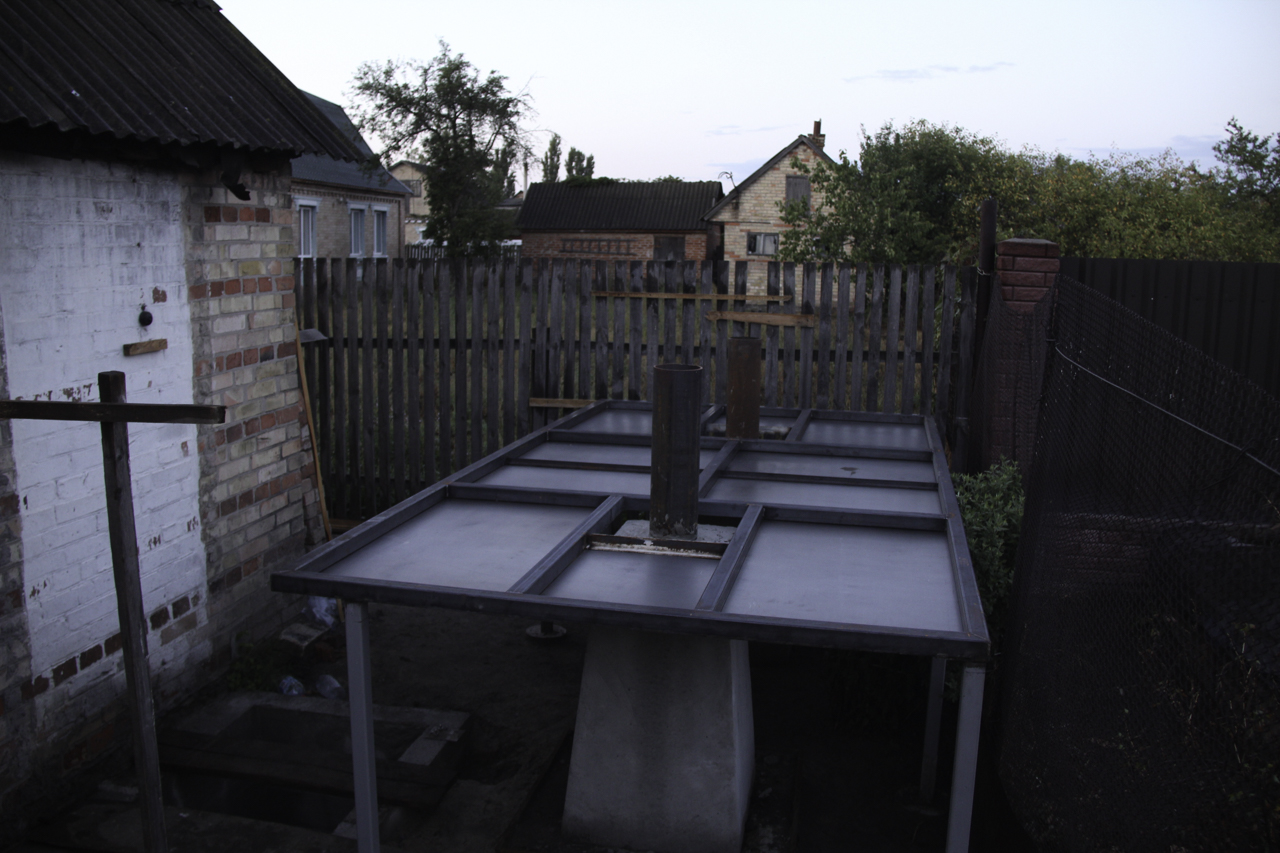
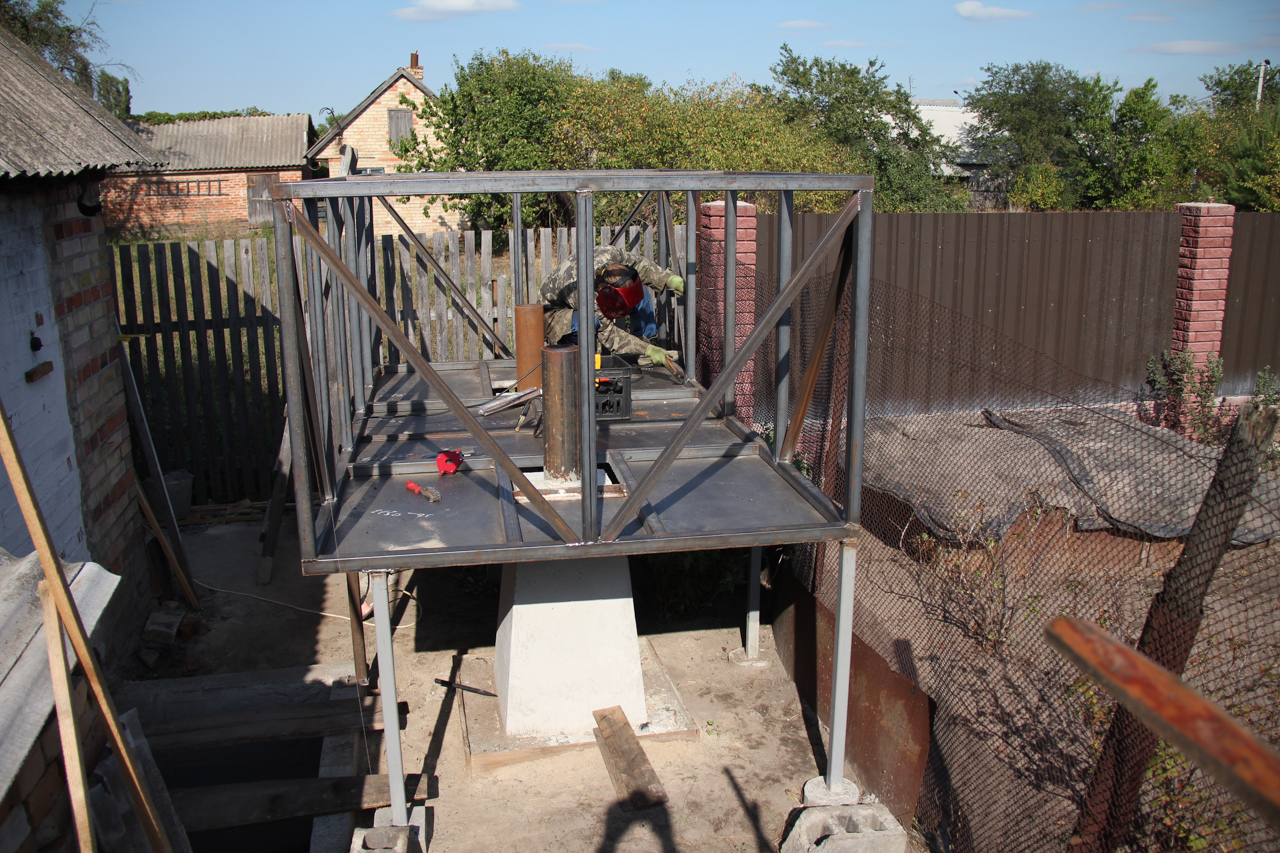
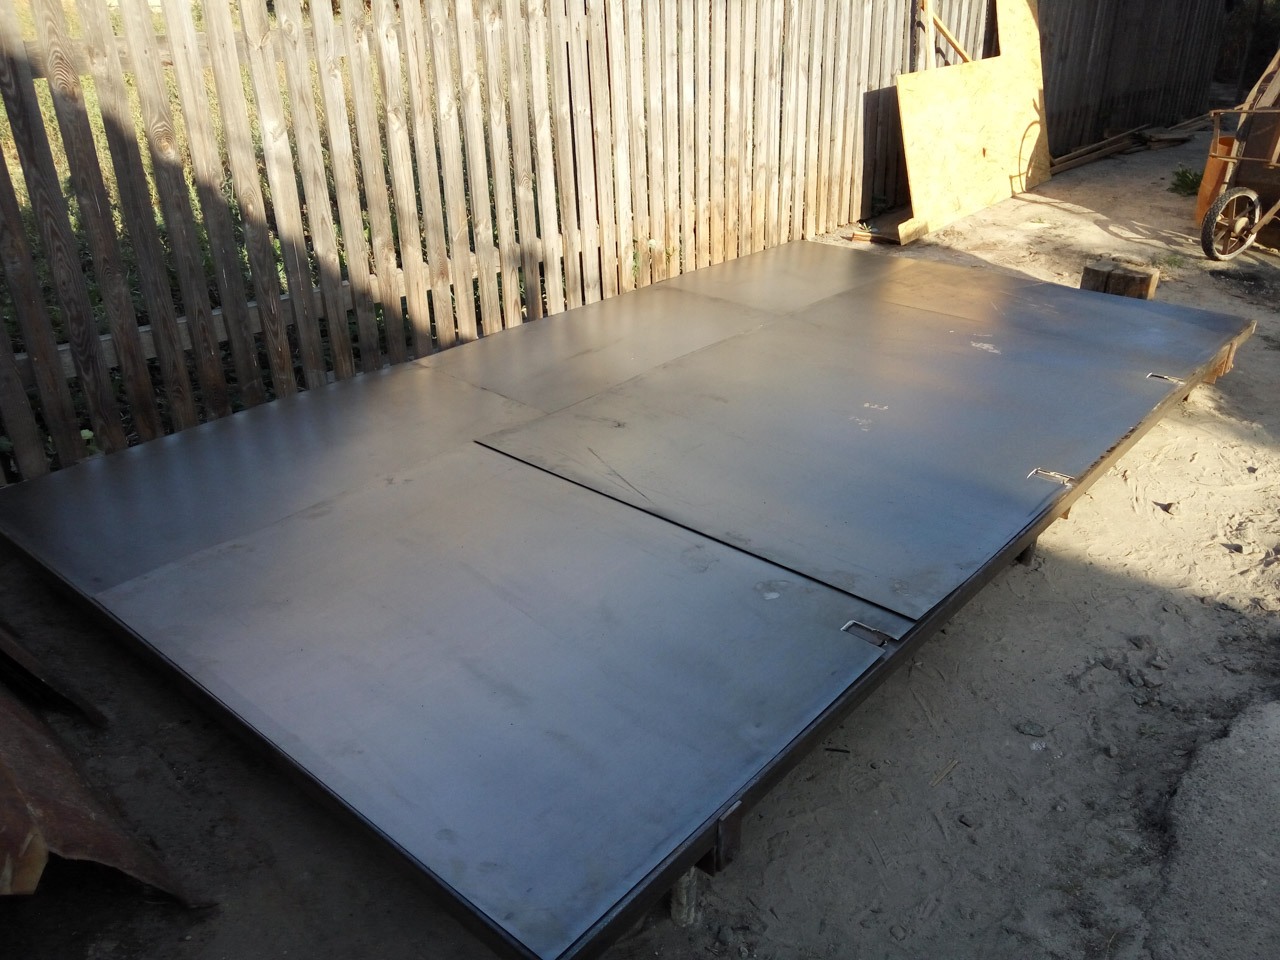
Supports for building and floor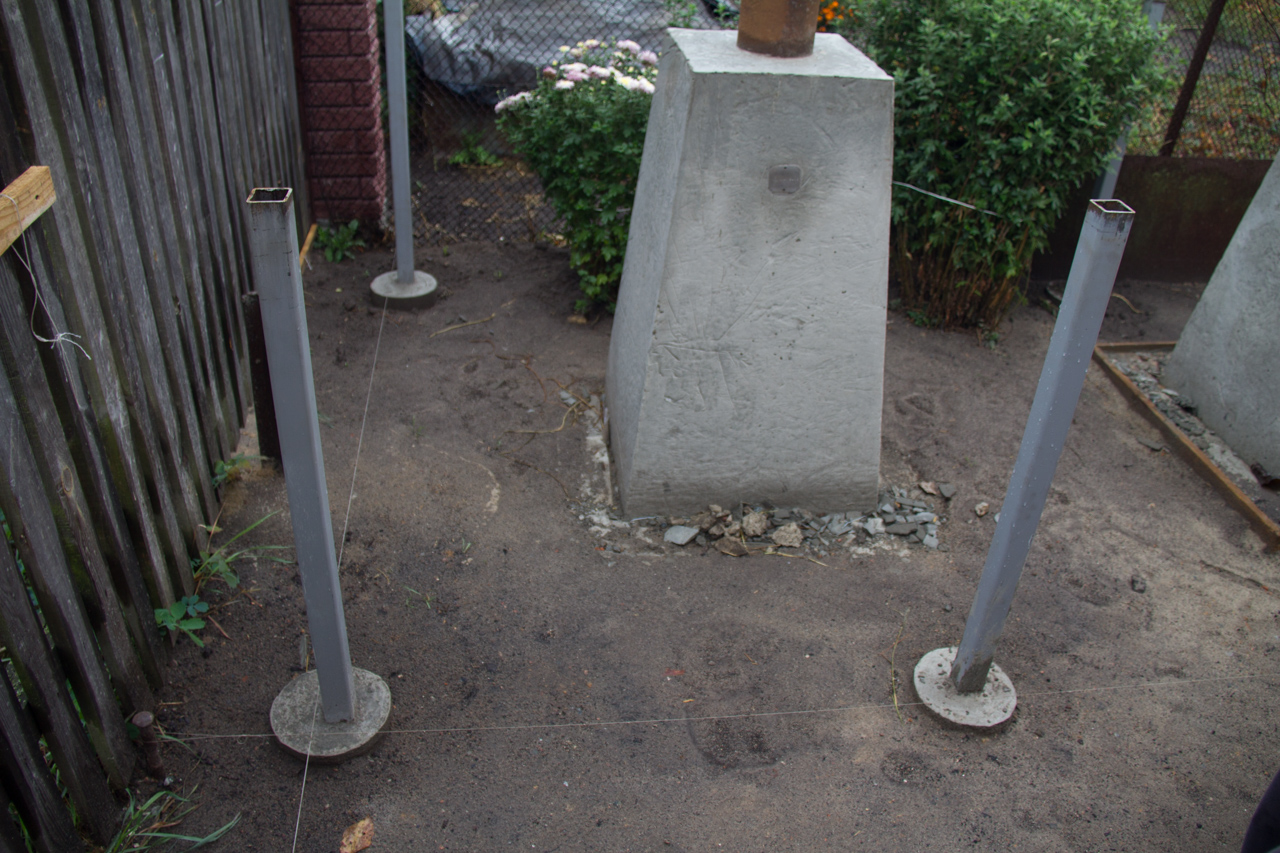
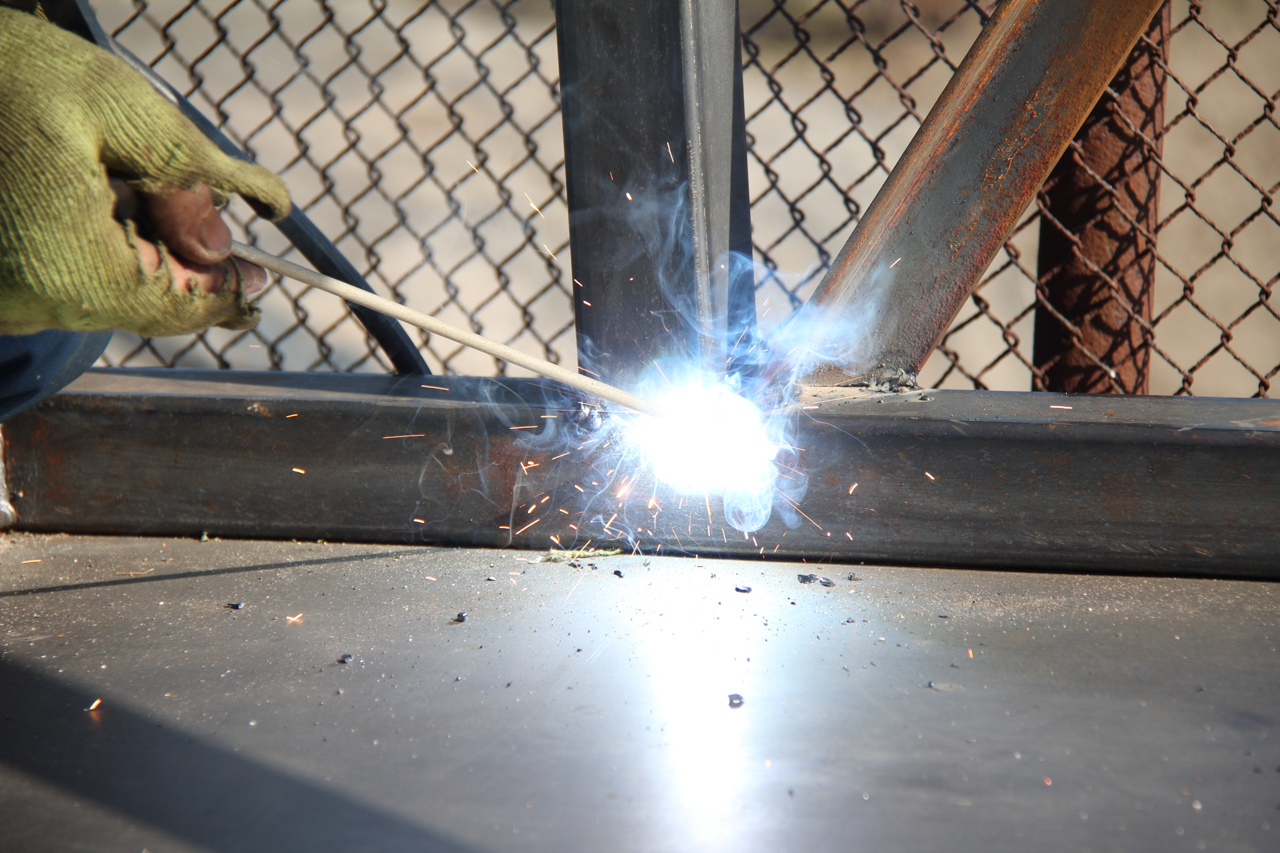
Frame assembly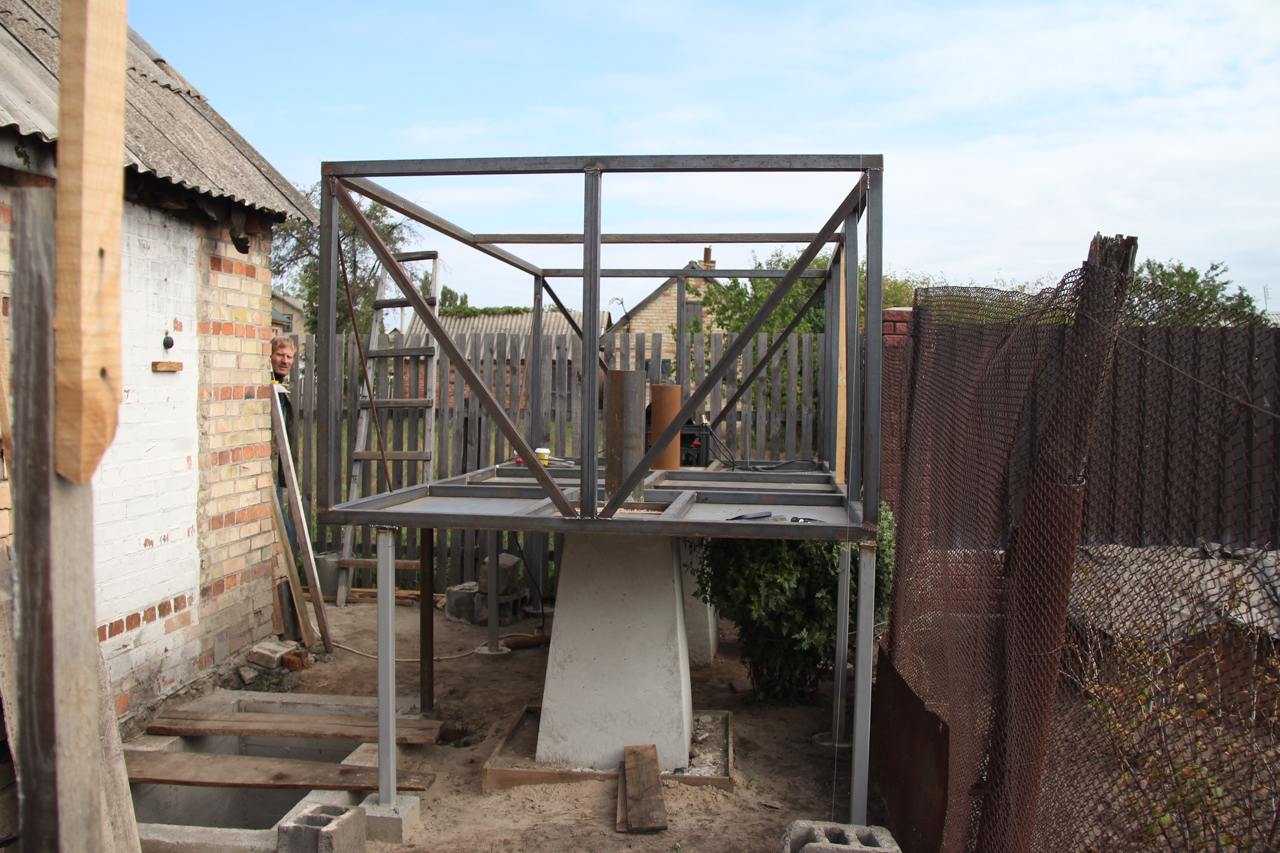
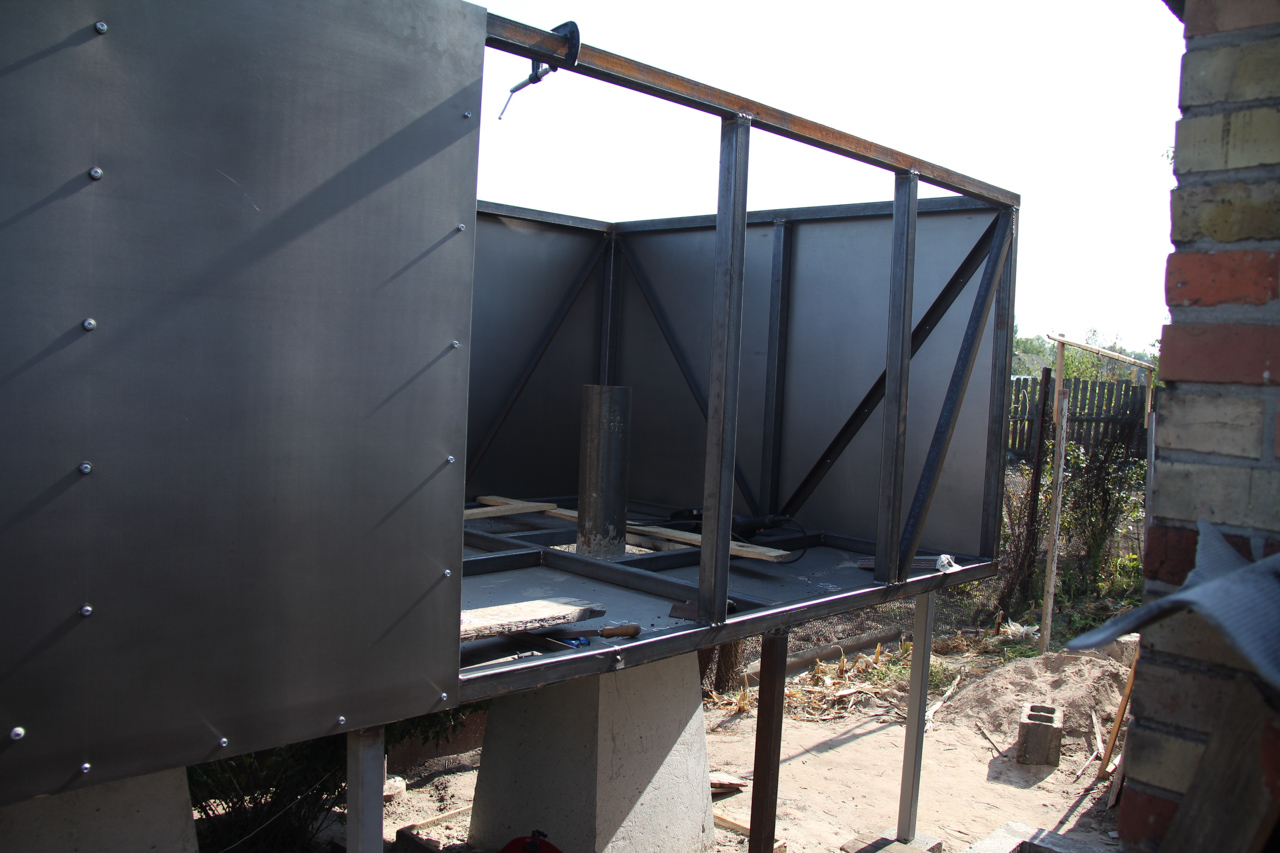
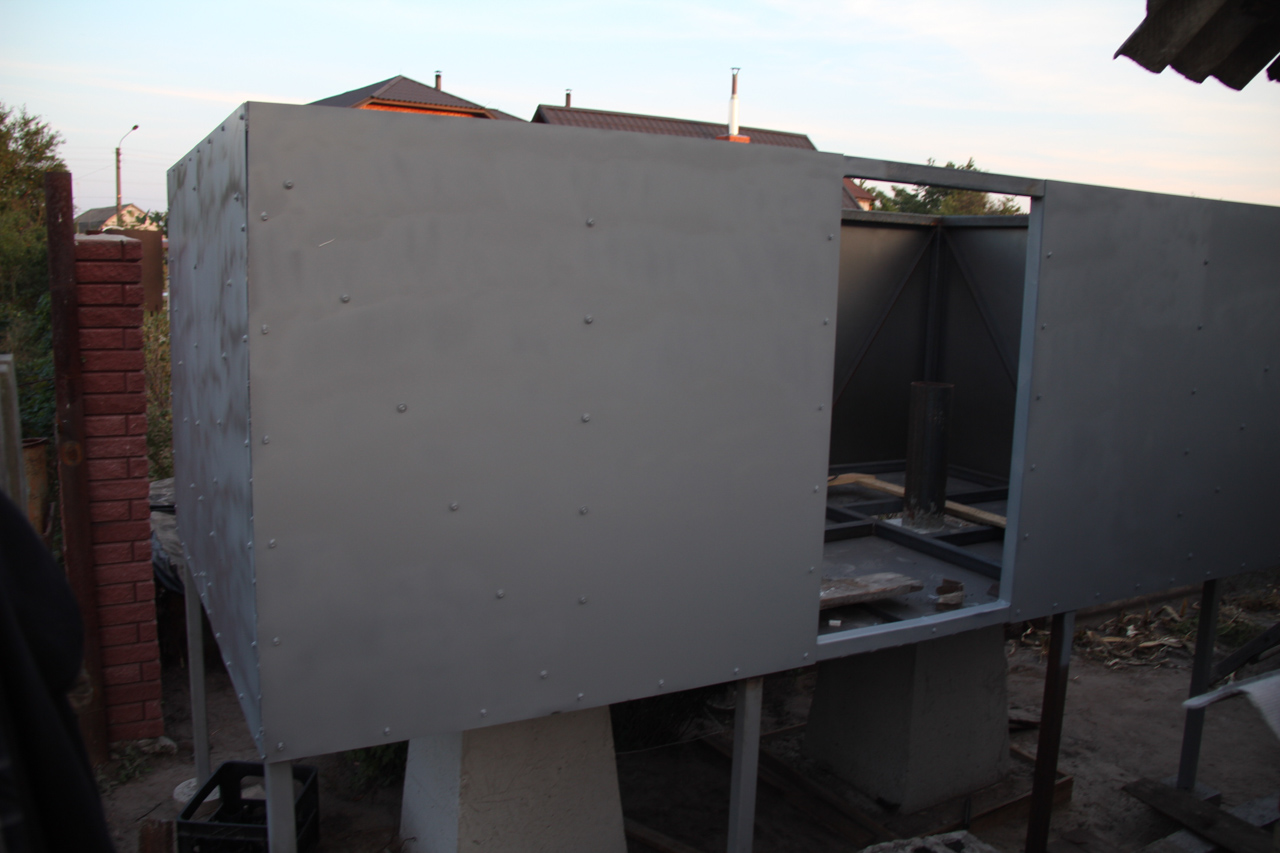
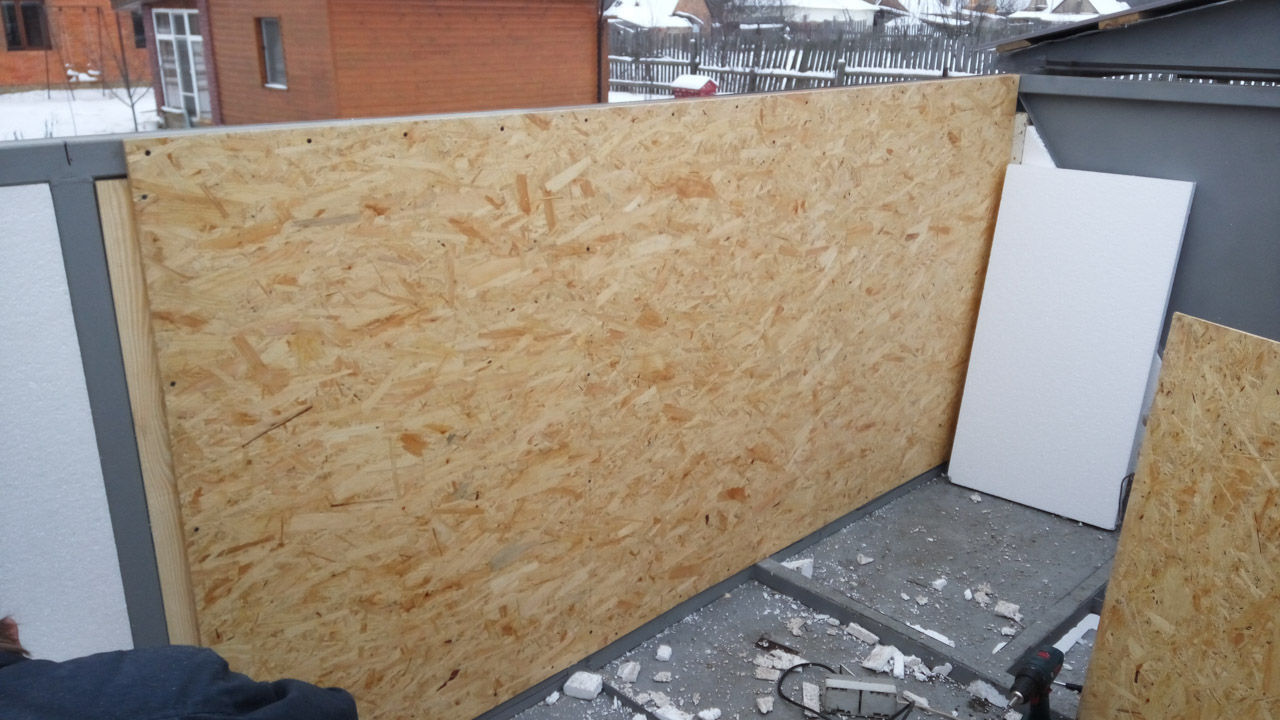
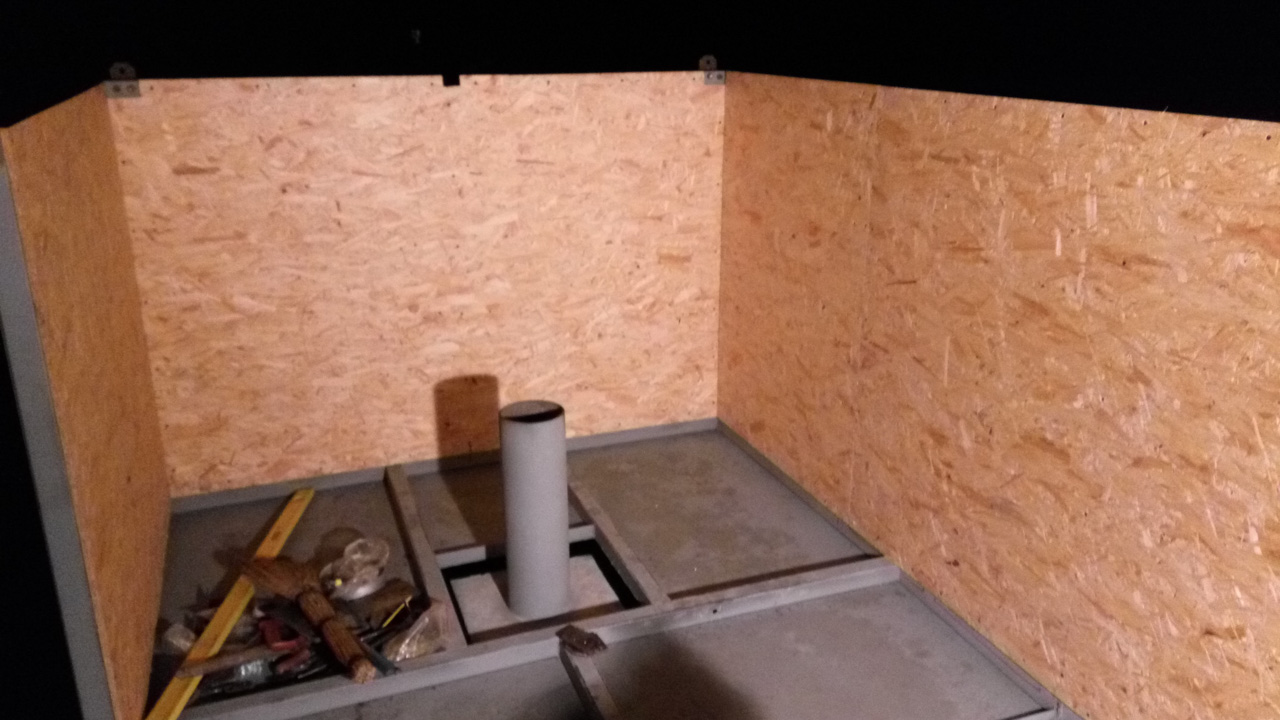
Structural cladding
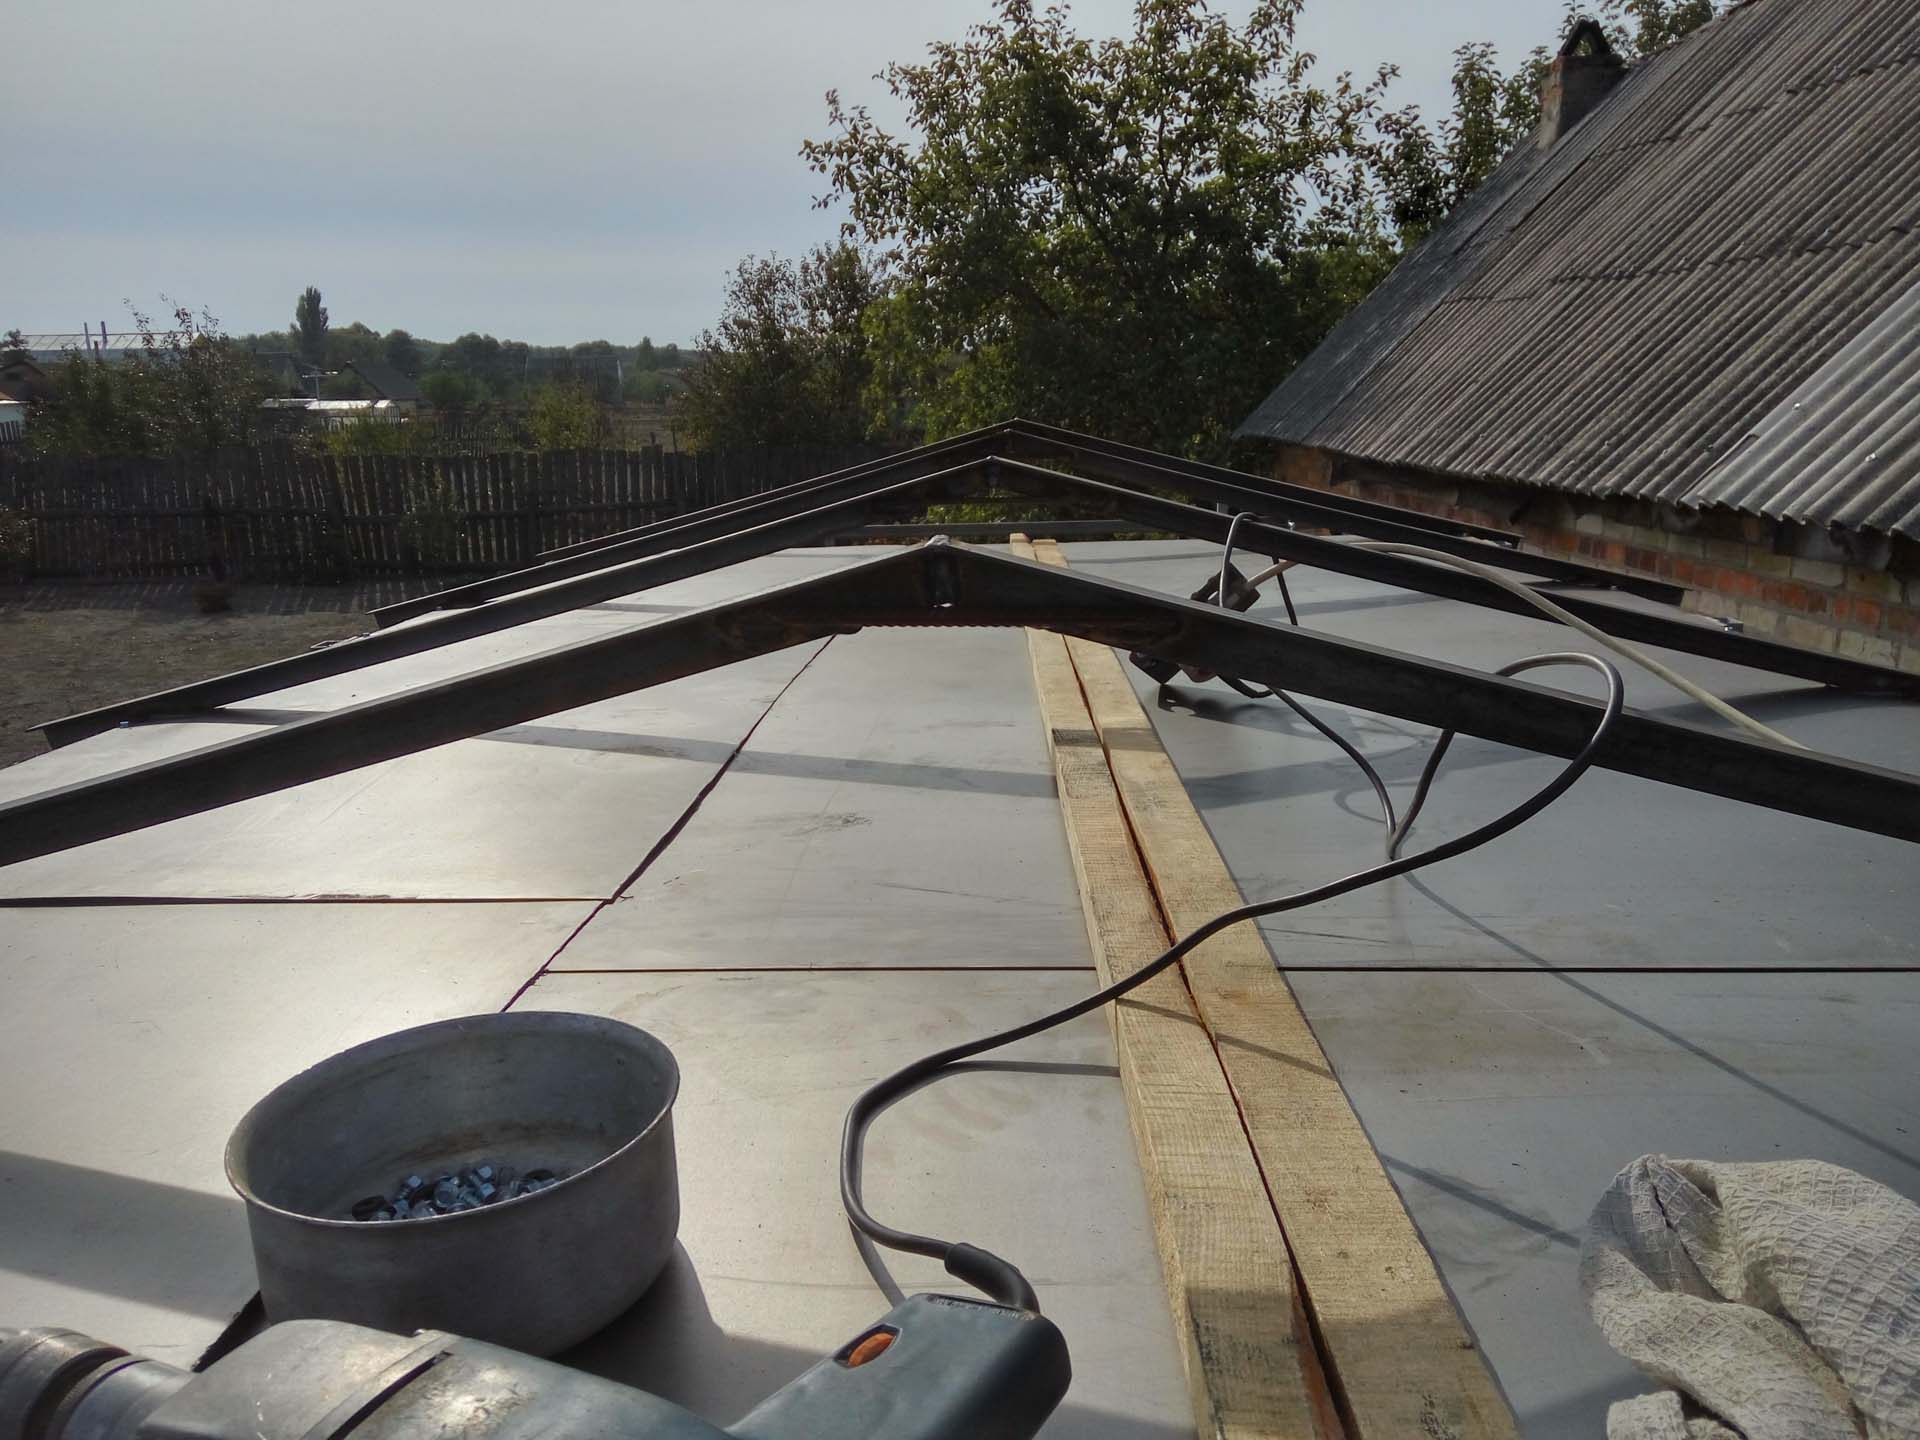
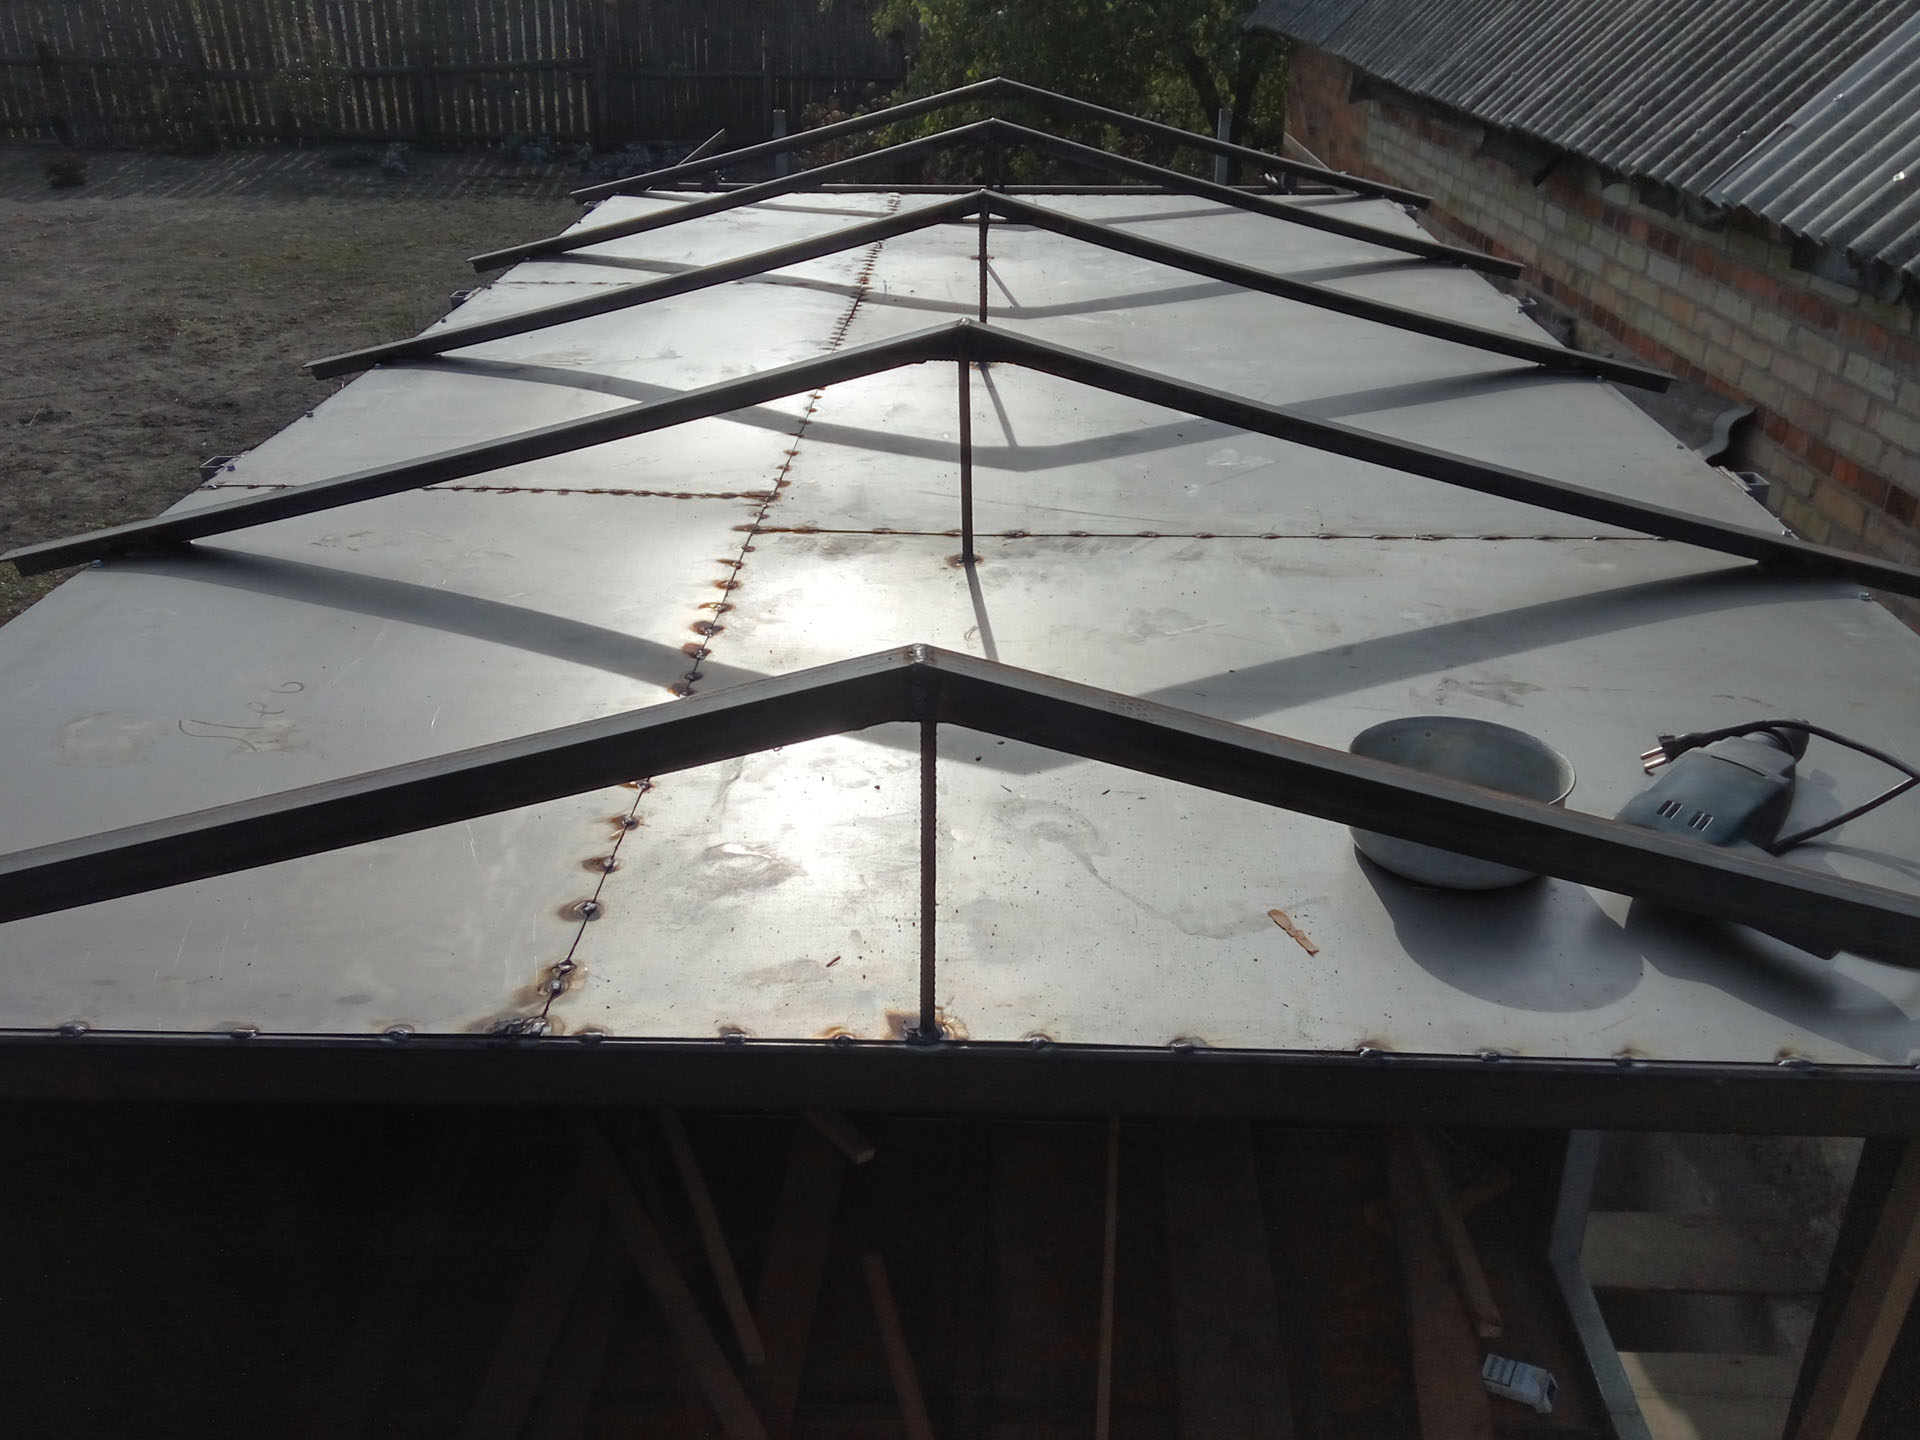
Assembly and installation of the roof

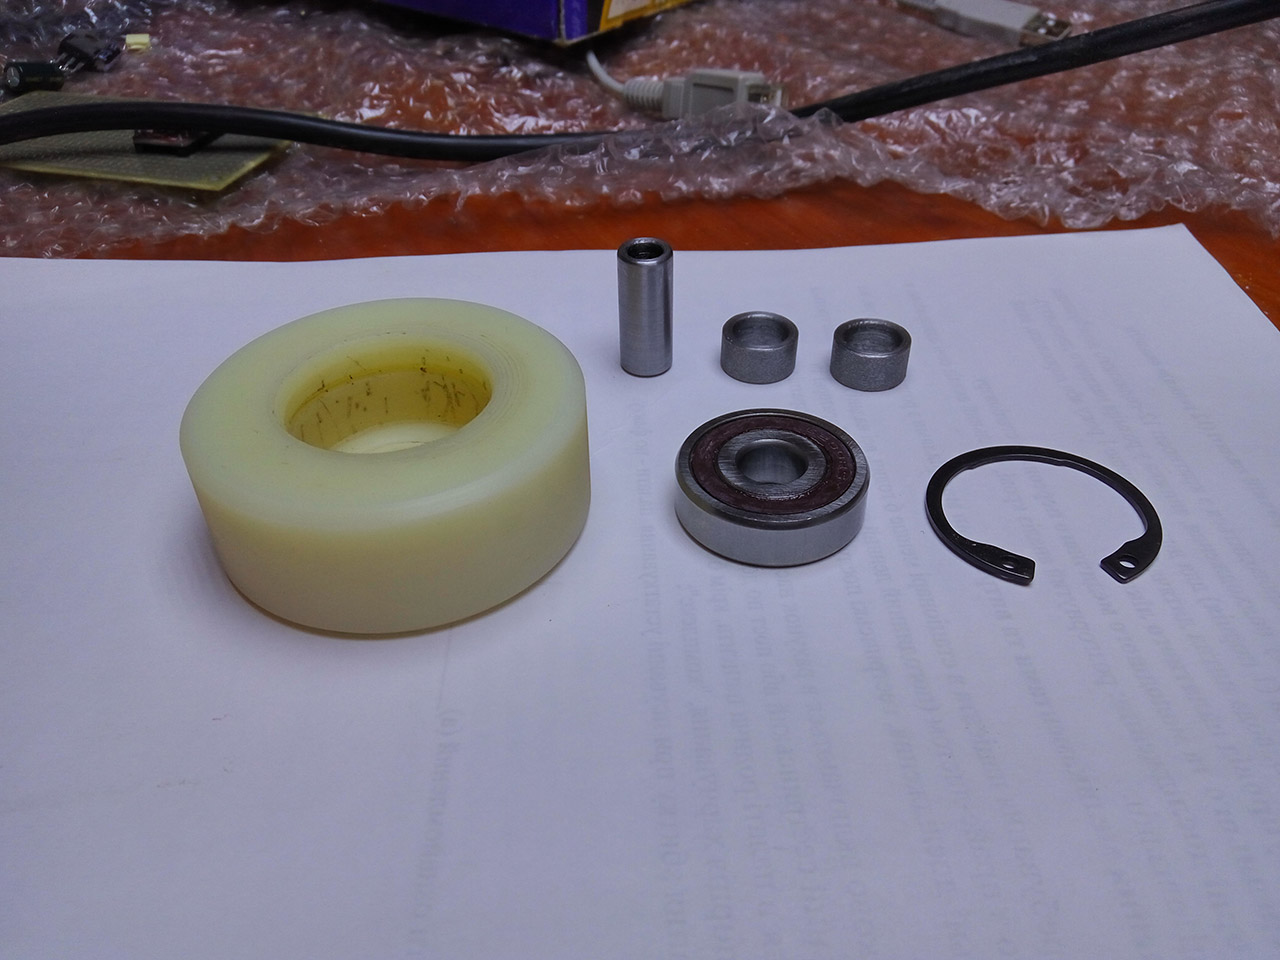
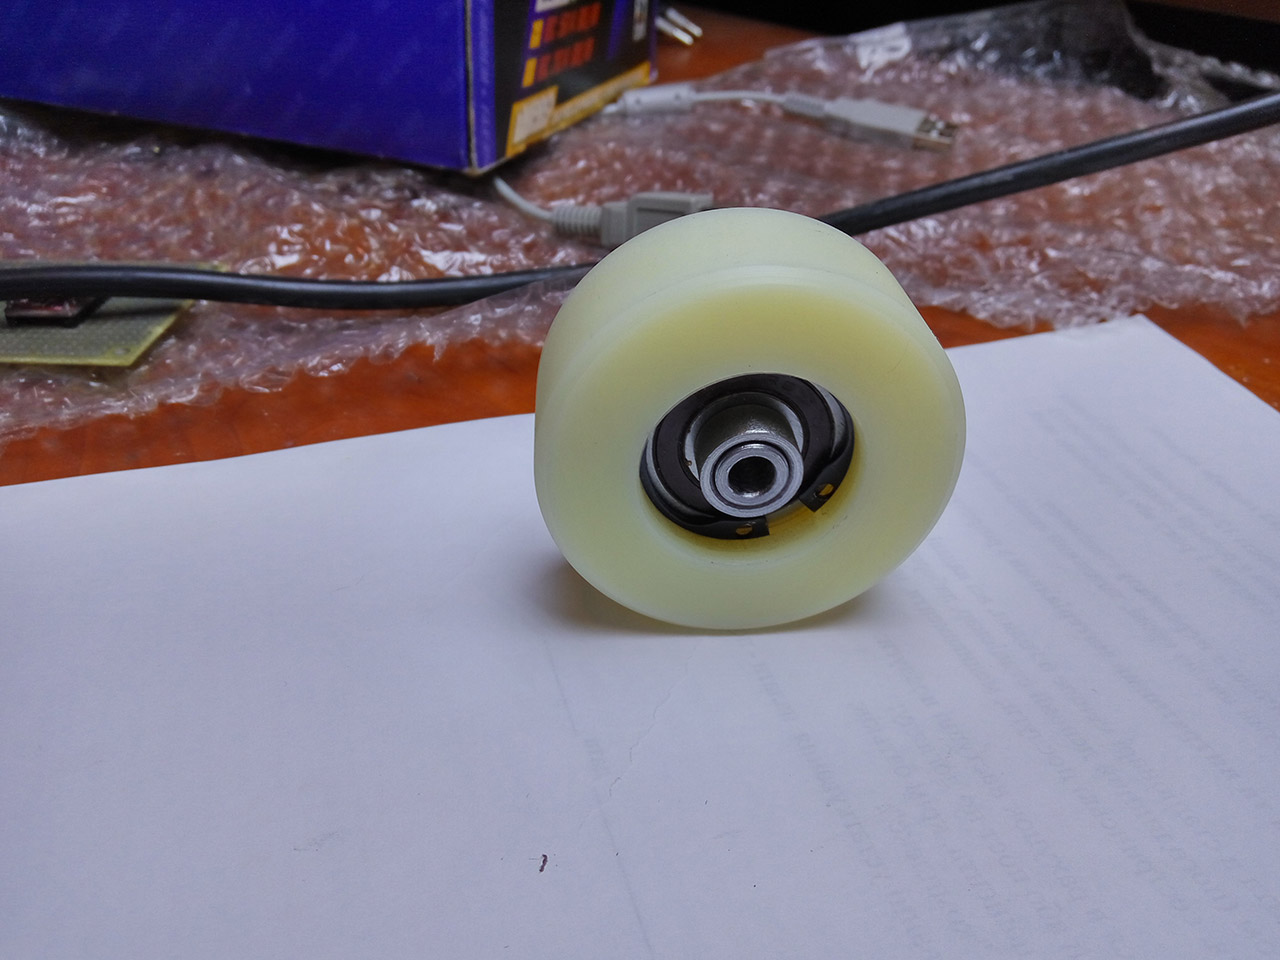
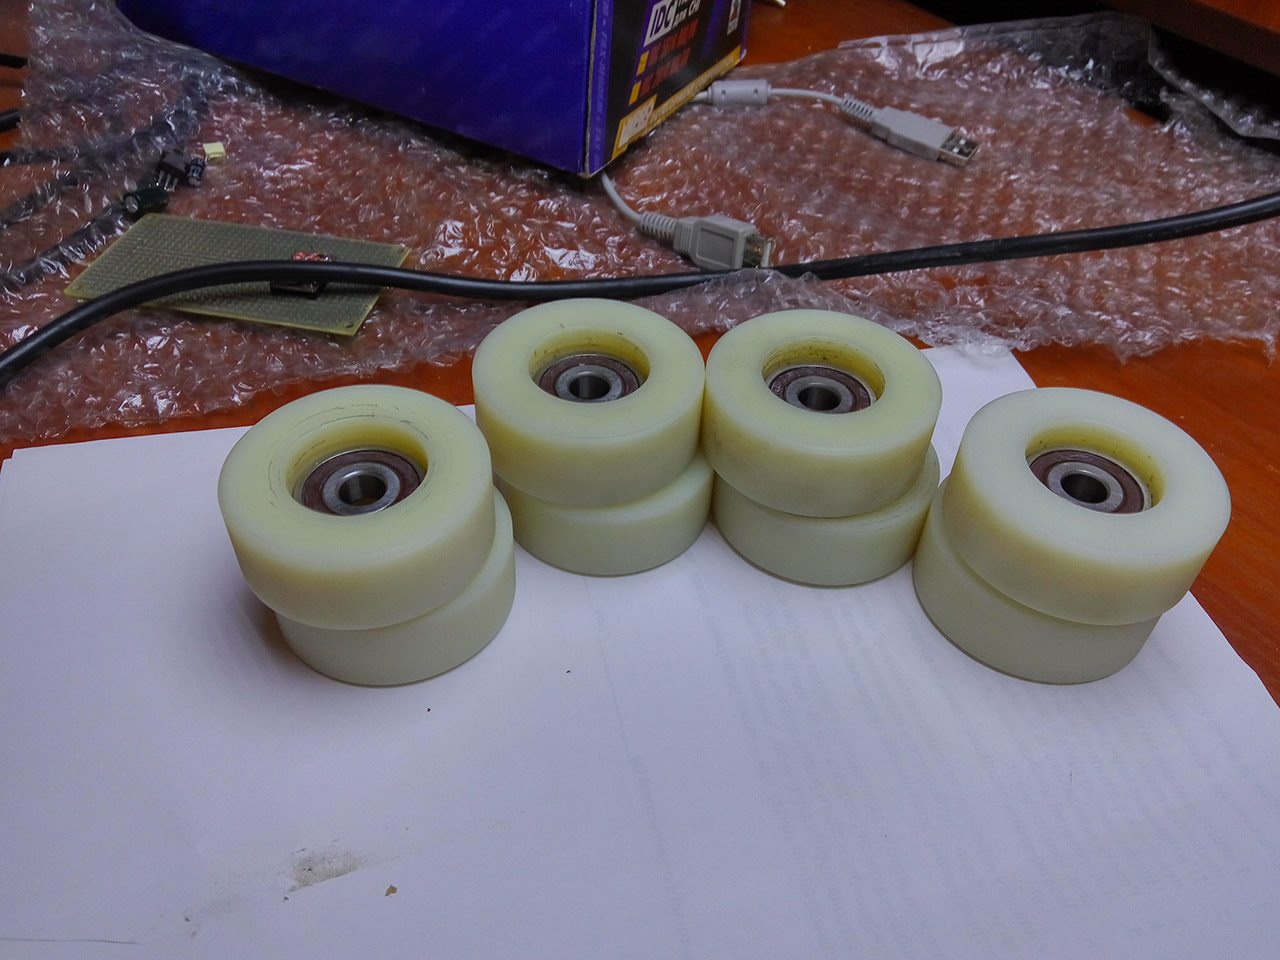
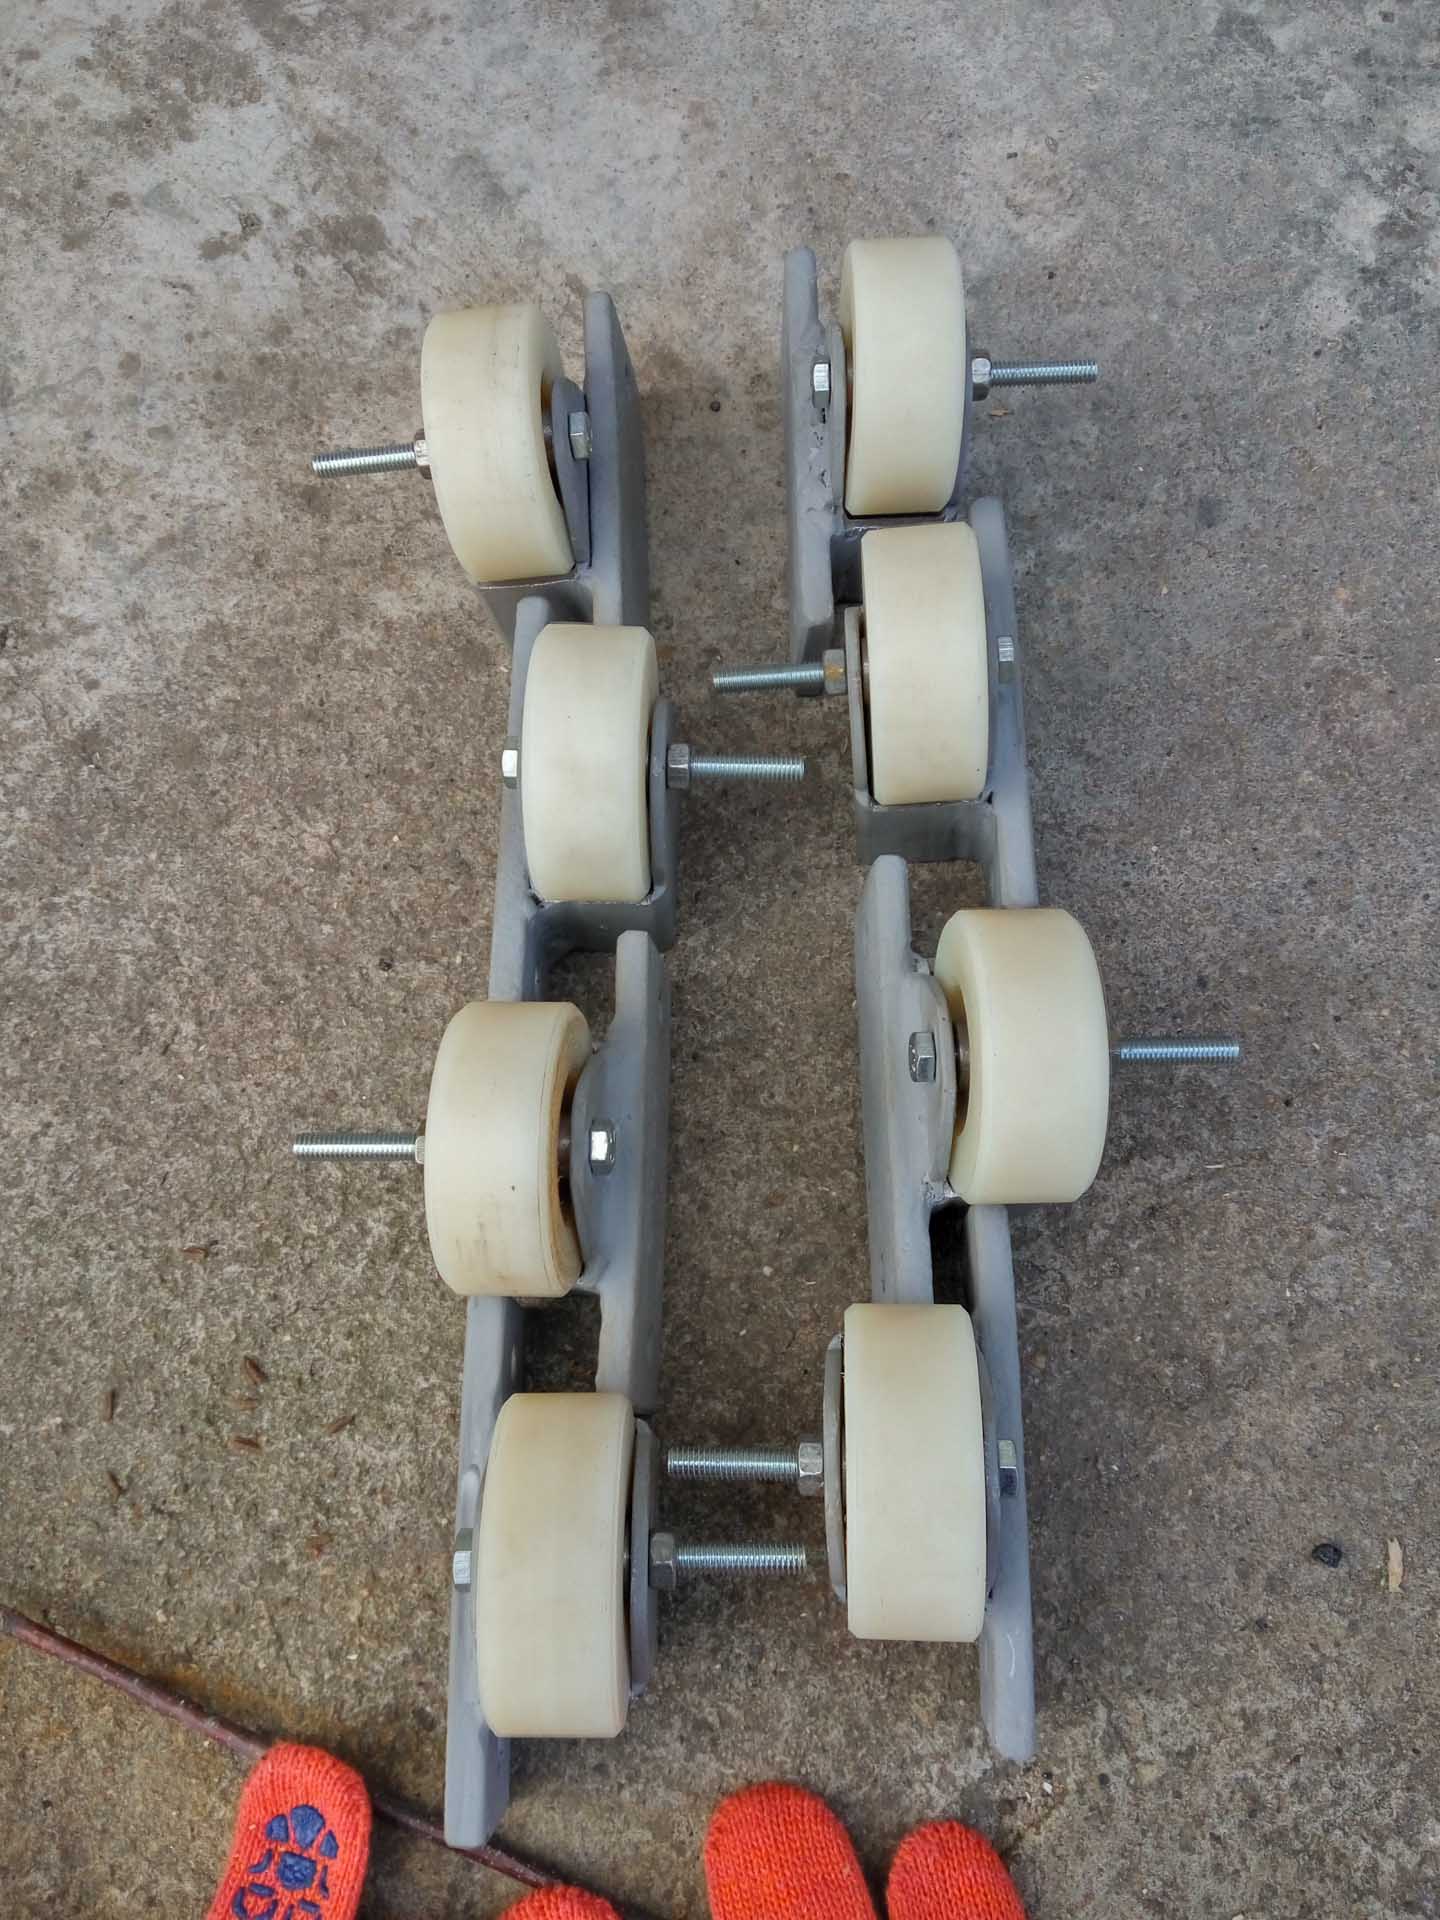
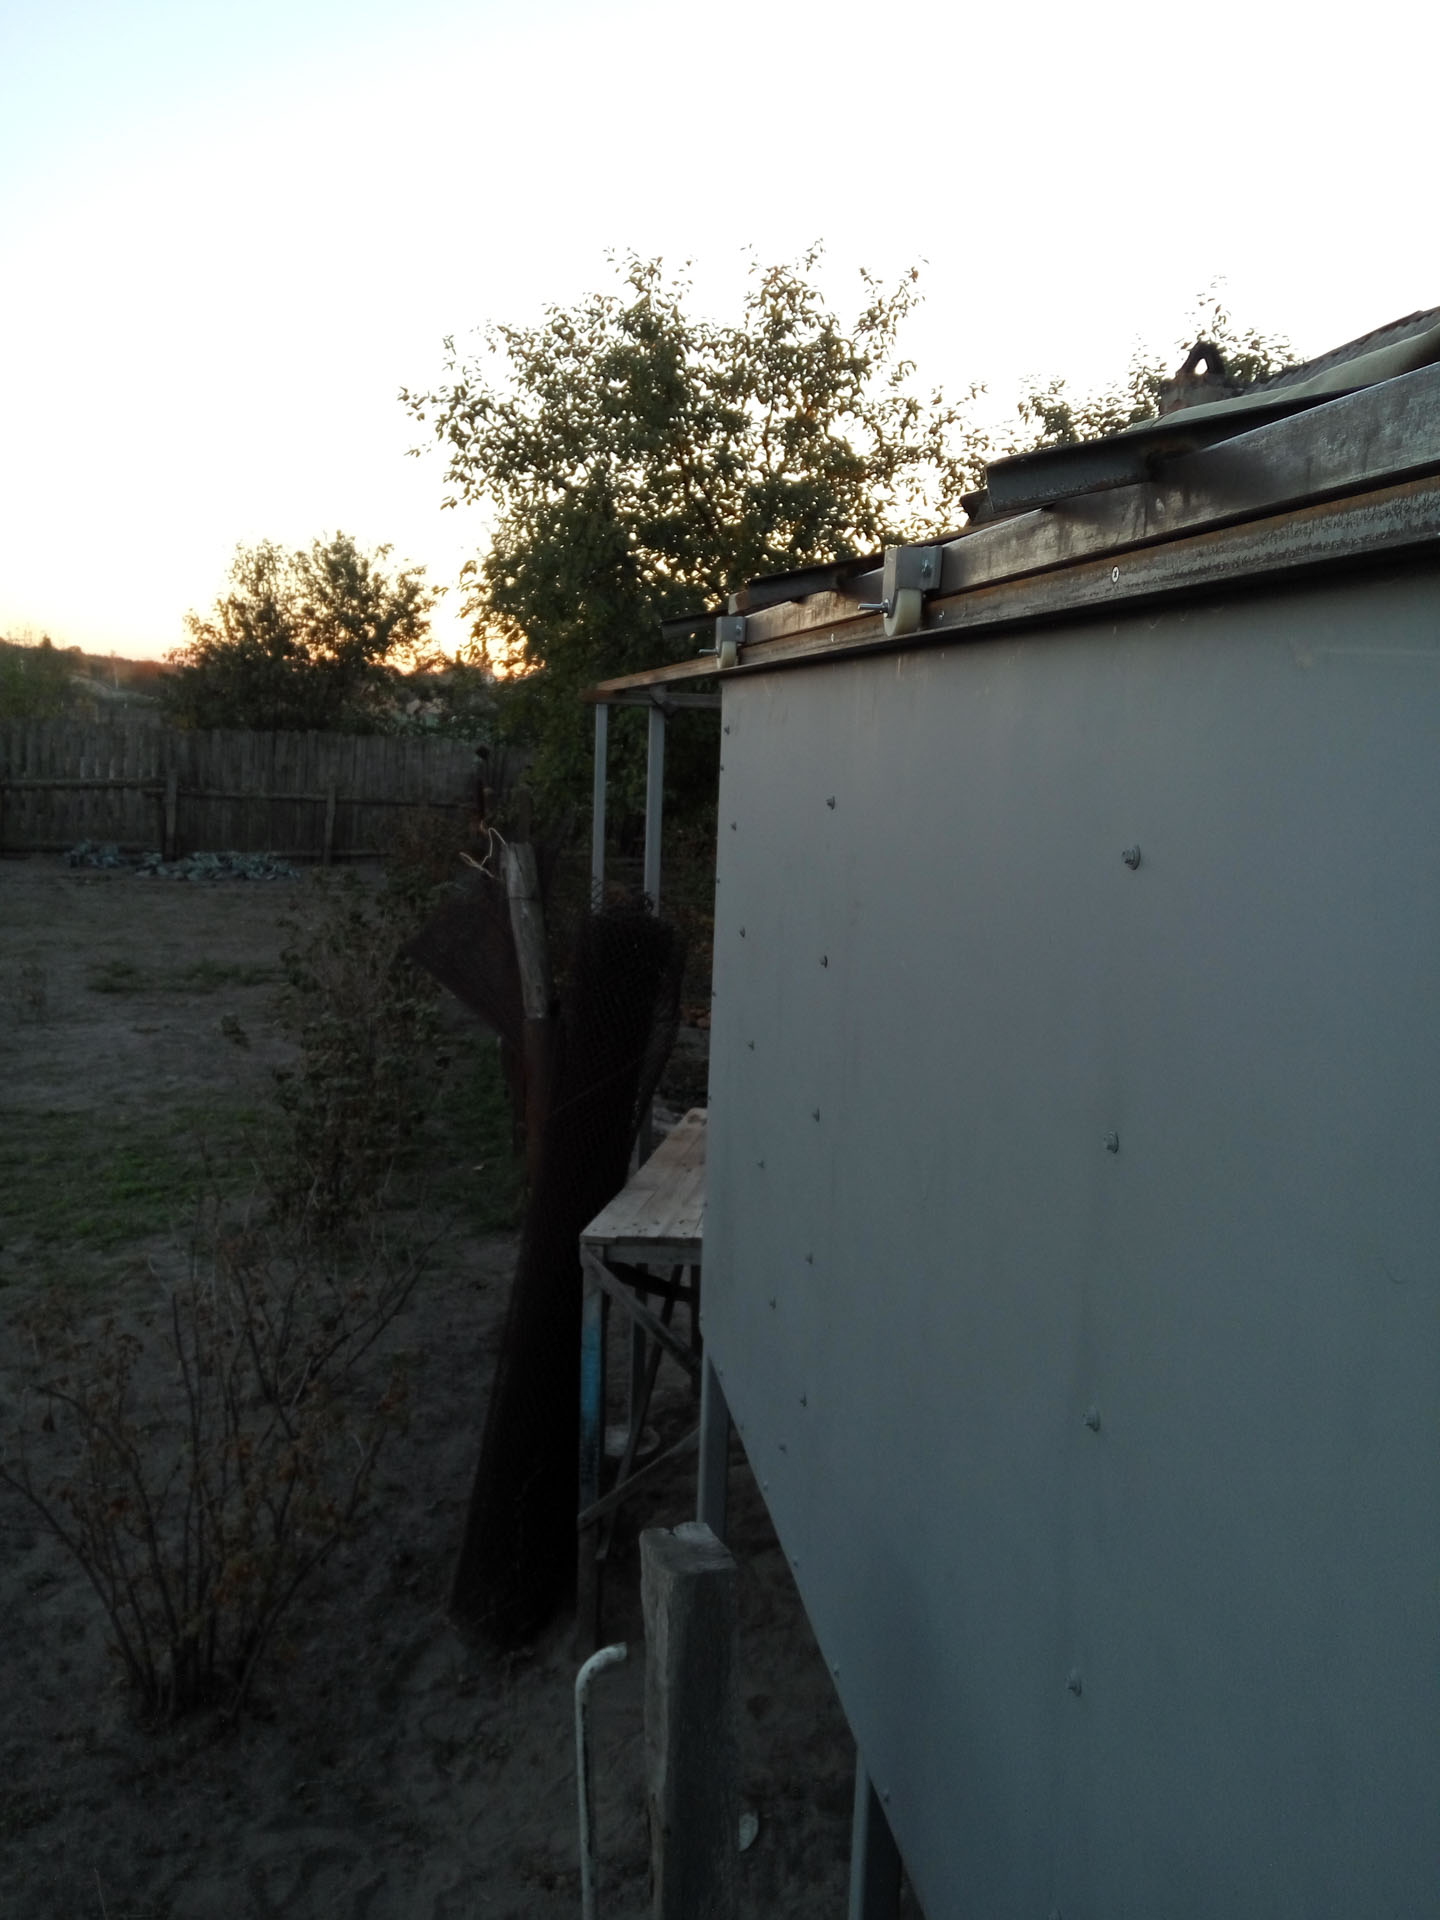
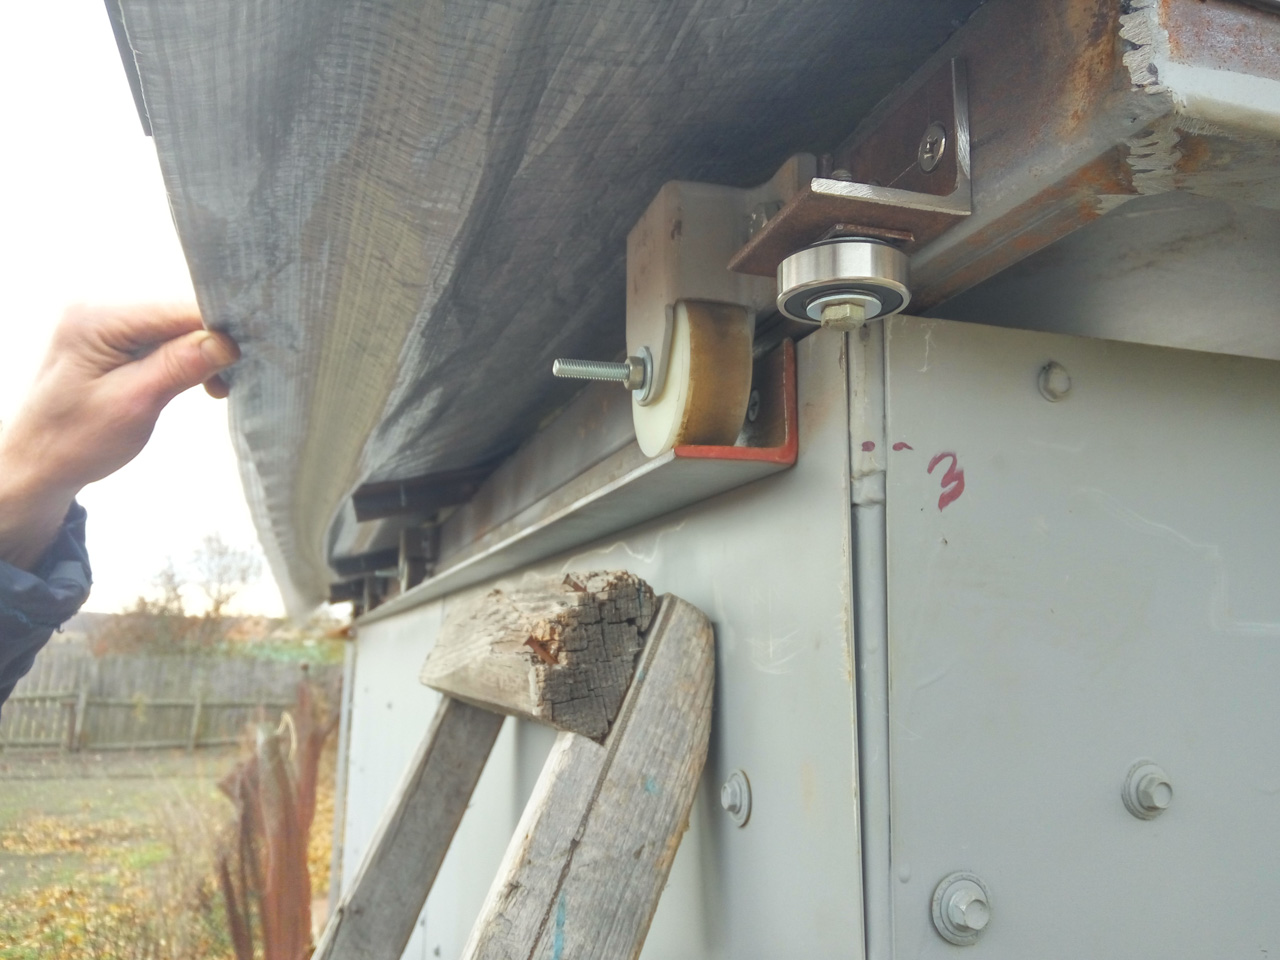
Roof wheels
From what was available for sale - did not fit anything. I had to grind to order.
Rails, roof and first movement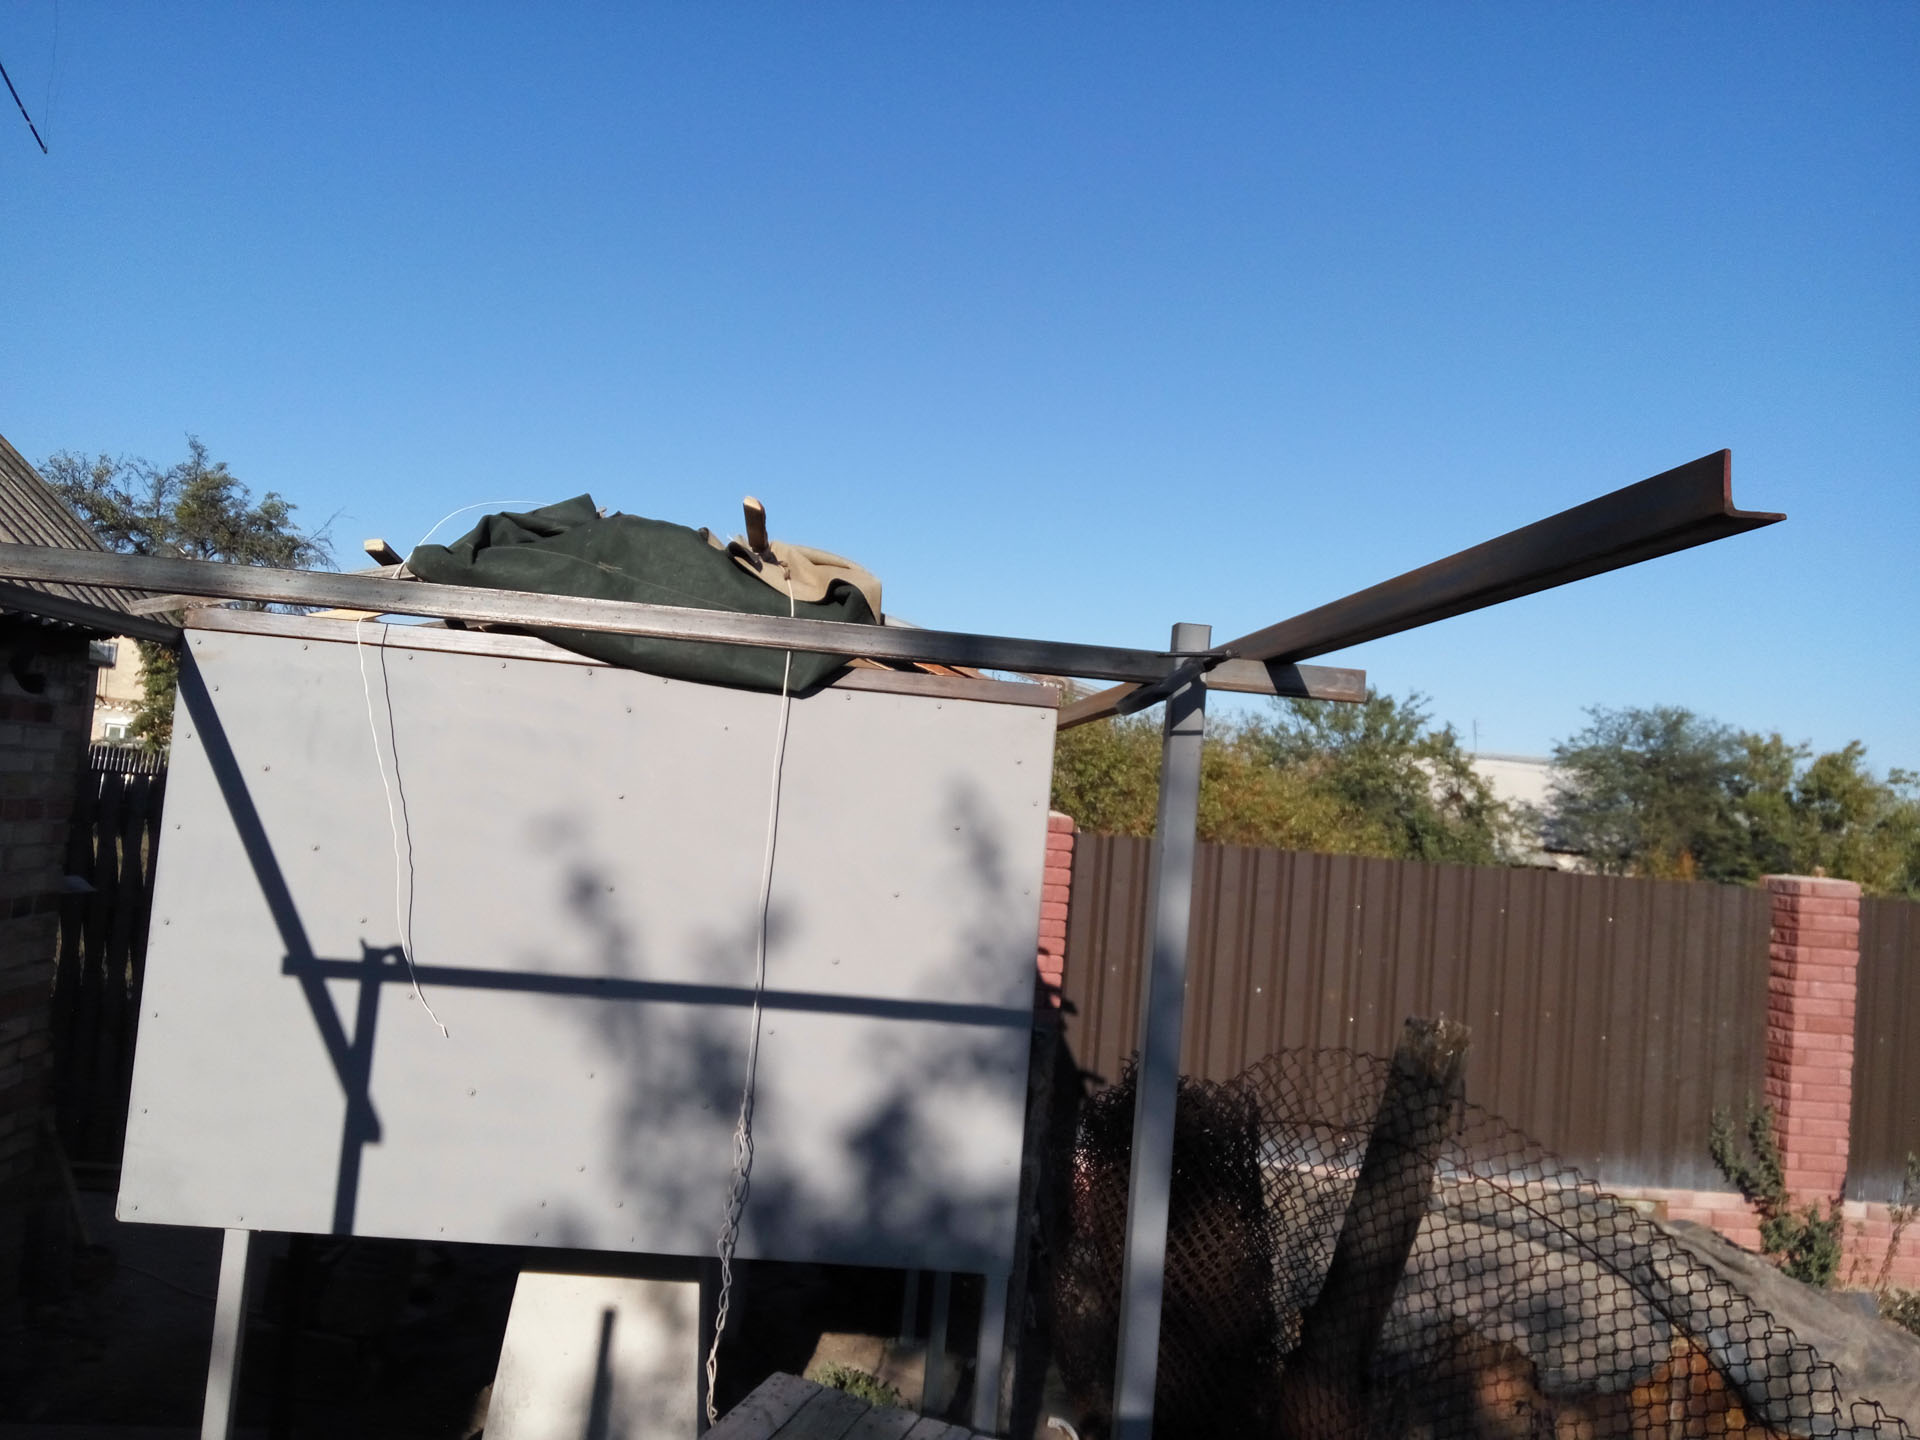
Since we didn’t work out to make a perfectly smooth roof, we had to make “rudders” to regulate the lateral displacement:
Since we didn’t work out to make a perfectly smooth roof, we had to make “rudders” to regulate the lateral displacement:
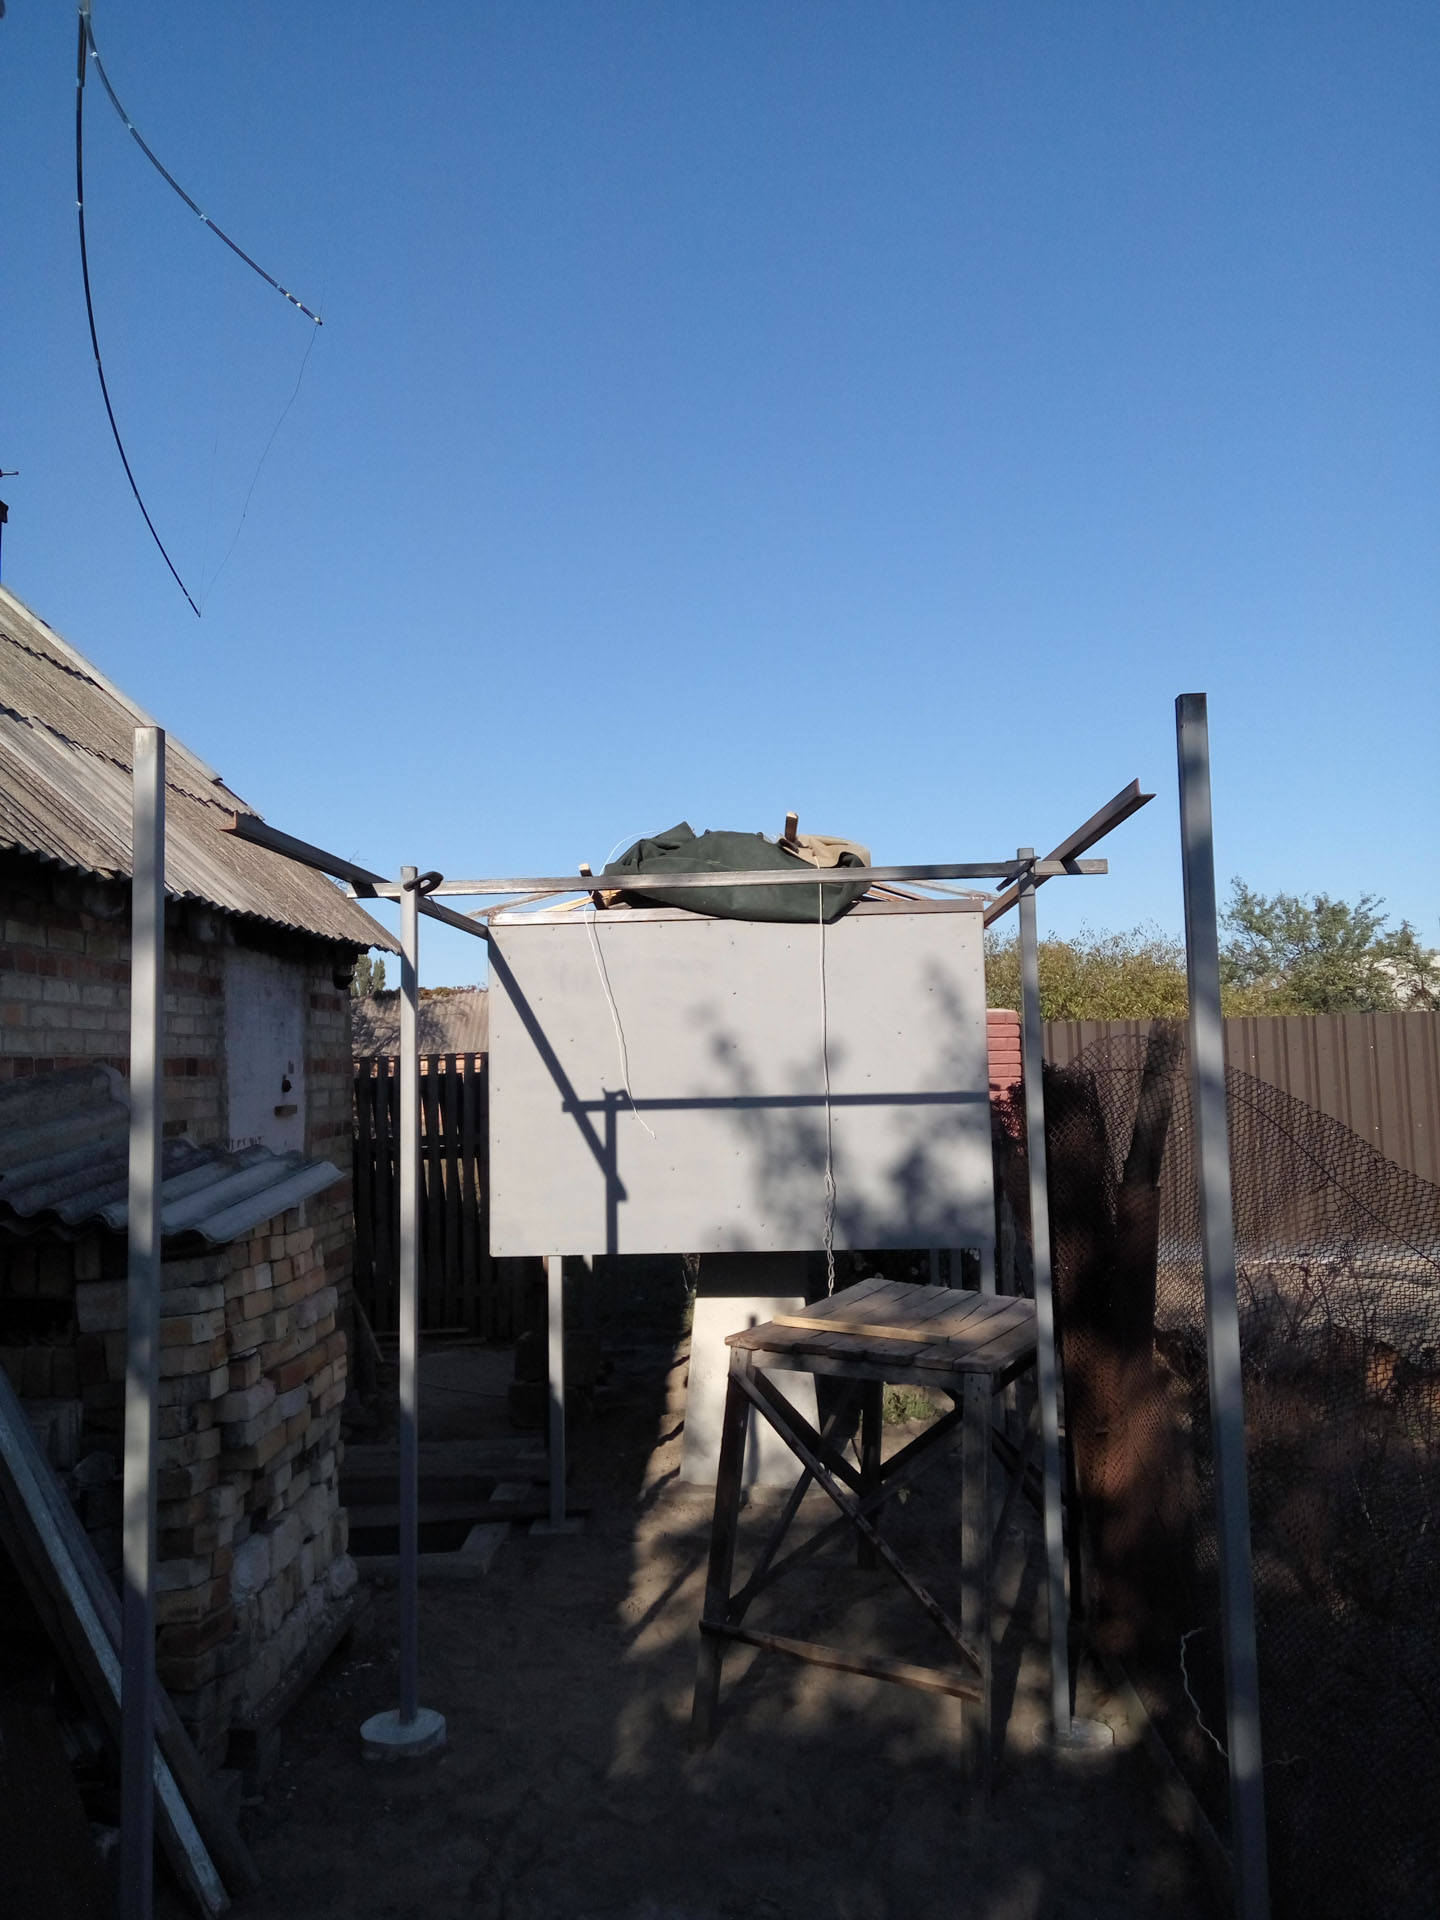
First fitting
The columns are covered with sand from the inside, faceplates are installed on the studs:
Try on height:
I remember at that particular moment, it seemed that there were literally another 2 weeks, maximum 3 - and we would start shooting. How I was wrong ...
Try on height:
I remember at that particular moment, it seemed that there were literally another 2 weeks, maximum 3 - and we would start shooting. How I was wrong ...
By this time, the building itself was almost completed, waiting for the good weather to take Shirik and FF, I went to shoot just like that.
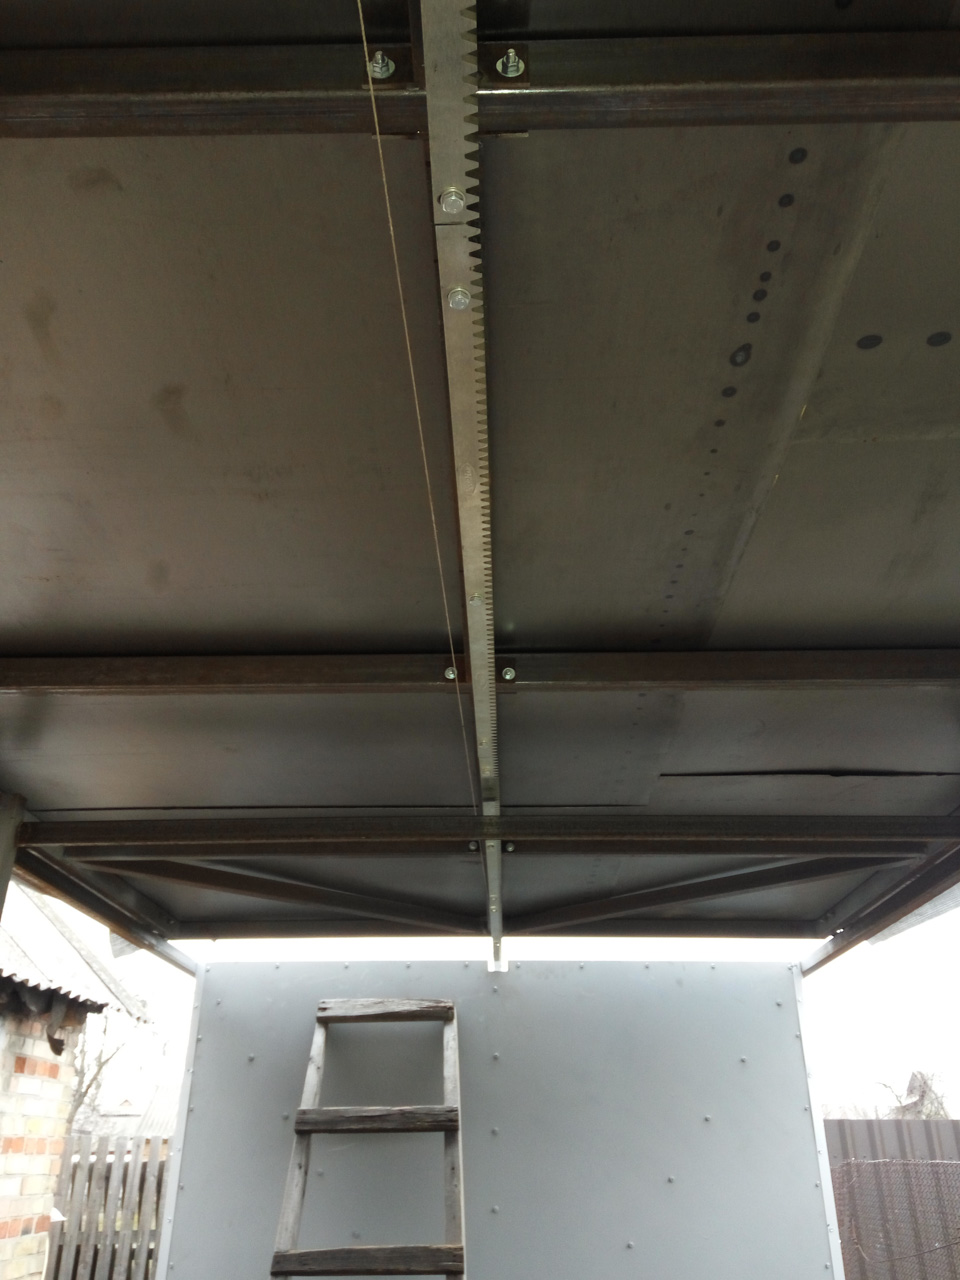
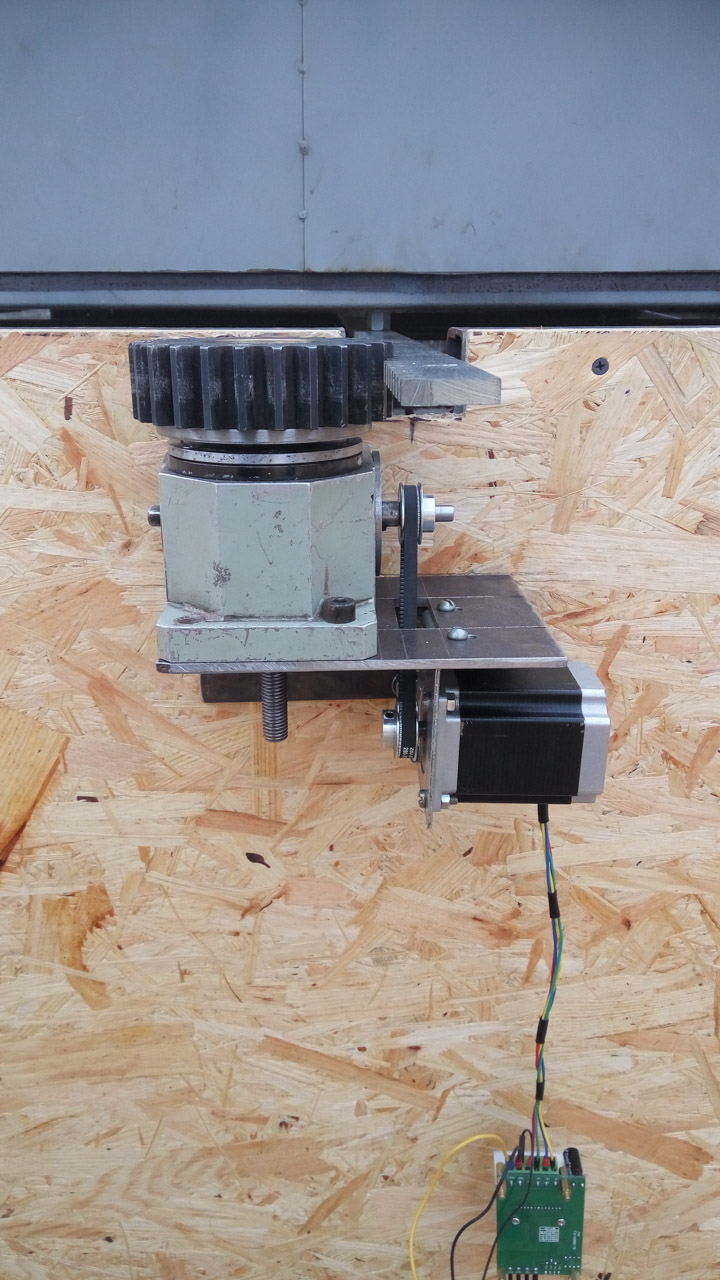
Roof drive, seals
To bring the roof in motion, we decided to use:
Gear rack:
Gearbox:
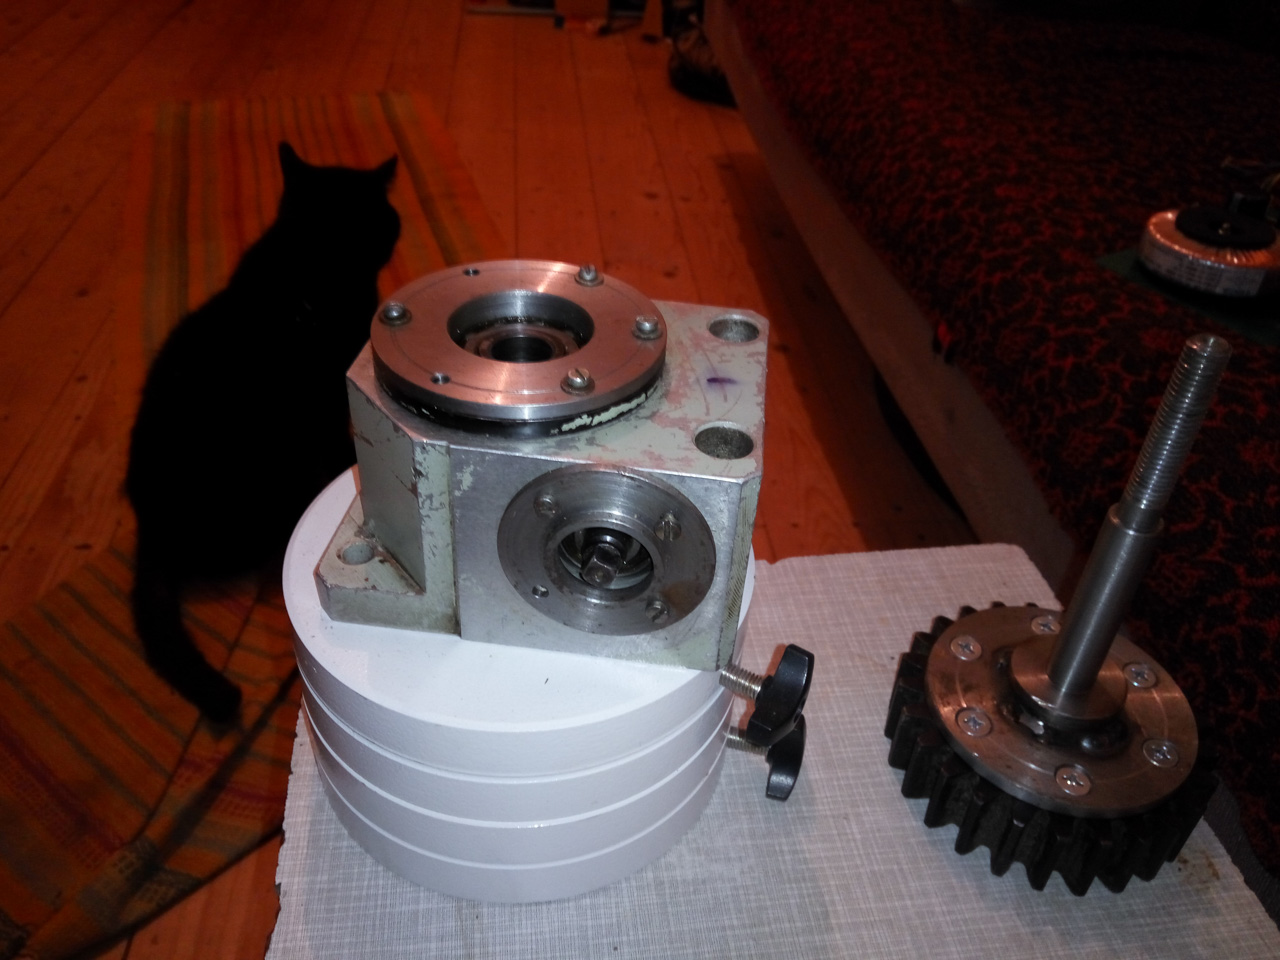
And stepper motor. Stepper was chosen because of the convenient control, just enough to count the steps - and you always know where the roof is. Just in case, we have a hardware encoder and limit switches.
Yes, yes, you were not mistaken, arduinka controls all this. More precisely, a simple prog, written on the knee, through arduinku. Later we switched to Arduino Due because of the large number of ports and the ability to use interrupts on any digital foot.
Gear rack:
Gearbox:
And stepper motor. Stepper was chosen because of the convenient control, just enough to count the steps - and you always know where the roof is. Just in case, we have a hardware encoder and limit switches.
Yes, yes, you were not mistaken, arduinka controls all this. More precisely, a simple prog, written on the knee, through arduinku. Later we switched to Arduino Due because of the large number of ports and the ability to use interrupts on any digital foot.
The first launch of the roof (more careful with the sound at the end, it seems that something went wrong):
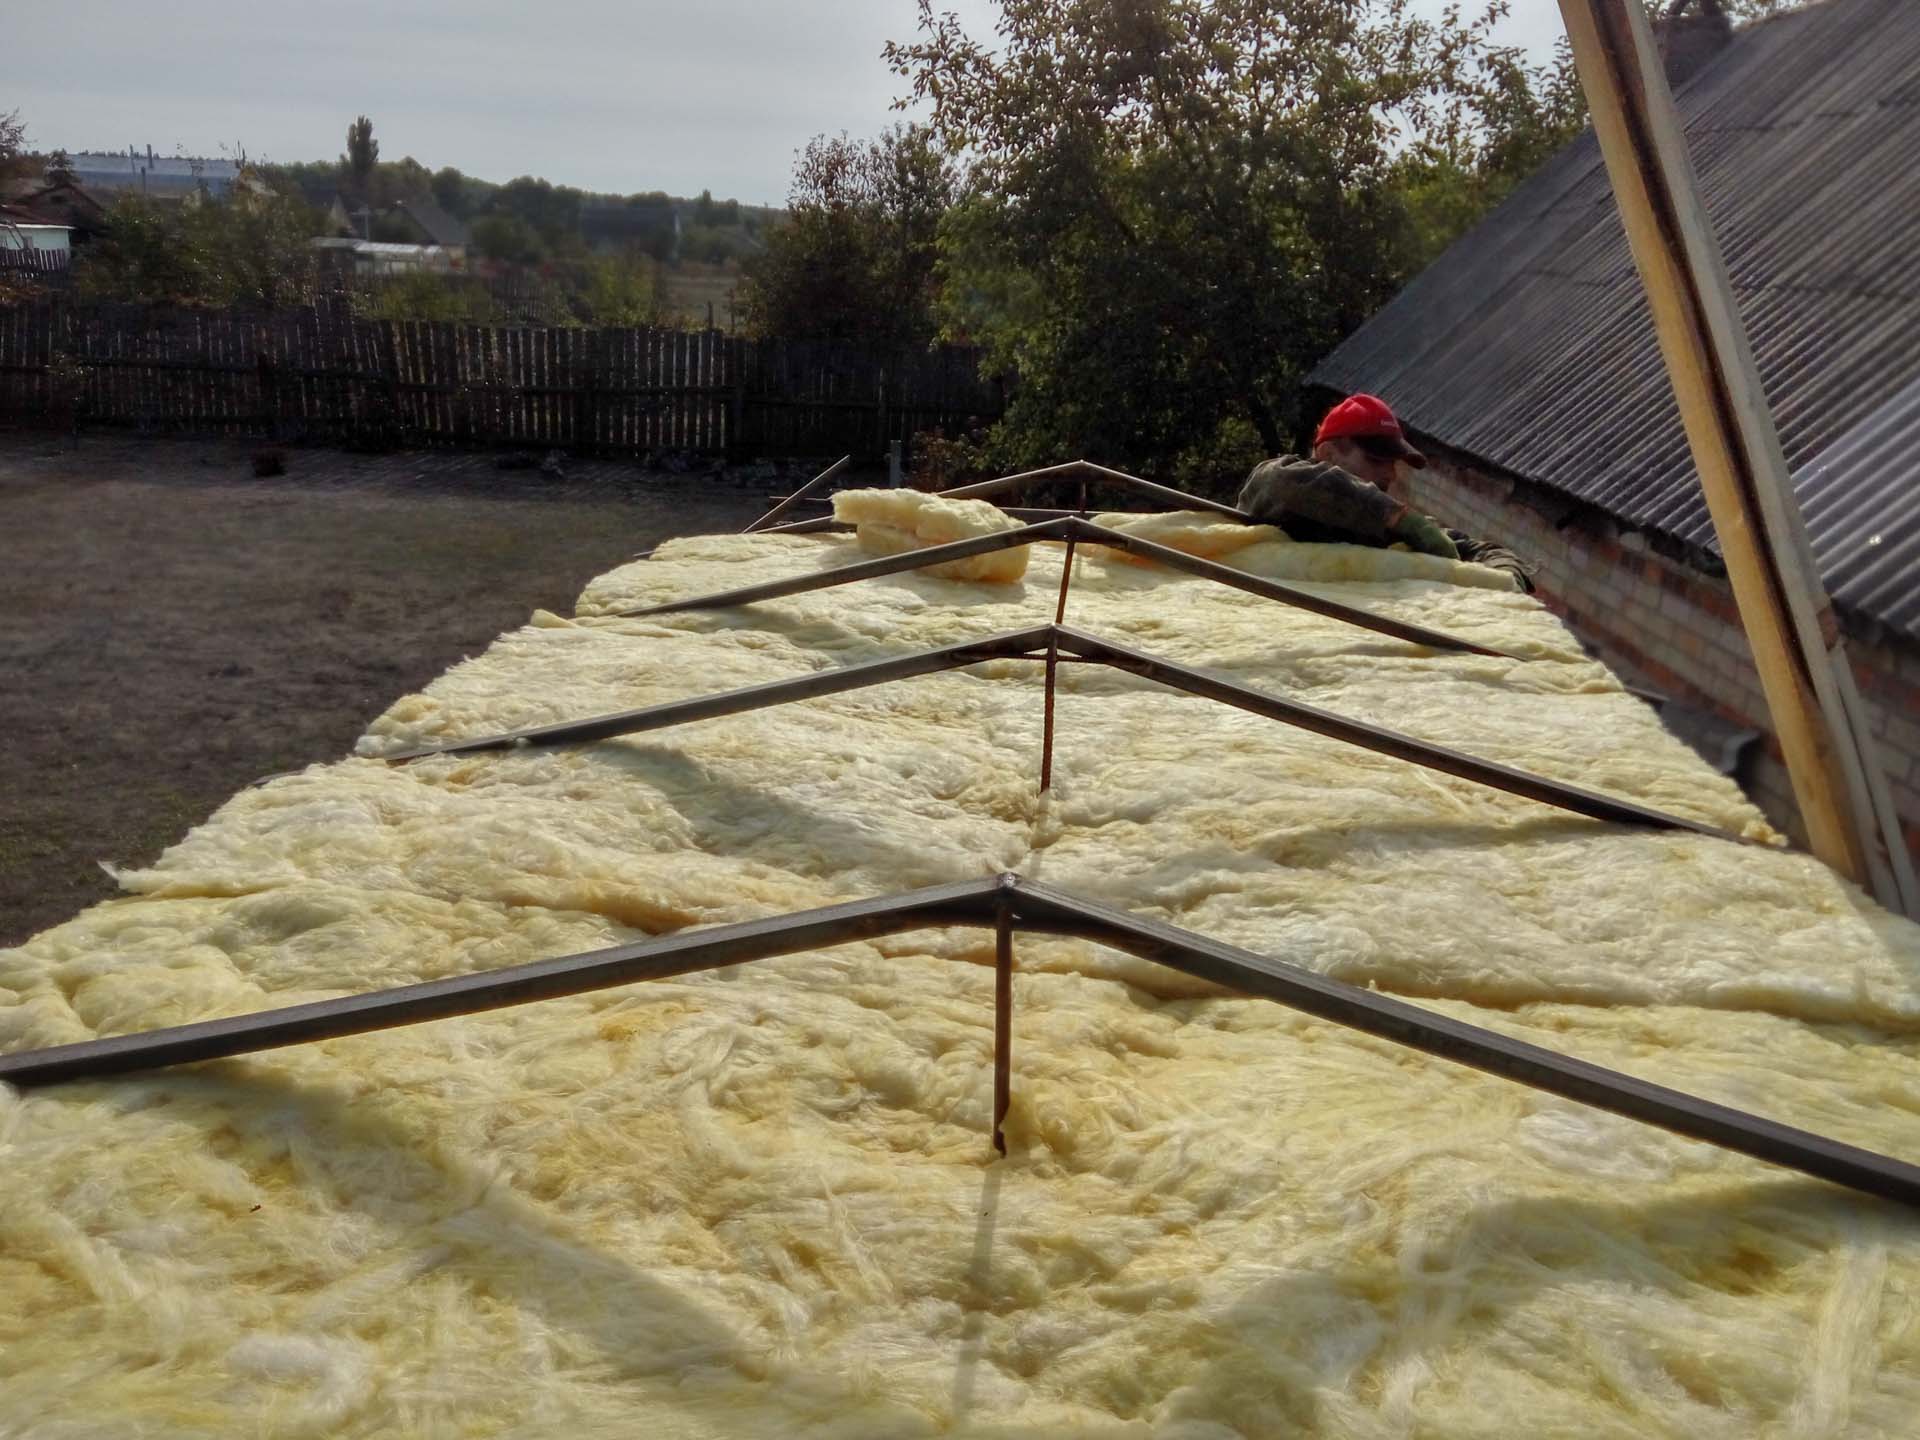
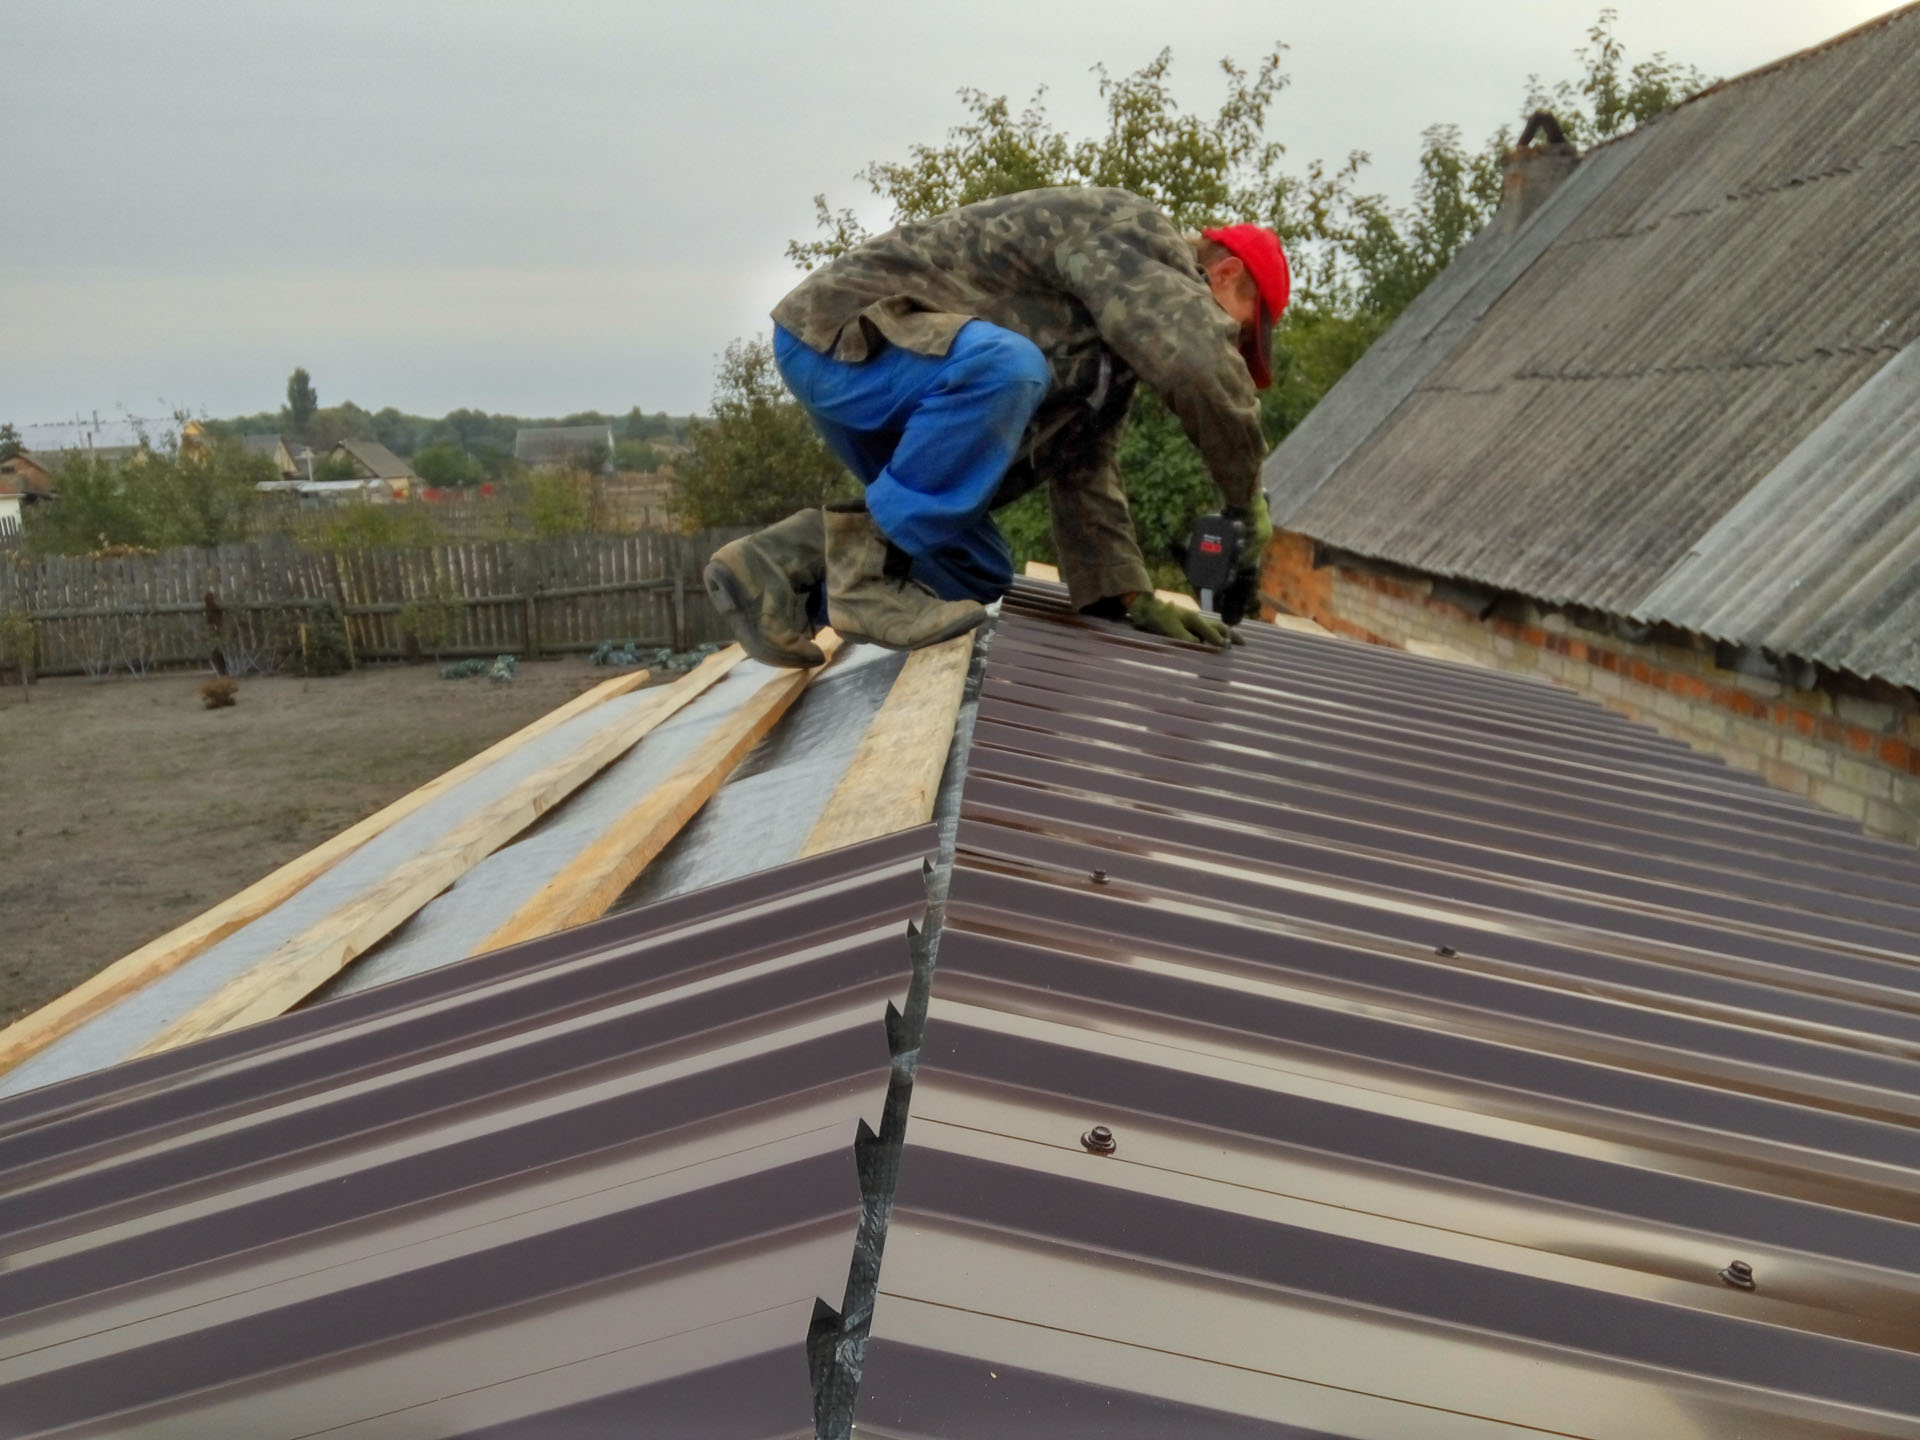
Sheathing, thermal insulation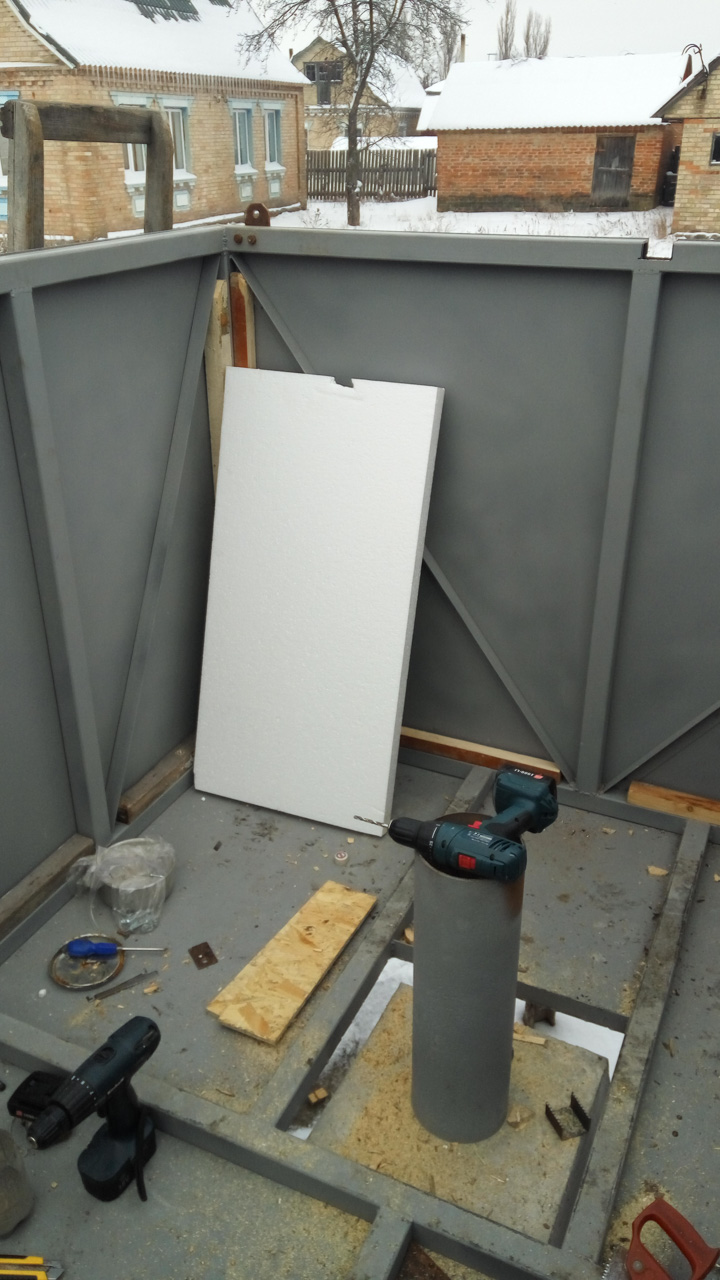
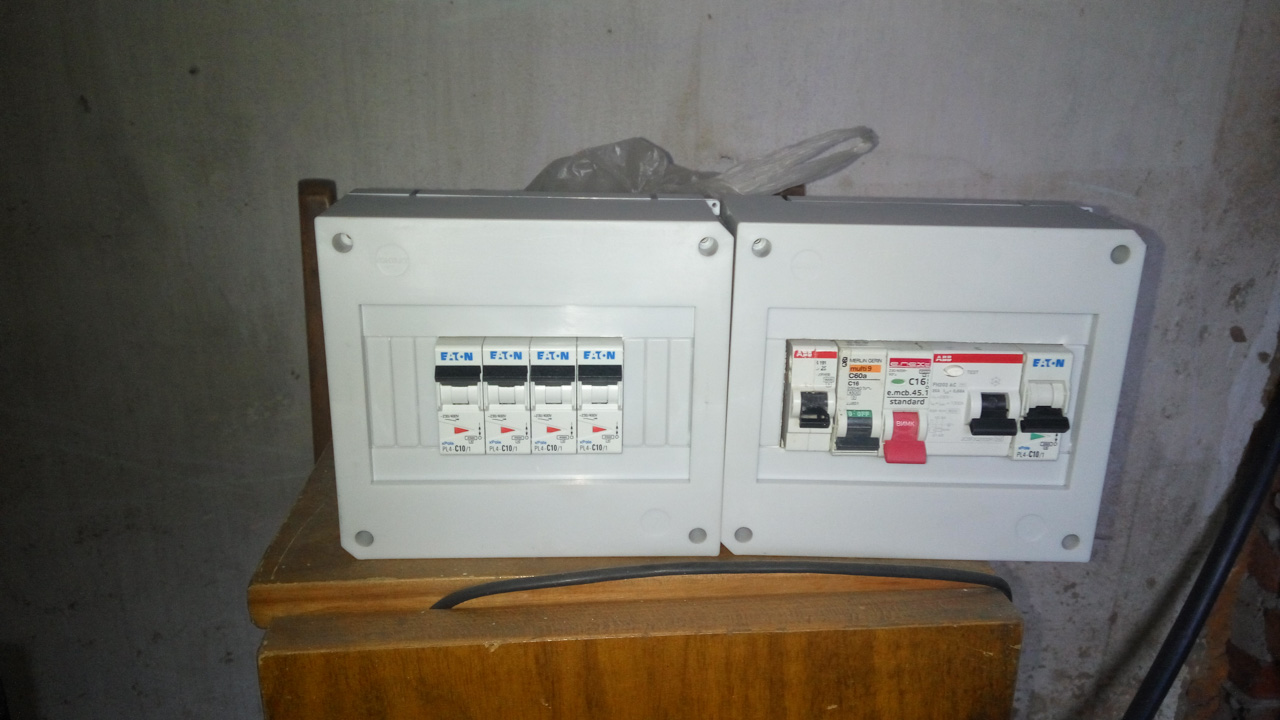
Communication and power supply
It's simple. In a residential building there is a UPS (so that batteries are not killed in the cold), the UPS is connected via an input circuit breaker and a RCD. There are 2 power cables in the booth: one of the UPS, the other is just 220 in case you need to turn on the load that is not designed for uninterrupted power supply, and also to monitor the city network to track the loss of electricity. Parallel to the power cables laid two twisted pairs.
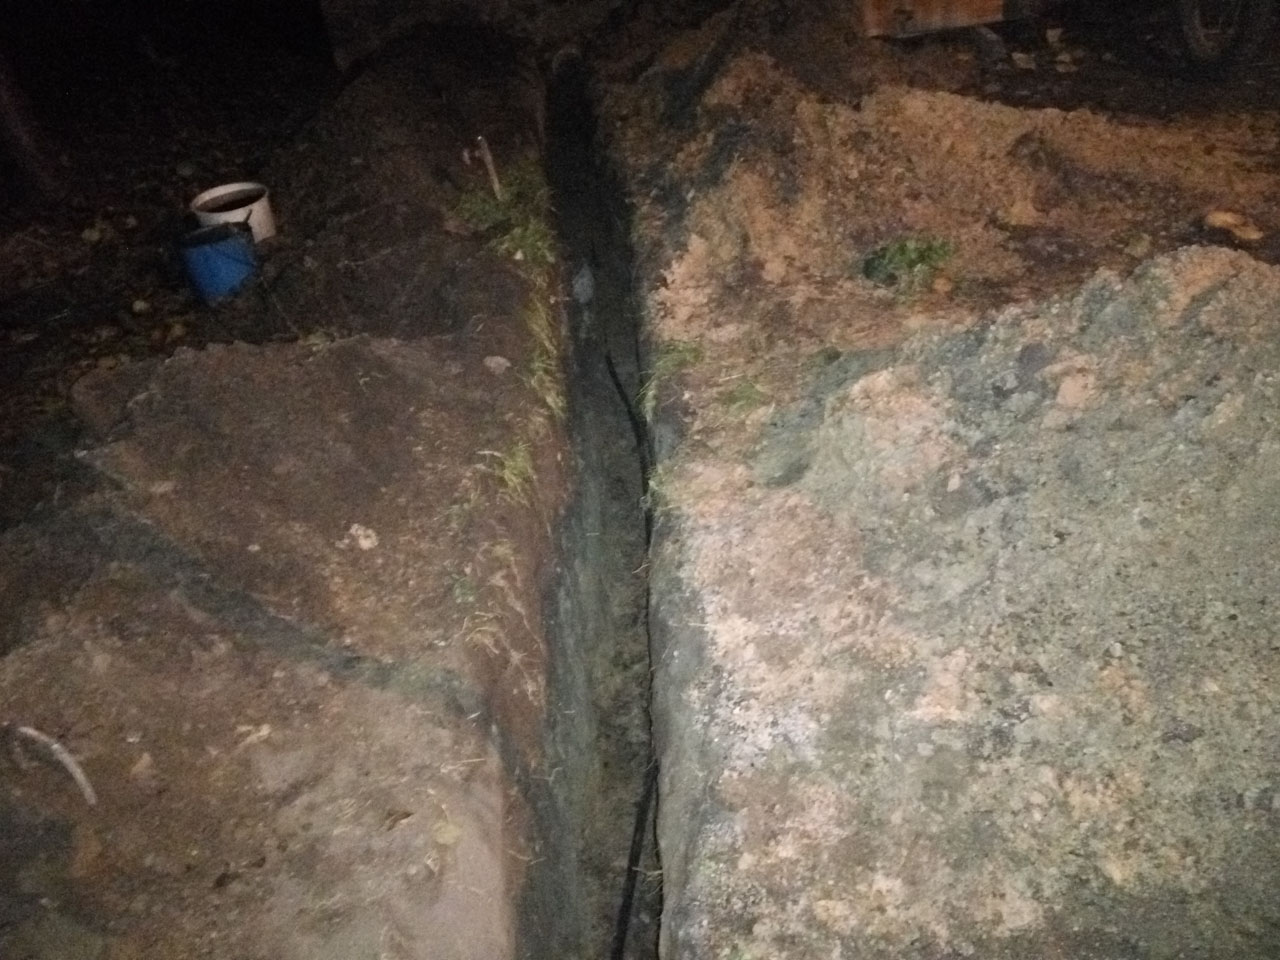
Communications go underground, for which a trench was dug from the residential building to the workshop:
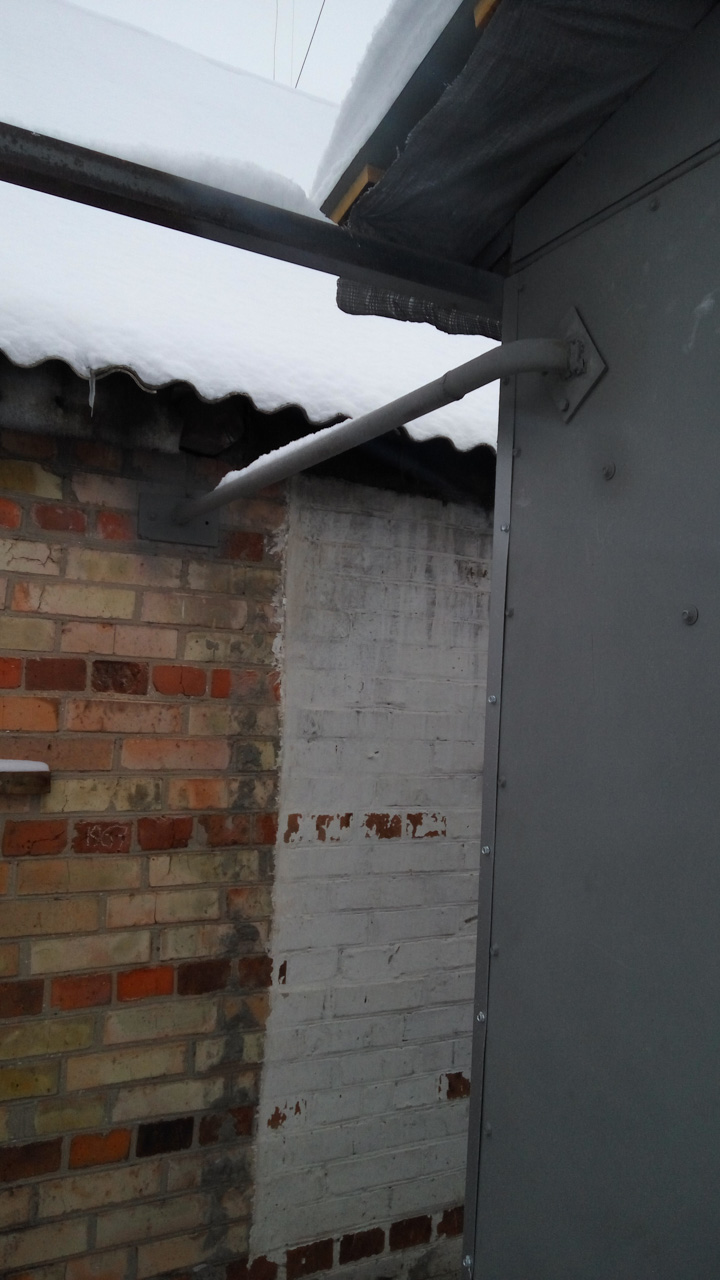
And wound up in a booth:
The grounding at the moment we have turned out in the form of a nice bonus. That is, we did not specifically make it, but because of the design features (12 metal poles buried deep in the ground around the perimeter of the entire structure), we received less than 3Ω resistance.
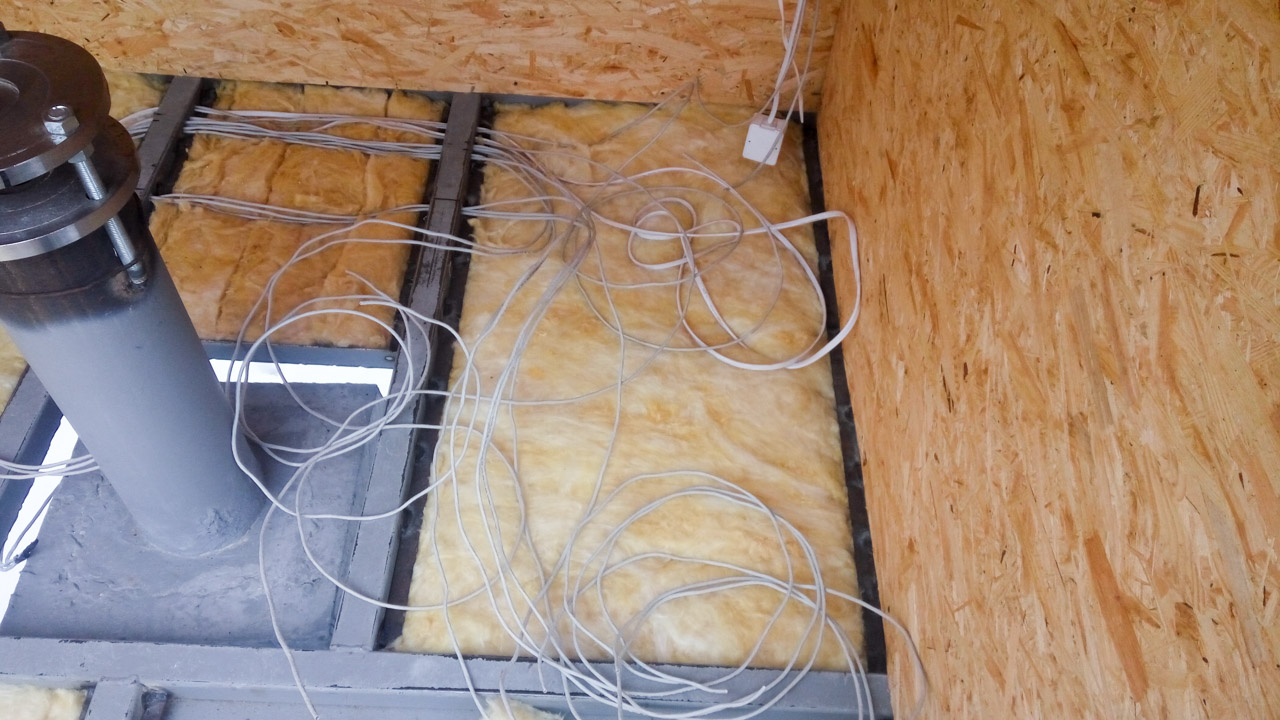
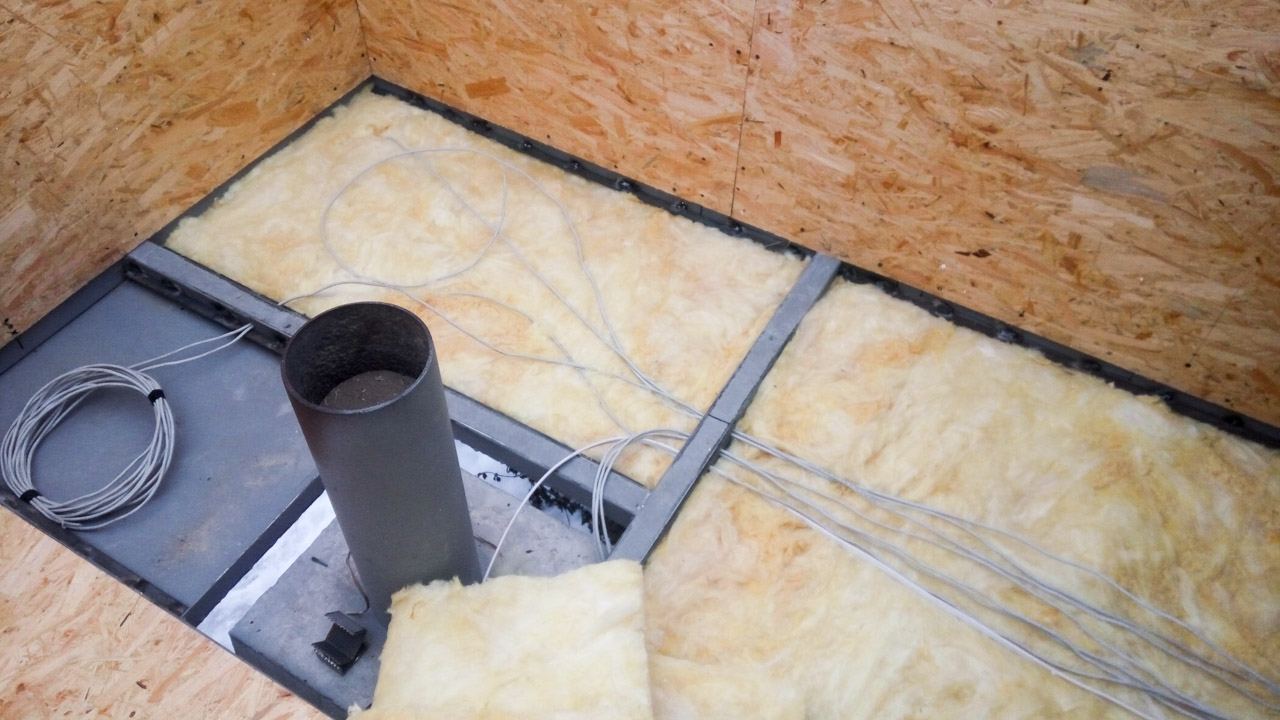
Inside the booth itself, all communications are laid in the floor:

Communications go underground, for which a trench was dug from the residential building to the workshop:
And wound up in a booth:
The grounding at the moment we have turned out in the form of a nice bonus. That is, we did not specifically make it, but because of the design features (12 metal poles buried deep in the ground around the perimeter of the entire structure), we received less than 3Ω resistance.
Inside the booth itself, all communications are laid in the floor:
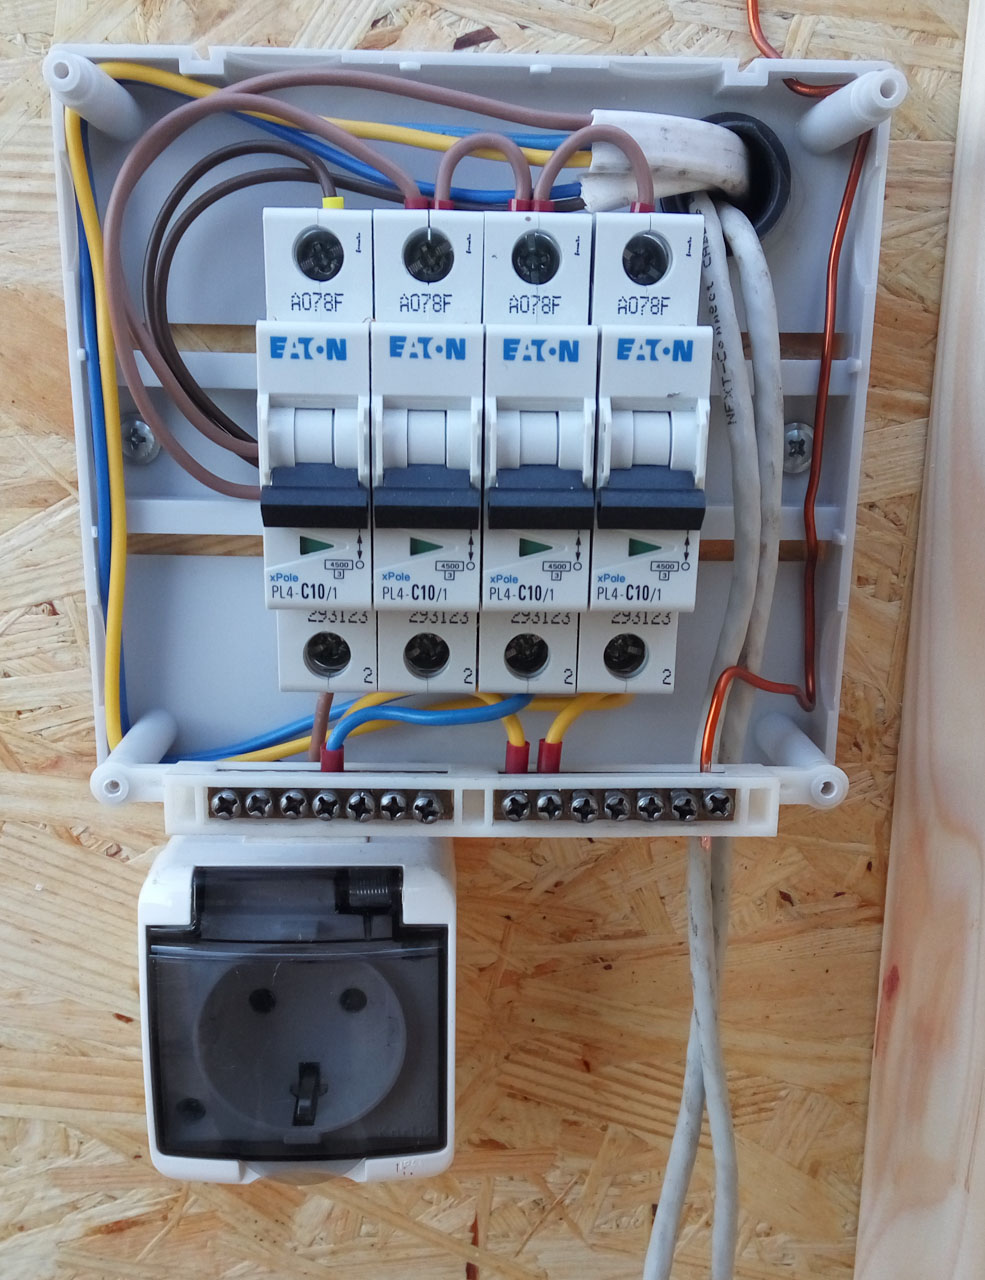
Office booth, low current
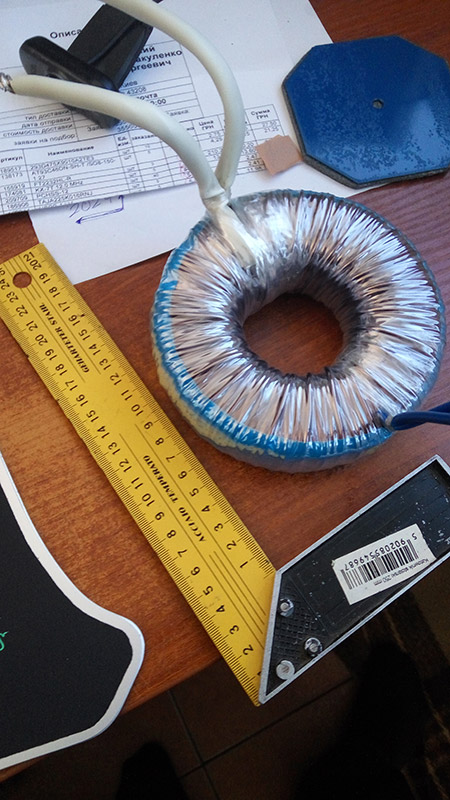
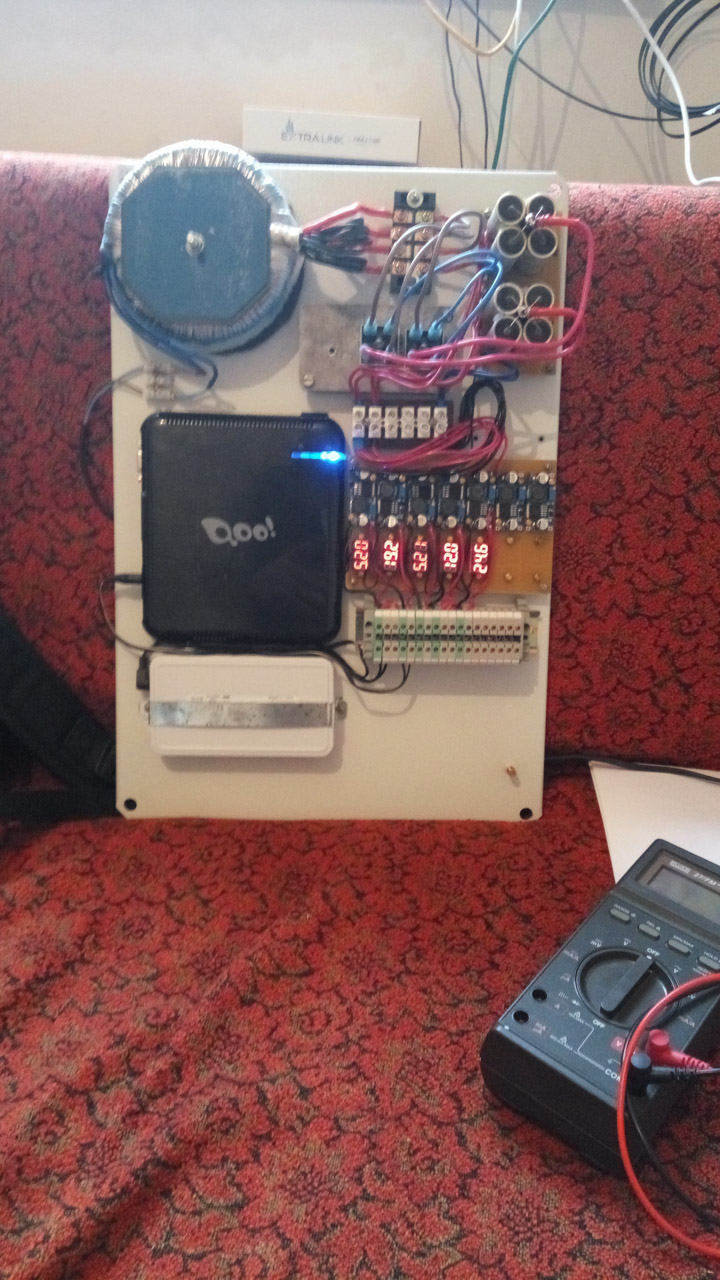
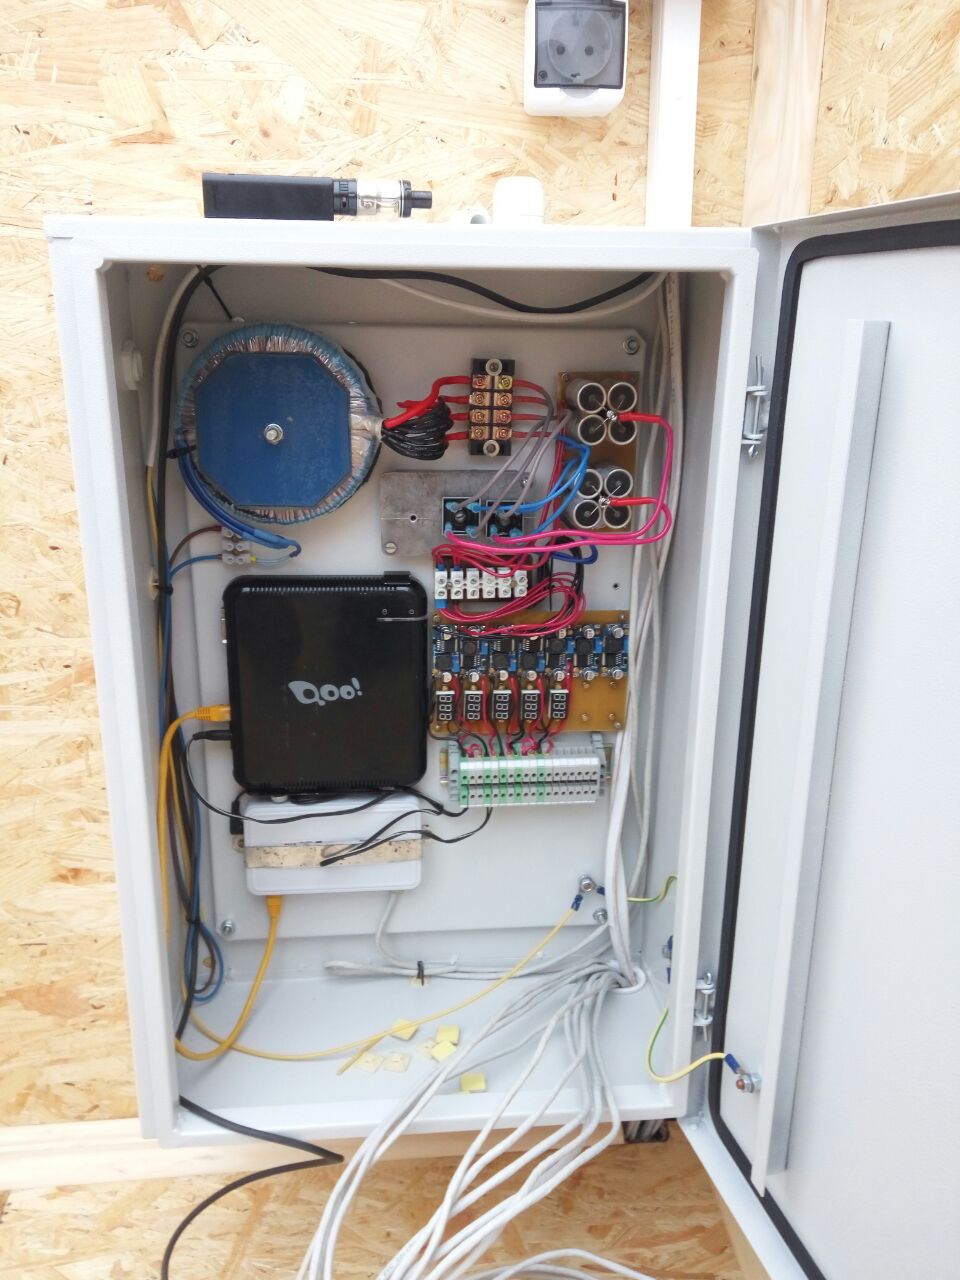
Since the pulsed power supply units are very sensitive to work in the heat, and even more so in the cold, they decided to use the simplest power supply unit - the transformer + bridge + capacitors - as a basis.
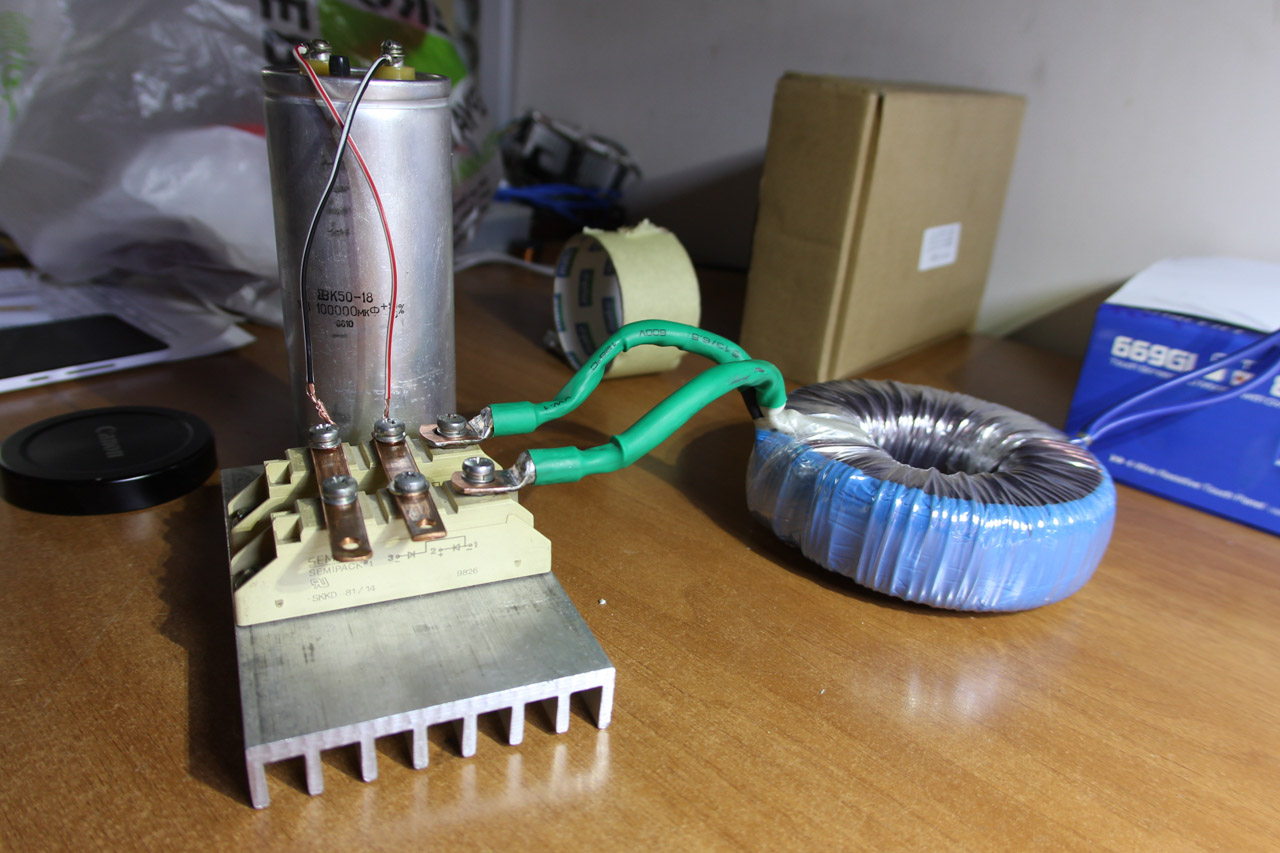

The concept has changed many times, in fact it turned out like this:
The concept has changed many times, in fact it turned out like this:
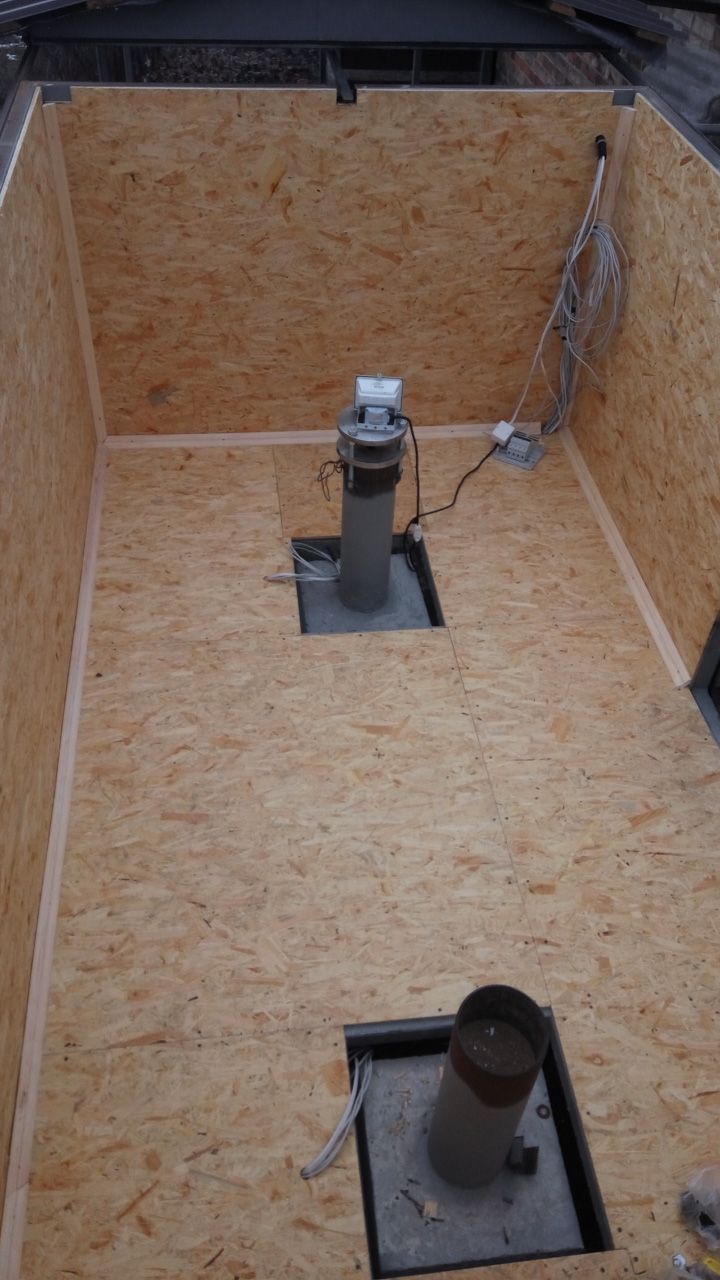
Finishing touches
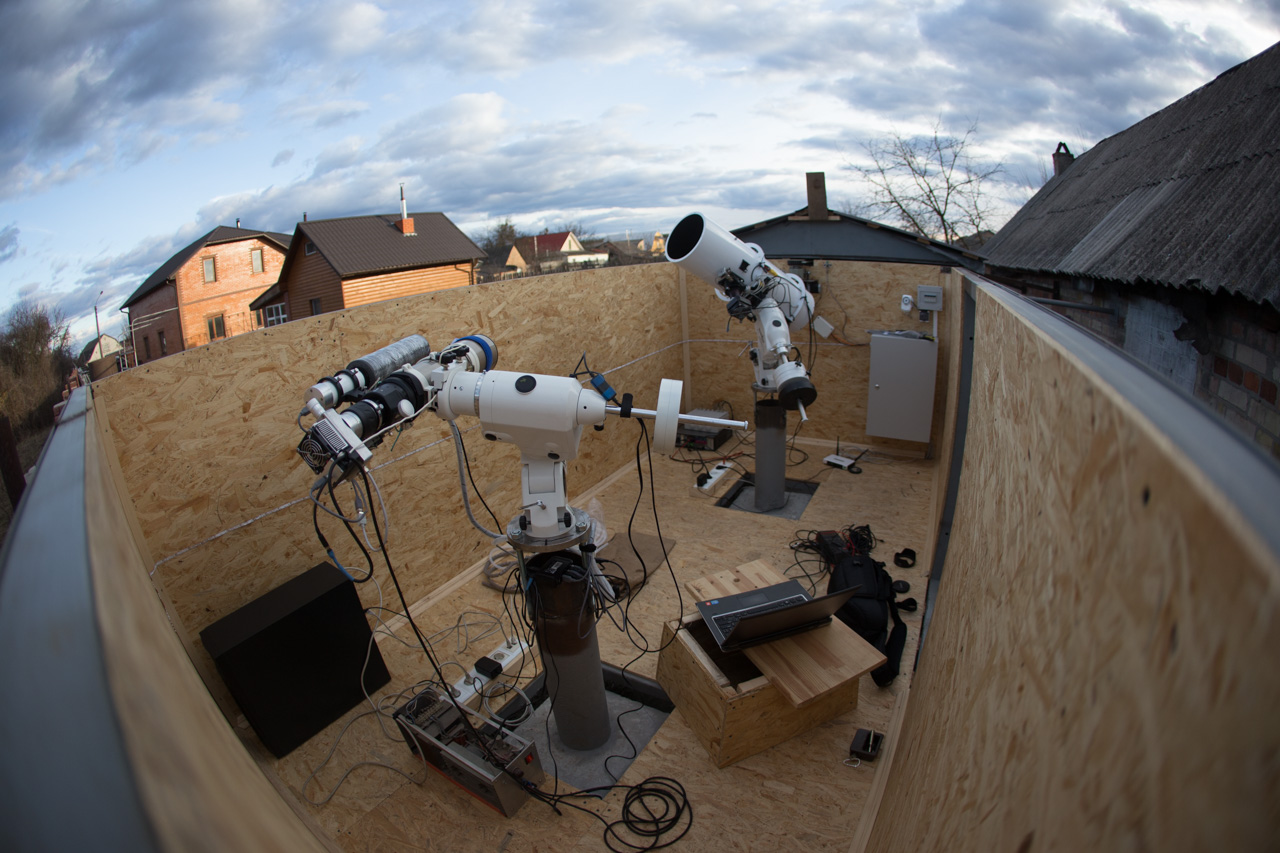
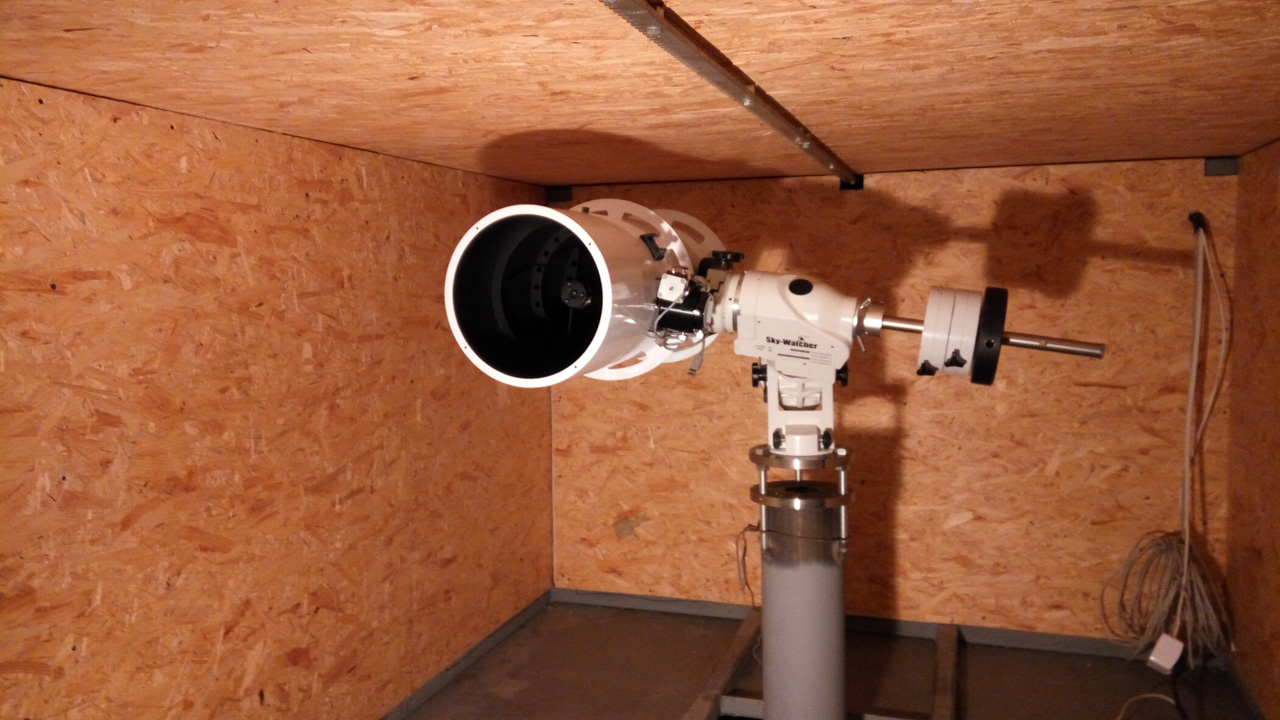
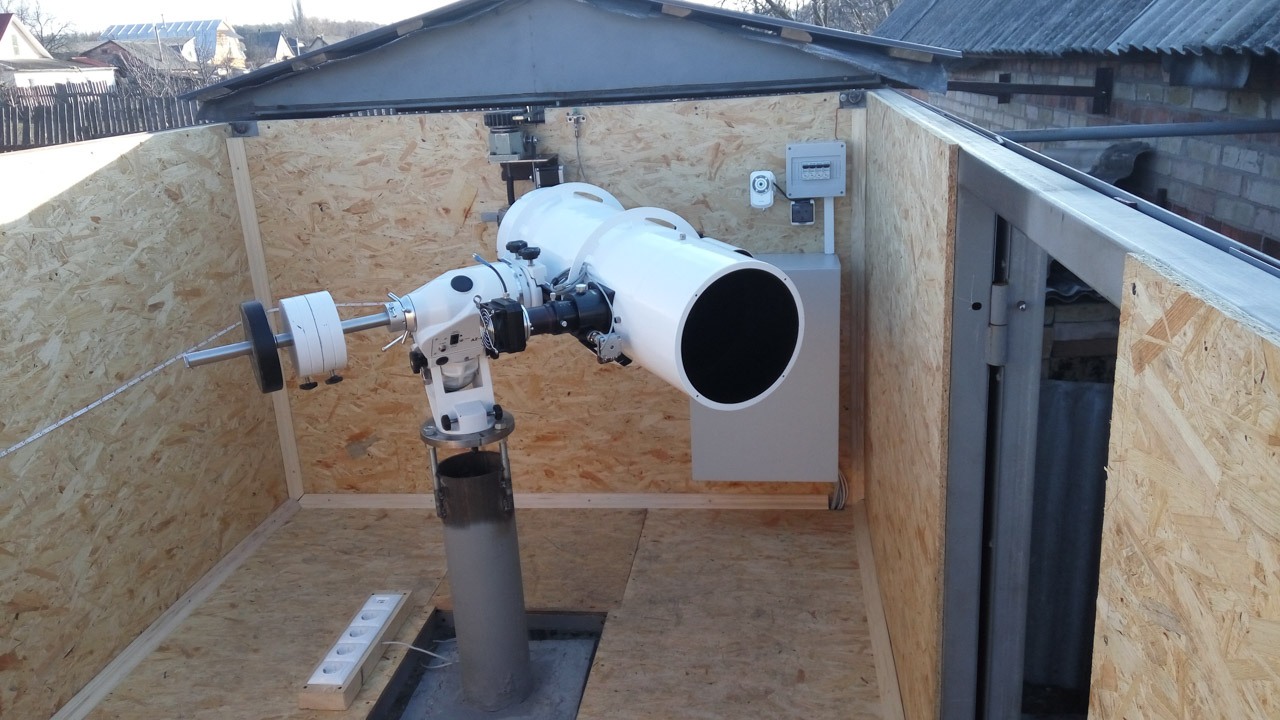
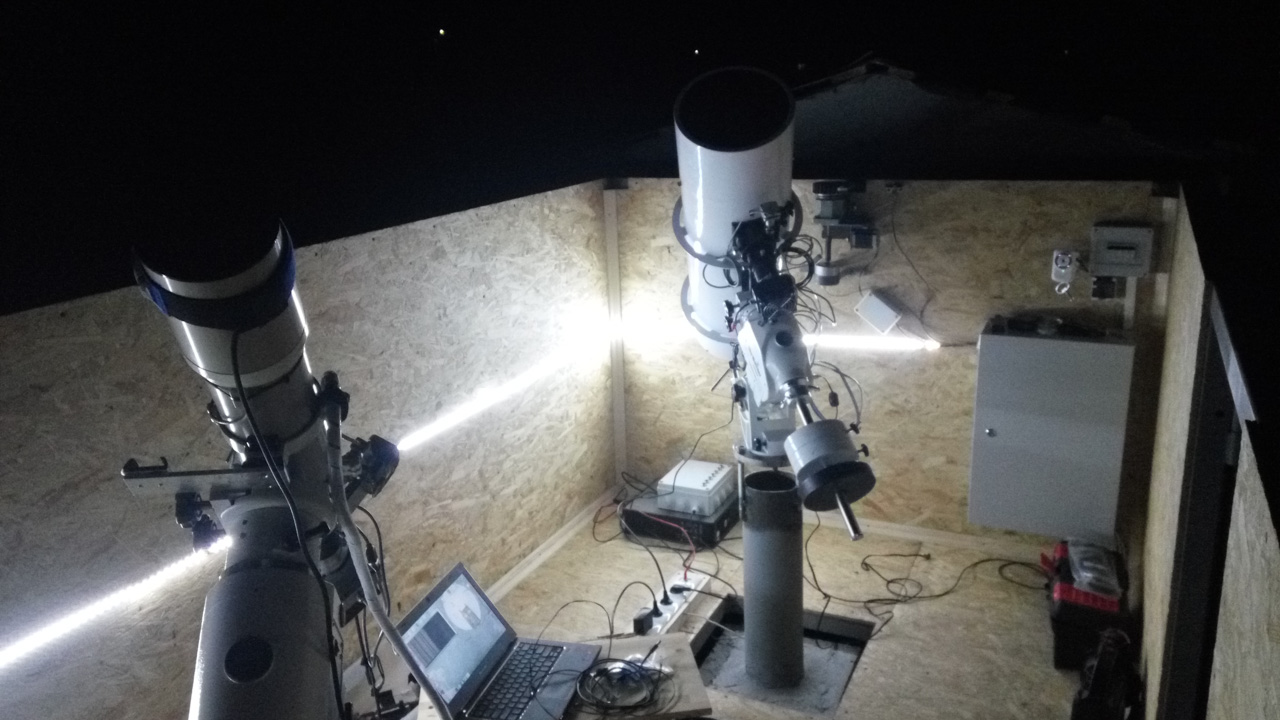
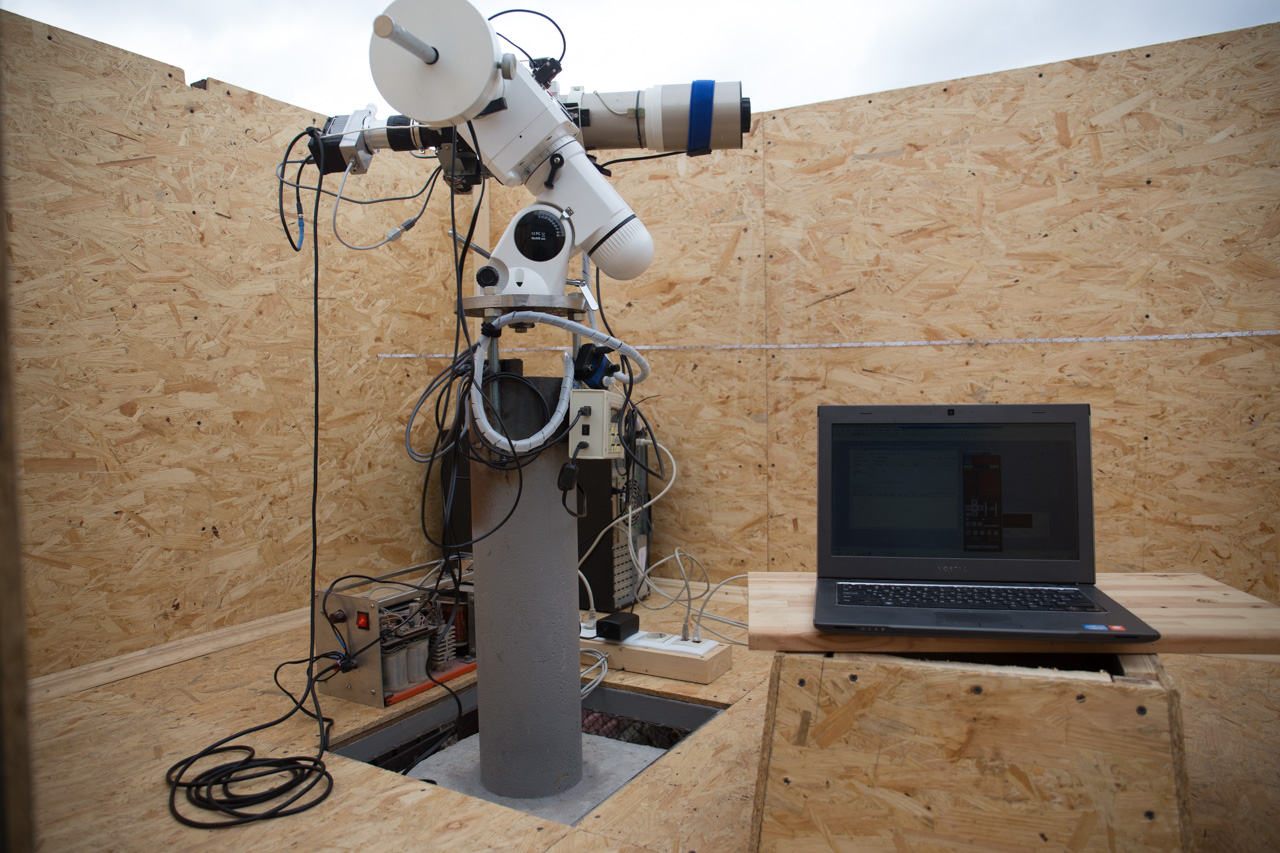
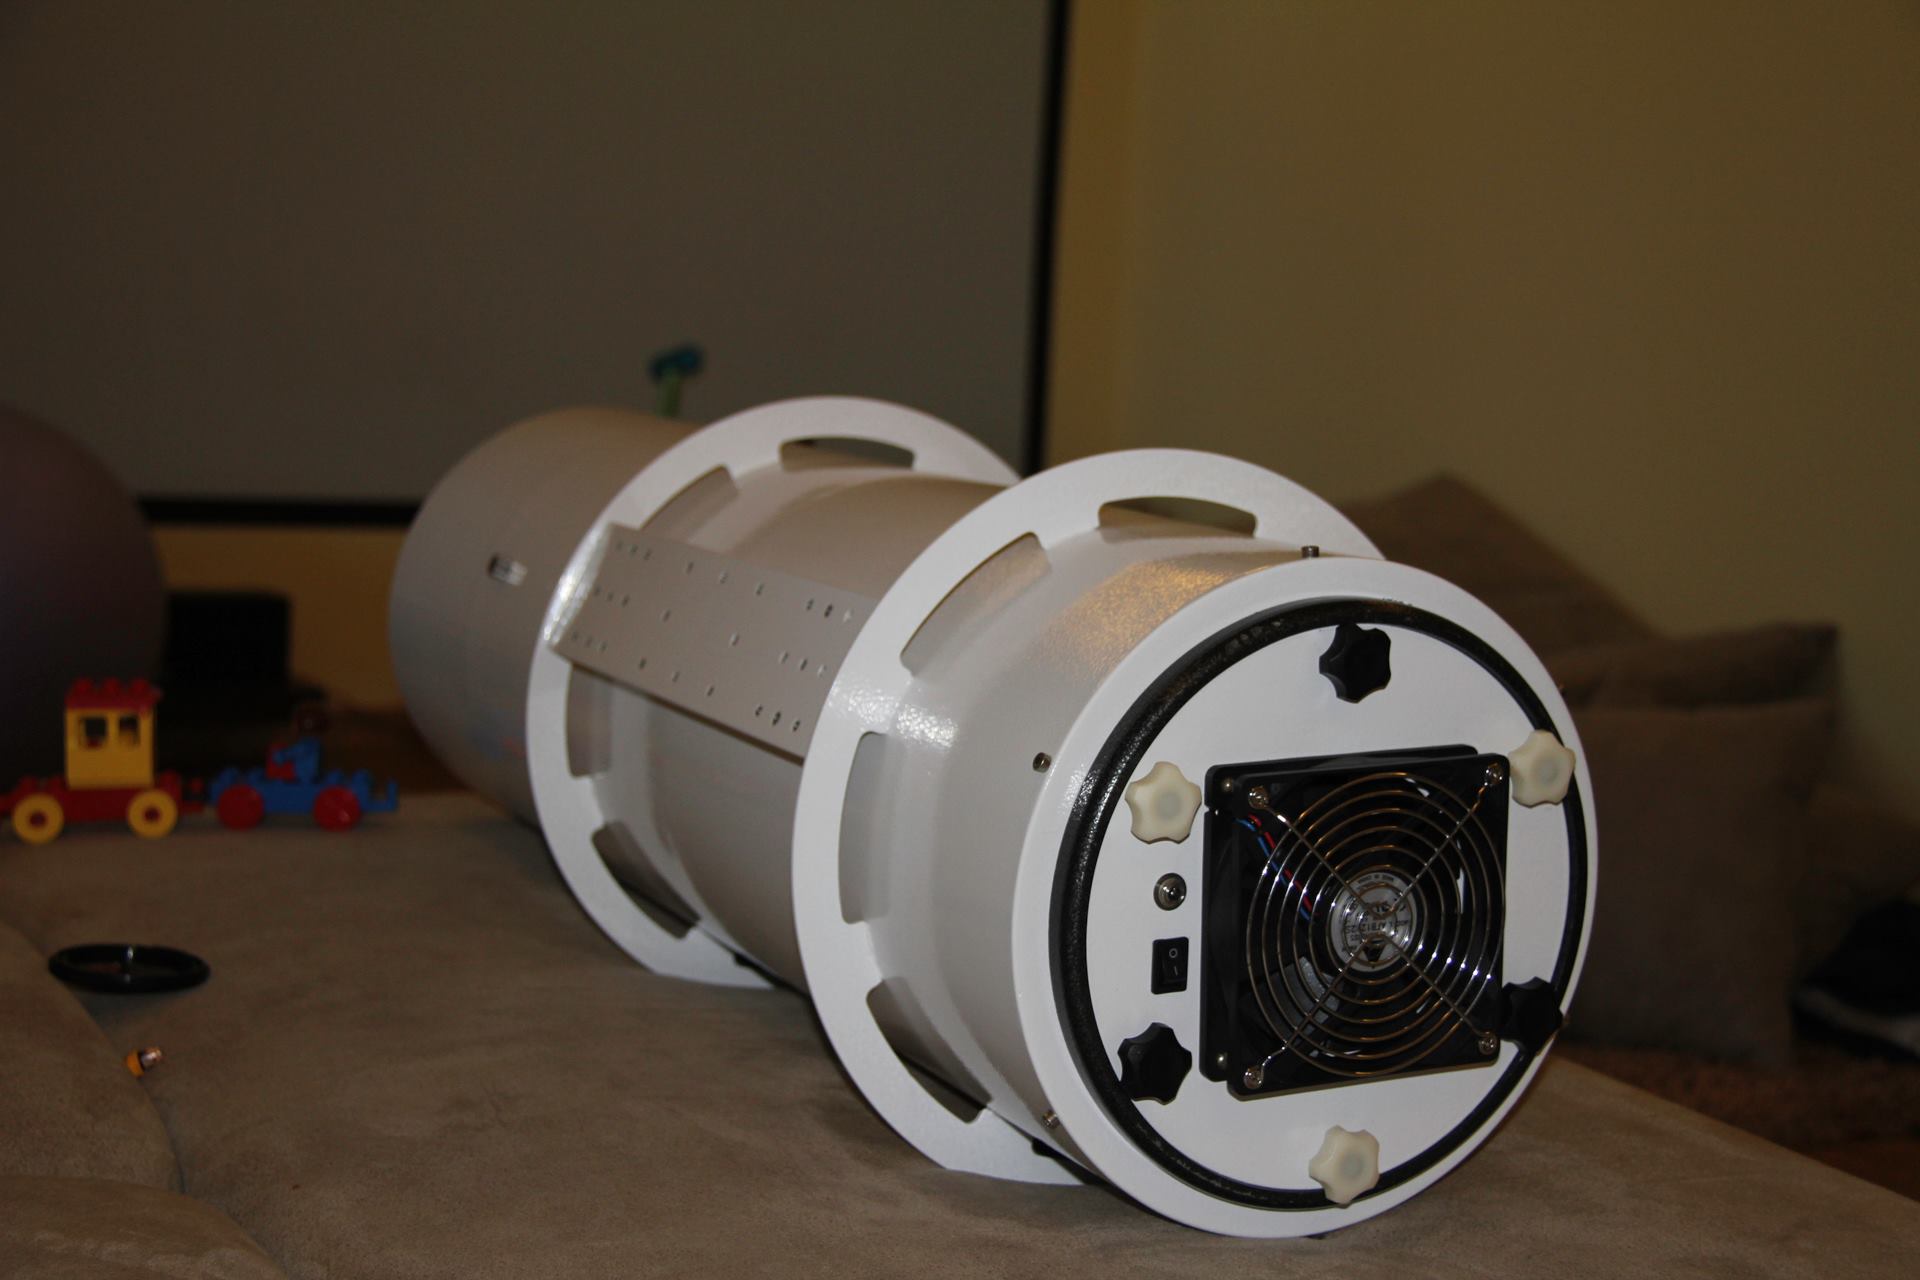
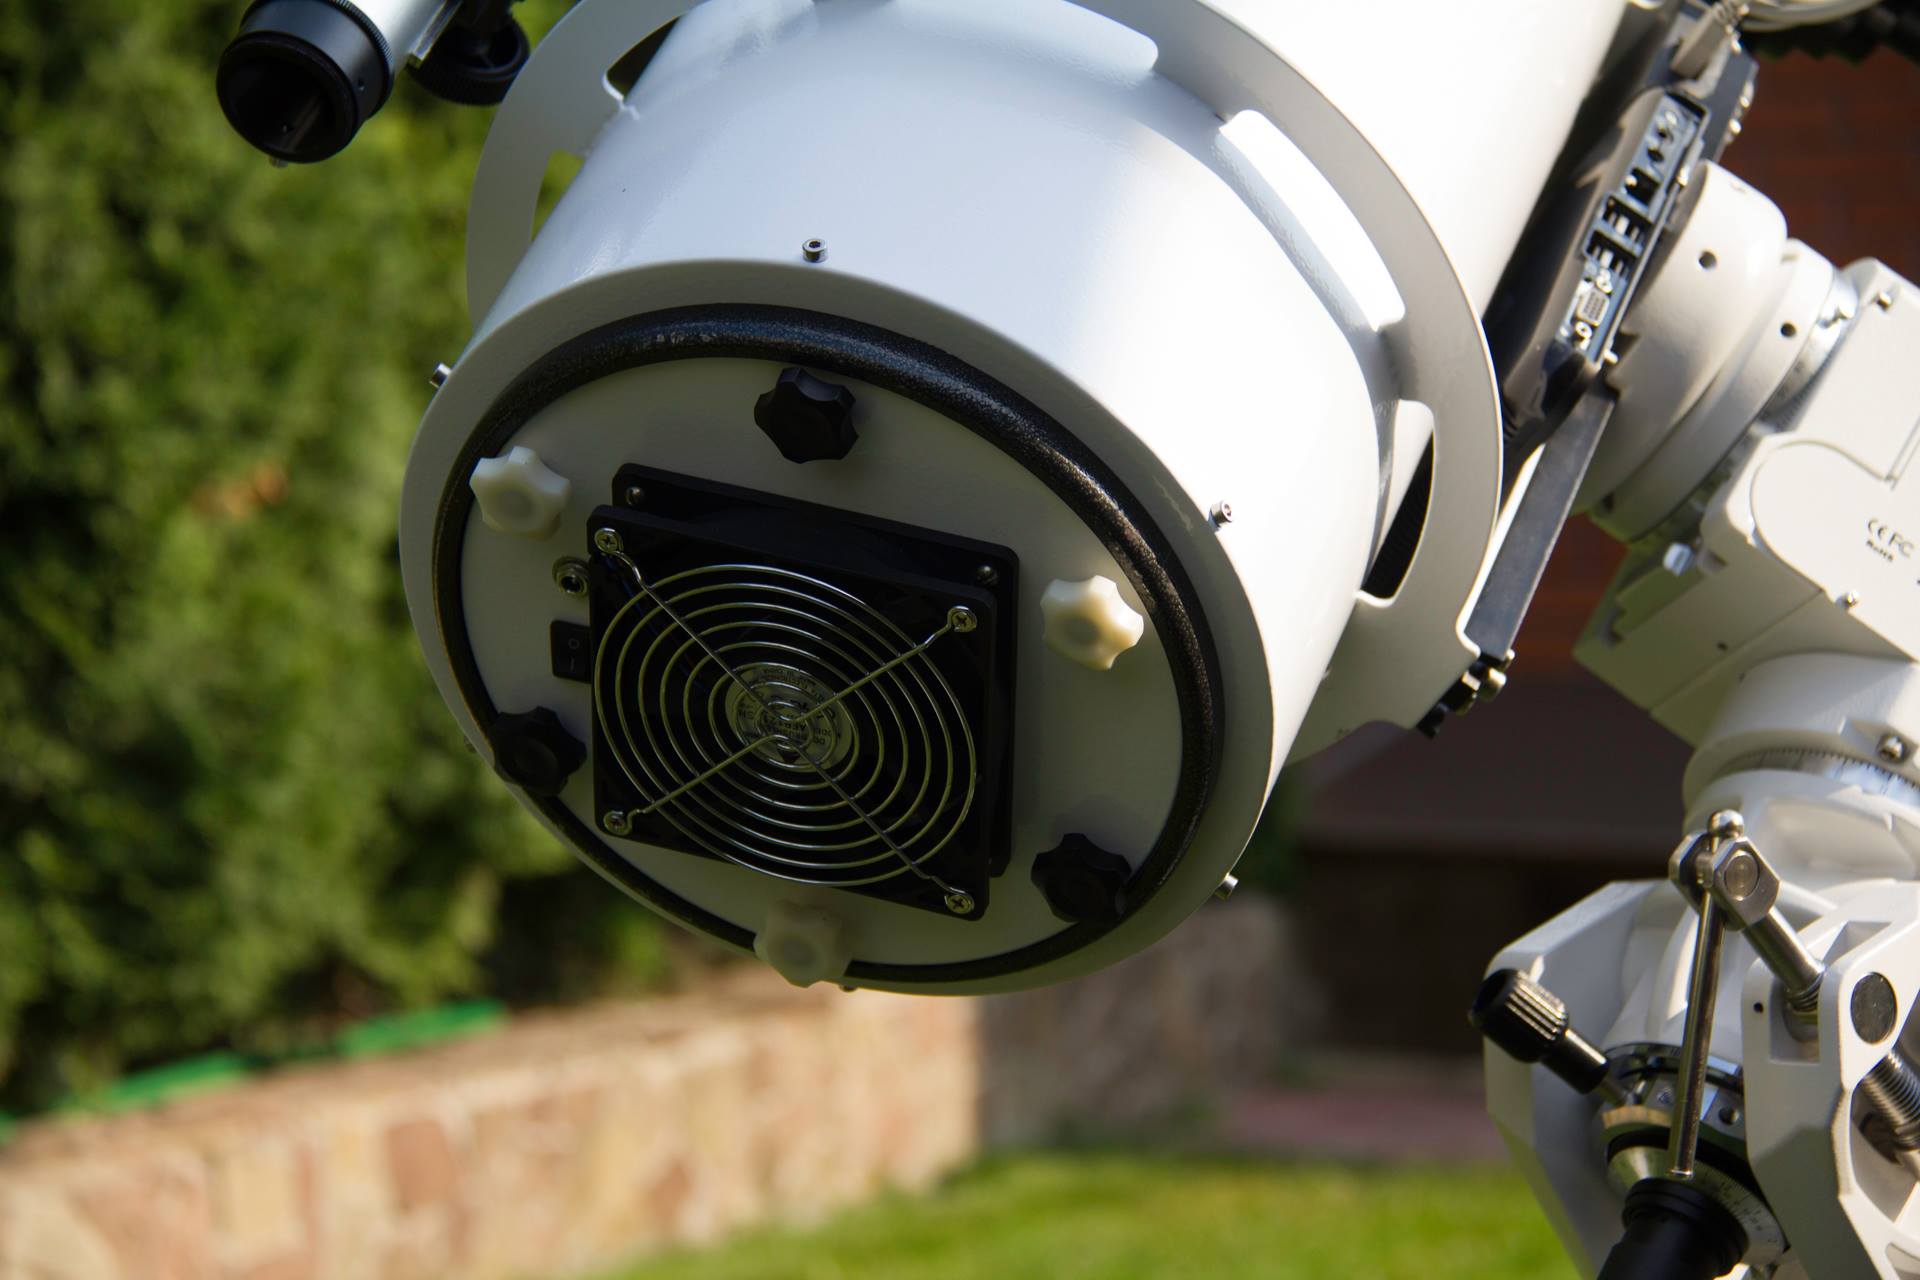
Equipment installation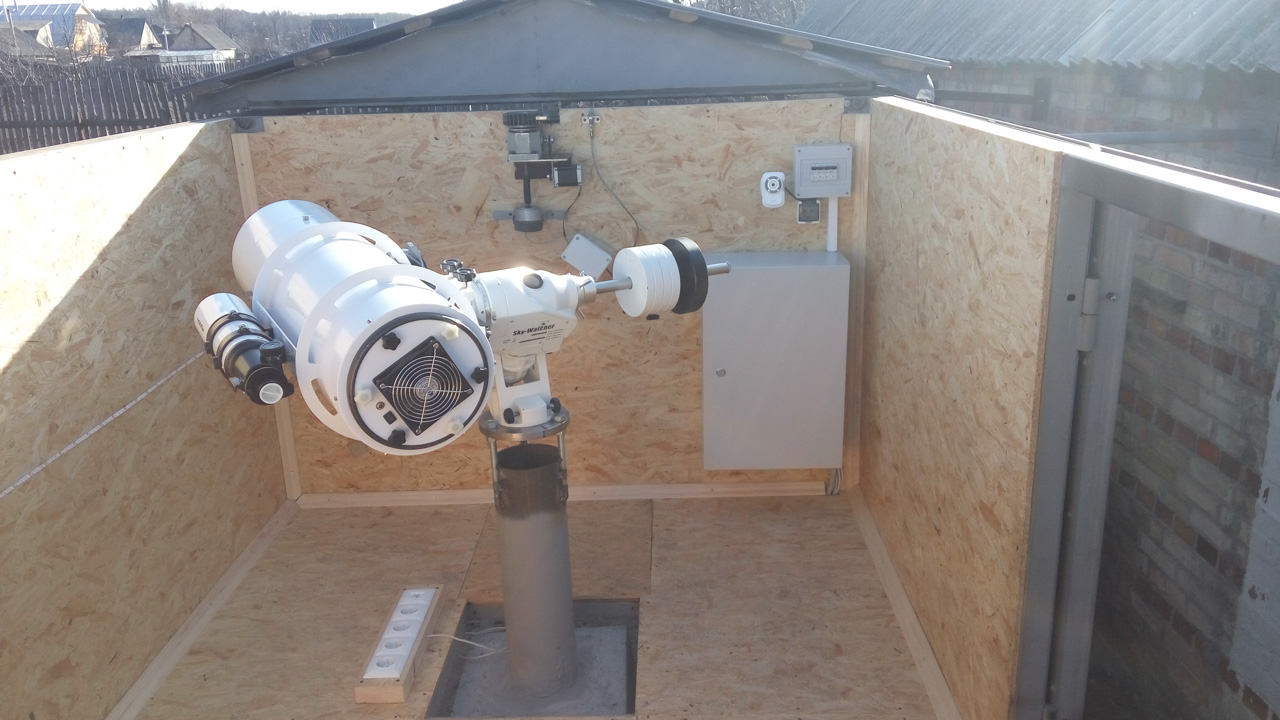
Exactly 9 months later the project was
Full version of the video
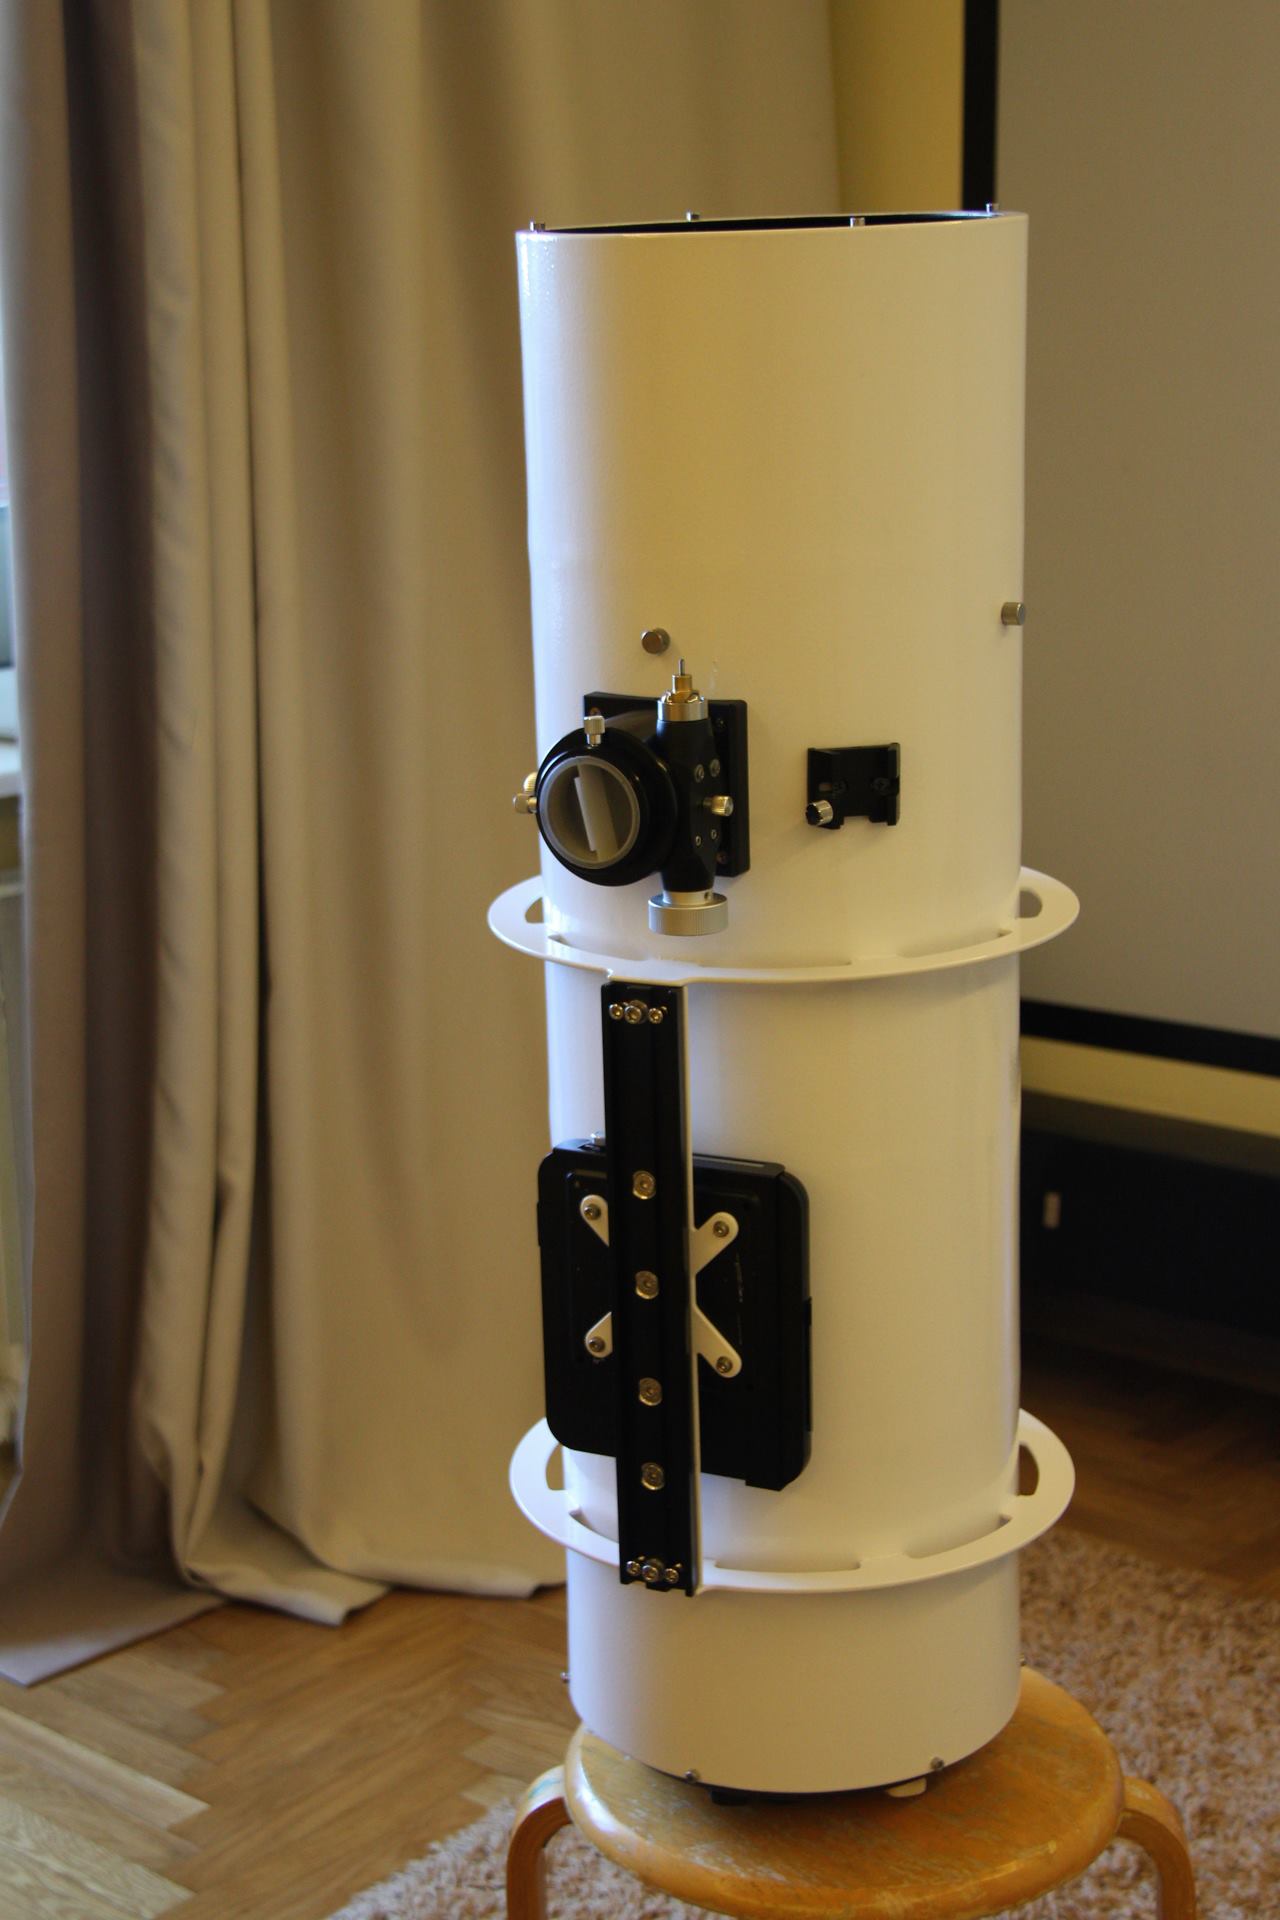
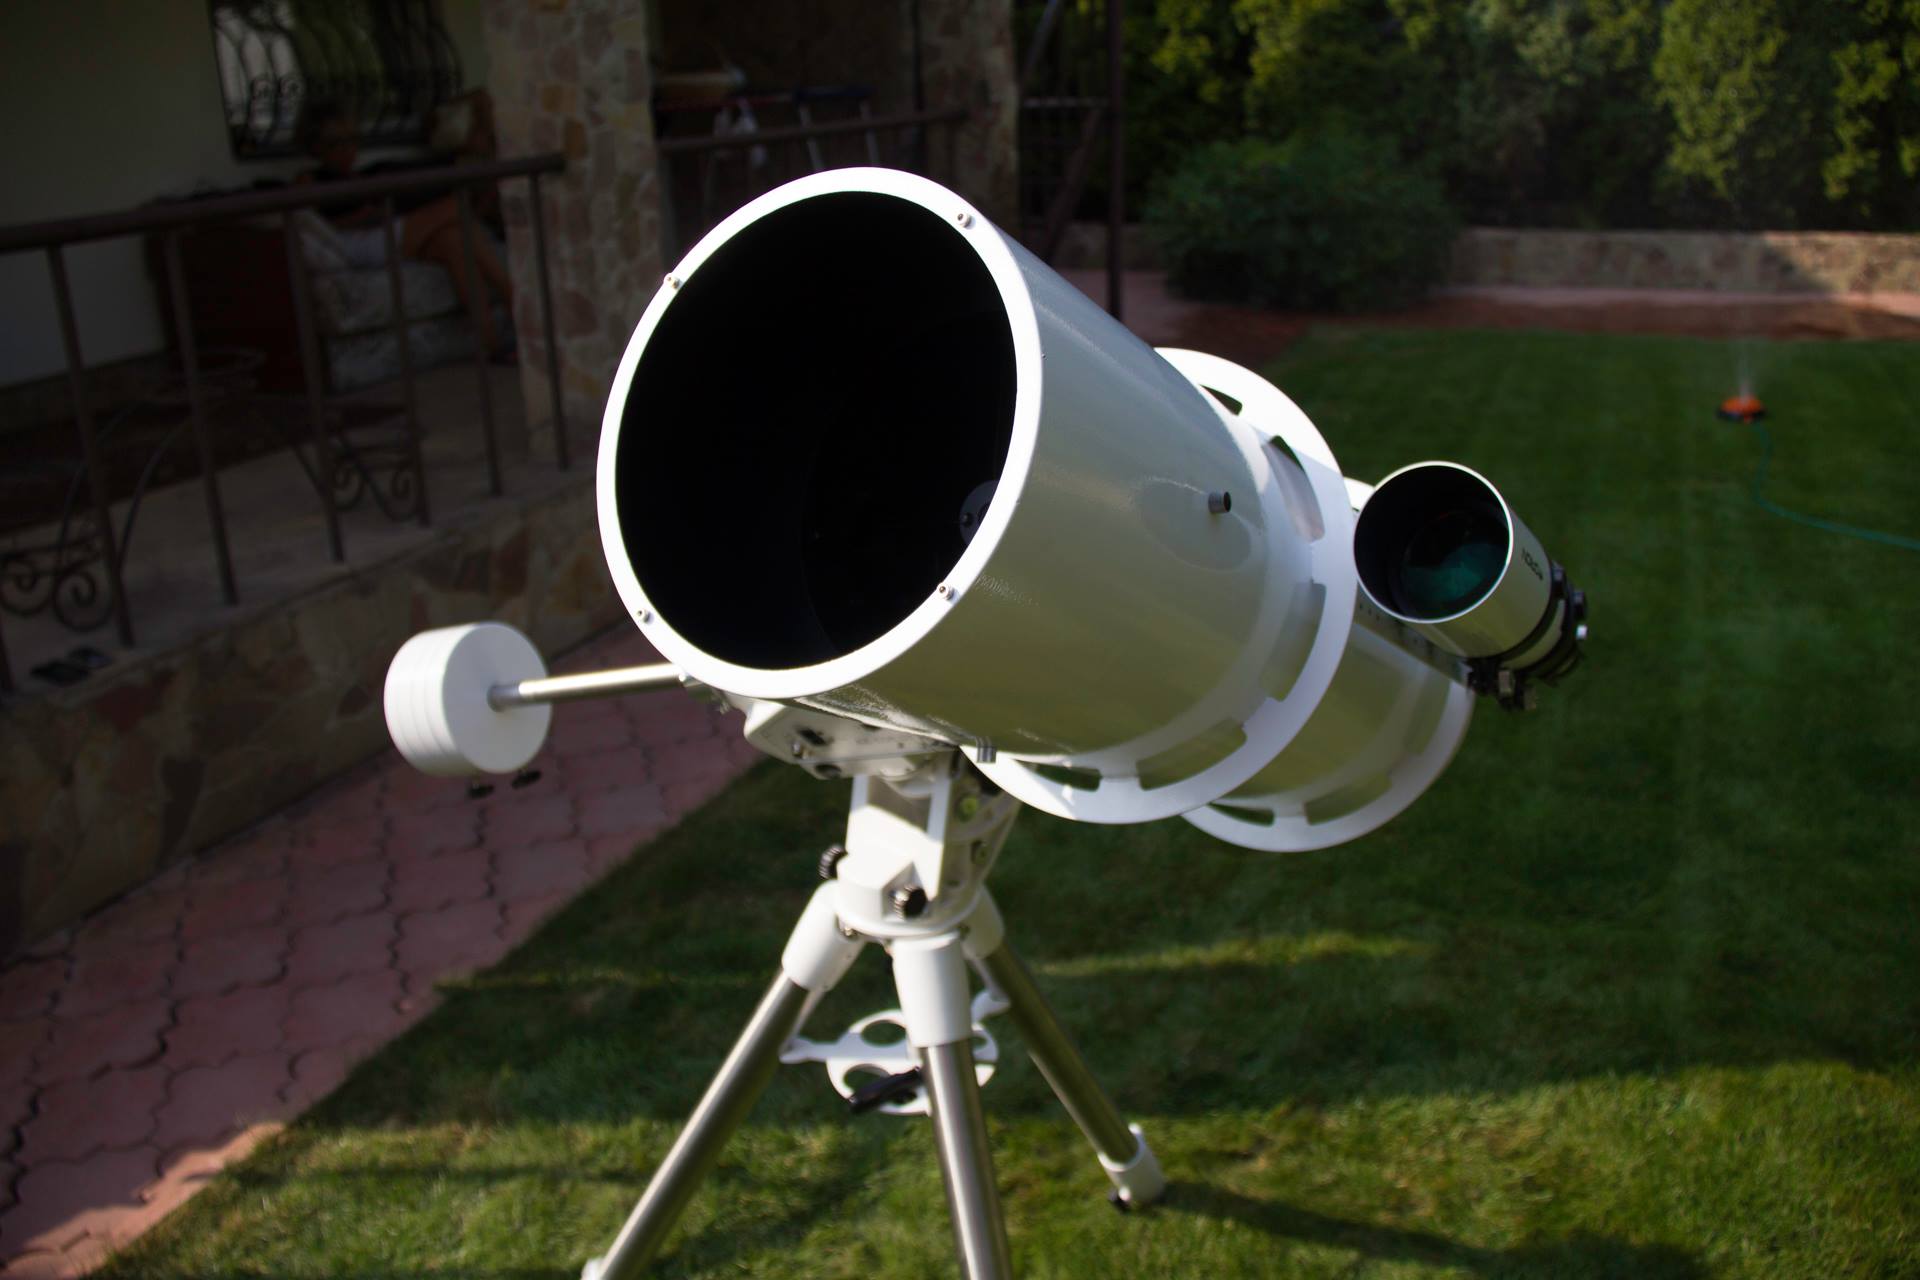
Description of equipment:
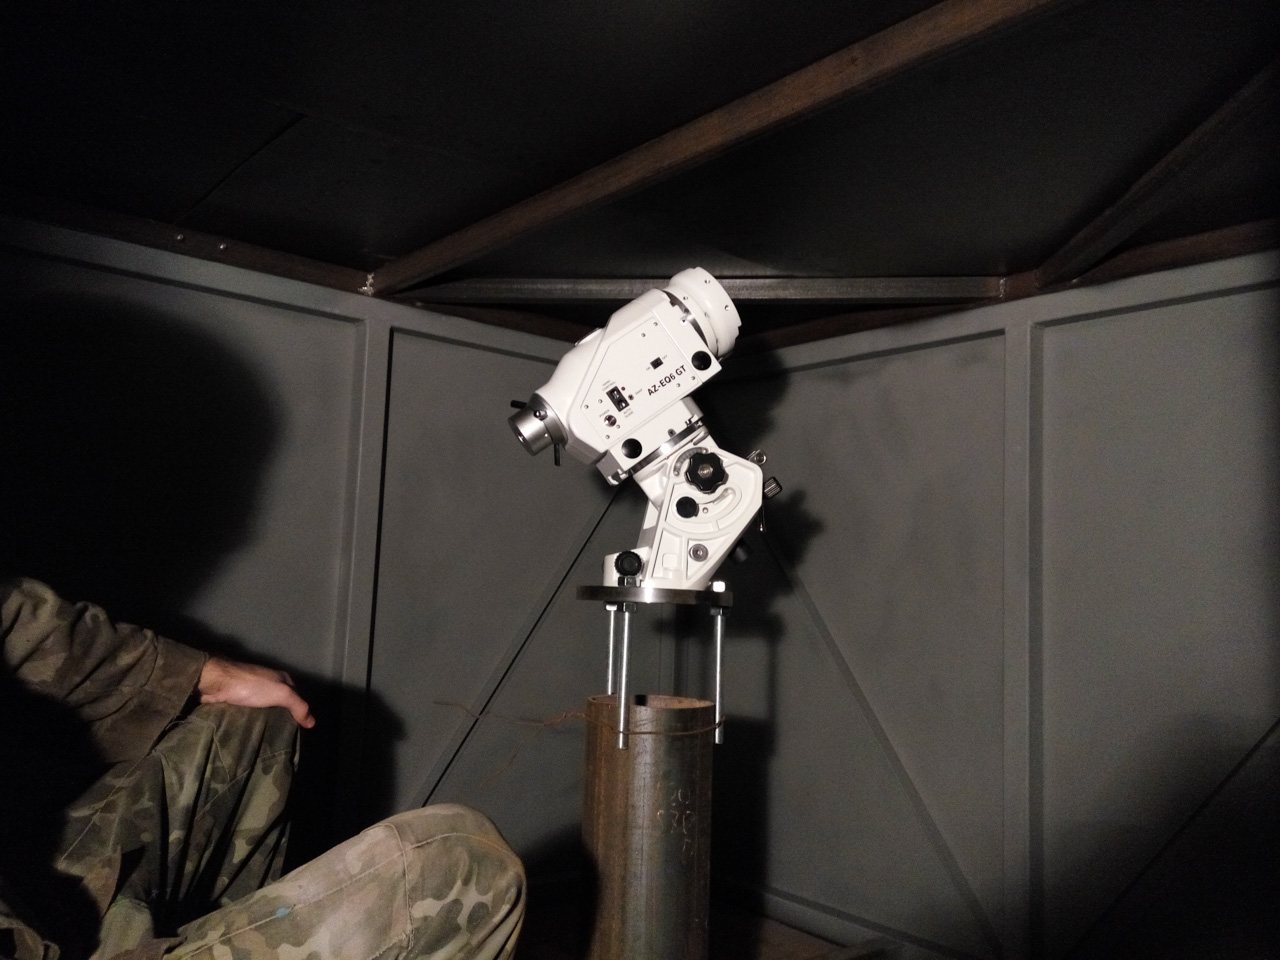
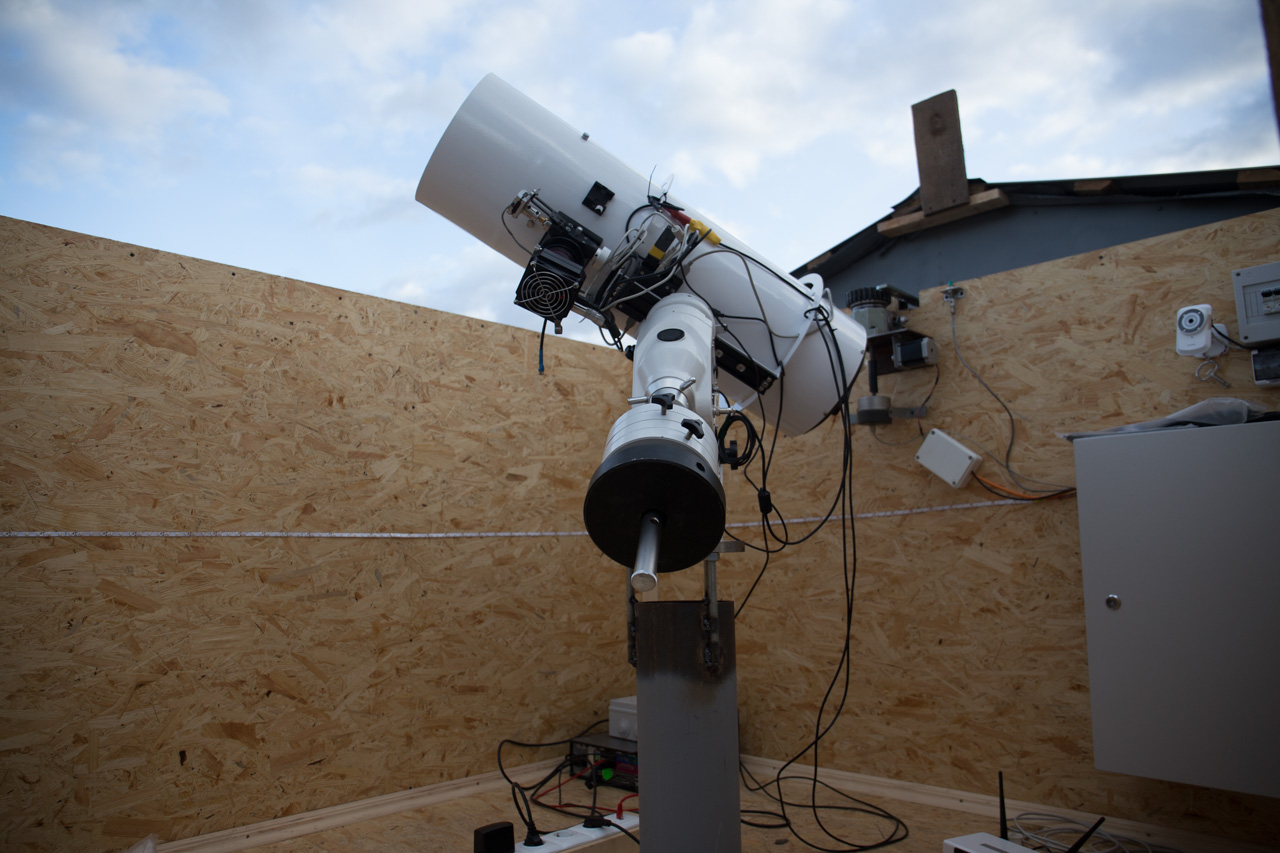
Setup number 1
- Mount: SkyWatcher NEQ6
- Main telescope: SkyWatcher ED80 Refractor
- Guide telescope: SkyWatcher 9x50 finder
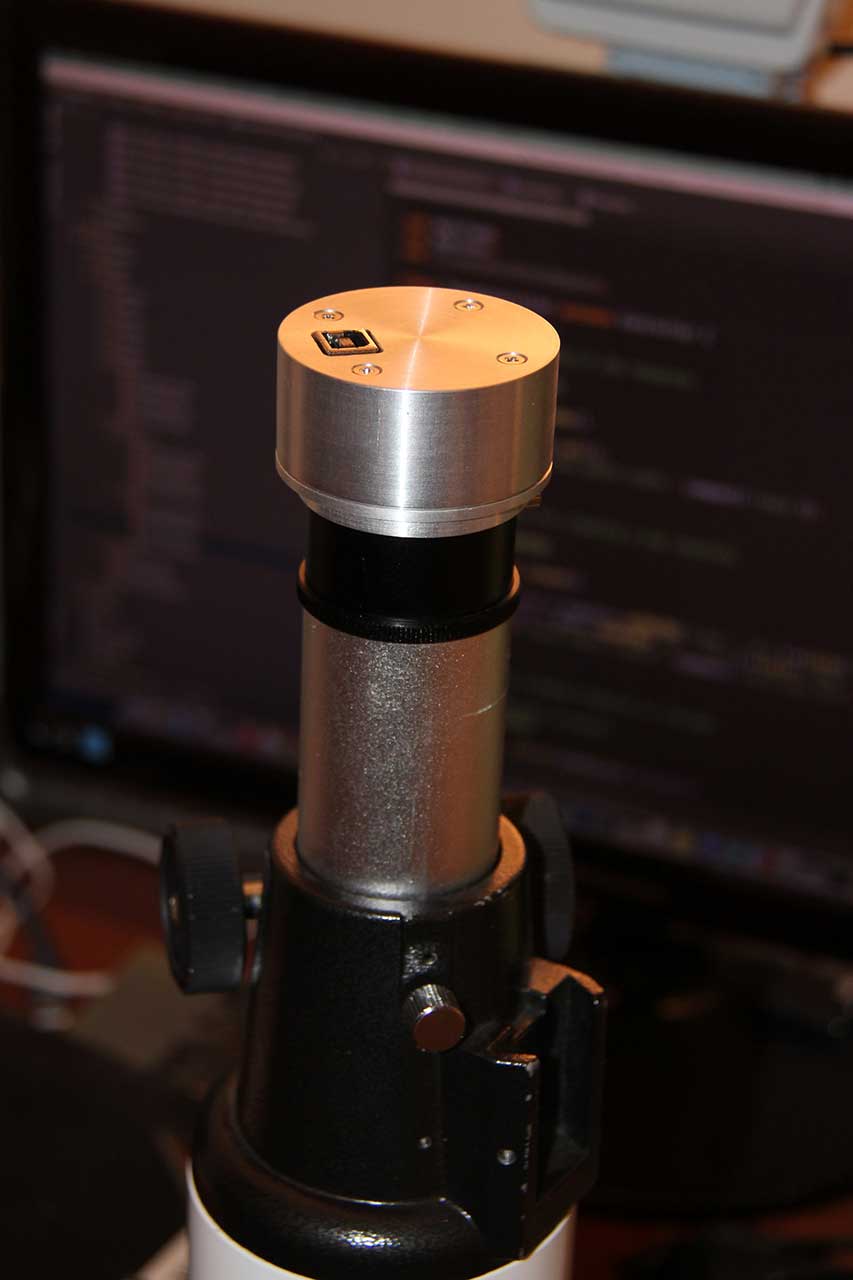
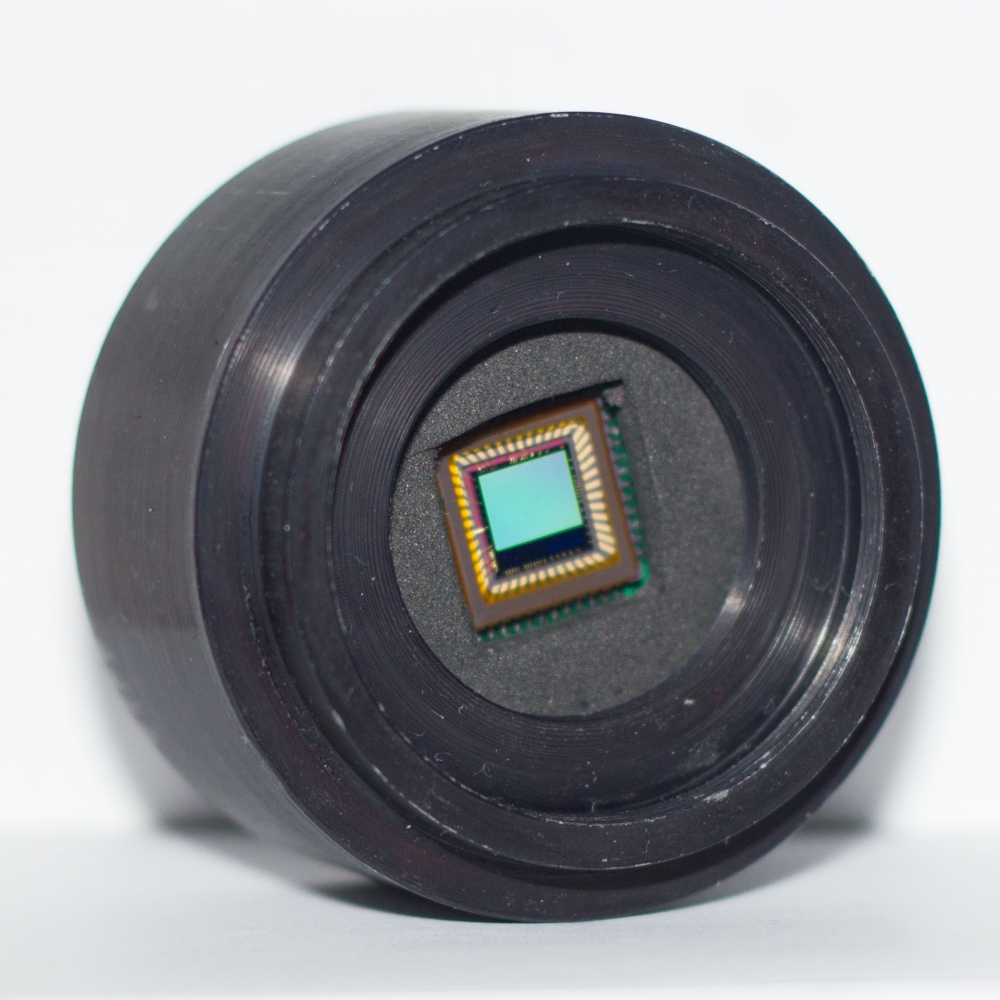
- Main camera: Cam8 homemade CCD camera
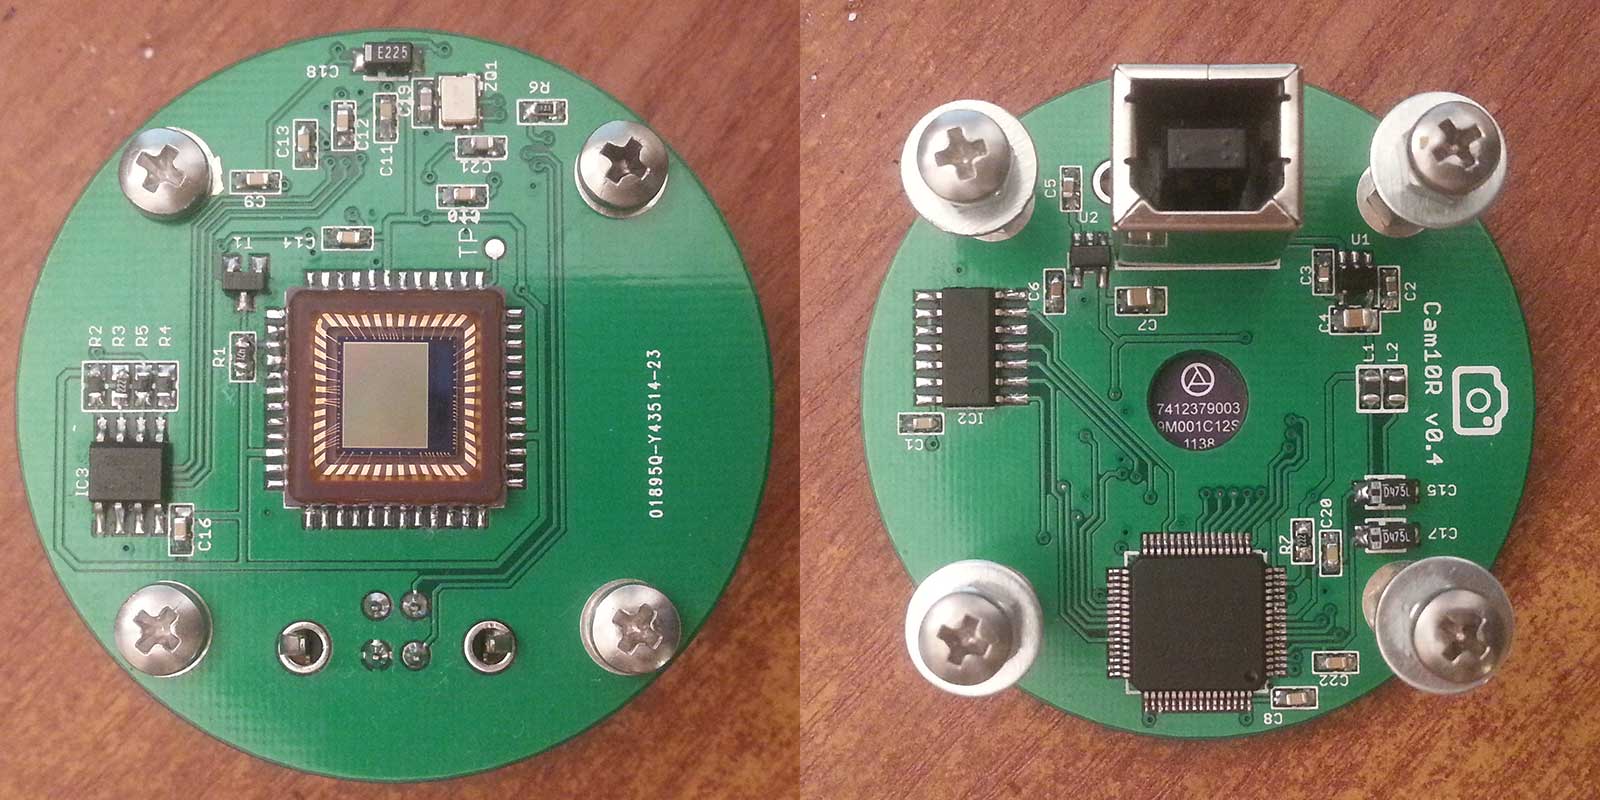
- Guiding camera: Cam10 self-made CMOS camera
- Homemade controller of the focuser according to the scheme of Vanya Ionov
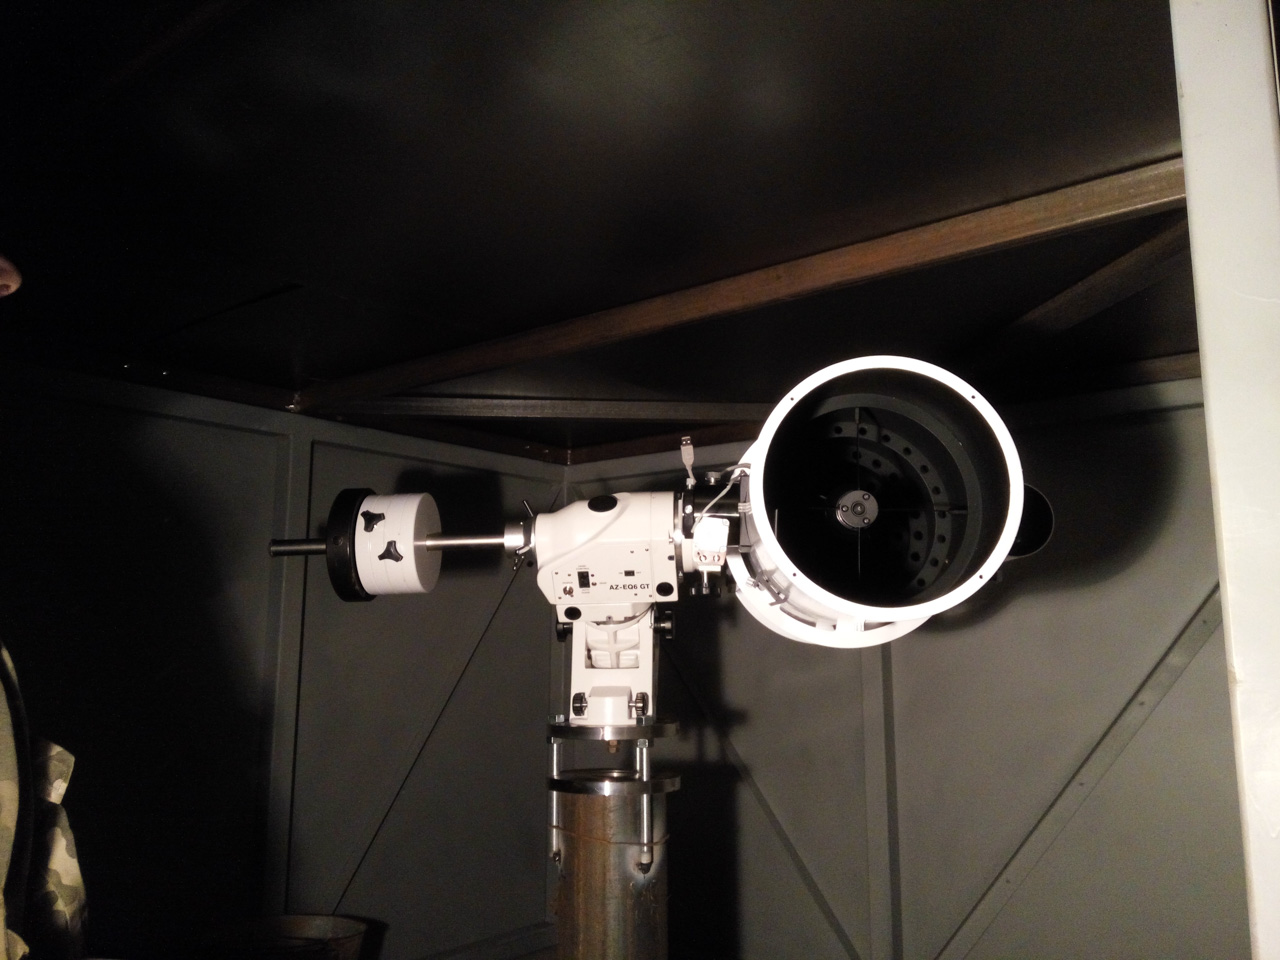
Setup number 2
- Mount: SkyWatcher AZ-EQ6
- Main telescope: Converted Newton 8 '' F / 4 GSO

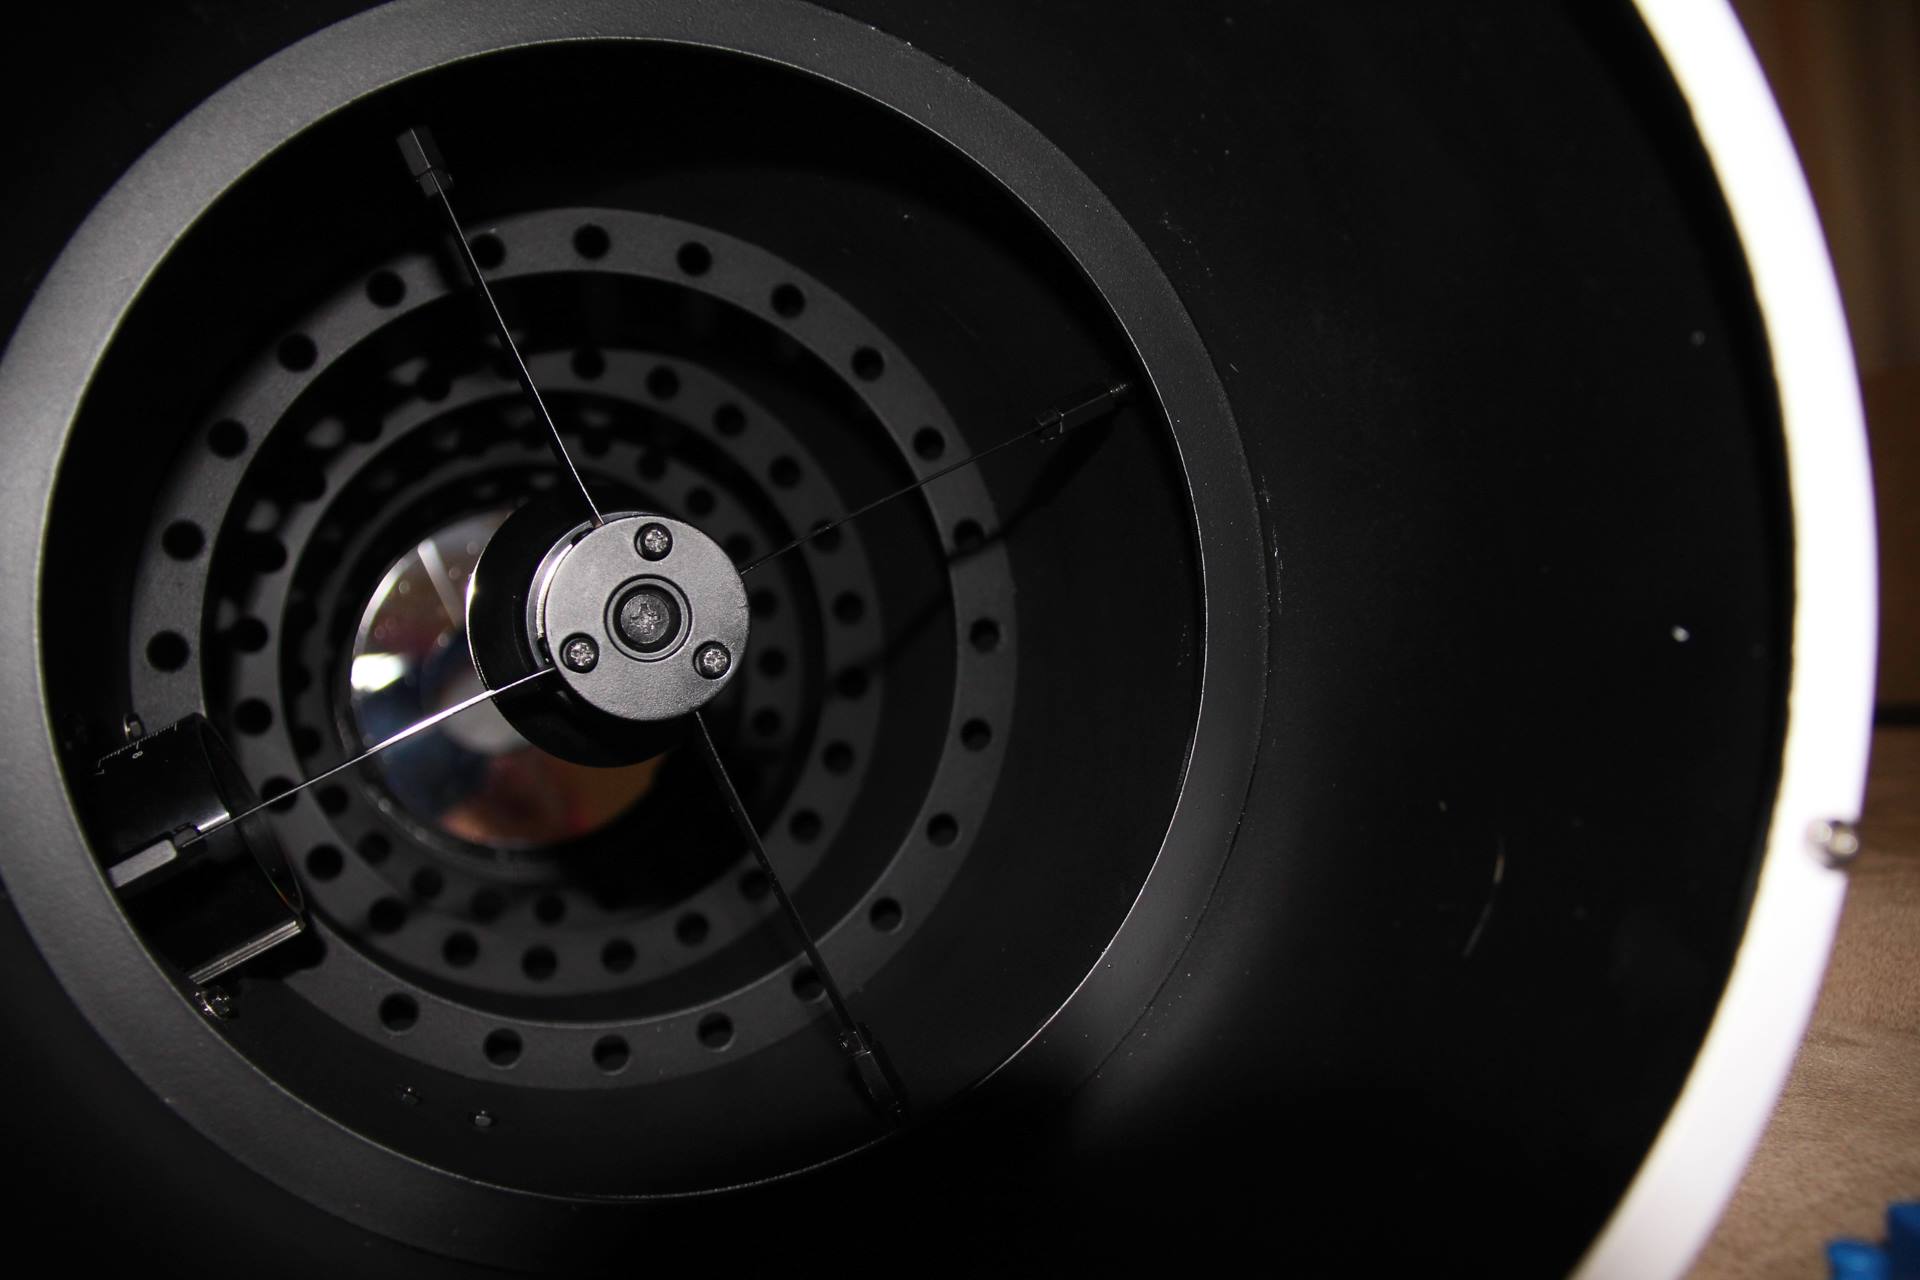
- Guide telescope: Orion short tube f 400mm, F / 5
- Main camera: QHY8Pro
- Guiding Camera: Lumenera 070m
- Homemade controller focus on my scheme
On the 4th of April 2016, the booth saw the first light remotely.
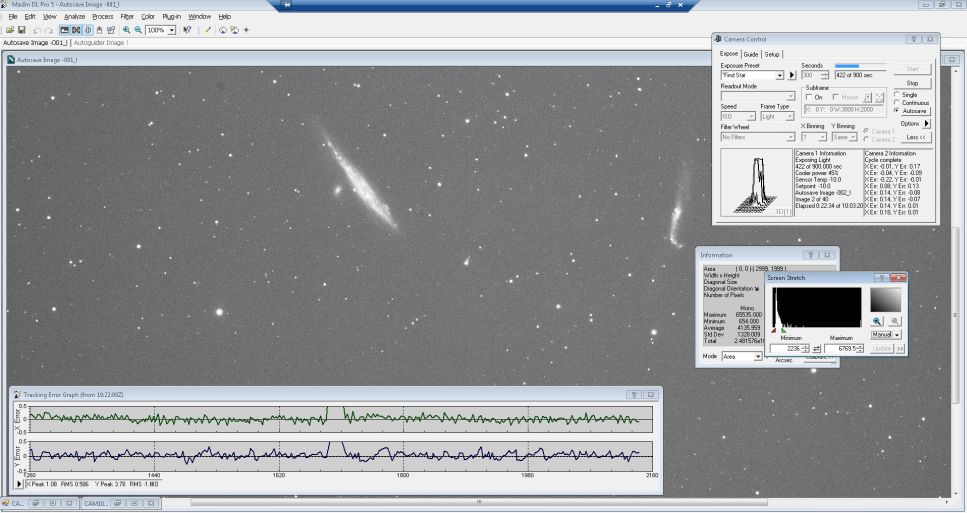
Within a month, my colleague Sergey received the first result from the accumulated material:
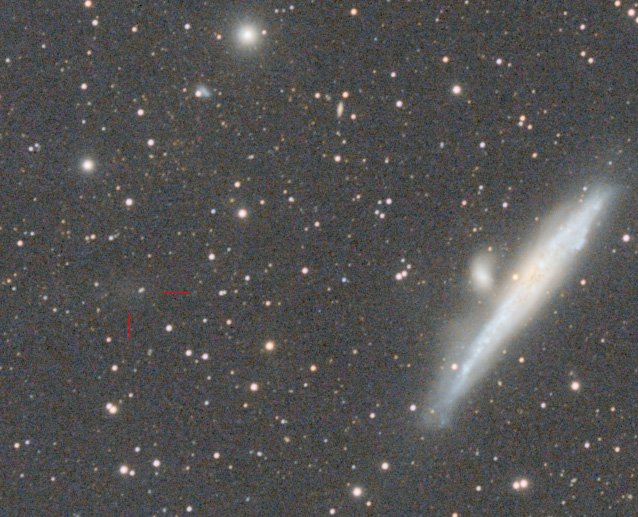
Galaxies NGC4631 (Whale) and NGC4656 (Stick), as well as the galaxy NGC4627 - the satellite of China and NGC4657 - are part of the Galaxy of the Club, which is listed in the NGC catalog under a separate number. All these galaxies belong to the NGC4631 group of galaxies, which is 25 million light-years distant from us.
What is interesting is that NGC4656 in the photo shows a certain emission from the northeast side. This is a tidal galaxy NGC4656UV (tidal dwarf galaxy), which shines brightly in ultraviolet radiation. It is clearly seen in the pictures (p. 5-6) at the link: wwwmpa.mpa-garching.mpg.de/gas2011/talks/Thilker.pdf
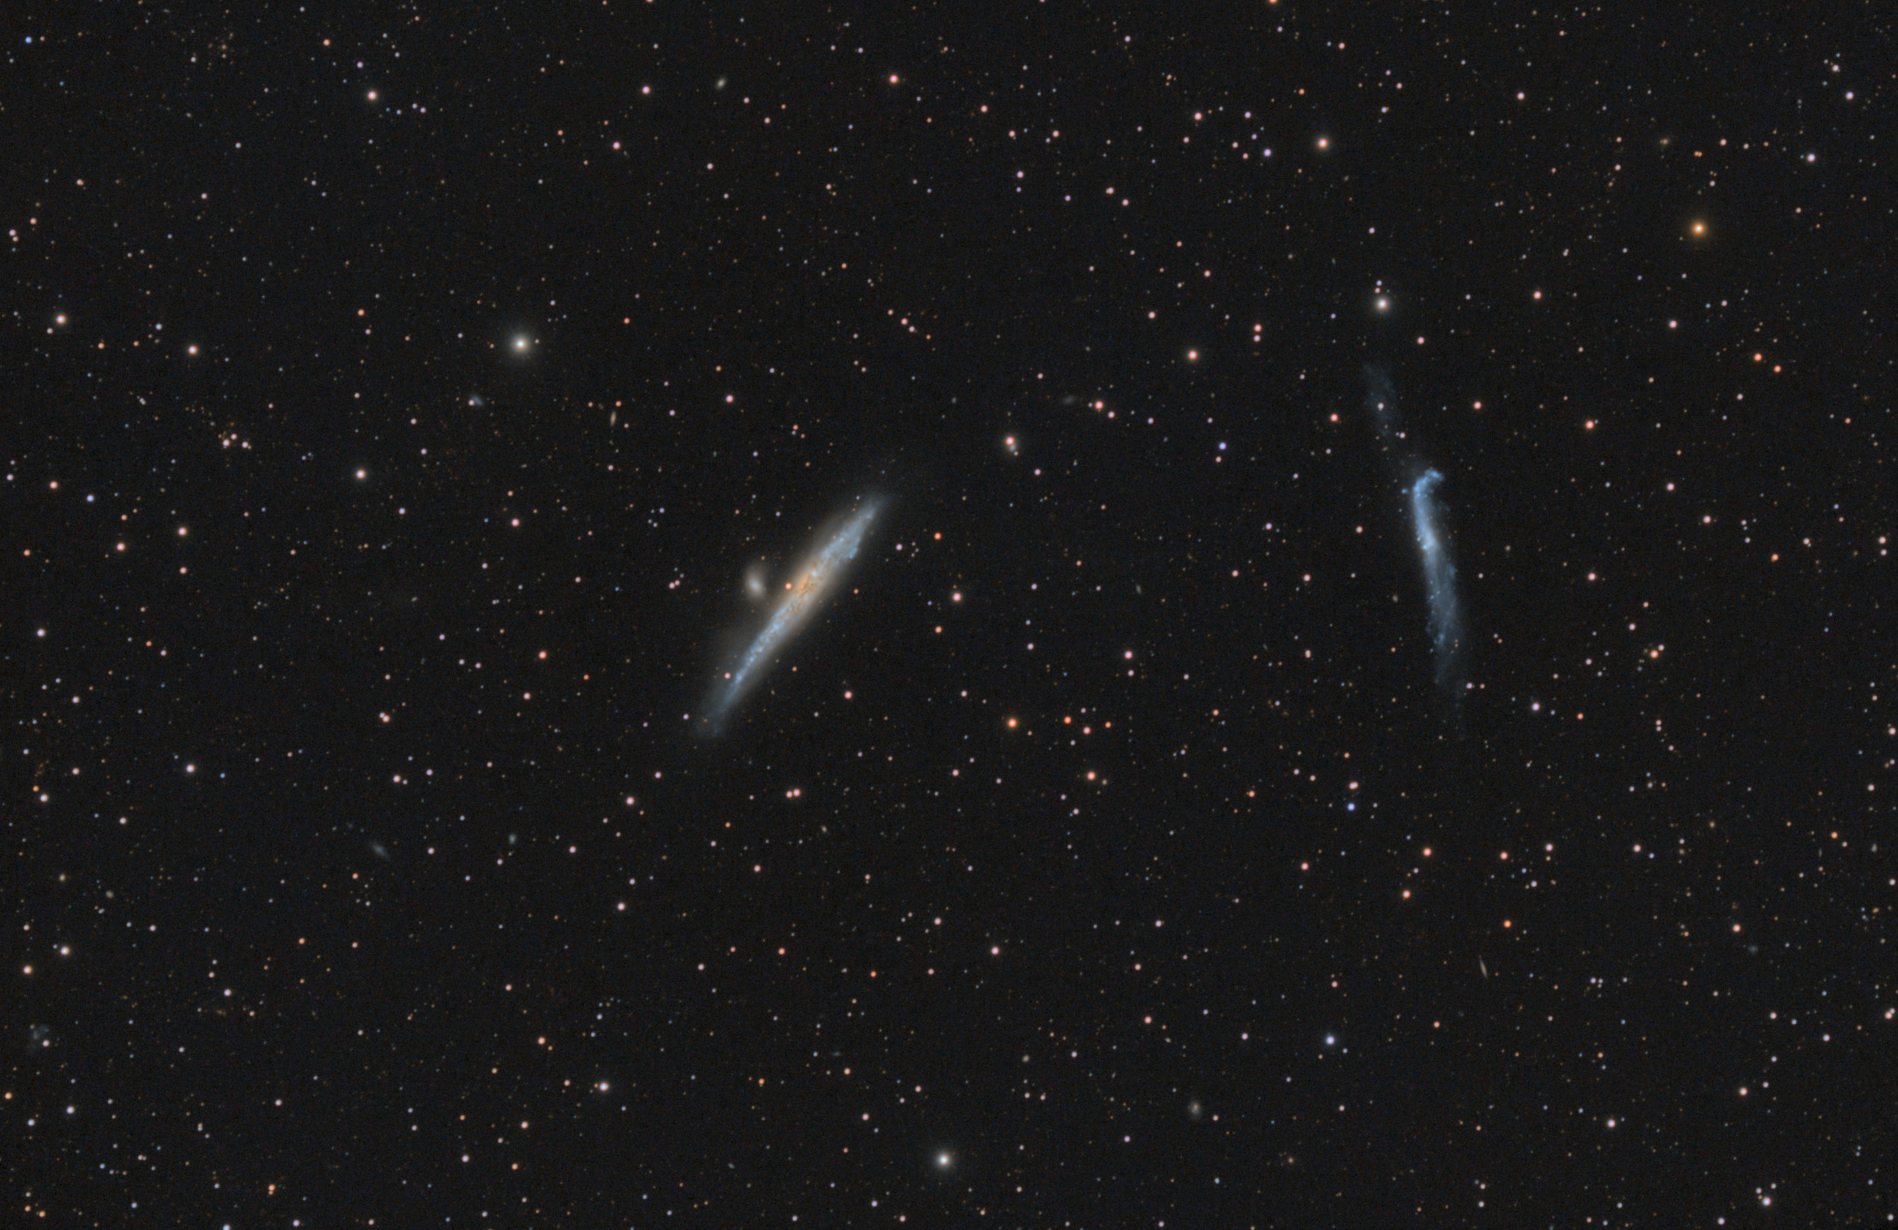
104 frames of 900s, the total exposure time is 26 hours. MaxImDL calibration calibration, DSS alignment, FITStacker addition, Pixinsight.
A careful study of the picture, in the north-west of NGC5631 at a distance of about 20 ′, found some muddy spot at the level of the glitch, first attributed to the processing artifact. But, picking on Aladin, I found out that this is a dwarf galaxy N4631dw1 with a very low surface brightness and it was discovered only 3 years ago (!!!). Where I was 3 years ago with my picture?
inspirehep.net/record/1276974/plots?ln=en
lanl.arxiv.org/pdf/1401.2719v1.pdf
The observatory was named Stozhary , in honor of the object M45 (Pleiades), taking into account the national color, and acquired a page on the FB .
I will try to answer all the questions. Parser, do not let me down!
Source: https://habr.com/ru/post/395681/
All Articles