Developing a Z-Wave Vacuum Cleaner iRobot Roomba
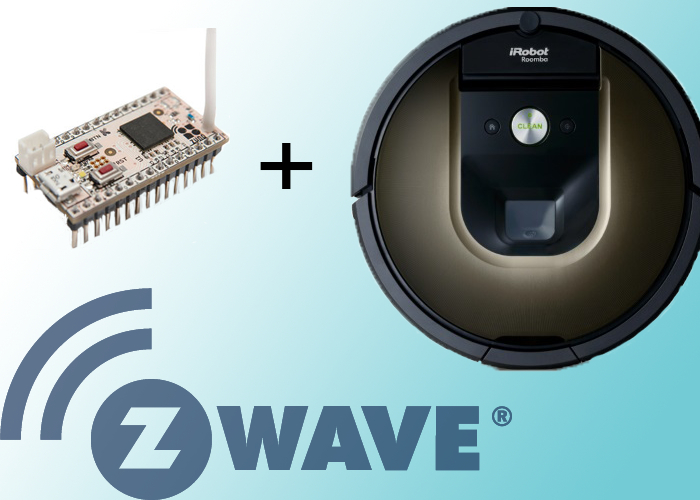
Without extra preludes immediately to the case. The apartment is automated with Z-Wave technology, and the iRobot Roomba 770 vacuum cleaner is not connected to the network in any way and is removed according to its schedule. It's time to add a vacuum cleaner to the Z-Wave network! This will help me Z-Wave board for developers - Z-Uno .
What are the advantages of automating a vacuum cleaner with Z-Wave?
- Ability to conveniently configure the schedule from the Web interface
- Get data from a vacuum cleaner about batteries and sensors
- Manage from mobile app
- Use in scenarios simulating the presence of a person in the house
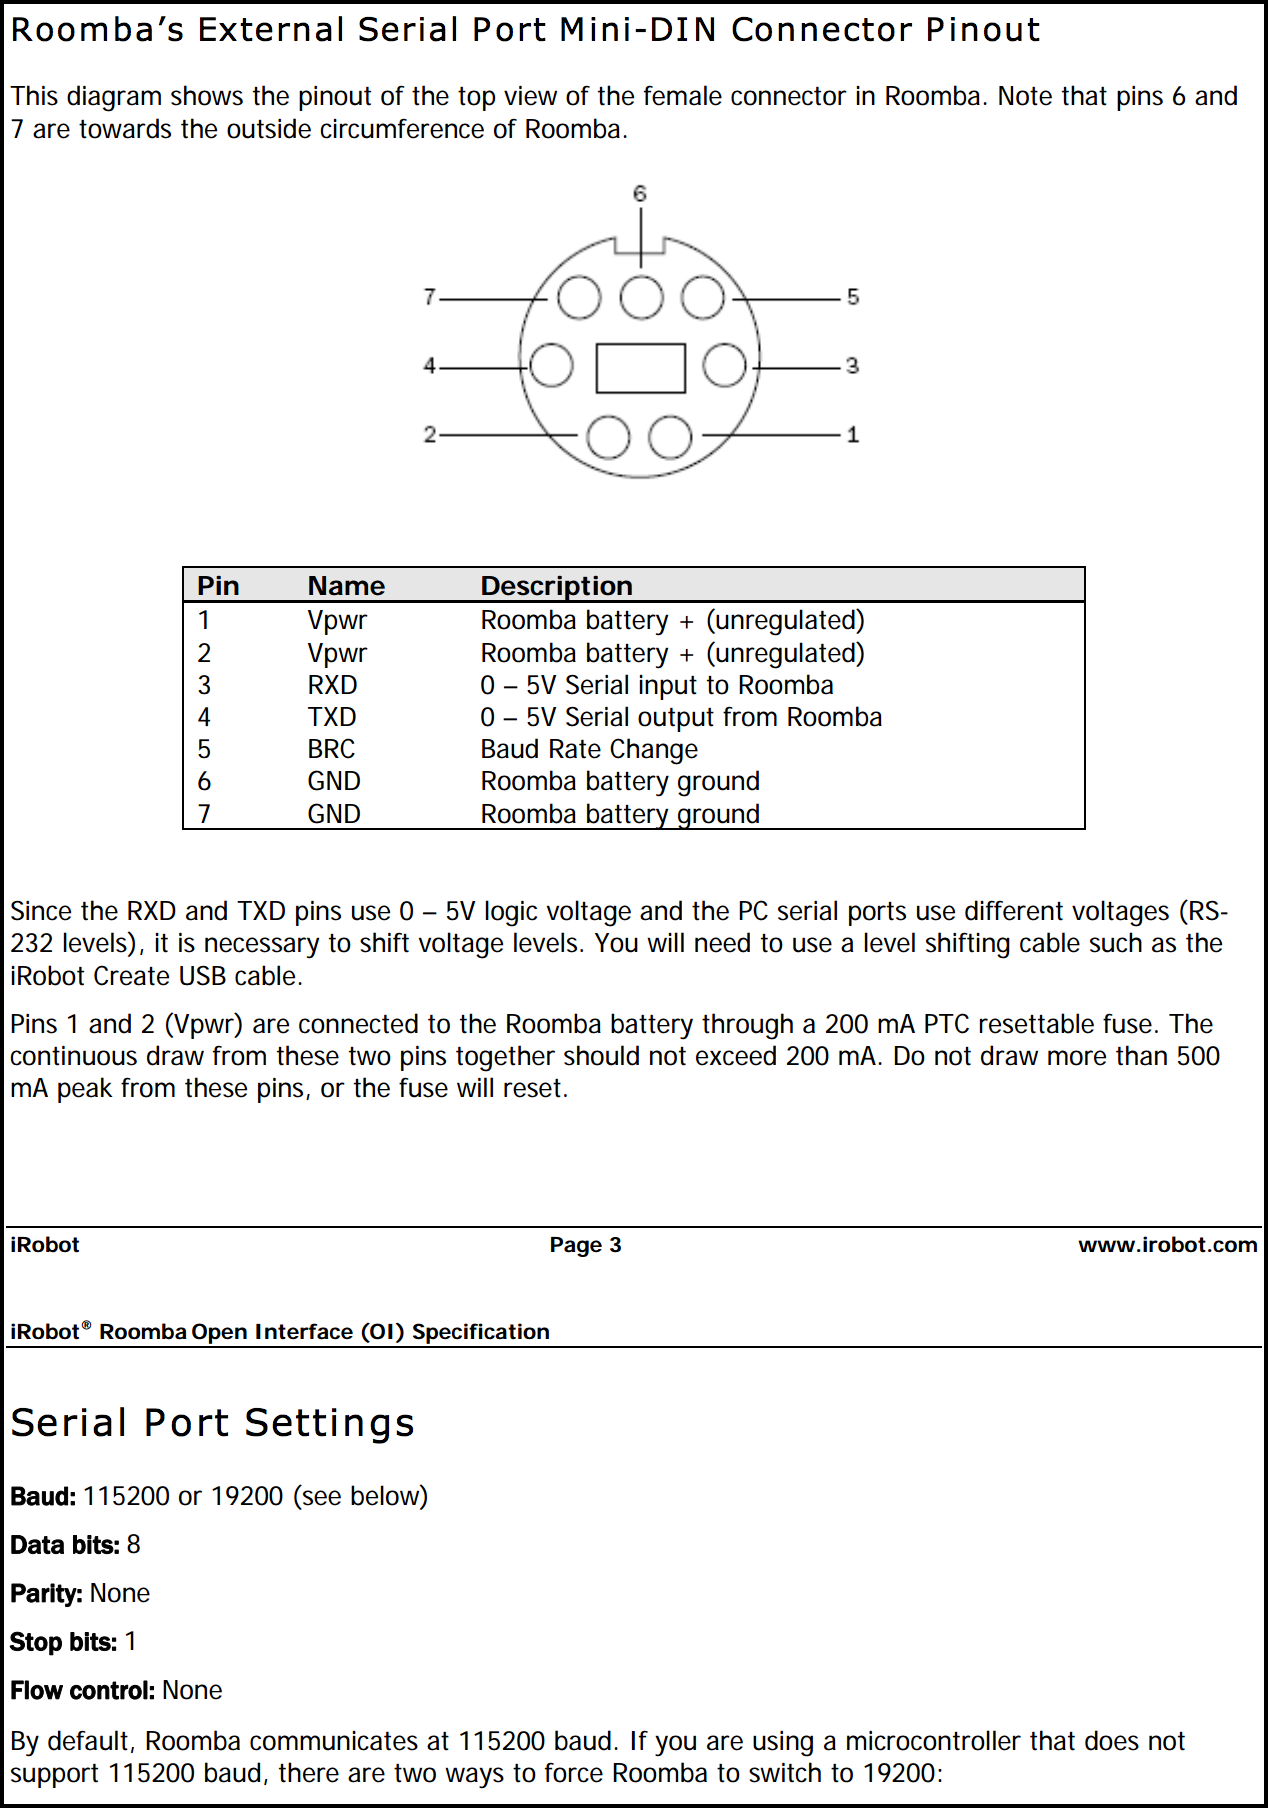
IRobot Roomba management documentation is open. It follows that communication with the vacuum cleaner occurs through the Mini-DIN connector on the UART at a speed of 115200, TTL level 5V.
')
All documentation on Z-UNO is available at http://z-uno.z-wave.me/ , it includes a description of all available functions, examples, schema.

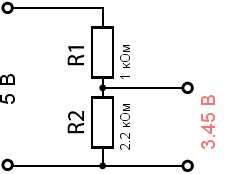
Z-Uno uses a UART with a TTL 3.3V level, so a voltage divider of 1k and 2.2k resistors should be placed on the Rx Z-UNO line.
When connecting Roomba to Arduino, there is a problem that Roomba produces a very small current on Tx, so data can be lost, if there is a similar problem on Z-UNO, then you need to use a transistor together with a voltage divider:
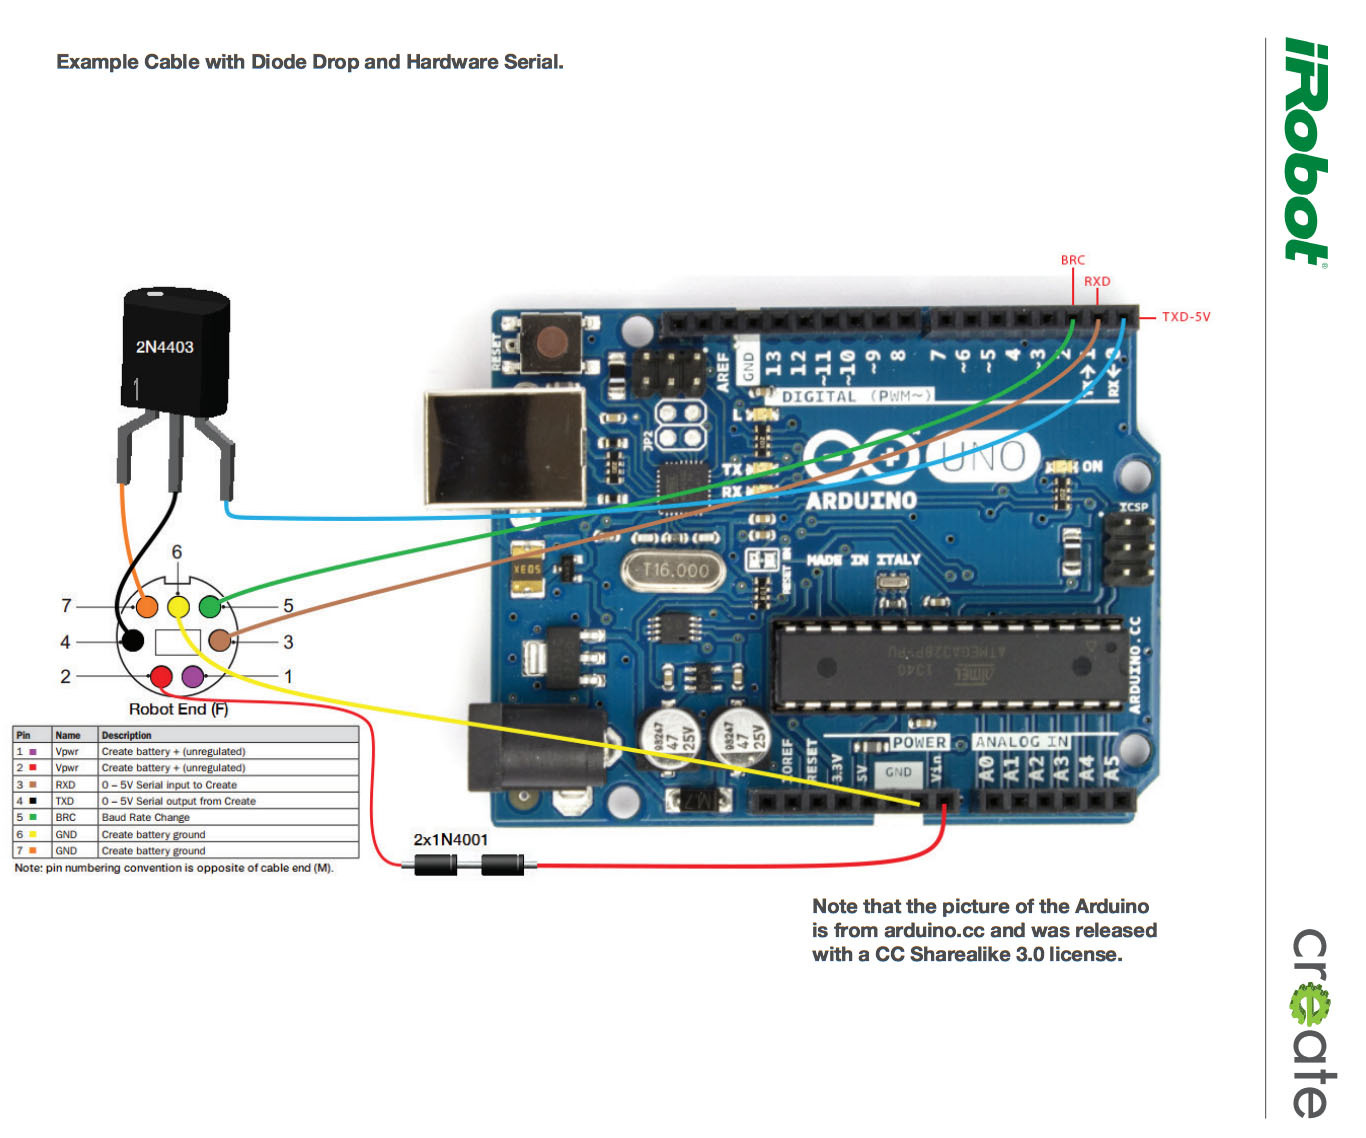
http://www.irobot.com/~/media/MainSite/PDFs/About/STEM/Create/Arduino_Tutorial.pdf
Z-Uno can be powered from 3.3V, from 5V through a regular voltage regulator and from 7-20V through the second regular voltage regulator. During cleaning, the iRobot Roomba's supply voltage is approximately 14V when the vacuum cleaner is at the base, the voltage rises to 20V. If you connect the Z-Uno to iRobot Roomba directly, the linear voltage regulator on the Z-Uno starts to get very hot, which will cause the power to go off by temperature, so you need to use either a radiator or a switching voltage regulator. I chose the second option and use the very compact Chinese voltage regulator MP1584EN .
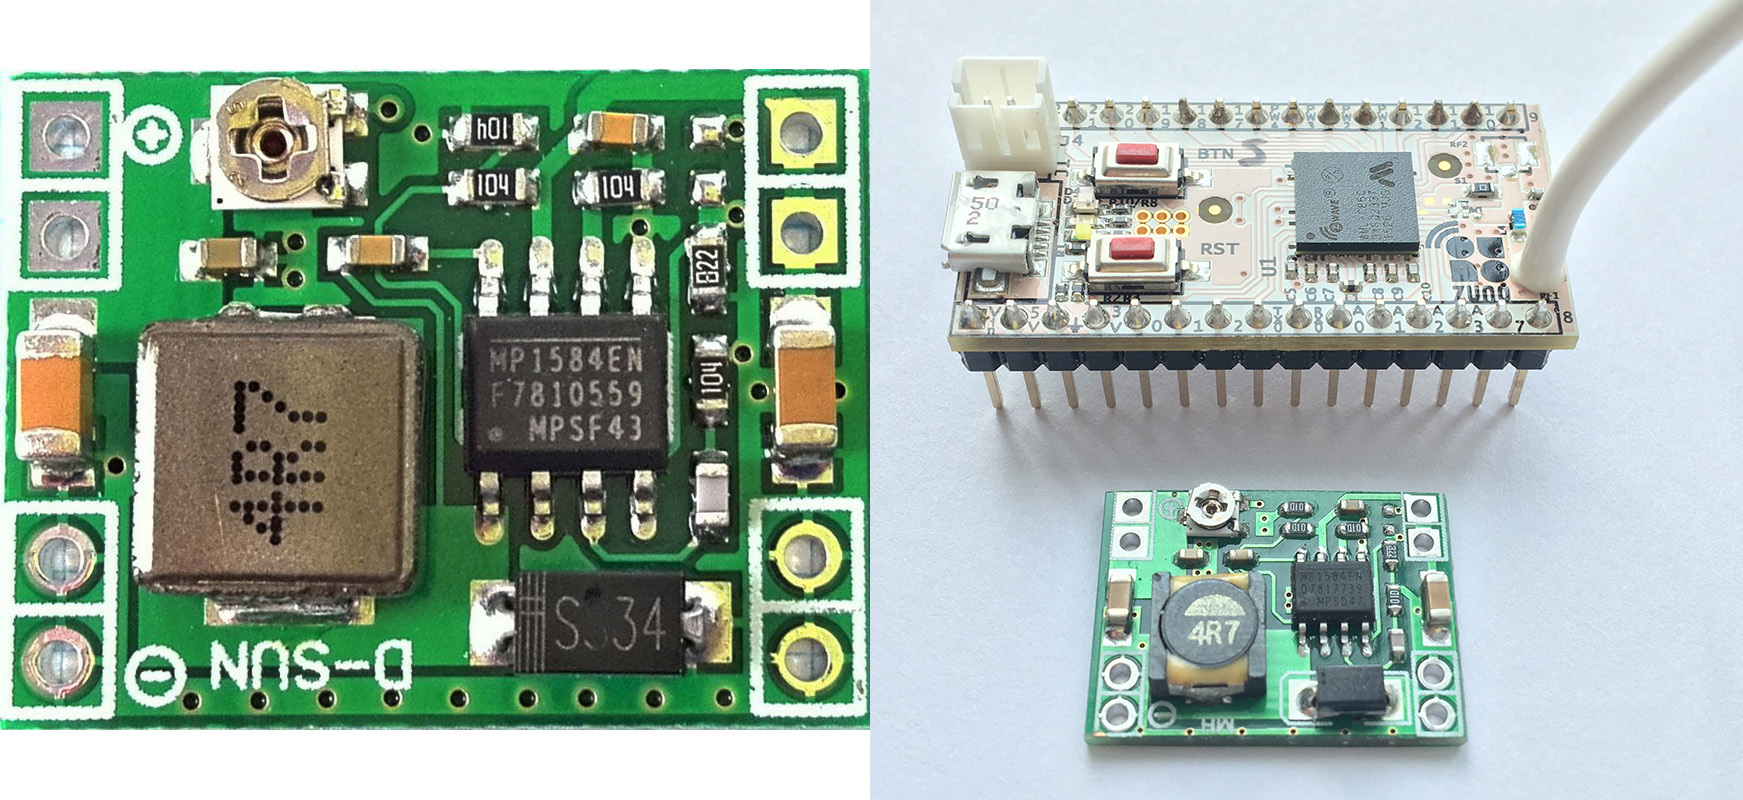
Brief characteristics of the voltage regulator MP1584EN:
- Input voltage: 4.5-28V
- Output voltage: 0.8-20V (adjustable)
- Output Current: 3A
- Efficiency: 96%
Voltage regulator and voltage divider fit on the back side of the Z-UNO, while not increasing the dimensions of the board.

Connecting Z-Uno to iRobot Roomba 770:

Cleaning Dock station
With the Cleaning-Dock sketch, the Z-Uno station on the radio receives ON / OFF commands and sends a Clean (clean) and Seek Dock (Search for a docking station) commands to the UART vacuum cleaner. When receiving a radio command, Z-Uno flashes once with the built-in LED. The radio command On / Off can send any Z-Wave device: keychain, switch, controller, etc.
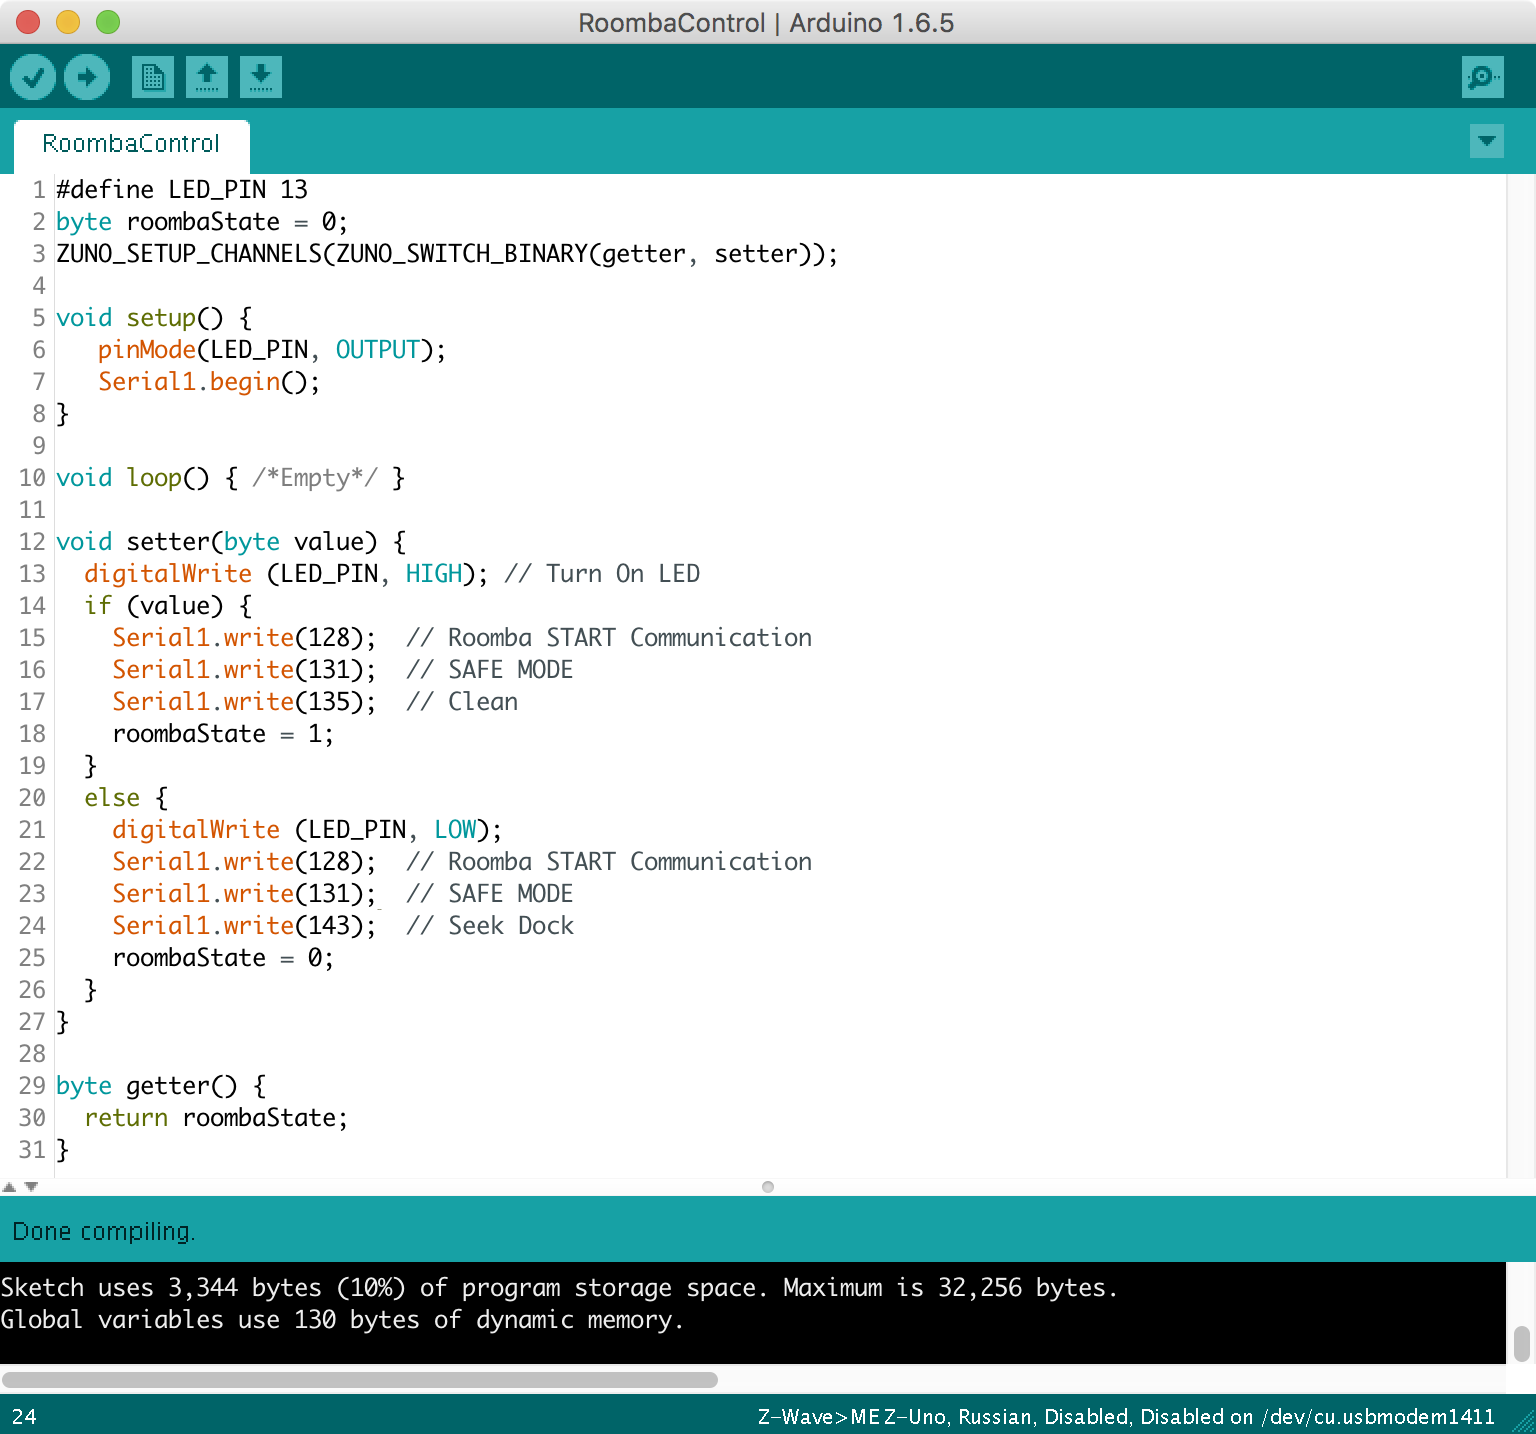
Sketch Cleaning-Dock Station for Z-Uno for Vacuum Cleaner Roomba
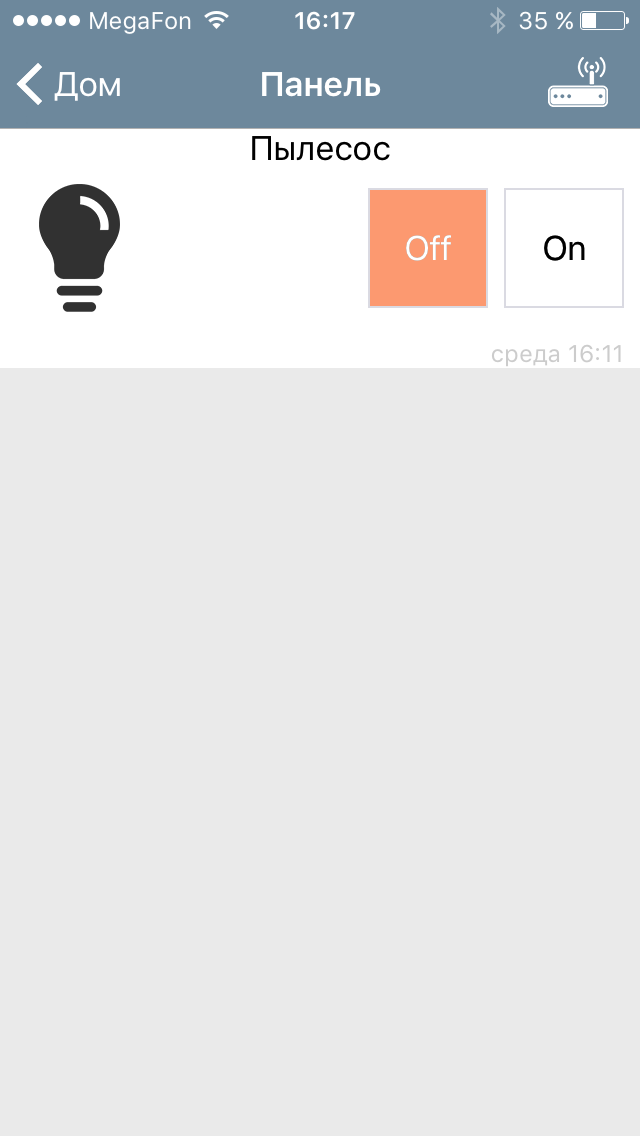
#define LED_PIN 13 byte roombaState = 0; ZUNO_SETUP_CHANNELS(ZUNO_SWITCH_BINARY(getter, setter)); void setup() { pinMode(LED_PIN, OUTPUT); Serial1.begin(); } void loop() { /*Empty*/ } void setter(byte value) { digitalWrite (LED_PIN, HIGH); // Turn On LED if (value) { Serial1.write(128); // Roomba START Communication Serial1.write(131); // SAFE MODE Serial1.write(135); // Clean roombaState = 1; } else { digitalWrite (LED_PIN, LOW); Serial1.write(128); // Roomba START Communication Serial1.write(131); // SAFE MODE Serial1.write(143); // Seek Dock roombaState = 0; } } byte getter() { return roombaState; } After casting the sketch, you need to add the Z-Uno to the Z-Wave controller. Z-Uno is displayed as a switch with On and Off buttons.
Read battery charge
Add to the function enable / disable the vacuum cleaner function to read the battery charge. With a sketch Reading the battery charge of the Z-Uno periodically or on request sends the battery charge of the Roomba vacuum cleaner to the Z-Wave controller.
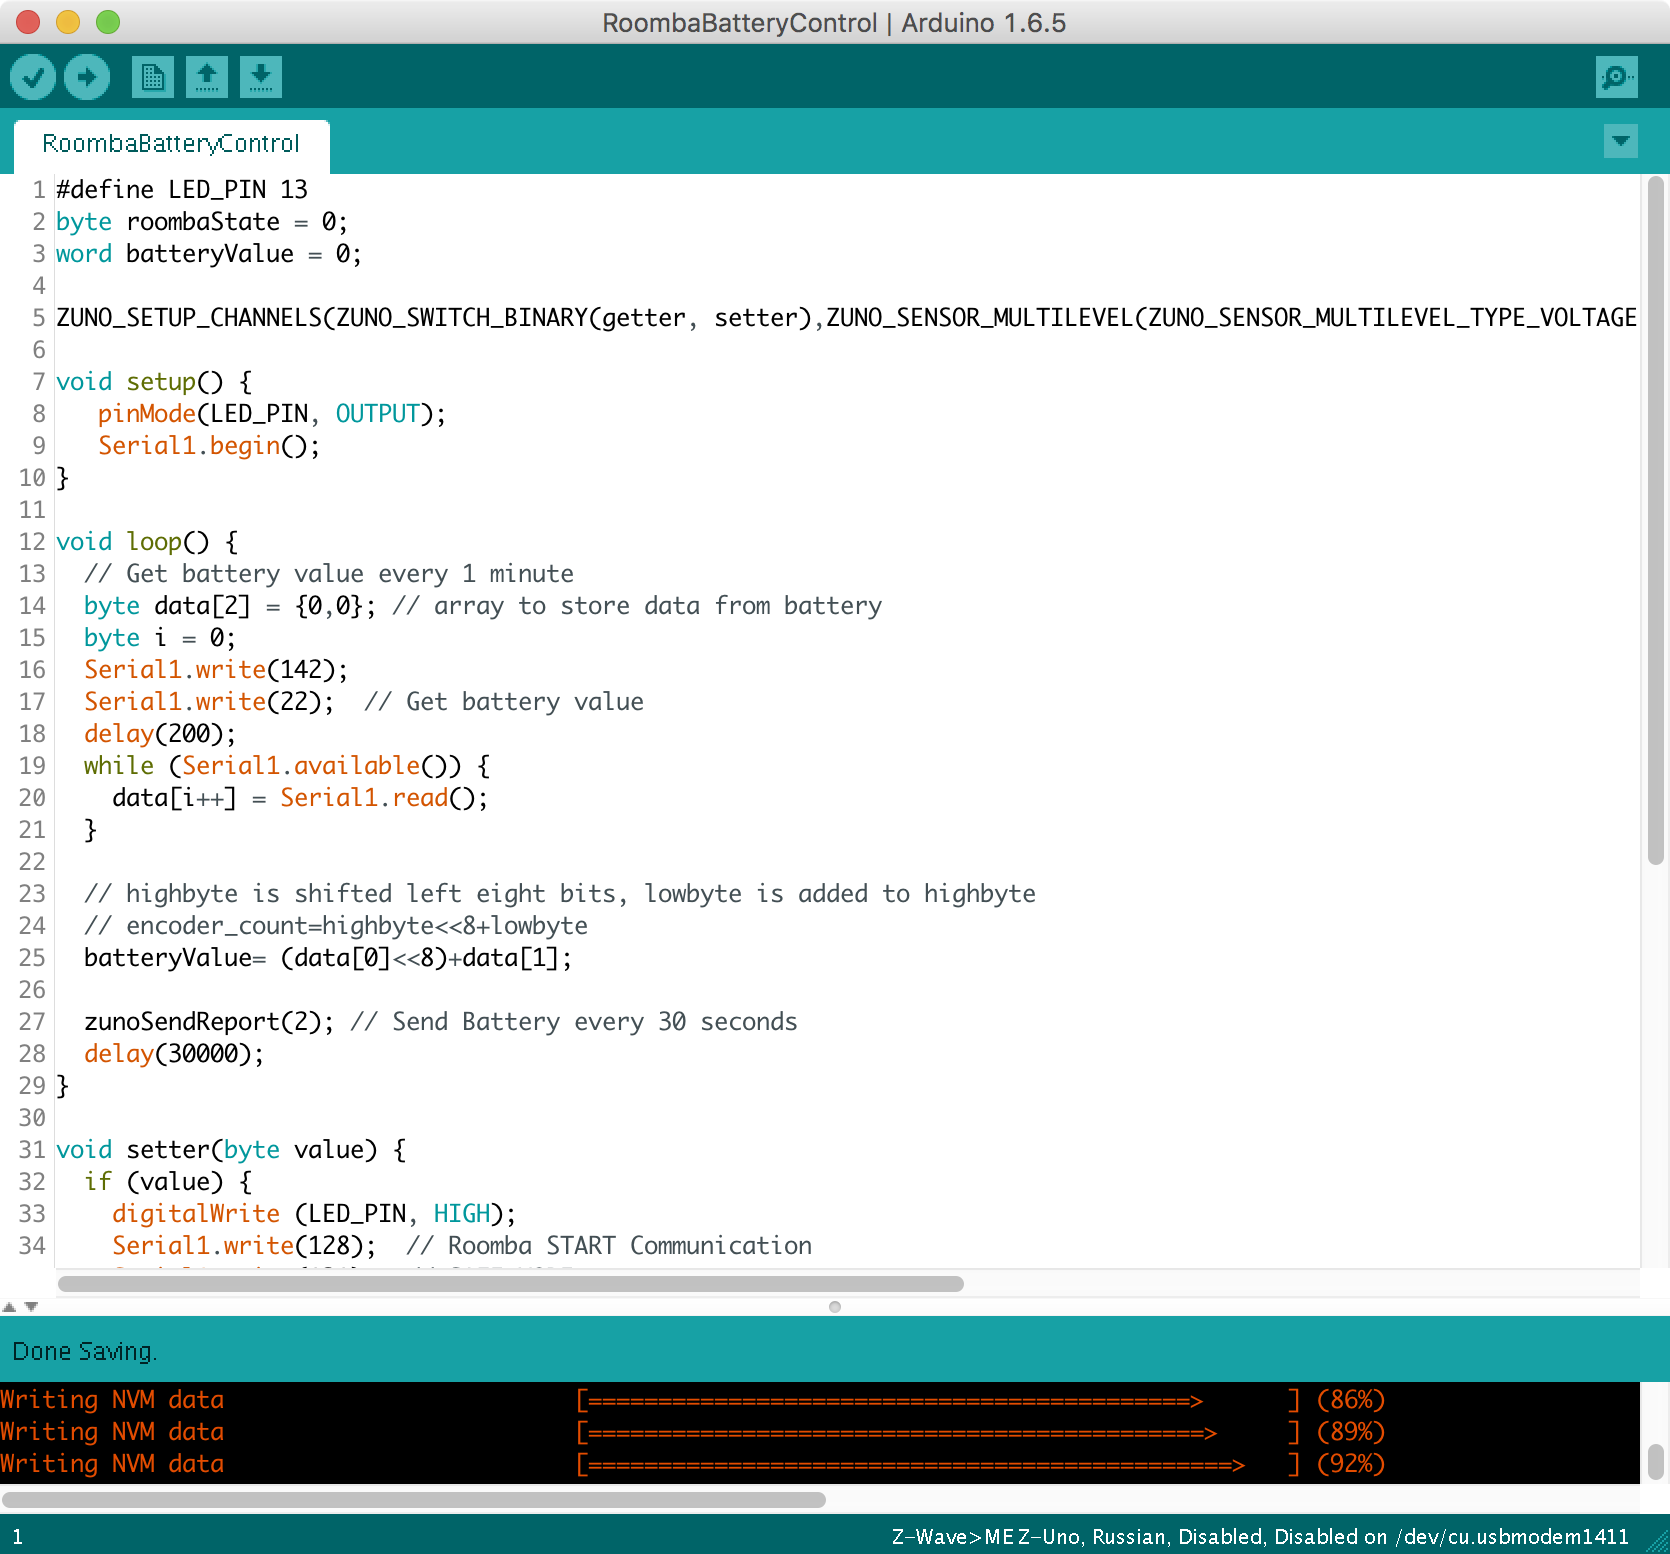
Sketch Battery Vacuum Cleaner Roomba and Cleaning-Docking Station for Z-Uno
#define LED_PIN 13 byte roombaState = 0; word batteryValue = 0; ZUNO_SETUP_CHANNELS(ZUNO_SWITCH_BINARY(getter, setter),ZUNO_SENSOR_MULTILEVEL(ZUNO_SENSOR_MULTILEVEL_TYPE_VOLTAGE, SENSOR_MULTILEVEL_SCALE_VOLT, SENSOR_MULTILEVEL_SIZE_ONE_BYTE, 1, getterBattery)); void setup() { pinMode(LED_PIN, OUTPUT); Serial1.begin(); } void loop() { // Get battery value every 1 minute byte data[2] = {0,0}; // array to store data from battery byte i = 0; Serial1.write(142); // Send a packet of sensor data bytes Serial1.write(22); // Get battery value delay(200); while (Serial1.available()) { data[i++] = Serial1.read(); } // highbyte is shifted left eight bits, lowbyte is added to highbyte // encoder_count=highbyte<<8+lowbyte batteryValue= (data[0]<<8)+data[1]; zunoSendReport(2); // Send Battery every 30 seconds delay(30000); } void setter(byte value) { if (value) { digitalWrite (LED_PIN, HIGH); Serial1.write(128); // Roomba START Communication Serial1.write(131); // SAFE MODE Serial1.write(135); // Clean roombaState = 1; } else { digitalWrite (LED_PIN, LOW); Serial1.write(128); // Roomba START Communication Serial1.write(131); // SAFE MODE Serial1.write(135); // Stop Clean roombaState = 0; } } byte getter() { return roombaState; } byte getterBattery() { return batteryValue; } Now Z-Uno is displayed as a 2-channel device with the functions of a switch and a multi-level sensor, i.e. On / Off and charge in volts buttons are displayed.

If necessary, you can add direct control, realize the reading of the temperature sensor, a report on the meeting with the wall and an alert when it is impossible to drive. You can add a function that would allow Roomba to get stuck under the sofa by sending him a command to play a melody.
Z-Uno is certainly not the only Roomba radio control option, there is RooWiFi and many projects like Arduino + ESP8266, but if you already have a Z-Wave network, then why not use Z-Uno to control your Roomba vacuum cleaner!
For those who want to save money, 5smart.ru shop gives a 10% discount on Z-Uno and on all Z-Wave equipment. Coupon GT_SUMMER .
Source: https://habr.com/ru/post/395105/
All Articles