Arduino and video? Easy
It is known that a weak arduino microcontroller is not able to pass through a video stream.
And if you approach this task from another side?
... and stretch the process of shooting in time.
Heh, many have already guessed themselves, this technique of shooting is called timelapse (slow motion-by-frame shooting). That is, this is not a video shooting, but a photographing, as a result of which a video is created.
I admit, initially I did not plan to do slow motion. I just wanted to make the registration of events, including with photos, for my arduin. Well, then off we go. If my reader is not engaged in development, then you can just see the result (go from under Chrome).
')
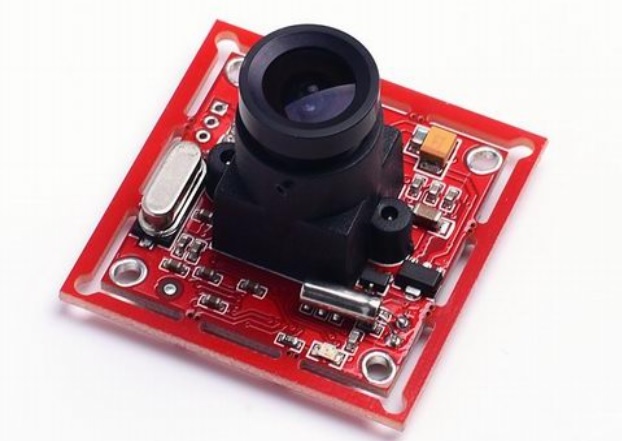
What does my system consist of:
- Arduino Mega board;
- JPEG camera module;
- MongoDB utility and database;
- WEB server for placing HTML files;
When arduin sends its data to the server, then each parameter is assigned its own time stamp.
Sent the parameter - an entry was added to the repository, another two times sent - two more entries remained.
All work with the storage is carried out through a utility program (hereinafter referred to as an intermediary), which runs on a stationary computer. At the same time, the WEB server itself gives only static content. That is, all clients exchange information through the service program of the intermediary, similar to the popular MQTT protocol. The main difference from MQTT will be that this broker directly works with the data warehouse, providing work with historical data. This fact simplifies the interaction scheme, and does not require additional network traffic for storing data.
For the convenience of developing my web applications, I created a javascript library with the following API:
This is how a client is created to work with network storage:
var client = new MgtClient("localhost", "login", "password", onDebugLog); Function Arguments:
- the network address on which the broker program is running, you can simply specify the IP, for example, “127.0.0.1”;
- username;
- user password;
- callback function for debug string messages;
The callback function for debugging messages might look like this:
function onDebugLog(aStr) { // console.log((new Date()).getTimeString() + ' ' + aStr + '\n'); } Isn't it difficult yet? It will be more difficult.
The structure of the request to the repository:
var request = { name: " 1", // placeId: 1, // beginTime: 1458108472000, // 1 1970 endTime: 1458194872000, // 1 1970 ( ) limit: 10000 // , ( ) }; Still not confused?
Then here is the structure of the response to the request:
var result = { times: [], // ( 1 1970 ) values: [], // position: 20, // ( ) status: "progress", // ("progress", "abort", "done", "fail") progress: 91 // ( ) }; Yeah, already complicated?
Status field "status":
- “Done” - got everything requested (either data was received for the entire time range, or the limit on the number of records worked);
- “Progress” - indicates that this is not the last piece of data, the download process is not over yet;
- “Abort” - data download was interrupted (the limitation on the total amount of data pumped out worked), you can immediately create a new request for receiving the missing data;
- "Fail" - something went wrong (maybe there is no current in the outlet?)
Do you think this is all? Unfortunately not.
The requested parameters can be of different types.
- If the parameter is numeric, then numbers will appear in the array of values.
- If string, then in the array of values there will be strings.
- If boolean, then in the array of values will be "true" or "false".
- If binary (for example a JPEG image), then in the array of values there will be arrays of bytes.
- If this event, then return arrays formed in a special way.
Example of one event record:
var event = [ " ", // "", // 1 27.5, // 1 "", // 2 true, // 2 ... "", // 1458108472000 // !!! , // . ]; That is, each event record can contain an arbitrary set of parameters. Such a grouping is very convenient for analyzing the overall picture.
Whew, the hard part is over.
And this is how sending the request itself looks like:
// aRequest - // onReadArchive - / client.readArchive(aRequest, onReadArchive); Feedback function for receiving answers:
// aResult - onReadArchive(aResult) { // TODO // "false", ( ) // "true", ( ) return false; } Finally, we come to the very installation of the video.
To create a video, I used the Whammy javascript library, more info here.
The function that creates the video:
<script src="whammy.js"></script> <canvas id="canvas" style="display:none"></canvas> <video id="player" controls autoplay loop></video> function createVideo() { var canvas = document.getElementById("canvas"); var context = canvas.getContext("2d"); canvas.width = '640'; // canvas.height = '480'; // var framerate = 10; // var quality = 0.8; // var video = new Whammy.Video(framerate, quality); // WebM for (var i = 0; i < images.length; i++) { // var image = images[i]; context.globalAlpha = 1; context.drawImage(image, 0, 0, 640, 480); // video.add(context); // } var output = video.compile(); // var url = URL.createObjectURL(output); // document.getElementById('player').src = url; // } Unfortunately, you can not create a video in all browsers. For example, my favorite Firefox does not know how to convert images into WebP format, on the basis of which the conversion into video takes place. And although I found a javascript library for such a conversion, but it converted so slowly (there were so many frames) that I refused to use it. However, in all browsers with the “chrome” engine, this thing will work.
Here you can see what I did.
Without having solid documentation, I can offer my previous articles.
Article 1
Article 2
Well, that's it, and I have nothing more to say.
Source: https://habr.com/ru/post/391773/
All Articles