Moon under the microscope
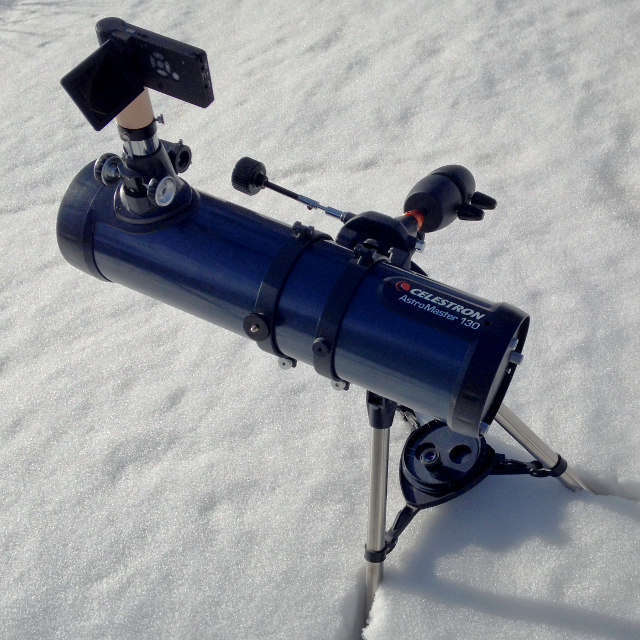
 On the left, you see a photograph of the Moon taken with a DigiMicro Mobile digital microscope. This is a snapshot of the real Moon, not a retaken film or slide. I used a rather unusual solution - I connected a microscope to a telescope. About how and why I did it, described in detail in the article Microscope + Telescope =? .
If you have not read that article, I recommend viewing it at least diagonally to understand what is happening under the cut. In it, I talked about the principles of operation of a telescope, a microscope and the theoretical possibility of combining their optical schemes. Described the manufacture of the adapter telescope-microscope using 3D printing. The first test of the construction was carried out in the afternoon, on remote ground objects. Go to the astronomical observations failed due to adverse weather conditions. Judging by the results of the survey, the idea of many interested (406 votes for the continuation, 92 against), so I publish the continuation with the real Moon under the lens of the microscope.
Consider this an entertaining experiment with optics and photographic equipment, like macro photography through a water droplet , and not a serious guide to astrophotography. For high-quality shooting of the Moon through a telescope, it is better to use a special astrocamera or a DSLR with a T-adapter in direct focus.
On the process of shooting a microscope
Before you start shooting the moon, I’ll tell you in more detail about some important points not mentioned in the previous article. Between pressing the trigger and the actual shooting takes about 0.3-0.4 seconds (found, removing the running stopwatch), which allows you to avoid the "shag" when using a microscope for its intended purpose. When shooting in conjunction with a telescope, such a delay is not enough. My budget mount CG3 trembles like an aspen leaf at the slightest touch, vibrations diminish for a few seconds, even if you don’t spread your legs to their full length.
')
At first I had a thought to solder the reed switch parallel to the shutter button and remove the magnet, but then I discovered in the microscope settings the “Time Lapse” mode.
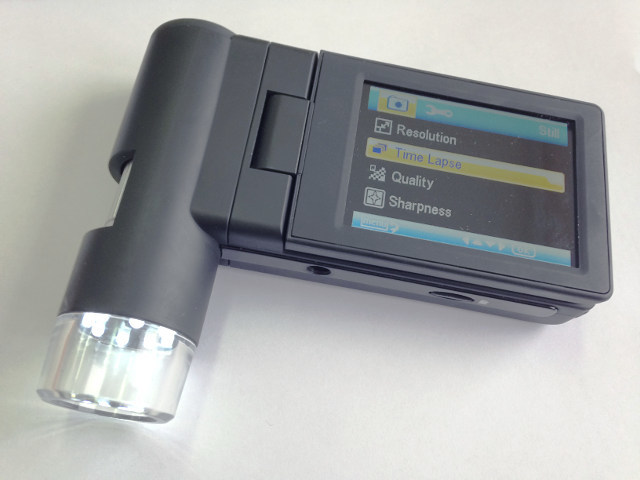
No, in this mode, the microscope does not record accelerated video, it simply automatically takes a specified number of frames at a specified interval (from a second or more). Video must then be collected from individual frames on the computer. I tried this mode taking pictures of the crystallization of salt from the solution at a speed of 1 frame per minute. The crystals grow slowly at the bottom of the plate with a solution, the increase is minimal, the size of the largest cubes is slightly less than a millimeter.
Another experiment - with soda. Unlike cubic crystals of sodium chloride, sodium bicarbonate settles with beautiful needle-like snowflakes. Here I take off a small drying drop, which is why the crystals grow much faster and turn out very small. Therefore, the maximum increase, shooting speed - 1 frame per second.
The “Time Lapse” mode was very useful when working with a telescope to avoid shaking when shooting. I started a serial shooting with a second interval, and in the meantime I was aiming at the object, changing the magnification, adjusting the focus, periodically removing my hands from the telescope with a microscope in order to preserve non-smeared frames.
Shooting a young moon with a bundle microscope + telescope
A few days after the new moon (which, by the way, was accompanied by a total solar eclipse ), the weather was finally clear. The phase of the moon was approaching the first quarter, which meant favorable observation conditions in the evening. I connected the microscope to the telescope and waited for the darkness.
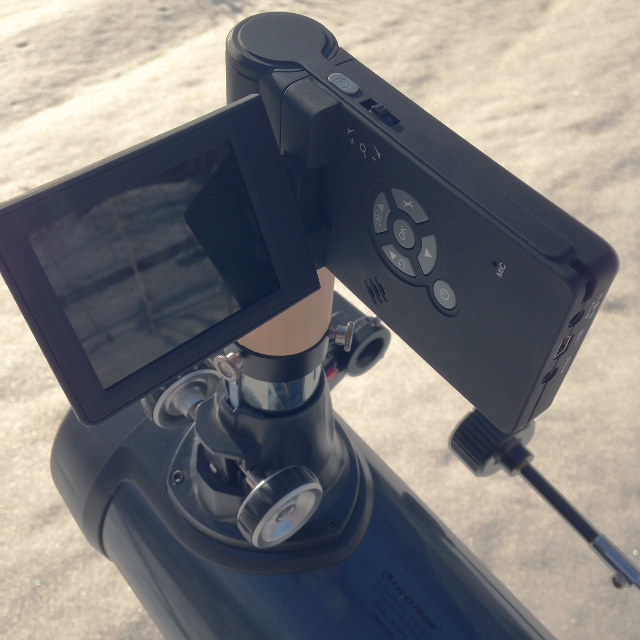
There was one more reason for concern. The fact is that in the microscope chamber there is no possibility of manual adjustment of the exposure. For a microscope, it does not matter, as there is an adjustable backlight. In the case of the moon, the backlight is useless. The logic of the “automaton” will focus on the average brightness of the frame and try to draw out the non-existent details of the black background. As a result, the surface of the moon will be hopelessly overexposed. Therefore, I decided not to wait until complete darkness, but began to shoot shortly after sunset. I was counting on the fact that the light background of the sky, which usually interferes with daytime observations , will play into my hands. Here is one of the first test shots:
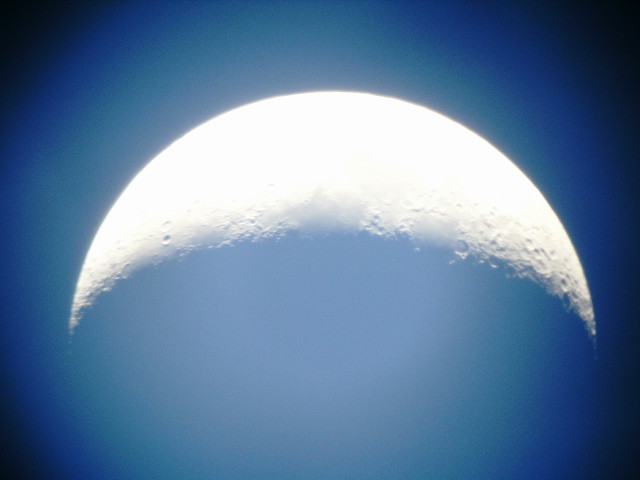
As it turned out, it was necessary to start shooting even earlier, the sky is no longer light enough. When it got dark even stronger and the background of the sky in the frames became almost black, there were even fewer details on the Moon, everything was lit.
And then I remembered the adjustable backlight. Of course, it will not help make the sky brighter. But I can put in the field of view something that will be illuminated by the backlight! This will affect the average brightness of the frame, which in turn will lead to a decrease in shutter speed "automatic". From a piece of foil for baking and a strip of masking tape, I quickly built just such a diaphragm.
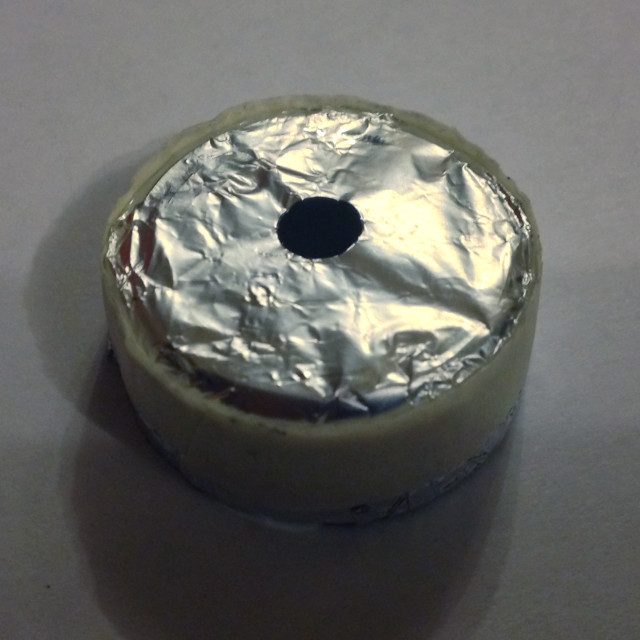
The hole in the center is punched by a stationery hole punch. Insert the product inside the adapter, so that the surface of the foil is in the focal plane of the telescope:
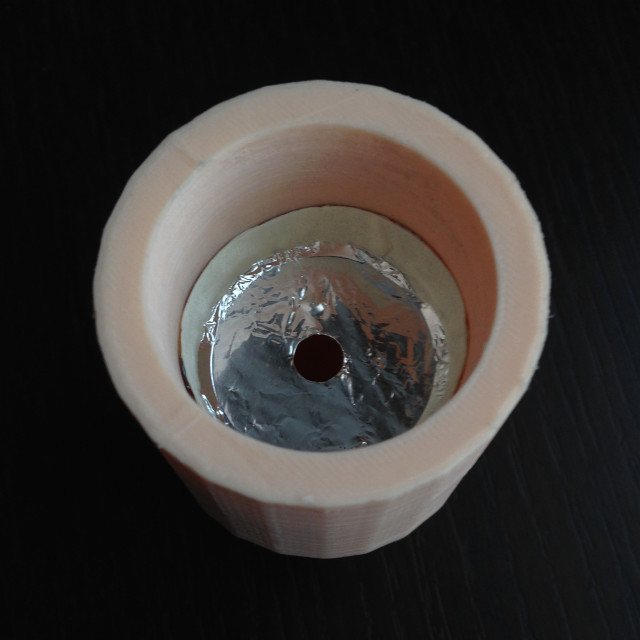
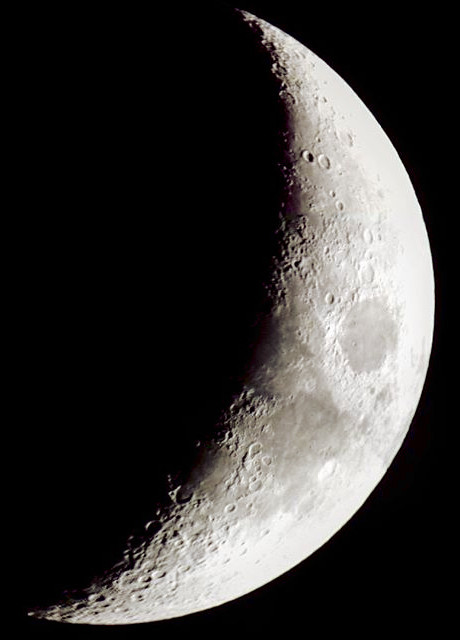
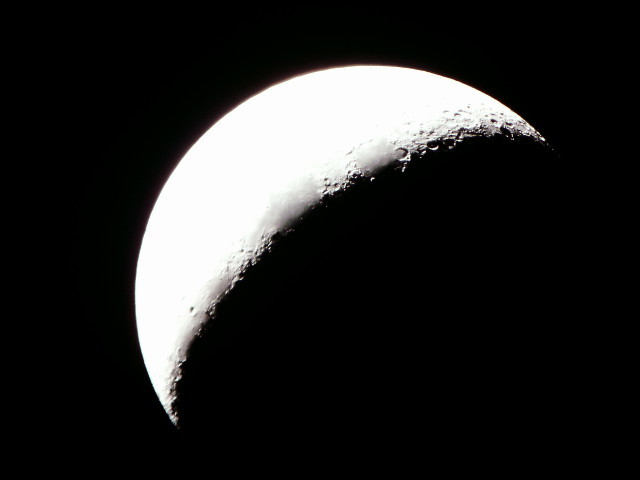
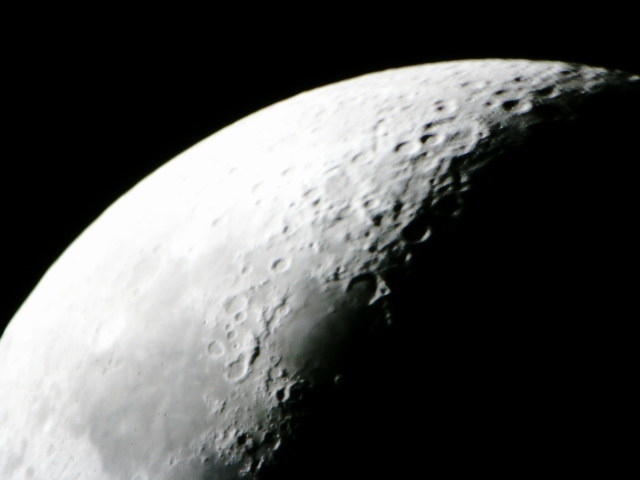
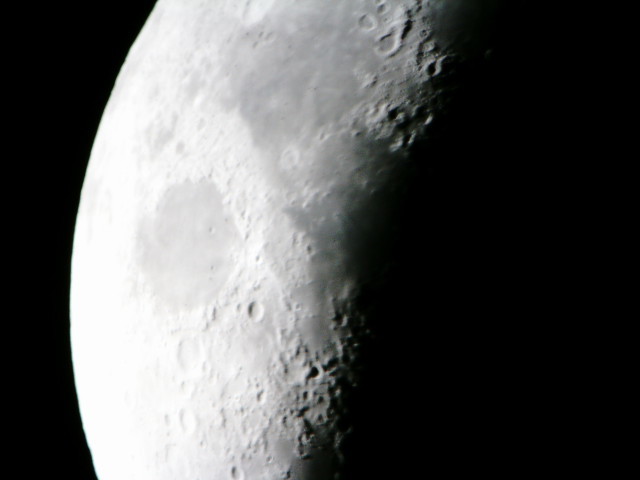
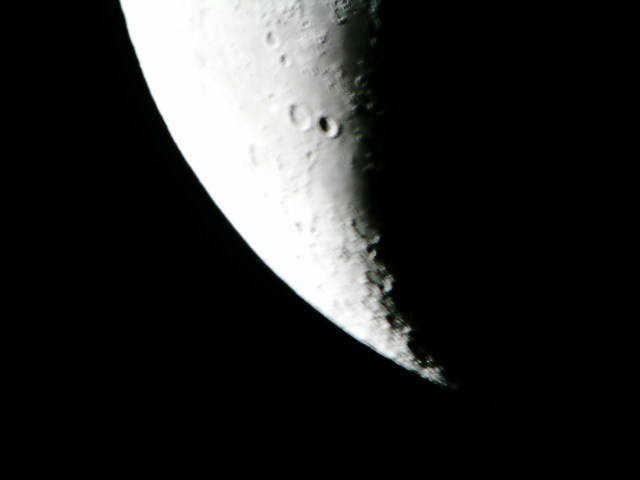
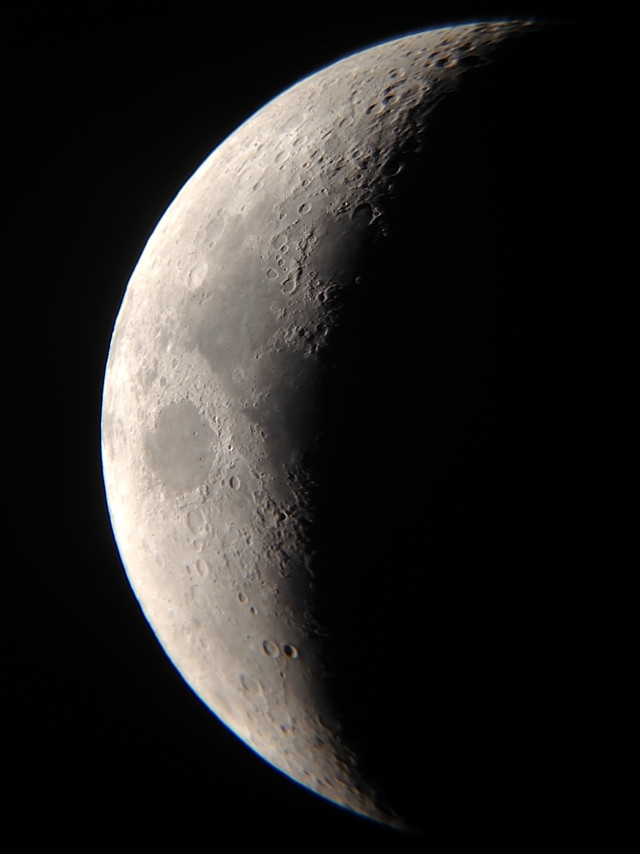
Putting it all back. Now you can adjust the shutter speed by the backlight brightness wheel, sacrificing a part of the useful area of the frame. It was a funny snapshot. Under the lens of the microscope - a piece of aluminum foil with a hole with a diameter of about 6 mm. In this hole, “suspended in the air,” an image of the Moon almost three and a half thousand kilometers wide, formed by a telescope mirror. And all in focus! Well, not quite everything, the foil is a bit crumpled :-)

The moon still didn’t crawl into the hole from the hole punch. I decided not to bother with fitting the hole, but to try to shoot more with the increase. In this case, the Moon will no longer fit into the frame, but the black sky area will decrease, and the correct exposure will be obtained without additional tweaks.

The only problem is that you have to glue the panorama to get a snapshot of the whole Moon. The title picture of the article is glued together from these three frames, and turned in such a way that the north is on top:
It's bad that the microscope has no autofocus. In order not to miss the focus, you can make the mask Bakhtinov .
What is the increase?
The question is interesting, but not entirely correct. When we talk about increasing the optical telescope or microscope during visual observations, we compare the angle at which the object is seen with an armed and naked eye. For example, my telescope with a focal length of a mirror of 650 mm gives an increase of 65 times when using a 10 mm eyepiece. If the light receiver is a matrix, then how to compare dimensions? Angle magnification will depend on the display device and viewing distance.
You can approach the question from the other side and compare the dimensions of the details of the surface of the moon — visible with the naked eye (or through an optical device with a known magnification), and distinguishable in my pictures. The most characteristic details of the lunar terrain are craters. True, they are not visible to the naked eye (at least mine). They were not known at all before Galileo Galilei discovered them with the help of his first telescope with a threefold magnification (and he coined the term crater). Craters on the visible side of the moon, which Galileo observed and sketched, have diameters of 100–200 kilometers:

In the photographs of the moon, under a microscope, craters up to 10–20 km in diameter are visible (for example, Swift and Pierce ).
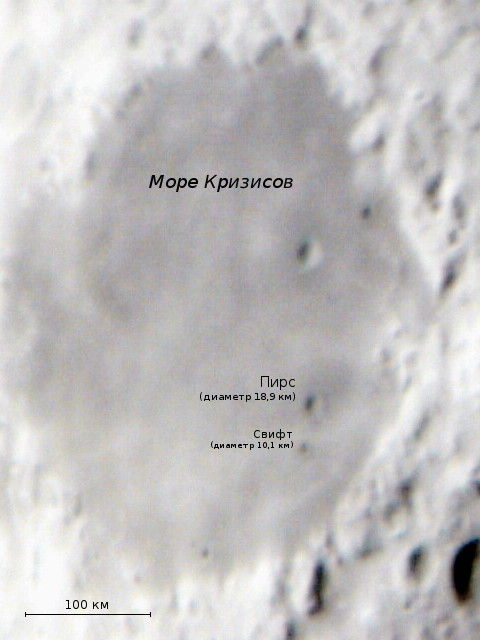
It turns out that in my photos details are seen 10 times smaller than Galileo saw in his triple tube. Therefore, the increase can be roughly estimated as thirtyfold. With visual observations with a 65x magnification through the same telescope, much more detail can be seen, which is consistent with the obtained estimate.
It would seem nothing outstanding, the result is just an order of magnitude better than that of Galileo. But, as the galaxy in the next post suggests , the details of the surface smaller than 1 kilometer cannot be seen in any ground-based telescope due to the influence of the atmosphere. So the result is in some sense the most average - 10 times better than the first telescope of the 17th century, and 10 times worse than the theoretical limit of modern telescopes.
What about stacking?
In the previous article I promised to touch on this topic, but all the above frames are single. Fans of astronomy when shooting celestial objects in most cases use the technique of stacking - they shoot a series of multiple frames (or video), and then combine them into one. This allows you to get rid of the matrix noise, atmospheric distortion, and significantly improve the quality of the result. With a microscope, this trick did not work - my telescope does not have a motor to track the moon, it runs away from the frame too quickly. When shooting with a second interval, the Moon has time to move strongly between frames and there is a problem with the alignment of the series. But it works when shooting an iPhone through the eyepiece ( I shot an eclipse like that ). Instead of burst shooting, you can record HD video at 30 frames per second, the Moon shifts slightly between frames and Registax does a great job with alignment. In addition, the phone has autofocus that corrects focusing errors.
The original video (I did it all the same, I shot and published a vertical video from an iPhone) :
After stacking:
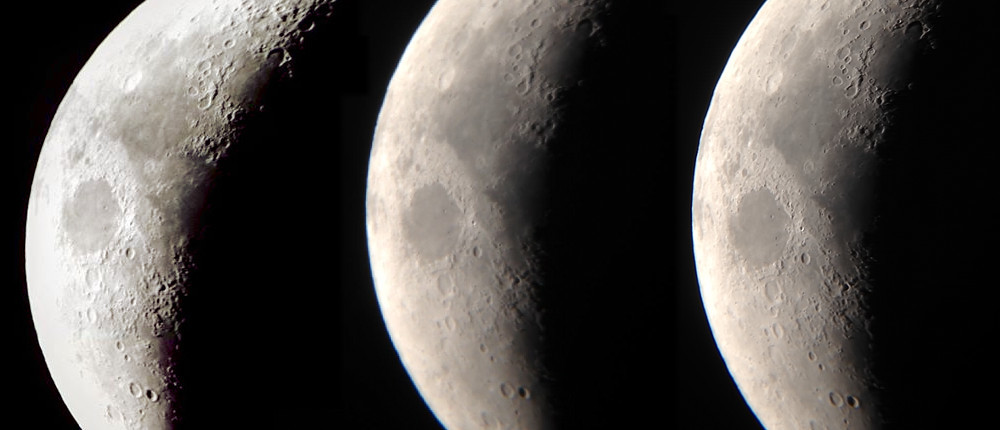
For comparison, I placed next to a frame from a microscope, a single frame from an iPhone and the result of stacking 100 frames from an iPhone.
Technical details
All the pictures of the moon under a microscope are clickable, you can look at them larger. Note that Habrastorage automatically reduces all uploaded images to 1920 pixels in width. Raw originals of images from a microscope with a resolution of 2560x1920 and video from a 1080x1920 phone can be downloaded here: https://goo.gl/Q5czXj ; Surely someone from the readers will get better processing results. The resolution of the images is close to the withered 5 megapixels and apparently corresponds to the native resolution of the microscope matrix. In the settings there are more options, but it will be upscaling. Digital zoom is not used anywhere.
If someone is interested in filling the microscope, here is a photo of the board on both sides.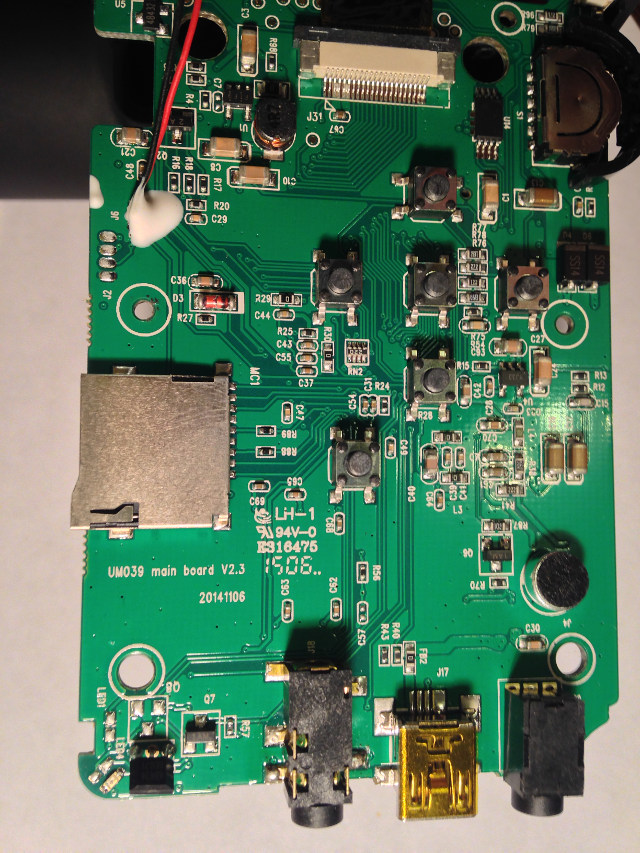
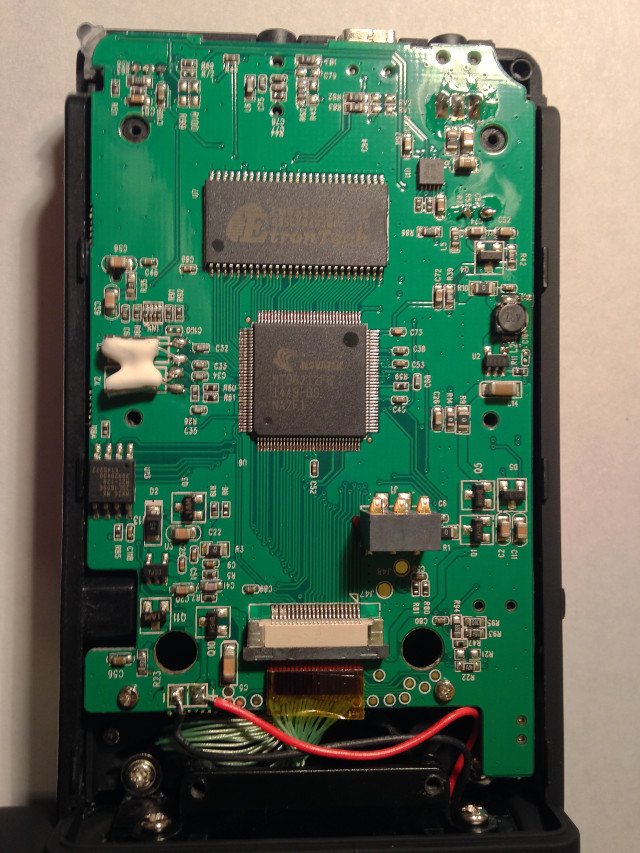
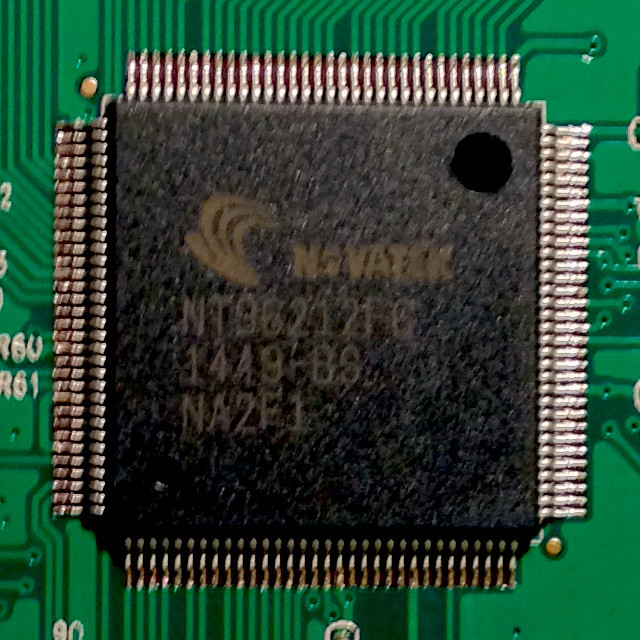
By marking on the board, you can google the Chinese relatives of this gadget.
By marking on the board, you can google the Chinese relatives of this gadget.
Conclusion
As a result of the described optical experiments, the microscope did not suffer at all and can continue to be used for its intended purpose. You can purchase the same microscope in the online store Dadzhet .
Spoiler for those who expected under the heading of this article to see lunar minerals.
I took these pictures at the K.E. State Museum of Cosmonautics. Tsiolkovsky . To see particles of a real moon at a distance of several centimeters, even if through a glass of a display case, is an unforgettable feeling.
I took these pictures at the K.E. State Museum of Cosmonautics. Tsiolkovsky . To see particles of a real moon at a distance of several centimeters, even if through a glass of a display case, is an unforgettable feeling.
My other articles with the tag " abnormal astronomy ":
Source: https://habr.com/ru/post/390655/
All Articles