Mouse Upgrade - Add Wheel Tilts, Replace Electronics
I had a lot of mice in my hands, but the most comfortable cases for me are only two - “Oklick Hunter” and “DeathAdder”.
“DeathAdder” appeared in me, back in 2006. He served me faithfully for several years, then there were different mice, in recent years he used the “Hunter”, or rather the W-mouse in the “Hunter” package, and the DeathAdder was gathering dust in the box.
For me, the main drawback of the DeathAdder is the small amount of extra buttons and the lack of wheel bending. On the slopes of the wheel, when working in windows, I have been assigned Copy / paste. It is very convenient. In the game, the tilt of the wheel to the right, I use as a target detection, i.e. forefinger constantly “tremolite” wheel to the right. I am very used to this and I don’t think for myself without a wheel inclination.
Therefore, the idea to remake the wheel in DeathAdder did not give me rest. Several times he took it apart, tried it on and collected it back. the idea seemed unreal ...
But as they say, the eyes are afraid, and the hands are doing - about six months ago, I began to think more actively about the options and still decided to rework ...
Caution traffic! many photos
The action plan, given the big doubts about the successful reworking of the wheel, drew this:
1. Alteration of the wheel.
2. Adding additional buttons.
3. Replacing electronics - creating a W-mouse.
4. Refining the case.
In most mice with tilts of the wheel, the construction with the wheel suspension in the “crib” is used - at the same time pressing the tilt buttons with the levers on the crib, and the button “pressing the wheel” aka the third mouse button (3KM) will be pressed by one of the axes of the crib.
For a “crib” I spent quite a long time going over different options - either to make it from separate “panels”, or to find something ready, suitable in size.
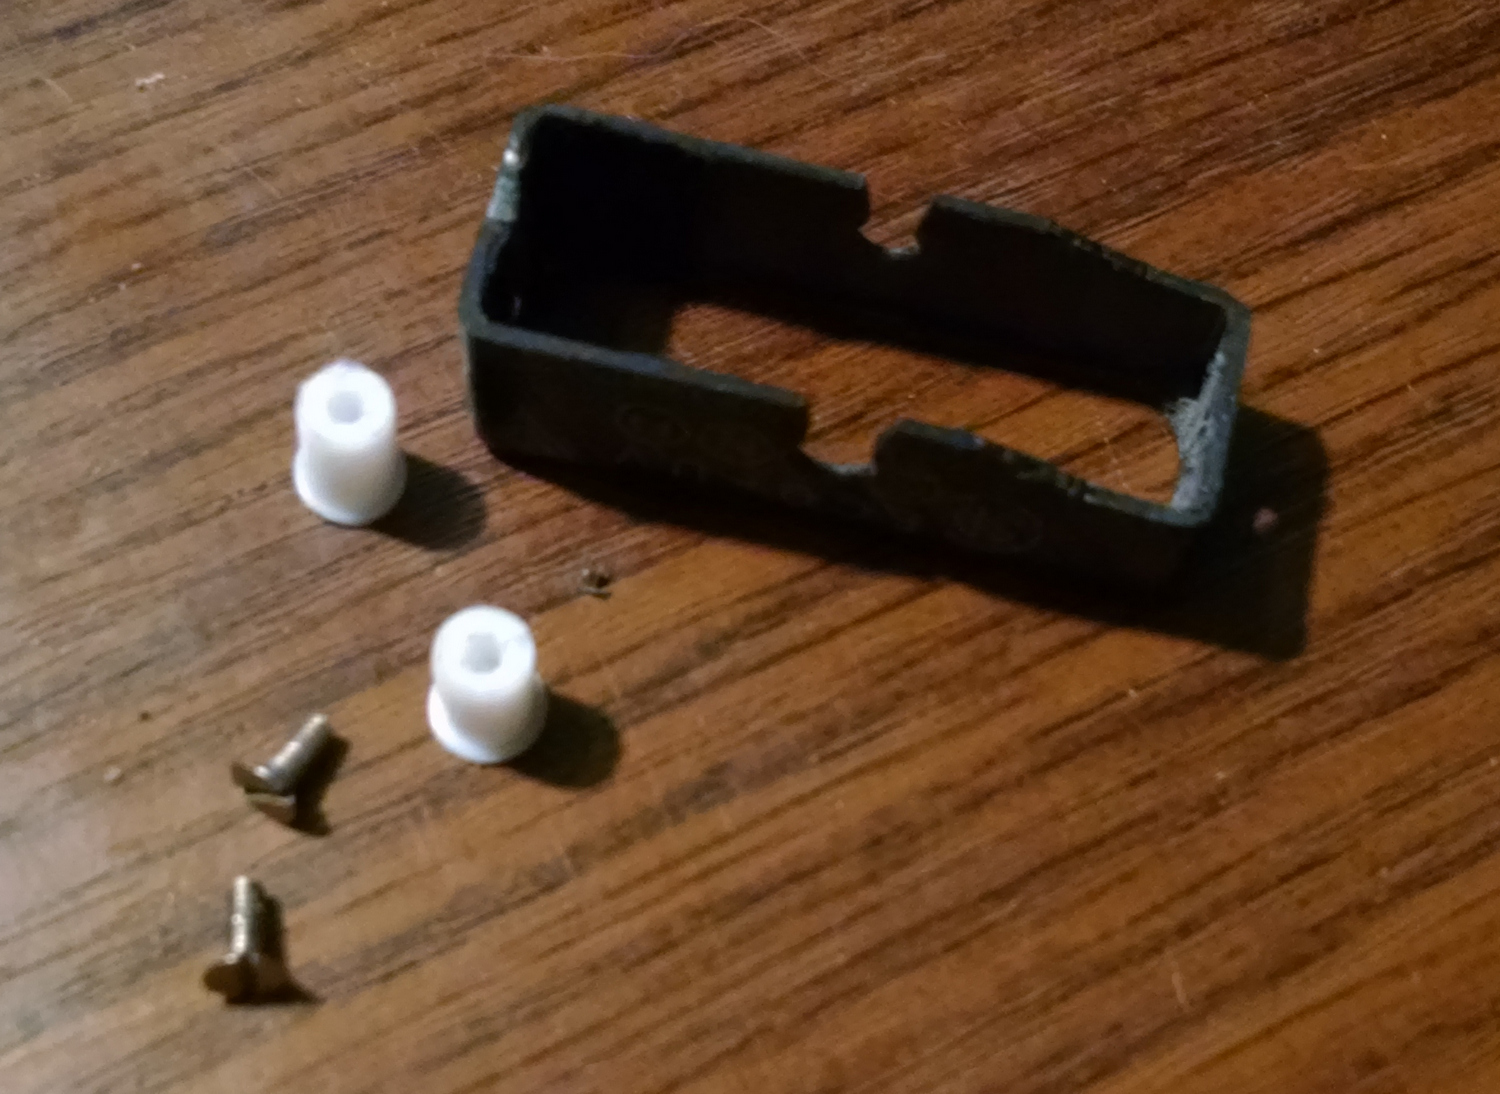
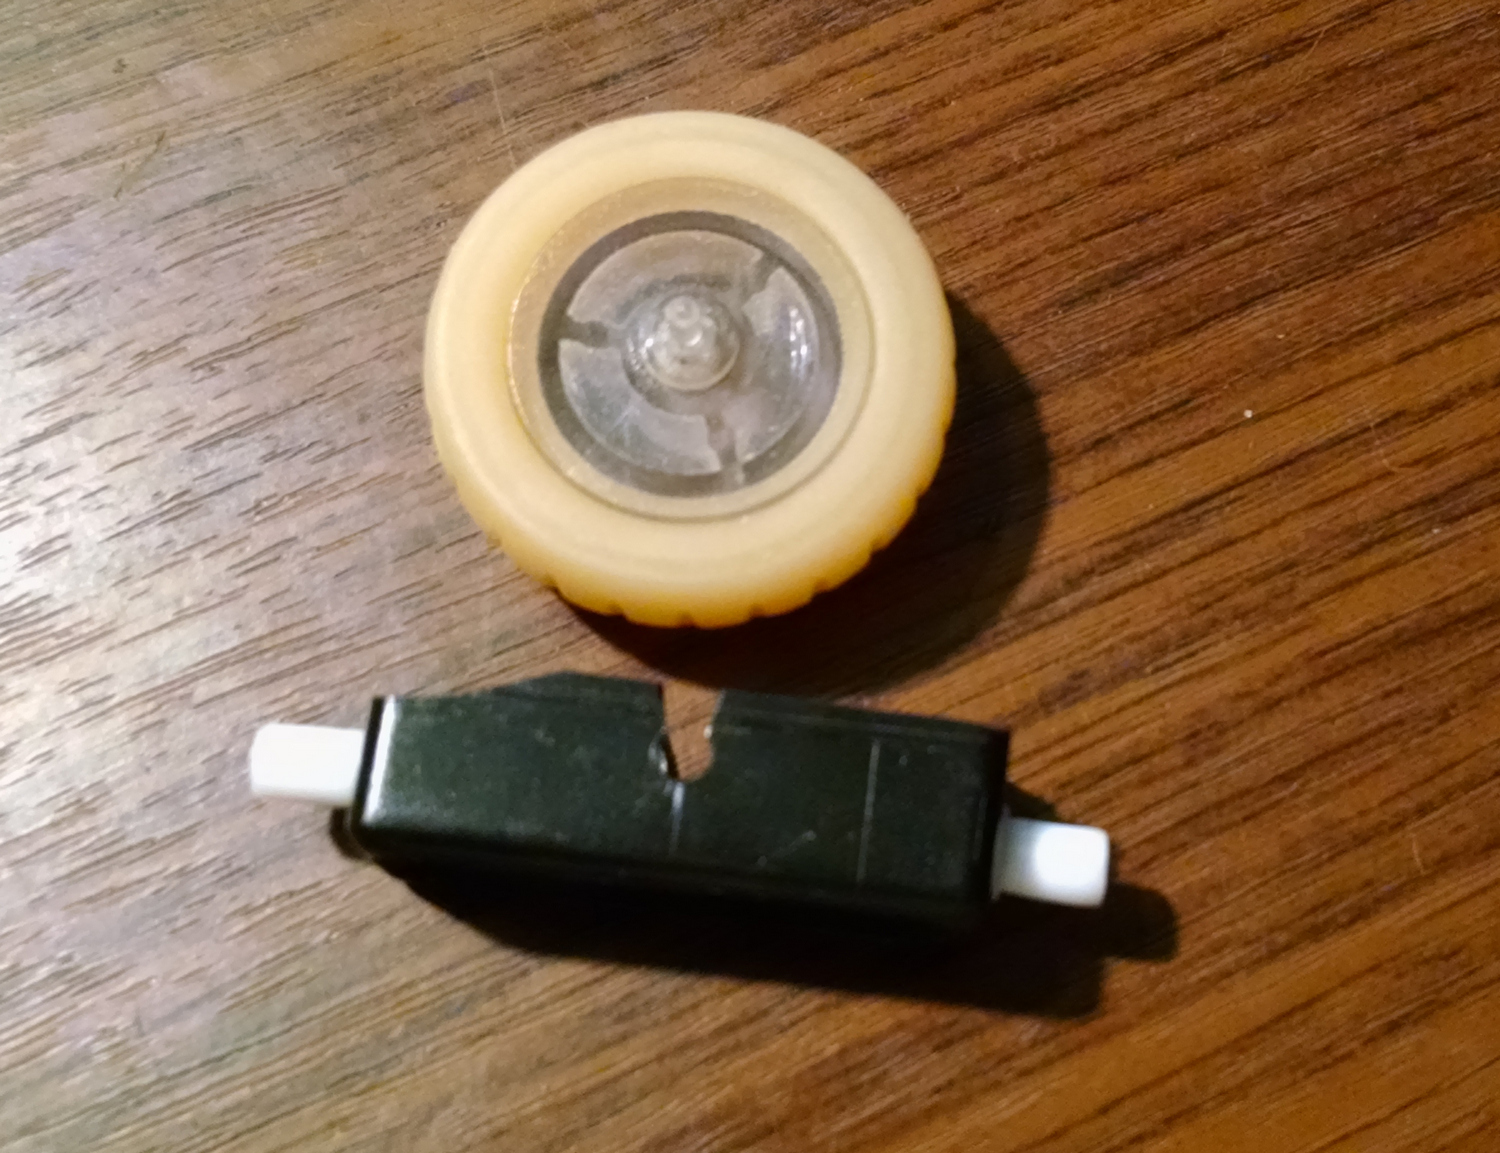
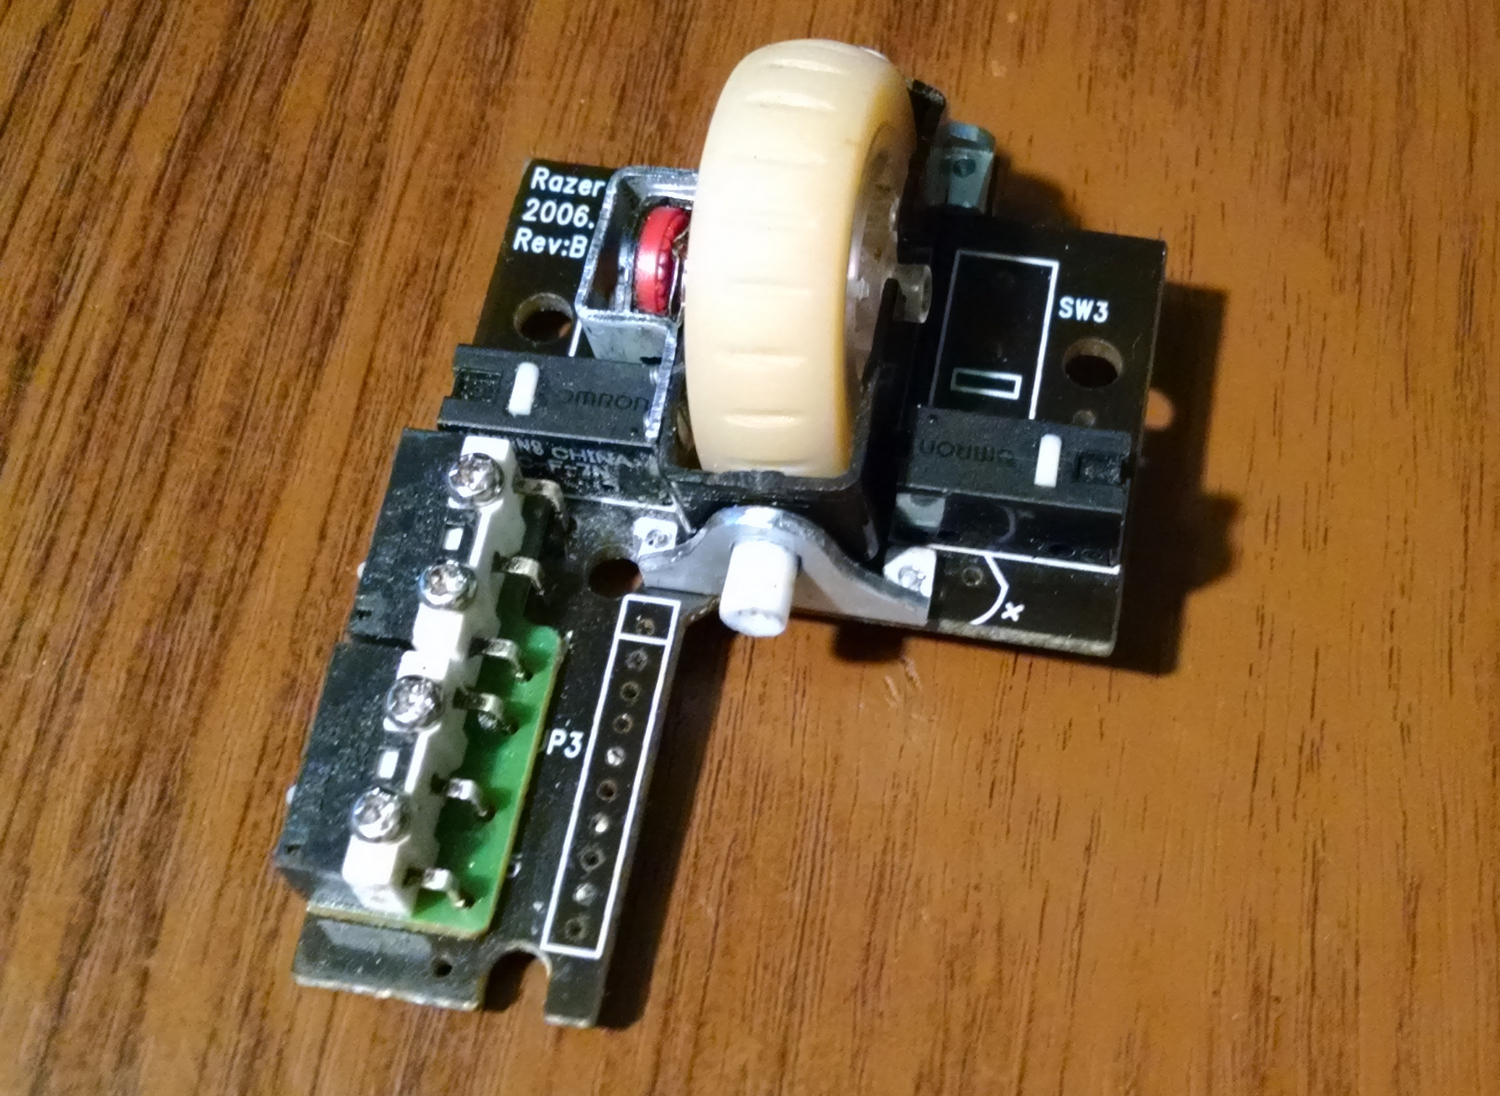
As a result, the body of a capacitor fits well. The interiors were removed, the body was cut in half. Holes for wheel axles are made, fluoroplastic axes of supports are placed at the ends. At the wheel itself, the axis on which the encoder hangs was shortened.
')
The whole process of alteration was accompanied by numerous fittings. /smile/
First fitting:
The encoder (wheel rotation sensor) should hang on the wheel axis, but in order for its body not to rotate, it had to be fixed - for this, a small bracket curved from thin metal was used.
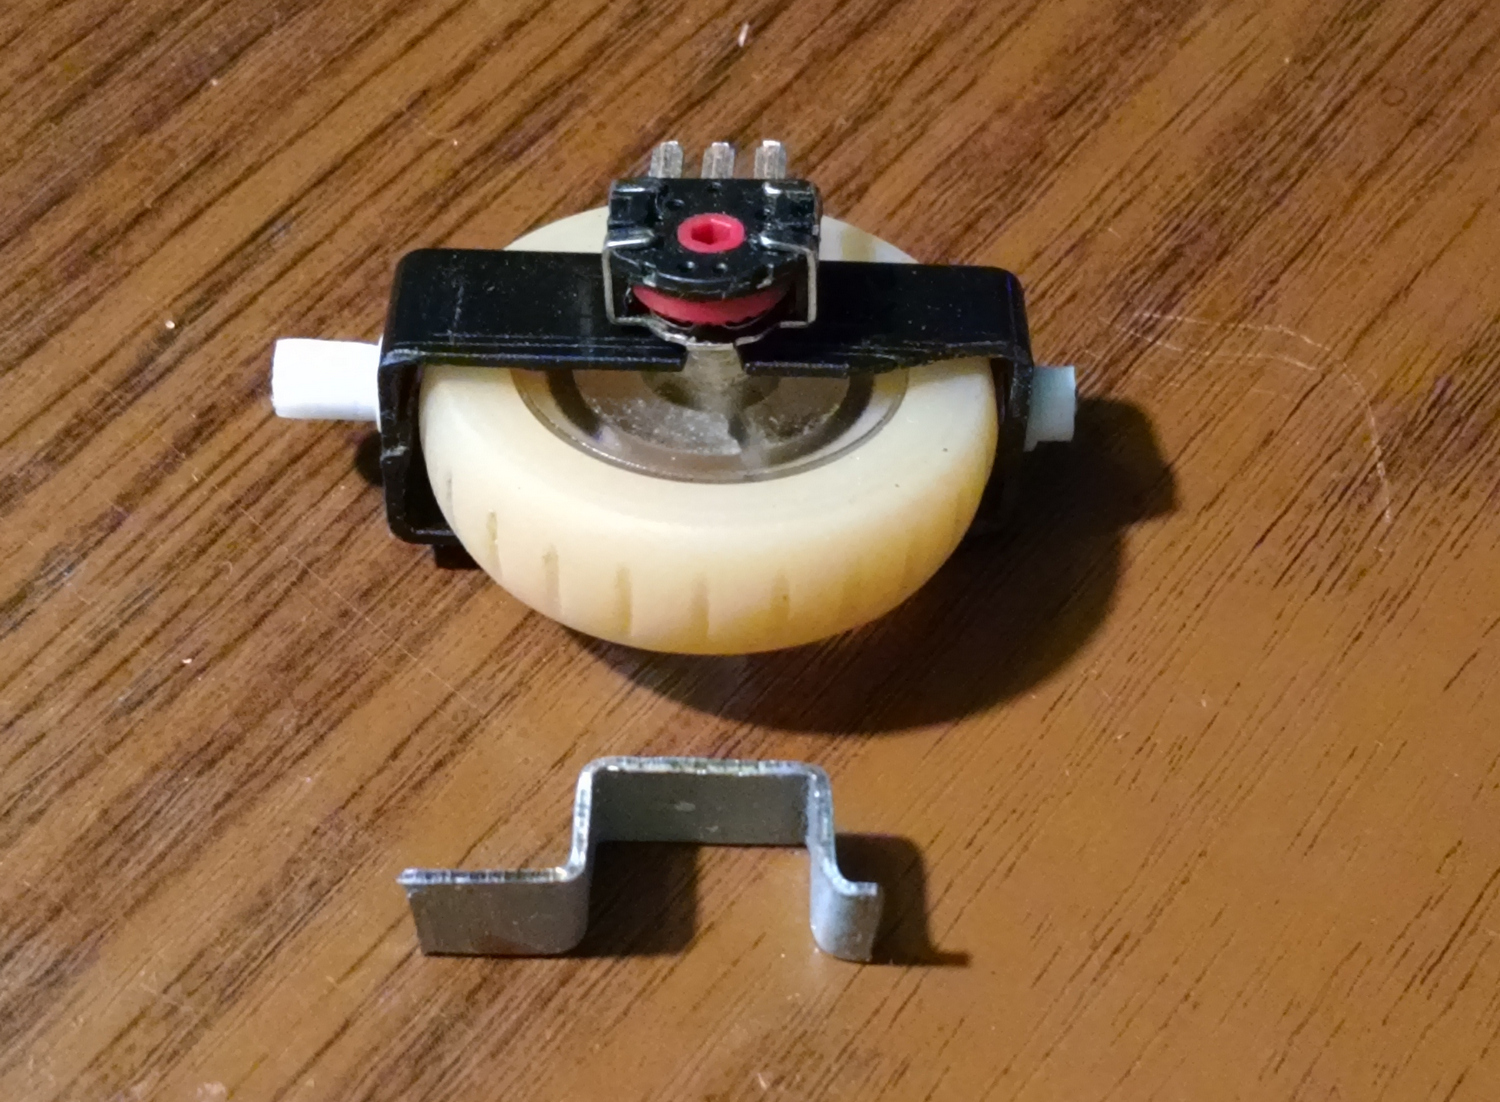
For the “crib” suspension, supports were made from an aluminum corner.
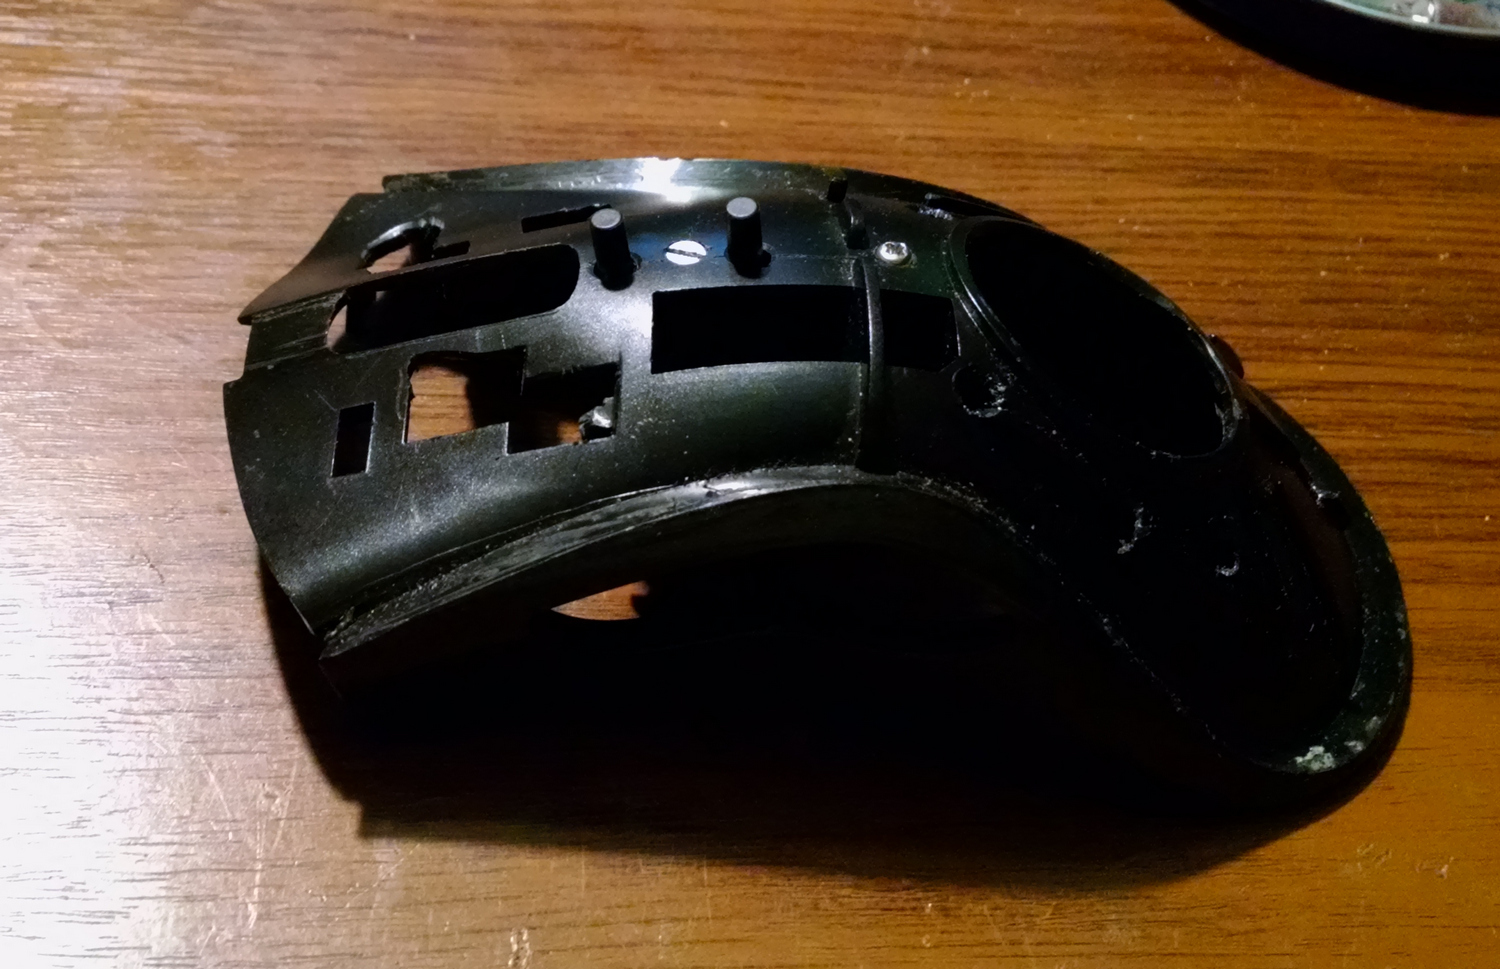
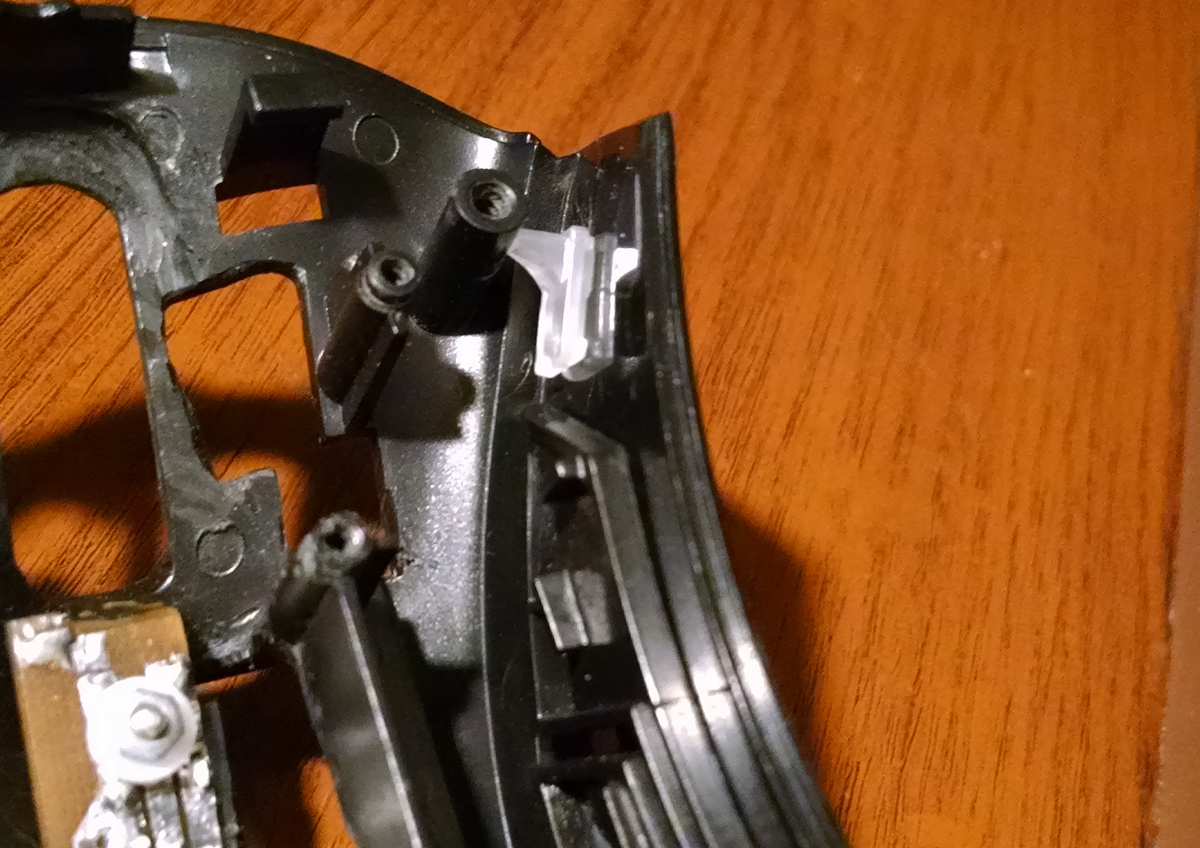
In general, the place in the front of the case is very limited, so everything was done with minimal gaps. The body itself, in some places, had to be thoroughly undermined.
I also had to cut the cot in front - these bevels are visible in the pictures.
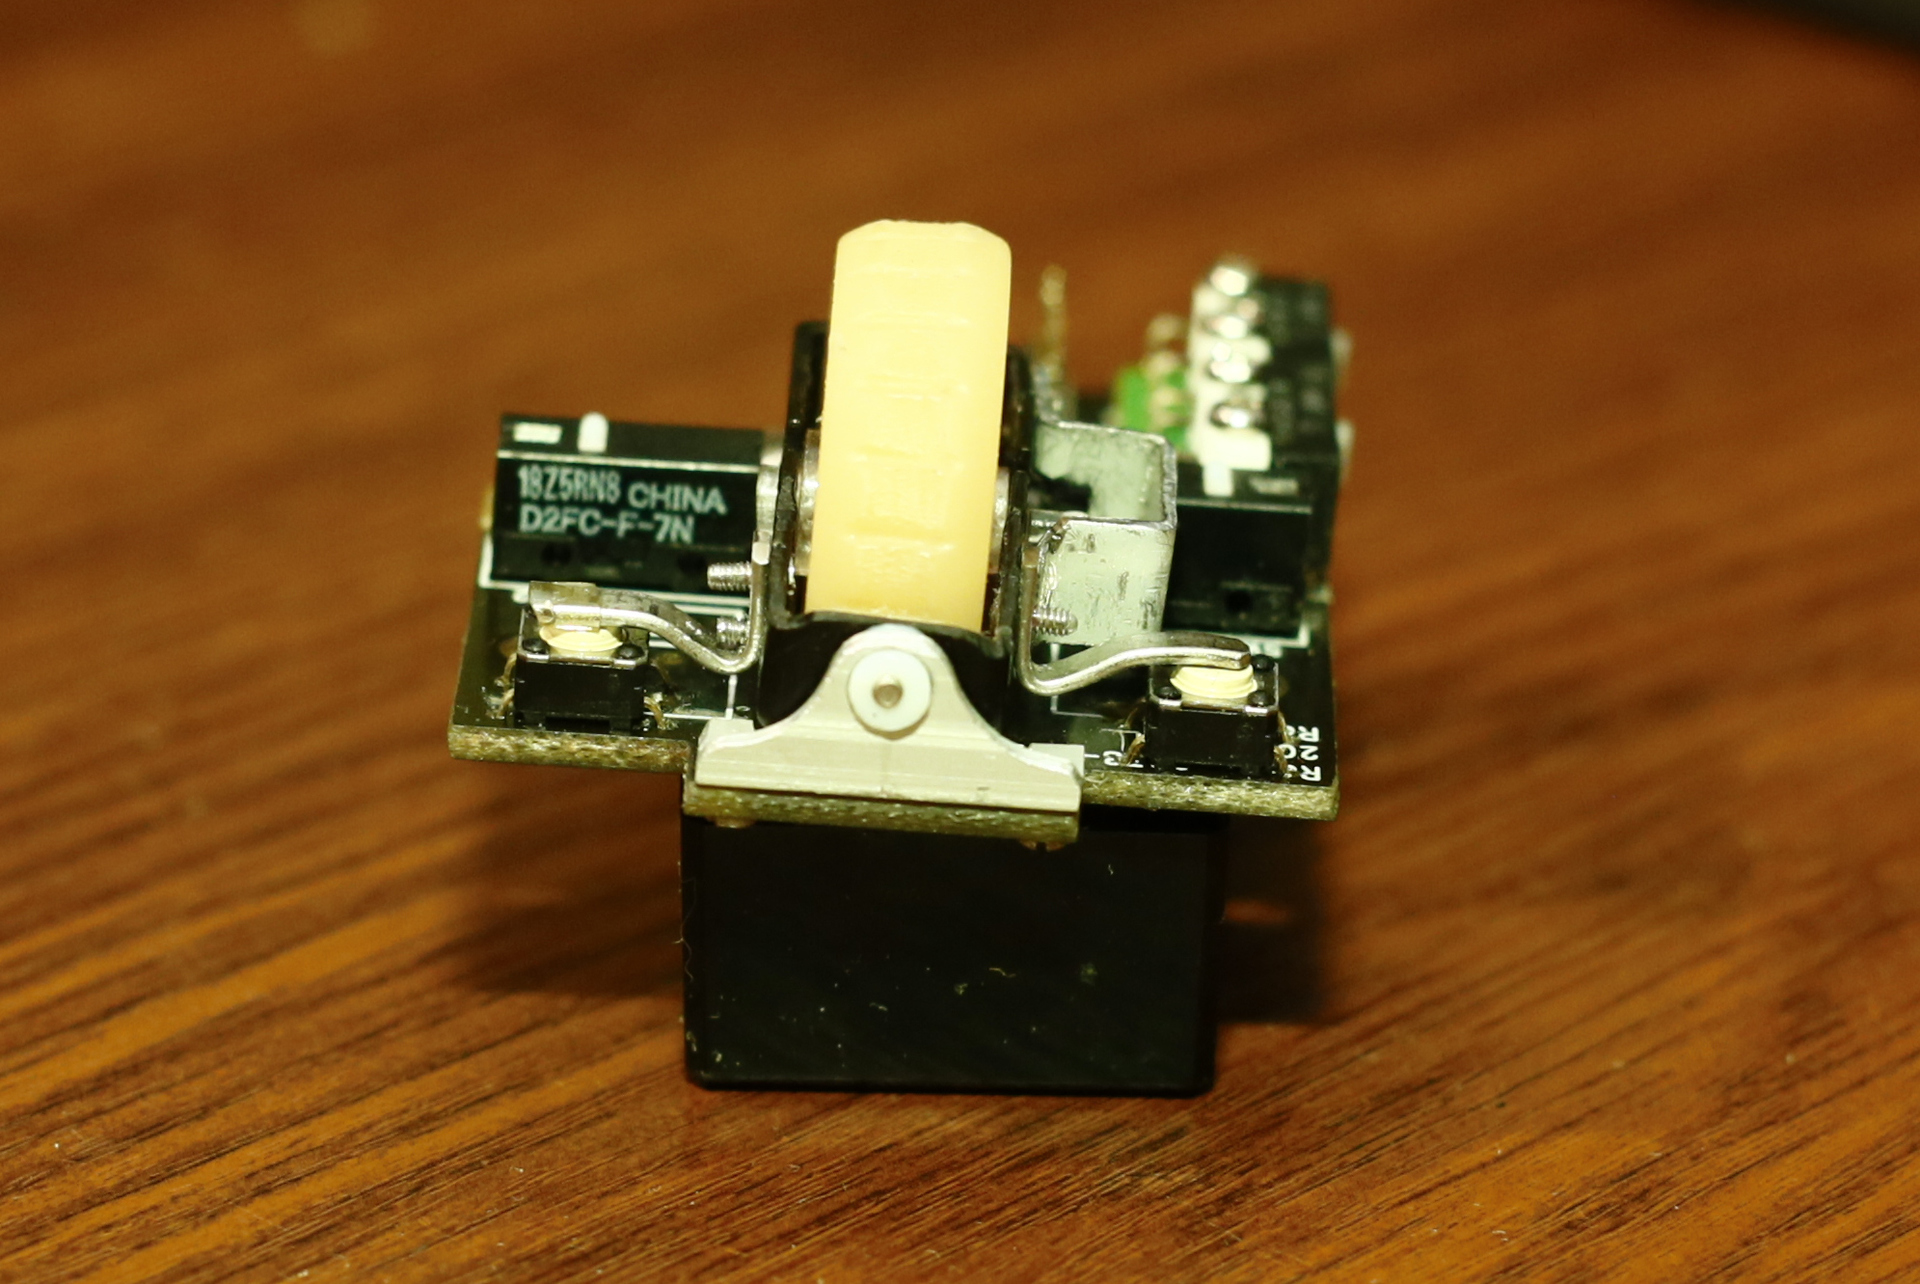
Front support and wheel with bracket locking encoder:
another fitting before manufacturing and installing the rear support, as you can see there is almost no place for support:
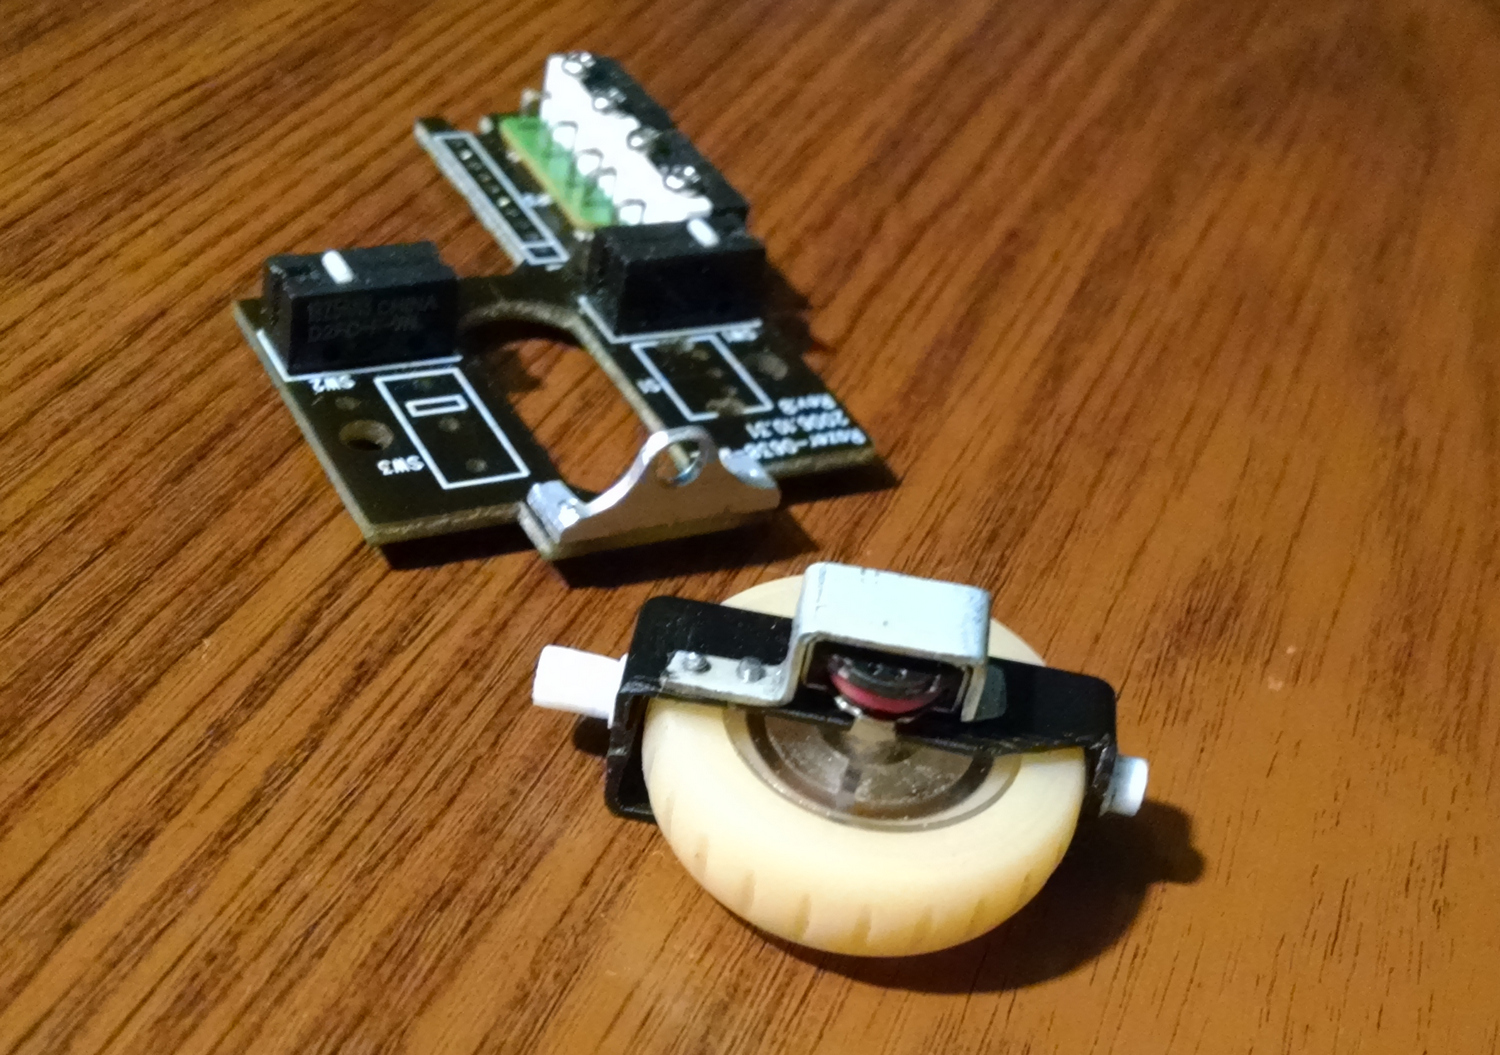
Mounted rear support. The axis is left intentionally long because It will be used to press 3km. Therefore, the hole in the support is made so that the axis can move up / down slightly:
As can be seen in the picture, to put the button under the rear axle of the “crib”, it is necessary to make an additional fee.
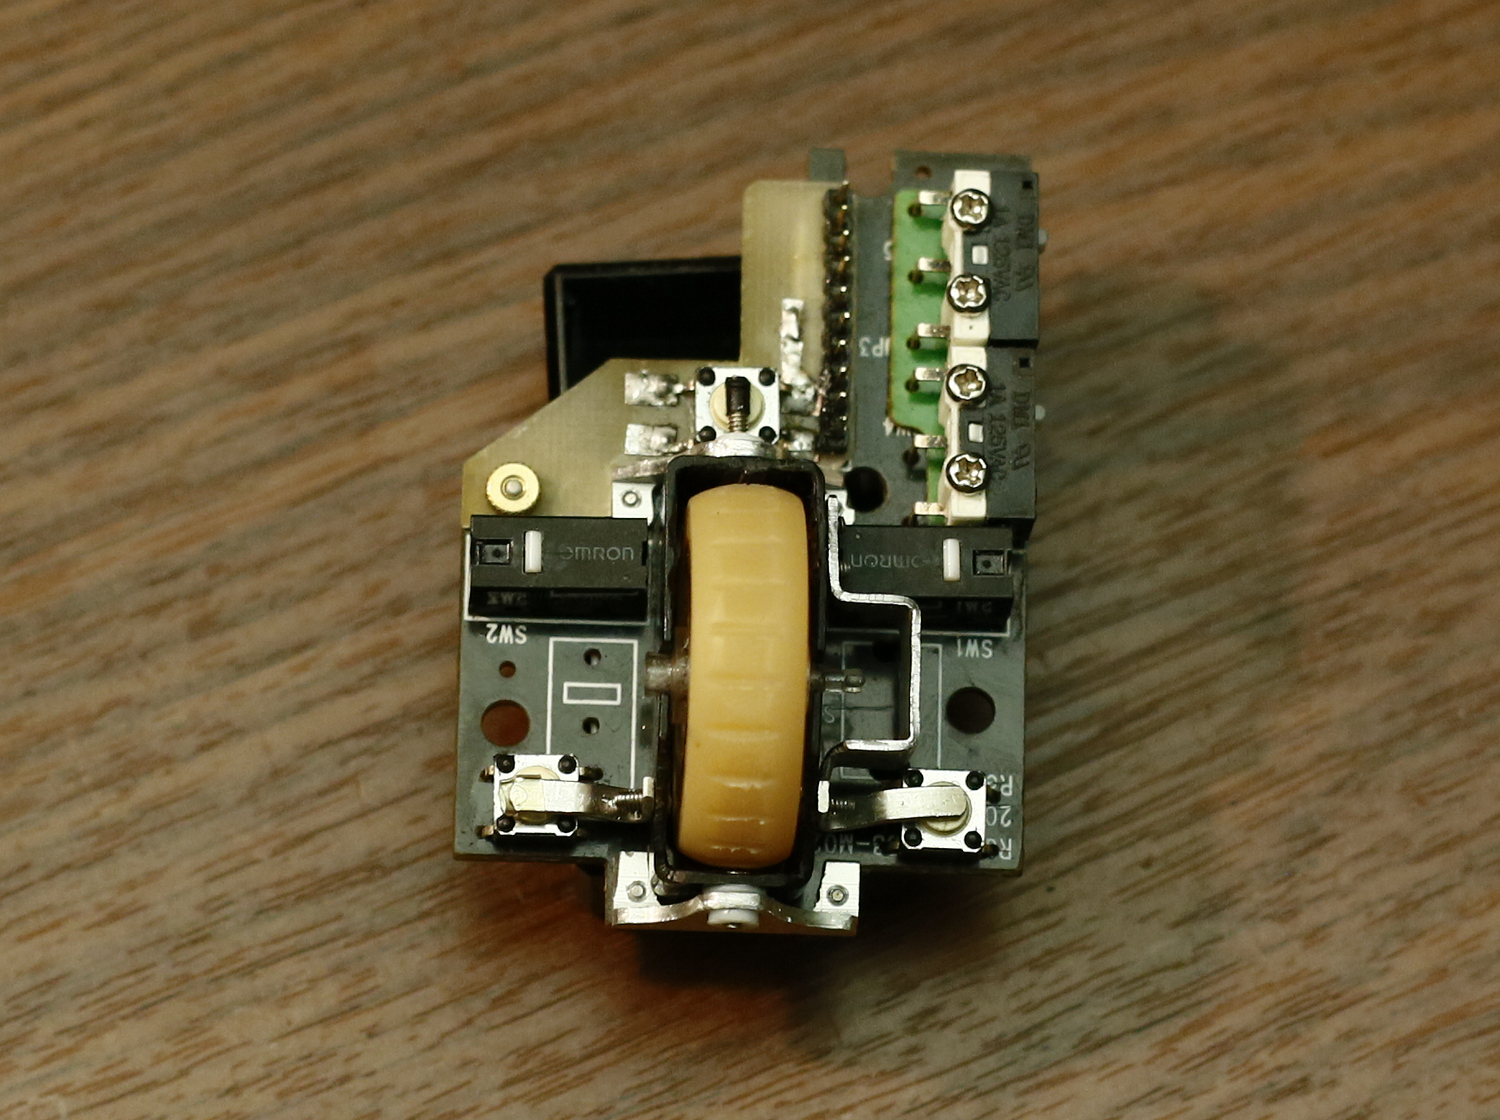
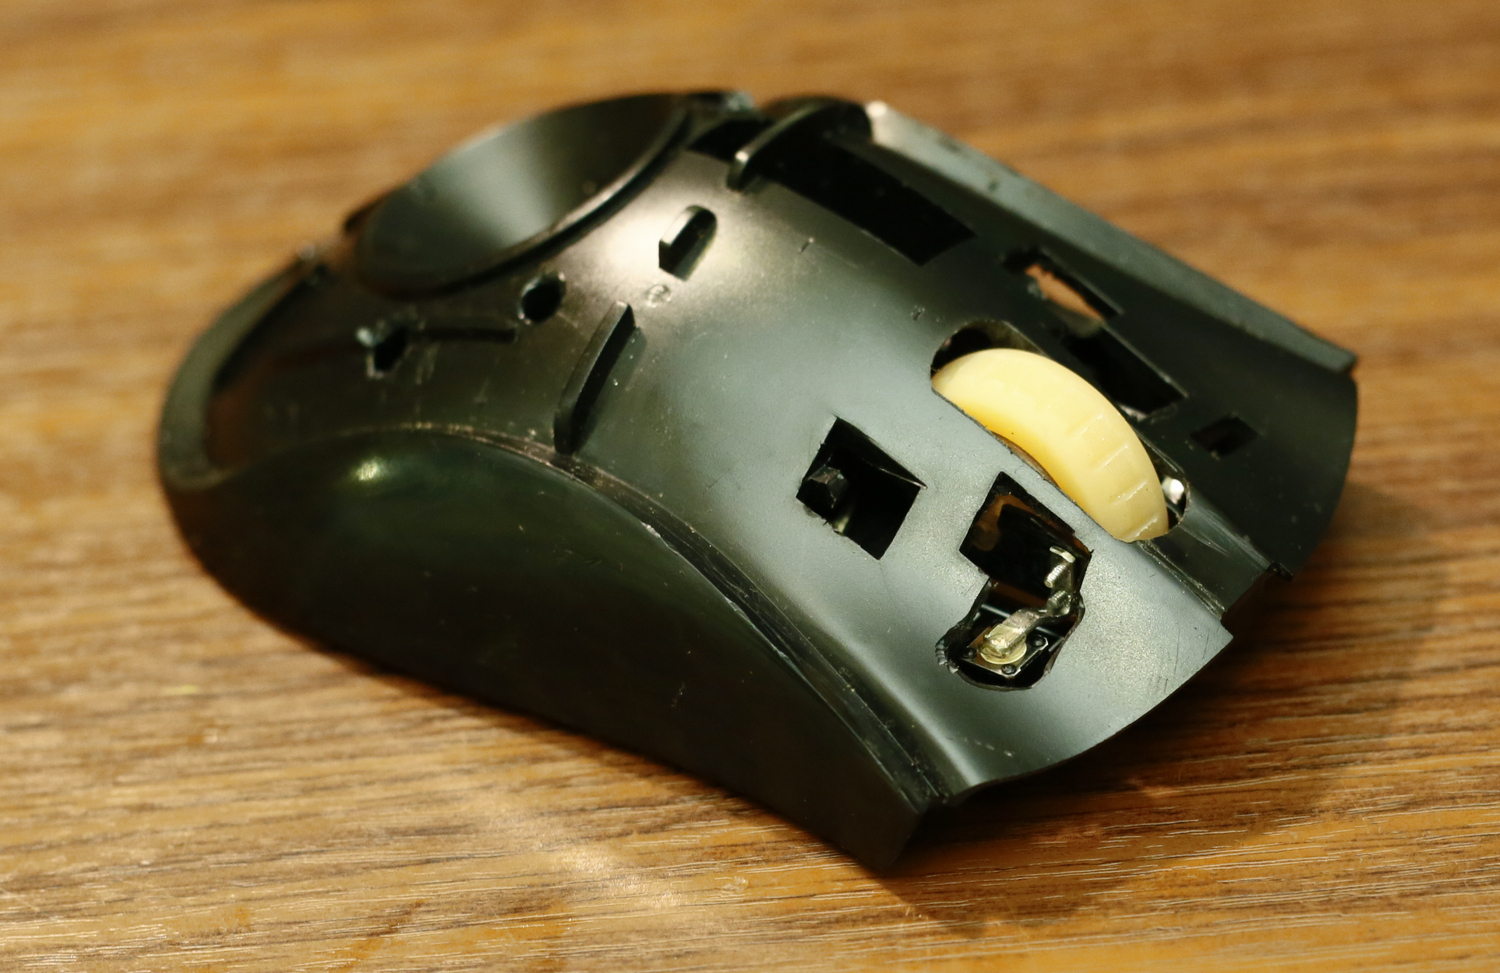
The first fitting, in the case after installing the wheel with a cot:
Installed "expanding" fee. 0.5mm glass fiber laminate used
As you can see, PTFE from the axis had to be cut off and a longer screw was used:
The buttons had to use membrane. Manufacturers indicate a resource of several million clicks. The main problem is to find the buttons with the lightest pushing.
In the bins I found pieces of 20 different buttons, I tested the effort just by pressing one button on the other. The most "light" buttons were the company omron.
Installation of the "back" button which will be pressed by aka 3KM wheel:
Installation of the front wheel tilt buttons:
The levers for pressing the side buttons were made of steel strips (pulled out of the old car "wipers"):
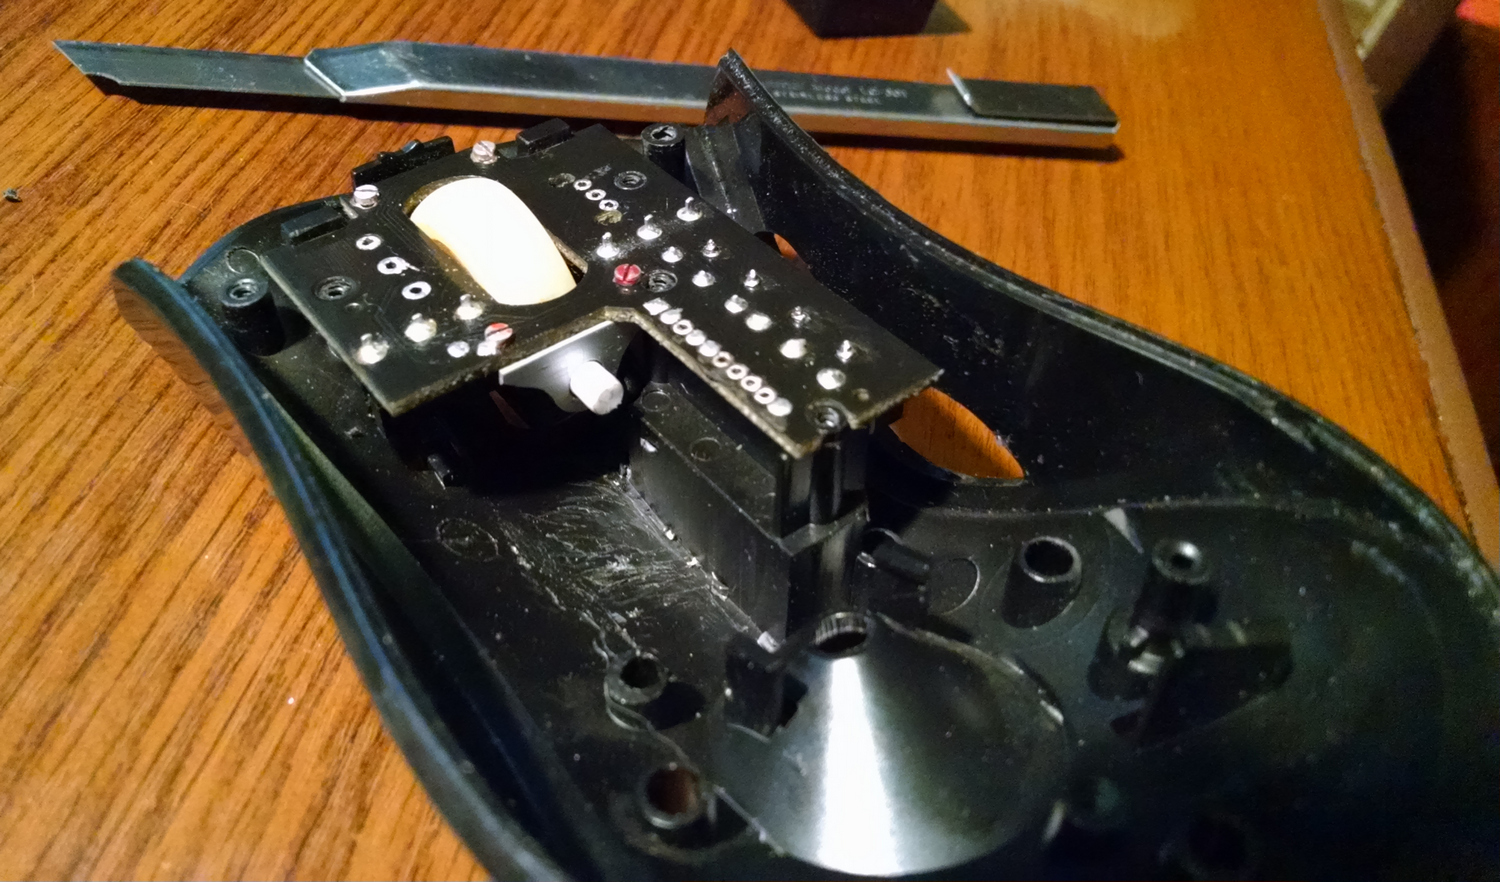
Trying in the mouse body:
Thus, the first point of the plan can be considered fulfilled - the wheel has received tilts.
I must say that the pressure turned out to be "tugovat." This was especially noticeable in comparison with the “Hunter” wheel, in which the lateral pressing of the wheel is very light and I’m not afraid to say so-pleasant ones. Therefore, there was a problem to find softer buttons. Fortunately, this type of buttons is cheap - on aliexpress and ebey I ordered several options, including such buttons as they stand in “Hantore” - i.ebayimg.com/images/g/BvsAAOSWLVZVpeQ7/s-l1600.jpg
The second point of the plan is the installation of additional buttons.
The “Hantora” on the “back” has two buttons to which I have assigned “Home” and “End” - this is very convenient, in the browser, to go to the beginning or end of the page, but also in games it is actively used to select additional props.
Putting a couple of buttons on my back turned out to be easier than I thought / smile /
Pressing these buttons, I used to make the index finger - closest to the body, a pillow of the index finger, the far button, the tip of a bent finger, it is convenient for me and it turns out without any tension.
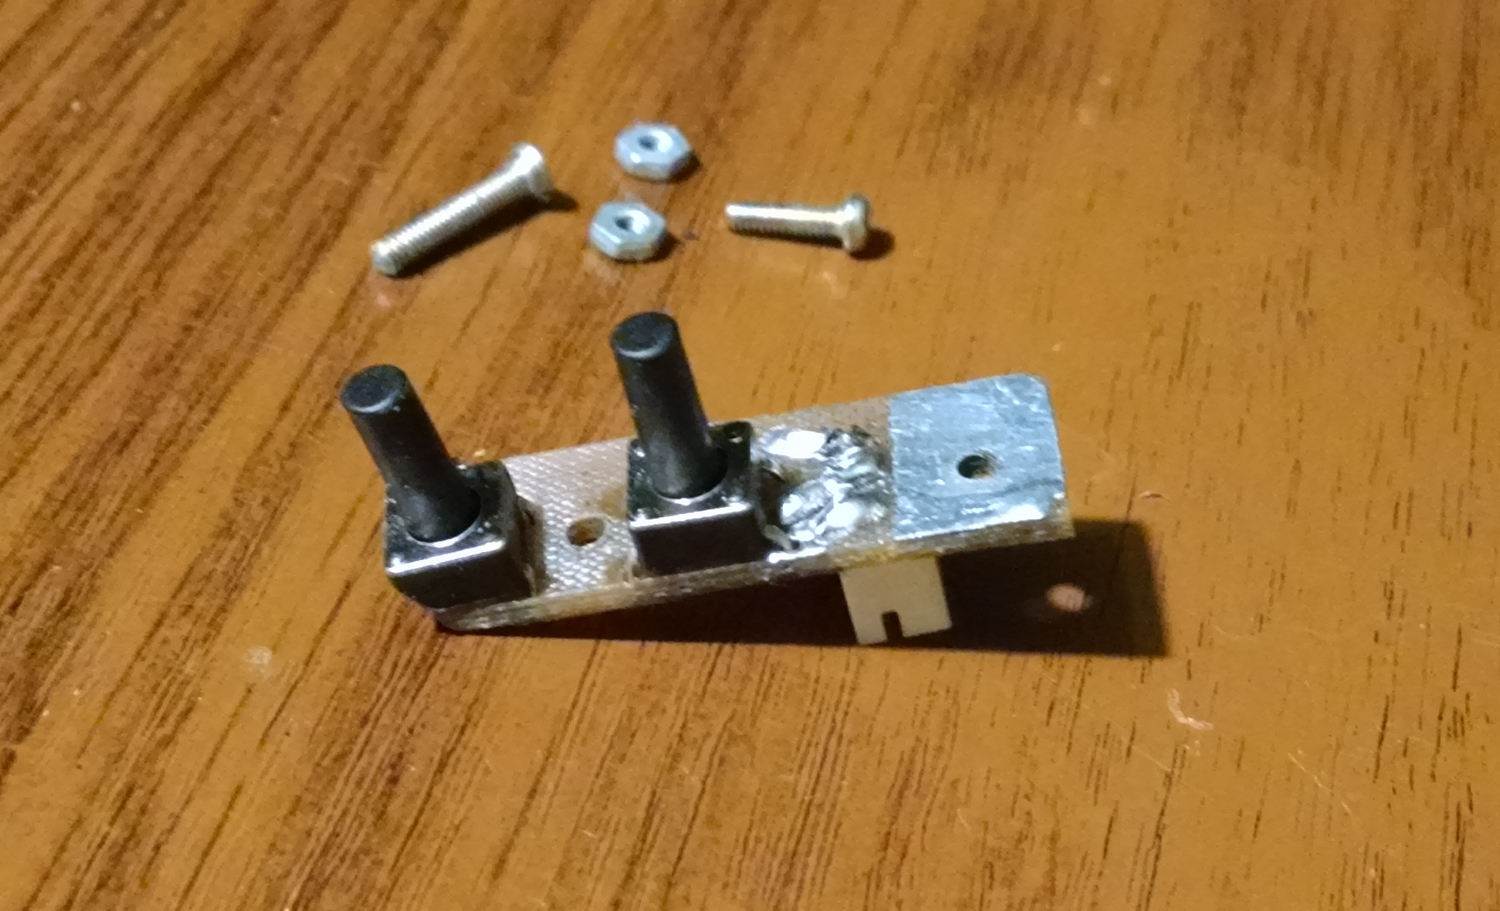
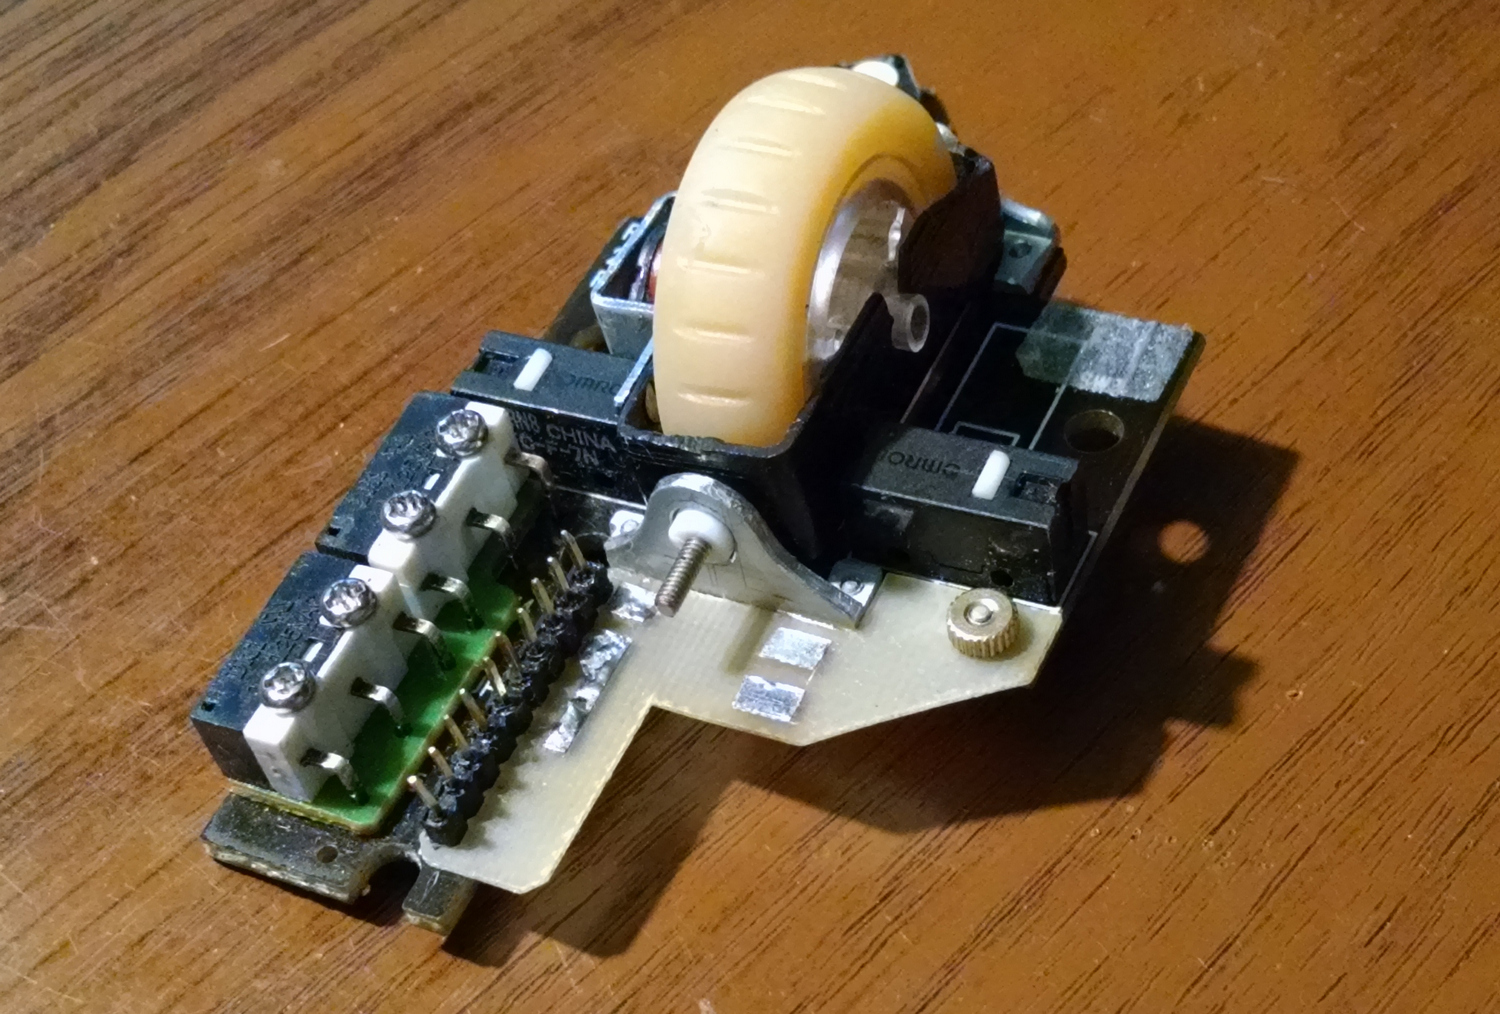
In order for the mouse to easily understand used connector.
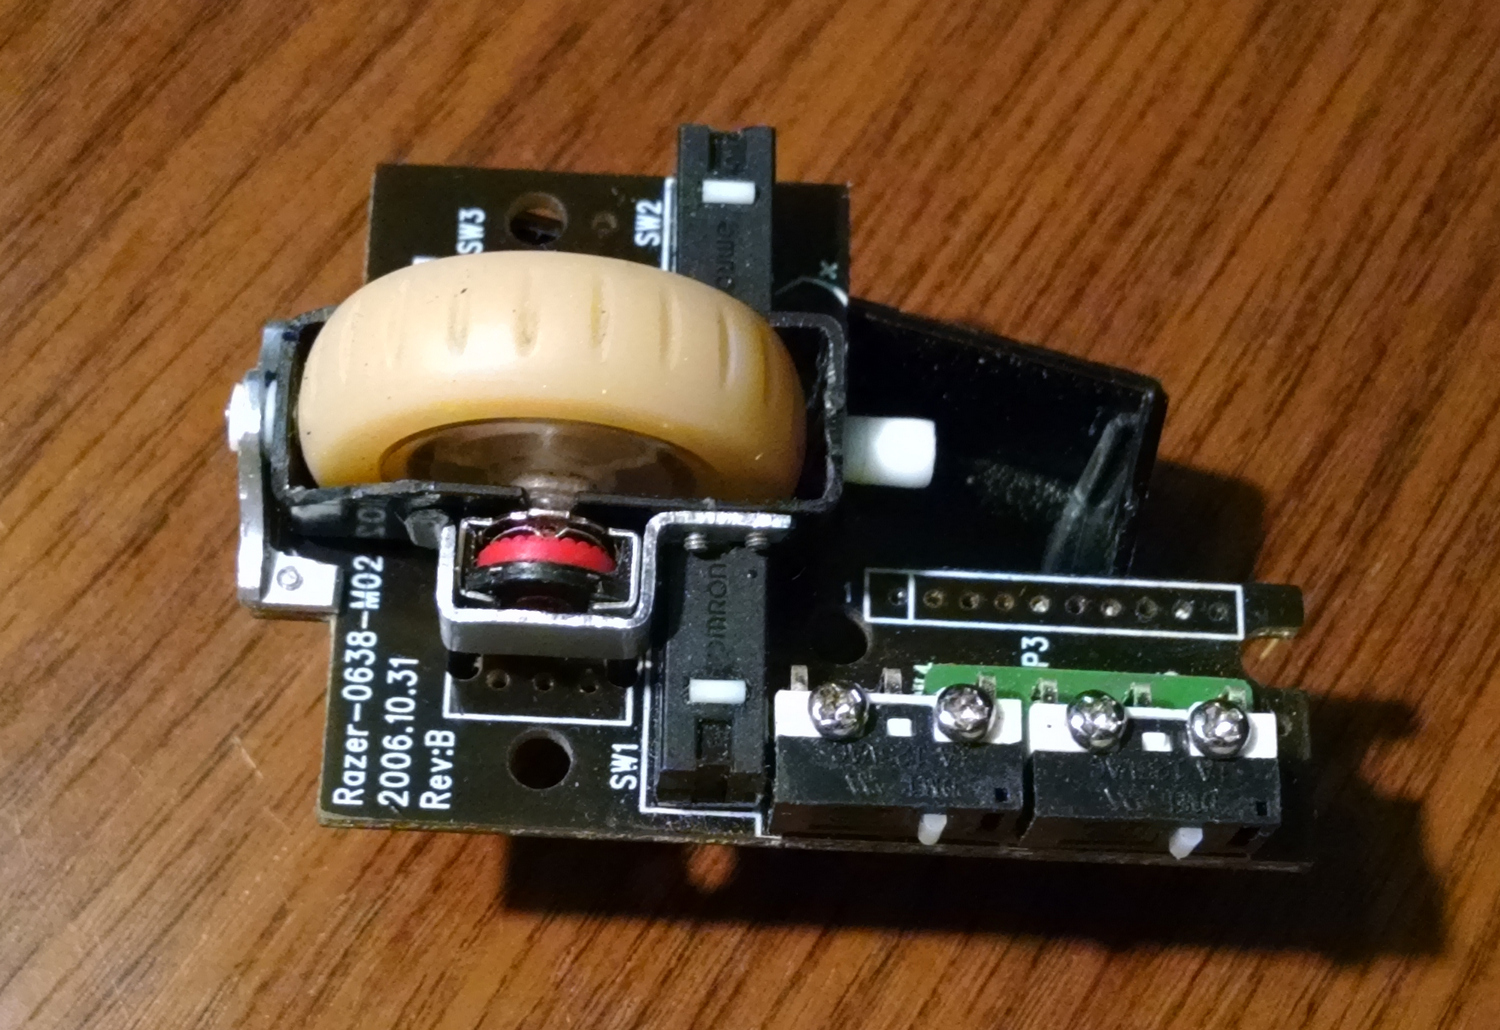
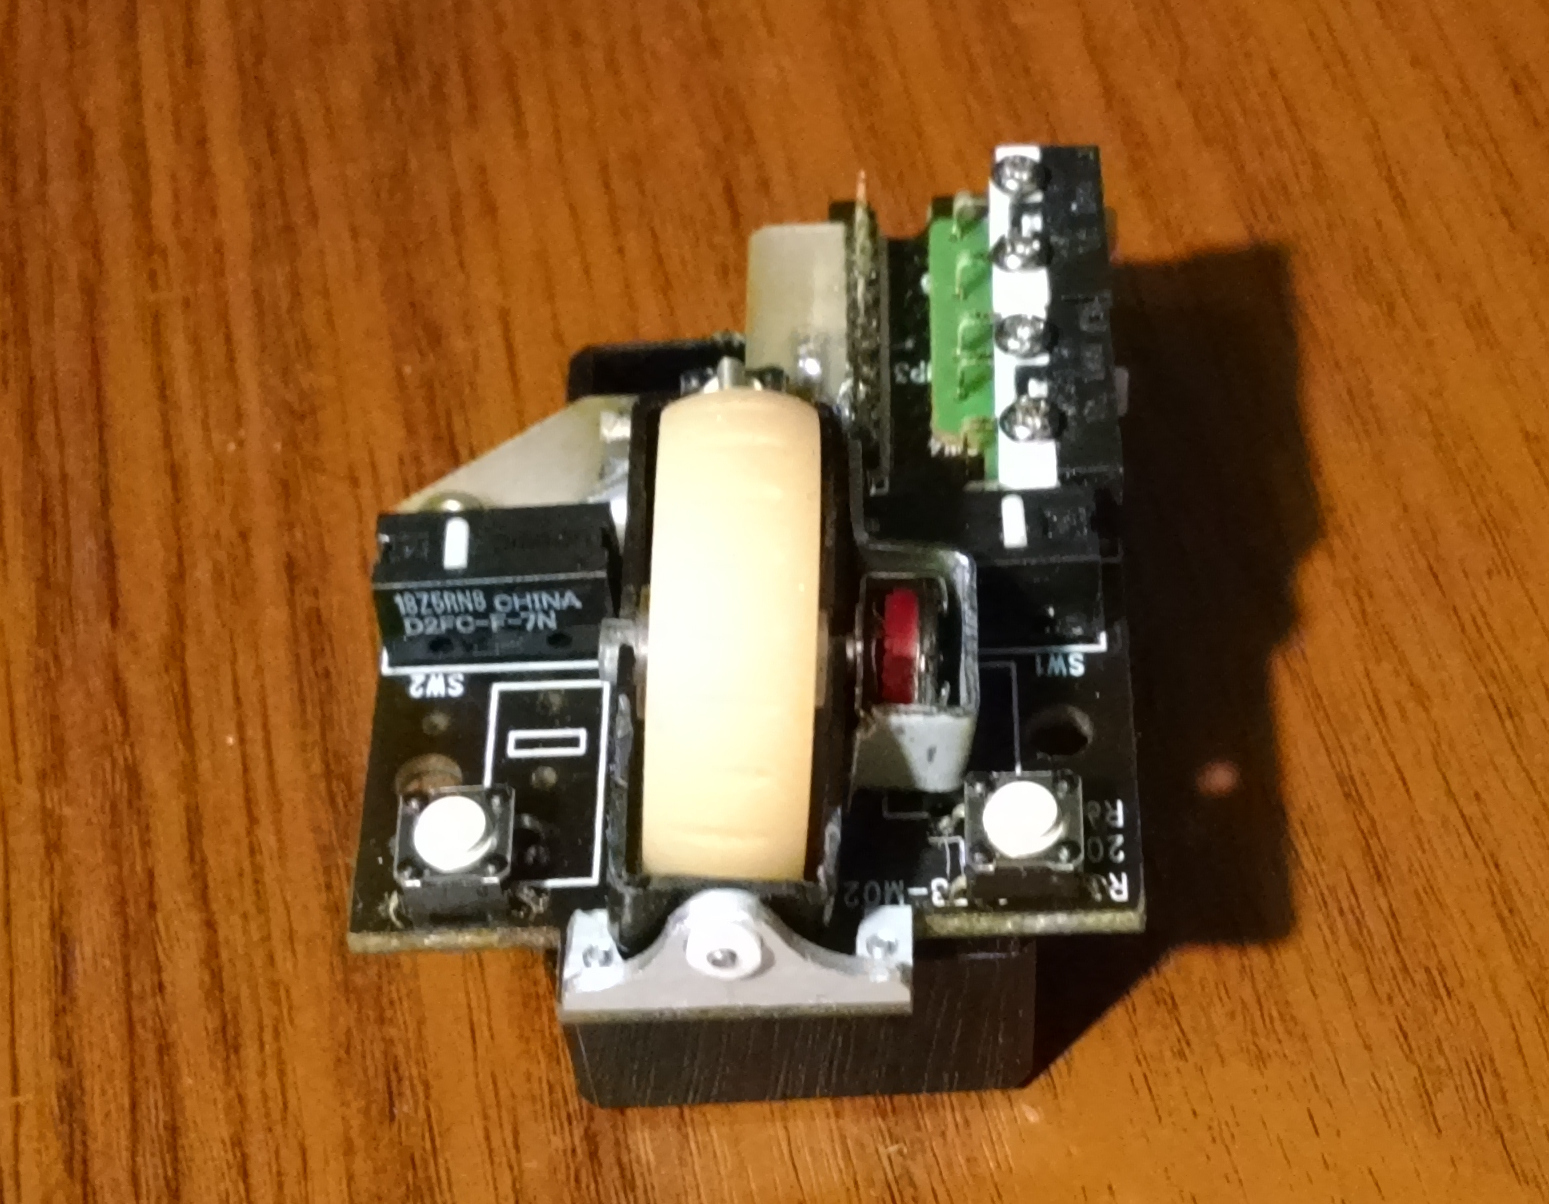
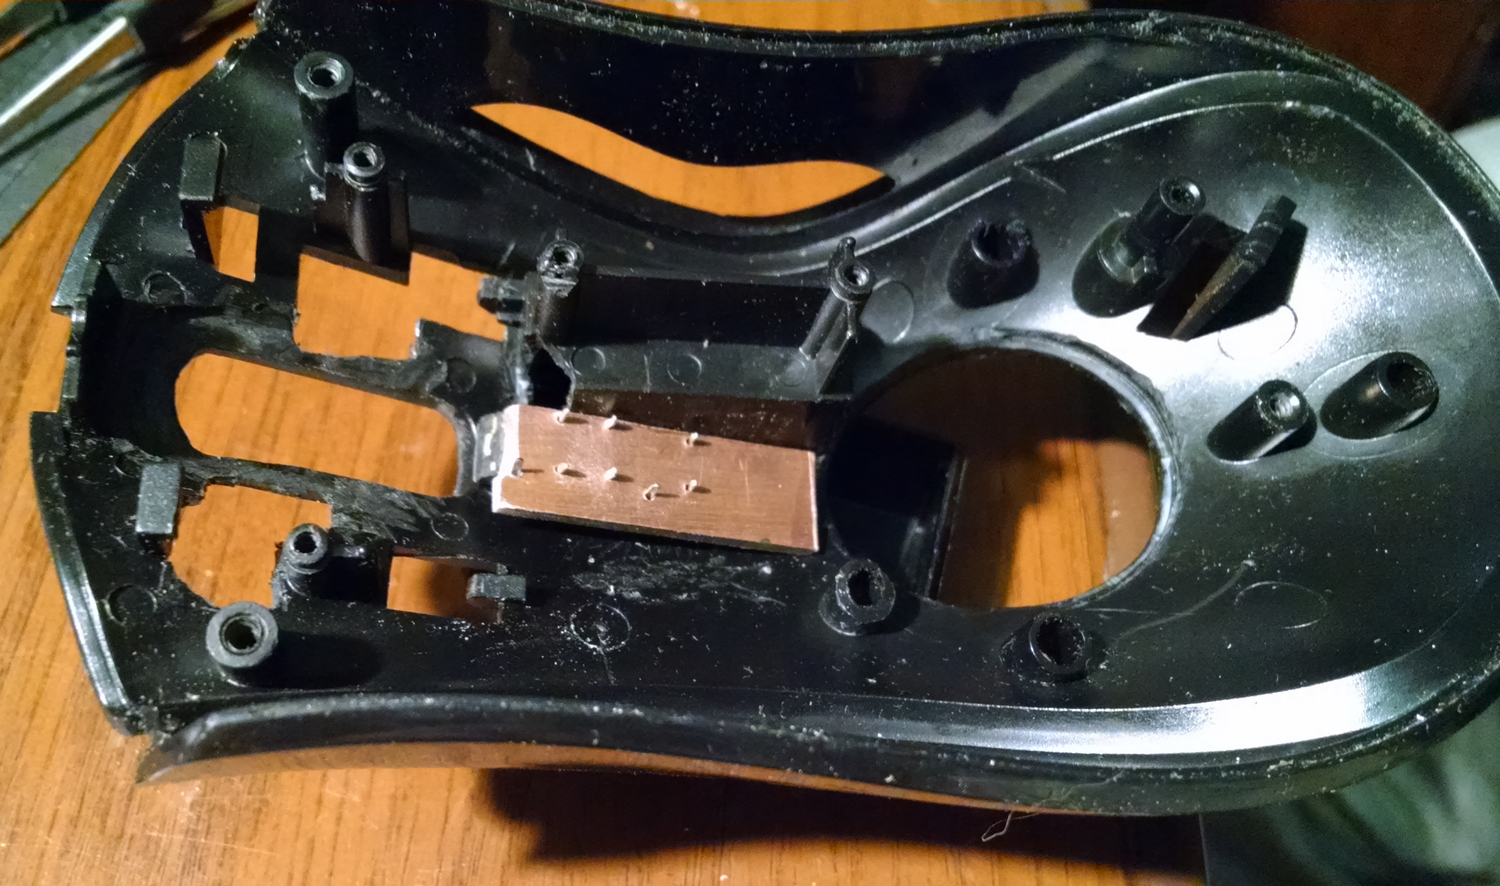
Trying on the assembled board with buttons:
Trying in a fully assembled "back" of the case. By the way, you can see what the worn and worn state of the case is:
Since the first two points of the plan have been successfully implemented, you can proceed to the third point - the creation of a W-mouse on the basis of DeathAdder.
W-mouse is a game mouse project with, I dare say, unique capabilities.
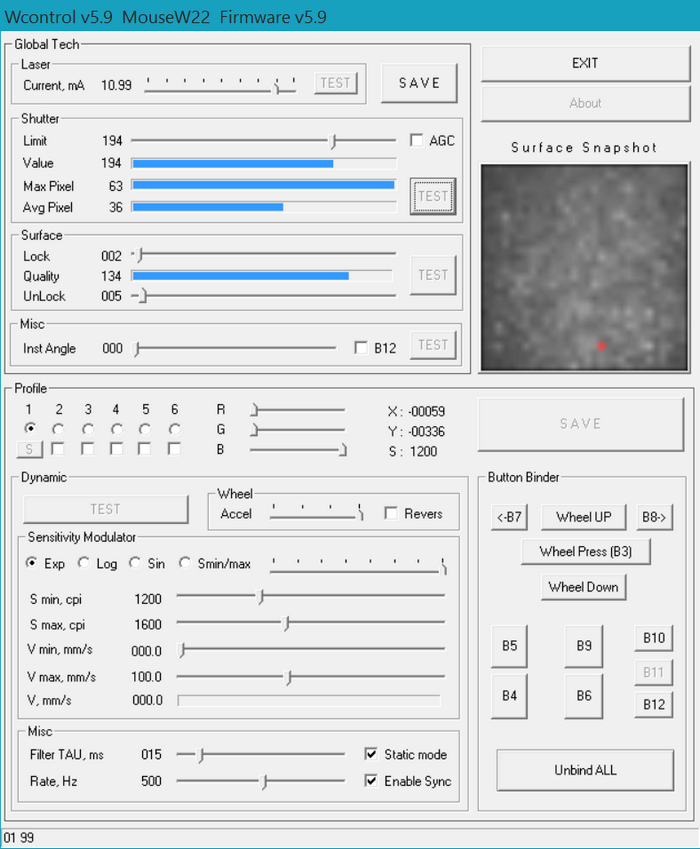
To assess the possibilities, you can show a screenshot of the W-mouse settings window.
On the picture is the screen of the setup program described by the mouse and the picture of how it sees the surface of the glass pad:
A link to the W-mouse project will be at the end of this material.
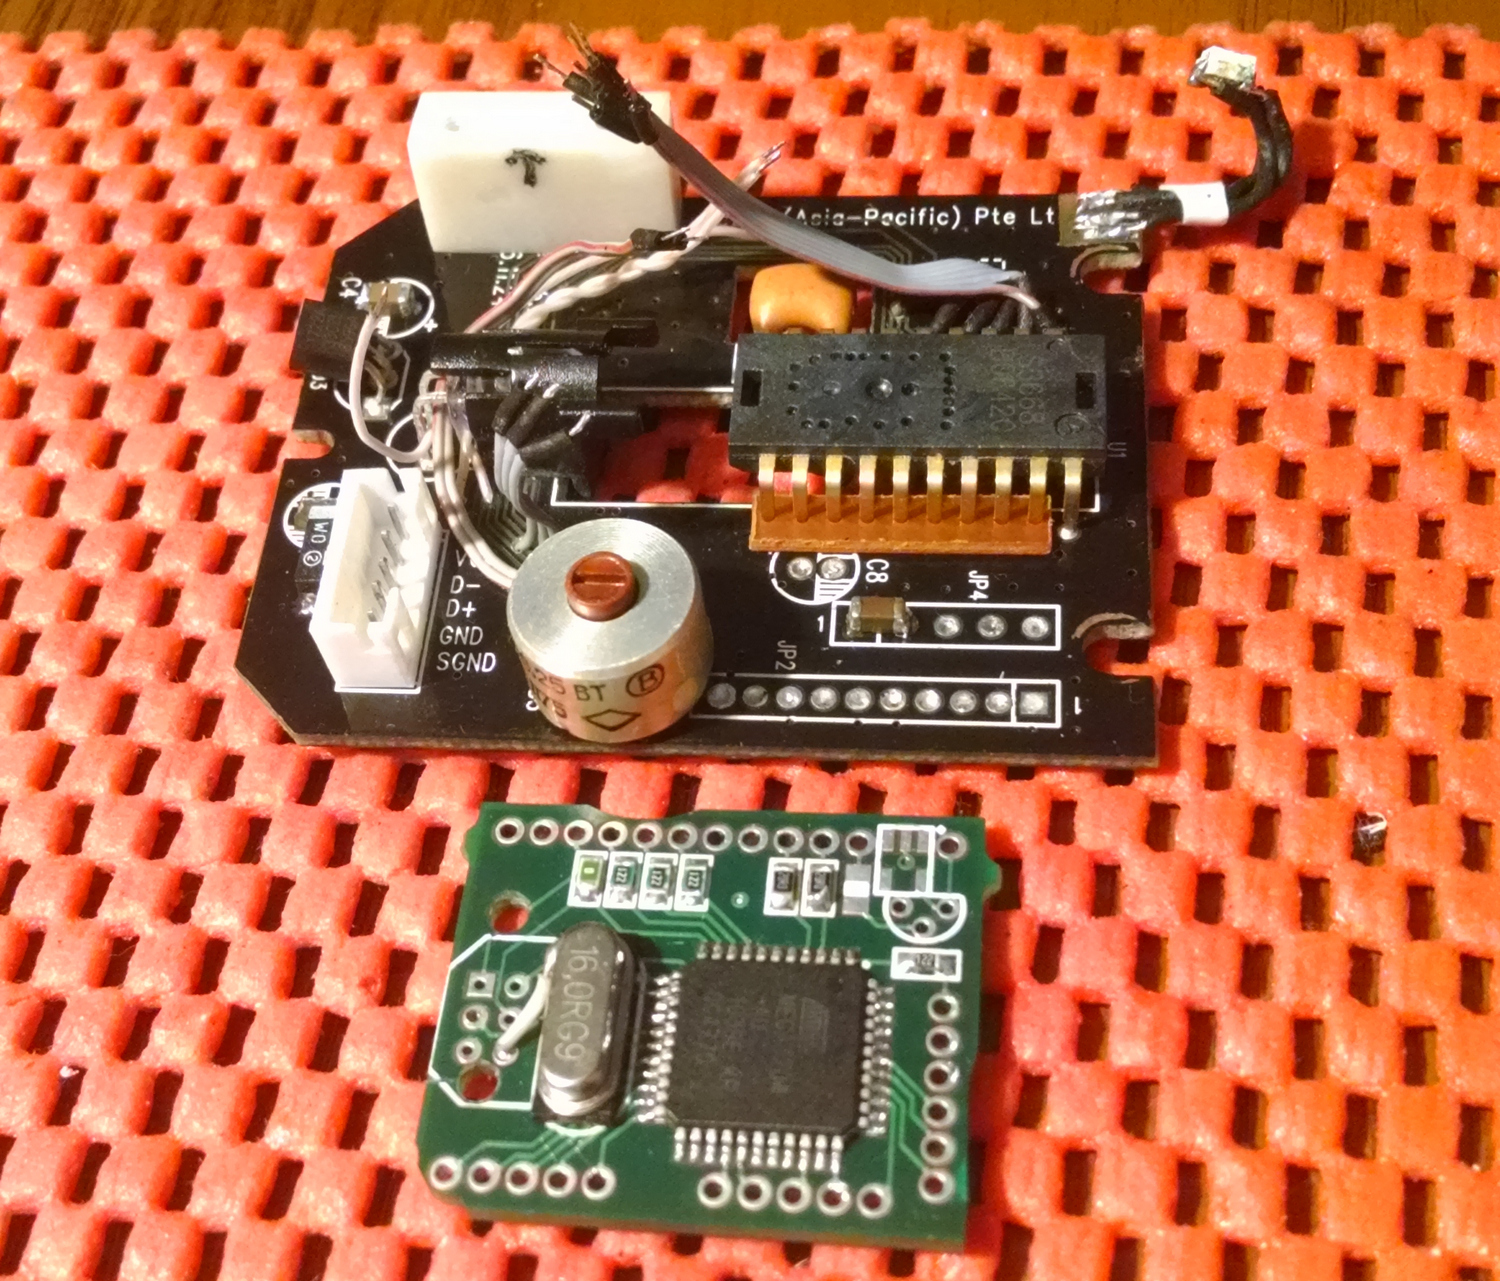
In short - a microcontroller is used (in this case, ATMEGA32U4) - which replaces the standard one. This allows you to implement additional features and improved characteristics of the mouse. For example, when setting up a w-mouse, on a specific rug, you can read a photo of the surface of the rug from the sensor.
The firmware, as well as the whole W-mouse project in general, is the result of the efforts of a person known as Walkie - he lives in southwest Russia.
Alteration has been reduced to the following steps:
- removes the "old" controller and all unnecessary items.
- deletes unnecessary sensor connections and adds new ones.
- wiring is added to connect to the board with a “new” controller, as well as a multi-color RGB LED to indicate the active profile.
- install the board with the controller.
- firmware is poured.
Now a little more detail, mainly due to photos / smile /
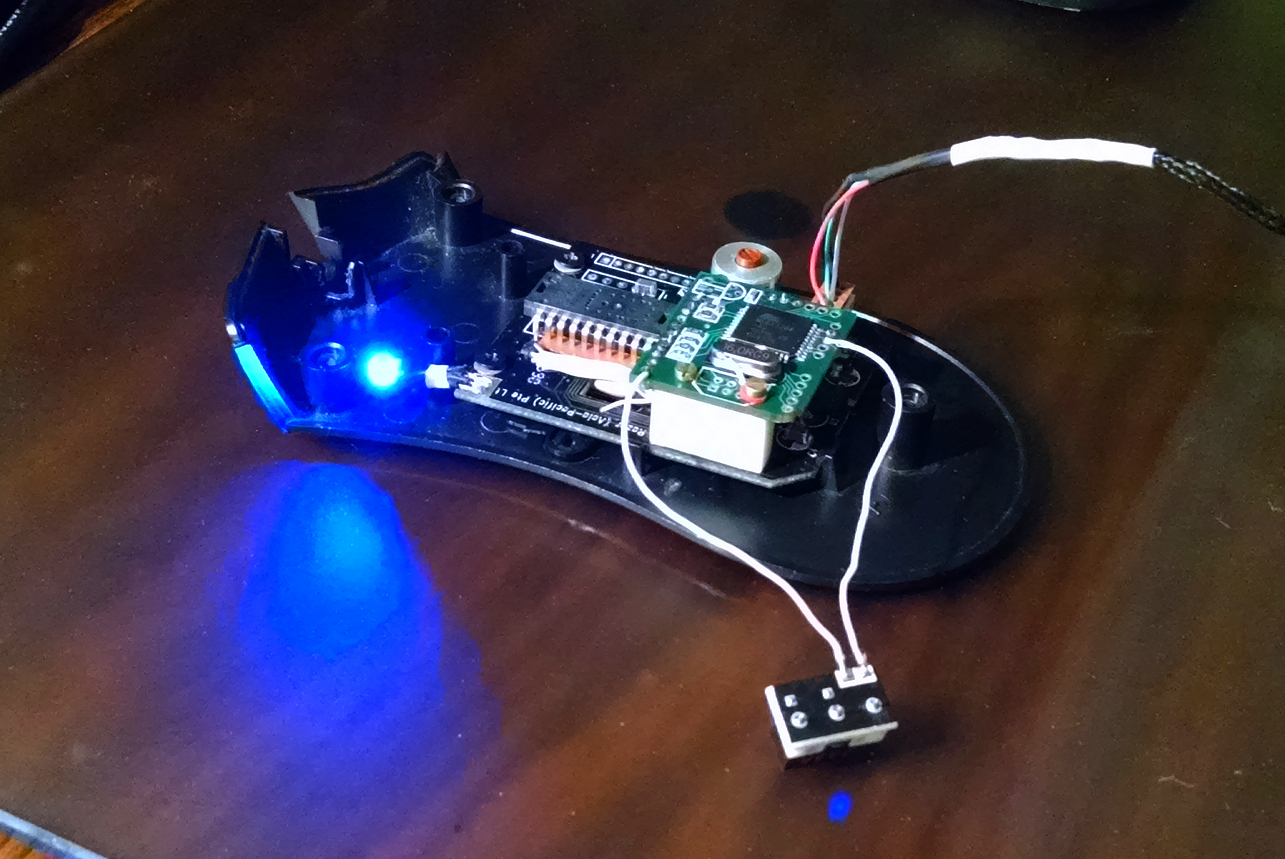
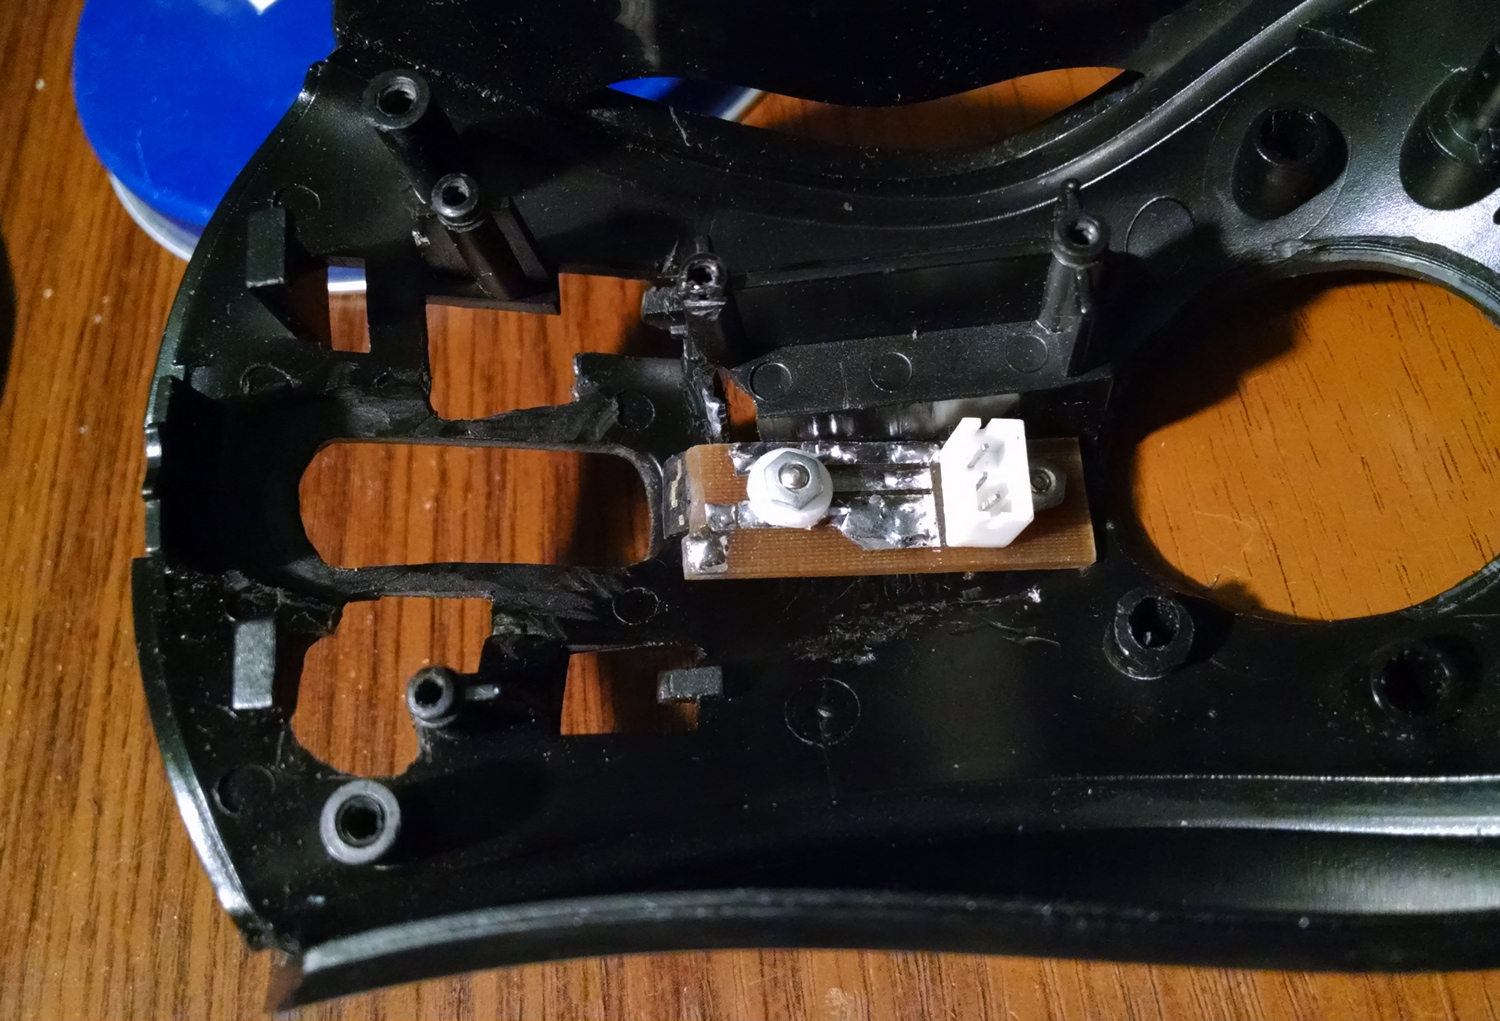
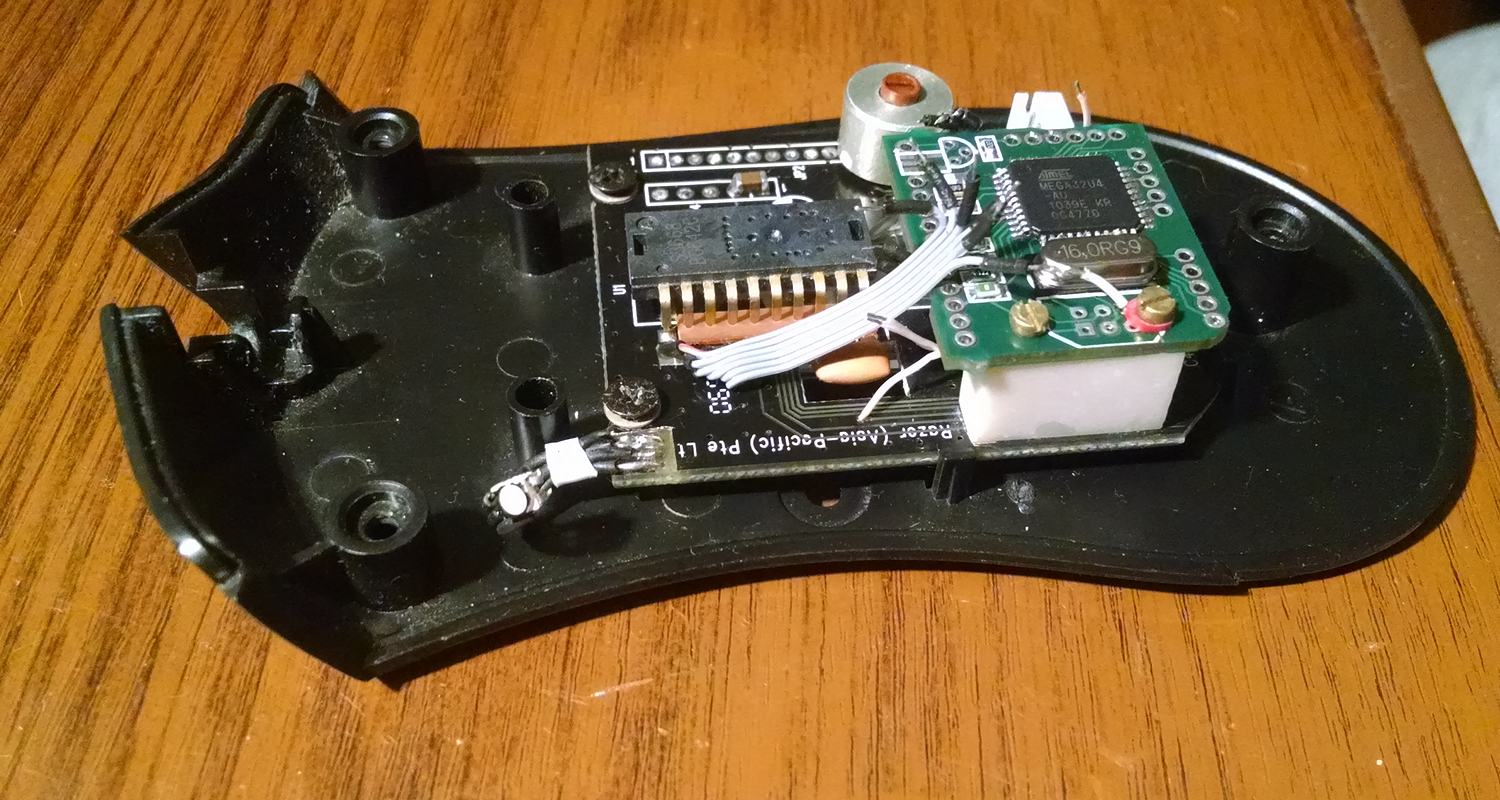
Trying to install the board for the microcontroller:
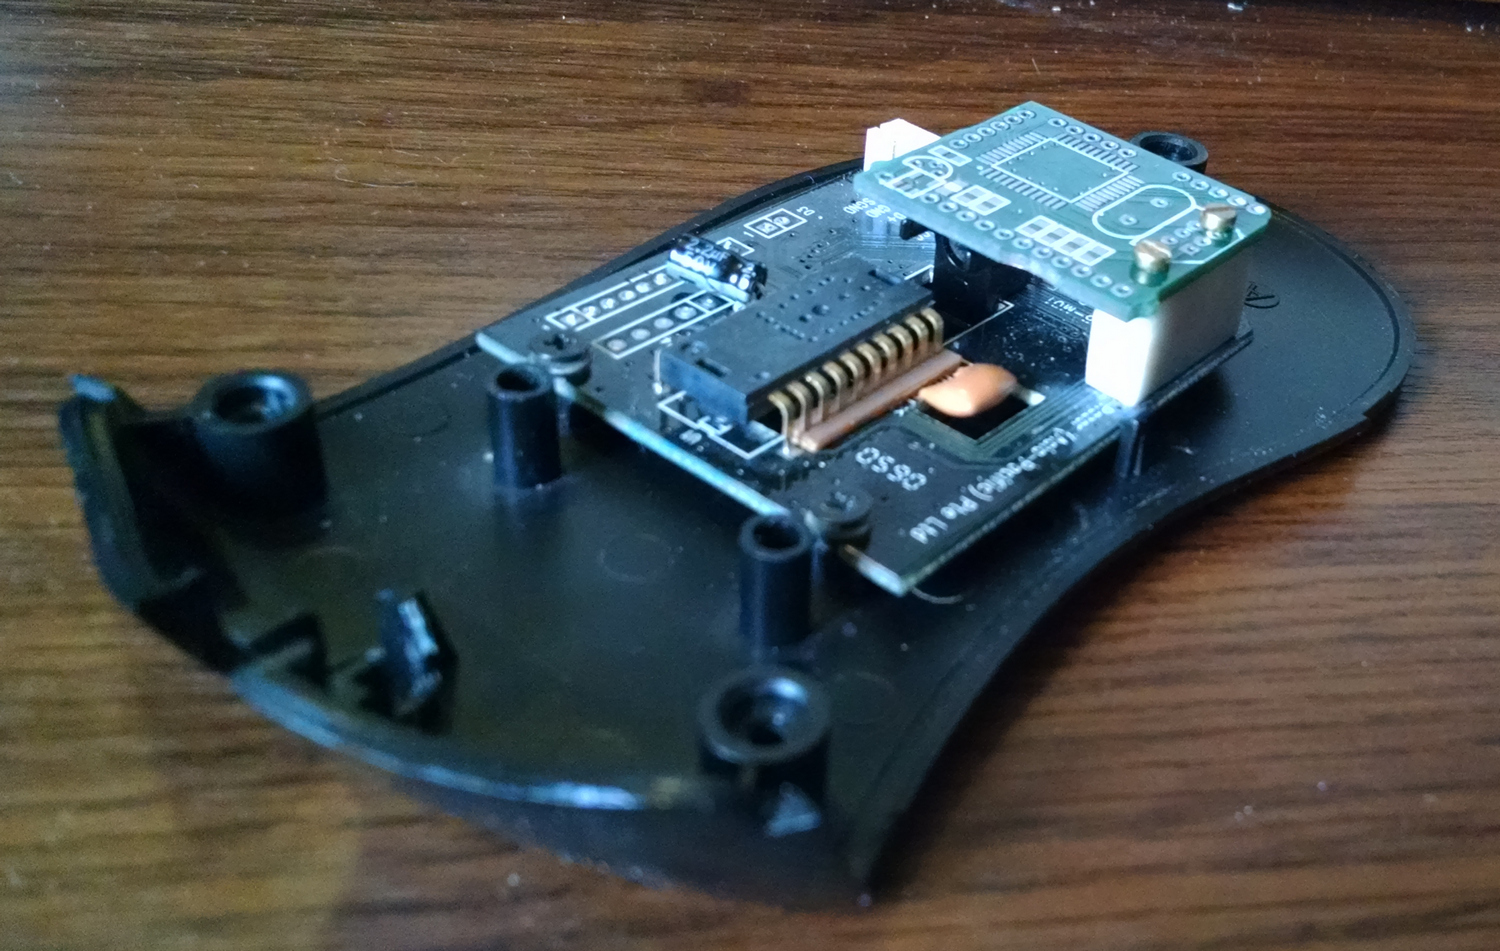
The microcontroller is installed on the board. On the main board, wiring for communication with the microcontroller board is prepared. A variable resistor is installed to adjust the sensor's backlight current. The “profile” LED is installed.
W-mouse can use one of six profiles.
Switching profiles can be done as a separate button or automatically by a special program that tracks the active window and includes the corresponding profile.
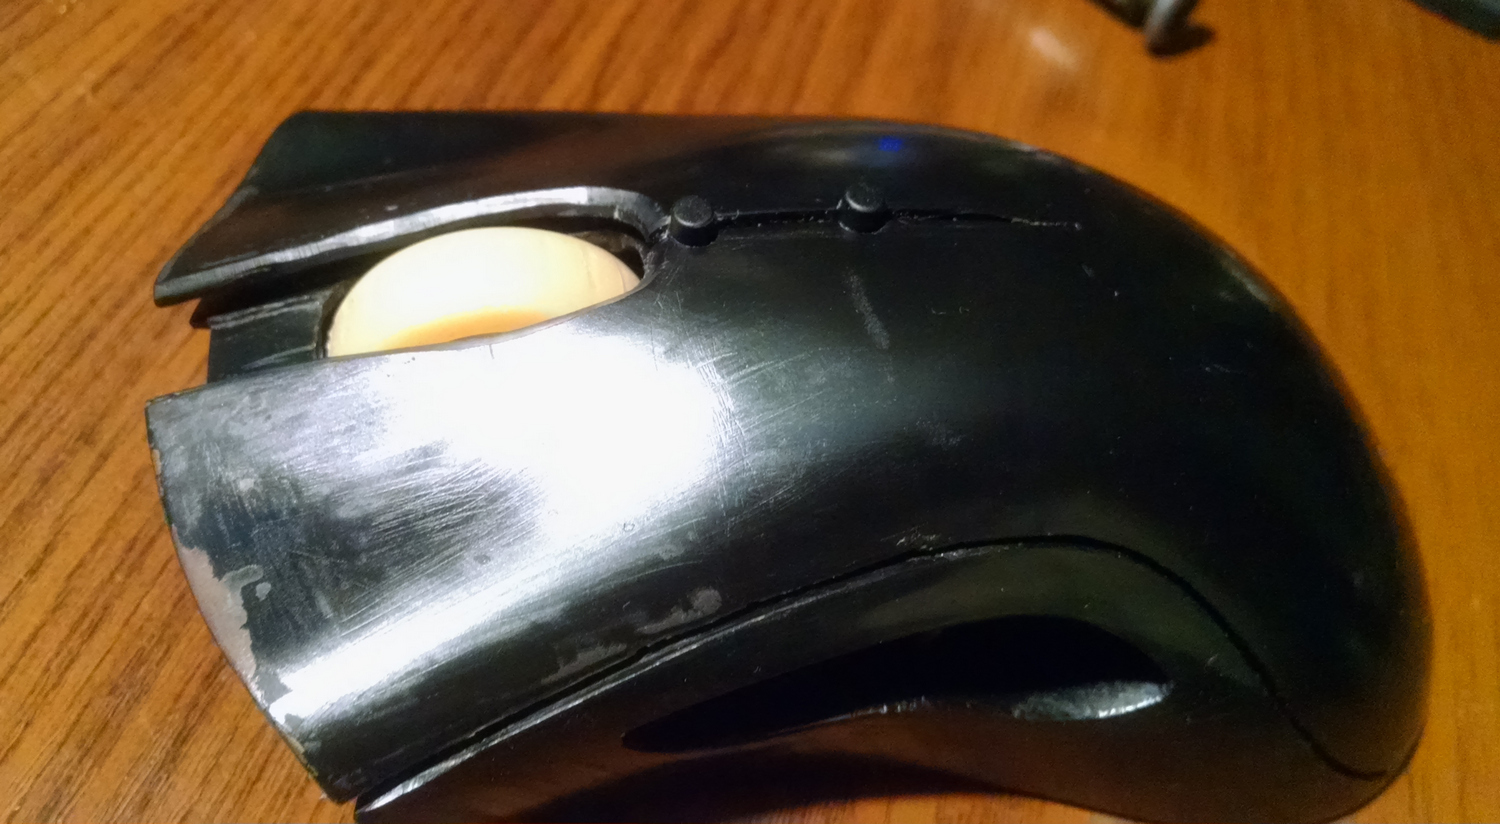
In the front of the mouse, which is always visible, made an insert from matte plexiglass (pulled it out of the old sdrome).

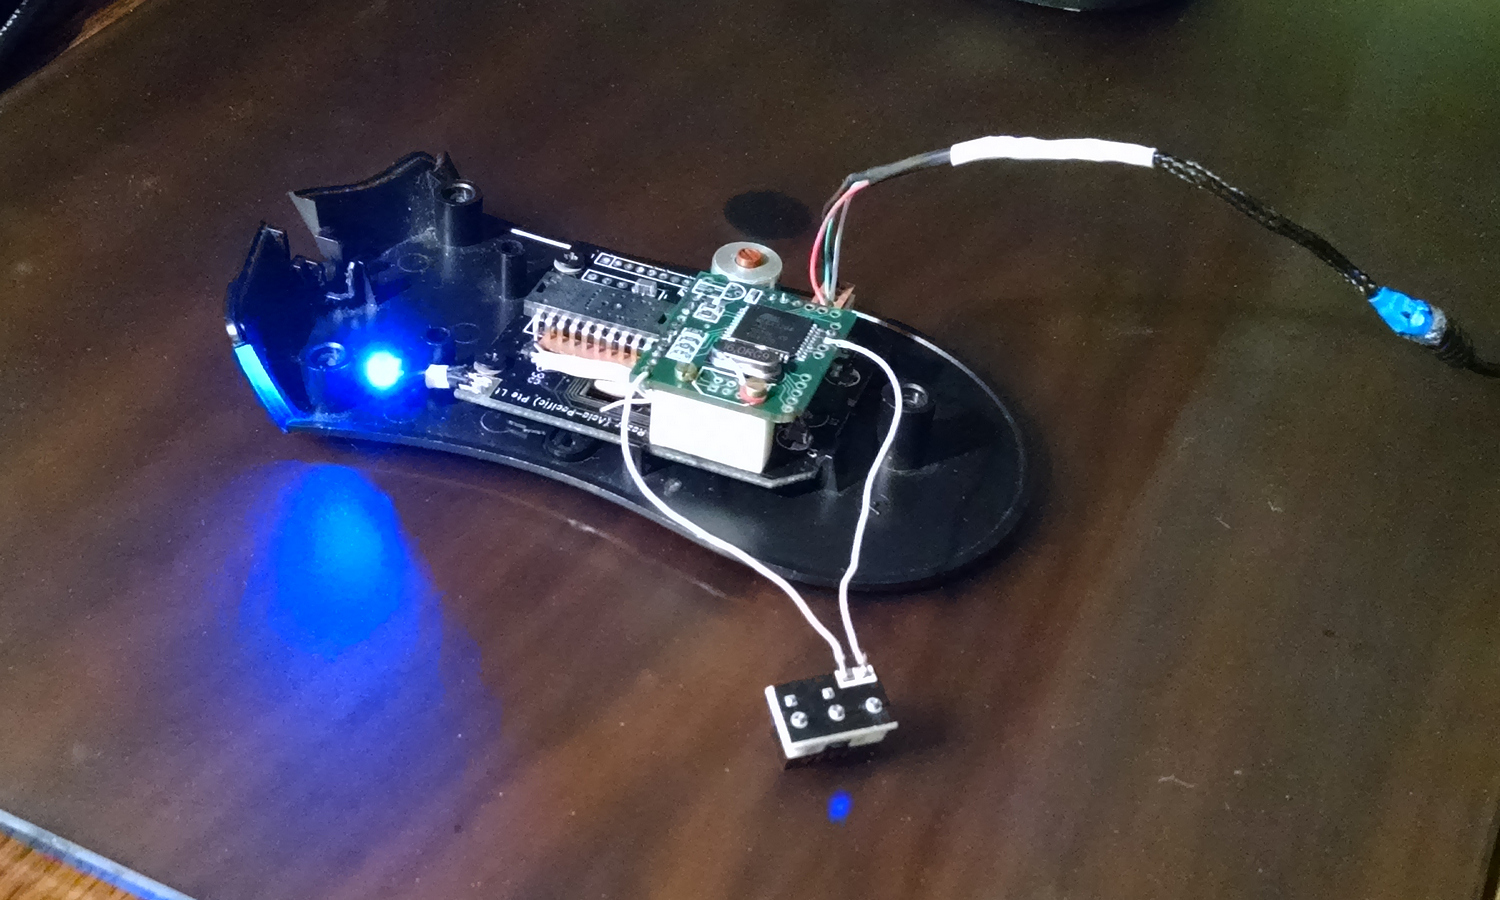
After that, the microcontroller board was connected and the W-mouse firmware was flooded.
The most exciting moment - the first inclusion:
Joy was short-lived. The mouse, having worked for five minutes, at shutdown and subsequent switching on, stopped giving signs of life. / longing sadness /
After a short break (nervous break and reflections / smile /), the mouse turned on and worked for about half a minute ...
Then there were 2-3 hours of tinkering with dialing, replacing tanks and trying to figure out the reason for such vile behavior - sometimes it turned on and worked for half a minute ...
It was decided to replace the quartz, and at this stage I soldered the wire from the quartz body to the ground.
I must say that on the previous W-mouse the connection of the quartz body to the ground is used. After desoldering this wire, the mouse turned on and began to work flawlessly. /Hooray/
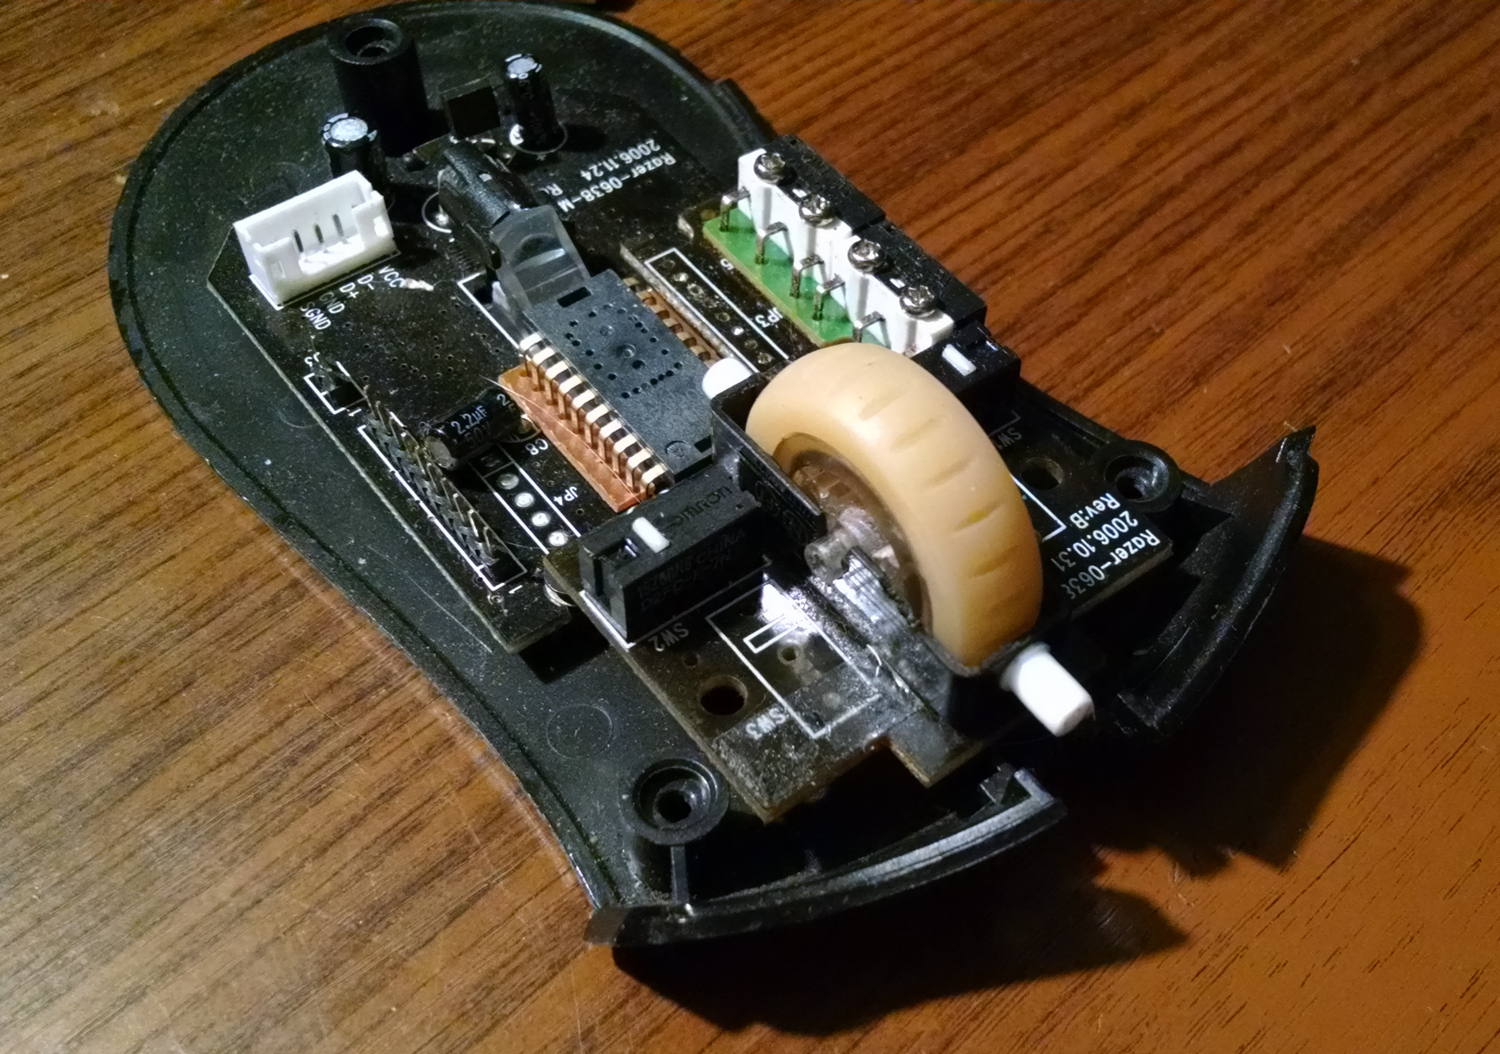
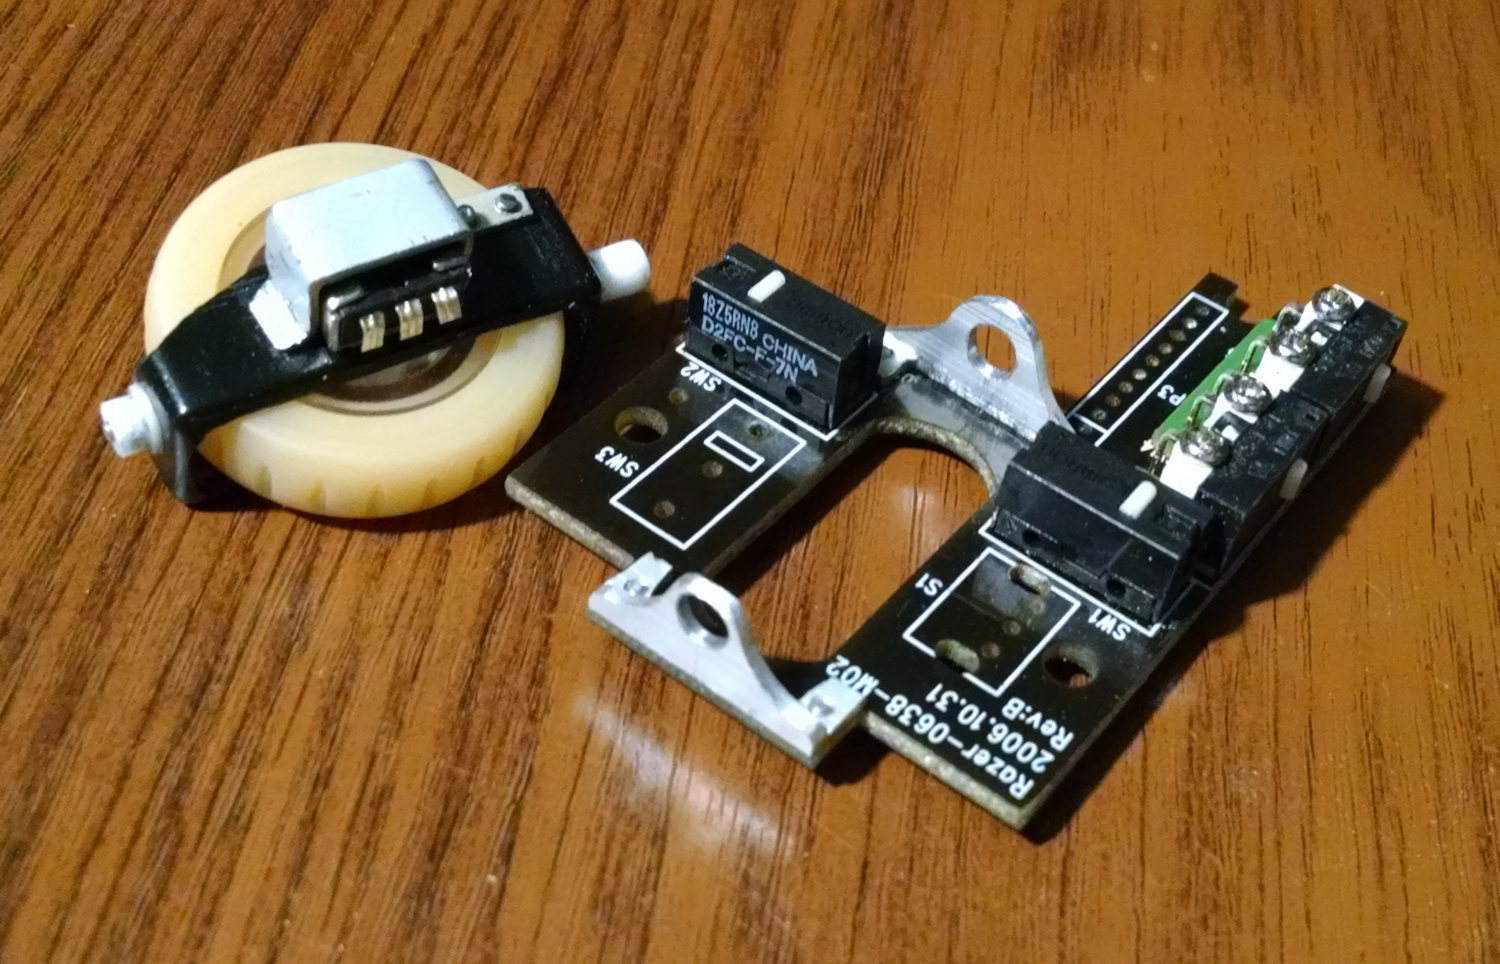
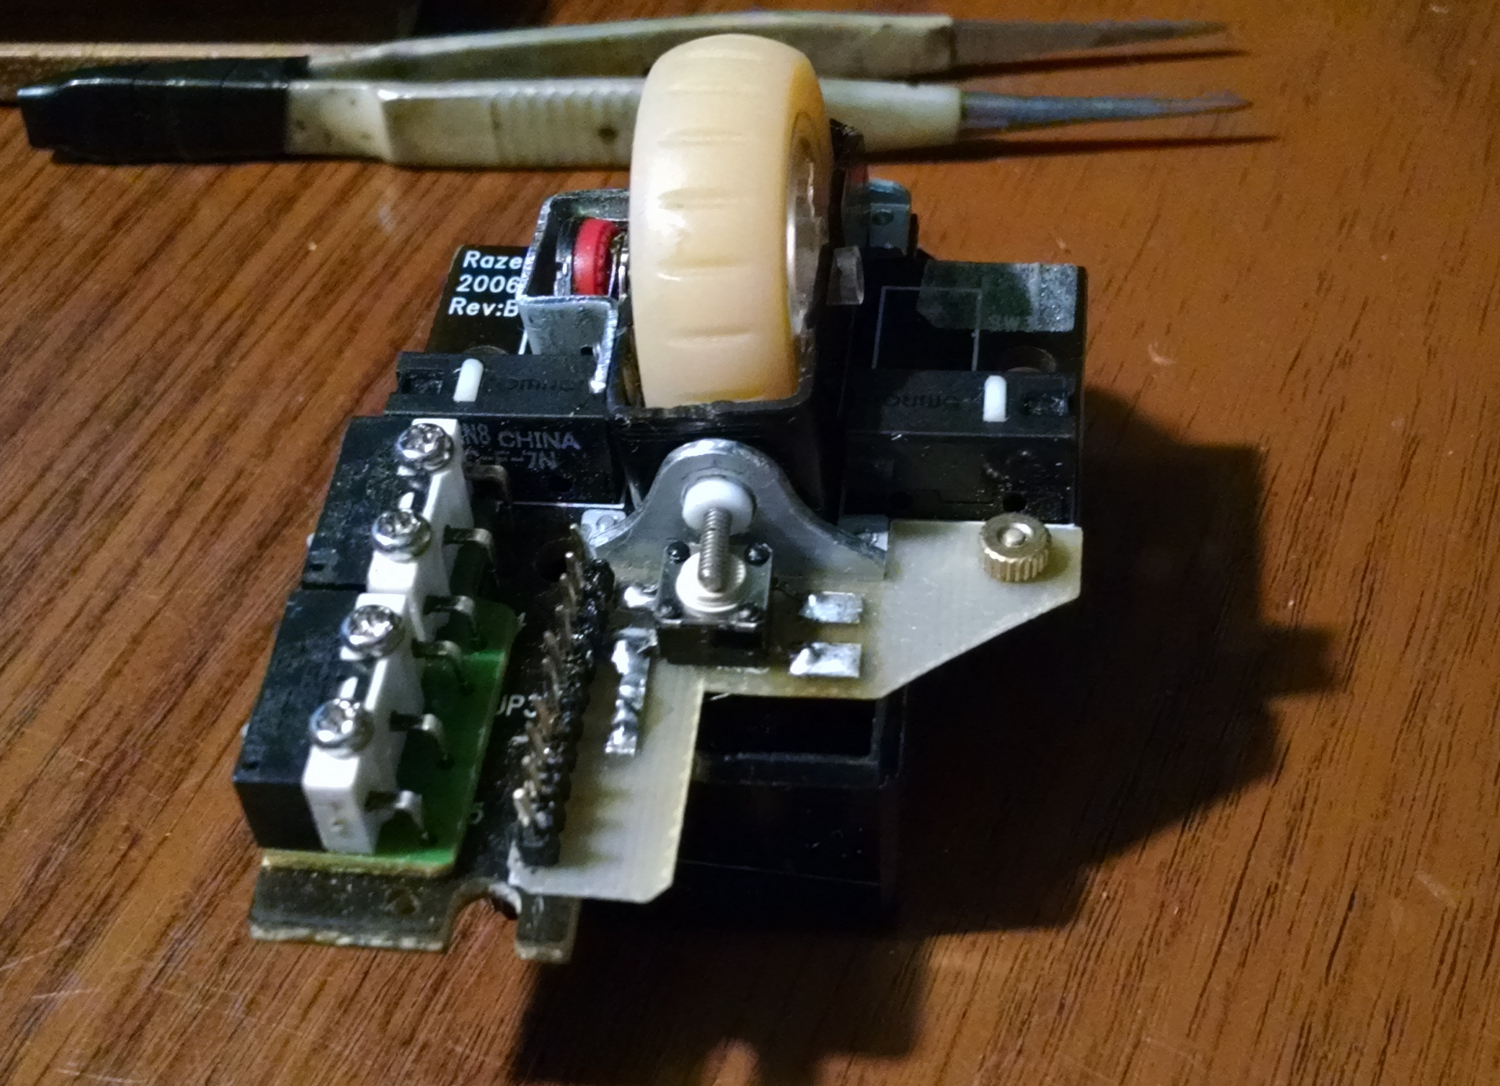
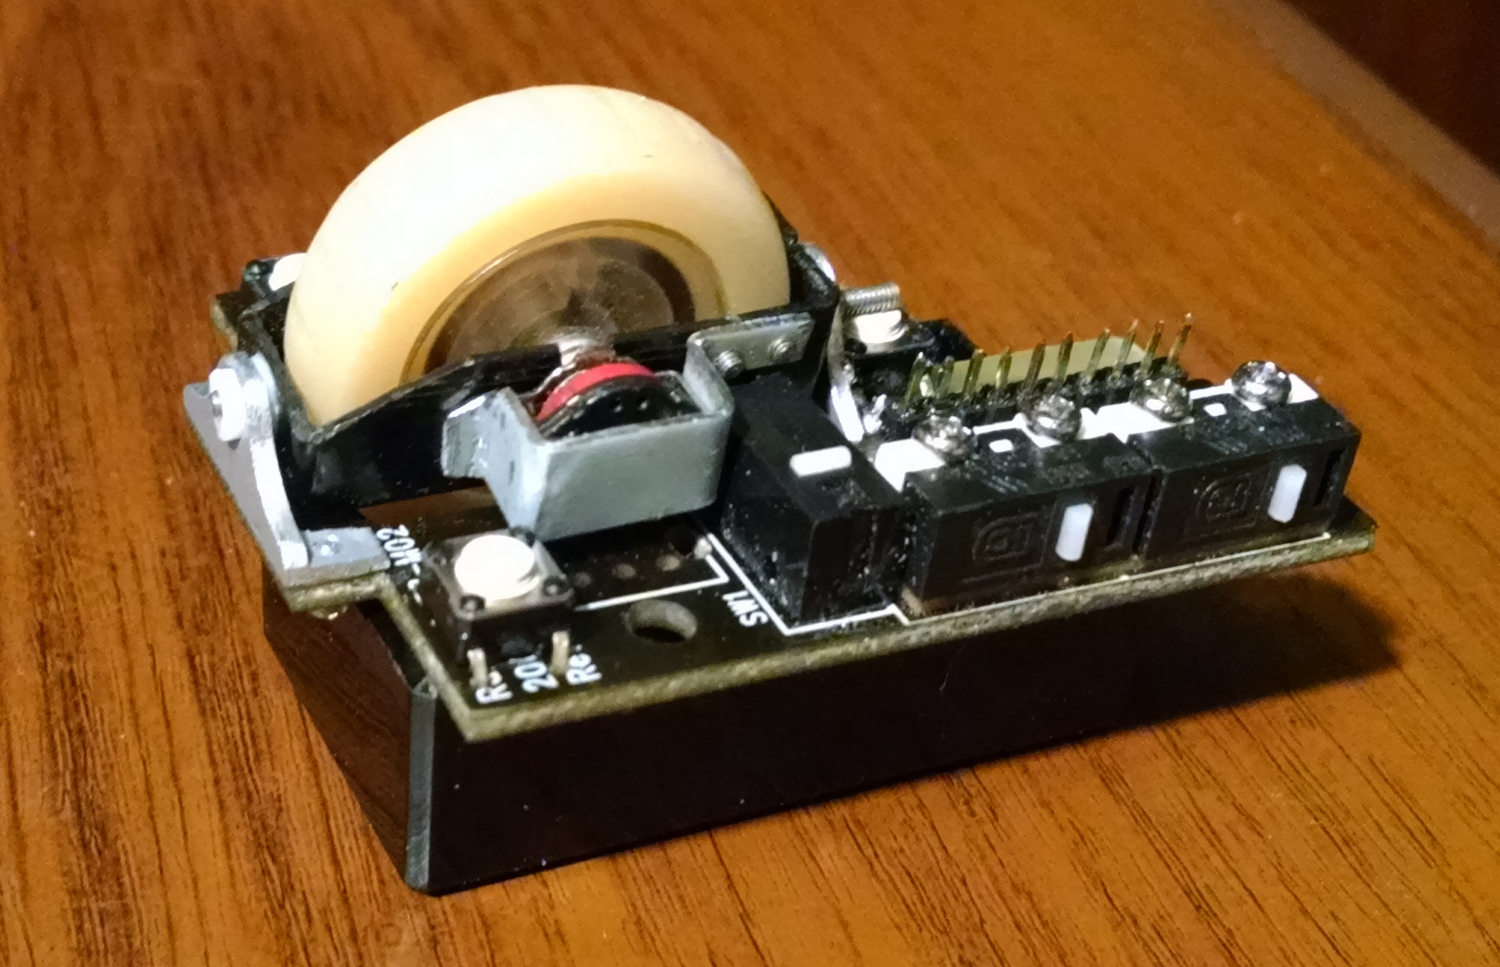
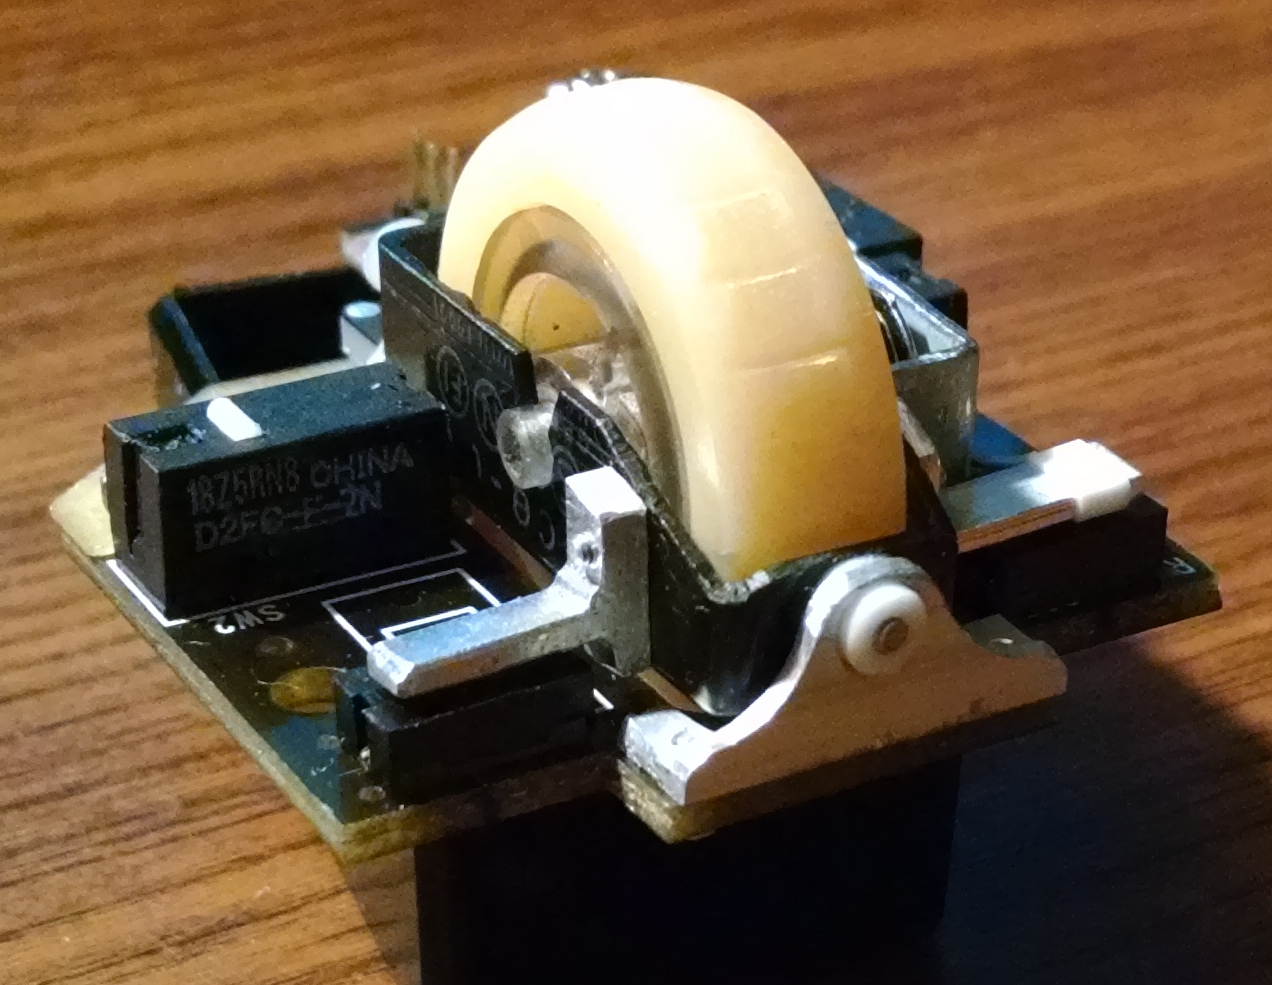
Checking the board with buttons and wheel:

Next, the mouse was assembled into the case, in a fully operational state, and it was checked in the browser, as well as in the BF4 game.
The audit showed that the side pressures of the wheels are very “heavy”, additionally this was aggravated by the fact that the DeathAdder wheel had rounded side faces.
It was also hard to press 3KM i. the wheel itself.
It was decided to put a spare Hunter in the Derben who had once bought a cheap price.
He pulled out of it two buttons that stood on the wheel slopes.
I didn’t want to do this right away, as these buttons were spare for the already used “Hunter”, but “since it’s such a booze, cut the last cucumber” / haha /
For 3KM, a “gentle” membrane button was found in one of the ragged bodies of an A4 mouse.
Installing the new side buttons required a remake of the push levers.
As one that fits only on one screw, it fits perfectly, the same aluminum corner from which the “crib” supports were made, while the lever that is fastened with two screws had to be completely turned out from a piece of duralumin 3 mm thick.
As a result, the lateral pressing of the wheel became light and pleasant.
The back was painted with alkyd paint, which is somewhat rough (“rust-oleum multicolor textured”), it is important because if the surface is smooth, the hand sticks unpleasantly.
The final appearance of the mouse:
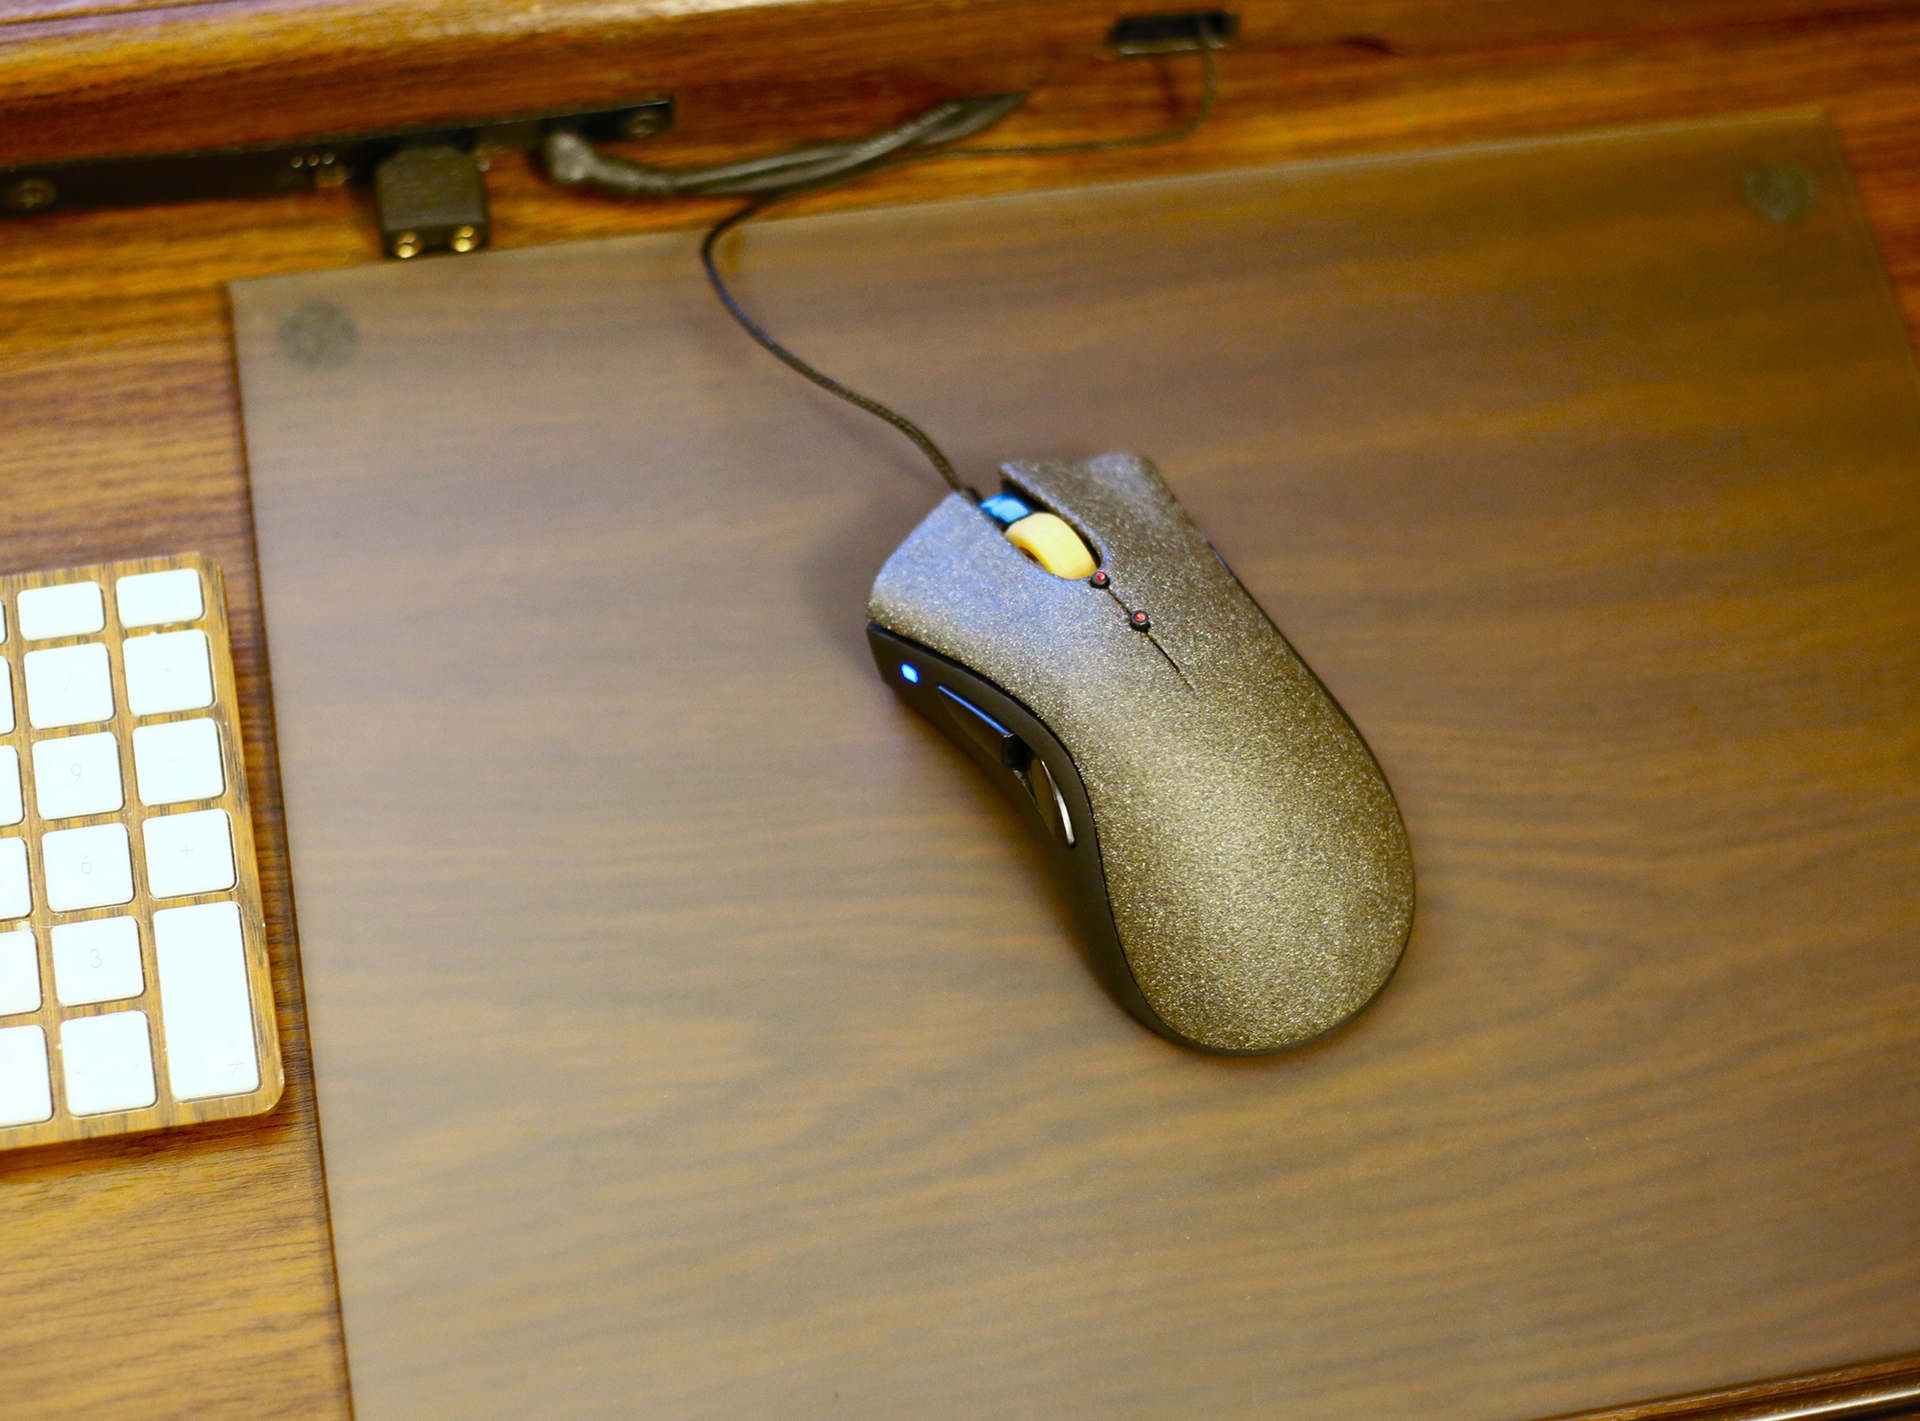
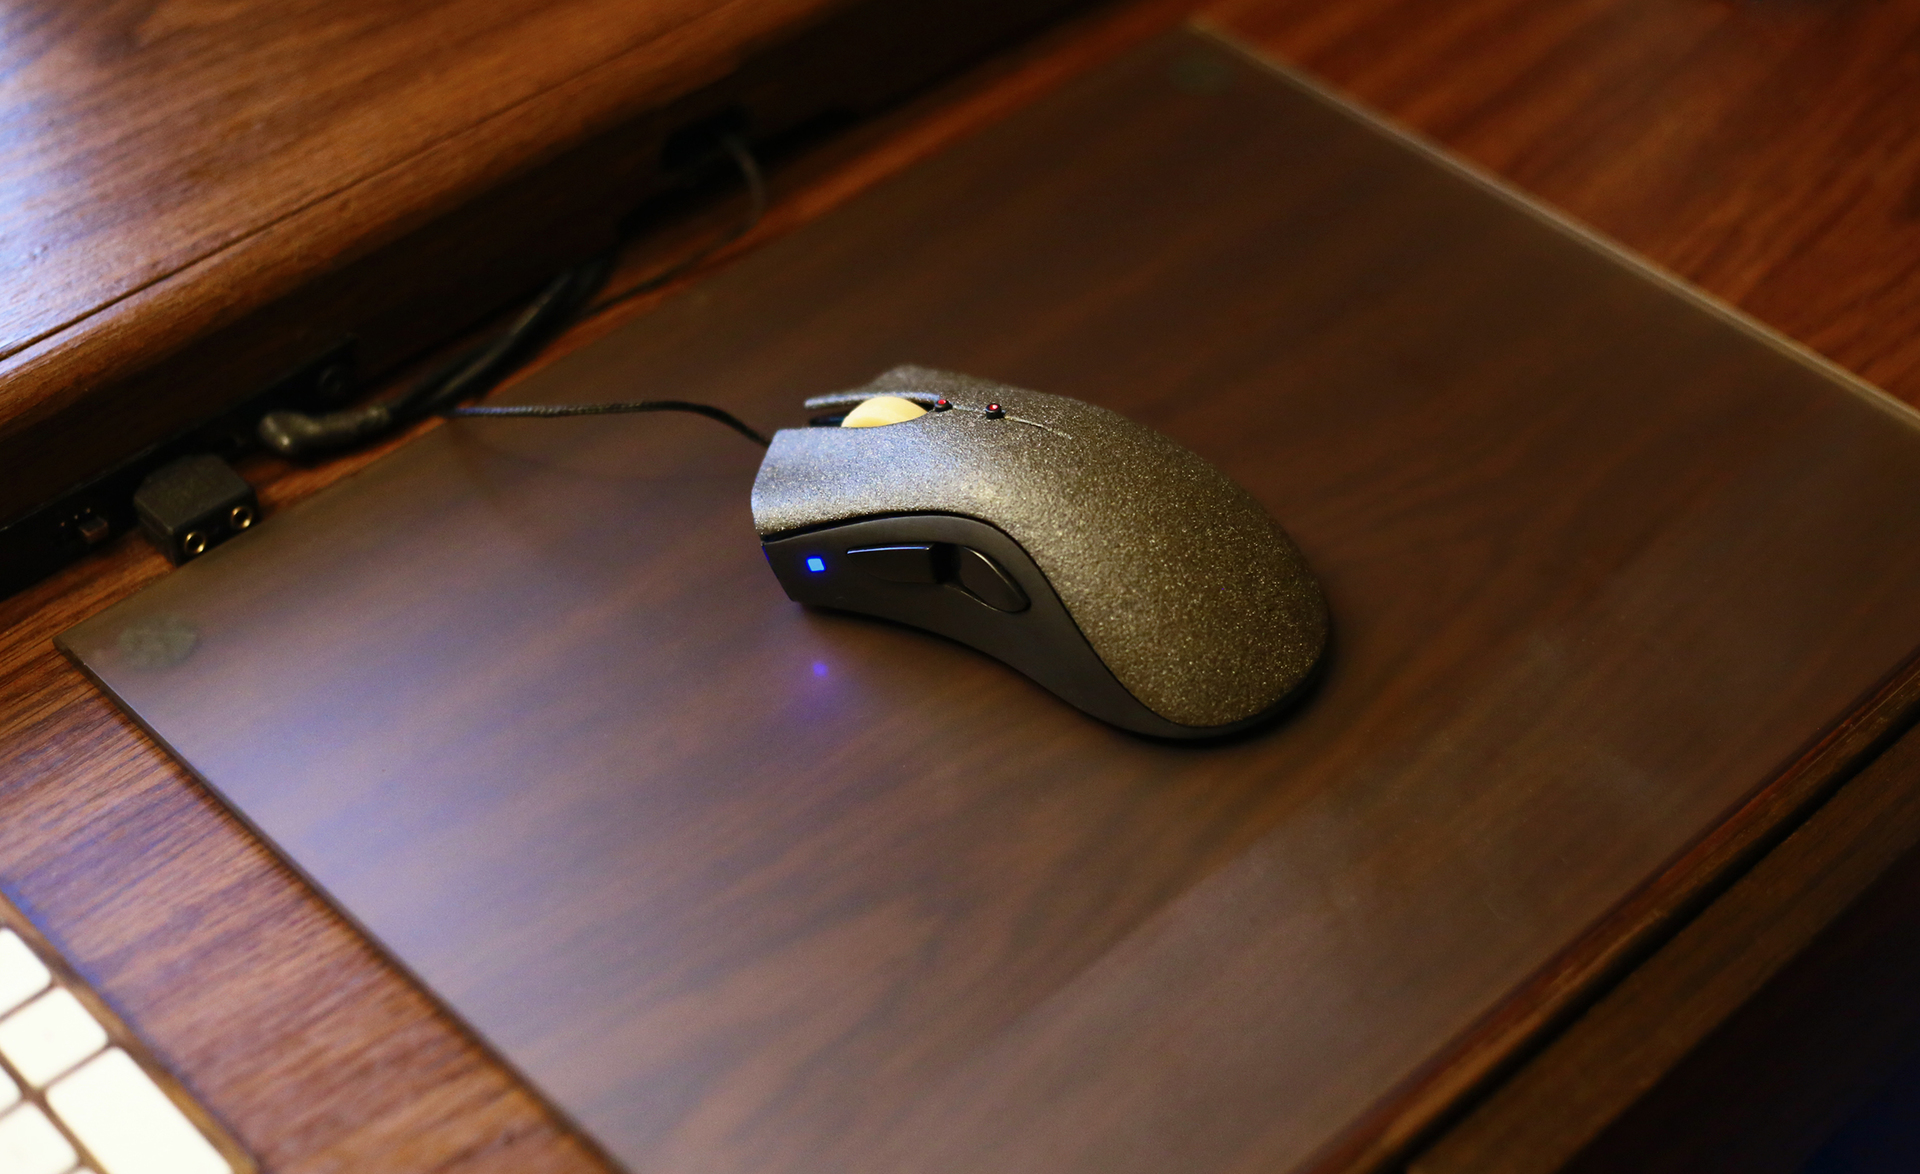
Very pleased with the result.
references:
W-mouse project on overclockers website - forums.overclockers.ru/viewtopic.php?f=47&t=330808
Previous build W-mouse in the case of "Hunter" - geektimes.ru/post/258184
special thanks to Walkie as author of the W-mouse
Source: https://habr.com/ru/post/390453/
All Articles