FLProg - Creating custom C blocks (Non-Queue Lesson)

The FLProg project has recently gained quite a lot of popularity, and I no longer have enough time to create blocks for the peripherals that users need. At the same time, among the users of the site there were a sufficient number of people who are well versed in the C language and could help me in the development of the program. I decided to give them the appropriate tool. Thus, in version 1.10.3, it became possible to create custom blocks with integrated code in C. This led to quite unexpected results. This tool is not only interested in programming users, but also those who have not written code before. They began to write at first unpretentious blocks (for example, receiving a logarithm — I did not have such a block among the standard ones), ending with already serious blocks using libraries. Therefore, I want to break the conceived sequence of lessons on working with the program, and I will tell you out of turn how to create such blocks.
A block for the digital compass HMC5883L will be created in the lesson. The basis of the block was taken this article. The library is taken from here .
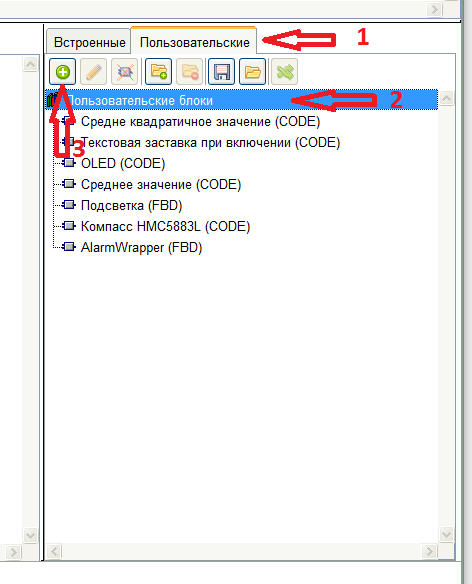
So, run the program and create a new project. In the library of elements, go to the “Custom” tab and select the tree branch of the library of user blocks, where the new block will be located. Then click the button "Create block"
')
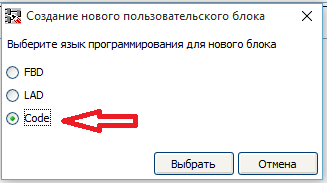
A window opens with a choice of programming language for the block. FBD, LAD and Code languages are available. LAD and FBD languages will be discussed in other lessons, and now we select “Code”.
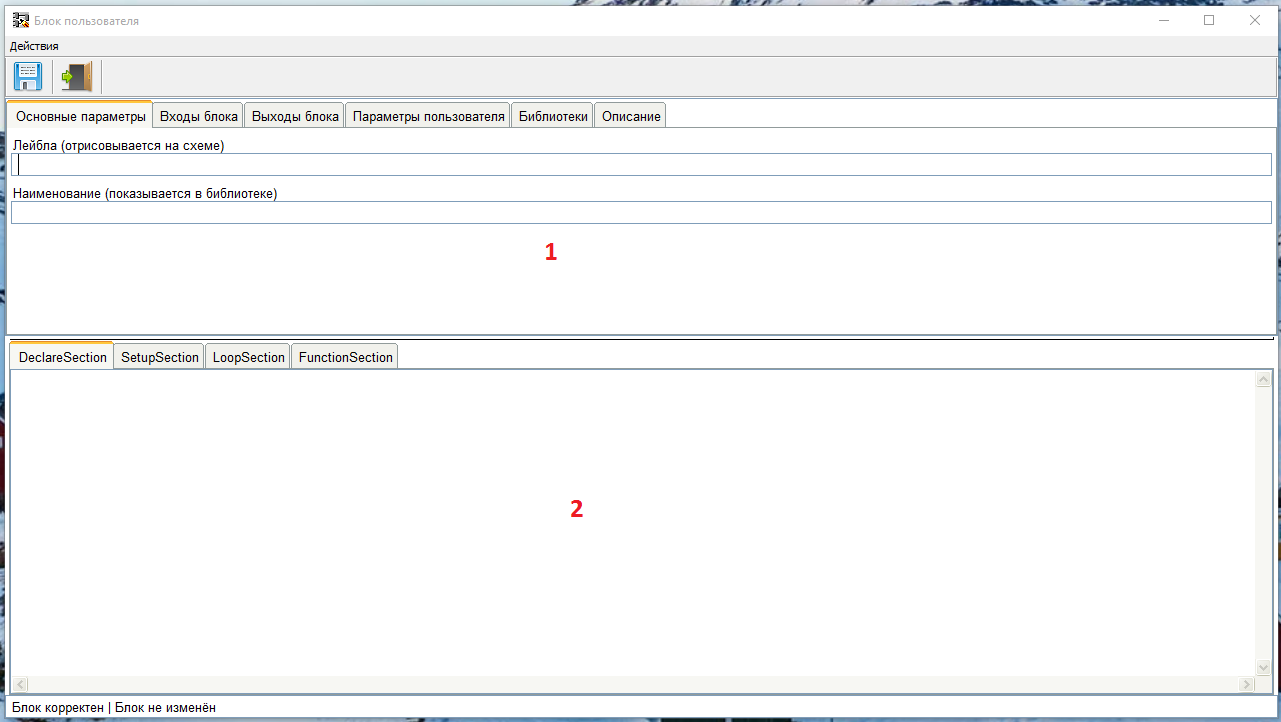
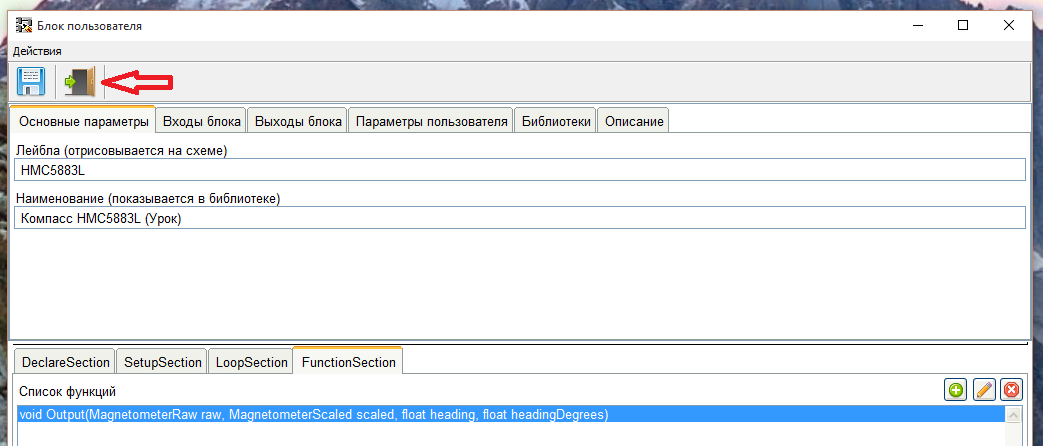
The user block editor window opens. In the upper part there are tabs of parameters (1), in the lower tab of sections of code (2).
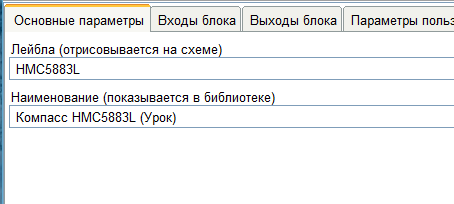
We fill the main parameters.
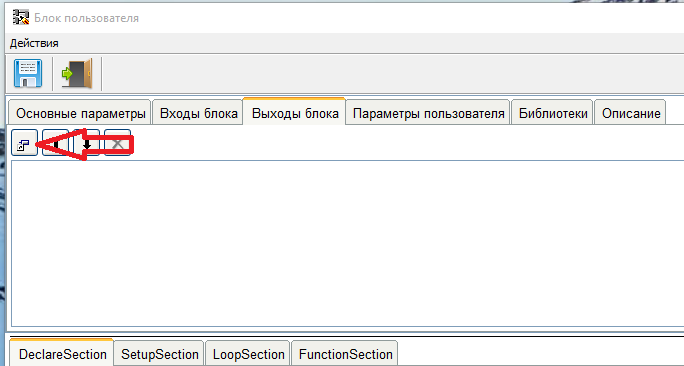
The inputs and outputs of the block are created similarly. There will be no inputs from our block, so we skip this tab and go to the “Block Outputs” tab. The block will have three outputs - the direction along the X, Y, and Z axis. To create an output, press the "Add output" button.
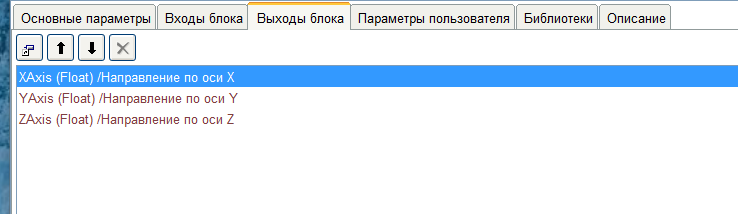
A login window will open. It is very similar to the variable creation window in the main program, so I will not describe it in detail. Values to the output of the block are given in the format Float - therefore, the type of inputs is chosen the same. Restrictions apply to the name of the output, which apply to the name of the variables in C. as it will appear in the code. There are no restrictions on writing comments.

In the same way we create the remaining exits.
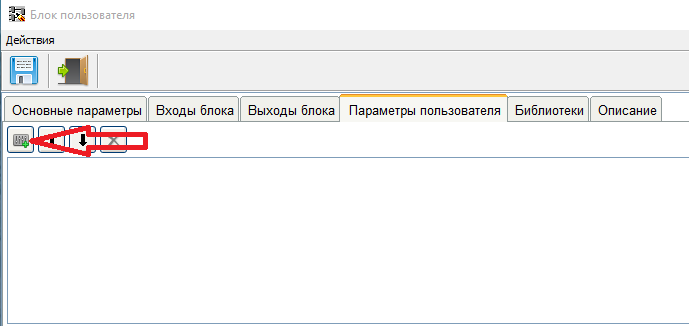
Now we will set the parameter that the user will set when using the block. This will be the sensitivity of the sensor. In accordance with the description, it is selected from the series: 0.88, 1.3, 1.9, 2.5, 4.0, 4.7, 5.6, 8.1
Go to the tab "User Parameters" and click the button "Add parameter".
A window for creating a user parameter will open. Since we have a parameter of type Float, we select this type. There are no restrictions on the name of the parameter, since in the resulting code this name will be replaced by the value of the parameter. There are also no restrictions on the text of the comment.
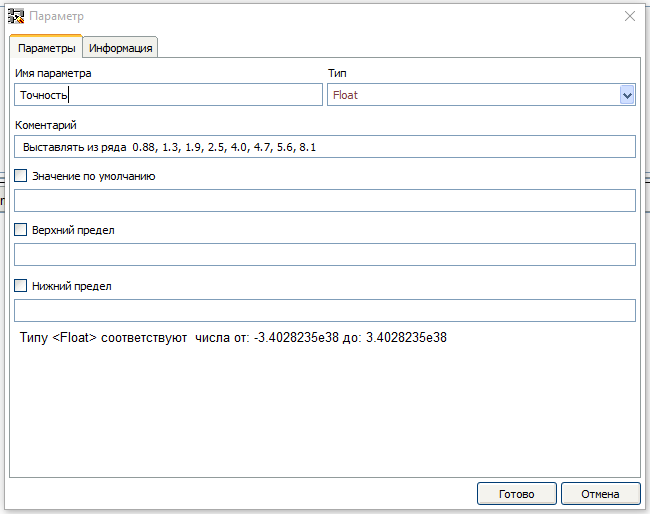
When creating a parameter, you can set a default value. In this case, when using a block, it will not be necessary to set the parameter value. It is also possible to set the bounds of the parameter values, and if the entered value goes beyond these bounds, the block will be considered incorrect.
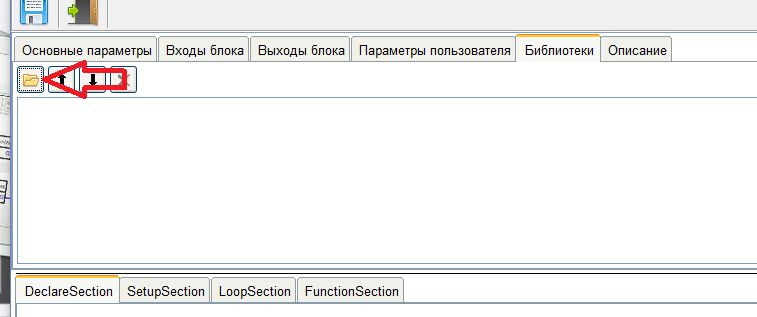
Now let's do the library. Let's go to the tab "Libraries". Libraries used in the block can be downloaded directly into the block. To do this, click the "Load Library" button.
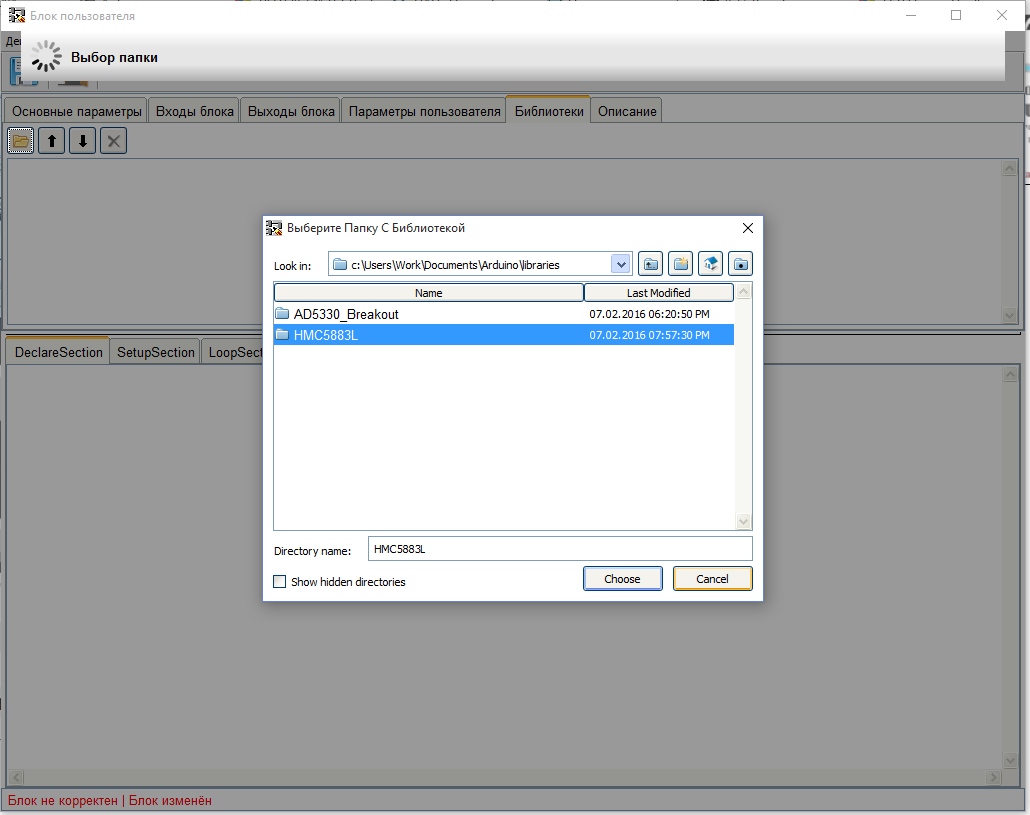
A window for selecting a folder with a library will open.
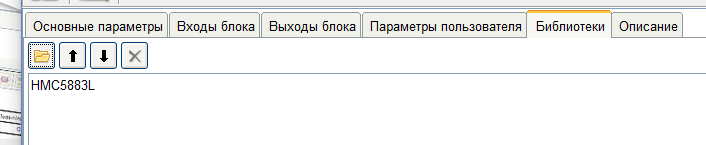
After selecting the library folder, it will be loaded into the block, and will be displayed in the list of loaded libraries. It is possible to load several libraries, if it is necessary for the operation of the block.
When using a block in a project, before compiling the scheme, the program will check the presence of libraries loaded in the block of libraries in the directory with libraries, and if there are none, it will unload the missing ones.
On the “Description” tab it is advisable to write how to work with the unit, what it is for, etc. This description will help other users to use it.
Now let's go to the code zone
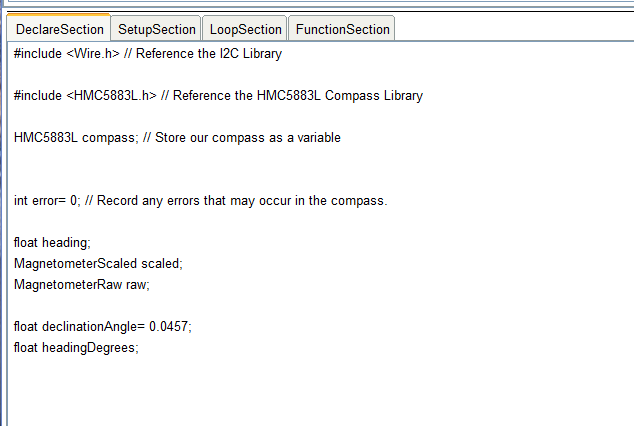
The first tab is the “DeclareSection” section. On this tab, you need to register the connection of the necessary libraries, the declaration of variables, arrays and structures. Fill this section, focusing on an example from the library.
The code for the Declare section from the example.
/* HMC5883L_Example.pde - Example sketch for integration with an HMC5883L triple axis magnetomerwe. Copyright (C) 2011 Love Electronics (loveelectronics.co.uk) This program is free software: you can redistribute it and/or modify it under the terms of the version 3 GNU General Public License as published by the Free Software Foundation. This program is distributed in the hope that it will be useful, but WITHOUT ANY WARRANTY; without even the implied warranty of MERCHANTABILITY or FITNESS FOR A PARTICULAR PURPOSE. See the GNU General Public License for more details. You should have received a copy of the GNU General Public License along with this program. If not, see <http://www.gnu.org/licenses/>. */ // Reference the I2C Library #include <Wire.h> // Reference the HMC5883L Compass Library #include <HMC5883L.h> // Store our compass as a variable. HMC5883L compass; // Record any errors that may occur in the compass. int error = 0; // Out setup routine, here we will configure the microcontroller and compass. When transferring to the block, unnecessary comments are removed, although there are no restrictions on their use other than the limitations of the C language itself. Also added some variables that will come in handy later in the code. In the original example, they are declared in the Loop section. Here they are moved to the Declare section.
Today, in the Declare section, you can use declarations of variables of any type, declaration of arrays and structures. The #define directive is correctly processed.
You cannot use an ad of this type:
typedef struct{ ... ...} test; It needs to be altered in this form:
struct test{ ... ... }; Cannot use extern type. This turned out to be quite a big problem, and I hope to solve it in the near future.
Now let's go to the “SetupSection” section. Here the code is transferred from the example almost one to one.
The code from the example
void setup() { // Initialize the serial port. Serial.begin(9600); Serial.println("Starting the I2C interface."); Wire.begin(); // Start the I2C interface. Serial.println("Constructing new HMC5883L"); compass = HMC5883L(); // Construct a new HMC5883 compass. Serial.println("Setting scale to +/- 1.3 Ga"); error = compass.SetScale(1.3); // Set the scale of the compass. if(error != 0) // If there is an error, print it out. Serial.println(compass.GetErrorText(error)); Serial.println("Setting measurement mode to continous."); error = compass.SetMeasurementMode(Measurement_Continuous); // Set the measurement mode to Continuous if(error != 0) // If there is an error, print it out. Serial.println(compass.GetErrorText(error)); } From the example, the section header and the brackets bounding the section are removed (they are inserted by the program during compilation). Also removed the entire diagnostic output in the comport. That's what happened.
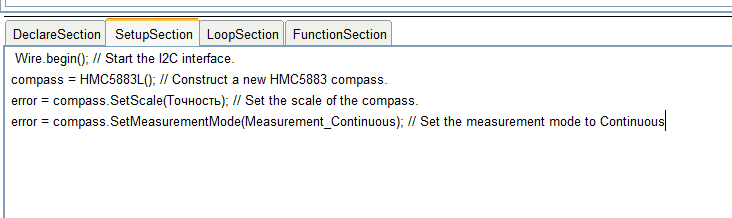
Note that instead of the accuracy parameter, the name of the parameter Accuracy is inserted. When the block is compiled, the value entered by the user will be inserted instead of this name.
We now turn to the Loop section.
The original code from the sample library
void loop() { // Retrive the raw values from the compass (not scaled). MagnetometerRaw raw = compass.ReadRawAxis(); // Retrived the scaled values from the compass (scaled to the configured scale). MagnetometerScaled scaled = compass.ReadScaledAxis(); // Values are accessed like so: int MilliGauss_OnThe_XAxis = scaled.XAxis;// (or YAxis, or ZAxis) // Calculate heading when the magnetometer is level, then correct for signs of axis. float heading = atan2(scaled.YAxis, scaled.XAxis); // Once you have your heading, you must then add your 'Declination Angle', which is the 'Error' of the magnetic field in your location. // Find yours here: http://www.magnetic-declination.com/ // Mine is: 2” 37' W, which is 2.617 Degrees, or (which we need) 0.0456752665 radians, I will use 0.0457 // If you cannot find your Declination, comment out these two lines, your compass will be slightly off. float declinationAngle = 0.0457; heading += declinationAngle; // Correct for when signs are reversed. if(heading < 0) heading += 2*PI; // Check for wrap due to addition of declination. if(heading > 2*PI) heading -= 2*PI; // Convert radians to degrees for readability. float headingDegrees = heading * 180/M_PI; // Output the data via the serial port. Output(raw, scaled, heading, headingDegrees); // Normally we would delay the application by 66ms to allow the loop // to run at 15Hz (default bandwidth for the HMC5883L). // However since we have a long serial out (104ms at 9600) we will let // it run at its natural speed. // delay(66); } Just as in the Setup section, we remove the section header and the bounding brackets. They will be inserted into the code automatically by the program. Also remove the variable declaration in the Loop section. In this section, it is not very desirable to declare temporary variables, because if a block is used in a project several times, then an error will be repeated to declare the variable.
The result is the following code:

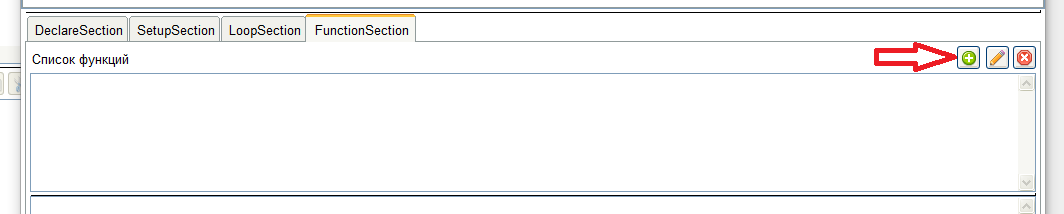
At the end of the code, we call the Output (raw, scaled, heading, headingDegrees) function . In principle, it was possible to do without it, but I decided to leave it for an example of creating a function. Therefore, go to the tab "FunctionSection"
To create a new function, click the button "Add function".
A function input window will open, where we enter its definition.
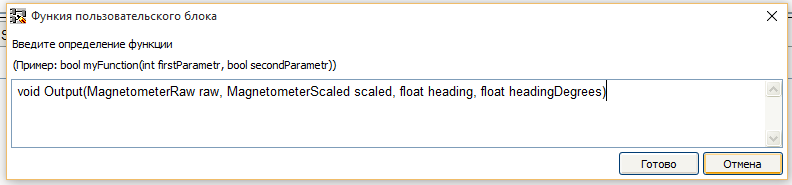
After creating the header, write the function code.
The original function code from the example.
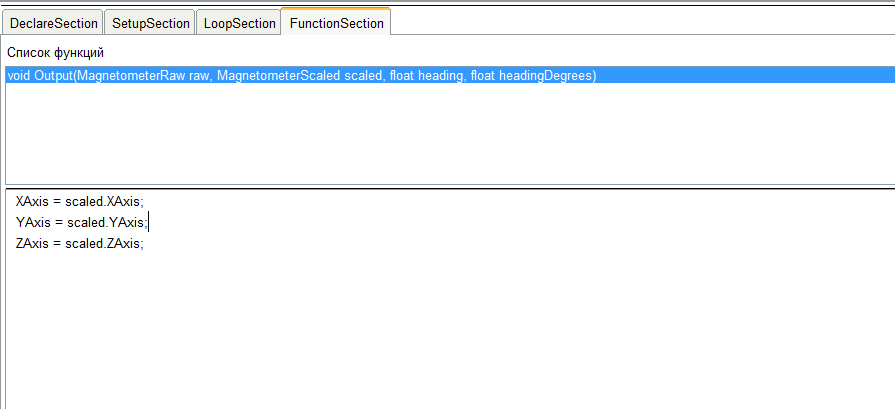
void Output(MagnetometerRaw raw, MagnetometerScaled scaled, float heading, float headingDegrees) { Serial.print("Raw:\t"); Serial.print(raw.XAxis); Serial.print(" "); Serial.print(raw.YAxis); Serial.print(" "); Serial.print(raw.ZAxis); Serial.print(" \tScaled:\t"); Serial.print(scaled.XAxis); Serial.print(" "); Serial.print(scaled.YAxis); Serial.print(" "); Serial.print(scaled.ZAxis); Serial.print(" \tHeading:\t"); Serial.print(heading); Serial.print(" Radians \t"); Serial.print(headingDegrees); Serial.println(" Degrees \t"); } Remove all related to the output in the comport, and assign the values to the outputs of the block. Well, as usual, we remove the title and the bounding brackets. This is the result.
Work on the block is finished.
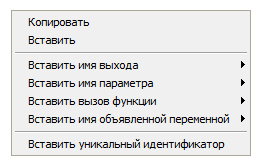
A small bauble when working in the editor block. In any field of the code, it is possible to insert an input name, a parameter output or a function call pattern using the context menu.
Finish the job by pressing the "Exit" button.
After saving the block, it can be used in the project as a normal block.
For the most patient who read to the end - the video version of this lesson.
Source: https://habr.com/ru/post/390267/
All Articles