New life of a budget mountain bike, turning into an electric train
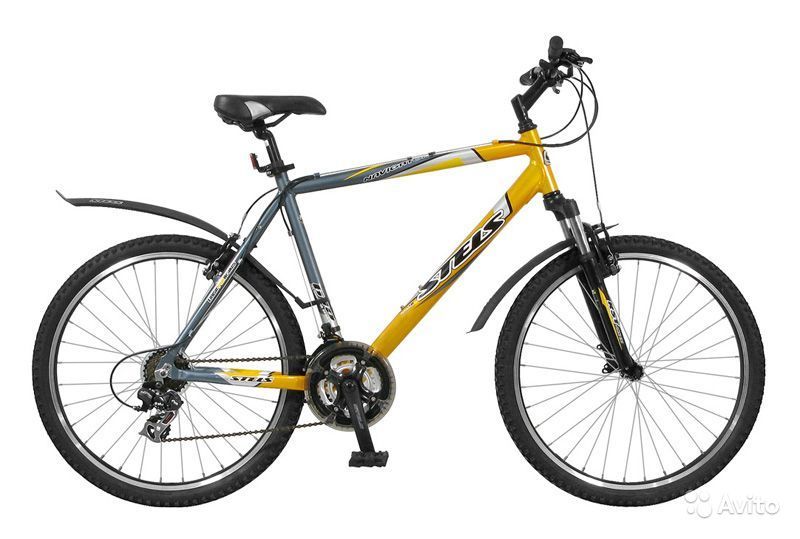
My name is Eugene, I am a student of the Belarusian State University of Transport. Always itching to do everything yourself, as soon as the first damage to my first mountain bike appeared, though it was very budget. It was the Stels Navigator 610.
In August 2014 it was boring, there was money, and I decided to google the topic of electric bikes. After watching videos and other materials on the Internet, I realized what I would borrow myself in August. In Minsk I found a shop that sells conversion kits.
')
For the indiscreet (now already understood) $ 530 set was purchased:

Taking into account the fact that the motor-wheel (front) is already assembled, it was decided that the rim from the front wheel should be spoke into the rear hub, since the rear rim had already been corrected far from the eights and other things. In addition, I decided to abandon the program, that is, instead of a ratchet with stars, I twisted a frivil (ratchet with one star). There were three reasons for this.
And here it would be possible to begin, but there is one more moment concerning appearance. The original paint on the bike was already notably scratched and looked very bad.

There was no time and money for high-quality repainting (it was August), so a simple plan was created that seemed very cool to me then. So, I just bought an album of stickers and, after degreasing the frame, put it up with stickers. And then I poured it over the top with varnish from a can. It looked quite even nothing, I liked it. Unfortunately, the photos of the assembly process have not been preserved, so I will try to describe it in a simple way.
So, the rear wheel is mounted on the finished frame with a fork, and the front motor-wheel is inserted into the fork's ears. By the way, that part of the axis, which is inserted into the ears of the fork, has a non-circular cross-section. In the photo you can see.

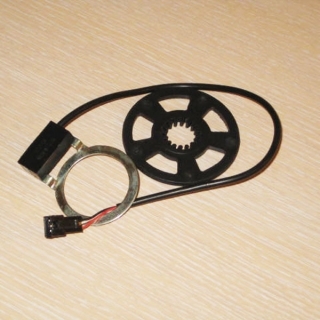
Well, after that the carriage is installed, before twisting a ring with a pedal assist system (PAS) sensor is put on it.
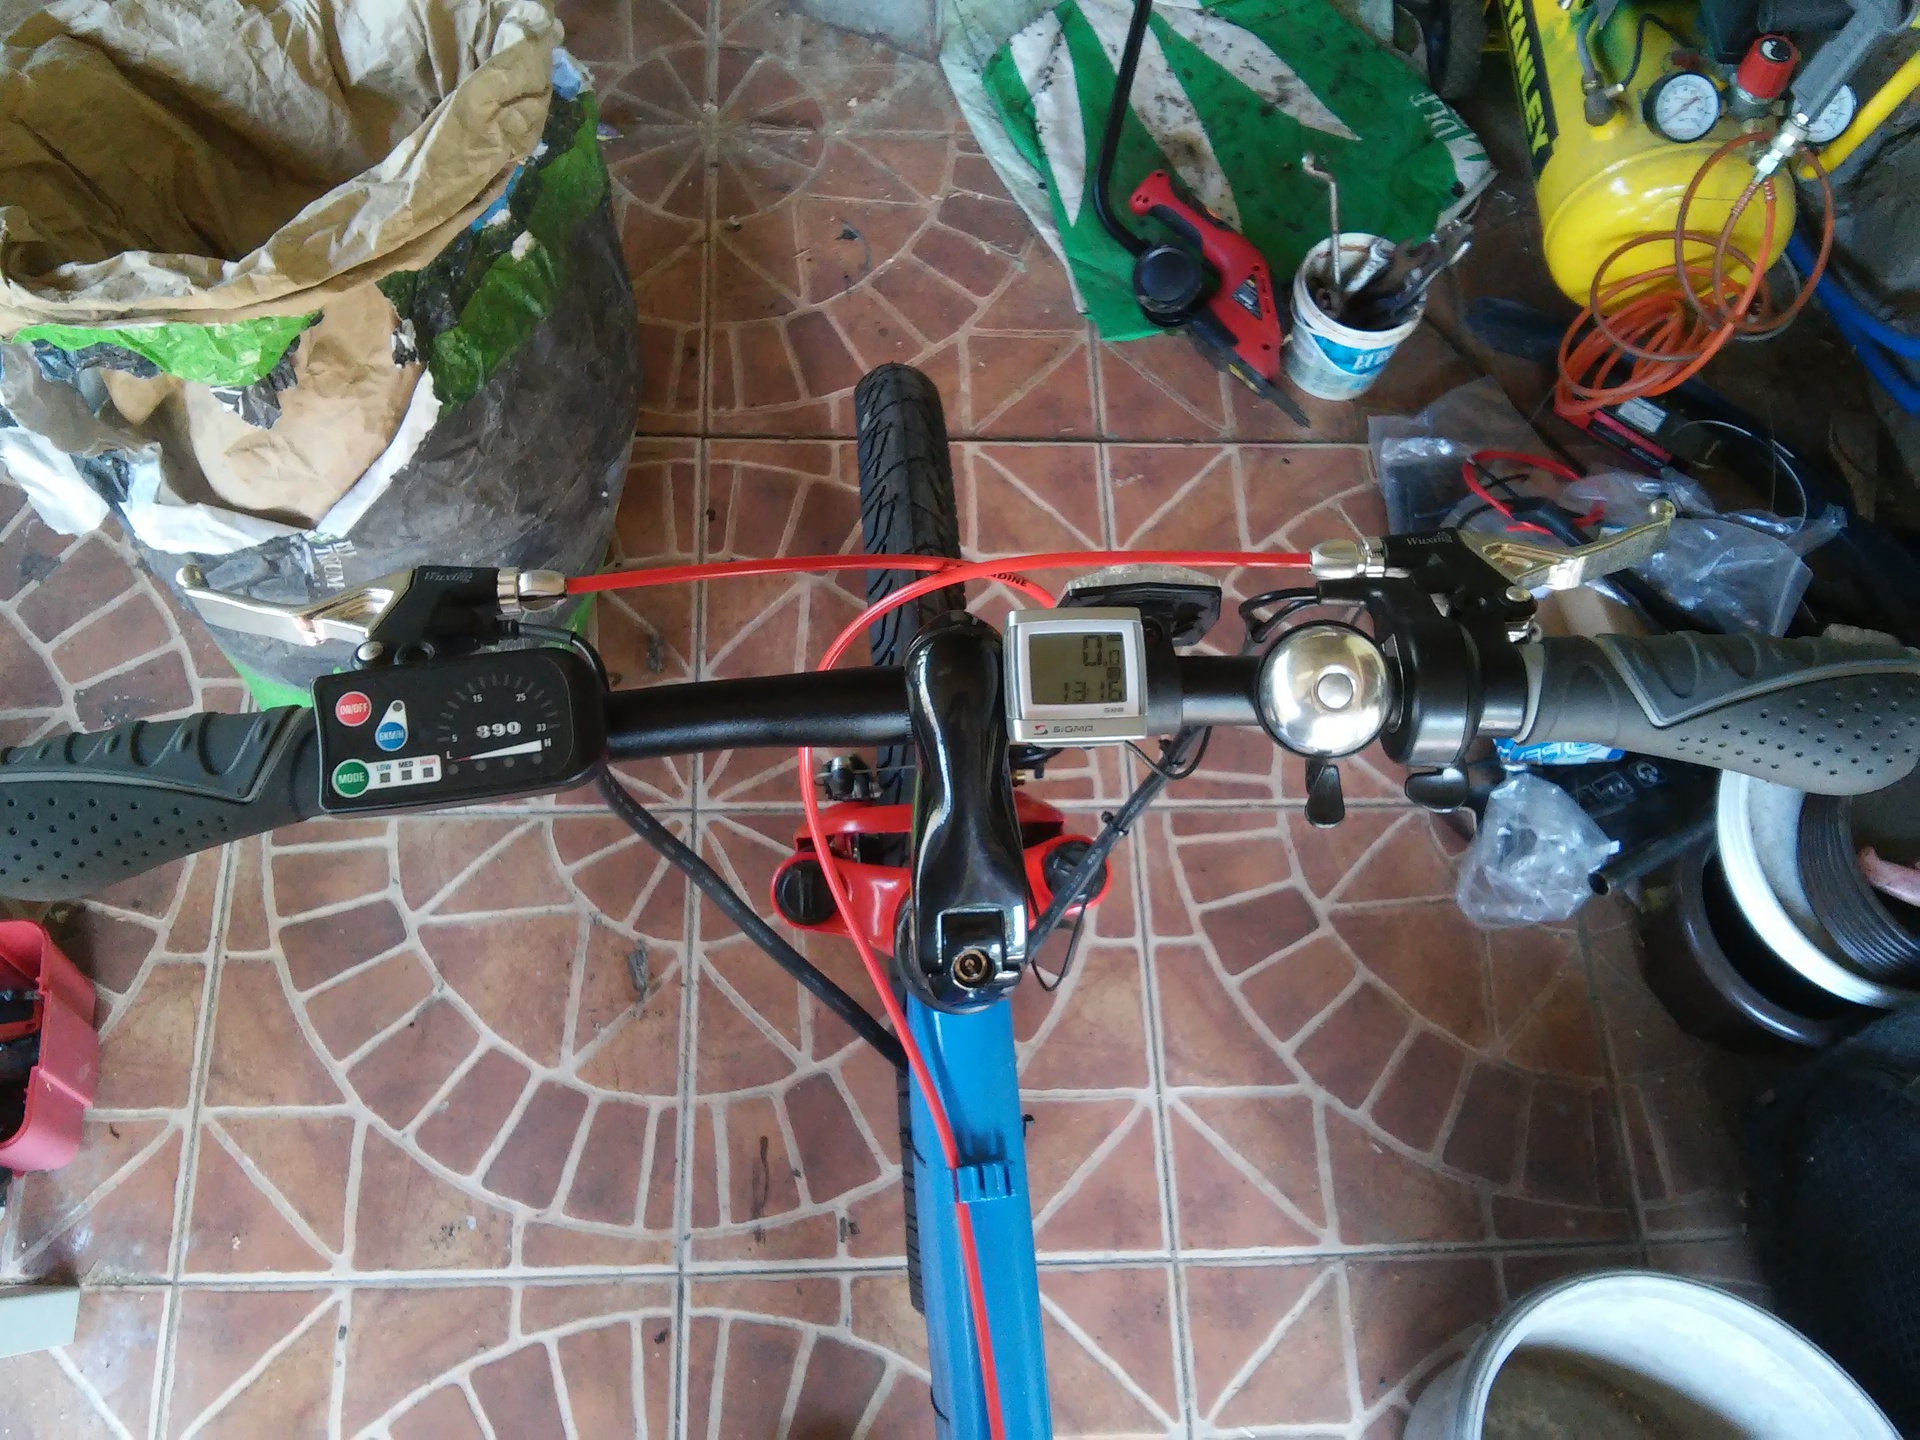
Brake handles, a control panel, a gas handle, grips (lining on the steering wheel, which you hold while riding) are hung on the steering wheel. An attachment for the battery is screwed onto the mounting holes of the flask holder. For the controller, a small handbag was taken from a friend, which was hung at the junction of the weekly and longitudinal upper tube.
We install brakes and other elements like footboards, mirrors, etc. Particular attention should be paid to the assembly of the rear wheel drive chain. Then there was the problem of chain tension. This bike has “point” dropsouts:
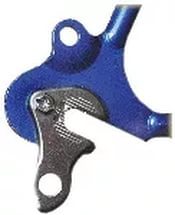
Their trick is that the axis of the sleeve is installed only in one position, it can not be moved, thereby pulling the chain. If you leave the chain loose, then just at certain turns it will fly off the star. Therefore, it was decided to return the old switch and zakolhozit so that he kept the chain in the position of a single star.
All this was done in one day, started at 10 in the morning and ended by seven o'clock in the evening. The first test - the bike rides itself ... Indescribable emotions.

Then I decided to go to the city to try it on asphalt, well, there was a confusion. Literally on the first “speed bump”, all the electrics go out and I stay only with the pedals.
First thought - contacts, quickly checked - everything seems to be fine. I spent about five minutes and everything worked again ... We’re going further, drove two kilometers through the city center, the exit of the curb and again. Repeat the operation in a circle, everything works. That day there was no such thing, but the sediment, of course, remained. For two weeks everything was fine, but the next morning on the way to the university this problem happened again. They touched all the contacts on the controller, cleaned it, looked at the plug to the battery, it aroused suspicions ... Everything is fine with it, I called at any bend in the wire.
As a result, the most likely cause of this behavior was found - a fuse in the battery. It is inserted into the capsule, and the capsule with it is already twisted into the case of the battery itself. The fuse is ringing, but for some reason it does not work. I put the jumper around it - it worked and I didn’t see the problem until the end of the season. Just a paradox. Already in April 2015, I found the reason, everything turned out to be simple. The capsule into which the fuse was inserted was slightly longer than the fuse itself, so sometimes it just lost contact with the capsule body. The story could have been completed on this, but there will be a new life of a hastily made electric bike ahead.
It got warmer in April, and I started to ride it again. May was coming, there were new problems that motivated me to make the electric bike again, taking into account all the errors.
The following did not suit me / broke in it:
So, the session was handed over, the last time I traveled on it in the city at the beginning of July and with pleasure began to disassemble it. I had a lot of work.
What was needed to do:
To order:
What had to be ordered was ordered, but for the time being it all flew towards me, there was another work.
The most important thing was to make a chain tensioner, and I really wanted it to be as compact as possible and not striking the eye. There were ready-made options from overseas online stores, but the toad stifled to give for the simple mechanism the cost of an acceptable switch. I disassembled the old switch and took out a spring from it, which worked not for tensile / compression, but for torsion. It was what you need. From a steel plate cut a bar that would be put on the former axis of the switch, and at the other end of which a bolt would be long, on which a plastic wheel would be wound, which would tighten the chain.


Then just brought it to the desired shape and prepared for painting.
The system of front stars simplified to one star, since other stars were not needed. Just drilled out the rivets and there was one middle star left with the connecting rod.
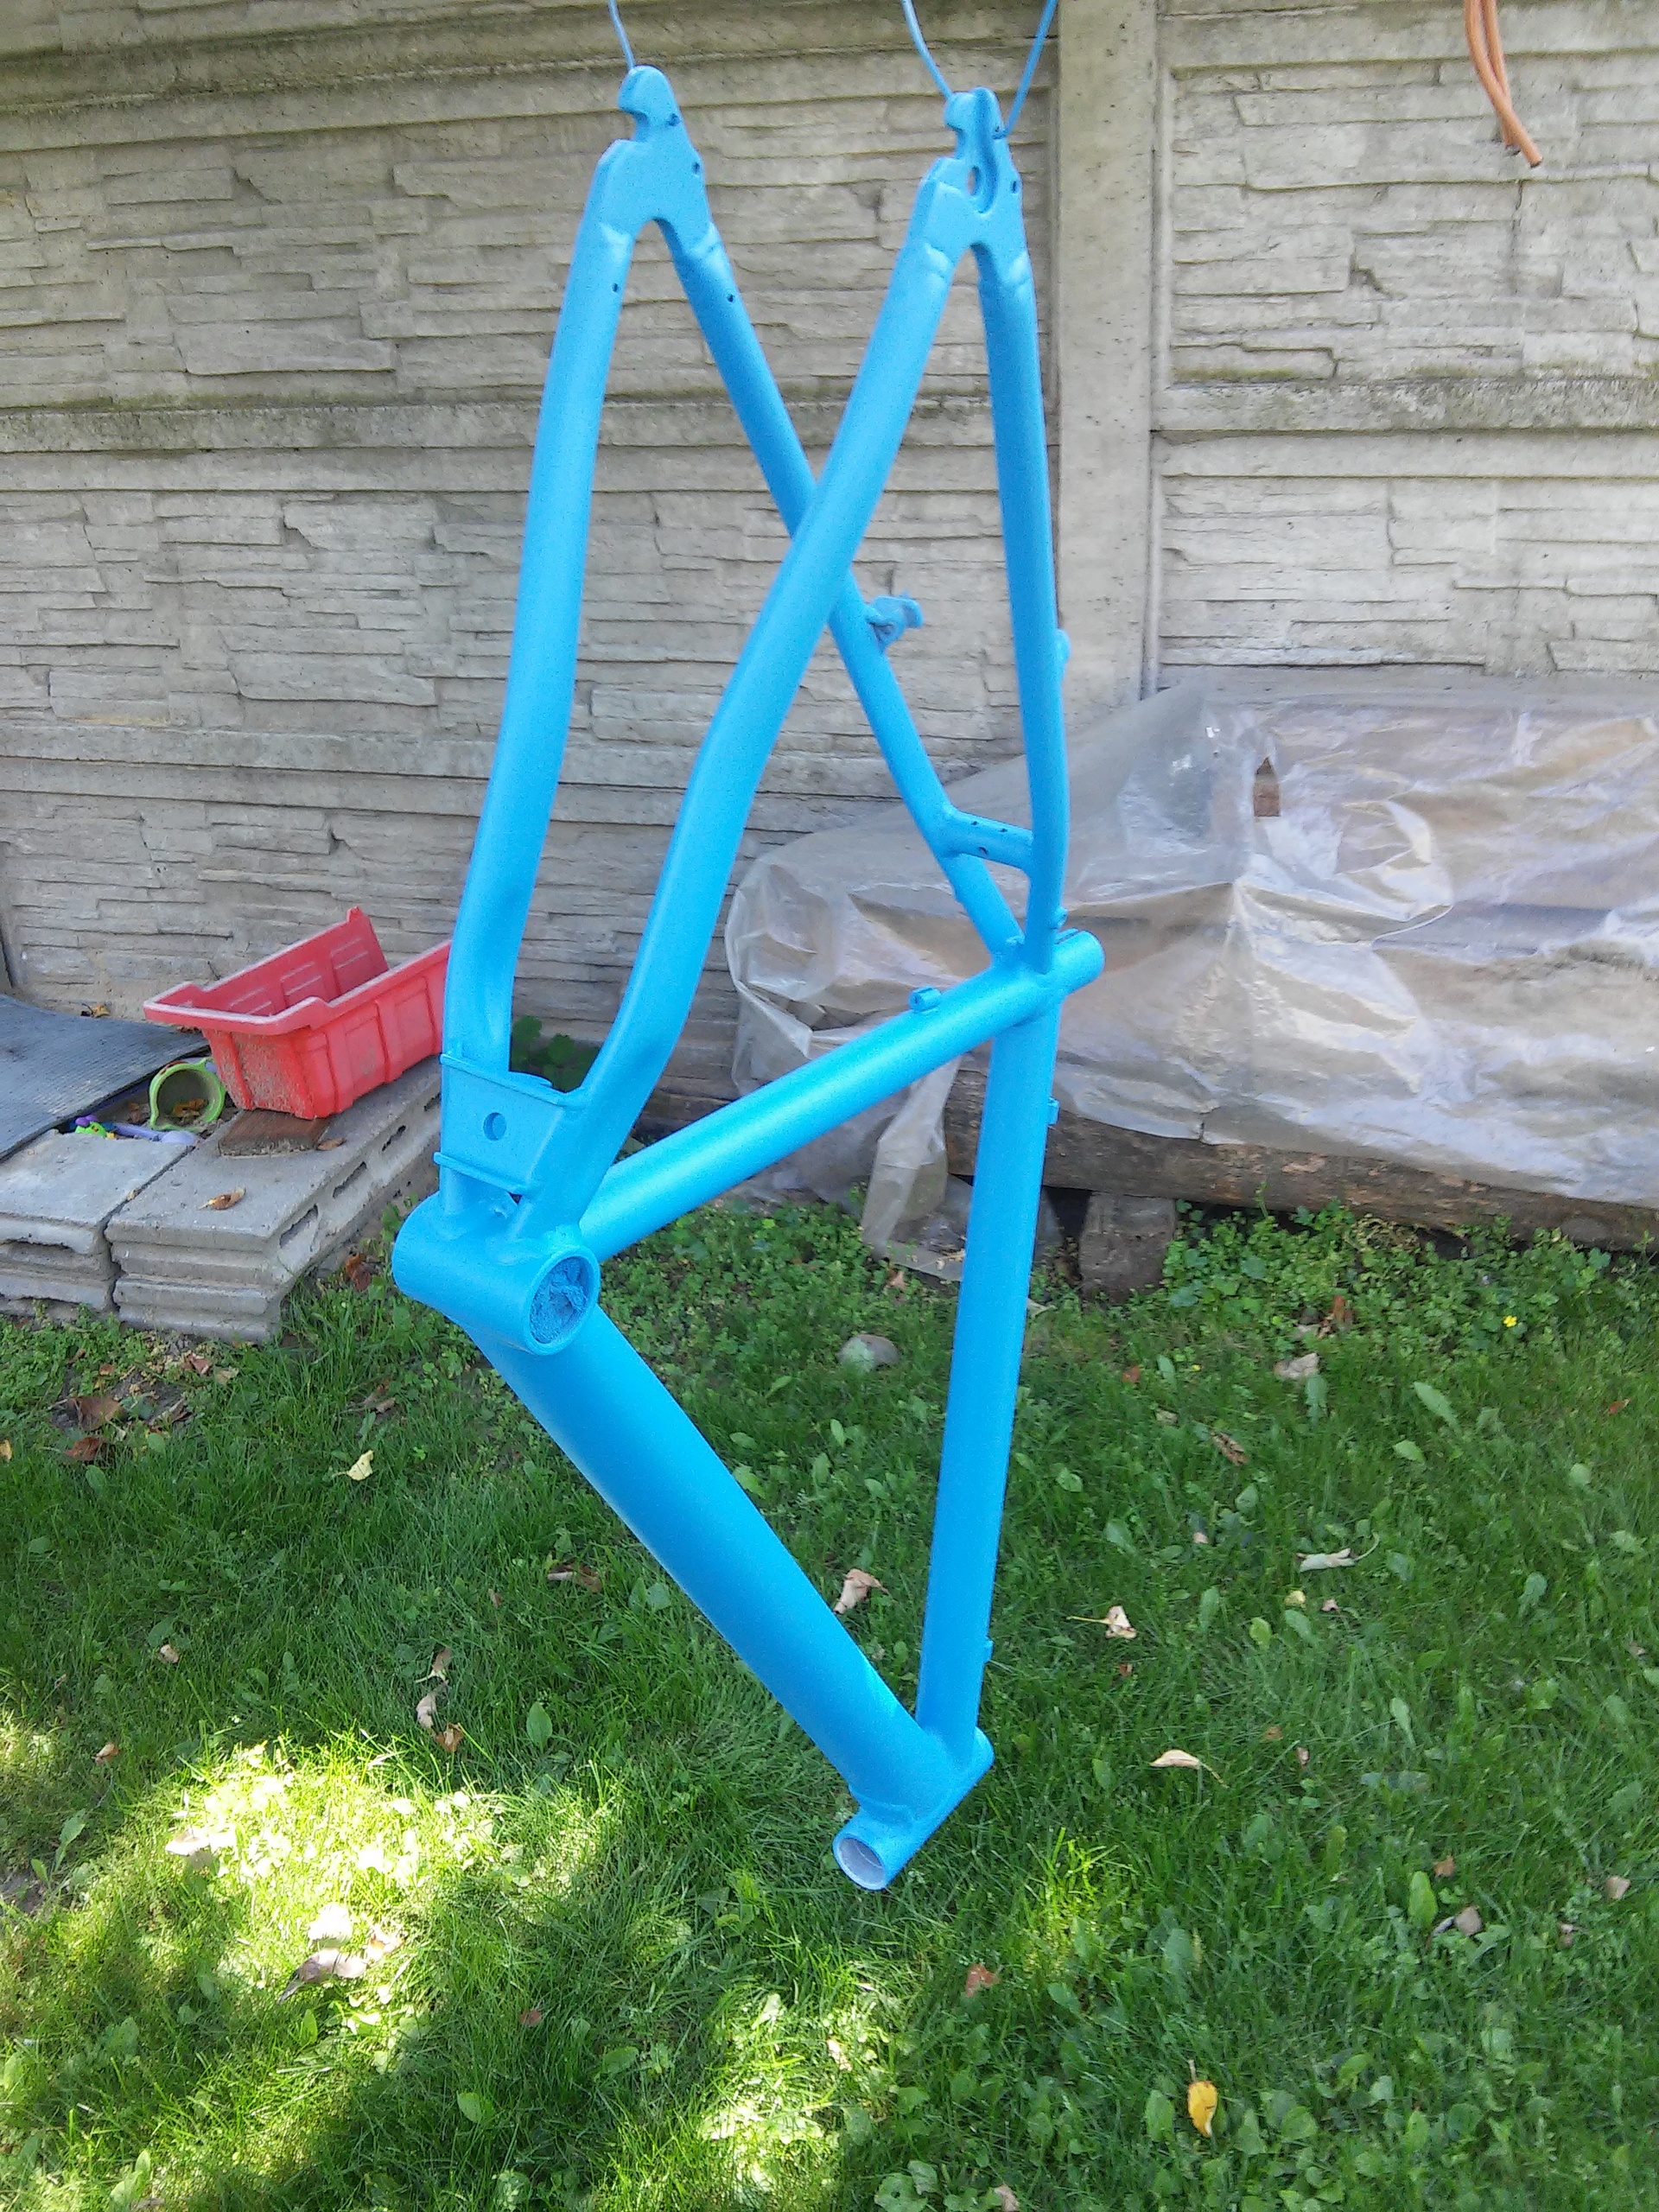
With the design I could not decide for a long time, I wanted something not typical, like all bicycles. From the colors I knew what I needed: blue, black and red. In the end, inspired by several bicycles, I decided to paint the frame in sky blue, and the pants and the fork crown - in bright red. The wheels (rims, spokes, bushing and motor), connecting rods and aluminum battery case were painted black. A good man taught painting technique and work with an airbrush on my fork.

Day three took to bring the frame to the state that it could be primed. The hardest thing was to get rid of adhered glue from the stickers.

Ram had to be mated, and all chips and micro-mashes were smoothed out to the maximum.

Primed. After drying, the frame is sanded again with water to make it smooth.
After that a layer of blue paint is applied. In order to avoid the appearance of smudges I made a very small and weak spraying, I had to paint for a long time, but without any smudges.

Well, the final layer - varnish. The varnish solution was with a hardener and solvent. At this stage, there are some difficulties. It was not easy to achieve a smooth lacquer surface, it was a bit “rough”, to put it simply - not a mirror, but not everywhere. Somewhere I went too far with the dusting and the smudges began. After drying, the smudges had to be cut off, then sanded again, and neatly applied varnish. Other parts were painted in parallel to the frame, and these were connecting rods, a new chain tensioner, wheels (the platform for v-brake was sealed with masking tape), brake mechanisms (v-brake) ... everything was black.
For all this time, I have already managed to buy a beautiful red shirt with brake cables, I found new tires on the market for great money that looked exactly the way I wanted it, and I was very happy about it.
Before assembling the plug, the old grease was removed from it and a new one was applied. Visibly revived after this operation. By the way, its springiness is directly dependent on temperature. Taking into account the fact that the plug is from the budget category, it is as simple as possible. Just two springs in the legs and all. No locks, adjustments, nothing. So, at temperatures up to 10 ° C, it is pretty tight, but in summer at 25 ° C and above - just super.
A new steering wheel, a takeaway, a controller box, grips, an accelerator handle came. All the details on the spot that you need to painted, you can collect.


In principle, the assembly process was not very different from what it was a year ago, but I said that I want to shorten the wires. 4 wires went to the steering wheel, two on each side (left brake + control panel and right brake + accelerator handle). For pointing of aesthetic beauty, I bought thermocembriques and four wires that went to the steering wheel pulled into two cambric (however, it didn’t do without oil). Next, the wires coming from the steering wheel and the motor are inserted into one large common blue cambric (which would not be noticeable), which already approached the carriage, and from there the wires went to the box with the controller.
In the photo below (the old version, it does not matter now) you can see how many wiring goes to the controller, despite the fact that in each black wire there are two to 7 wires inside.

And each one had to be cut to the desired length, soldered and isolated. The work, I will say, is not for the faint of heart, because you can’t put all the wires on the table, they are already connected to the great one, so everything was soldered almost “on the knee”, that is, on the weight, bent over in three deaths.
Of course, before you hide everything the scheme was checked, everything worked, so you can hide it in a box.

Well, then the coolest moments. I liked the look very much, it became great much more comfortable and beautiful, the steering wheel was nice, I adjusted the takeaway, the grips were very cool, you get a buzz from driving.


Of course, for another two days something was adjusted, tuned, etc., but in the end it turned out to be a very cool electric bike, which I decided to briefly call the electric train now. I never would have thought that the budget mountain is great will not even get a second, but a third life and in this appearance.
A little later, I found a good bike shop Exito in my town, where I was weighed in an electric train. Many asked for approximate weight. Well, I gave her about 20-25 kg. It turned out to be exactly 20. For electric bikes, these are excellent numbers.
I will answer frequent questions: “What speed does it develop?”, “How much is enough?”, “What do you need it for?”.
The maximum speed is limited by the controller - 27 km / h. And he is really at the maximum charge the battery travels 27 km / h. Some craftsmen remove software limitations, but this causes high loads on the battery, which significantly shortens its service life.
How much is enough: it all depends on driving style. When using only the motor, without the help of pedaling - enough for 20 km. But it is at a temperature from 0 ° C to 10 ° C. Just when it's warm outside, I'm already twisting the pedals and the mileage immediately increases. Maximum I drove it 46 km with pedaling, despite the fact that it has not yet been planted "to zero." The rest - a lot of factors that affect the mileage on a single battery. In the summer of 25-40 km. As a rule, I do not wait for him to fully sit down. The train is used as a transport, not a pleasure bike.
It can go far and fast, while with minimal effort, no more than when walking, from which you do not sweat - accordingly you come to study / work in good condition.
I am a student, I study full-time. At the time of purchase of the conversion kit, it was summer before the first course. In this state of affairs, I can not afford to spend big money on such projects, so I tried to keep the edge stingy / scatter money. I have already said that the box with all the equipment cost $ 530, and if my memory serves me, then it cost me about $ 80 to update after the stickers, which I consider to be quite a good result.
And a little more about the cost of the kit. In the fall of 2015, I met a man in my city who also rides an electric bike. In short, this set can be bought twice as cheaply as in Chernigov, Ukraine, about which I simply did not know before. I myself am from the city of Gomel, Belarus. Just when I decided on this purchase, I looked at prices for the same ali, which turned out to be in some places more expensive than they were sold in Minsk. Therefore, I chose the simplest option - buy it in Minsk. In other matters, I do not regret anything, for me it is creativity.
PS: In the future, I really want to make a custom electric cruiser with a powerful engine that would take the bar at 60 km / h. There are a lot of similar projects on the Internet, and from there I get such ideas. Thanks to everyone who read to the end.
Prehistory
Gradually gaining experience, I learned to repair various components and mechanisms, but after 3 years of skating, I realized that with my loads on great, he became obsolete. New parts lived less original, needed a permanent repair, but for good parts just did not have the desire to spend money, it's still a budget bike. It was decided to buy a new one with more serious attachments for more specific tasks - to drive around the city in comfort. They became Fuji Crosstown 1.1, but this post is not about him. While I was driving a new Fuji, I brought the Stels to a state that it would be possible to go somewhere on it, but I definitely won’t get the joy of driving. So he stood for a year and a half, from time to time he was taken somewhere one-time to go.
New life - the beginning
In August 2014 it was boring, there was money, and I decided to google the topic of electric bikes. After watching videos and other materials on the Internet, I realized what I would borrow myself in August. In Minsk I found a shop that sells conversion kits.
')
For the indiscreet (now already understood) $ 530 set was purchased:
- Electric motor 36 V 350 W, spliced into rim 26 ''
- The control unit of the entire system (in other words, brains)
- Battery 10 Ah * 36 V
- Rotation sensor on the carriage shaft (for pedal assist)
- Accelerator handle
- Brake handles with integrated breakers (turn off the motor when braking)
- Control panel of the entire system (on / off, selection of the pedal assistance mode, speed, battery charge)
Taking into account the fact that the motor-wheel (front) is already assembled, it was decided that the rim from the front wheel should be spoke into the rear hub, since the rear rim had already been corrected far from the eights and other things. In addition, I decided to abandon the program, that is, instead of a ratchet with stars, I twisted a frivil (ratchet with one star). There were three reasons for this.
- Ratchet while rotating the wheel “swam”, in other words, somewhere it was deformed.
- The switch was not able to work properly anymore
- When a motor appeared in a bicycle, the meaning of having several gear ratios simply disappeared.
And here it would be possible to begin, but there is one more moment concerning appearance. The original paint on the bike was already notably scratched and looked very bad.
There was no time and money for high-quality repainting (it was August), so a simple plan was created that seemed very cool to me then. So, I just bought an album of stickers and, after degreasing the frame, put it up with stickers. And then I poured it over the top with varnish from a can. It looked quite even nothing, I liked it. Unfortunately, the photos of the assembly process have not been preserved, so I will try to describe it in a simple way.
Assembly
So, the rear wheel is mounted on the finished frame with a fork, and the front motor-wheel is inserted into the fork's ears. By the way, that part of the axis, which is inserted into the ears of the fork, has a non-circular cross-section. In the photo you can see.
Well, after that the carriage is installed, before twisting a ring with a pedal assist system (PAS) sensor is put on it.
Brake handles, a control panel, a gas handle, grips (lining on the steering wheel, which you hold while riding) are hung on the steering wheel. An attachment for the battery is screwed onto the mounting holes of the flask holder. For the controller, a small handbag was taken from a friend, which was hung at the junction of the weekly and longitudinal upper tube.
We install brakes and other elements like footboards, mirrors, etc. Particular attention should be paid to the assembly of the rear wheel drive chain. Then there was the problem of chain tension. This bike has “point” dropsouts:
Their trick is that the axis of the sleeve is installed only in one position, it can not be moved, thereby pulling the chain. If you leave the chain loose, then just at certain turns it will fly off the star. Therefore, it was decided to return the old switch and zakolhozit so that he kept the chain in the position of a single star.
All this was done in one day, started at 10 in the morning and ended by seven o'clock in the evening. The first test - the bike rides itself ... Indescribable emotions.
Then I decided to go to the city to try it on asphalt, well, there was a confusion. Literally on the first “speed bump”, all the electrics go out and I stay only with the pedals.
First thought - contacts, quickly checked - everything seems to be fine. I spent about five minutes and everything worked again ... We’re going further, drove two kilometers through the city center, the exit of the curb and again. Repeat the operation in a circle, everything works. That day there was no such thing, but the sediment, of course, remained. For two weeks everything was fine, but the next morning on the way to the university this problem happened again. They touched all the contacts on the controller, cleaned it, looked at the plug to the battery, it aroused suspicions ... Everything is fine with it, I called at any bend in the wire.
As a result, the most likely cause of this behavior was found - a fuse in the battery. It is inserted into the capsule, and the capsule with it is already twisted into the case of the battery itself. The fuse is ringing, but for some reason it does not work. I put the jumper around it - it worked and I didn’t see the problem until the end of the season. Just a paradox. Already in April 2015, I found the reason, everything turned out to be simple. The capsule into which the fuse was inserted was slightly longer than the fuse itself, so sometimes it just lost contact with the capsule body. The story could have been completed on this, but there will be a new life of a hastily made electric bike ahead.
It got warmer in April, and I started to ride it again. May was coming, there were new problems that motivated me to make the electric bike again, taking into account all the errors.
The following did not suit me / broke in it:
- Appearance. He very much disliked me, too “collective-farm” and coarse with stickers.
- A pile of black ugly wires, wound around the frame
- Inconvenient handle accelerator. If you hold in the maximum position for a long time, your hand gets tired.
- The former switch of speeds began to be broken constantly, thereby throwing off a chain from a star.
- Order tired of the original cheap takeaway and the steering wheel with the rise. I wanted to put a little different form of takeaway with adjustable angle, and the steering wheel straight.
- The regular grips turned out to be a stupidly hard piece of rubber, from which hands began to hurt after congresses and curbs.
- Strained front-star system, there are three of them in the original, connected by rivets, despite the fact that only one was used.
- They demanded the replacement of the brake cable jacket.
- The plug was no longer, she needed cleaning and lubrication.
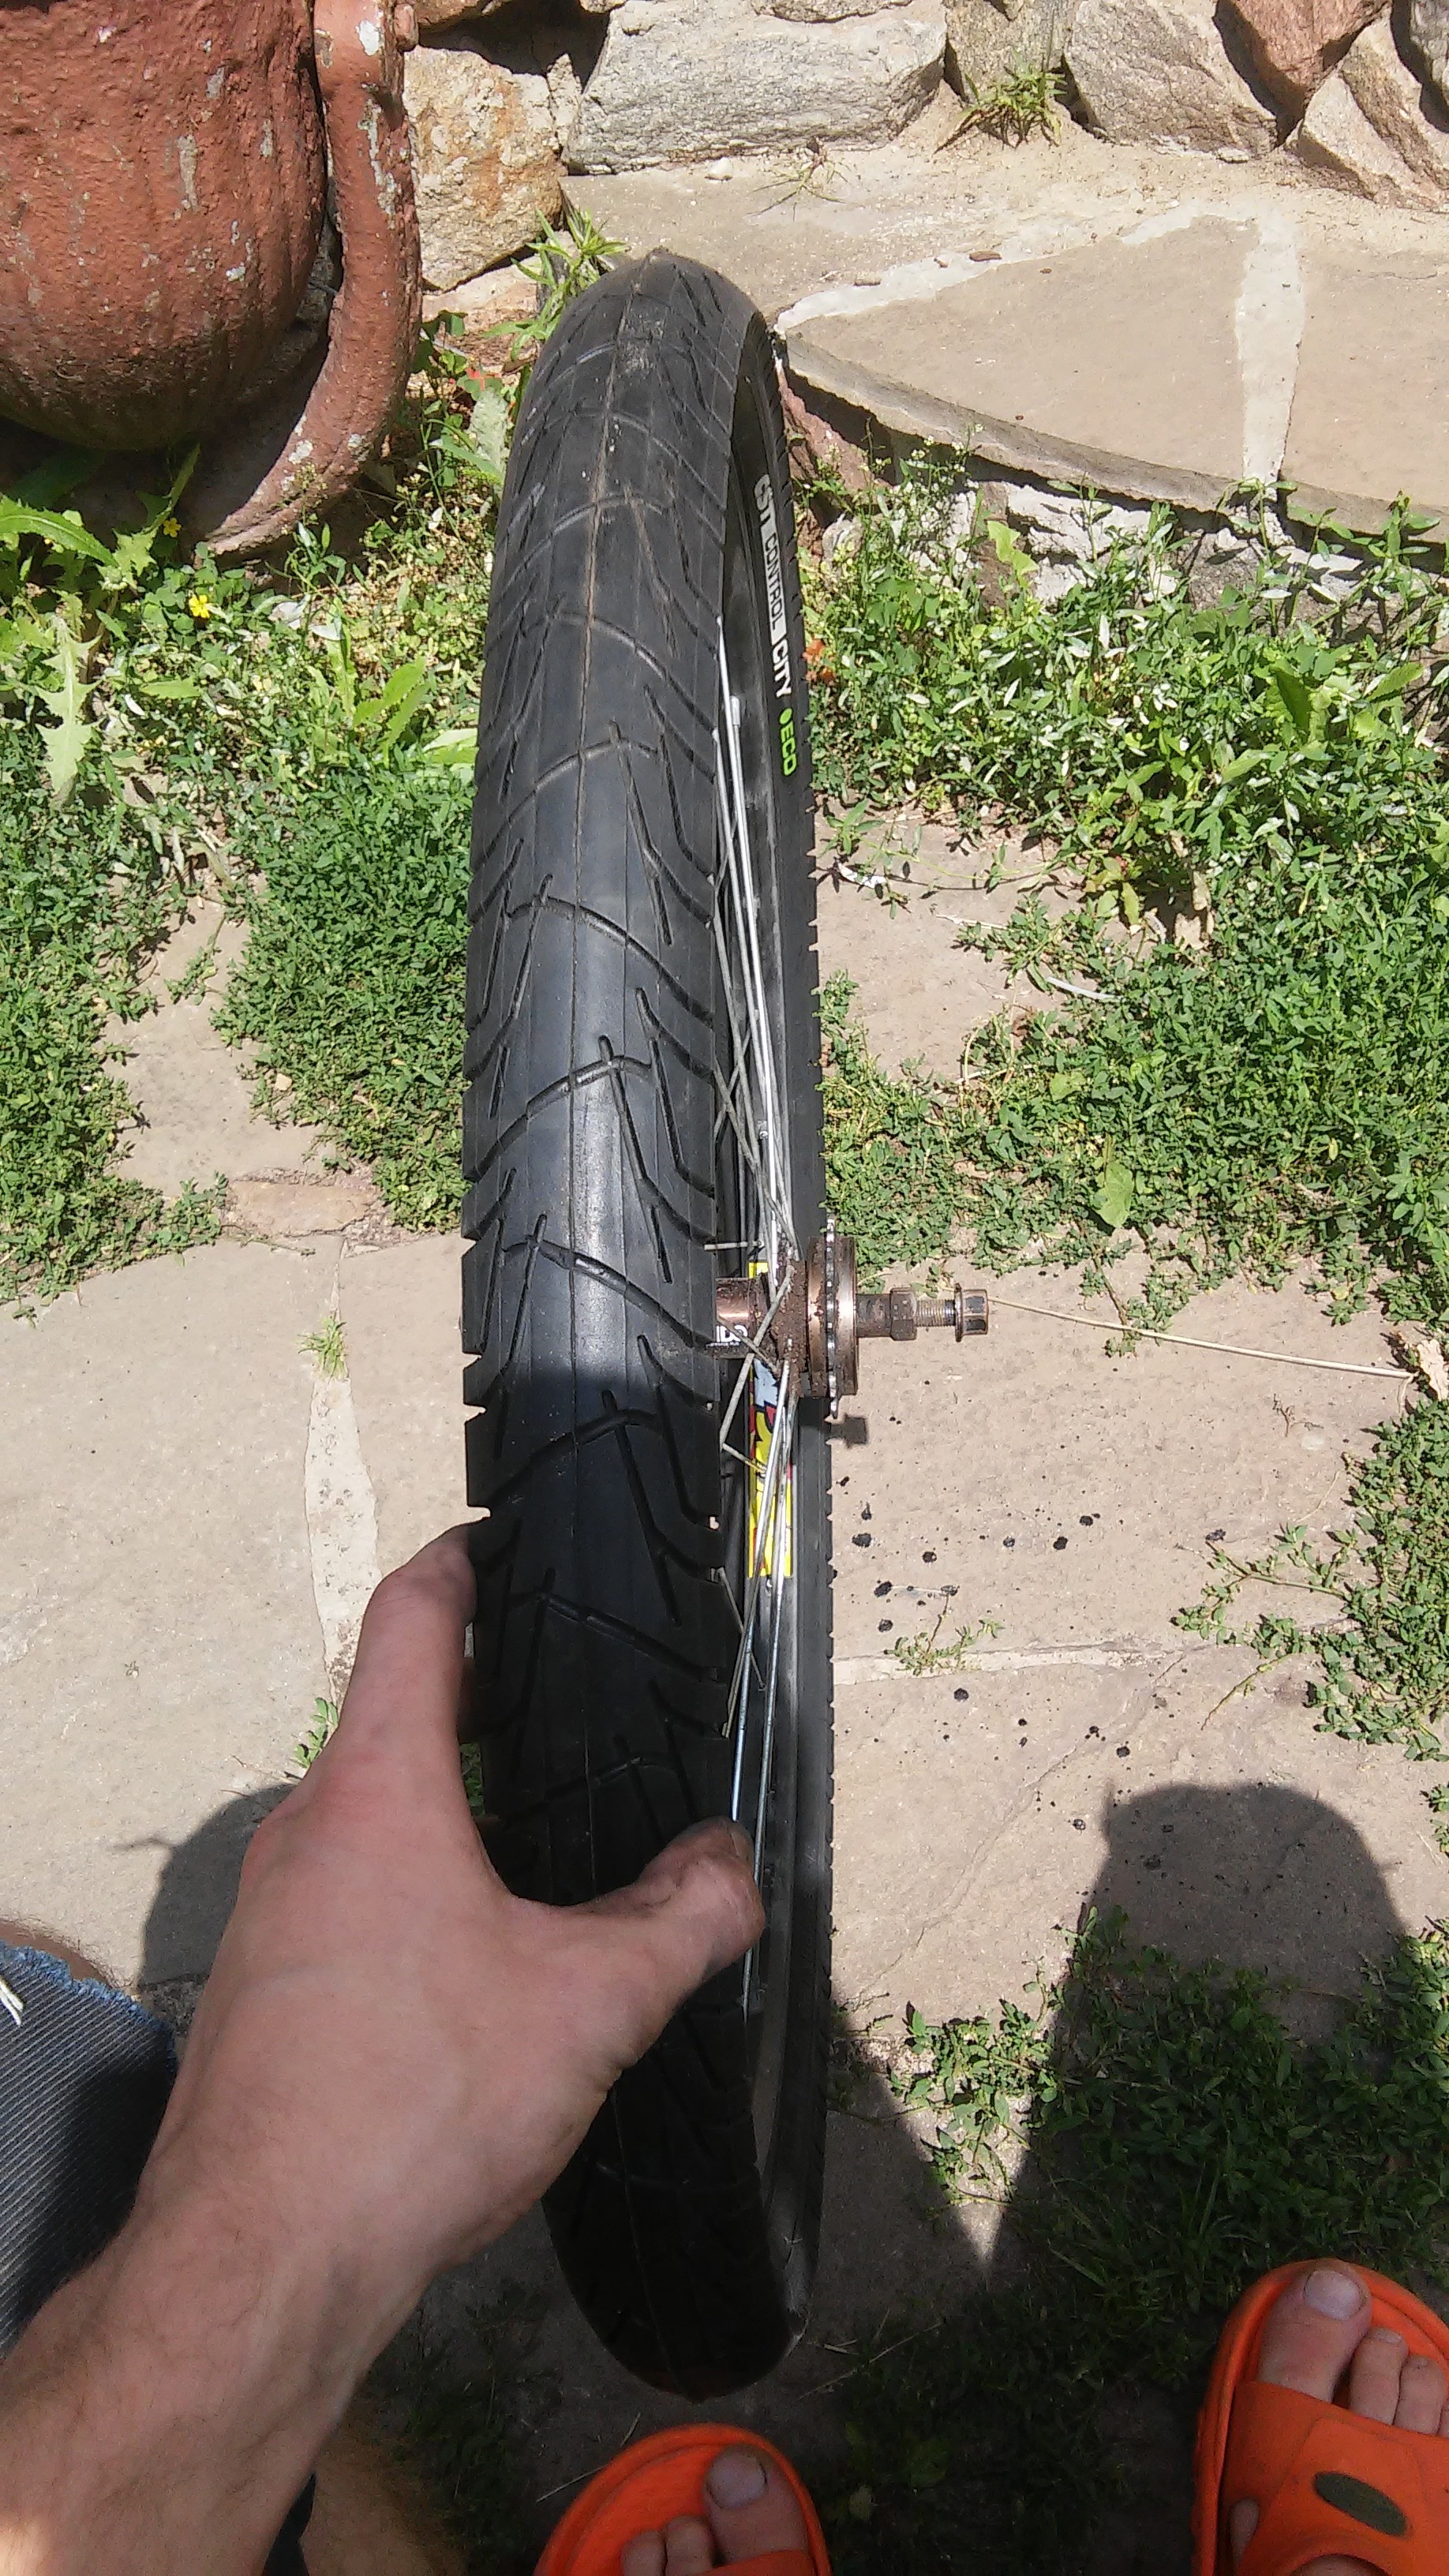
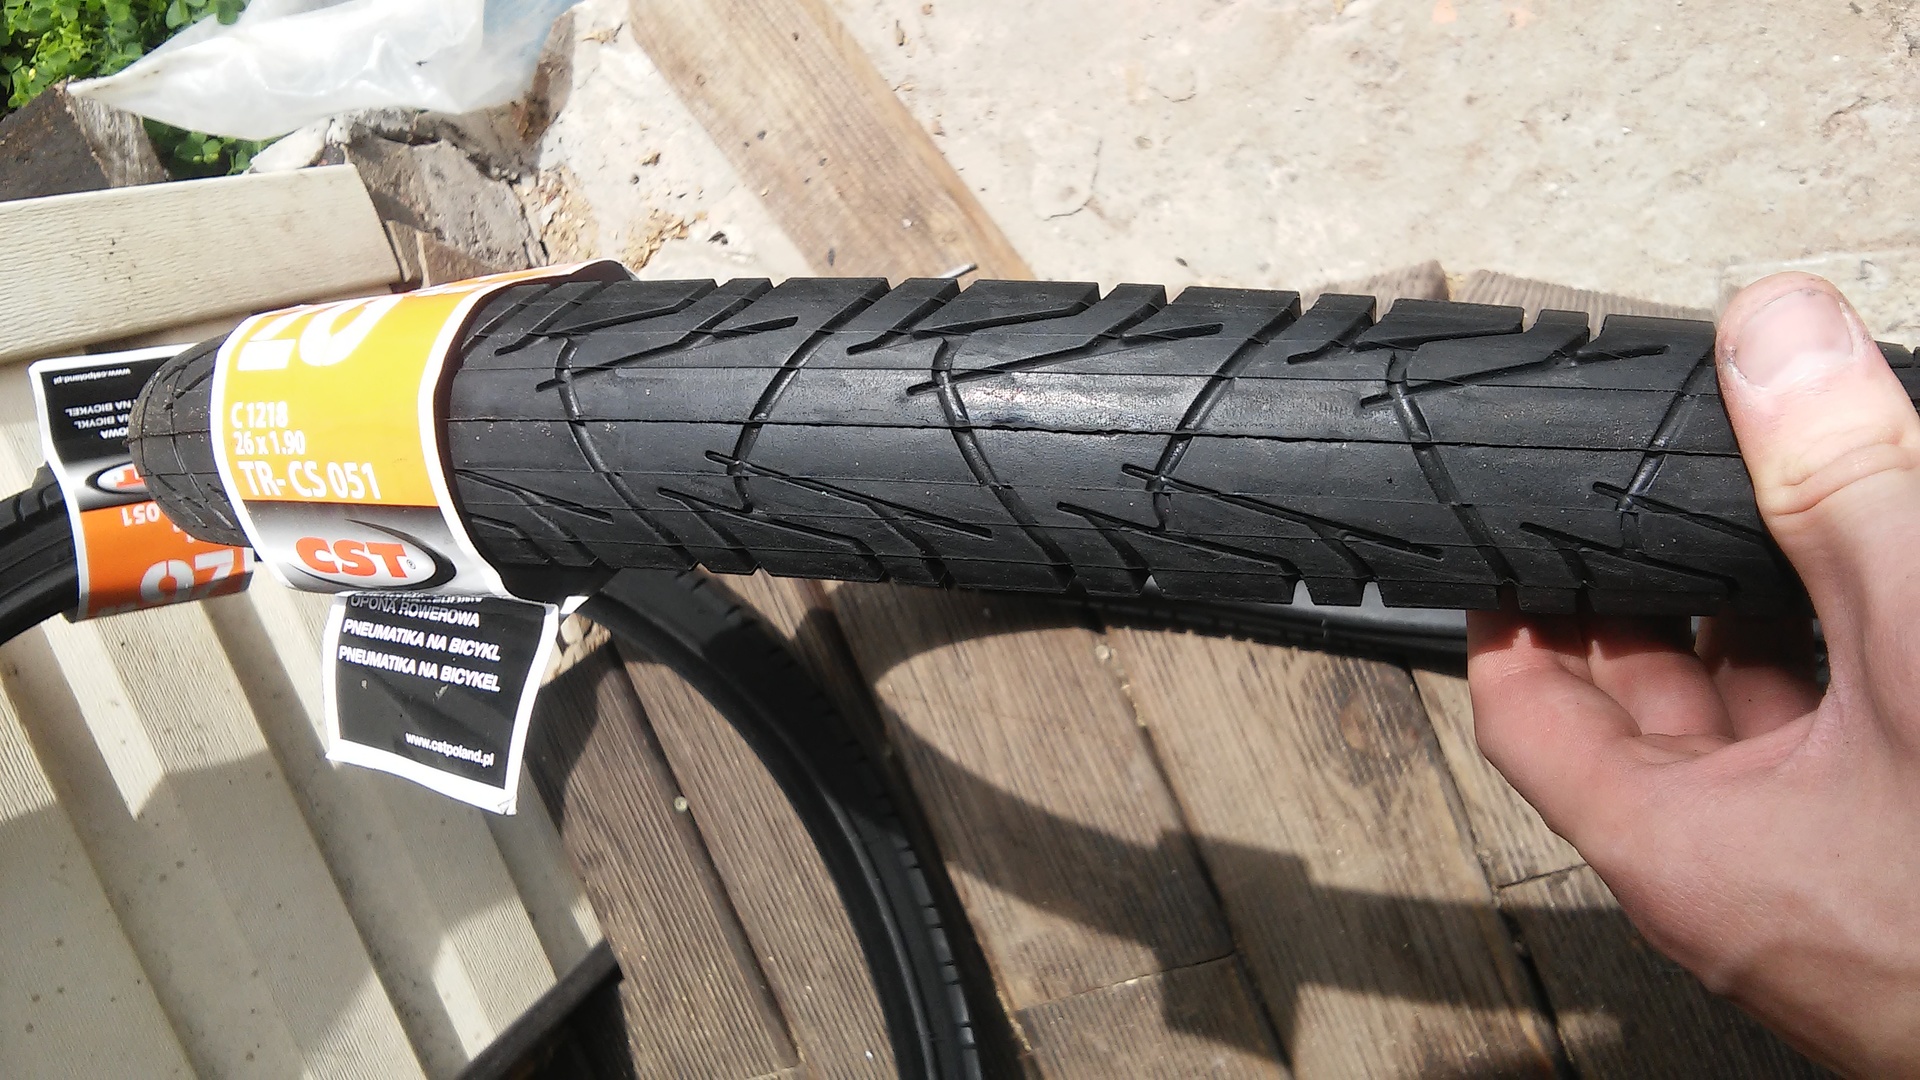
- I wanted a wide slick tire, I really wanted to.
New life - continuation
So, the session was handed over, the last time I traveled on it in the city at the beginning of July and with pleasure began to disassemble it. I had a lot of work.
What was needed to do:
- Come up with a new design
- Repaint the frame, fork and other parts
- To move the plug
- Solve a problem with chain tensioner
- Buy new shirts with cables
- Buy new tires
- Shorten all the wires to the required length so that they do not have to be rewound
- Put it all back together
To order:
- Takeaway
- Steering wheel
- Grips
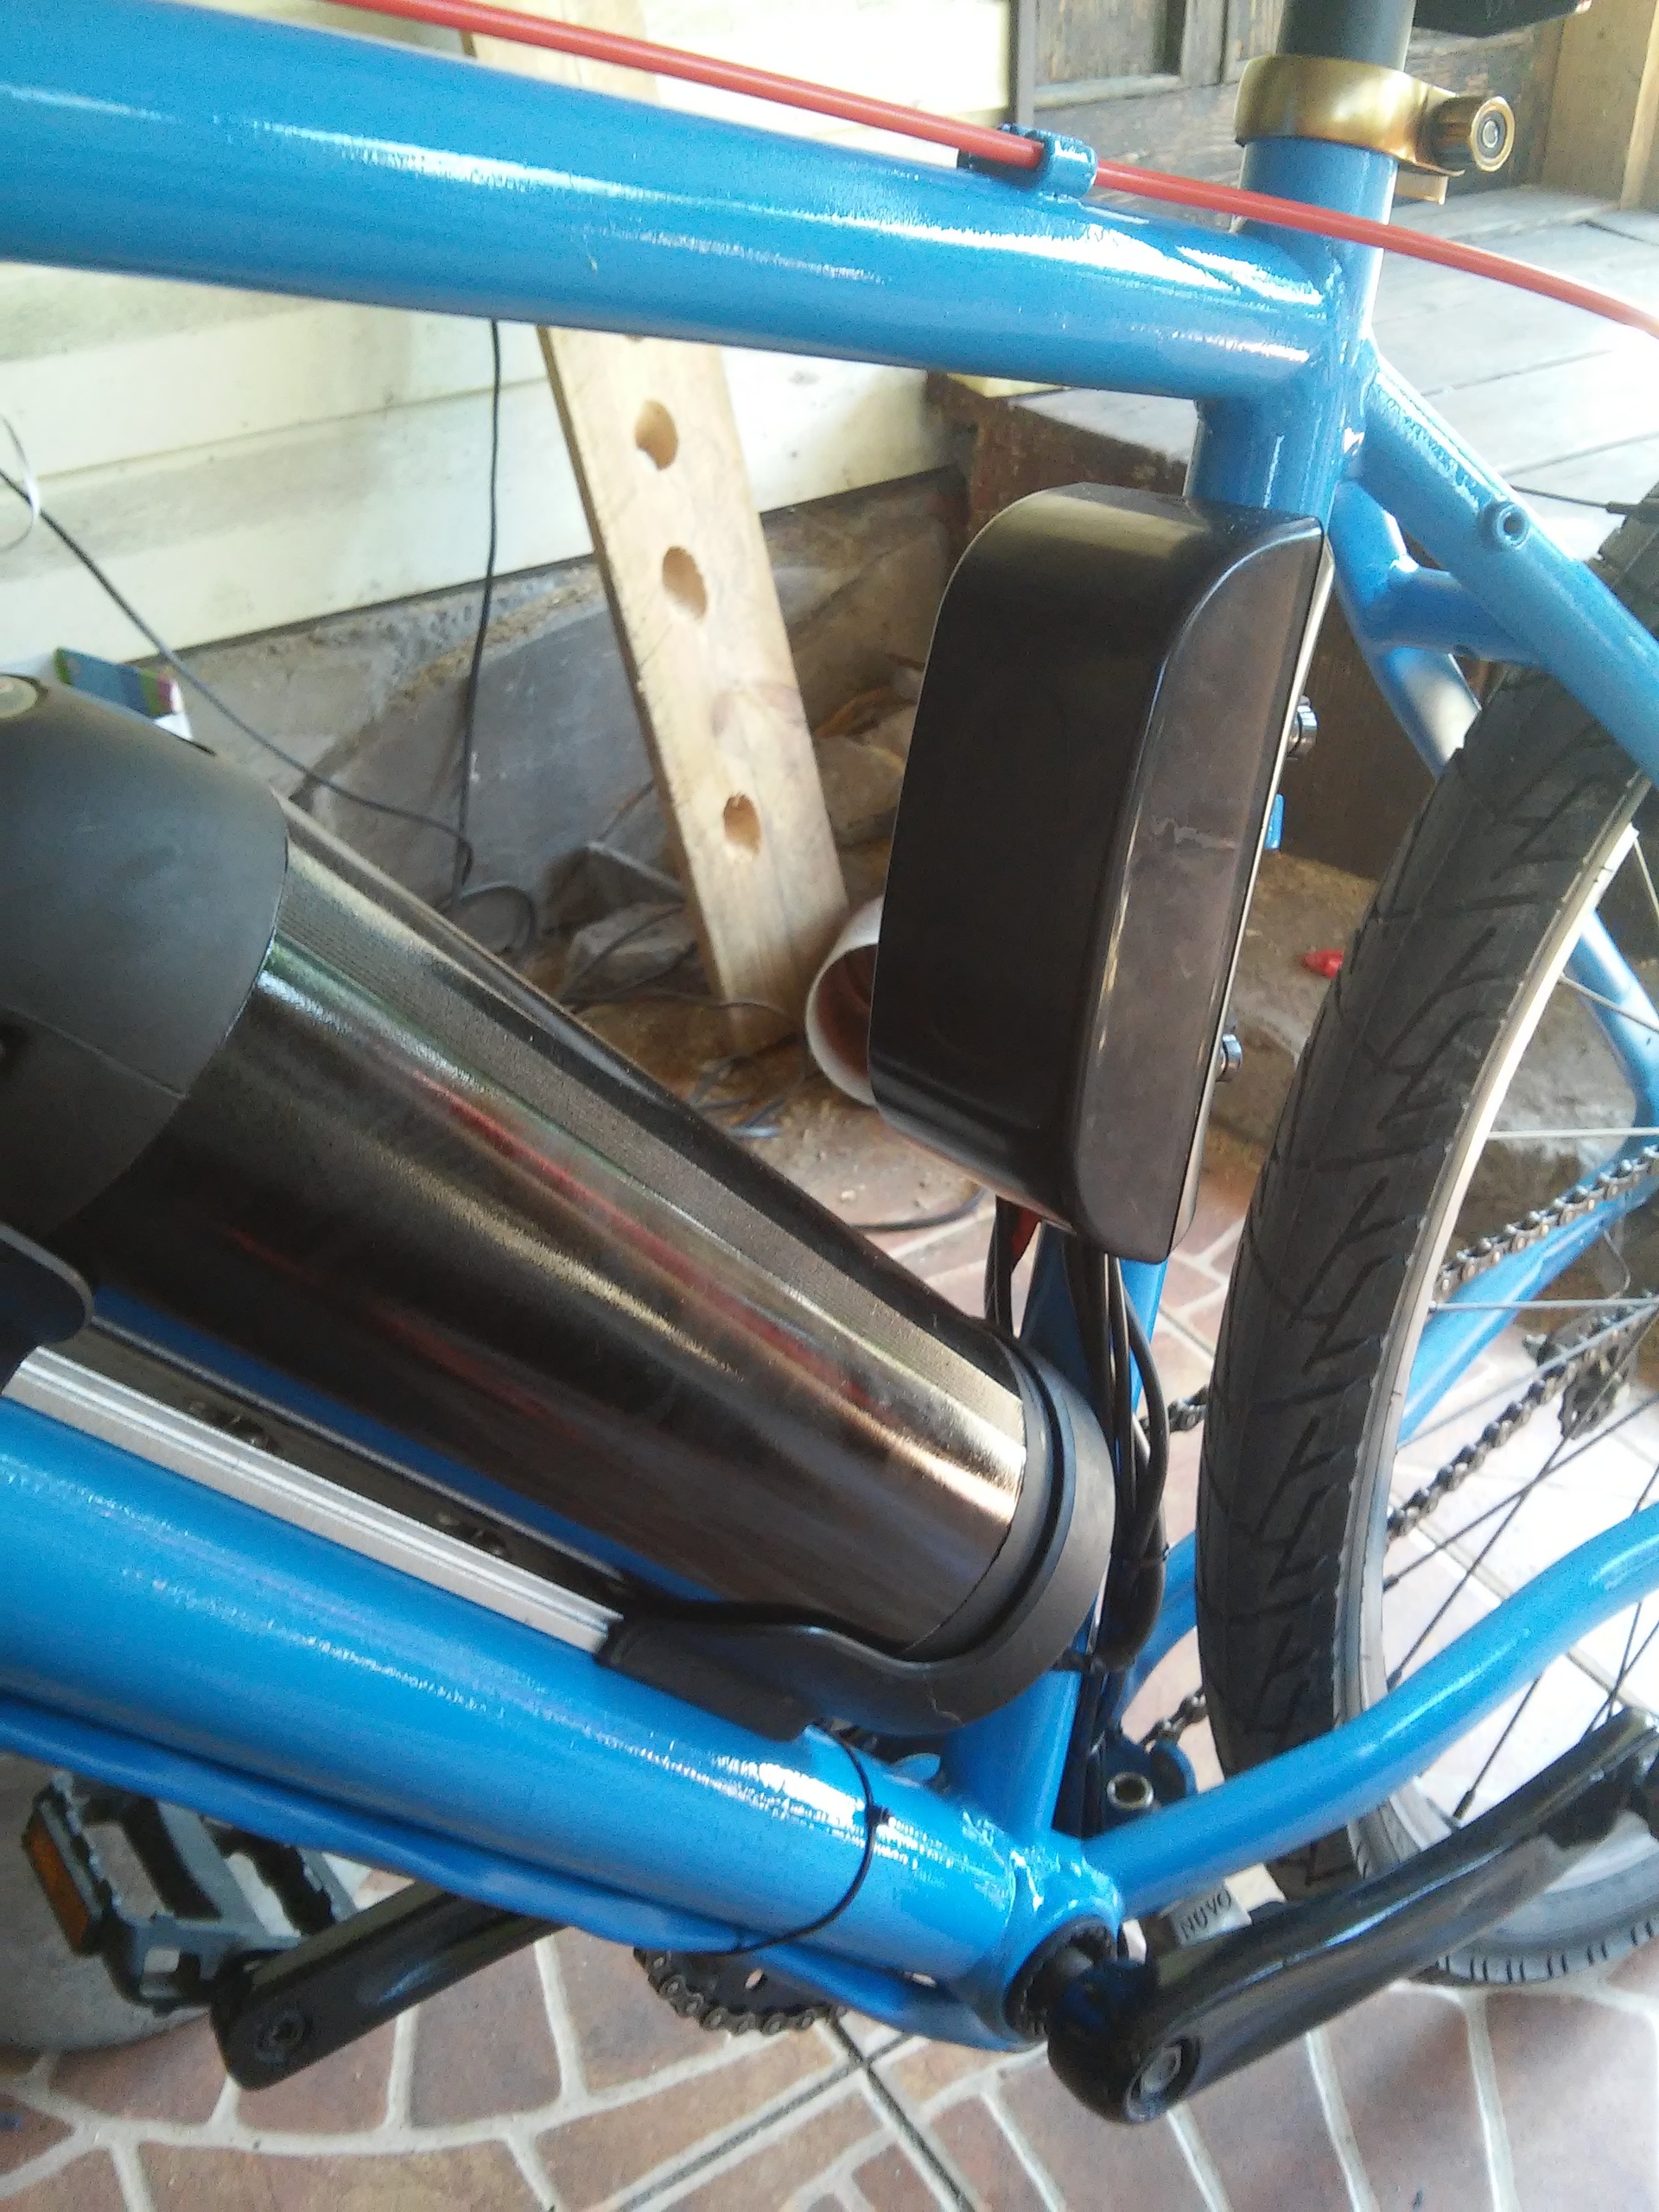
- Neat box for the controller
- New handle accelerator trigger type
What had to be ordered was ordered, but for the time being it all flew towards me, there was another work.
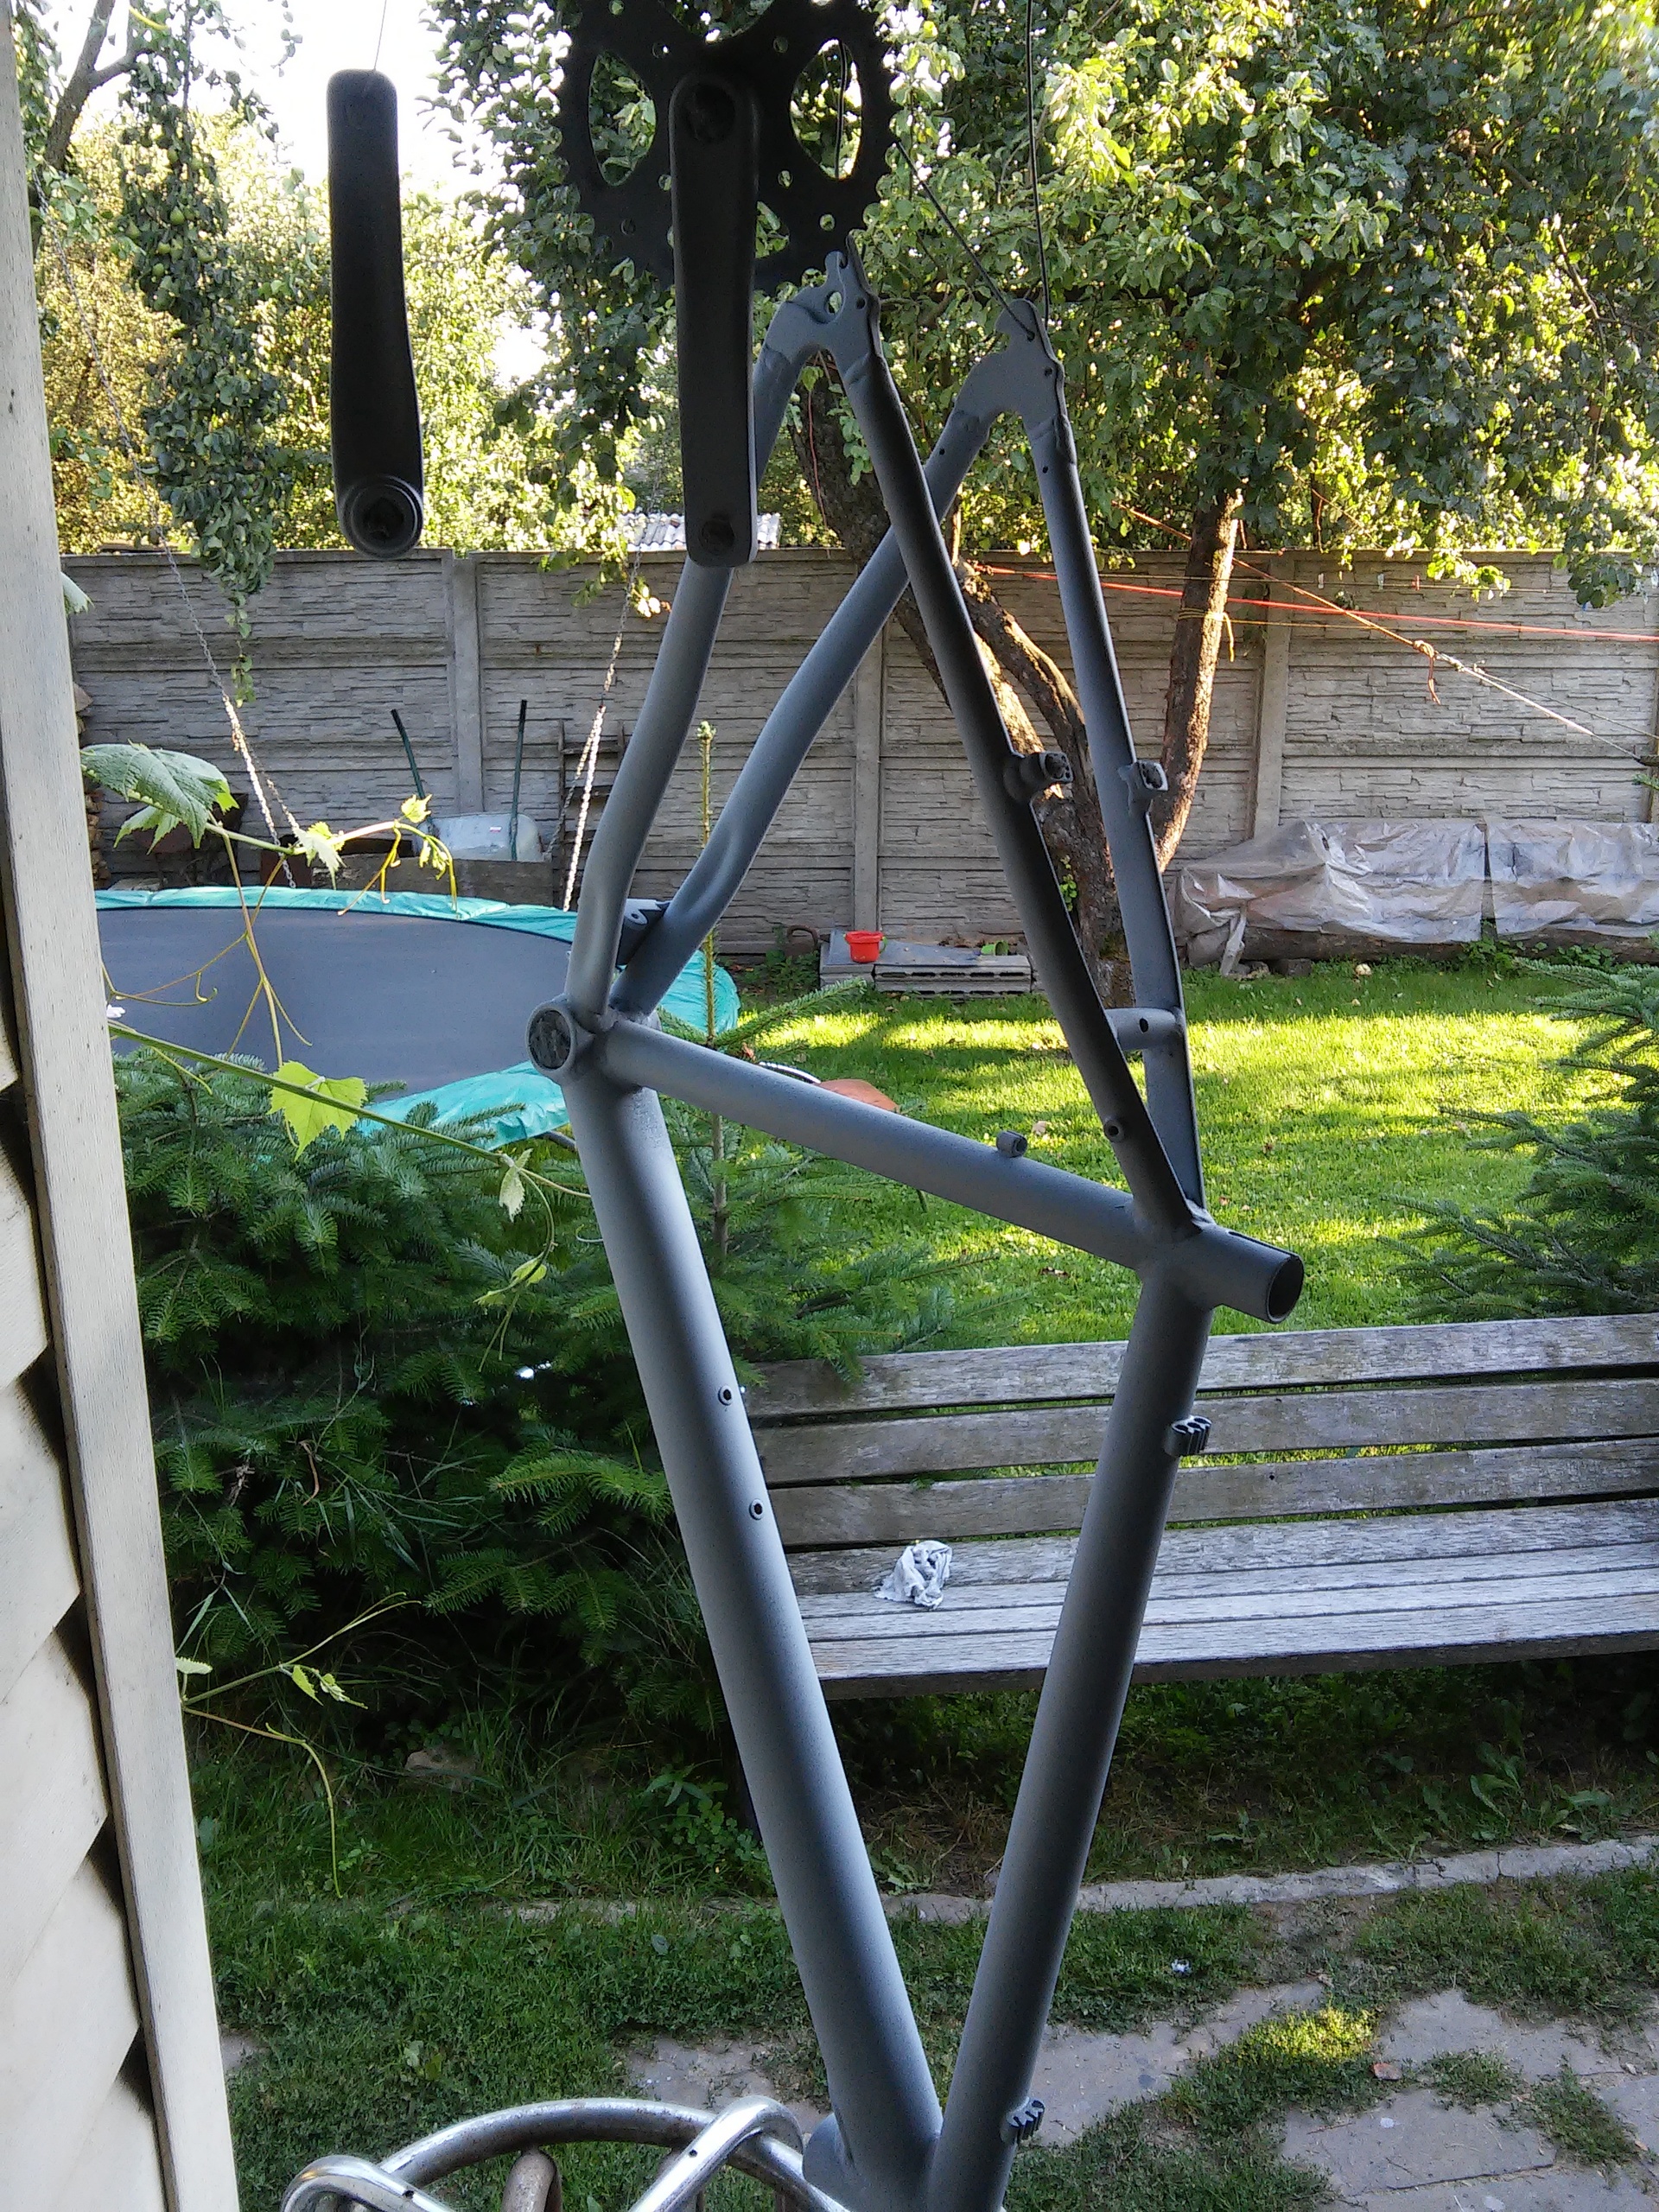
The most important thing was to make a chain tensioner, and I really wanted it to be as compact as possible and not striking the eye. There were ready-made options from overseas online stores, but the toad stifled to give for the simple mechanism the cost of an acceptable switch. I disassembled the old switch and took out a spring from it, which worked not for tensile / compression, but for torsion. It was what you need. From a steel plate cut a bar that would be put on the former axis of the switch, and at the other end of which a bolt would be long, on which a plastic wheel would be wound, which would tighten the chain.
Then just brought it to the desired shape and prepared for painting.
The system of front stars simplified to one star, since other stars were not needed. Just drilled out the rivets and there was one middle star left with the connecting rod.
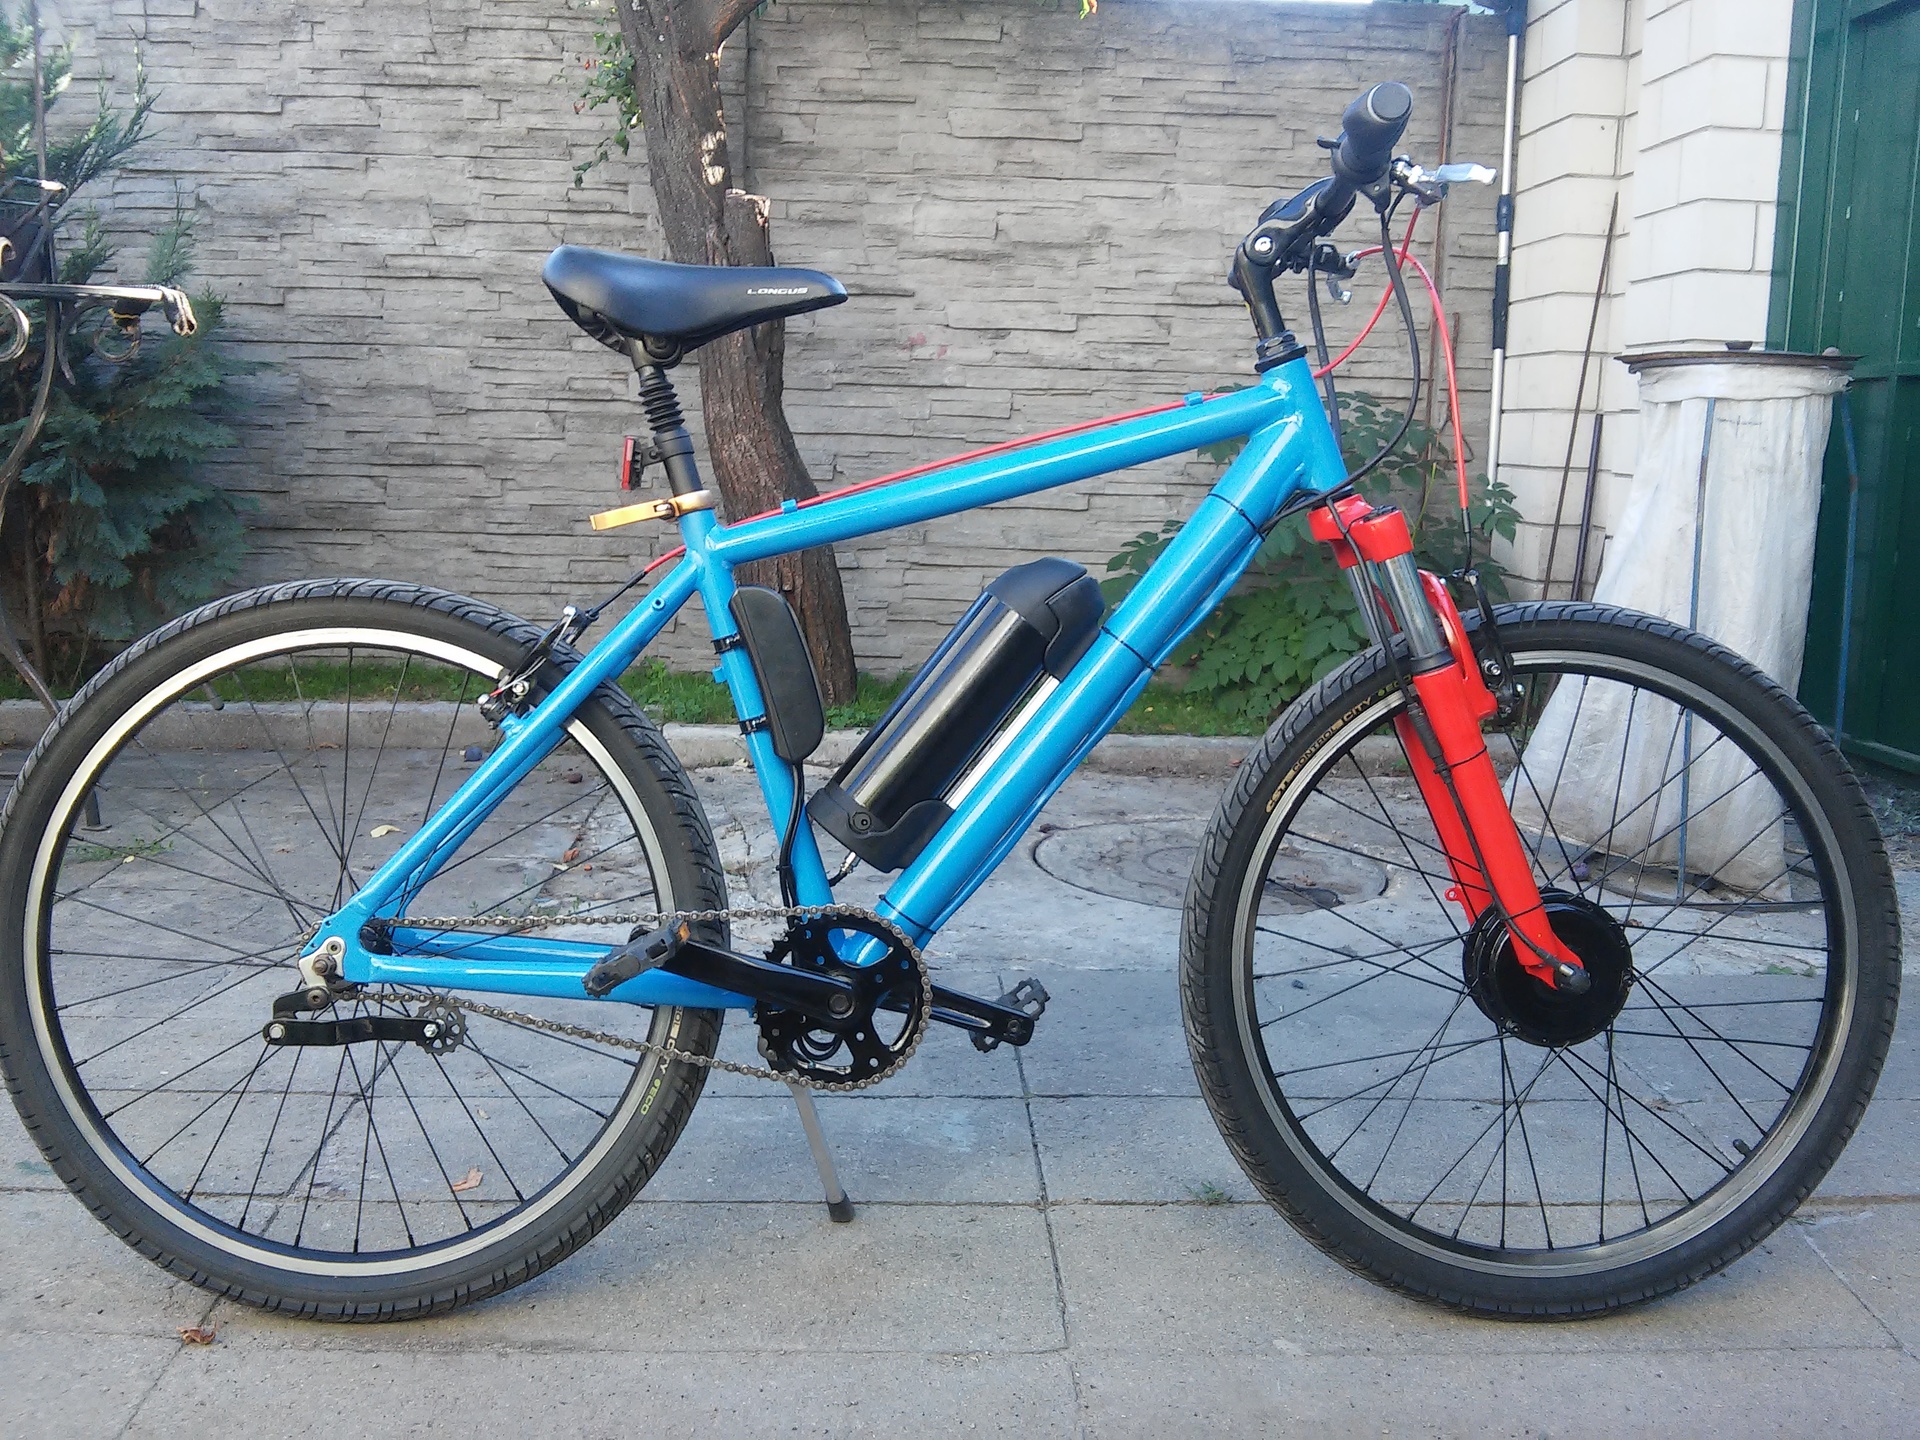
With the design I could not decide for a long time, I wanted something not typical, like all bicycles. From the colors I knew what I needed: blue, black and red. In the end, inspired by several bicycles, I decided to paint the frame in sky blue, and the pants and the fork crown - in bright red. The wheels (rims, spokes, bushing and motor), connecting rods and aluminum battery case were painted black. A good man taught painting technique and work with an airbrush on my fork.
Day three took to bring the frame to the state that it could be primed. The hardest thing was to get rid of adhered glue from the stickers.
Ram had to be mated, and all chips and micro-mashes were smoothed out to the maximum.
Primed. After drying, the frame is sanded again with water to make it smooth.
After that a layer of blue paint is applied. In order to avoid the appearance of smudges I made a very small and weak spraying, I had to paint for a long time, but without any smudges.
Well, the final layer - varnish. The varnish solution was with a hardener and solvent. At this stage, there are some difficulties. It was not easy to achieve a smooth lacquer surface, it was a bit “rough”, to put it simply - not a mirror, but not everywhere. Somewhere I went too far with the dusting and the smudges began. After drying, the smudges had to be cut off, then sanded again, and neatly applied varnish. Other parts were painted in parallel to the frame, and these were connecting rods, a new chain tensioner, wheels (the platform for v-brake was sealed with masking tape), brake mechanisms (v-brake) ... everything was black.
For all this time, I have already managed to buy a beautiful red shirt with brake cables, I found new tires on the market for great money that looked exactly the way I wanted it, and I was very happy about it.
Before assembling the plug, the old grease was removed from it and a new one was applied. Visibly revived after this operation. By the way, its springiness is directly dependent on temperature. Taking into account the fact that the plug is from the budget category, it is as simple as possible. Just two springs in the legs and all. No locks, adjustments, nothing. So, at temperatures up to 10 ° C, it is pretty tight, but in summer at 25 ° C and above - just super.
A new steering wheel, a takeaway, a controller box, grips, an accelerator handle came. All the details on the spot that you need to painted, you can collect.
In principle, the assembly process was not very different from what it was a year ago, but I said that I want to shorten the wires. 4 wires went to the steering wheel, two on each side (left brake + control panel and right brake + accelerator handle). For pointing of aesthetic beauty, I bought thermocembriques and four wires that went to the steering wheel pulled into two cambric (however, it didn’t do without oil). Next, the wires coming from the steering wheel and the motor are inserted into one large common blue cambric (which would not be noticeable), which already approached the carriage, and from there the wires went to the box with the controller.
In the photo below (the old version, it does not matter now) you can see how many wiring goes to the controller, despite the fact that in each black wire there are two to 7 wires inside.
And each one had to be cut to the desired length, soldered and isolated. The work, I will say, is not for the faint of heart, because you can’t put all the wires on the table, they are already connected to the great one, so everything was soldered almost “on the knee”, that is, on the weight, bent over in three deaths.
Of course, before you hide everything the scheme was checked, everything worked, so you can hide it in a box.
Well, then the coolest moments. I liked the look very much, it became great much more comfortable and beautiful, the steering wheel was nice, I adjusted the takeaway, the grips were very cool, you get a buzz from driving.
Of course, for another two days something was adjusted, tuned, etc., but in the end it turned out to be a very cool electric bike, which I decided to briefly call the electric train now. I never would have thought that the budget mountain is great will not even get a second, but a third life and in this appearance.
A little later, I found a good bike shop Exito in my town, where I was weighed in an electric train. Many asked for approximate weight. Well, I gave her about 20-25 kg. It turned out to be exactly 20. For electric bikes, these are excellent numbers.
Little performance
I will answer frequent questions: “What speed does it develop?”, “How much is enough?”, “What do you need it for?”.
The maximum speed is limited by the controller - 27 km / h. And he is really at the maximum charge the battery travels 27 km / h. Some craftsmen remove software limitations, but this causes high loads on the battery, which significantly shortens its service life.
How much is enough: it all depends on driving style. When using only the motor, without the help of pedaling - enough for 20 km. But it is at a temperature from 0 ° C to 10 ° C. Just when it's warm outside, I'm already twisting the pedals and the mileage immediately increases. Maximum I drove it 46 km with pedaling, despite the fact that it has not yet been planted "to zero." The rest - a lot of factors that affect the mileage on a single battery. In the summer of 25-40 km. As a rule, I do not wait for him to fully sit down. The train is used as a transport, not a pleasure bike.
It can go far and fast, while with minimal effort, no more than when walking, from which you do not sweat - accordingly you come to study / work in good condition.
A little about the project budget
I am a student, I study full-time. At the time of purchase of the conversion kit, it was summer before the first course. In this state of affairs, I can not afford to spend big money on such projects, so I tried to keep the edge stingy / scatter money. I have already said that the box with all the equipment cost $ 530, and if my memory serves me, then it cost me about $ 80 to update after the stickers, which I consider to be quite a good result.
And a little more about the cost of the kit. In the fall of 2015, I met a man in my city who also rides an electric bike. In short, this set can be bought twice as cheaply as in Chernigov, Ukraine, about which I simply did not know before. I myself am from the city of Gomel, Belarus. Just when I decided on this purchase, I looked at prices for the same ali, which turned out to be in some places more expensive than they were sold in Minsk. Therefore, I chose the simplest option - buy it in Minsk. In other matters, I do not regret anything, for me it is creativity.
PS: In the future, I really want to make a custom electric cruiser with a powerful engine that would take the bar at 60 km / h. There are a lot of similar projects on the Internet, and from there I get such ideas. Thanks to everyone who read to the end.
Source: https://habr.com/ru/post/389991/
All Articles