Review of the photopolymer 3D-printer Liquid Crystal HR

Hello! We talk about the properties of Photocentric 3D printer - Liquid Crystal HR . This is a desktop stereolithographic 3D printer that prints volumetric models with photopolymer resins .

We tested the printer, printed a lot of test samples, and now we can share what we learned about it in practice.
')

First look
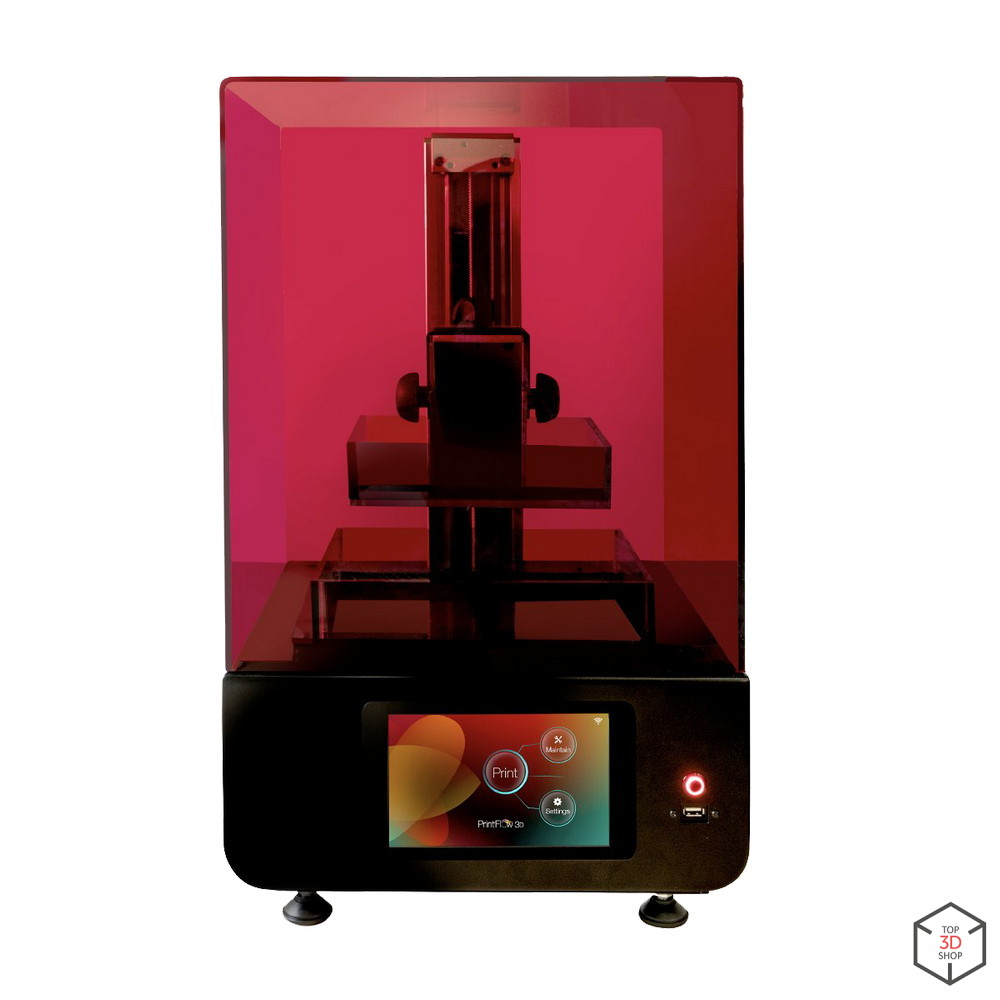
The printer looks standard for devices of this type, nothing new. Externally similar to Form 2 and other members of its class.

In set
- 2 replaceable films
- Wi-Fi - USB adapter
- Funnel for polymer drain
- Power supply with interchangeable connectors
- Polymer bottle PhotoCentric Daylight
- Gloves
- Printed test model
Liquid Crystal HR features
- Material: Daylight Photopolymer
- Printing technology: LCD;
- Layer thickness: 25, 50, 100 microns
- XY axis positioning accuracy: 0.097 mm;
- Working area: 200x150x200 mm;
- Connection interface: USB, USB drive, Wi-Fi;
- Software: Creation Workshop, Printflow3D;
- Supported file formats: STL;
- Weight (without packaging): 15 kg;
- Dimensions (without packaging): 380350570 mm;
- Power supply: 100-240 V, 50-60 Hz, 1;
- Country of Origin: UK
- Price: 265 000 rubles
Governing bodies
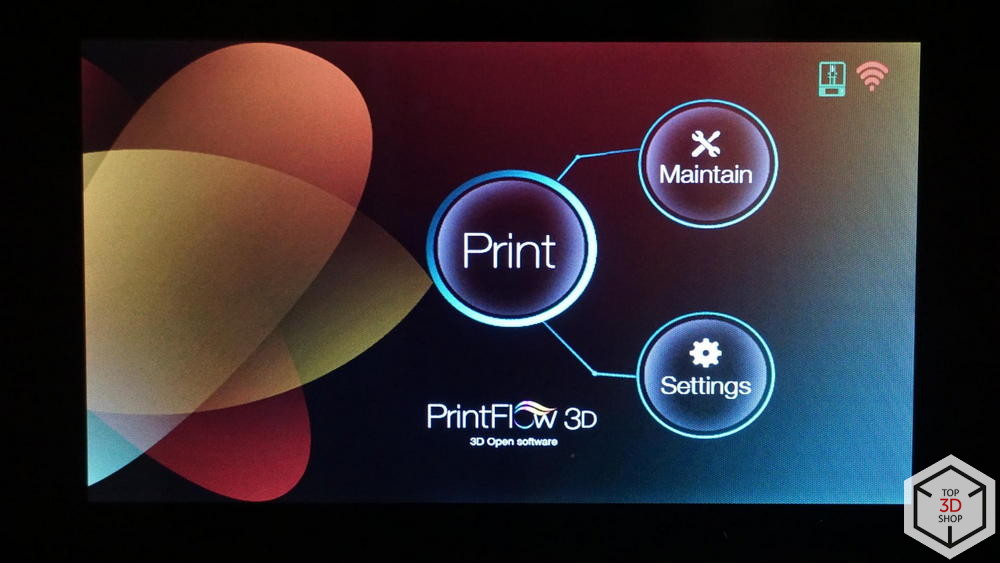
All LCHR controls are a button for turning on a projecting display and a touchscreen display. The printer menu consists of 3 main sections: Print - selection of prepared files for printing, Settings - Wi-Fi connection and update settings and Maintain - menu for managing the printer itself.
The menu itself is quite simple, stylized.

In the Settings menu, you can set up a Wi-Fi connection, update the printer software, and download log information.

In the Maintain menu, you can restart the printer controller, raise / lower the platform by a specified amount, return the platform to its original position, and run the projection display test.
Compound
For project files, a wired connection via Ethernet, a Wi-Fi connection and the use of flash media are provided.
Device Overview
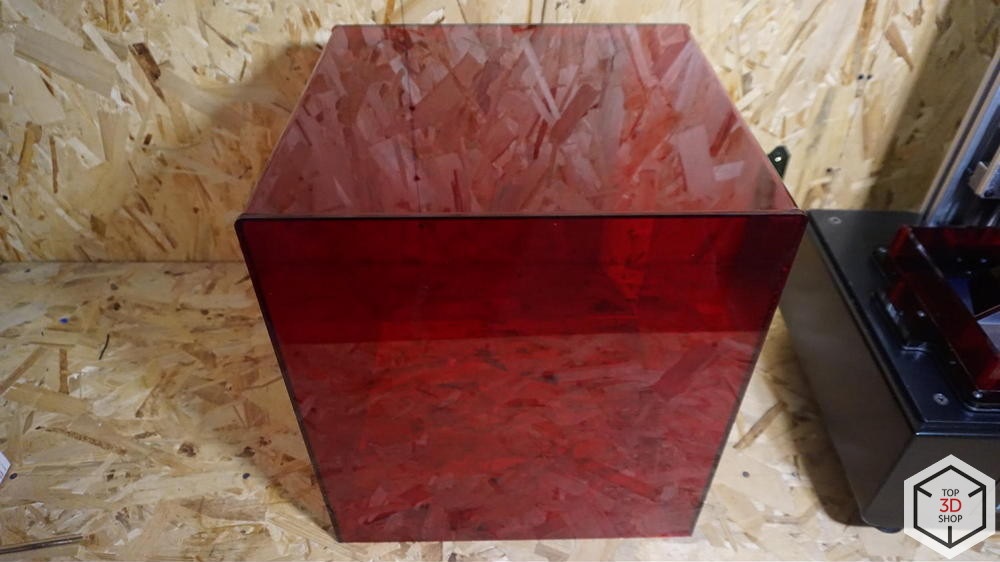
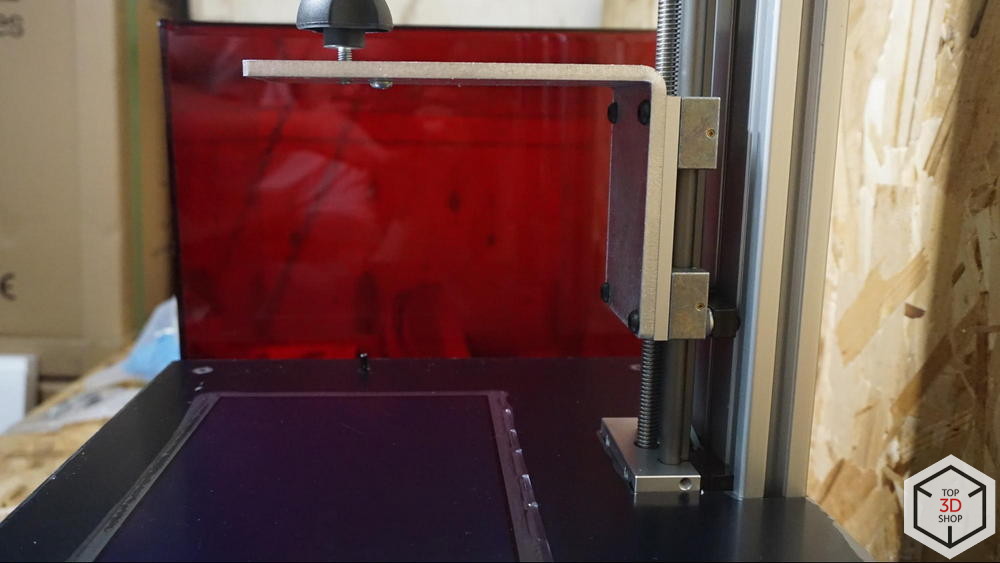
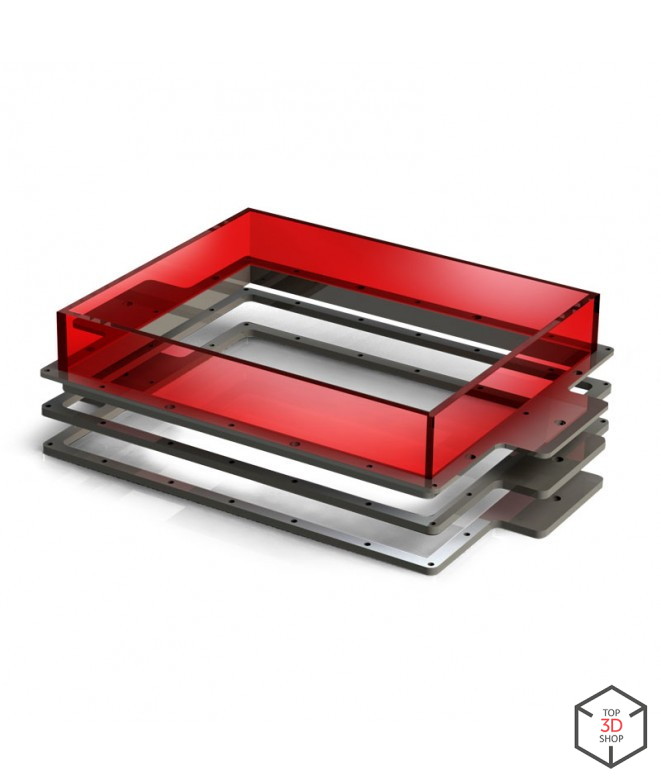
Removable cap is made of 6mm red acrylic.

The construction platform is fixed with 3 massive screws. The tray is not pressed against the printer body, but is mounted on the guide pins. The decision is dubious.
On the front side: the power button on and off the display, an interactive display with touch controls, a USB socket for a flash drive.

On the back of the printer: Ethernet connector, USB for connecting an external Wi-Fi-USB adapter, a button for turning on the printer, a socket for connecting the power supply.
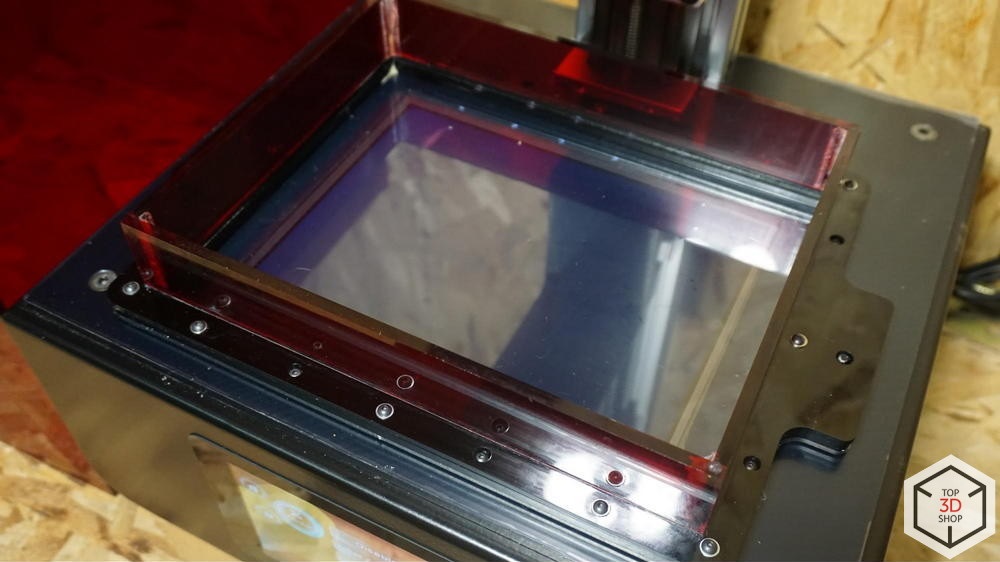
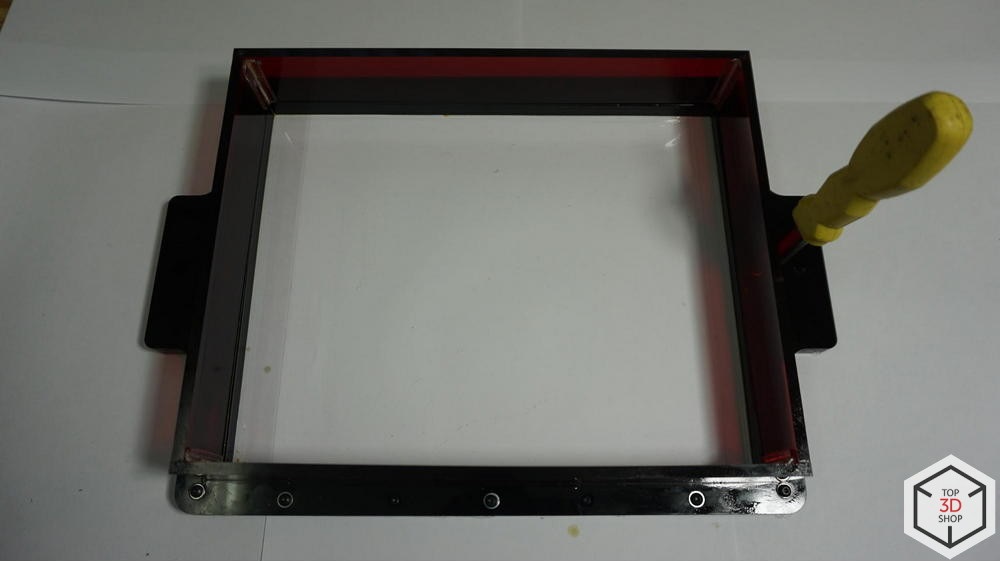
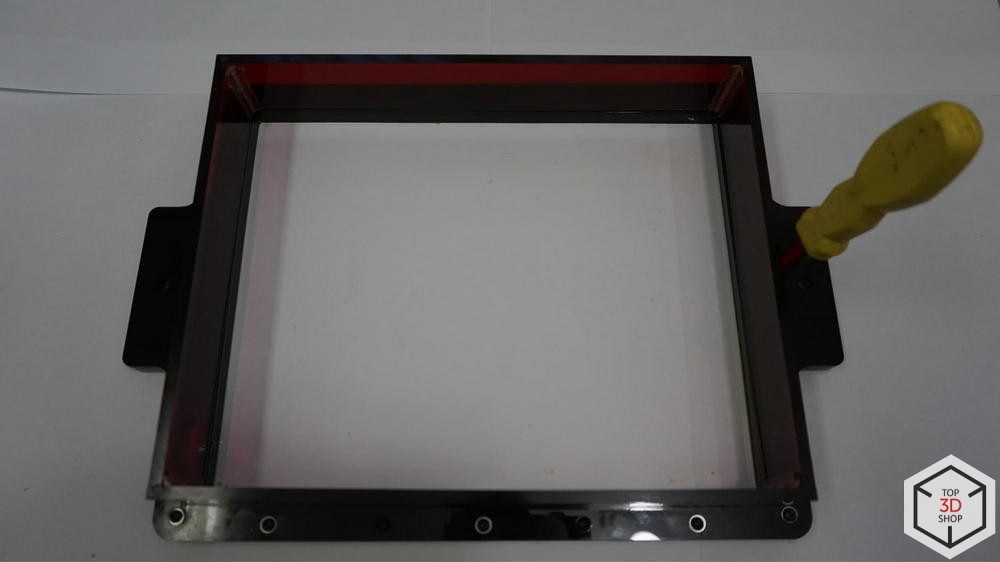
The bath is three-layered, folding. You can install any sheet film. Disassembling is much more convenient than at FlashForge Hunter, but you should take care of the cleanliness of the workplace, because There are no additional protective glasses in the bath - only one layer of the film - it is easy to contaminate it with dust.
Under the bath is a huge sheet of thick film that should protect the inside of the printer from polymer spillage. Very good solution.
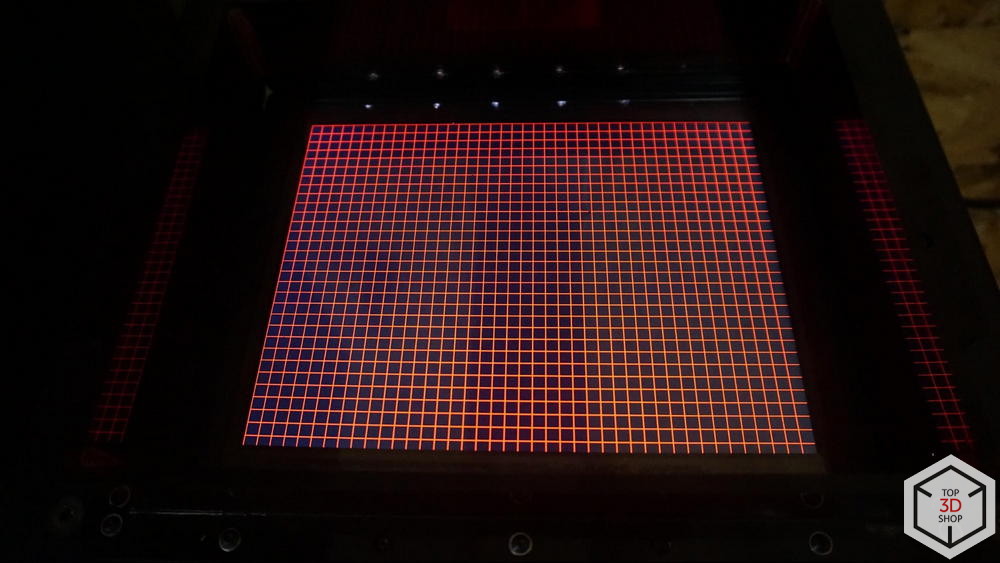
Under the film hides a projection display. The properties of this display are the main difference between the LCHR and most other LCD printers. Photocentric specially developed “daytime” resins, for work on a low-power source of light. Standard polymers rated for 405 Nm will not work.

On the reverse side is the limit switch. It signals the controller about the removal and installation of the printer cap. With the hood removed, the platform travel along the Z axis is blocked.

The Z-axis guide does not play, runs smoothly, is rigidly installed.
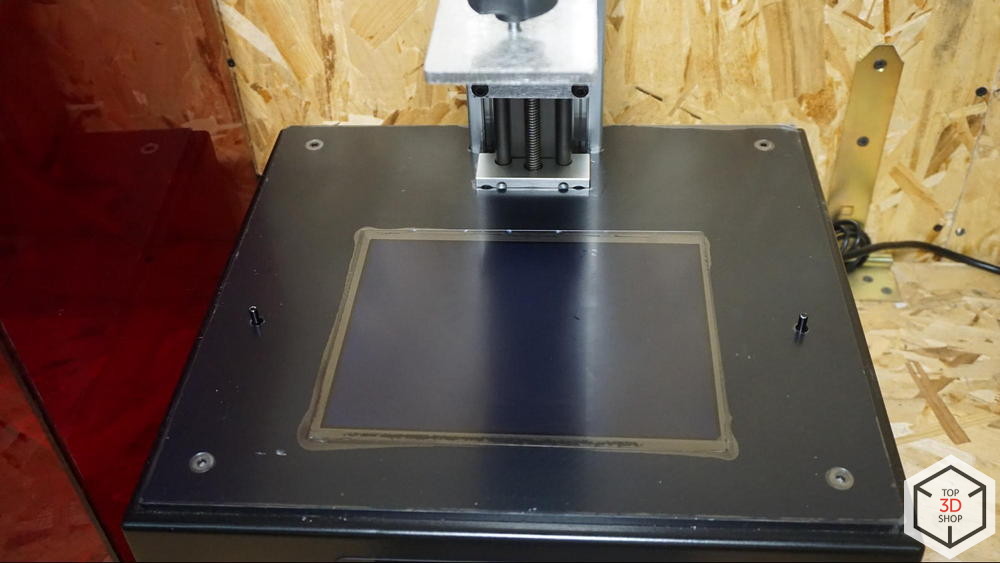
The platform mounting arm is made of massive 7 mm thick aluminum sheet. Such an element is very difficult to bend or break.

The platform consists of an aluminum base and an acrylic edge. The solution is interesting, but ambiguous - the bucket takes away part of the volume of the working chamber during printing and reduces the maximum amount of polymer that can be poured into the bath.

But there are also advantages of such a structure - when removing the platform, you do not need to clean it from both sides, and two screws attaching to the shoulder allow you to install the platform at an angle, which makes it possible to drain the polymer without unnecessary problems.

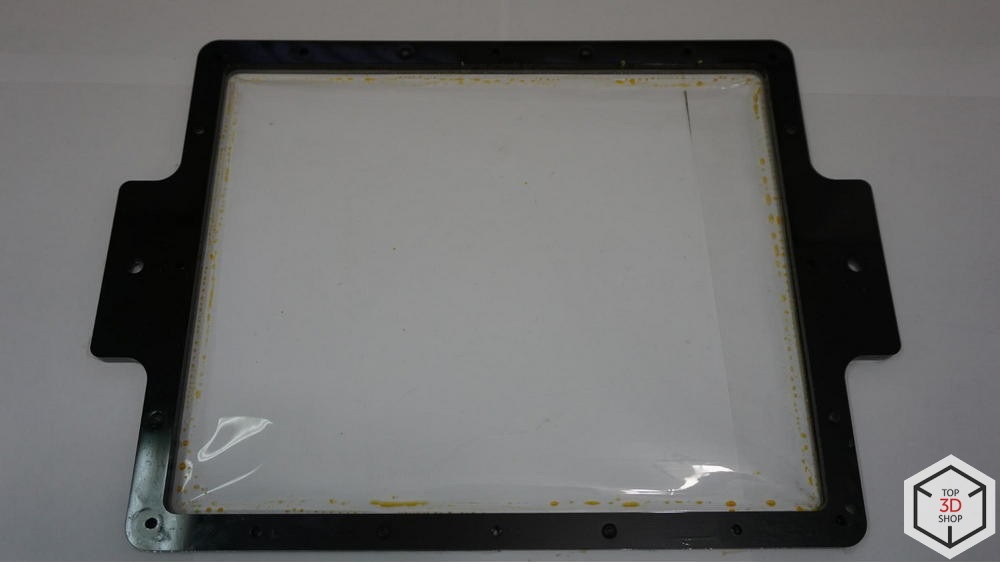
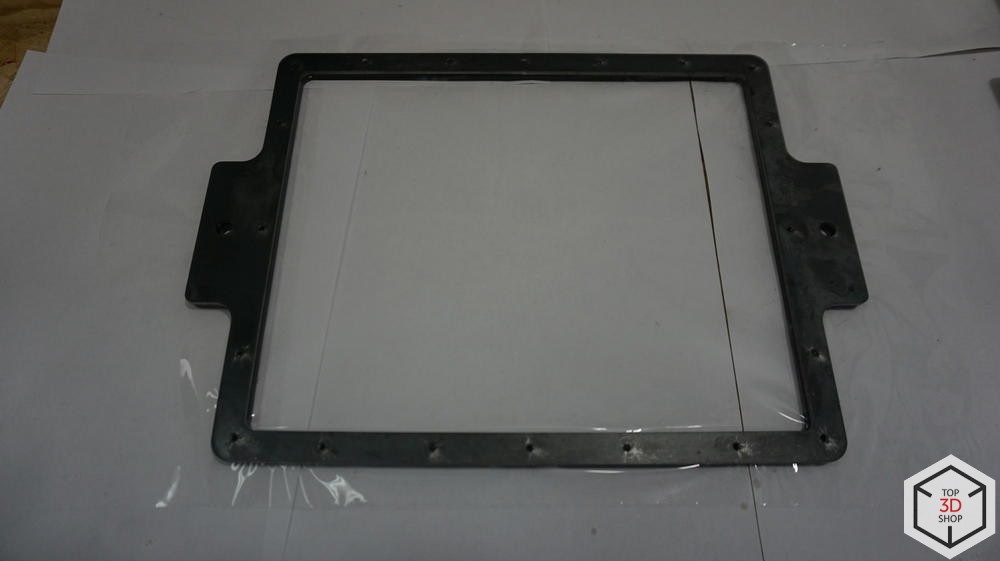
The bath consists of four elements: an acrylic board, an acrylic contour of pressing the film and an aluminum contour for the final fixation of the structure. There will not be any particular difficulties in replacing the film; juggling with the component parts is also not required.
Slicer Creation WorkShop
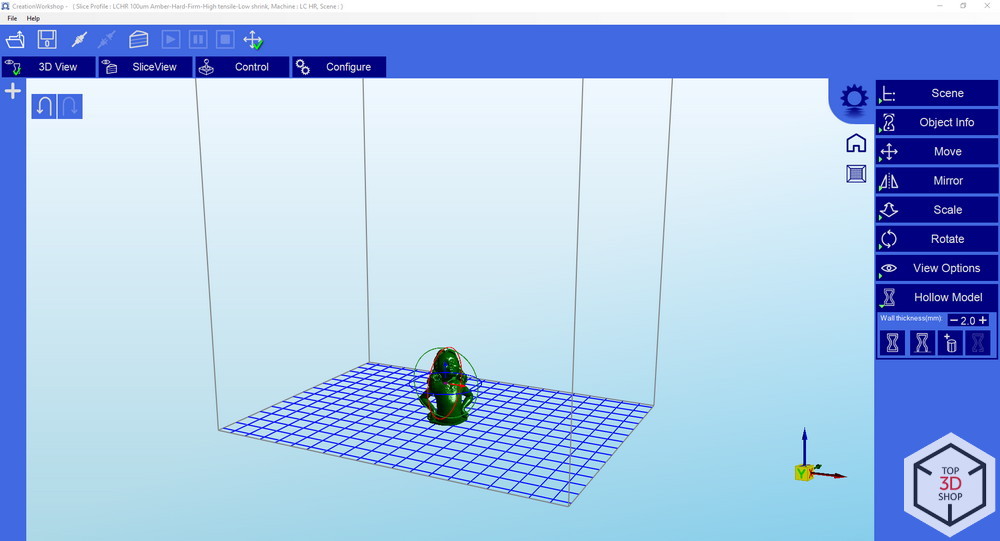
Almost all people involved in additive technologies are familiar with this slicer. Slayser is simple, functional. In the version from Photocentric, there is a more convenient positioning and rotation system, a function for setting the thickness of an object to save polymer when printing, and modeling the internal space of an object by adding base columns.

There are many manuals and recommendations for this slicer.
Let's go straight to the web-interface of a 3D printer.
PrintFlow 3D

This plugin allows you to find your LCHR on the network and launch the printer's web interface in the browser.
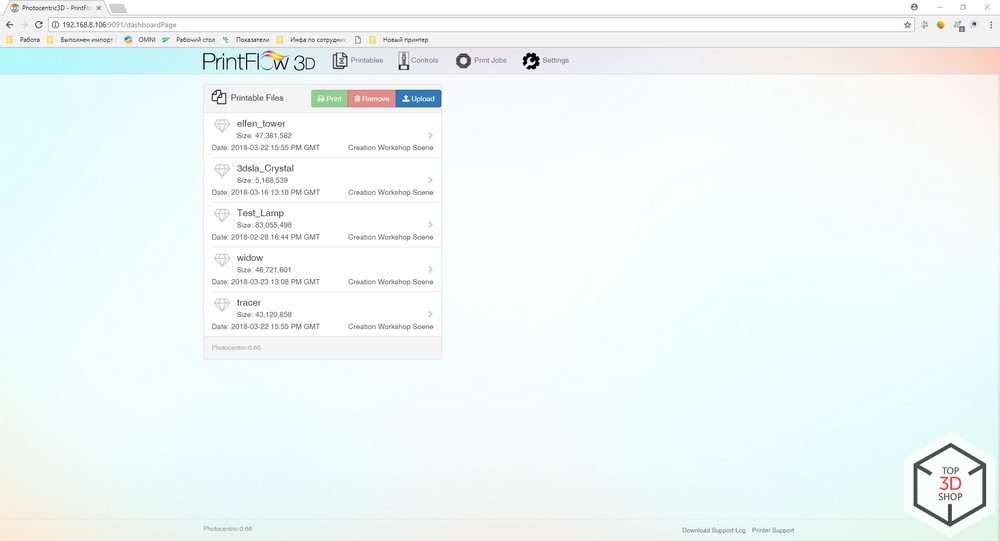
The web interface is simple and slightly enhances the control of the 3D printer.

In the “Printables” tab, we can find out the statistics of the printed print.

Customize the display of layers.
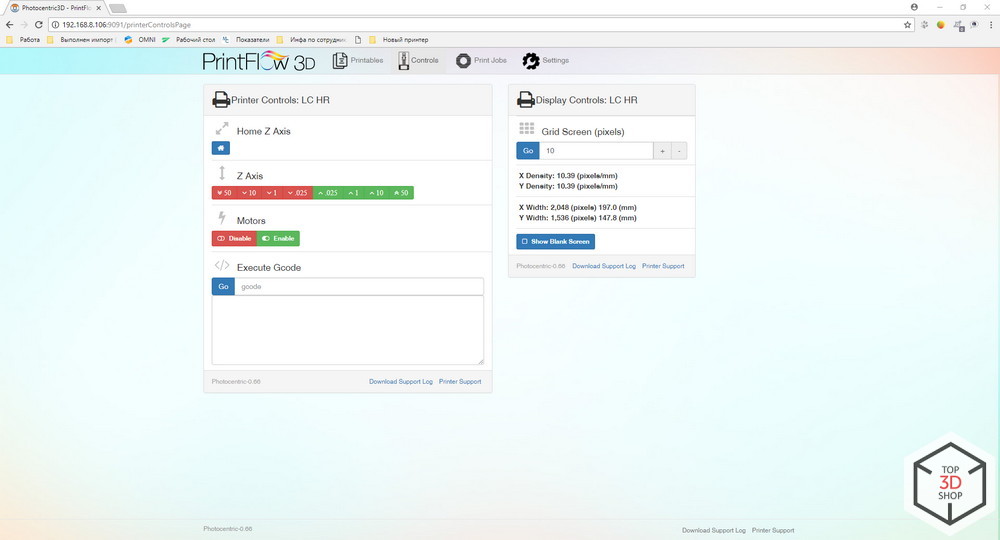
In the “Control” menu - remotely control the position of the platform, enter commands Gcode.

In the “Settings” tab, you can configure Wi-Fi and Ethernet-connection to the printer.
Printing process

The printing process is no different from most photopolymer 3D printers. There are no additional valves in the printer, as in Creator B9 and Form. Sticking occurs due to the deformation of the film.
LCD technology is not perfect and measurements with a luxmeter will give different results on the screen areas, but, as practice has shown, deviations are minimal and do not affect print quality. There is no agitator in the printer, so try not to leave the polymer in the bath for a long time unattended, and if left, you need to mix it with a soft brush before printing.
Service
All maintenance of the Photocentric LCHR 3D printer comes down to topping up the polymer and replacing the film on the bath.
The process of replacing the film is quite simple. All you need is a clean workplace and straight arms.
First, we unscrew all the screws on the contour that fix the upper part of the bath with the board.
After removing the upper part, we find a “sandwich” of acrylic and aluminum, which holds the sheet of Fep-film.

We throw away the old film. The remaining fasteners are washed in warm water with soap.
Putting it all in reverse order. The sheet of the film to be replaced is beyond the dimensions of the bath and is easily cut with a clerical knife.
Done!
Materials
Testing was conducted by a single material: PhotoCentric Flexible Daylight .
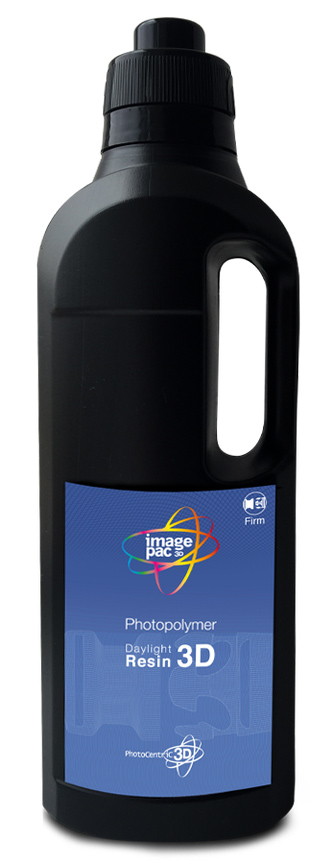
There are other materials for this printer - all that are labeled as Daylight are suitable for daylight. Standard UV resins will not work.
Advantages and disadvantages
The 3D printer showed itself diametrically on both sides. On the one hand - the undoubted advantages.
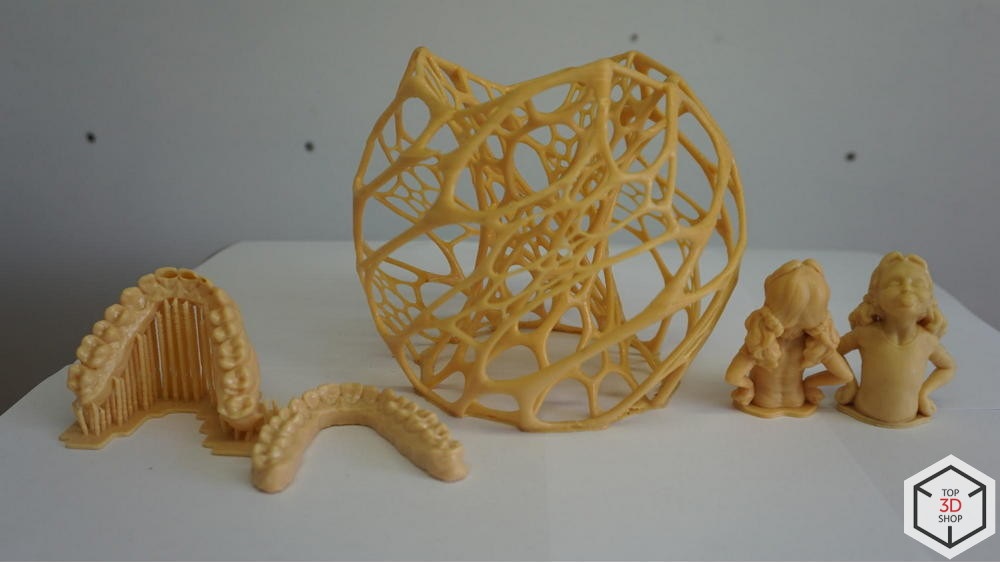
1. Good print quality in general.
2. Large printing area
3. Detailed customizable slicer
4. Rigid construction
5. Interesting management in the Web-interface and thoroughly designed profiles for printing with its polymers.
The main disadvantage is that the 3D Liquid Crystal HR printer only works with its own polymers, it will not work to replace them with polymers from other manufacturers.
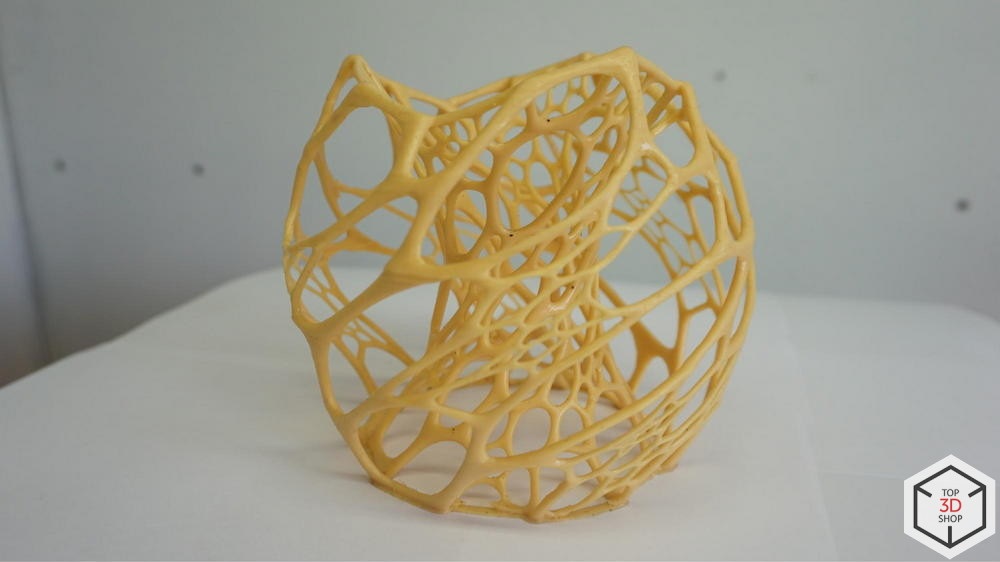
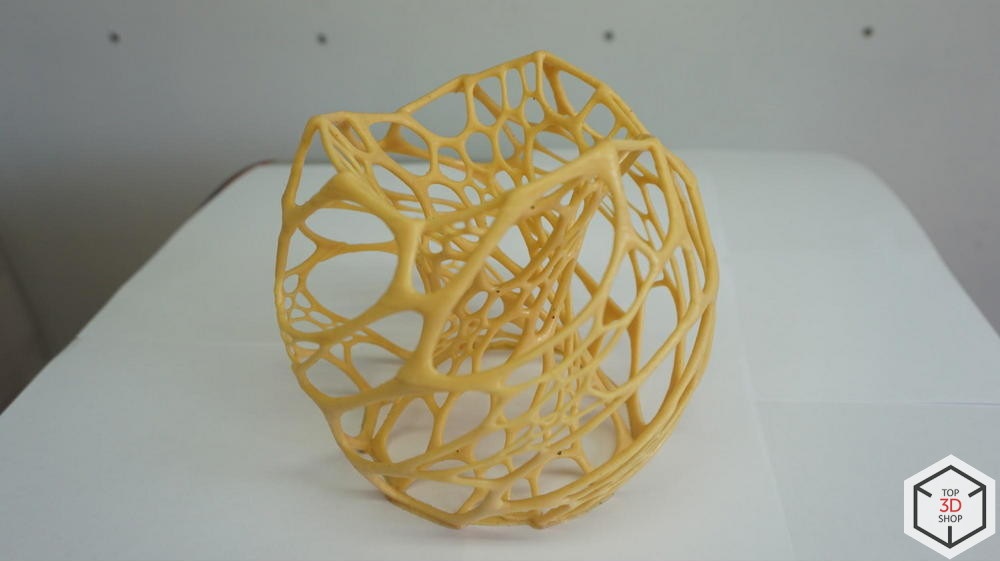
Samples
Photo prints printed during the tests:


Total
We can recommend Liquid Crystal HR as a high-quality and reliable 3D printer, more convenient to use than, for example, Flashforge Hunter, and much more humane to your finances than Formlabs Form 2.
The printer will be useful to makers, modellers and other users of the amateur segment, as well as small businesses - for making figures to order.
Buy Liquid Crystal HR 3D printer at Top3DShop.ru and get free shipping and training.
Want more interesting news from the world of 3D technology?
Subscribe to us in the social. networks:


Source: https://habr.com/ru/post/374521/
All Articles